
The Carousel Interface
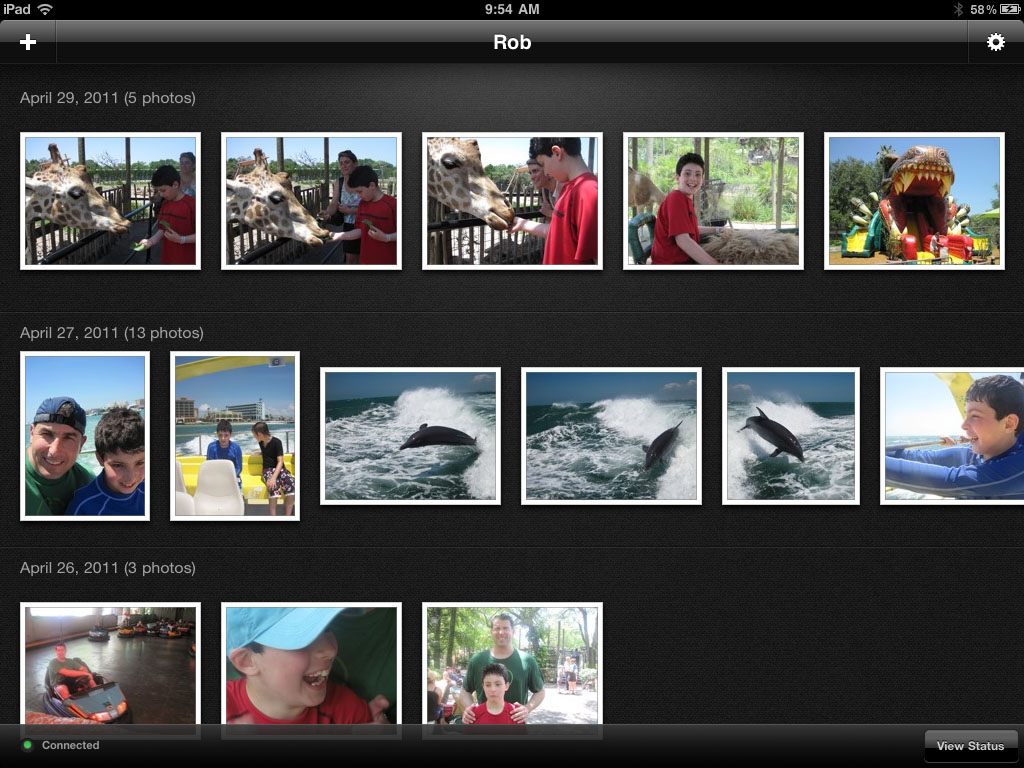
Adobe did a good job of keeping the Mac version of Carousel (Figure 3.1) almost identical in terms of looks and functionality as the mobile version (Figure 3.2). There are some minor differences that we’ll explore, but for the most part when you look at your photos in Carousel on any device, your photos will look the same and you’ll have all the same options available to you.
Figure 3.1 The Carousel interface on a Mac.
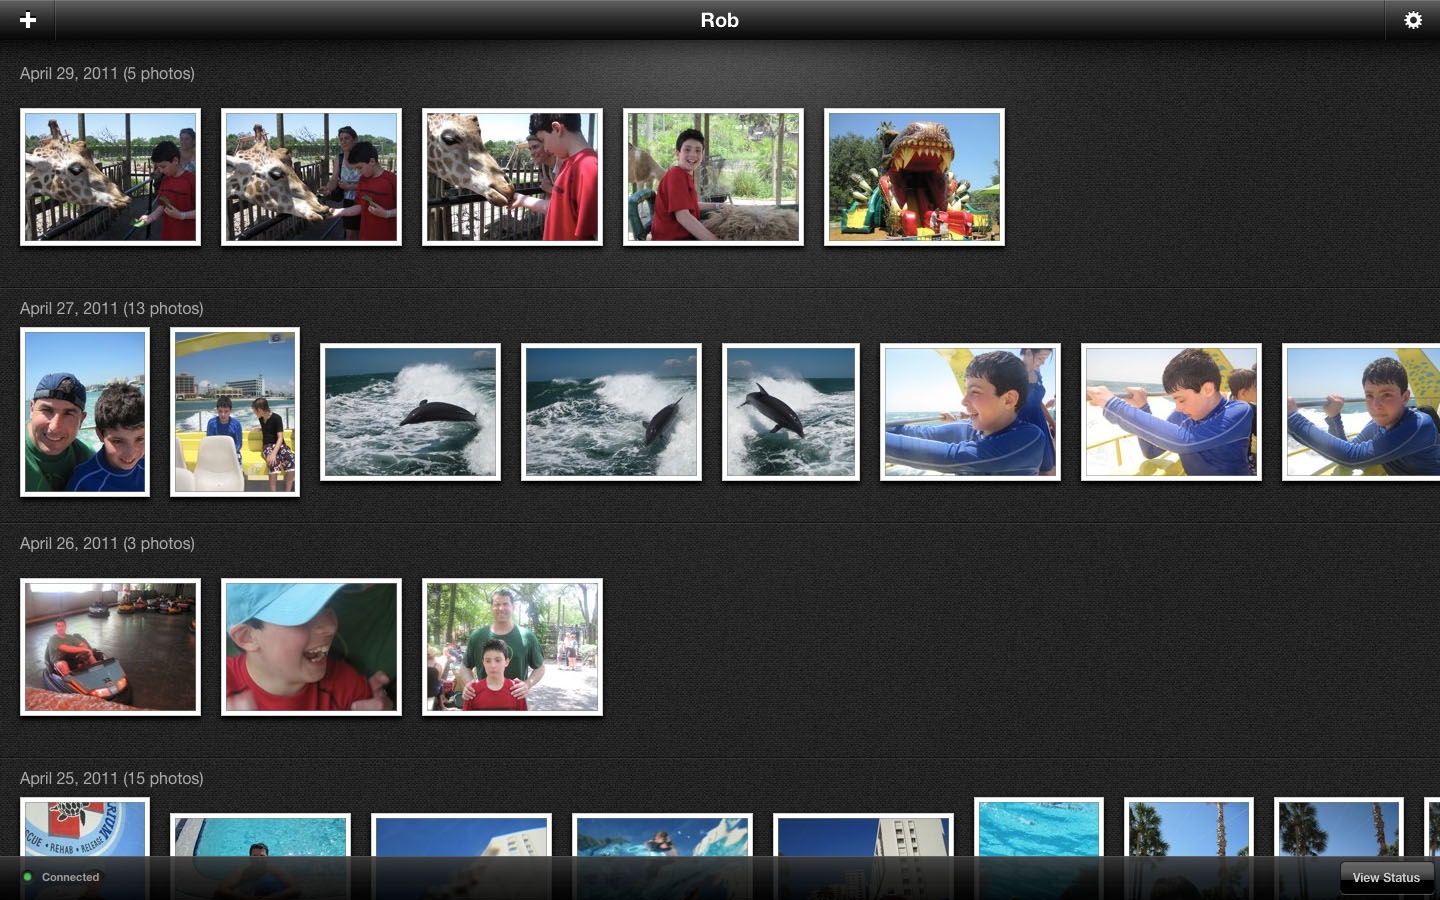
Figure 3.2 The Carousel interface on an iPad.
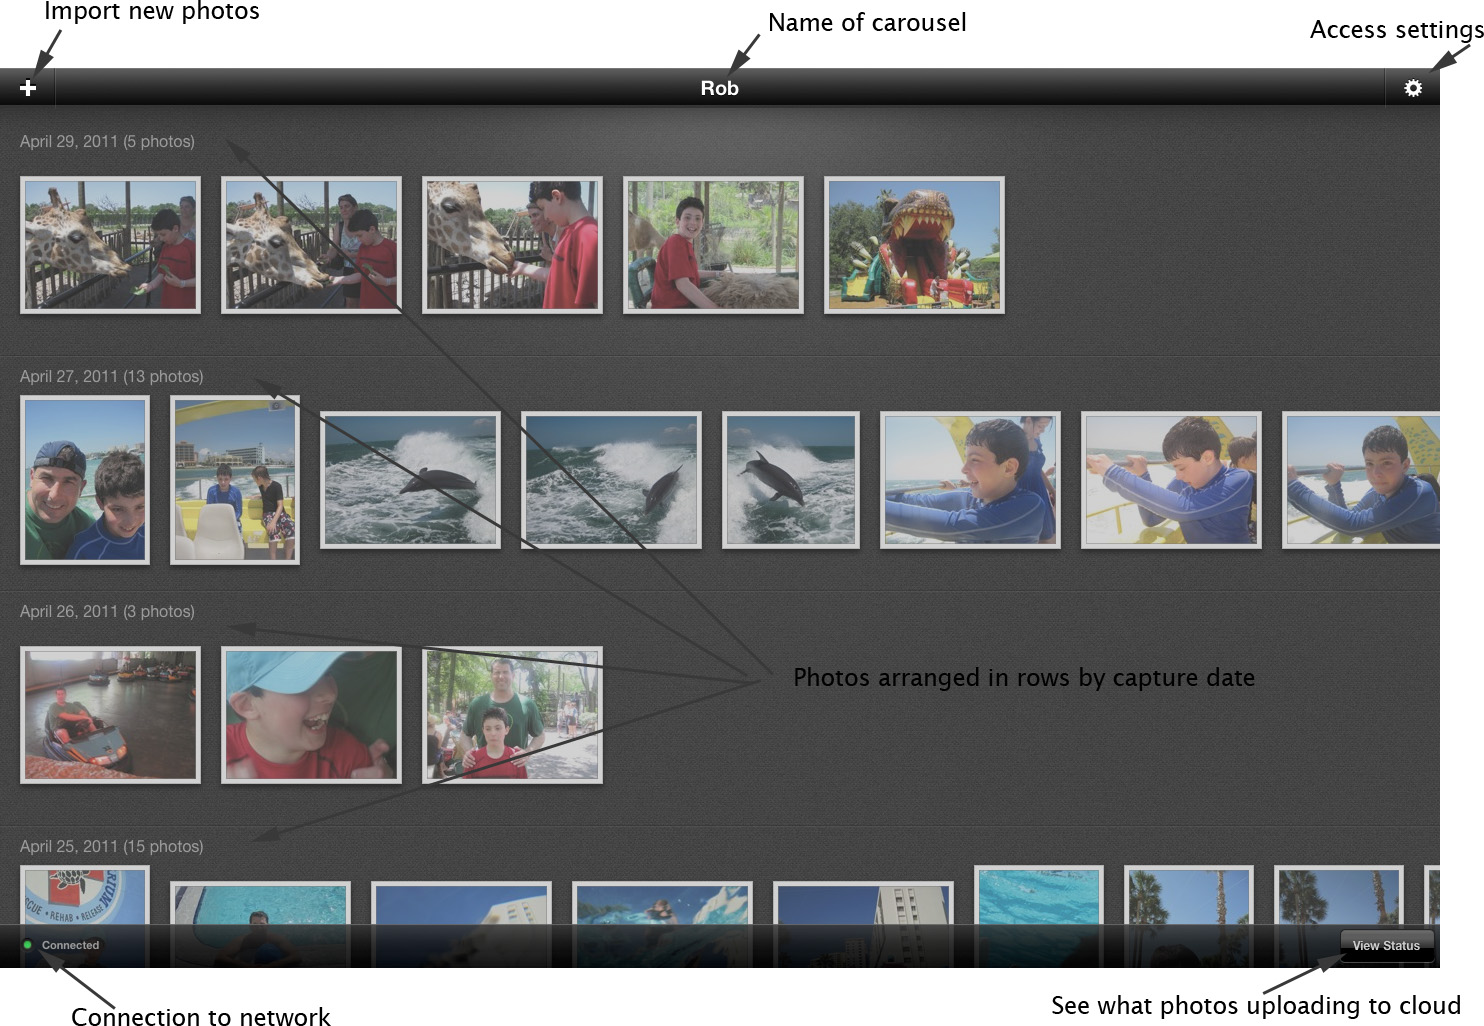
Obviously, one difference in appearance will be due to the size of the screen of the device you are using. Your Mac’s screen will be the largest, and if you have an iPhone, its screen will be the smallest. The size of the screen will determine how many of your photos are visible at one time. Other than the size, the basic elements of the interface are the same (Figure 3.3).
Figure 3.3 The elements of the Carousel interface.
Browsing Your Photos
You can either browse your photos as a series of thumbnails organized by the date the photos were taken, or you can zoom in to view a large version of one photo at a time.
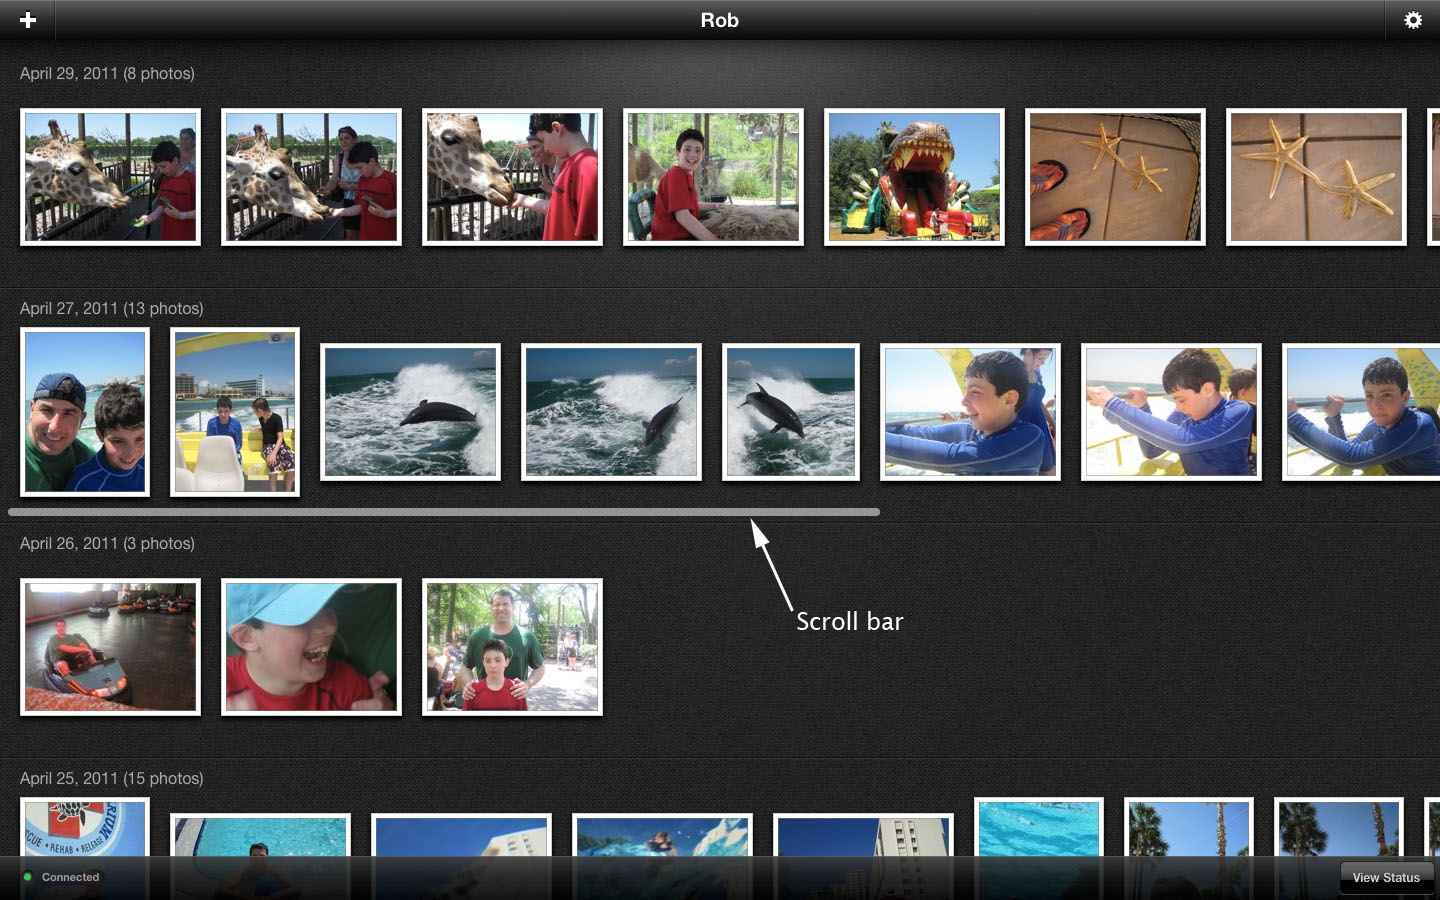
To browse thumbnails on a Mac, you can place your cursor under the row of photos you want to see and a horizontal scroll bar will appear (Figure 3.4). Click and drag the scroll bar to browse all the photos taken on that date. If your Mac has a touchpad, you can also place your cursor over a row of thumbnails and use a two-finger swipe on the touchpad to scroll. Similarly, to view different dates that are off the screen, you can place the cursor on the right edge of the interface until a vertical scroll bar appears, then click and drag down to see older dates or drag up to see more recent photos.
Figure 3.4 A scroll bar appears under the active row when you place your cursor there.
Browsing works the same way on your iDevice except that you will use familiar left and right finger swipes to scroll through a single row of thumbnails, or up and down finger swipes to scroll through different dates within a carousel.
Viewing Individual Photos
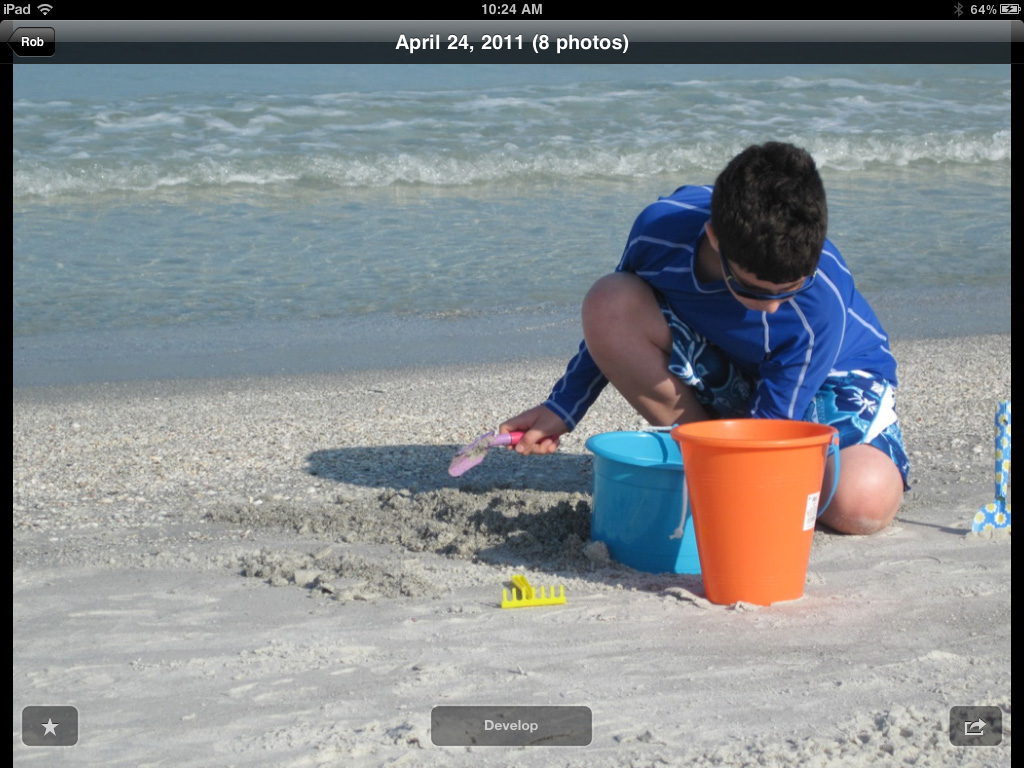
A single click on any photo will bring that photo into what is called Loupe view, where you see only that one photo full screen. This is where you will find some visual differences between what you see on your Mac versus an iDevice. Let’s compare the same photo in Carousel on a Mac (Figure 3.5) and on an iPad (Figure 3.6).
Figure 3.5 Viewing a single photo in Loupe view on a Mac.
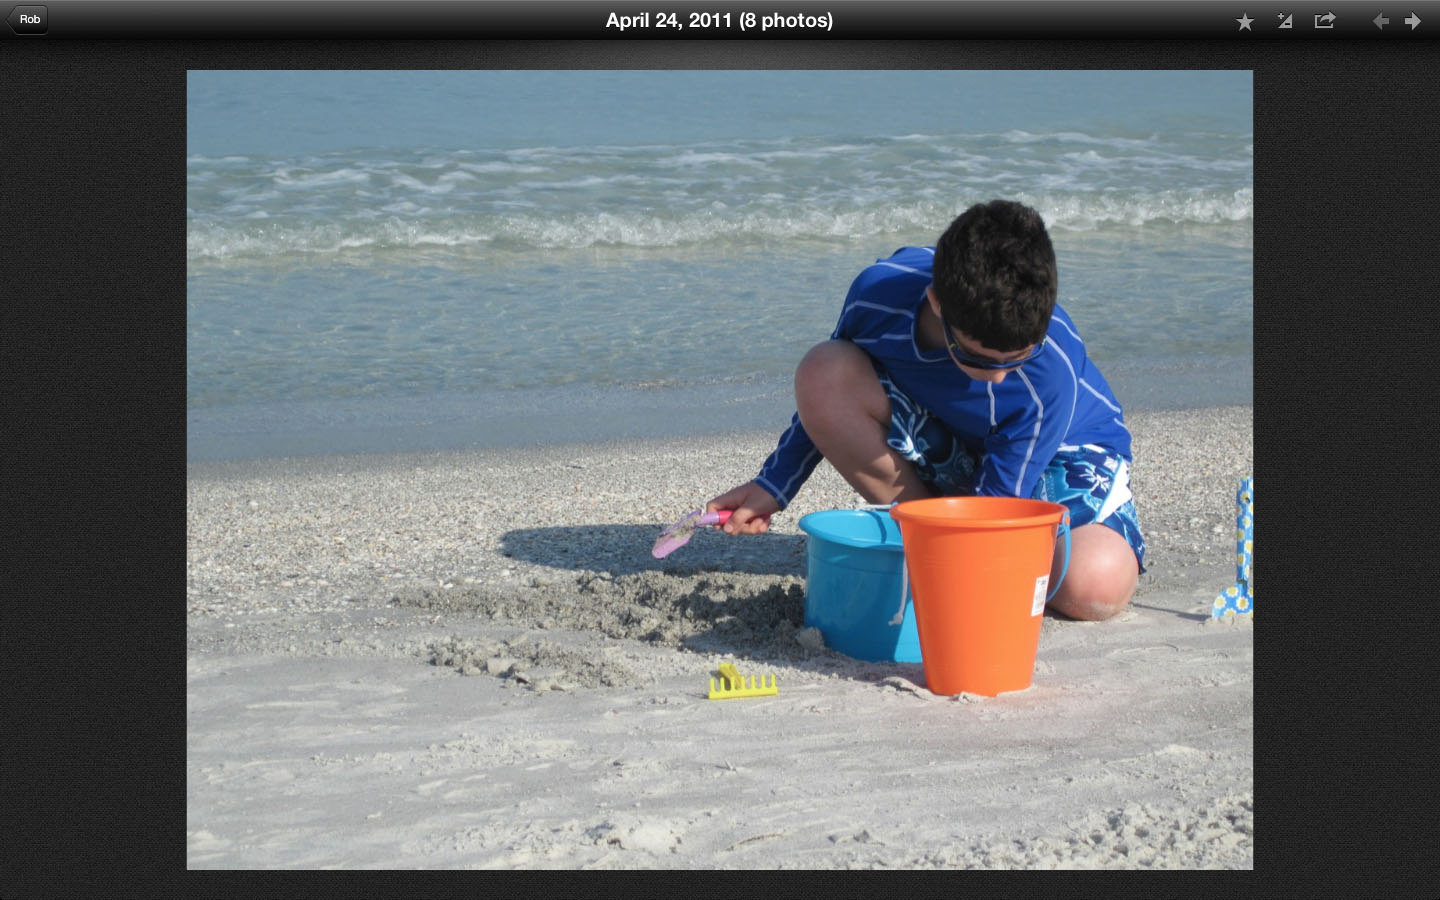
Figure 3.6 Viewing a single photo in Loupe view on an iPad.
The most significant difference is in the placement of the tools on each version of the app. The Mac has a set of icons in the top-right corner of the interface for assigning favorites (the star), developing the photo (the plus or minus icon [-/+]), accessing various actions (the rectangle with the arrow), and left and right navigation buttons for browsing through each photo taken on a given date.
You can also use the left and right arrow keys on your Mac’s keyboard to move between all the photos in the active row.
On your iDevice, you will find the star icon for assigning favorites is in the bottom-left corner, the Develop button is in the bottom center of the screen, and the Actions icon in the bottom-right corner. In addition, all the icons automatically hide from view a few seconds after entering Loupe view to give you an uncluttered view of your photo. A single tap will bring them all back. There are no left and right navigation buttons here because you can use a finger swipe to scroll left or right through each photo in the row. Another difference on an iDevice is that you can zoom in on a photo in Loupe view by pinching your fingers open, or zoom out by pinching your fingers closed. You can’t zoom in while in Loupe view on your Mac (only in Develop).
On your iDevice you can also double-tap a photo in Loupe view to zoom in, and double-tap a second time to zoom out.
No matter which device you are using, you will see the capture date of the photos in the top center of the interface, and a button in the top-left corner showing the name of the carousel you are in (Figure 3.7). One click of that button takes you back to viewing all the photos in the carousel arranged by date.
Figure 3.7 The date of the photos you are viewing and the button that takes you back to viewing all the photos in the carousel.
