
You know that you can print any PDF document and it retains the integrity of your original document—that’s one of the big attractions of the Portable Document Format, after all.
However, in addition to providing a variety of printing methods and options, Acrobat 9 Pro includes a suite of preflight tools, which are used to evaluate and prepare documents. Preflight has been used for testing files for compliance to certain printers or standards. In Acrobat 9, professional preflight goes further than ever before, offering a wide range of fix-ups and checks for all manner of standards and features.
There is a lot more to a document than what you see on the screen or printed page. Use the Document Properties dialog when you want to find or modify information about your documents. Choose File > Properties (or press Ctrl+D [Command+D]) to open this dialog. It opens to the Description tab by default. If you have modified settings in the dialog, the last tab you worked with displays instead.
The dialog contains six tabs:
The Description tab contains information about a document (Figure 31)—how much information depends on the source program that created the original document. Use this tab to add keywords for searching. Click to activate a field and add content to any description element.
The Security tab describes what level of security has been added to the document, and lists permissions granted to users of the document. If you are the author, use either the document’s password or a security certificate to change the security settings, depending on how they are applied. You can read more about security in Chapter 16, “Making Your Documents Secure.”
The Fonts tab lists the fonts, font types, and encoding information used in the original document. Having this information at hand can be a real time-saver. Read about fonts in #37, “Choosing and Using Fonts.”
Click Initial View to display information that defines how the PDF document looks when it is opened. A range of options related to the document, user interface, and window are available:
See the sidebar “Crafting Your Readers’ Viewing Experience—Part 1: Navigation” for information on controlling the visible panes.
For information about choosing a magnification option, see the sidebar “Crafting Your Readers’ Viewing Experience—Part 2: Magnification.”
The sidebar “Crafting Your Readers’ Viewing Experience—Part 3: Window Displays” describes when to use different window options.
The Custom tab lets you add properties and values that identify the content in the document according to your own criteria, such as corporate or government keyword or nomenclature structures.
The Advanced tab shows PDF settings and reading options. Normally, you won’t often change this information, aside from attaching an index to a document. Click Browse to open an Attach Index dialog and locate an index on your hard drive. Click Open and attach the selected index to the document.

When you have finished making changes to the document’s properties, click OK. Save the file to apply the modified properties.
Acrobat 8 introduced the opportunity to examine the contents of a document and remove features such as hidden text or metadata based on the idea that sensitive material in a PDF file may not be suitable for sharing with your readers, or may be unnecessary for saving the file long-term. Acrobat 9 Pro takes the Examine PDF process a step further by looking for more types of content, displaying the results in a navigation pane, and listing the numbers of items found.
Follow these steps to evaluate and change a document:
Choose Document > Examine Document. The file is evaluated, and the Examine Document navigation pane opens. Items identified are indicated by check marks; the number of each item found is shown in brackets following the item name. Click Expand
 to show the values and preview options for the list; click Collapse
  to return the list to its default view (Figure 32a).
Check through the features identified. If you want to see the entire list of items that Examine Document looks for (shown in pale gray text in Figure 32a), click Options
 and select Show All items. To select items you want to remove from the document, you can do any of the following:
Click Info
 to open a metadata dialog listing the types and values of metadata included for the file.
Click Preview
 to display the listed content. Acrobat opens navigation panes, such as Comments or Bookmarks, or a Hidden Text dialog, depending on the item you are evaluating.
Click to select or deselect items checked
 in the Examine Document pane.
Click Remove to process the file, after reading and dismissing an information dialog that explains how removing content affects your document. After the file is processed, a list of the items removed displays in the pane (Figure 32b).
Save the document to preserve the changes; if you need to save the original format, be sure to save the file with another name.


Some projects are quite involved, and the finished document reflects that complexity. There may be all sorts of nonoptimized content, such as images with overly high resolutions, multimedia renditions added and deleted, or pages inserted and removed. Acrobat Professional has included the PDF Optimizer in the last few versions; Acrobat 9 Pro includes new enhancements.
For removing “regular” types of extra content, such as comments and hidden text, run the Examine Document process, described in #32, “Using the Examine PDF Process.” For making a document the most efficient without sacrificing its quality, turn to the PDF Optimizer in Acrobat 9 Pro.
Choose Advanced > PDF Optimizer. The first step is to analyze the document to see its contents. Click “Audit space usage” at the upper right of the PDF Optimizer dialog. Acrobat examines the document and displays a report (Figure 33a).

Depending on the document’s contents, you see listings for such elements as fonts, comments, and images; each is defined both in percentages of the entire document size and in bytes. Click OK.
The default settings in the PDF Optimizer are the same as those of the document. If you select another program version from the “Make compatible with” menu, the Settings name in the upper left of the dialog changes from Standard to Custom. The options available in the different panes of the dialog vary according to the selected program version.
Click a label in the left column of the dialog to display settings (Figure 33b).

As you look through the list, deselect items that you don’t want to optimize; look for optimizing in these areas:
Images. Define settings for color, grayscale, and monochrome images. Choose compression types, quality, and downsampling values. Select “Optimize images only if there is a reduction in size” to prevent bloating the file size.
Fonts. The fonts in the document are listed in the dialog, and fully embedded fonts are subset by default. You can unembed those you don’t need, such as system fonts or common fonts. If a document is intended for departmental circulation, for example, and you know everyone viewing it uses the same set of fonts, you can delete those from the list.
Transparency. Choose transparency flattening and settings such as resolutions for text, line art, and gradients.
Discard Objects. Decide what objects to remove, such as form fields, alternate images, and search indexes. Some options in this panel are the same as those available in the Examine Document dialog, described in #32.
Discard User Data. Decide what added items can be removed from the document, such as layers, form content, cross-references, attachments, and comments. Some of the options from the Examine Document dialog described in #32 are included in this panel.
Clean Up. Choose other cleanup details, such as removal of invalid links or bookmarks, encoding options, and a method of compressing the document’s structure.
Click Save to name and save the settings if you plan to reuse them at a later time. If optimizing is a onetime thing, click OK to close the dialog. Click Save in the Save Optimized dialog to overwrite the original file. To be on the safe side, however, save the document with another name instead, and after you are satisfied with the results, delete the original.
You can use a PDF document for a variety of purposes and pass it through various programs. For example, you can create a document in Microsoft Word, convert it to a PDF using PDFMaker, and then export it from Acrobat as an HTML Web page that includes PNG images, or as a PDF file compliant with a standard.
To save a PDF document in another file format (in this case, Word):
Choose File > Save As. Select a format in the “Save as type” pop-up menu (Figure 34a). Alternatively, choose File > Export, and select the format to open the Save As dialog. The file format extension is appended to the filename and the Settings button becomes active.
Click Settings. The available options in the Settings dialog are specific to the file format you chose and appear as part of the dialog’s name. Check out an overview of the Word export settings in the sidebar “What’s the Good Word?”
Adjust the settings in the dialog, and click OK to return to the Save As dialog.
Click Save. Acrobat exports your file in your chosen format.

Note
You can choose among a number of similar formats for exporting from Acrobat. Many are composed of document, text, and code formats for use in Word, document processing, Web, and data exchange applications and programs—read about them in the sidebar “Pick a Format—Any Format.”
Acrobat 9 Pro includes options to save an ordinary PDF file according to a specific standard. That’s right—you don’t have to run Preflight on the file first! Here’s how it works:
Choose File > Save As and choose a standards format (PDF/A, PDF/E, or PDF/X) from the “Save as type” pull-down list. Click Settings to open the Preflight: Convert to PDF/[standard] dialog. The dialog name varies according to the standard selected (Figure 34b).
If there are multiple standard choices, choose a standard from the options. For example, PDF/A may be either PDF/A-1a or PDF/A-1b, while PDF/E has no optional conditions; PDF/X has four choices.
To ensure that your document is up to standards, select “Create PDF/ [standard] according to the following PDF/[standard] conversion profile.” In the case of PDF/X conversions, you can also choose from multiple conversion profiles.
Choose a viewing or printing condition from the drop-down list, or leave the default.
Click Overview
 to open a small dialog (also shown in Figure 34b) listing the fix-ups and corrections Acrobat includes in the conversion profile; click OK to close the dialog and return to the main Preflight: Convert to PDF/[standard] dialog (read about fixups in Chapter 6, “Complying with PDF and Accessibility Standards”).
Click OK to close the settings dialog and return to the Save As dialog, and then click Save to convert the file. Acrobat starts to process, fix, and evaluate the file according to the standard. If there are errors that can’t be corrected, you’ll see a notice that the file needs to be evaluated using Preflight. You can read about Preflight and standards in Chapter 6.

Suppose you don’t want to save a file in some variation of a text format, but instead would like to save it as a set of image pages, or export the images to use elsewhere.
To save a PDF as an image, do the following:
Choose File > Save As and select an image export option from the Format pop-up menu.
Click Settings to open the Settings dialog. Modify the options in the Save As [type] Settings dialog according to your requirements, which vary depending on the file format you selected.
Click OK and return to the Save As dialog. Click Save to convert the file. Acrobat converts each page of your document to an image: The image will be the same size as the document page.
You can also export the images alone, and specify the extraction size and other details. Follow these steps:
Choose Advanced > Document Processing > Export All Images. Browse for the folder you want to use to store the images in the Export All Images As dialog.
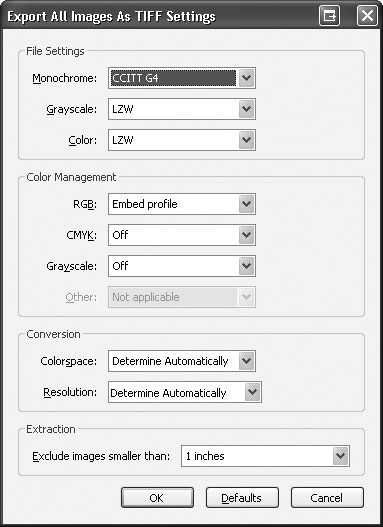
Choose an image format from the list at the bottom of the dialog. Your choices include JPG, TIF, PNG, and JPEG2000.
Click Settings. In Figure 35, the resultant dialog shows Export All Images As TIFF Settings. The dialog is similar to that used for configuring export settings for any format that allows for image export.
Click Save to export the images to the folder and save them using the file’s name and an incremental number.
Acrobat 9 Pro includes a suite of Print Production tools you can use to evaluate and prepare documents for high-end printing. Choose Advanced > Print Production or View > Toolbars and select Show Print Production Toolbar to display the set of tools. To access the toolbar from the shortcut menu, right-click (Control-click) the toolbar area at the top of the program window and choose Print Production from the toolbar listing.
Although the tools are intended for high-resolution printing, several tools can be useful in many business-based production situations as well:
Click Output Preview
 to open the Output Preview dialog. From the Simulation Profile menu, choose options to show you how your document would look using different types of paper, different monitors, different color profiles, and so on (Figure 36a). Read more in the sidebar “Soft Proofing.”
To open the Crop Pages dialog, click the Crop tool
 . Use the settings to crop off unwanted areas of the page or to increase the size of the page. Read more about the Crop tool in #51, “Cropping and Rotating Pages.”
Click the PDF Optimizer tool
 to open the PDF Optimizer dialog, which lets you choose settings to compress or remove content and decrease the size of files. The PDF Optimizer is discussed in #33, “Optimizing a PDF Document.”
Click the Fix Hairlines tool
 to open a dialog that allows you to define a page range, the size of line to target, and the replacement width. Increasing the width of very thin lines makes it easier to see them onscreen.

Printing from Acrobat can be much more complex than clicking the Print button: You can control what you print as well as where and how a document is printed. In addition, Acrobat lets you print to a printer or to a file, define a portion of your document for printing, or create a PostScript file.
Choose File > Print. In the Print dialog (Figure 36b), you can choose specific print characteristics, such as the print range and number of copies.

Let’s take a look at the Print dialog options:
Choose a printer from the Name pop-up menu in the Printer area of the dialog; in Mac OS, choose an option from the Presets pop-up menu. Your operating system’s printer and printer driver installations, as well as your network configuration, determine the Presets and Printer lists.
Avoiding White Patches
Click the Transparency Flattening tool
 to open the Flattener Preview dialog. Where you have layered images in your documents, unless the layers are flattened before printing, transparent areas print as white—not what you usually want to see in your masterpiece. Choose the desired settings and click Apply.
In Windows, select the “Print to file” check box to create a PostScript file.
Specify Print Range and Page Handling options. Select a Page Scaling option such as None (the default), shrinking or tiling pages, printing multiple pages per sheet, or using booklet printing. For some selections, additional options display, such as using Labels or CutMarks with tiled pages.
Choose Document (the default setting), Document and Markups, Document and Stamps, or Form Fields Only from the Comments and Forms pop-up menu.
Click Summarize Comments to open the Summarize Options layout, and choose settings for printing the comments in the document. See #77, “Setting Comment Status and Creating Summaries,” for more on printing comments.
Click Advanced Print to open the Advanced Print Setup. In this dialog, choose settings for precise printing features, including Output, Marks and Bleeds, Color Management, and PostScript Options.
Before printing, preview the page in the Preview area of the dialog. If you like, drag the slider below the Preview area to show the other pages in the document. Click OK to start the print job.
Before converting a document to PDF, make sure your fonts can be used and viewed by others. Access the settings from a PDFMaker, Distiller, or the Adobe PDF Printer driver. Here’s an example using Word:
In Word, choose Adobe PDF > Change Conversion Settings. Click the Advanced Settings button to open the Adobe PDF Settings dialog; then click the Fonts folder in the left column to display the Fonts settings (Figure 37a).
You Can’t Break the Lock
A lock symbol
 to the left of a font’s name in the Fonts settings dialog indicates that the font is locked. If you select that font, Acrobat displays a message below the Font Source menu stating that the font’s license does not permit embedding. In this case, you have two options: Either you must purchase the font for everyone who uses the document, or you should change to a font that can be embedded.
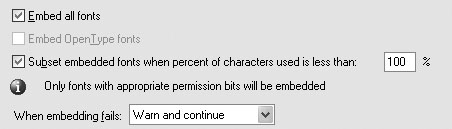
Depending on the conversion settings option you are using, you may find the “Embed all fonts,” “Embed Open Type fonts,” or the “Subset embedded fonts” check boxes at the top of the pane already selected.
In the lower portion of the window, select the font you want to embed from the list at the left and click Add. The font is added to the Always Embed list at the right if it can be embedded. A locked font, which shows a lock icon to the left of its name, can’t be embedded (see the sidebar “You Can’t Break the Lock”).
Click OK and name the joboptions file in the prompt dialog that opens. Back in the source program, convert the document to PDF.
A common error is to preview a document only on your computer using your installed fonts, which isn’t how other computers display your file unless the font is embedded. Figure 37b shows the text using fonts installed on my computer in the upper heading example. To preview the file without local fonts, choose Edit > Preferences (Acrobat > Preferences) and choose Page Display from the left column. Clear the “Use local fonts” check box and click OK. The same document, without benefit of local fonts, is shown in the lower heading example of Figure 37b.

The difference is clear. The font used—Everyday Formula—is a locked font and can’t be embedded. If I sent someone this document, my spiffy headings would be replaced by something far tamer.
You can check the Document Properties for confirmation. Choose File > Document Properties and select the Fonts tab to show the font information (Figure 37c). The information for the Everyday Formula font is as you would expect: The dialog states that the actual font used is Adobe Sans MM.

Here are some basic tips and hints that you may find handy in times of stress (usually one minute before a deadline!). If you’re having trouble printing a PDF, try the following:
Rewrite the file. Choose File > Save As, and resave the file as itself (don’t change the name). Click OK when prompted to overwrite the existing file and prevent storing multiple copies of the same file. When you choose Save As and resave it as a PDF, Acrobat overwrites all the stored versions created each time you save the file, sometimes clearing a stored problem.
Try using the Examine Document process to remove elements from the file. The problem may be solved by removing content such as metadata and data from other applications. (See #32, “Using the Examine PDF Process,” for information on using the Examine Document process.)
Re-create the PDF file using a different method; for example, if you originally converted the file using PDFMaker, try again using Acrobat Distiller.
If you are using a Web file, download the PDF again and try printing once more.
Try exporting the file as an image file, and print the exported image pages (refer to #35, “Saving Image PDF Files,” for information on image exports). Although you won’t solve the problem, you will have your printed output.
Print the file as an image. Sometimes a document won’t print because of errors in interpreting the text or font information—neither of which is required when printing an image of the page. Click the Advanced button at the bottom left of the Print dialog (shown in Figure 36b) to open the Advanced Print Setup dialog, and then select the Print As Image check box (Figure 38). The Settings option switches from Acrobat Default to Custom as a result. Click OK to close the dialog, and then click OK to try printing again.
In a layered document, merge or flatten the layers in the PDF file to determine if a layer is causing the printing issue. To preserve your original, save the document with another name after flattening layers.
If you are using a PostScript printer, set the printer to display printing errors. Check that the PostScript Printer Description (PPD) file is up to date, and that you are using the PPD file recommended by the printer manufacturer.
If the document you are trying to print has color separations, print a composite of the document to see if a color plate is causing the problem.
