8. Distorting Objects with the Puppet Tools
Lesson overview
In this lesson, you’ll learn how to do the following:
Place Position pins using the Puppet Position Pin tool.
Deform an image using Advanced pins.
Define areas of overlap using the Overlap pins.
Manipulate rotation and scale using Bend pins.
Stiffen parts of an image using Starch pins.
Animate the position of puppet pins.
Record animation using the Puppet Sketch tool.
Animate facial expressions with Character Animator.

This lesson will take about an hour to complete. If you haven’t already done so, download the project files for this lesson from adobepress.com/AfterEffectsCIB2022, following the instructions in the Getting Started section under “Accessing the lesson files and Web Edition.”

PROJECT: ANIMATED ILLUSTRATION
Pull, squash, stretch, and otherwise deform objects on the screen using the Puppet tools. Whether you’re creating realistic animations, fantastic scenarios, or modern art, the Puppet tools will expand your creative freedom.
Getting started
Using the Puppet tools in After Effects, you can add natural motion to raster images and vector graphics. Five tools create pins to define the points of deformation, areas of overlap, and areas that should remain more rigid. An additional tool, the Puppet Sketch tool, lets you record animation in real time. In this lesson, you’ll use the Puppet tools to animate a crab’s pincers in an advertisement.
Start by previewing the final movie and then setting up the project.
Make sure the following files are in the Lessons/Lesson08 folder on your hard disk, or download them from adobepress.com now:
In the Assets folder: crab.psd, text.psd, Water background.mov
In the Sample_Movie folder: Lesson08.mp4
Open and play the Lesson08.mp4 sample movie in Windows Movies & TV or QuickTime Player to see what you will create in this lesson. When you are done, close Windows Movies & TV or QuickTime Player. You may delete the sample movie from your hard disk if you have limited storage space.
When you begin this lesson, restore the default application settings for After Effects. See “Restoring default preferences” on page 3.
Start After Effects, and then immediately hold down Ctrl+Alt+Shift (Windows) or Command+Option+Shift (macOS). When prompted, click OK to delete your preferences. Click New Project in the Home window.
After Effects opens to display a blank, untitled project.
Choose File > Save As > Save As.
In the Save As dialog box, navigate to the Lessons/Lesson08/ Finished_Project folder.
Name the project Lesson08_Finished.aep, and then click Save.
Importing footage
You’ll import two Adobe Photoshop files and a background movie.
Choose File > Import > File.
Navigate to the Lessons/Lesson08/Assets folder. Press Ctrl or Command to select the crab.psd and Water background.mov files. Then click Import or Open. The assets appear in the Project panel.
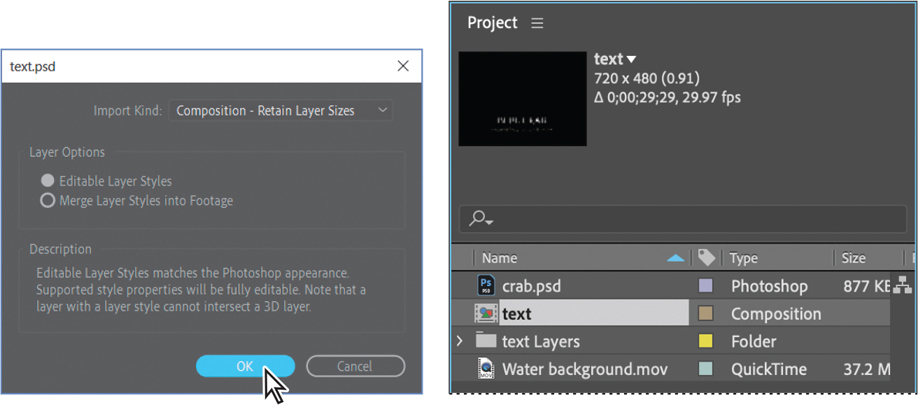
Double-click an empty area in the Project panel to open the Import File dialog box again. Select the text.psd file in the Lessons/Lesson08/Assets folder.
Choose Composition – Retain Layer Sizes from the Import As menu. (In macOS, you may need to click Options to see the Import As menu.) Then click Import or Open.
In the Text.psd dialog box, select Editable Layer Styles, and click OK. The imported file is added as a composition to the Project panel; its layers are added in a separate folder.

Creating the composition
As with any project, you need to create a new composition.
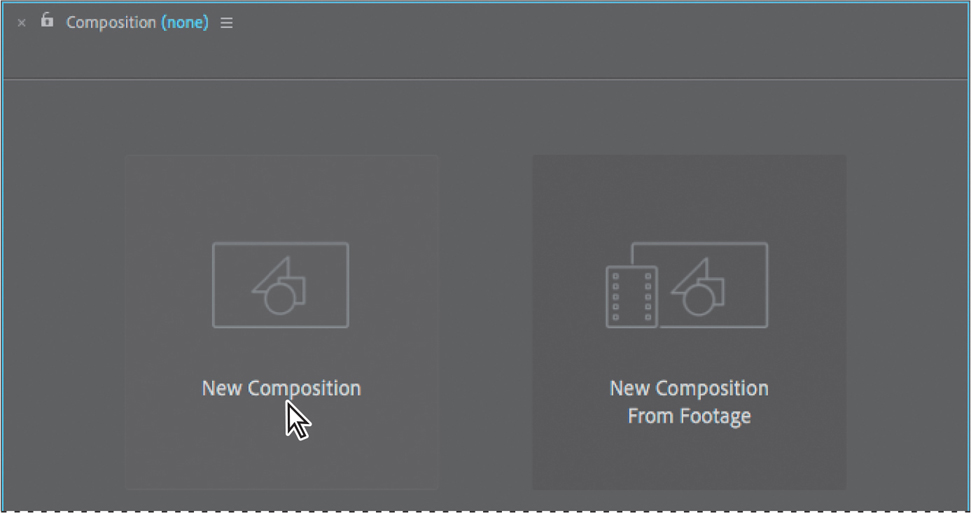
Click New Composition in the Composition panel.

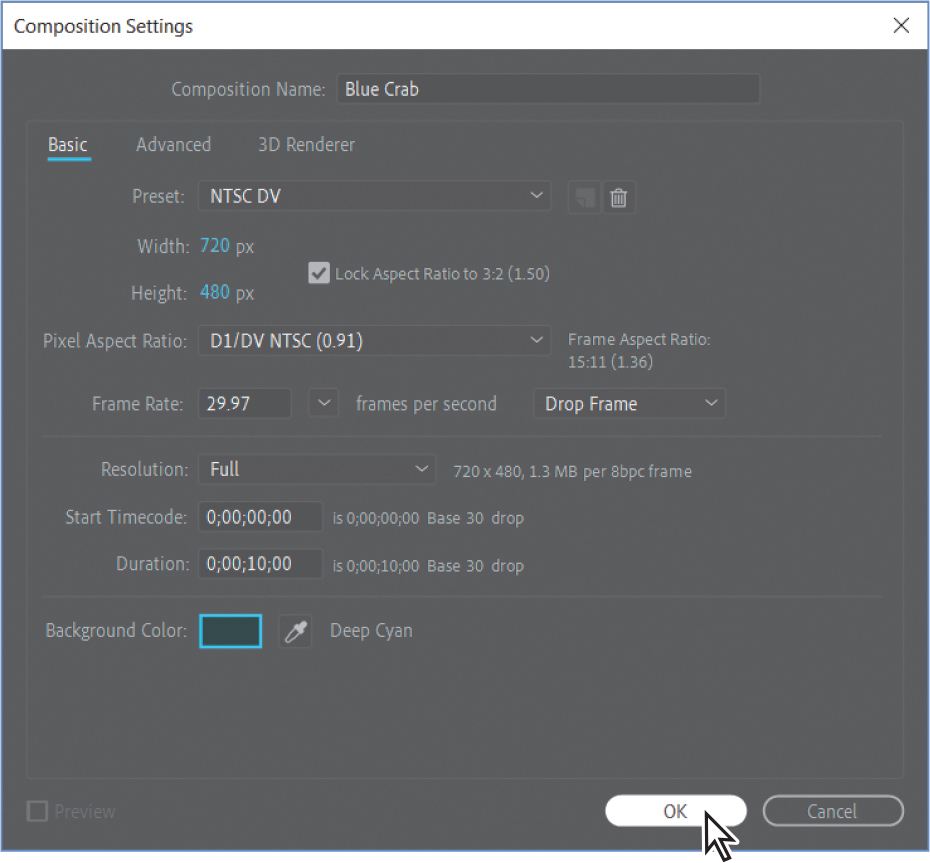
Name the composition Blue Crab.
Choose NTSC DV from the Preset pop-up menu. The preset automatically sets the width, height, pixel aspect ratio, and frame rate for the composition.
In the Duration field, type 1000 to specify 10 seconds.
Change the Background Color to a deep cyan color. (We used R=5, G=62, B=65.) Then click OK to close the Composition Settings dialog box.

After Effects opens the new composition in the Timeline and Composition panels.
Adding the background
It’s easier to animate the image in context, so first you’ll add the background to the composition.
Press the Home key or move the current-time indicator to the beginning of the composition.
Drag the Water background.mov file to the Timeline panel.
Click the Lock icon (
 ) for the layer to prevent accidental changes to it for now.
Animating imported text
The final movie includes two lines of animated text. Because you imported the text.psd file as a composition with layers intact, you can work on it in its own Timeline panel, editing and animating its layers independently. You’ll add an animation preset to each layer.
Drag the text composition from the Project panel into the Timeline panel, placing it at the top of the layer stack.

Double-click the text composition to open it in its own Timeline panel.
Shift-click to select both layers in the text Timeline panel, and choose Layer > Create > Convert to Editable Text.

Now the text layers can be edited, so you can apply animation presets.
Go to 3:00. Then deselect both layers, and select only the BLUE CRAB layer.
In the Effects and Presets panel, search for the Fly In With A Twist animation preset. Then drag it onto the BLUE CRAB layer.

By default, the animation preset lasts just over two and a half seconds, so the text will begin to fly in at 3:00 and finish at 5:16. After Effects adds the keyframes for the effect.
Go to 5:21, and select the charter services layer.
In the Effects and Presets panel, search for the Slow Fade On animation preset. Then drag it onto the charter services layer.
Return to the Blue Crab Timeline panel, and move the current-time indicator to the beginning of the time ruler. Press the spacebar to preview the animation. Press the spacebar again to stop playback.

Choose File > Save to save your work so far.
Scaling an object
Next, you’ll add the crab. You’ll animate it so that it fills the screen at the beginning of the movie, and then quickly shrinks and moves into position above the area where the text will appear.
Drag the crab.psd file from the Project panel to the top layer in the Timeline panel.
Press the Home key to move the current-time indicator to the beginning of the time ruler.
Select the crab.psd layer in the Timeline panel, and press S to display its Scale property.

Change the Scale value to 400%.
Click the stopwatch icon (
 ) next to Scale to create an initial keyframe.
Move to 2:00, and change the Scale to 75%.

The crab scales appropriately, but its position isn’t quite right.
Press the Home key to return to the beginning of the time ruler.
Press P to display the layer’s Position property, and change the Position to 360, 82. The crab moves up to fill the composition.
Click the stopwatch icon next to Position to create an initial keyframe.
Go to 1:15, and change the Position to 360, 228.
Go to 2:00, and change the Position to 360, 182.
Drag the current-time indicator across the first two seconds of the time ruler to see the crab animation.

Hide the properties for the crab.psd layer, and choose File > Save.
About the Puppet tools
The Puppet tools turn raster and vector images into virtual marionettes. When you move a string on a marionette, the body part attached to that string moves; pull the string attached to the hand, and the hand goes up. The Puppet tools use pins to indicate where strings would be attached.
The Puppet effect deforms parts of an image based on the positions of pins that you place and animate. These pins determine which parts of the image should move or rotate, which parts should remain rigid, and which parts should be in front when areas overlap.
There are five kinds of pins, each placed by a different tool:
The Puppet Position Pin tool (
 ) places and moves Position pins, which change the position of specific points in an image.
The Puppet Starch Pin tool (
 ) places Starch pins, which stiffen parts of the image so that they are distorted less.
The Puppet Bend Pin tool (
 ) places Bend pins, which let you change the rotation or scale of part of an image without changing its position.
The Puppet Advanced Pin tool (
 ) places Advanced pins, which give you complete control over rotation, scale, and position.
The Puppet Overlap Pin tool (
 ) places Overlap pins, which indicate the parts of an image that should be in the front when areas overlap.
![]() Note
Note
The mesh is calculated at the frame where the Deform pins are applied. If you add more pins anywhere in the timeline, they are placed based on the original position of the mesh.
As soon as you place a pin, the area within an outline is automatically divided into a mesh of triangles. Each part of the mesh is associated with the pixels of the image, so as the mesh moves, so do the pixels. When you animate a Position pin, the mesh deforms more in the area closest to the pin, while keeping the overall shape as rigid as possible. For example, if you animate a pin in a character’s hand, the hand and arm will be deformed, but most of the character will remain in place.
Adding Position pins
Position pins are the basic component of the Puppet effect. Where you place these pins and how you position them determine how the objects move on the screen. You’ll place Position pins and display the mesh that After Effects creates to determine the area of influence for each pin.
When you select the Puppet Position Pin tool, the Tools panel displays the Puppet tool options. Each pin has its own properties in the Timeline panel, and After Effects automatically creates an initial keyframe for each pin.
Select the Puppet Position Pin tool (
 ) in the Tools panel.
Go to 1:27, just before the crab scales down to its final size.
In the Composition panel, place a Position pin in the middle of the crab’s left pincer.
A yellow dot representing the Position pin appears in the Composition panel. If at this point you were to use the Selection tool (
 ) to move the Position pin, the entire crab would move with it. You need more pins to keep the other parts of the mesh in place.
Using the Puppet Position Pin tool, place another Position pin in the middle of the right pincer.

Now you can move a pincer with the Selection tool. The more pins you place, the smaller the area of influence for each pin, and the less each area will stretch.
Select the Selection tool (
 ), and drag one of the Position pins to see its effect. Then return it to its original position by pressing Ctrl+Z (Windows) or Command+Z (macOS).
Select the Puppet Position Pin tool again, and then place additional Position pins at the top of each antenna, at the end of each side leg, and at the tip of each of the crab’s swimming legs.

In the Timeline panel, expand the Mesh 1 > Deform properties. Each Position pin is listed.
Adding Advanced and Bend pins
You can move Advanced pins in the same way that you move Position pins. But you can also use them to rotate and scale the area of the image. You’ll replace the Position pins in the pincers with Advanced pins. Bend pins don’t affect position, but they do let you rotate or scale an area while keeping it in place. You’ll add Bend pins to the middle of the crab’s swimmer legs. Then, you’ll display the mesh that After Effects creates to determine the area of influence for each pin.
Select the Selection tool in the Tools panel. Then, select and delete each of the Position pins in the pincers.
Select the Puppet Advanced Pin tool (
 ), hidden beneath the Puppet Position Pin tool in the Tools panel.
Place an Advanced pin in the middle of the left pincer, and then place another one in the middle of the right pincer.

Advanced pins appear as dots surrounded by rings. To scale an area, drag the box in the ring outward or inward. To rotate an area, drag the ring itself clockwise or counter-clockwise. You’ll use the Advanced pins to animate the pincers.
Select the Puppet Bend Pin tool (
 ), hidden beneath the Puppet Advanced Pin tool in the Tools panel.
Place a Bend pin in the middle of the crab’s left swimmer leg, and then place another one in the middle of the right swimmer leg.

Depending on the type of animation you’re performing, you may want to name the pins. In this case, you’ll name just the pincer and antenna pins.
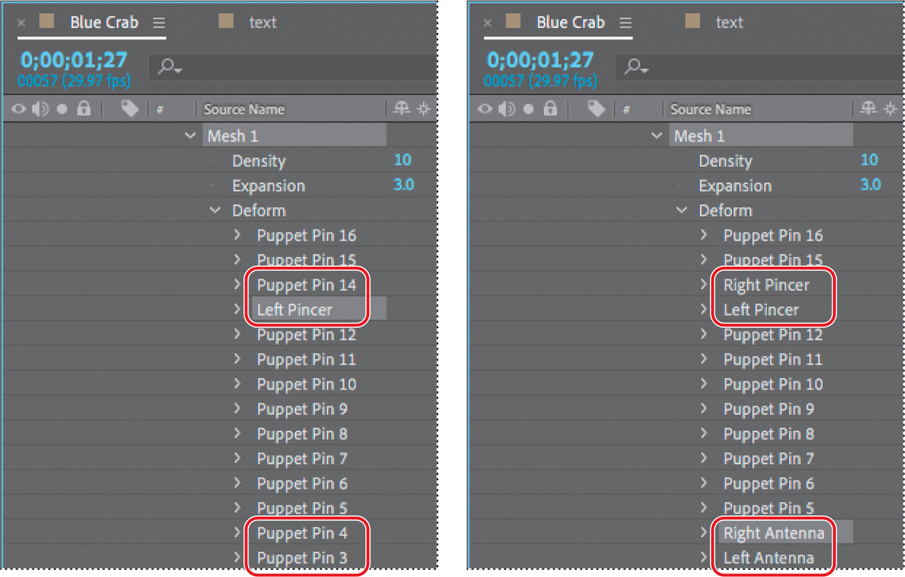
In the Timeline panel, select Puppet Pin 13, press Enter or Return, and rename the pin Left Pincer. Press Enter or Return again to accept the new name.

Hide the pins’ properties. Then, rename the corresponding pins Right Pincer, Left Antenna, and Right Antenna. (They’re probably Puppet Pins 14, 3, and 4, respectively.) The default pin names are numbered in the order they were created. You do not need to name the pins on the legs unless you want to.

Select Show in the options section of the Tools panel to display the distortion mesh.
The crab is nearly the same color as the triangles in the mesh, so you’ll need to change the mesh color. The mesh takes its color from the layer’s color label.
In the Timeline panel, click the color label next to the Crab.psd layer, and then choose a contrasting color, such as red or purple.
 Tip
TipYou can extend the mesh beyond the outline of the layer in order to ensure a stroke is included in the deformation. To expand the mesh, increase the Expansion property in the options section of the Tools panel.
Select Mesh 1 in the Crab.psd layer to display the mesh again.
Change the Density value in the options section of the Tools panel to 12. You may need to select Mesh 1 to see the mesh again.
The Density setting determines how many triangles are included in the mesh. Increasing the number of triangles results in a smoother animation, but also increases rendering time.

Choose File > Save to save your work so far.
Stiffening an area
The pincers, legs, and antennae of the crab will move in the animation, but the carapace should stay firm. You’ll use the Puppet Starch Pin tool to add Starch pins to ensure the carapace isn’t affected by the pins’ movements.
Select the Puppet Starch Pin tool (
 ), which is hidden behind the Puppet Bend Pin tool in the Tools panel.
If the mesh isn’t showing, select Show in the options area of the Tools panel to display it.
Place Starch pins at the base of each pincer, leg, and antenna to stiffen the entire carapace, as in the image below.

Hide the properties for the crab.psd layer in the Timeline panel.
Choose File > Save to save your work so far.
Animating pin positions
The pins are in place. Now you can change them to animate the crab. The Starch pins keep specific areas (in this case, the carapace) from moving too much.
When you placed the pins, After Effects created initial keyframes for each pin at 1:27. You’ll animate the pins so that the crab waves its pincers, legs, and antennae, and then returns to its original position.
Select the crab.psd layer in the Timeline panel, press U to display all the keyframes for the layer, and select the Puppet effect to make the puppet pins visible.
Select the Selection tool in the Tools panel. Then go to 4:00, and select the Advanced pin on the left pincer. Drag the ring around it to the left to rotate the pincer outward, and then drag the center pin so that the pincer is almost vertical. Repeat the steps (but dragging the ring to the right) for the right pincer.

Go to 5:00, and move the Left Pincer and Right Pincer pins so that the pincers are further apart and turn them outward. Then drag the small rectangle on each ring outward to bloat the pincers slightly.

At 6:19, turn the pincers back inward. Then, at 8:19, position them so that they’re roughly vertical again. At 9:29, reduce the pincers’ scale back to their original size, and move the pincers so that they’re fully turned inward.
Move the current-time indicator across the time ruler to see the pincers wave.
Next, you’ll move the antennae closer together. The first keyframe already exists, so you need to create only one more.
Go to 7:14, and pull the pins on the antennae closer to each other.
Now you can animate all the legs. You want them to start moving even before the pincers do, and they should wave around a bit.
Go to 1:19, and move the pin on each leg so that each leg is slightly longer and curved outward. Use the Bend pin on each of the swimmer legs to scale each leg slightly larger.
Make changes to each leg at 2:01, 4:00, 6:17, and 8:10 so that the legs move slightly upward or downward, in and out as the video progresses. Move each pin about the same amount each time, in whatever direction you choose. At 8:10, use the Bend pins to return the swimmer legs to their original size.
Hide the properties for the crab.psd layer. Then press F2 or click an empty area of the Timeline panel to deselect all layers. Then, press the Home key or move the current-time indicator to the beginning of the time ruler.
Press the spacebar to preview your animation. Press the spacebar again to stop playback. If you want to change the animation, adjust pins at each keyframe.


Choose File > Save to save your animation.
Using the Puppet tools to animate video
You’ve used the Puppet tools to animate an image on a layer, but you can also use them to warp or create other special effects on video layers. You’ll use Advanced pins to make the water swirl.
In the Timeline panel, click the Lock icon to unlock the Water background.mov layer so you can edit it.
Go to 4:00, where you can see the water clearly.
Select the Water background.mov layer.
Select the Puppet Advanced Pin tool in the Tools panel, and then create two Advanced pins in the water on either side of the crab and one each above and below it.
Deselect Show in the Tools panel so you can see the water clearly.
Rotate each pin to create waves in the water. You’ll probably need to scale and reposition the pins as well to ensure that the water reaches the edges of the scene. If you aren’t happy with the effect, you can delete the pins and start over.

Press the Home key or move the current-time indicator to the beginning of the time ruler. Then press the spacebar to preview the animation. Press the spacebar again to stop playback.
Hide all properties in the Timeline panel, and then save the project.
Recording animation
Changing the position of each pin at each keyframe worked, but you probably found the process to be slow and tedious. Instead of manually animating keyframes, you can use the Puppet Sketch tool to drag the pins into position in real time. After Effects starts recording the motion as soon as you begin dragging a pin, and it stops recording when you release the mouse button. The composition moves forward through time as you move the pin. When you stop recording, the current-time indicator returns to the point at which you began recording, so that you can record the path for another pin during the same time period.
Experiment with this method of animation as you re-create the pincers’ movement using the Puppet Sketch tool.
![]() Tip
Tip
By default, the motion is played back at the speed at which it was recorded. To change the ratio of recording speed to playback speed, click Record Options in the Tools panel, and change the Speed value before recording.
Choose File > Save As > Save As, and name the project Motionsketch.aep. Save it in the Lesson08/Finished_Project folder.
Move the current-time indicator to 1:27.
In the Timeline panel, select the crab.psd layer, and press U to display all the keyframes for the layer.
Scroll down to the Left Pincer and Right Pincer pins. Drag to select all keyframes for those pins after 2:08, and then delete the keyframes.


The animation for the other pins remains, but you’ve removed the keyframes that animate the pincers. Depending on where you placed Starch pins, the pincers may move slightly in response to other pins’ movements.
Select the Puppet Position Pin tool (
 ) in the Tools panel.
In the Timeline panel, select Puppet to see the pins in the Composition panel, if they’re not already visible.
Select the Left Pincer pin in the Composition panel, and press Ctrl (Windows) or Command (macOS) to activate the Puppet Sketch tool. (A clock icon appears next to the pointer.)
Continue to hold down Ctrl or Command as you drag the Left Pincer pin into different positions for the length of the video. Release the mouse button when you’ve finished. The current-time indicator returns to 1:27.
 Note
NoteThe Puppet Sketch tool records changes in position, but not rotation or size.
Press Ctrl or Command, and drag the Right Pincer pin into different positions. Use the outline of the crab and the other pincer’s movements to guide you. Release the mouse button to stop recording.

Preview the final animation.
You’ve used the Puppet tools to create a realistic, engaging animation. Remember that you can use the Puppet tools to deform and manipulate many kinds of objects.
Review answers
1 The Puppet Position Pin tool creates Position pins, which define the position of a por-tion of the image as the image is deformed. The Puppet Advanced Pin tool creates Advanced pins, which define the scale and rotation, as well as the position, of a portion of the image.
2 Use the Puppet Starch Pin tool to add Starch pins to an area that you want to remain more rigid while other areas of the object are distorted.
3 You can manually animate pin positions by changing the position for each pin in the Timeline panel. To animate pin positions more quickly, use the Puppet Sketch tool: With the Puppet Position Pin tool selected, press Ctrl or Command, and drag a pin to record its movement.
