
5. Advanced Motion Tweening
Lesson overview
In this lesson, you’ll learn how to do the following:
Use the Motion Editor to refine and create complex animation
Understand when to use the Motion Editor
Change the Motion Editor view
Edit a property curve
Copy and paste a property curve
Use eases to create more realistic motion
Add different eases to different property curves
Modify or remove an ease
Understand the difference between a property curve and an ease curve
This lesson will take about one hour to complete. Please log in to your account on peachpit.com to download the lesson files for this chapter, or go to the Getting Started section at the beginning of this book and follow the instructions under “Accessing the Lesson Files and Web Edition.”

The advanced Motion Editor in Adobe Animate CC makes creating complicated animation fast and easy. Use the Motion Editor to view how the properties of your motion tween change over time, and apply eases for sophisticated effects.
Getting Started
Start by viewing the finished movie file to see the animated infographic that you’ll create in this lesson.
![]() Note
Note
If you have not already downloaded the project files for this lesson to your computer from your Account page, make sure to do so now. See Getting Started at the beginning of the book.
Double-click the 05End.html file in the Lesson05/05End folder to play the animation in a browser.

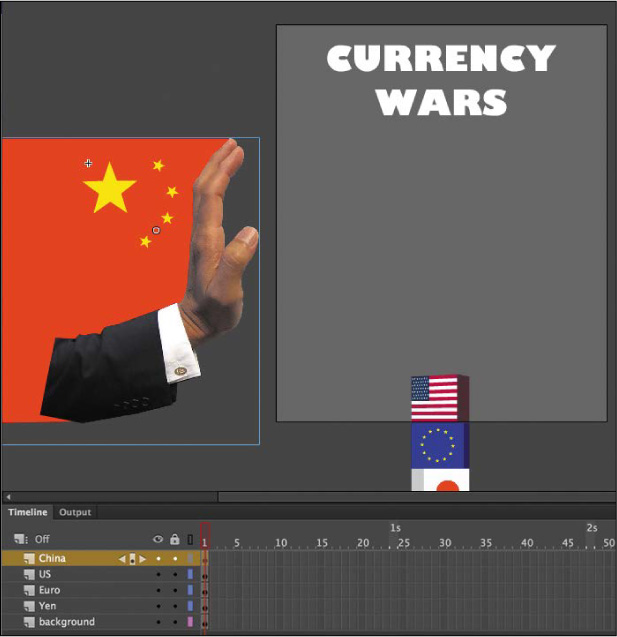
The project is a short animated infographic illustrating the idea of China as an emerging economic threat to the highest-traded currencies in the world. The animation is something you might see accompanying a story in the business and economy section of a news site. In the animation, blocks with the American, European Union, and Japanese flags, representing the Dollar, the Euro, and the Yen, respectively, stack themselves up. A moment later, a large hand with the Chinese flag bumps the stack, sending them tumbling down. In this lesson, you’ll use the Motion Editor to make refinements in the motion tweening of the blocks, including the bouncing movements as they fall.
Close the 05End.html file.
Double-click the 05Start.fla file in the Lesson05/05Start folder to open the initial project file in Animate. This file is an HTML5 Canvas document that already contains all the graphics created for you, with movie clip symbols saved in the library. Each of the graphics has its own layer, and instances of the symbols have been placed on the Stage in their initial positions.
Choose View > Magnification > Clip to Stage to deselect the option (or deselect the Clip Content Outside The Stage button above the Stage) to enable the pasteboard so that you can see all the graphics positioned just off the Stage.
Choose File > Save As. Name the file 05_workingcopy.fla, and save it in the 05Start folder.
Saving a working copy ensures that the original start file will be available if you want to start over.
About the Motion Editor
You don’t have to use the Motion Editor at all to create your animations. However, if you’re dealing with a motion tween that contains multiple properties that change at different times through the animation (for example, a rocket that fades and rotates as it moves across the Stage), or if you’re handling animation that mimics real-world physics (like bounces and springs), then the Motion Editor can make your task much simpler.
The Motion Editor is an advanced panel that is integrated into the Timeline and accessible only when editing a motion tween. The panel shows you how the properties of your animation change over the course of the tween as lines on a graph. It takes some time to become familiar with the meaning of the lines and how the curves translate to visual changes on the Stage. But once you recognize how the curves reflect changes in your animation, you have a powerful tool at your disposal. You can modify the curves on the graph, called property curves, by adding or deleting anchor points, and change their curvature with Bezier precision. You can copy property curves and apply them to other properties or other motion tweens.
The Motion Editor also allows you to apply sophisticated eases to your animation. Although you can apply eases through the Properties panel, the Motion Editor provides a wider range of ease types, with options to customize any ease. The Motion Editor also visually shows you how your ease affects a property curve. You can even apply different eases to different property curves.
![]() Note
Note
The Motion Editor is available only for motion tweens (and not classic tweens, shape tweens, inverse kinematics with the Bone tool, or frame-by-frame animations).
Understanding the Project File
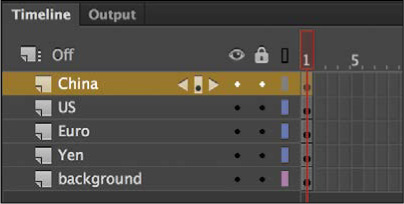
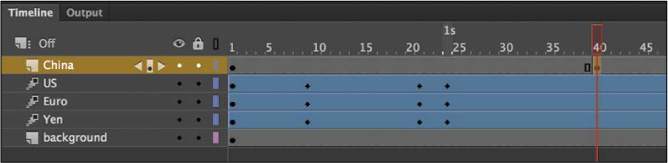
The 05Start.fla file has five layers. The background layer contains background elements that will not be animated. The China layer contains the movie clip instance of the hand and Chinese flag representing China. Each of the top three layers (US, Euro, and Yen) contains a corresponding movie clip instance of a block representing those currencies.
The Stage is set at 500 pixels by 600 pixels, and the color of the Stage is gray.
For this lesson, you’ll add motion tweens in the top four layers, and refine the movements of the blocks with the Motion Editor.
Adding Motion Tweens
You’ll start this project by animating the three boxes representing the US Dollar, the Euro, and the Japanese Yen. The three boxes will start below the Stage and rise up.
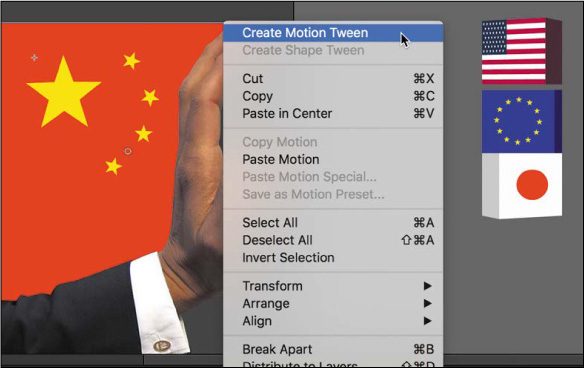
Select all three blocks (the ones with the US flag, the European Union flag, and the Japanese flag).
Right-click the multiple selection and choose Create Motion Tween.
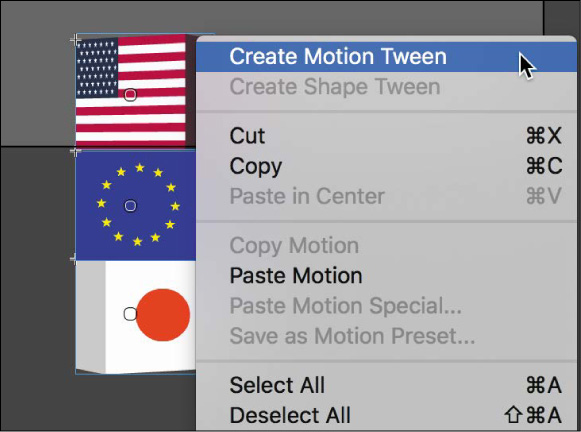
Animate creates motion tweens for all three movie clip instances and extends the Timeline for those three layers to frame 24, representing one second of time.

Move the red playhead to frame 24.
Add additional frames to the other two layers so they extend to frame 24.
Select all three blocks and, while holding down the Shift key, move them up onto the Stage. Drag the blocks high enough onto the Stage so they’ll have room to fall down and tumble over.

Ending keyframes are added to all three instances.

Press Enter/Return to preview your animation.
The three blocks move upward onto the Stage, sticking together.
Editing Property Curves
The motion tween of the three blocks positions them on the Stage for the viewer to see, but the movement is sluggish and not very interesting. To create a more dynamic animation that gives some life and snappiness to the blocks, you’ll modify the curve for their Y-properties in the Motion Editor.
Double-click the motion tween in the US layer on the Timeline, or right-click and choose Refine Tween.
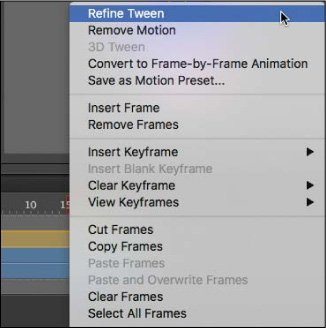
The motion tween expands to reveal the Motion Editor panel. The Motion Editor contains two straight red lines. One represents the change in the X-position, and the other represents the change in the Y-position. Both the X- and Y-properties are grouped under the Location property group.

Click the X-property to select it.
The horizontal red line becomes bold, and the downward diagonal line fades. The horizontal red line represents the value of the block’s X-position, which remains unchanged over the span of the motion tween. Note that the scale on the vertical axis of the graph is limited to a range from 238 to 240.
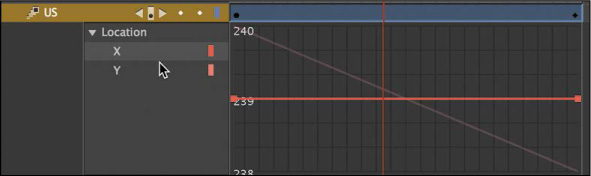
Now, select the Y-property.
The downward diagonal line becomes bold, and the horizontal line fades. The diagonal line represents the value of the block’s Y-position, which decreases over the course of the tween (the block moves upward). Because of the change in Y-property values, the vertical scale now expands to encompass a wider range.

Understanding the Motion Editor values
The units on the vertical axis of the Motion Editor measure the values of the selected property. When you select the Y-property, Animate shows the pixel units of the Y-position of the motion tween.
The initial value of the curve appears to be greater than 560, and the final value of the curve appears to be about 200. However, those values don’t seem to match the initial Y-values when you look at the position of the US movie clip in the Properties panel. Why the discrepancy?
The Motion Editor measures from the transformation point of your object. Since the transformation point of your object is in the center, the Motion Editor vertical values show the Y-property values as the initial position plus half of the movie clip’s height.

Adding anchor points
You want to create a nonlinear property curve for the first block that moves on the Stage—that is, you want the block to move a different distance during each interval of time. An object on a linear property curve moves the same distance during each interval of time, which is represented by a straight line in the Motion Editor. A nonlinear path is curved.
To change the shape of the property curve, you add anchor points. From each anchor point, you can change the curvature or direction of the curve.
Select Add Anchor Point On Graph at the bottom of the Motion Editor.

Make sure the Y-property curve is still selected, and move your mouse pointer over the property curve.
Your cursor changes to the Pen tool icon with a plus sign, indicating that you can add an anchor point to the curve.

Use your mouse to drag the curve downward at frame 21 and release the mouse button when the anchor point is at about the 25-pixel mark (the graph will scroll to follow your mouse below the 250-pixel mark).
This adds a new anchor point to the curve, and a new keyframe is added at frame 21.
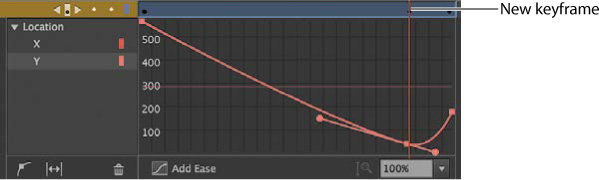
The anchor point allows you to change the motion of your animation. The new curve overshoots the final Y-value of the motion tween just before the final keyframe. The resulting motion makes the movie clip move rapidly up, then fall back to its final Y-position value. You can see the motion by pressing the Enter/Return key.
Select Add Anchor Point On Graph again.
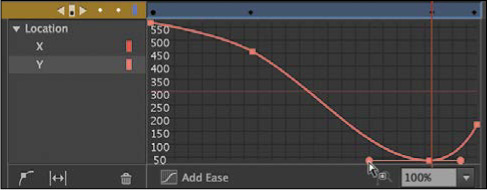
Add a new anchor point at frame 5 and drag it to the right to about frame 8.
Adding another anchor point to the graph also adds a new keyframe to the motion tween. The new curve looks like a broad, lazy “S” shape, with a smooth flattened slope at the beginning, a steep section in the middle, and the bump at the end.

 Tip
TipYou can also double-click a location on a property curve to add a new anchor point.
Test your new motion by pressing Enter/Return.
Your red playhead moves through the motion tween. Your new curve makes your movie clip slowly accelerate into its motion, then rapidly shoot past its destination, and then fall back to its ending value.
Changing the curvature
Each new anchor point comes with direction handles on either side, which allow you to change the curvature at that point. The anchor points and direction handles work just like the ones created by the Pen tool when drawing paths.
Click the anchor point on the Y-property curve at the keyframe at frame 21.
The direction handles at the selected anchor point appear.
Use the left direction point to drag the left handle downward so the direction handles are horizontal.
The property curve flattens out at frame 21, which makes the movie clip remain at that Y-position for just a split second before moving again. That slight hang-time gives the movie clip a more realistic physics-based motion, just as a ball that you throw up in the air stays still for a moment before falling back to the ground.
Test your new motion by pressing Enter/Return.
Your red playhead moves through the motion tween. Your new curve makes your movie clip have a more realistic motion.
 Note
NoteSome anchor points (for example, the first and last anchor points of a property curve) do not have direction handles by default. Hold down the Alt/Option key and drag a selected anchor point to pull out a direction handle and edit the curvature.
Moving anchor points
You can move any anchor point, including the ones at the first and last keyframes, to new property values along the vertical axis. You can also move any of the anchor points (except the first one) to new times along the motion tween. In effect, when you move anchor points to new times, you move the keyframes within the tween span.
Select the anchor point at frame 8.
The handle bars at the selected anchor point appear.
TipHold down the Alt/Option key and click an anchor point to remove its direction handles, converting it to a corner point without smooth curves.
Drag the anchor point slightly up and to the right.

The property curve flattens out even more, creating a more extended ease-in effect.
TipHold down the Alt/Option key as you move a direction handle of an anchor point to change the angle of that direction handle independently of the other. You can adjust the length of each direction handle without holding Alt/Option. If you adjust the length or angle of one side of a directon handle independently of the other, you can create more dramatic changes to the property curve.
Test your new motion by pressing Enter/Return.
The final motion is more interesting than a linear one, with your motion tween rising up and falling back down like somebody had tossed it up in the air.
TipHold down the Shift key to constrain the dragging motion to a vertical or horizontal direction.
TipYou can use the arrow keys to nudge a selected anchor point for precise control. Press the Up or Down Arrow key to move the anchor point one property unit up or down, or Shift-Up or Shift-Down to move the anchor point ten property units up or down.
Deleting anchor points
If you’ve added too many anchor points, you can always remove them (except for the first and last anchor points). Removing an anchor point has the same effect as removing a keyframe of the motion tween.
Hold down the Command/Ctrl key.

Your cursor turns into the Pen icon with a minus sign when you hover over any anchor point. Click any anchor point (except the first or last).
Animate removes the anchor point from the property curve. Do not remove any anchor points from your project at this point in the lesson. If you do, press Ctrl+Z (Windows)/Command+Z (Mac) to undo the operation.
Deleting property curves
Click Remove Tween For Selected Property (the trash can icon) at the bottom of the Motion Editor to delete a tween for a selected property curve.

At the moment, your animation has a tween for only one property—the Y-property—so deleting the curve would remove the property changes in your tween. Use the Remove Tween option if you want to delete the animation of a particular property when you have multiple properties changing.
Viewing Options for the Motion Editor
Animate provides different viewing options for the Motion Editor so you can refine your property curves with greater accuracy.

Use the menu at the bottom of the Motion Editor to change the zoom level.
The vertical axis expands to show a more granular level of property values. Scroll up or down to see the top or bottom of the curve.
Click 100% Zoom to reset the Motion Editor to its default view.
Click Fit To View to expand the Motion Editor to fill the existing space on the Timeline. Click the icon again (its name is now Restore View) to return to the default view.
NoteYou can enter a custom magnification level for the Motion Editor, but the minimum value is 100% and the maximum value is 400%.
TipYou can also hold down the Ctrl/Command key and scroll inside the Motion Editor to change the magnification.
Copying and Pasting Curves
You’ve spent a lot of effort creating a custom property curve for the motion of the first movie clip. Fortunately, you don’t have to work through those same steps for the other movie clips. Animate provides quick and easy ways to duplicate individual property curves or entire motion tweens.
In the following section, you’ll duplicate the motion of the US block to the European Union and Japanese blocks.
In the Motion Editor of the motion tween for the US movie clip, select the Y-property curve.
Right-click the Y-property curve and choose Copy.

Animate copies the curve for the Y-property.
Double-click the motion tween in the Euro layer.
The Motion Editor in the US layer collapses and the Motion Editor in the Euro layer expands. Both the X-property and Y-property curves of the motion tween in the Euro layer are straight, linear motions.

Select the Y-property.
Right-click the Y-property curve and choose Paste To Fit Current Range.

The property curve data copied from the US clip is applied to the Euro clip, but it is adjusted to fit the range of Y-position values for the Euro clip’s motion.

The final pasted curve has the correct shape and anchor point curvatures, but it is squeezed to fit the starting and ending points of the Euro motion tween. That means its ending point is lower on the Stage than you want.
Hold down the Shift key and drag the final anchor point down so its property value is identical to the previous anchor point. (The final anchor point should be at a point where the Euro block sits immediately under the US block with no space between them.)

Hold down the Shift key and click and drag the anchor point at frame 21 to about Y=150 in the Motion Editor to re-create the gentle slope in the original curve.

Test your new motion by pressing Enter/Return.
Both the US and the European Union blocks slowly ease in to their motion, fly up high, and then settle back down in the middle of the Stage.
TipIn the Motion Editor, you can use Ctrl+C (Windows)/Command+C (Mac) to copy a selected property curve and Ctrl+C/Command+V to paste a curve.
Duplicating entire motion tweens
Copying and pasting individual curves in the Motion Editor allows you to duplicate the animation of individual properties. For example, you could duplicate the Y-motion of a tween, but not its rotation.
In this project, since you want to duplicate the entire motion tween of the US block (which consists of change only along the Y-property), you can use the commands Edit > Timeline > Copy Motion and Edit > Timeline > Paste Motion.
You’ll use Copy Motion and Paste Motion to copy the motion tween of the European Union movie clip and paste it into the Yen movie clip.
Double-click the motion tween in the Euro layer to collapse the Motion Editor.
Shift-click the motion tween in the Euro layer.
The entire motion tween span is selected.

Right-click and choose Copy Motion, or choose Edit > Timeline > Copy Motion.

The entire Euro layer motion tween is copied.
Select the motion tween in the Yen layer.
Right-click and choose Paste Motion, or choose Edit > Timeline > Paste Motion.
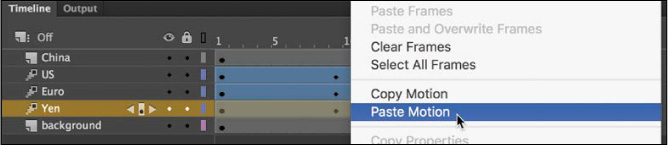
The property curves of the Yen motion tween now are identical to that of the Euro motion tween, with different beginning and ending values.
If you want to refine the motion of the Yen block further, open its Motion Editor. Select the Y-position property and lower the height to which it rises (by dragging the anchor point in frame 21 up slightly) before falling back down. Doing so will create a slight separation between all the blocks. Make minor adjustments to the positions of the property curve keyframes until you’re satisfied with the overall motion.
Wrap things up by closing the Motion Editor.

Adding Complex Eases
Now that your three blocks representing the US, European Union, and Japanese currencies are animated, it’s time to animate the hand that pushes them. The hand will move horizontally onto the Stage and give the stack of blocks a shove, sending them toppling.
The motion of the hand easing into the Stage and the toppling motion can be quite complex. As the blocks topple, they bounce up and down, decreasing in height after each bounce. The Motion Editor, fortunately, makes much of the motion quick and easy to edit.
Adding the next motion tween
The next motion tween will be applied to the hand of China. The movie clip is positioned just off the left of the Stage in the layer called China.
Select frame 90 for all the layers, and press F5 (Insert > Timeline > Frame).
Animate adds frames to all the layers up to frame 90. This establishes the span of time for the hand to enter and knock over the blocks.

Select frame 40 in the China layer and insert a new keyframe (F6) to define the moment when the hand starts to move.
A keyframe is added to the China layer at frame 40 and the movie clip instance from the previous keyframe is copied into it.
Right-click the China movie clip instance just off the Stage and choose Create Motion Tween.
Move the red playhead to frame 55, the point where we want the hand to make contact with the blocks.
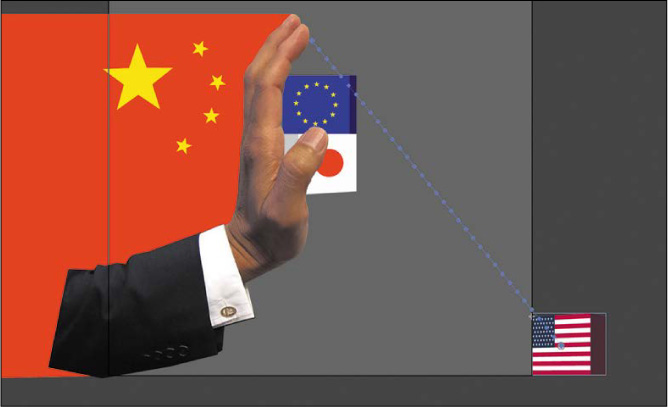
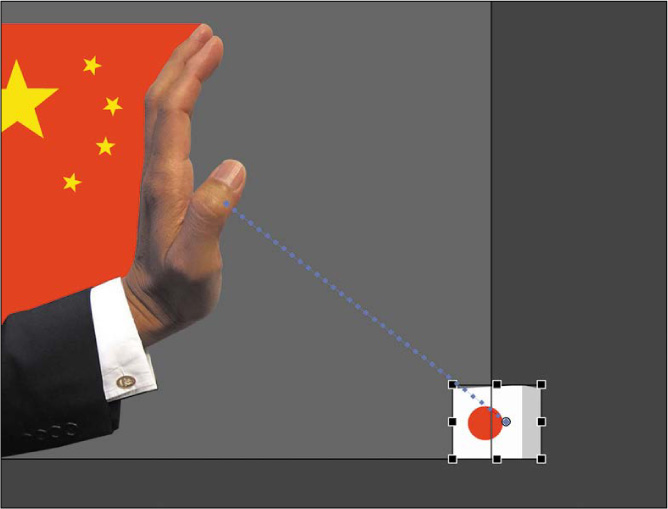
Move the hand straight across the Stage so that its palm butts up against the stack of blocks. (Use the right-arrow key to keep the movie clip’s motion restricted to a horizontal direction.) The X-position should be at about 2. Make sure that the Y-position remains at Y=210 in the ending keyframe as in the beginning keyframe.
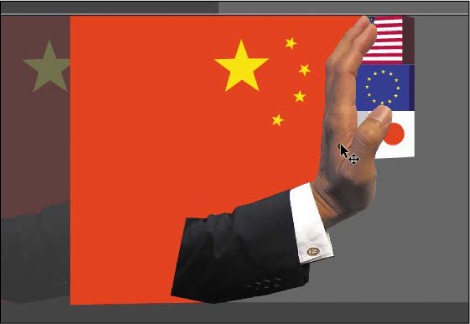
The China movie clip instance is now animated so it moves straight across the Stage from the left to right and stops at frame 55. The movie clip stays at its ending position from frame 55 to frame 90.
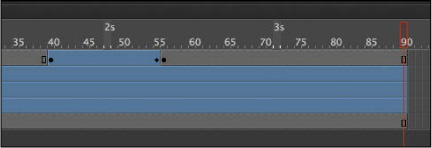
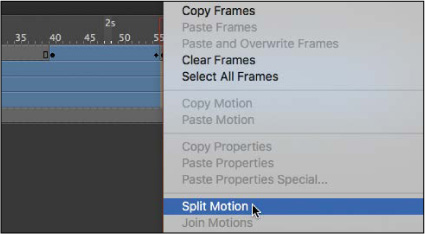
Select frame 56 of the China layer.
Right-click and choose Split Motion.

The motion tween in the China layer is split into two motion tweens—one that begins at frame 40, and another that begins at frame 56.

At frame 56, right-click and choose Remove Motion.
The motion tween at frame 56 is deleted, leaving the movie clip instance as a static graphic from frame 56 to the last frame of the animation. The motion tween from frame 40 to frame 56 is now ready for an ease.
Adding an ease-in
The Motion Editor provides a host of different ease types that can give a simple motion, like the China movie clip’s shove, a more interesting effect.
Double-click the motion tween in the China layer, or right-click and choose Refine Tween.
The Motion Editor opens to reveal property curves for both the X- and Y-properties. The X-property curve is angled upward whereas the Y-property curve is relatively flat.

Select the X-property curve.
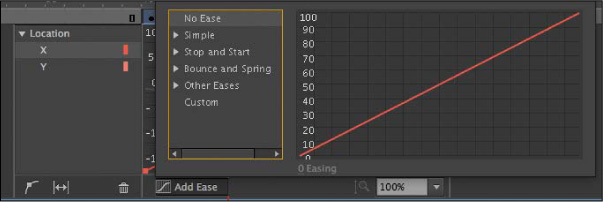
Click the Add Ease button at the bottom of the Motion Editor.

The Ease panel opens, listing the different ease presets grouped by category, from No Ease at the top to Custom Ease at the bottom. The different ease presets change the way the motion tween proceeds from the first keyframe to the last.
Double-click the Simple category.
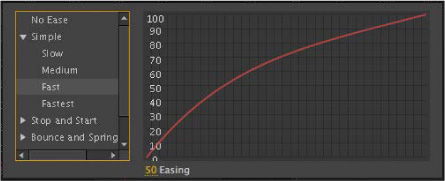
The category opens, revealing Slow, Medium, Fast, and Fastest presets. The eases in the Simple category affect one side of the motion tween (either the beginning or the end). The eases in the Stop and Start categories affect both sides of the motion tween. The eases in the other categories are more complex ease types.
TipYou can use the Up, Down, Left, and Right Arrow keys to navigate the ease types in the Ease panel of the Motion Editor.
Select the Fast ease preset.

The Fast ease curve is displayed, showing graphically the intensity of the ease. Slower eases are fairly shallow and closer to a straight line, whereas faster eases have progressively greater curvature.
NoteAfter you’ve chosen an ease preset, the label on the Add Ease button changes to the name of the preset.
Double-click the Easing value and change it to −60; then press Tab or Enter/Return to exit the entry field and confirm the value. You can also drag on the Easing value to change it (drag left or down to decrease the value; drag right or up to increase it).
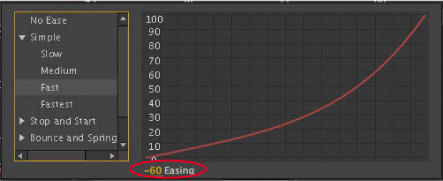
The Easing value determines the strength of the ease for each ease preset and the direction of the ease. A positive number represents an ease-out, and a negative number represents an ease-in.
Click off the Ease panel to dismiss it, or press the Esc key.
A dotted line appears in the Motion Editor superimposed on the original property curve. This is called the “resultant curve” and shows the effect of the ease on the tween.

Close the Motion Editor and test your new motion by pressing Enter/Return.
The motion tween of the China block proceeds slowly, gaining momentum until it finally collides with the stack of smaller blocks in the middle of the Stage.

If the clip is selected, its motion tween path on the Stage shows the position of the instance at each frame. The clustering of the dots on the left side of the tween path means that the object doesn’t move very far in the beginning of its motion, but gradually speeds up.
Removing an ease
Eases can be deleted as quickly as you’ve added them.
Double-click the motion tween in the China layer, or right-click and choose Refine Tween.
Click the Ease button at the bottom of the Motion Editor, which now bears the label Simple(Fast).
Animate opens the Ease panel, displaying the currently selected ease.
Select No Ease to remove the ease preset, and press Esc to close the Ease panel.

Press Ctrl+Z (Windows)/Command+Z (Mac) to undo the removal of the ease. You’ll keep the ease in place for this project.
Double-click the China motion tween to close the Motion Editor.
Animating bounces
As soon as the hand graphic hits the stack of blocks, you’ll want to animate the blocks tumbling down. You’ll create a motion tween with multiple complex eases to create the bouncing effect.
Drag-select frame 56 in the US, Euro, and Yen layers.

Right-click and choose Split Motion.
New motion tweens begin at frame 56 in all three layers.

Move the playhead to frame 90.
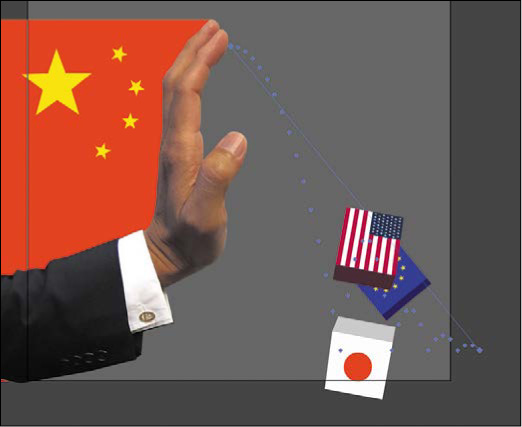
Move the US movie clip instance to the bottom of the Stage at X=500 and Y=530.
Using the Free Transform tool, rotate it 180 degrees clockwise so it appears upside down.

Move the Euro movie clip instance to the bottom just off the Stage in the same manner and and use the Free Transform tool to rotate it 90 degrees clockwise. You may have to hide the US layer above it so you can grab the Euro graphic.

Move the Yen movie clip instance to the bottom just off the Stage and use the Free Transform tool to rotate it 180 degrees clockwise. Hide the Euro layer so the Yen graphic is easier to work with.
Test your new motion by pressing Enter/Return.

The three blocks fall gracefully in a diagonal direction, rotating as they fall. You’ll want a more violent, realistic tumble, so the next step is to add some eases.
Using the BounceIn ease
One of the presets in the Ease panel is BounceIn, which simulates a bouncing motion. The distance to the final property value gradually decreases as the motion tween approaches its ending keyframe.
Double-click the last motion tween in the US layer to open the Motion Editor.

Animate expands the motion tween in the US layer, revealing the Motion Editor panel. The Motion Editor contains property curves for both the X- and Y-properties for Location as well as Z-properties for Transform > Rotation.
Select the Y-property under Location.
Click Add Ease at the bottom of the Motion Editor to open the Ease panel.
Double-click the Bounce And Spring category to reveal the presets within.
Select the BounceIn ease preset and enter 5 for the Easing value.

The BounceIn ease simulates a bounce that slowly decays as the motion tween approaches its end. The Easing value for the BounceIn ease determines the number of bounces.
Press Tab to confirm the Easing value and press Esc to close the Ease panel.
Test your new motion by pressing Enter/Return. Select Loop at the bottom of the Timeline and set the markers at frames 56 and 90 so you can repeat the motion automatically.

The US instance bounces (only in the Y-direction) as it falls to the ground. Note the path of the bounce on the Stage defined by the dots.
Collapse the Motion Editor for the US layer, and expand the Motion Editor for the Euro layer.
Apply a BounceIn ease to the Euro instance, and change the Easing value to 4.

Collapse the Motion Editor for the Euro layer, and expand the Motion Editor for the Yen layer.
Apply a BounceIn ease to the Yen instance, and change the Easing value to 3.

Test your new motion by pressing Enter/Return.
When the three blocks fall, each tumbles with a different number of bounces. The top block bounces the most with five bounces, the middle bounces four times, and the bottom block bounces three times.
NoteIf you’re encountering strange, unpredictable behaviors, check to make sure that you’ve applied the BounceIn ease only to the Y-property curve. You want the bouncing motion to affect only the vertical motion, and not the horizontal motion or the rotation.
Applying a second ease to a different property curve
The Motion Editor is powerful because it enables you to treat each property curve of one motion tween independently. For example, you can apply one ease for the Y-property and a different ease for the X-property. This is exactly what you’ll do next. You’ll add an ease-out for the horizontal motion of each instance, while maintaining the BounceIn ease for the vertical motion.
Expand the Motion Editor for the US layer.
Select the X-property under Location.

Click Add Ease at the bottom of the Motion Editor to open the Ease panel.
Double-click the Simple category.
Select the Fast ease preset and enter 50 for the Easing value.
The Easing value of 50 represents a strong ease-out motion.

Apply Fast eases with an Easing value of 50 for the X-property curves of the other two motion tweens (the Euro and the Yen instances).
Test your new motion by pressing Enter/Return. Use the Loop option at the bottom of the Timeline so you can repeat the motion automatically.
As the three blocks bounce to the ground, their forward momentum gradually slows down, creating a more realistic animation.

Review Questions
1 How do you access the Motion Editor for a motion tween?
2 What’s the difference between a property curve and an ease curve?
3 What does the Easing value do to an ease?
4 How do you change the curvature of a property curve?
Review Answers
1 To open the Motion Editor panel, double-click a motion tween span on the Timeline, or right-click a motion tween span and choose Refine Tween.
2 A property curve is the graphical representation of how a property of a motion tween changes values over time. An ease curve represents a different rate of change that you can apply to an individual property curve. Animate displays the effects of an ease curve on a property curve as a dotted line.
3 The Easing value changes the strength and direction of an ease. Easing values affect eases differently, depending on the type of ease selected. For example, the Easing value for BounceIn eases determines the number of bounces, whereas the Easing value for a Simple Fast ease determines whether the ease is an ease-in or ease-out, and the strength of the ease.
4 To change the curvature of a property curve, select the property in the Motion Editor and select Add Anchor. Click the curve to add a new anchor point and move the direction handles to change the shape of the curve at that point. You can move the anchor points up or down to change the property value, or you can move the anchor points left or right to change the position of the keyframe within the motion tween.