
13 Post-Processing with Adobe Photoshop CC
Lesson overview
In this lesson, you’ll discover why and how you would open in Adobe Photoshop CC a scene that was rendered by Dimension and learn the following:
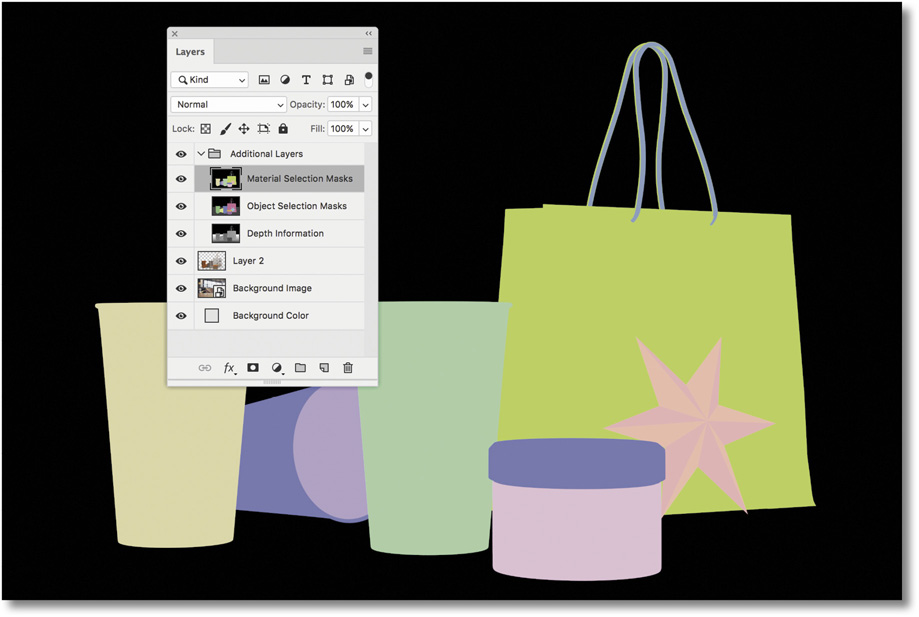
What Photoshop layers are created automatically by Dimension’s renderer and what you can use them for
How to easily change the background image in Photoshop
How to use the masks that are automatically saved into the rendered image to make selections easier
How to apply simple color correction to a rendered scene in Photoshop
This lesson will take about 45 minutes to complete. Please log in to your account on peachpit.com to download the lesson files for this lesson, or go to the “Getting Started” section at the beginning of this book and follow the instructions under “Accessing the lesson files and Web Edition.” Store the files on your computer in a convenient location.
Your Account page is also where you’ll find any updates to the lesson files. Look on the Lesson & Update Files tab to access the most current content.
This lesson assumes that you have some basic knowledge of how to use Adobe Photoshop and are familiar with the Photoshop interface, in particular the Layers panel.
When you render a scene to the PSD format, Dimension adds several useful layers to the file that make certain post-processing tasks easier.
Opening a scene rendered as a PSD file in Photoshop
Dimension is the easiest place to make changes to the lighting, color, background, and composition of your Dimension scenes. But occasionally you might need to edit a scene in Photoshop after it has been rendered. For example, you might want to make a quick tweak to the overall color of the scene without re-rendering the entire scene. Or you might need to work on the image after you’ve converted it to CMYK for print output in Photoshop. Or you might want to manipulate the image in some way that can be done only in Photoshop.
As you saw in an earlier lesson, Dimension can save the rendered output as a PNG file or as a PSD file. The main difference is that a PNG file is “flat.” There are no layers, masks, or other helpful extras saved with a PNG file. However, if you save the rendered scene as a PSD file, Dimension adds extras to the file that make it easier to edit, or “post-process,” the scene.
Launch Adobe Photoshop.
Choose File > Open.
Select the file named Lesson_13_begin_high_quality_render.psd, which is in the Lessons > Lesson13 folder that you copied onto your hard disk, and then click the Open button.
If your Layers panel isn’t visible on the screen, choose Window > Layers.
Your Layers panel should contain six layers. Let’s look at what some of the things these layers could be used for.

Editing the background
Because the models are all rendered onto a transparent layer separate from the background, it is easy to make changes to the background behind the models.
Change the background color
Changing the background color of the background is straightforward. Here’s one way to do this in Photoshop.
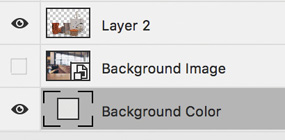
Click the eyeball icon next to the layer named Background Image to hide the background image.
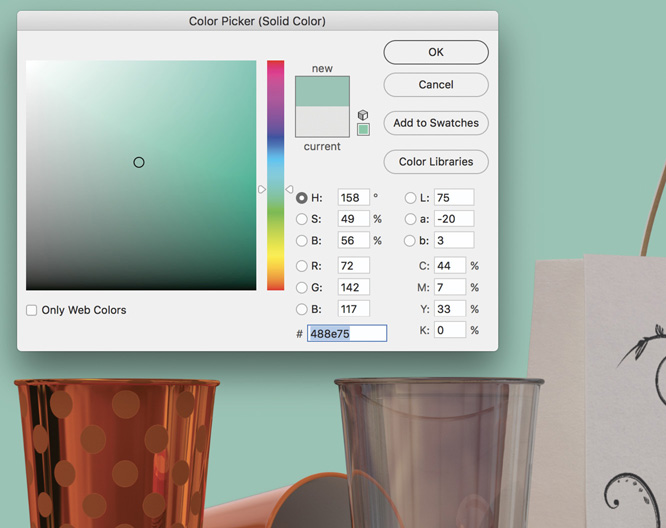
Double-click the thumbnail icon on the Background Color layer to access the color picker.
Select a new color for the background, and click OK.
The shadows cast by the models on the background are semi-transparent, so they blend realistically with the new colored background. If this image had reflections that were reflecting on the ground plane, those reflections would also be retained and blend realistically with the new background color.
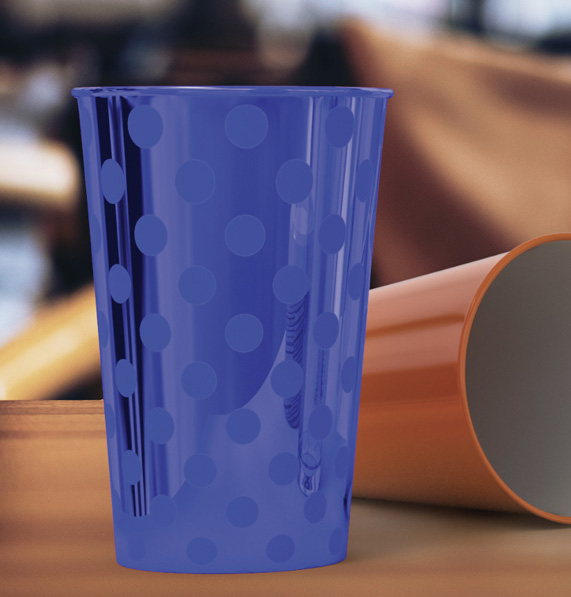
The image in the water glass still shows the background image through the glass. Semi-transparent materials are rendered with the background image in the material, which can make it difficult to edit such scenes in Photoshop.
Change the background image
Since the background image is rendered on its own Photoshop layer, it can easily be swapped out with a different image. However, your scene will not look very realistic unless the new background image has similar perspective and lighting as the original background image.
Click the eyeball icon to the left of the Background Color layer to hide that layer.
Note that the 3D models are all rendered on a single layer called “Layer 2” and that the area around the models on this layer is a light gray checkerboard, indicating that it is transparent. Since the area around the models is transparent, you can just put a new layer with a new background image beneath Layer 2 to replace the background.
Choose File > Place Embedded.
Select the file named Checkerboard.jpg, which is in the Lessons > Lesson13 folder that you copied onto your hard disk, and then click Place.
Double-click the image to place it.
The image is placed on a new layer, named Checkerboard.
Drag the new layer beneath the layer named Background Image in the Layers panel.

The scene looks pretty good because the new background has a perspective similar to the old background. But the original image still appears when viewed through the glass, and the reflections that appear on the models are created from the original background. This would be very difficult to fix in Photoshop.
Modify the background image
You’ve seen that replacing the background image can be problematic because of translucent objects and reflections on the surface of objects. But simple edits to the background image such as color correction, sharpening, and blurring can often be done without destroying the realism of the scene.
Click in the eyeball column next to Background Image in the Layers panel to reveal the original background.
Click Background Image in the Layers panel to select that layer.
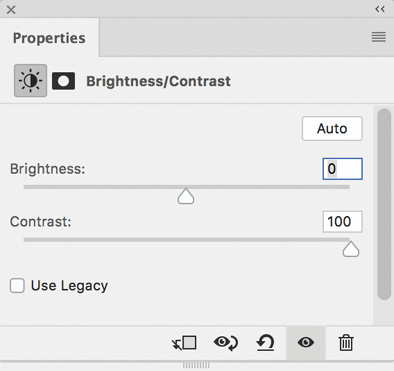
Choose Layer > New Adjustment Layer > Brightness/Contrast.
Click OK in the New Layer dialog. This creates a new Brightness/Contrast adjustment layer above the Background Image layer.

In the Properties panel, drag the Contrast slider all the way to the right to increase the contrast. This increases the contrast only in the Background Image layer, not in the layers above it.
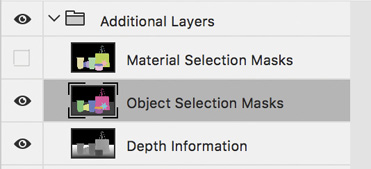
Using masks to make selections
When you render an image in the PSD format, Dimension always creates a layer called Object Selection Masks, in which every 3D model in the scene is filled with a separate solid color on a black background. This layer makes it easy to select the outlines of each model in the rendering.
You’ll use this layer to change the color of the spotted glass on the left side of the scene.
In the Layers panel, click the eyeball column next to Additional Layers to show the layer group.
Click the eyeball icon next to Material Selection Masks to hide that layer.
Select the Object Selection Masks layer.
Select the Magic Wand tool (underneath the Quick Selection tool in the Tools panel).

In the options bar, make sure that Tolerance is set to 0, that Anti-alias and Contiguous are selected, and that Sample All Layers is deselected.

On the Object Selection Masks layer, click the green color, which represents the left-most glass.
In the Layers panel, click the eyeball icon next to Additional Layers to hide that layer group.
Click Layer 2 in the Layers panel. Now the cup on that layer is precisely selected, based on the selection we made in the Object Selection Masks layer.
Select Layer > New > Layer Via Copy.
Double-click the layer name and change it to Dotted cup.

Choose Layer > Layer Style > Color Overlay.
Choose Color from the Blend Mode menu.
Click the color swatch, choose a blue color for the cup, and click OK.

Click OK again to close the Layer Style dialog.
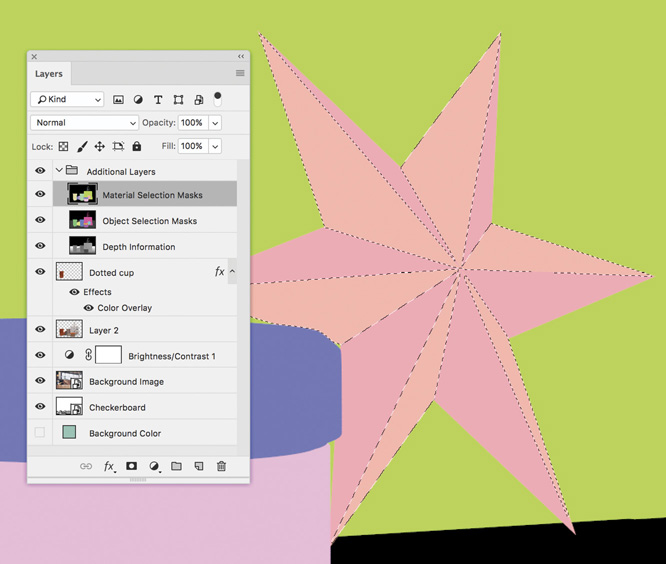
Adjusting materials
Dimension automatically creates a layer named Material Selection Masks in each rendered PSD file. This layer contains individual solid-color shapes that represent each material applied to the surface of a model. You’ll use this layer to change the look of one of the materials used for the Star model.
Click the eyeball column next to the Additional Layers layer group to show the group.
Compare the filled area that represents the star on the Object Selection Masks layer to the filled area that represents the star on the Material Selection Masks layer by using the eyeball column to show and hide the layers.
You should see that the Object Selection Masks layer displays a single color for the entire Star model. But since two different materials are applied to the different facets of the Star model, the Material Selection Masks layer represents these two materials with two separate colors.
In the Layers panel, make sure the Material Selection Masks layer is visible, and click the layer to select it.
With the Magic Wand tool, click one of the light-colored facets of the Star model.
Hold down the Shift key, and click each of the other light-colored facets of the Star model to add all of them to the selection.
Click the eyeball icon next to the Additional Layers layer group to hide the group.
Click Layer 2 in the Layers panel to select it.
Choose Filter > Pixelate > Pointillize.
 Tip
TipYou can use the Depth Information layer as a mask to add depth of field effects or dramatic lighting to the scene. In the Depth Information layer, light-colored areas are farther away from the camera, and darker areas are closer to the camera.
Set Cell Size to 3, and click OK.

Correcting color in the image
I want the overall color of the entire scene, including the background, to be a bit warmer. There are many ways to do this in Photoshop. Here’s one way to do it without needing to flatten the layers containing the models and the background.
Click Layer 2 in the Layers panel, and then Shift-click the Background Image layer.
Choose Layer > New > Group from Layers.
Click OK.
Choose Filter > Convert for Smart Filters.
Choose Filter > Camera Raw Filter.
Drag the Temperature slider to the right to warm the image up.
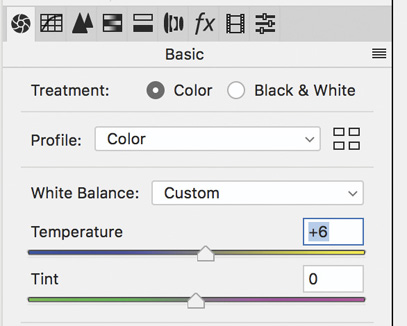
Click OK.
You can do a lot to a 2D scene in Photoshop, of course. You are limited only by your imagination, your skill, and your knowledge of Photoshop.
Review questions
1 What is the advantage of saving a render from Dimension in the PSD format instead of in the PNG format?
2 What type of material could make it more difficult to realistically edit a background image in Photoshop?
3 Which layer contains a colored mask for each material applied to the surface of a model?
Review answers
1 The PSD format contains extra layers that make the image easier to edit. A scene rendered as a PNG will be a single-layer flat image.
2 Images that are semi-transparent, such as glass, once rendered, can make it difficult to swap in a new background in Photoshop.
3 The Material Selection Masks layer contains a separate colored mask for each part of a model that has a material applied to it.