
11 Publishing to the Web
Lesson overview
In this lesson, you’ll publish your website to the Internet and do the following:
Define a remote site
Define a testing server
Put files on the web
Cloak files and folders
Update out-of-date links sitewide
This lesson will take about 1 hour and 15 minutes to complete. If you have not already done so, please log in to your account on peachpit.com to download the project files for this lesson asdescribed in the “Getting Started” section at the beginning of this book and follow the instructions under “Accessing the Lesson Files and Web Edition.” Define a site based on the lesson11 folder.
Your Account page is also where you’ll find any updates to the lesson files. Look on the Lesson & Update Files tab to access the most current content.
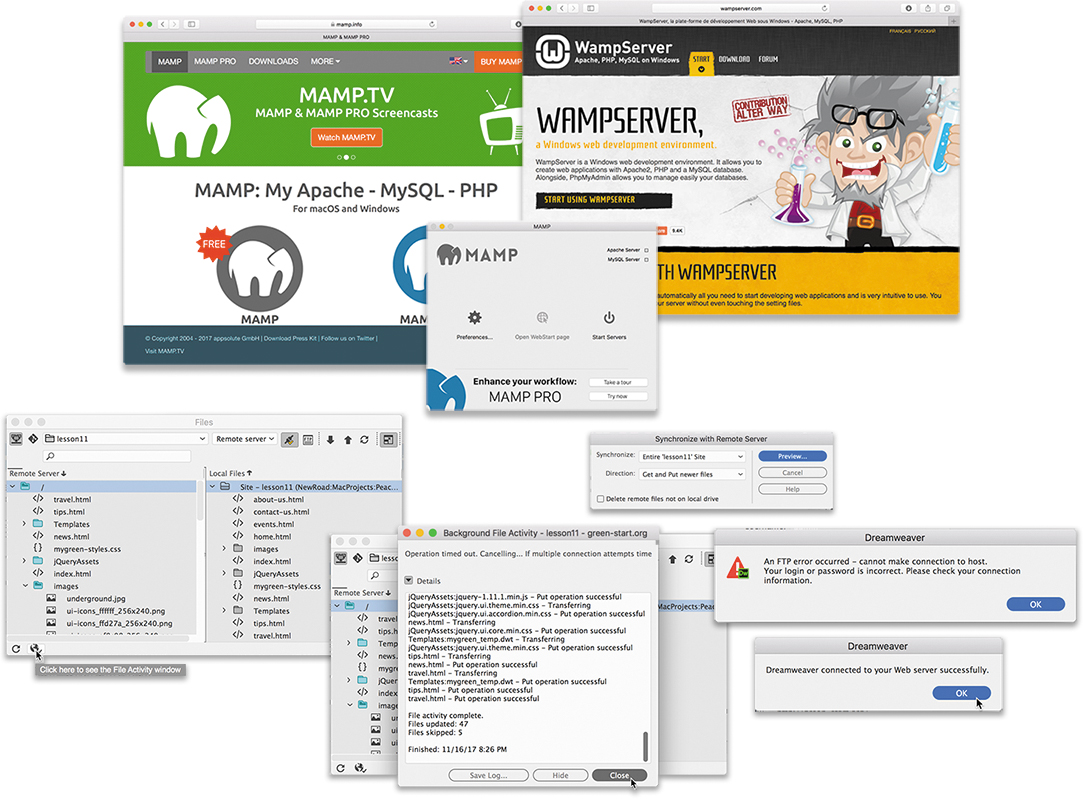
The goal of all the preceding lessons is to design, develop, and build pages for a remote website. But Dreamweaver doesn’t abandon you there. It also provides powerful tools with which to upload and maintain a website of any size over time.
Defining a remote site
Dreamweaver’s workflow is based on a two-site system. One site is in a folder on your computer’s hard drive and is known as the local site. All work in the previous lessons has been performed on your local site. The second site, known as the remote site, is established in a folder on a web server, typically running on another computer, and is connected to the Internet and publicly available. In large companies, the remote site is often available only to employees via a network-based intranet. Such sites provide information and applications to support corporate programs and products.
![]() Note
Note
If you have not already downloaded the project files for this lesson to your computer from your Account page and defined a site based on this folder, make sure to do so now. See “Getting Started” at the beginning of the book.
Dreamweaver supports several methods for connecting to a remote site.
FTP (File Transfer Protocol)—The standard method for connecting to hosted websites.
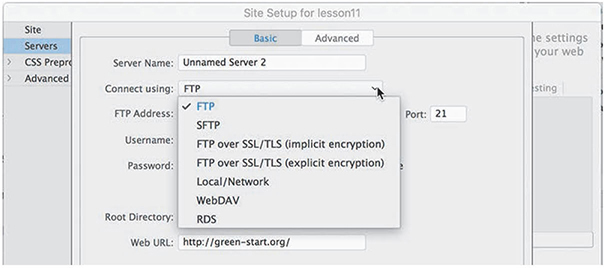
SFTP (Secure File Transfer Protocol)—A protocol that provides a method to connect to hosted websites in a more secure manner to preclude unauthorized access or interception of online content.
FTP over SSL/TLS (implicit encryption)—A secure FTP (FTPS) method that requires that all clients of the FTPS server be aware that SSL is to be used on the session. It is incompatible with non-FTPS-aware clients.
FTP over SSL/TLS (explicit encryption)—A legacy-compatible, secure FTP method where FTPS-aware clients can invoke security with an FTPS-aware server without breaking overall FTP functionality with non-FTPS-aware clients.
Local/network—A local or network connection is most frequently used with an intermediate web server, known as a staging server. Staging servers are typically used to test sites before they go live. Files from the staging server are eventually published to an Internet-connected web server.
WebDav (Web Distributed Authoring and Versioning)—A web-based system also known to Windows users as Web Folders and to Mac users as iDisk.
RDS (Remote Development Services)—Developed by Adobe for ColdFusion and primarily used when working with ColdFusion-based sites.
Dreamweaver can now upload larger files faster and more efficiently and as a background activity, allowing you to return to work more quickly. In the following exercises, you’ll set up a remote site using the two most common methods: FTP and Local/Network.
Setting up a remote FTP site
The vast majority of web developers rely on FTP to publish and maintain their sites. FTP is a well-established protocol, and many variations of the protocol are used on the web—most of which are supported by Dreamweaver.
♦ Warning
To complete the following exercise, you must have a remote server already established. Remote servers can be hosted by your own company or contracted from a third-party web-hosting service.
Launch Adobe Dreamweaver CC (2019 release) or later.
Choose Site > Manage Sites, or choose Manage Sites from the site list dropdown menu in the Files panel.
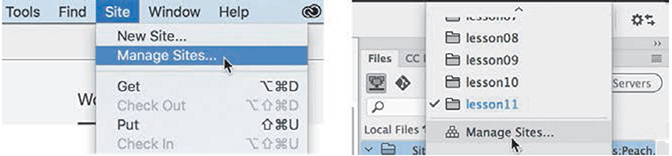
In the Manage Sites dialog is a list of all the sites you may have defined.
Make sure that the current site, lesson11, is selected. Click the Edit icon
 .
.
In the Site Setup dialog for lesson11, click the Servers category.
The Site Setup dialog allows you to set up multiple servers so that you can test several types of installations, if desired
Click the Add New Server icon
 .
.Enter GreenStart Server in the Server Name field.

From the Connect Using pop-up menu, choose FTP.

 Note
NoteIf necessary, select a different protocol to match your available server.
In the FTP Address field, type the URL or IP (Internet protocol) address of your FTP server.
If you contract a third-party service as a web host, you will be assigned an FTP address. This address may come in the form of an IP address, such as 192.168.1.100. Enter this number into the field exactly as it was sent to you. Frequently, the FTP address will be the domain name of your site, such as ftp.green-start.org. But don’t enter the characters ftp into the field.
 Tip
TipIf you are in the process of moving an existing site to a new Internet service provider (ISP), you may not be able to use the domain name to upload files to the new server. In that case, the IP address can be used to upload files initially.
In the Username field, enter your FTP username.
In the Password field, enter your FTP password.

Usernames may be case sensitive, but password fields almost always are; be sure you enter them correctly. Often, the easiest way to enter them is to copy them from the confirmation email from your hosting company and paste them into the appropriate fields.
NoteThe username and password will be provided by your hosting company.
In the Root Directory field, type the name of the folder that contains documents publicly accessible to the web, if any.
Some web hosts provide FTP access to a root-level folder that might contain nonpublic folders—such as cgi-bin, which is used to store common gateway interface (CGI) or binary scripts—as well as a public folder. In these cases, type the public folder name—such as public, public_html, www, or wwwroot—in the Root Directory field. In many web-host configurations, the FTP address is the same as the public folder, and the Root Directory field should be left blank.
TipCheck with your web-hosting service or IS/IT manager to obtain the root directory name, if any.
Select the Save checkbox if you don’t want to re-enter your username and password every time Dreamweaver connects to your site.
Click Test to verify that your FTP connection works properly.
TipIf Dreamweaver does not connect to your host, first check the username and password, as well as the FTP address and root directory for any errors.

Dreamweaver displays an alert to notify you that the connection was successful or unsuccessful.
Click OK to dismiss the alert.
If Dreamweaver connects properly to the webhost, skip to step 14. If you received an error message, your web server may require additional configuration options.
Click the More Options triangle to reveal additional server options.

Consult the instructions from your hosting company to select the appropriate options for your specific FTP server:
Use Passive FTP—Allows your computer to connect to the host computer and bypass a firewall restraint. Many web hosts require this setting.
Use IPV6 Transfer Mode—Enables connection to IPV6-based servers, which use the most recent version of the Internet transfer protocol.
Use Proxy—Identifies a secondary proxy host connection as defined in your Dreamweaver preferences.
Use FTP Performance Optimization—Optimizes the FTP connection. Deselect this option if Dreamweaver can’t connect to your server.
Use Alternative FTP Move Method—Provides an additional method to resolve FTP conflicts, especially when rollbacks are enabled or when moving files.
Once you establish a working connection, you may need to configure some advanced options.
Troubleshooting your FTP connection
Connecting to your remote site can be frustrating the first time you attempt it. You can experience numerous pitfalls, many of which are out of your control. Here are a few steps to take if you have issues connecting:
If you can’t connect to your FTP server, double-check your username and passwordand re-enter them carefully. Remember that usernames may be case sensitive on some servers, while passwords frequently are. (This is the most common error.)
Select Use Passive FTP and test the connection again.
If you still can’t connect to your FTP server, deselect the Use FTP Performance Optimization option and click Test again.
If none of these steps enables you to connect to your remote site, check with your IS/IT manager or your remote site administrator or web-hosting service.
Click the Advanced tab.
Select from the following options for working with your remote site:
Maintain Synchronization Information—Automatically notes the files that have been changed on the local and remote sites so that they can be easily synchronized. This feature helps you keep track of your changes and can be helpful if you change multiple pages before you upload. You may want to use cloaking with this feature. You’ll learn about cloaking in an upcoming exercise. This feature is usually selected by default.

Automatically Upload Files To Server On Save—Transfers files from the local to the remote site when they are saved. This option can become annoying if you save often and aren’t yet ready for a page to go public.
Enable File Check-Out—Starts the check-in/check-out system for collaborative website building in a workgroup environment. If you choose this option, you’ll need to enter a check-out name and, optionally, an email address. If you’re working by yourself, you do not need to select this option.
It is acceptable to leave any or all these options unselected, but for the purposes of this lesson, select the Maintain Synchronization Information option, if necessary.
Click Save to finalize the settings in the open dialogs.
The server setup dialog closes, revealing the Servers category in the Site Setup dialog. Your newly defined server is displayed in the window.
The Remote radio button should be selected by default once the server is defined. If you have more than one server defined, click the Remote radio button for the GreenStart Server.
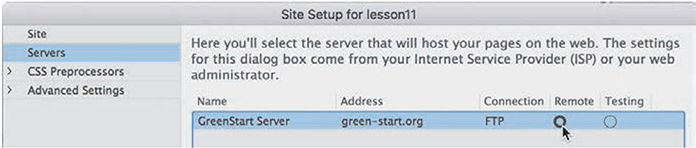
Click Save to finish setting up your new server.
A dialog may appear, informing you that the cache will be re-created because you changed the site settings.
If necessary, click OK to build the cache.
When Dreamweaver finishes updating the cache, click Done to close the Manage Sites dialog.
You have established a connection to your remote server. If you don’t currently have a remote server, you can substitute a local testing server instead as your remote server.
Establishing a remote site on a local or network web server (optional)
If your company or organization uses a staging server as a “middleman” between web designers and the live website, it’s likely you’ll need to connect to your remote site through a local or network web server. Local/network servers are often used as testing servers to check dynamic functions before pages are uploaded to the Internet.
♦ Warning
To complete the following exercise, you must have already installed and configured a local or network web server as described in the sidebar “Installing a testing server.”
Launch Adobe Dreamweaver CC (2019 release) or later.
Choose Site > Manage Sites.
In the Manage Sites dialog, make sure that lesson11 is selected.
Click the Edit icon.
NoteYou must install a local testing server on your computer or network before performing step 5.
In the Site Setup for lesson11 dialog, select the Servers category.
Click the Add New Server icon.
In the Server Name field, enter GreenStart Local.
Installing a testing server
When you produce sites with dynamic content, you need to test the functionality before the pages go live on the Internet. A testing server can fit that need nicely. Depending on the applications you need to test, the testing server can simply be a subfolder on your actual web server, or you can use a local web server such as Apache or Internet Information Services (IIS) from Microsoft.

For detailed information about installing and configuring a local web server, check out the following links:
Apache/ColdFusion—http://tinyurl.com/setup-coldfusion
Apache/PHP—http://tinyurl.com/setup-apachephp
IIS/ASP—http://tinyurl.com/setup-asp
Once you set up the local web server, you can use it to upload the completed files and test your remote site. In most cases, your local web server will not be accessible from the Internet or be able to host the actual website for the public.
From the Connect Using pop-up menu, choose Local/Network.
In the Server Folder field, click the Browse icon
 .
.Select the local web server’s HTML folder, such as C:wampwwwlesson11.
In the Web URL field, enter the appropriate URL for your local web server. If you are using WAMP or MAMP local servers, your web URL will be something like http://localhost:8888/lesson11 or http://localhost/lesson11.

You must enter the correct URL or Dreamweaver’s FTP and testing features may not function properly.
NoteThe paths you enter here are contingent on how you installed your local web server and may not be the same as the ones displayed.
Click the Advanced tab, and as with the actual web server, select the appropriate options for working with your remote site: Maintain Synchronization Information, Automatically Upload Files To Server On Save, and/or Enable File Check-Out.
Although leaving these three options unselected is acceptable, for the purposes of this lesson select the Maintain Synchronization Information option if necessary.
If you’d like to use the local web server as the testing server too, select the server model in the Advanced section of the dialog. If you are creating a dynamic site using a specific programming language, like ASP, ColdFusion, or PHP, select the matching Server Model from the drop-down menu so you’ll be able to test the pages of your site properly.

NoteIn the latest version of Dreamweaver, you cannot select one server to be both the remote and testing server.
Click Save to complete the remote server setup.
In the Site Setup dialog for lesson11, select Remote. Click Save.
In the Manage Sites dialog, click Done.
If necessary, click OK to rebuild the cache.
Only one remote and one testing server can be active at one time, but you may have multiple servers defined. Before you upload files for the remote site, you may need to cloak certain folders and files in the local site.
Cloaking folders and files
Not all the files in your site root folder may need to be transferred to the remote server. For example, there’s no point in filling the remote site with files that won’t be accessed or that will remain inaccessible to website users. Minimizing files stored on the remote server may also pay financial dividends, since many hosting services base part of their fee on how much disk space your site occupies. If you selected Maintain Synchronization Information for a remote site using FTP or a network server, you may want to cloak some of your local materials to prevent them from being uploaded. Cloaking is a Dreamweaver feature that allows you to designate certain folders and files that will not be uploaded to or synchronized with the remote site.
![]() Tip
Tip
If disk space is not a concern, you might consider uploading the template files to the server as a means of creating a backup.
Folders you don’t want to upload include the Templates and resource folders. Some other non-web-compatible file types used to create your site, such as Photoshop (.psd), Flash (.fla), or Microsoft Word (.doc or .docx), also don’t need to be on the remote server. Although cloaked files will not upload or synchronize automatically, you may still upload them manually, if desired. Some people like to upload these items to keep a backup copy of them off-site.
The cloaking process begins in the Site Setup dialog.
Choose Site > Manage Sites.
Select lesson11 in the site list, and click the Edit icon.
Expand the Advanced Settings category and select the Cloaking category.
Select the Enable Cloaking and Cloak Files Ending With options, if necessary.
The field below the checkboxes displays several extensions and may differ from those pictured.
NoteAdd any extension you may be using as your own source files.
Insert the cursor after the last extension, and insert a space, if necessary.
Type .doc .txt .rtf in the field.

Be sure to insert a space between each extension. By specifying the extensions of file types that don’t contain desired web content, you prevent Dreamweaver from automatically uploading and synchronizing these file types no matter where they appear in the site.
Click Save. If Dreamweaver prompts you to update the cache, click OK.
Then, click Done to close the Manage Sites dialog.
Although you have cloaked several file types automatically, you can also cloak specific files or folders manually from the Files panel.
NoteIt should be mentioned that any resource uploaded to the server can be accessed by search engines and accessed by the public. Sensitive material or content should not be uploaded if you are concerned that it may be seen by the public.
Open the Files panel.
In the site list, you will see a list of the files and folders that make up the site. Some of the folders are used to store the raw materials for building content. There’s no need to upload these items to the web. The Templates folder is not needed on the remote site, because your webpages do not reference these assets in any way. If you work in a team environment, it may be handy to upload and synchronize these folders so that each team member has up-to-date versions of each on their own computers. For this exercise, let’s assume you work alone.
Right-click the Templates folder.
From the context menu, choose Cloaking > Cloak.
In the warning dialog that appears, click OK.
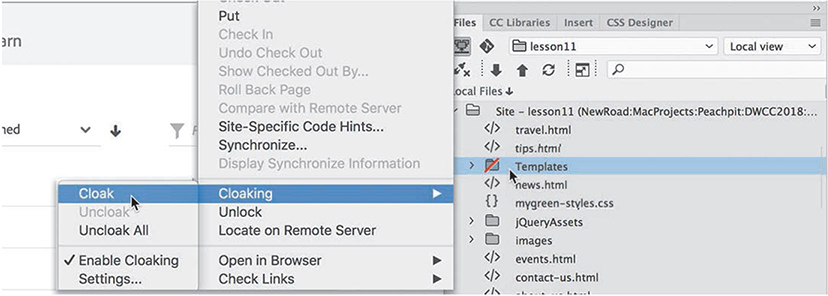
The selected folder shows a red slash, indicating that it is now cloaked.
Using the Site Setup dialog and the Cloaking context menu, you cloaked file types, folders, and files. The synchronization process will ignore cloaked items and will not automatically upload or download them.
Wrapping things up
Over the last 10 lessons, you have built an entire website, beginning with a starter layout and then adding text, images, movies, and interactive content, but a few loose strings remain for you to tie up. Before you publish your site, you’ll need to create one important webpage and make some crucial updates to your site navigation.
The file you need to create is one that is essential to every site: a home page. The home page is usually the first page most users see on your site. It is the page that loads automatically when a user enters your site’s domain name into the browser window. Since the page loads automatically, there are a few restrictions on the name and extension you can use.
Basically, the name and extension depend on the hosting server and the type of applications running on the home page, if any. Today, the majority of home pages will simply be named index. But default, start, and iisstart are also used.
Extensions identify the specific types of programming languages used within a page. A normal HTML home page will use an extension of .htm or .html. Extensions like .asp, .cfm, and .php, among others, are required if the home page contains any dynamic applications specific to that server model. You may still use one of these extensions—if they are compatible with your server model—even if the page contains no dynamic applications or content. But be careful—in some instances, using the wrong extension may prevent the page from loading altogether. Check with your server administrator or IT manager for the proper extension.
The specific home page name or names honored by the server are normally configured by the server administrator and can be changed, if desired. Most servers are configured to honor several names and a variety of extensions. Check with your IS/IT manager or web-server support team to ascertain the recommended name and extension for your home page.
Create a new page from the site template.
Save the file as index.html or use a filename and extension compatible with your server model.
Open home.html from the lesson11 site root folder in Design view.
The file contains content for the sidebars and main content areas of the new home page.
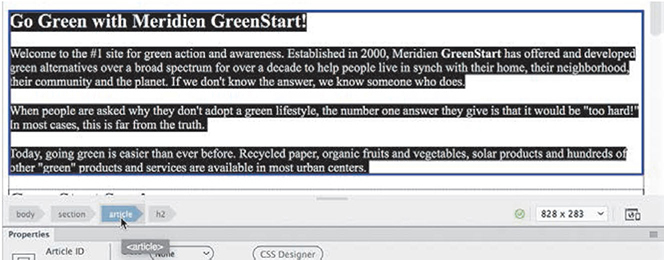
Insert the cursor in the heading Go Green with Meridien GreenStart!
Select the
articletag selector and copy the content.
NoteMoving content from one file to another is easier in Design view or Code view. Remember that you must use the same view in both the source and target documents.
In index.html, select Design view.
Double-click to edit the heading Add main heading here.
Type Welcome to Meridien GreenStart.
Insert the cursor in the heading Add article heading here.
Select the
articletag selector. Paste to replace the selection.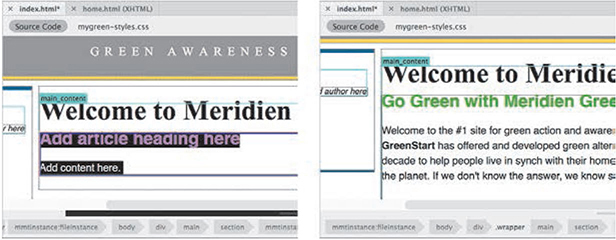
NotePasting to replace an element with another works only in Design view and Code view.
The main content section in the new layout is replaced by the copied text and code.
In index.html, replace the quotation placeholder with the
<blockquote>element in home.html.Replace the Sidebar 2 placeholder with the
<figure>element in home.html.Note the hyperlink placeholders in the
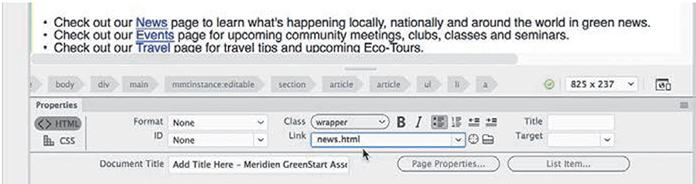
main_contentregion.Insert the cursor in the News link in the
main_contentregion.In the Property inspector, browse and connect the link to news.html.
Repeat step 7 with each link.
Connect the links to the appropriate pages in your site root folder.
Save and close all files.
The home page is nearly complete. For example, the title and meta description placeholders still need to be updated. Feel free to update them with appropriate text.
In the meantime, let’s assume you want to upload the site at its current state of completion. This happens in the course of any site development. Pages are added, updated, and deleted over time; missing pages will be completed and then uploaded at a later date. Before you can upload the site to a live server, you should always check for and update any out-of-date links and remove dead ones.
Prelaunch checklist
Take this opportunity to review all your site pages before publishing them to see whether they are ready for prime time. In an actual workflow, you should perform the following actions, which you learned in previous lessons, before uploading a single page:
Spell-check (Lesson 7, “Working with Text, Lists, and Tables”)
Sitewide link check (Lesson 9, “Working with Navigation”)
Fix any problems you find, and then proceed to the next exercise.
Putting your site online (optional)
For the most part, the local site and the remote site are mirror images, containing the same HTML files, images, and assets in identical folder structures. When you transfer a webpage from your local site to your remote site, you are publishing, or putting, that page. If you put a file stored in a folder on your local site, Dreamweaver transfers the file to the equivalent folder on the remote site. It will even automatically create the remote folder or folders if they do not already exist. The same is true when you download files.
♦ Warning
Dreamweaver does a good job trying to identify all the dependent files in a particular workflow. But, in some cases, it may miss files crucial to a dynamic or extended process. It is imperative that you do your homework to identify these files and make sure they are uploaded.
Using Dreamweaver, you can publish anything—from one file to a complete site—in a single operation. When you publish a webpage, by default Dreamweaver asks if you would also like to put the dependent files too. Dependent files are the images, CSS, HTML5 movies, JavaScript files, server-side includes (SSI), and other files necessary to complete the page.
![]() Note
Note
This exercise is optional, since it requires that you set up a remote server beforehand.
You can upload one file at a time or the entire site at once. In this exercise, you will upload one webpage and its dependent files.
Open the Files panel and click the Expand icon
 , if necessary.
Click the Connect To Remote Server icon
 to connect to the remote site.
If your remote site is properly configured, the Files panel will connect to the site and display its contents on the left half of the panel. When you first upload files, the remote site may be empty or mostly empty. If you are connecting to your Internet host, specific files and folders created by the hosting company may appear. Do not delete these items unless you check to see whether they are essential to the operation of the server or your own applications.
In the local file list, select index.html.

In the Files panel toolbar, click the Put icon
 .
.By default, Dreamweaver will prompt you to upload dependent files. If a dependent file already exists on the server and your changes did not affect it, you can click No. Otherwise, for new files or files that have had any changes, click Yes. There is an option within Preferences where you can disable this prompt, if desired.
NoteDependent files include but are not limited to images, style sheets, and JavaScript used within a specific page and are essential to the proper display and function of the page.
Click Yes.
Dreamweaver uploads index.html and all images, CSS, JavaScript, server-side includes, and other dependent files needed to properly render the selected HTML file. Although you chose only one file, you can see that five files and one folder were uploaded.
The Files panel enables you to upload multiple files as well as the entire site at once.
Select the site root folder for the local site and then click the Put icon
in the Files panel.
Dialogs appear, asking you to confirm that you want to upload the entire site.
Click Yes or OK as appropriate.
NoteA file that is uploaded or downloaded will automatically overwrite any version of the file at the destination.
TipIf you are using a third-party web-hosting service, be aware that they often create placeholder pages on your domain. If your home page does not automatically appear when you access your site, check to make sure that there is no conflict with the web host’s placeholder pages.
Dreamweaver begins to upload the site. It will re-create your local site structure on the remote server. Dreamweaver uploads pages in the background so that you can continue to work in the meantime. If you want to see the progress of the upload.
Click the File Activity icon
 in the lower-left corner of the File panel.
When you click the File Activity icon, you will see a list featuring the filenames and the status of the selected operation. You can even save the report to a text file, if desired, by clicking the Save Log button in the Background File Activity dialog.
Note that neither the cloaked lesson folders nor the files stored within them were uploaded. Dreamweaver will automatically ignore all cloaked items when putting individual folders or an entire site. If desired, you can manually select and upload individually cloaked items.
Right-click the Templates folder and choose Put from the context menu.
Dreamweaver prompts you to upload dependent files for the Templates folder.
Click Yes to upload dependent files.
The Templates folder is uploaded to the remote server. The log report shows that Dreamweaver checked for dependent files but did not upload the files that had not changed.
Note that the remote Templates folder displays a red slash, indicating that it, too, is cloaked. At times, you will want to cloak local and remote files and folders to prevent these items from being replaced or accidentally overwritten. A cloaked file will not be uploaded or downloaded automatically. But you can manually select any specific files and perform the same action.
The opposite of the Put command is Get, which downloads any selected file or folder to the local site. You can get any file from the remote site by selecting it in the Remote pane and clicking the Get icon. Alternatively, you can drag the file from the Remote pane to the Local pane.
If you were able to successfully upload your site, use a browser to connect to the remote site on your network server or the Internet. Type the appropriate address in the URL field—depending on whether you are connecting to the local web server or to the actual Internet site—such as: http://localhost/domain_name or http://www.domain_name.com.
NoteWhen accessing Put and Get, it doesn’t matter whether you use the Local or Remote pane of the Files panel. Put always uploads to Remote; Get always downloads to Local.

The GreenStart site appears in the browser.
Click to test the hyperlinks to view each of the completed pages for the site.
Once the site is uploaded, keeping it up to date is an easy task. As files change, you can upload them one at a time or synchronize the whole site with the remote server.
Synchronization is especially important in workgroup environments where files are changed and uploaded by several individuals. You can easily download or upload files that are older, overwriting files that are newer in the process. Synchronization can ensure that you are working with only the latest versions of each file.
Synchronizing local and remote sites
Synchronization in Dreamweaver keeps the files on your server and your local computer up to date. It’s an essential tool when you work from multiple locations or with one or more co-workers. Used properly, it can prevent you from accidentally uploading or working on out-of-date files.
At the moment, your local and remote sites are identical. To better illustrate the capabilities of synchronization, let’s make a change to one of the site pages.
Open about-us.html in Live view.
Collapse the Files panel by clicking the Collapse icon
 , if necessary.
Clicking the collapse button re-docks the panel on the right side of the program, if necessary.
In the CSS Designer, click the All button. Select mygreen-styles.css.
Create a new selector:
.greenAdd the following property to the new rule:
color: #090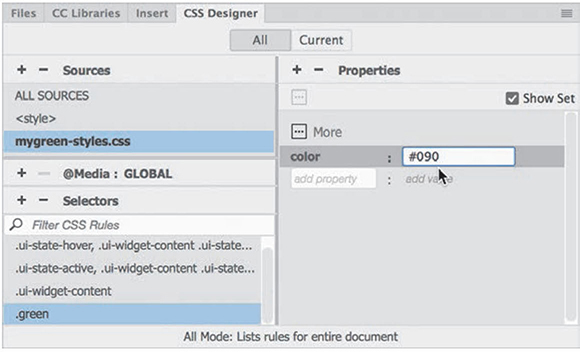
In the main heading, drag the cursor across the word Green in the heading About Meridien GreenStart.
Apply the
greenclass to this text.
Apply the
greenclass to each occurrence of the word green anywhere on the page where the text is not already green.Save all files and close the page.
Open and expand the Files panel.
In the Document toolbar, click the Synchronize icon
 .
.
The Synchronize With Remote Server dialog appears.
NoteThe Synchronize icon looks similar to the Refresh icon but is located on the upper-right side of the Files panel.
From the Synchronize pop-up menu, choose the option Entire ‘lesson11’ Site. From the Direction menu, choose the Get And Put Newer Files option.
NoteSynchronize does not compare cloaked files or folders.

Click Preview.

The Synchronize dialog appears, reporting what files have changed and whether you need to get or put them. Since you just uploaded the entire site, only the files you modified—about-us.html and mygreen-styles.css—should appear in the list, which indicates that Dreamweaver wants to put them to the remote site. If you see any other files listed, select them and click the Synchronize icon to tell Dreamweaver that these files are okay as is.
Synchronization options
During synchronization, you can choose to accept the suggested action or override it by selecting one of the other options in the dialog. Options can be applied to one or more files at a time.
 Get—Downloads the selected file(s) from the remote site
 Put—Uploads the selected file(s) to the remote site
 Delete—Marks the selected file(s) for deletion
 Ignore—Ignores the selected file(s) during synchronization
 Synchronized—Identifies the selected file(s) as already synchronized
 Compare—Uses a third-party utility to compare the local and remote versions of a selected file
Click OK to upload the two files.
If other people can access and update files on your site, remember to run synchronization before you work on any files to be certain you are working on the most current versions of each file in your site. Another technique is to set up the check-out/check-in functionality in the advanced options of the server’s setup dialog.
In this lesson, you set up your site to connect to a remote server and uploaded files to that remote site. You also cloaked files and folders and then synchronized the local and remote sites.
Congratulations! You’ve designed, developed, and built an entire website and uploaded it to your remote server. By completing the exercises in this book to this point, you have gained experience in all aspects of the design and development of a standard website compatible with desktop computers. In the following lessons, you will learn some productivity tricks with HTML code and how to adapt your static, fixed-width site to work with cellphones, tablets, and other mobile devices.
Review questions
1. What is a remote site?
2. Name two types of file transfer protocols supported in Dreamweaver.
3. How can you configure Dreamweaver so that it does not synchronize certain files in your local site with the remote site?
4. True or false: You have to manually publish every file and associated image, JavaScript file, and server-side include that is linked to pages in your site.
5. What service does synchronization perform?
Review answers
1. A remote site is typically the live version of the local site stored on a web server connected to the Internet.
2. FTP (File Transfer Protocol) and local/network are the two most commonly used file transfer methods. Other file transfer methods supported in Dreamweaver include Secure FTP, WebDav, and RDS.
3. Cloaking the files or folders prevents them from synchronizing.
4. False. Dreamweaver can automatically transfer dependent files, if desired, including embedded or referenced images, CSS style sheets, and other linked content, although some files may be missed.
5. Synchronization automatically scans local and remote sites, comparing files on both to identify the most current version of each. It creates a report window to suggest which files to get or put to bring both sites up to date, and then it will perform the update.