
9. Inserting HTML and Working with the Library Panel
Lesson overview
• Embed and edit HTML from other sites
• Work with the Library panel
Extending the capabilities of Adobe Muse is easy with the ability to insert HTML from other sources as well as share content with the Muse community using the Library panel within Muse.
Embedding HTML
In Adobe Muse, you can incorporate source code content generated by a number of different websites, such as a Google map, a YouTube video, Flickr content, or a form. You simply copy and paste the code from those sites, and then embed that HTML into your pages. Embedding HTML into a Muse page is like putting a window inside a page on your site that displays the content of a third-party site.
Embedded HTML is a great way for you to add complex information (such as maps, contact forms, and weather forecasts) as well as rich media (like videos, slideshows, and audio files) quickly and easily to your Muse site. If you want to insert social content, like Twitter Follow buttons or YouTube videos, for instance, don’t forget that Muse has built-in Social widgets in the Widgets Library (Window > Widgets Library).
Although embedding HTML has limitless uses, in this lesson you’ll focus on one that is related to the property company website you are working on.
Inserting HTML
To practice inserting HTML content into your pages, in this exercise you’ll insert a mortgage calculator into a page. To complete this section and the next one, you’ll need an Internet connection.
![]() Note
Note
If you have not already downloaded the project files for this lesson to your computer from your Account page, make sure to do so now. See “Getting Started” at the beginning of the book.
1. With the SPC site still open in Muse and Plan mode showing, double-click the SERVICES page thumbnail to open the page in Design mode.
2. Choose View > Fit Page In Window.
3. Choose Window > Reset Panels.
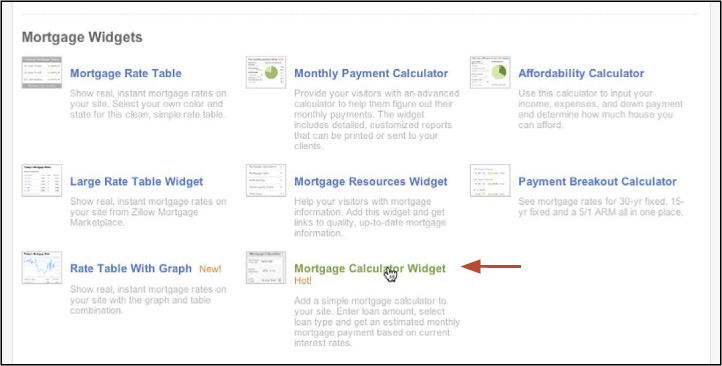
4. Choose File > Preview Page In Browser. In the browser window that opens, type http://www.zillow.com/webtools/widgets/ in the Address bar to visit the page.
5. When the page opens, scroll down the page if necessary, and click the Mortgage Calculator widget to open the widget page.
![]() Note
Note
Previewing In Browser in this step is just a way to open the default browser on your machine.
![]() Note
Note
The appearance of that web page may not exactly match the figure in the book, and that’s OK.
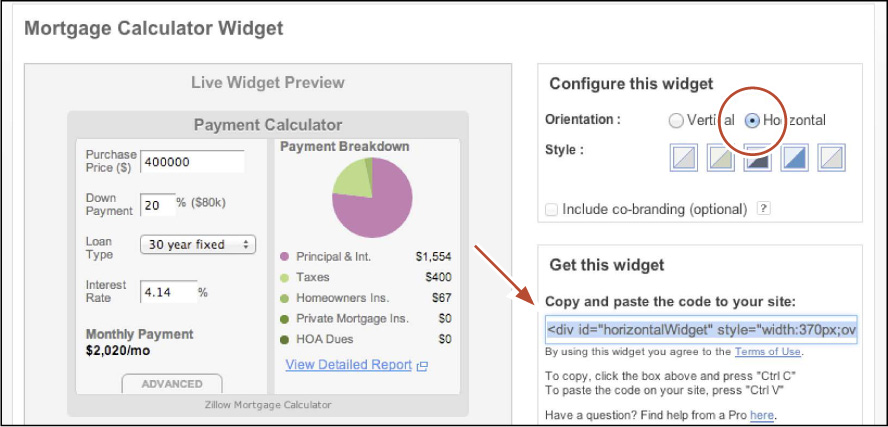
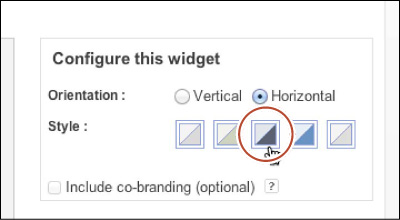
6. In the Mortgage Calculator Widget page that opens next, select Horizontal in the Configure This Widget section on the right side of the page. If you want to set a color style, you can select that as well.
7. In the Get This Widget section of the page, copy all of the code in the field below “Copy and paste the code to your site:” (Command+C [Ctrl+C] or right-click to choose Copy from the menu).
Next, you’ll insert the HTML into the SERVICES page using the Insert HTML command (Object > Insert HTML). You can also just paste the HTML content directly into the page in Design mode. In most cases, Muse detects HTML source tags and will automatically paste the code as HTML into the page.
8. Return to Muse, and in the Layers panel, select the Page content layer.
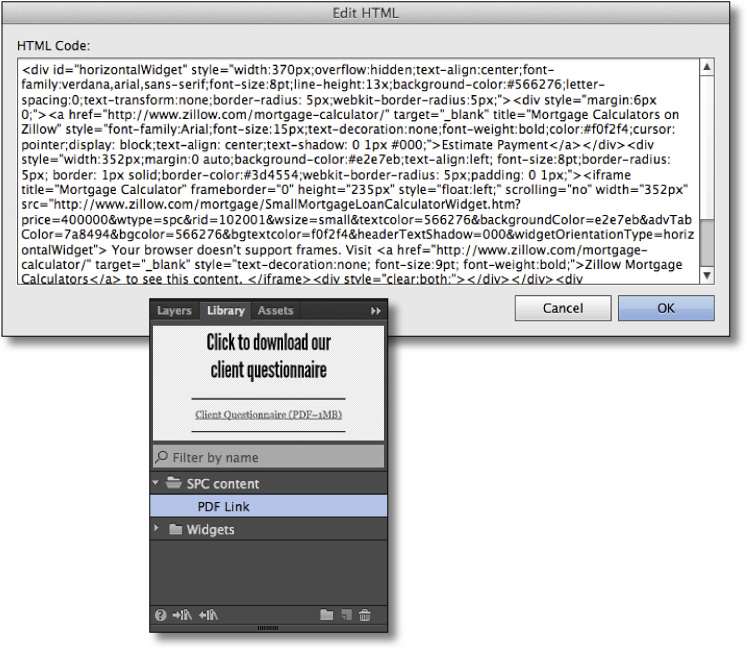
9. Choose Object > Insert HTML. In the Edit HTML dialog box, delete the sentence “Insert your HTML here.” Right-click in the Edit HTML dialog box and choose Paste. Click OK. The widget appears on the page.
When you insert HTML into Muse, the live content will appear in Design mode in most cases, but it won’t be interactive until you preview the page.
10. With the Selection tool, drag the widget to the right of the Accordion panel widget on the page.
When you hover over embedded HTML content that isn’t selected, the words “Embedded HTML” appear in a tooltip next to your cursor. If the embedded HTML is selected, “Embedded HTML” appears in the Selection Indicator in the Control panel.
![]() Note
Note
You can apply certain formatting options like fill and stroke, as well as background images to the iframe that the HTML is in. But other options like rounded corners will not work properly, and you cannot apply effects.
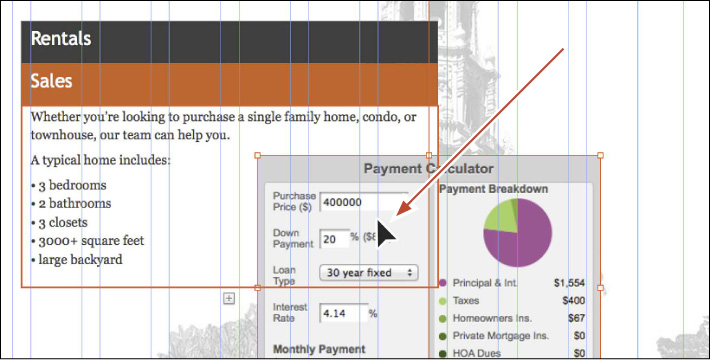
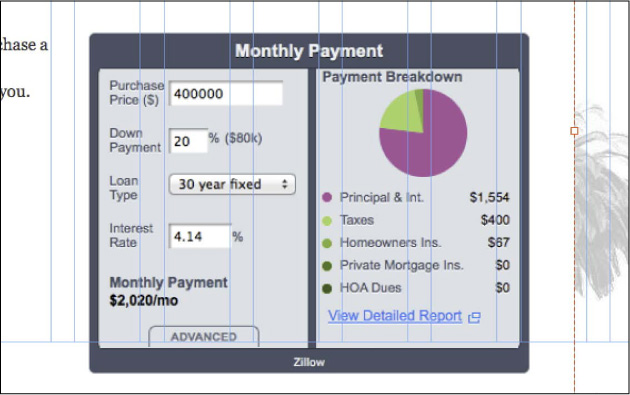
11. Click twice on the Sales tab of the accordion to show the Sales tab panel content. Drag the widget into the text area that starts with the text “Whether you’re looking to purchase...” Make sure that your cursor is within the bounds of the content area. A thick, red border will appear when the widget is within the bounds. Release the mouse button.
![]() Note
Note
Your widget may look a bit different and that’s okay. The widget on the site may be updated after this book is published, so the code you copy from the site may be different.
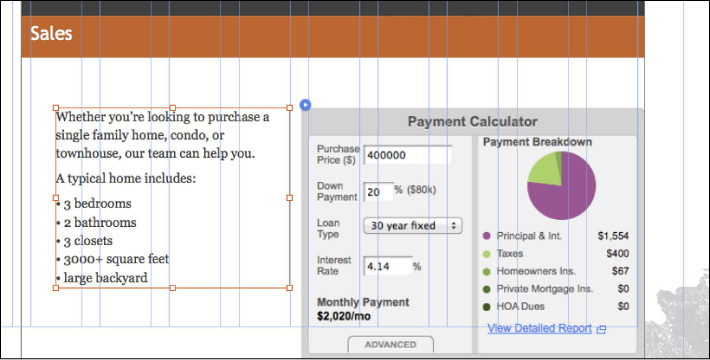
12. Drag the widget and the text frame within the content area of the accordion so they look something like the following figure.
Notice that as you drag, the size of the content area changes to fit the content. You’ll need to make the text frame narrower to fit both objects.
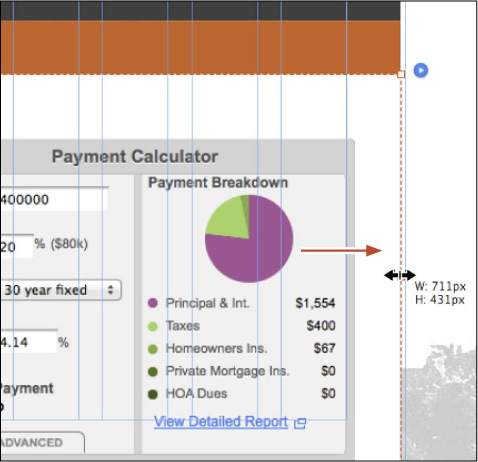
13. Click in a blank area of the page to deselect all content. Click twice to select the content area with the HTML content. The words “Content Area” will appear in the Selection Indicator on the left end of the Control panel. Drag the right, middle bounding point to the right to make the content area a little wider than the text frame and widget. Drag the bottom, middle bounding point down a bit to make it a little taller as well.
![]() Tip
Tip
You could also just drag the lower, right bounding point to resize width and height at the same time.
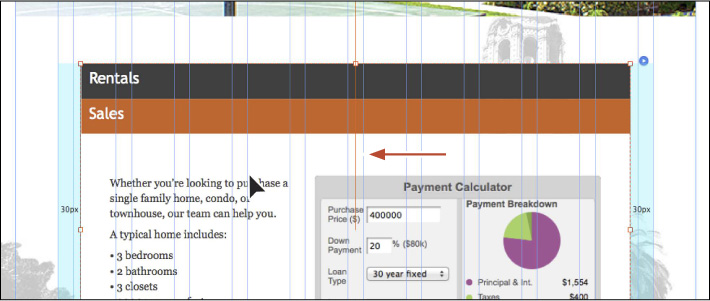
14. Press the Esc key again to select the entire accordion. Drag it into the horizontal center of the page. A temporary, red smart guide will appear when the object is center aligned to the page.
15. Choose File > Save Site.
Editing the embedded HTML
After you embed the HTML content, you can either delete the object on the page to delete the HTML content, or you can edit the HTML if you want to make changes or replace it. You’ll make some changes to the embedded HTML next.
1. Choose File > Preview Page In Browser. In the browser window that opens, type http://www.zillow.com/webtools/widgets/ in the navigation bar to visit the page.
2. When the page opens, click the Mortgage Calculator Widget to open the widget page (as you did in the previous section).
3. Select Horizontal in the Configure This Widget section on the right side of the page. Select one of the other styles in the Style section. We selected the blue/gray style.
![]() Tip
Tip
You can also right-click in the HTML Code dialog box and choose commands like Select All or Paste.
4. In the Get This Widget section of the page, copy all of the code in the field below “Copy and paste the code to your site:” (Command+C [Ctrl+C]).
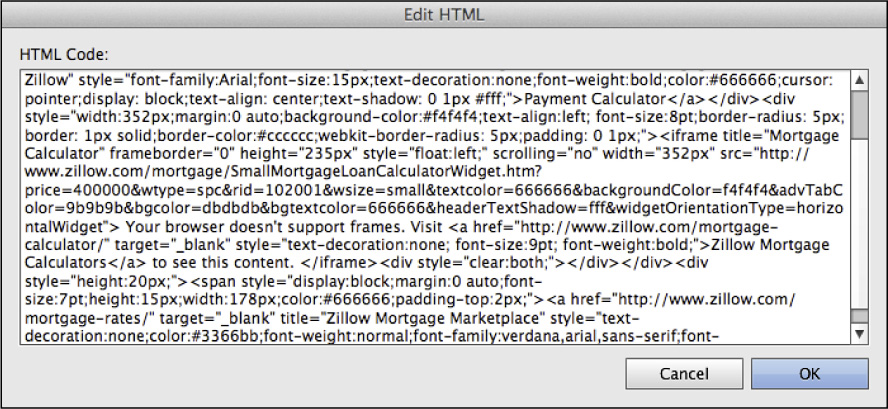
5. Return to Muse, right-click the Calculate Payment widget frame, and choose Edit HTML. Select all of the code in the dialog box and press Delete (Backspace) to remove it. With your cursor in the dialog box, right-click in the Edit HTML dialog box and choose Paste. Click OK.
After a few seconds, the widget should update to show the new formatting.
![]() Note
Note
Your widget may look a bit different and that’s okay. The widget on the site may be updated after this book is published, so the code you copy from the site may be different.
![]() Tip
Tip
If you are comfortable editing code, you can also change embedded HTML objects by editing the source code in the HTML dialog box. Some changes, like updating the height or width of the embedded HTML object, might be achieved by simply making the change in the HTML dialog box.
You may see that there is no gap between the accordion and the footer. In the next section, you’ll add other content to the SERVICES page and will adjust the minimum height of the page to fix the gap issue.
6. Click the Preview mode link to see the accordion. Click the Sales tab to view the Mortgage widget you added, if necessary. Click the Design mode link to return to the SERVICES page.
7. Choose File > Save Site and leave the SERVICES page open.
The Library panel
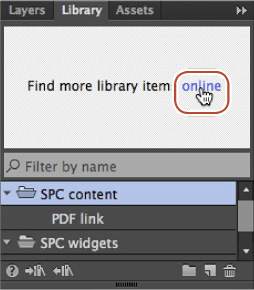
In Design mode, the Library panel gives you the ability to save design elements, such as logos; images; color swatches; guides; customized widgets; embedded HTML; paragraph, text, character, and graphic styles; stylized buttons; and more, so that you can reuse them later. The content stored in the Library panel is available to any site you are working on and can be shared with others as well via the Adobe Muse Add-ons site. You can also distribute Muse Library files using other methods, like emailing the files to other designers.
![]() Note
Note
You’ll learn more about sharing Library content in the next section, “Working with the Adobe Muse Add-ons site.”
In this section, you’ll open the Library panel, add to it some of the elements you’ve created, and reuse that content elsewhere.
Adding content to the Library panel
You’ll start by adding some content you’ve created to the Library panel so you can easily add it to a page later.
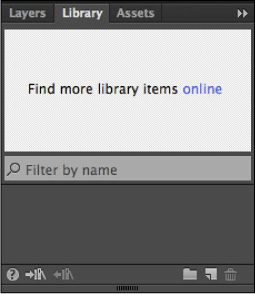
1. With the SERVICES page still open in Design mode, choose Window > Library to open the Library panel. If there is a check mark next to the name in the Window menu, it should already be visible on the right side of the workspace.
The content you add to the Library panel will be organized in folders. The first time you add content to the Library panel, Muse will automatically create a folder for you that you can rename.
Next, you’ll save the Accordion widget on the page as a library item in the Library panel.
![]() Note
Note
You can also Shift-click to select multiple objects and add them as a single library item to the Library panel.
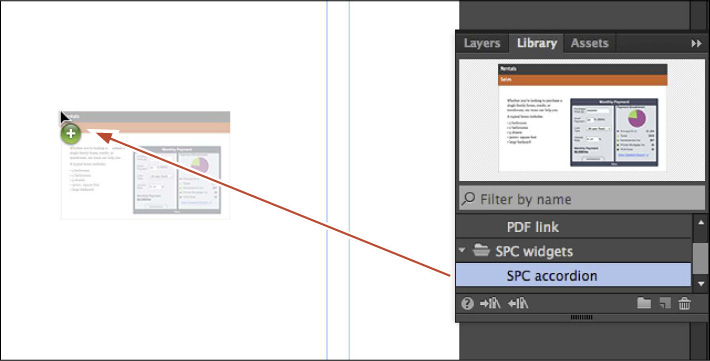
2. Choose Edit > Deselect All, and then click the accordion on the SERVICES page to select it.
3. Click the Add Selected Item(s) button (![]() ) at the bottom of the Library panel to add the selected group to the panel. Rename the library item in the panel to SPC accordion.
) at the bottom of the Library panel to add the selected group to the panel. Rename the library item in the panel to SPC accordion.
![]() Tip
Tip
Any styles (character, paragraph, and graphic) and swatches applied to the content are saved with the library item. If you drag the library item into a different site, the styles and swatches in the library item are listed in the corresponding panels of the new site automatically, in order to maintain their appearance.
The content is added as a library item and a folder is created (because it was the first library item). With only one folder, the selected content is automatically added to that single folder. Folders are sorted alphabetically by name in the Library panel, so you can either use a prefix (like “1_,” “2_,” or “A_,” “B_,” etc.) or similar names to keep related items together in the list because you can’t drag folders in the panel to reorder them. Once a folder contains at least one item, you can click the arrow to the left of the folder name to toggle between showing and hiding the folder’s contents.
4. Double-click the new folder that the SPC accordion is in and name it SPC widgets.

Next, you’ll save content on the page in the Library panel using a different method.
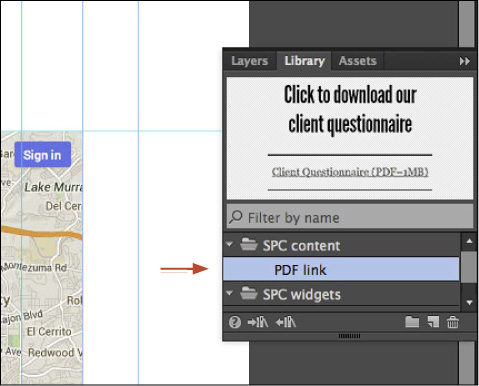
5. Click the Create Folder button (![]() ) at the bottom of the Library panel. When the new folder appears in the panel, change the name to SPC content.
) at the bottom of the Library panel. When the new folder appears in the panel, change the name to SPC content.

6. Press Command+J (Ctrl+J) press the arrow to see the list of pages, and choose CONTACT from the menu in the Go To Page dialog box. Click OK.
7. With the Selection tool, drag across the “Click to download our client questionnaire” headline and the “Client Questionnaire (PDF–1MB)” beneath it to select both text frames. Right-click on the selected content and choose Add To Library > SPC content. The new library item should appear in the Library panel.
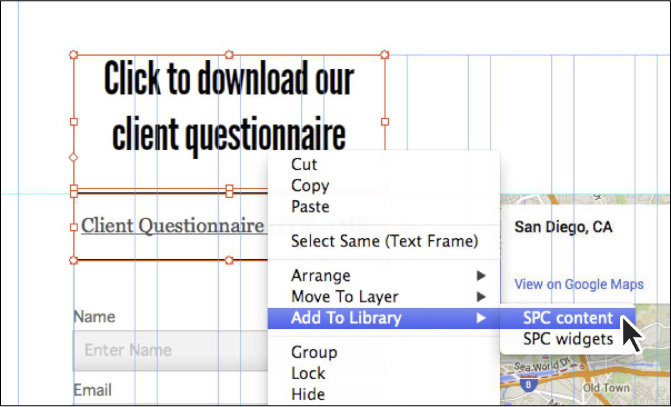
8. In the Library panel, rename the library item to PDF link. You can double-click the name of the library item if the name isn’t editable.
![]() Tip
Tip
To open or close all the folders in the Library panel, Option-click (Alt-click) the arrow to the left of a folder name.
With more than one folder in the Library panel, you can choose which folder to add content to when you right-click on page content.
After you’ve added items to the Library panel, you can easily find a library item in the folders by searching for content in the Library panel. Type any part of the library item’s name in the Filter By Name field. This will filter the Library panel view to show only the matching items.
![]() Tip
Tip
In the Library panel, you can drag a library item from one folder to another. You must drag the library item onto a folder in the list rather than onto a library item in that folder.
9. In the Library panel, type link in the Filter By Name field. You’ll see that the list is filtered to show only the one library item called “PDF link.” Click the X on the right side of the field to clear the filtering.

In addition to creating your own library items, you can also share them with others. You can export and import library items in the Library panel. Next, you’ll export one of the library items you created so if you wanted to, you could send it to others to add the content to their Muse site.
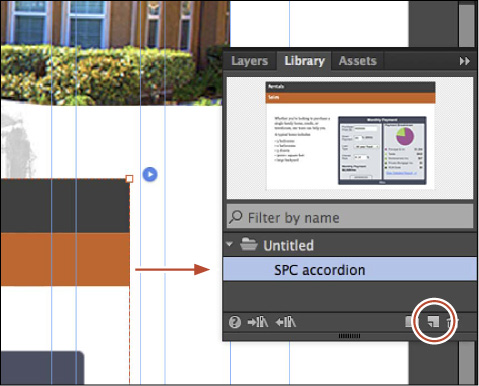
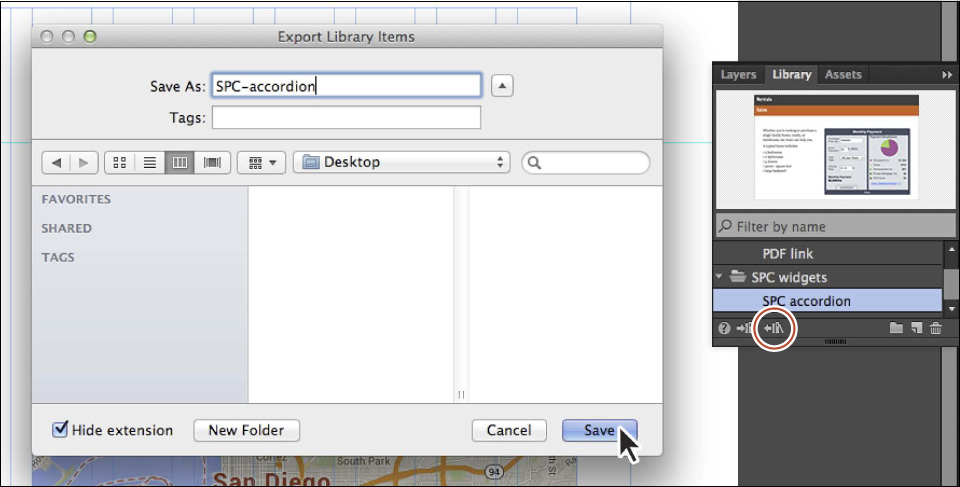
10. Click the SPC accordion item in the Library panel to select it (you may need to scroll in the Library panel or expand the SPC widgets category). Click the Export Selected Item(s) As A Muse Library button (![]() ) at the bottom of the Library panel. In the Export Library Items dialog box, change the name to SPC-accordion, navigate to your desktop, and click Save.
) at the bottom of the Library panel. In the Export Library Items dialog box, change the name to SPC-accordion, navigate to your desktop, and click Save.
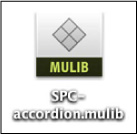
The library items are saved as a .mulib file on your desktop. You can send this file to others, and they can import the library items into their Library panel. The .mulib file content can be imported by clicking the Import Muse Library button (![]() ) at the bottom of the Library panel and selecting the .mulib file or by double-clicking the .mulib file. If you double-click the file, Muse launches (if it’s not already open) and the contents of the library file are added to the Library panel.
) at the bottom of the Library panel and selecting the .mulib file or by double-clicking the .mulib file. If you double-click the file, Muse launches (if it’s not already open) and the contents of the library file are added to the Library panel.
![]() Tip
Tip
You can select more than one library item in a single folder to export.
11. Choose File > Close Page to close the CONTACT page and then click the SERVICES page tab, if necessary, to show that page in Design mode.
Using content from the Library panel
Once you have some content in the Library panel, it will be there regardless of which site or page is open and you can easily rename the content or delete it.
Next, you’ll insert some of the saved content in the Library panel on another site.
1. Choose File > New Site. In the New Site dialog box, simply click OK.
2. Double-click the Home page thumbnail in Plan mode to open the page.
3. In the Library panel, click the “SPC accordion” library item to see a thumbnail of the content at the top of the panel. Drag it onto the page.
As you can see, the content is still editable and is not tied to the library item in any way. As a matter of fact, any images in a library item are linked to the original location of the image. You’ll find that links may not transfer, and Menu widgets with the Menu Type option set to Top Level Pages in the menu options will reflect the pages in the site into which it is dragged, among other things.
![]() Note
Note
Currently the only way to “update” a library item is to delete the original library item and remake it. This will not affect content that has been dragged onto the page already in any site it is used.
4. Choose File > Close Site to close the new site without saving, and return to the SERVICES page in the SPC site.
5. Choose File > Save Site and close all open pages, returning to Plan mode.
In Lesson 10, “Designing for Mobile Devices,” you’ll explore alternate layouts in Muse and learn how to add alternate layouts for mobile devices, add content to the layouts, use mobile design best practices, and more.
Review questions
1. How can you embed HTML content in your pages?
2. What advantages are there in saving content in the Library panel?
3. When you export library items from the Library panel, what file format is exported?
Review answers
1. You can insert HTML source code generated by a third-party website by copying the source code from the original website, choosing Object > Insert HTML, pasting the code into the dialog box that appears, and clicking OK. You can also paste the HTML content directly into a page in Design mode.
2. The Library panel in Muse offers a convenient way to store and manage common page elements. You can then quickly access items you want to reuse, saving time and maintaining consistency throughout a project.
3. After exporting from the Library panel, the content is saved in the .mulib file format. You can send this file to others, and they can import the library items you share with them into their Library panel in Muse.