
6. Working with Links and Buttons
Lesson overview
• Create different types of links
• Link to a file
• Edit link properties
• Edit text link styles
• Create a button in Adobe Muse
• Work with states
• Place an Adobe Photoshop button
• Create and link to anchors
• Pin content
Whether you need to link to a website, link to a part of the same page, or create interactive buttons in Muse or Photoshop, Muse can help. It enables you to create and edit many types of links with ease and flexibility, and offers some great design features.
Working with links
A hyperlink, or link, takes your users to a resource on the web or within your site. The resource can be anything that a computer can store and display: a web page, an image, a text document, a movie, a sound file, and more. With Muse you can create several types of links: internal, external, link to a file, and email links.
![]() Note
Note
If you are starting from scratch using the Jumpstart method described in the “Jumpstart” section in “Getting Started,” your workspace may look different than the figures you see in this lesson.
The simplest hyperlink is an internal link, which takes the visitor to another part of the same page in your Muse site, to another page in your site, to other content like a PDF stored in the site folder, or between pages in alternate layouts (desktop, mobile, or tablet). An external link takes the visitor to a document or resource on another website or another web host. An email link is a link to an email address that, when clicked, launches the visitor’s default email program and creates a new email message configured to send to the email address you entered when you created the link in Muse.
![]() Note
Note
If you have not already downloaded the project files for this lesson to your computer from your Account page, make sure to do so now. See “Getting Started” at the beginning of the book.
Creating an internal link
Muse makes it easy to add different types of hyperlinks to your content. In this exercise, you’ll create links on the Home-master page to other pages in your Muse site.
![]() Tip
Tip
You can remove a link by selecting the text or object that the link is applied to and clicking the Remove Applied Link button (![]() —the little x to the right of the Add Or Filter Links menu).
—the little x to the right of the Add Or Filter Links menu).
1. With your SPC site open and Plan mode showing, double-click the Home-master page thumbnail to open the page in Design mode.
2. Choose View > Fit Page In Window, and then scroll up to see the logo in the header.
3. Choose Window > Reset Panels.
4. Select the Selection tool (![]() ), and click the logo in the header. Click the Add Or Filter Links text to the right of the word Hyperlinks in the Control panel. Click Home in the menu to link to the Home page.
), and click the logo in the header. Click the Add Or Filter Links text to the right of the word Hyperlinks in the Control panel. Click Home in the menu to link to the Home page.
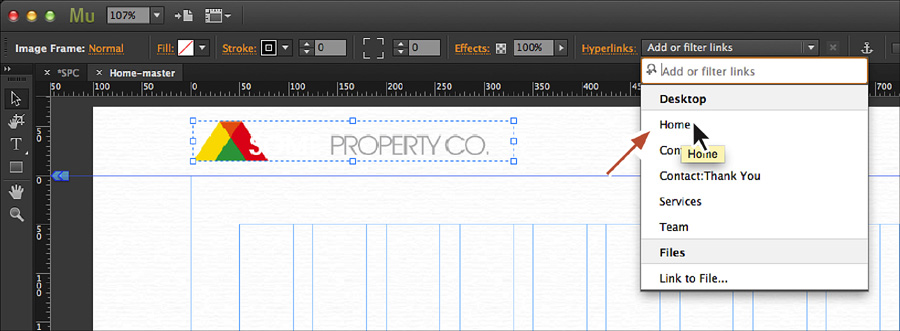
At the top of the Add Or Filter Links menu is a field for filtering your currently available links or for typing in a link. Instead of choosing an item from the menu that appears, you can also type the name of the page, for instance, to filter the list. All of the pages in that menu, except for master pages in your site, are listed and categorized by layout type (desktop, tablet, or phone). Currently, we only have a Desktop layout, so that’s the only category you’ll see.
![]() Note
Note
You can’t publish a text link on text that uses a System Font because it will be rasterized when the site is published or exported.
5. Click the Preview mode link and then click the logo to visit the Home page.
By default, when you create a link, the new page or website replaces the existing page in the same browser window or tab.
6. Choose File > Close Preview to close the Preview and return to the Home-master page.
Creating an external link
In addition to linking to pages within your site, you can also link to other websites, and that’s what you’ll do next. These links are called external links.
1. Press Command+J (Ctrl+J) and type team in the Go To Page dialog box. Select the Team page and click OK.
2. Select the Text tool, and click at the end of the sentence in the second paragraph that starts with “That is why SPC is proud to serve the local community ...” Type of San Diego. The sentence should now read “That is why SPC is proud to serve the local community of San Diego.”

![]() Tip
Tip
As a quick reminder, after typing in a page name, you can also use the arrow keys to select a page in the Go To Page dialog box and then press Return (Enter).
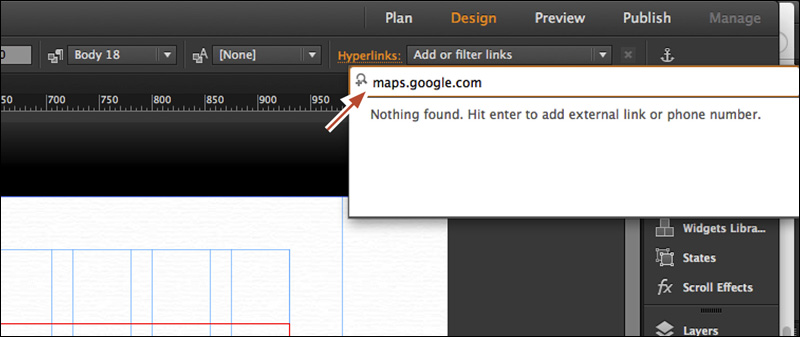
3. Select the words “San Diego” in that sentence.
4. Click the Add Or Filter Links menu to the right of the Hyperlinks link in the Control panel. With the cursor in the Add Or Filter Links field at the top of the menu, type maps.google.com, and then press Return (Enter). The linked text now has default blue and underline formatting applied. Later, you’ll change the appearance of the links you create.
At anytime later, you can select the “San Diego” text and edit the hyperlink.
5. Press Command+P (Ctrl+P) to open the page in Preview mode and see the text link on the page. Click the San Diego link to go to maps.google.com.
By default, the linked website (maps.google.com) replaces the original page in Preview mode. In Muse, there is no back button, so once you click to view an external link, you can close the Preview tab (File > Close Preview), click another page tab, or leave the Preview tab open and simply go back to Plan or Design mode.
6. Click the x on the Preview tab at the top of the Document window to close the Preview tab.
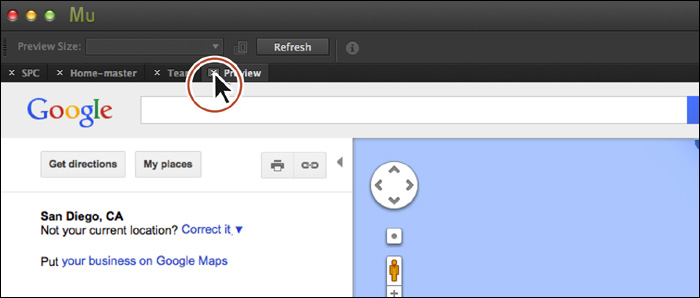
Preview appears as a tab like other pages. You can leave the Preview tab open and simply refresh the page being previewed.
Creating an email link
You create an email link exactly as you do an external link, but instead of providing a website address you type an email address.
1. Click the Home-master tab at the top of the Document window to open that page in Design mode.
2. On the Home-master page, scroll down so you can see the entire footer that contains the gray frame and logo.
3. In the Layers panel (Window > Layers), select the Master content layer.
4. With the Text tool, click and drag to create a text frame below the logo on the right side of the page. Type [email protected]. You’ll reposition the footer content a little later in the lessons.
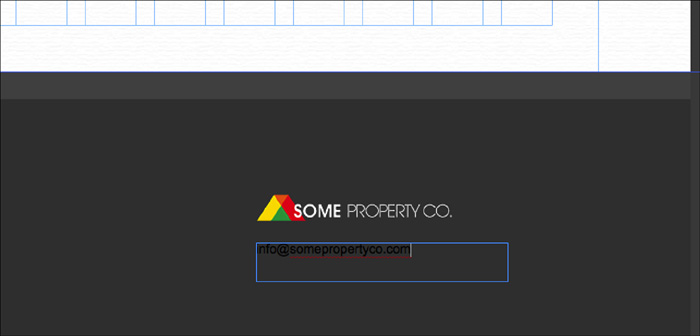
5. Select the email address text you just typed, and choose the style named Body 18 from the Paragraph Style menu in the Control panel.

![]() Note
Note
You can also apply the paragraph style from the Paragraph Styles panel (Window > Paragraph Styles).
6. Click the Text Color icon in the Control panel, and select the white swatch to change the color of the text to white.
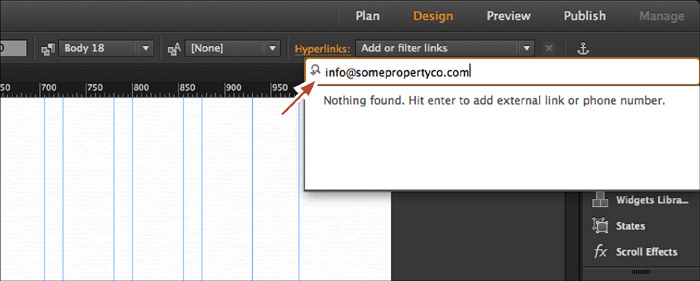
7. Click the Add Or Filter Links menu to the right of the word Hyperlinks in the Control panel. With the cursor in the search field at the top of the menu, type [email protected]. Press Return (Enter). The link will now be blue with an underline. You’ll change that in a later part of the lesson.
![]() Tip
Tip
You could have also copied the email address on the page and pasted it into the search field of the Hyperlinks menu.
![]() Note
Note
The linked text on the page doesn’t have to be the actual email address. You can use phrases like “Email us” or “Contact us” instead.
8. Click the Preview mode link to see the email link you just created (you may need to scroll down). Click the [email protected] link to open the default email application on your machine.
9. Click the Home-master tab to return to that page.
10. Choose File > Save Site.
![]() Note
Note
If you don’t have an email application installed on your machine, the link will do nothing. If you have an email application installed but it’s not set up, you may be asked to set it up when the link is clicked. If the email application is installed and configured, a new message window will appear with the email address automatically entered in the To field.
Linking to a file
Most likely, you’ll often want to make a file, such as a .pdf or .zip file, available for users to download. Muse includes an option to create a link on your pages to a file that you supply. The linked file will be included in the collection of files that are published or exported.
![]() Tip
Tip
If you want to add more email addresses, type a comma (,) after [email protected] and add another address. After every email address (except the last one), type a comma.
Next, you’ll add a .pdf file that users can download from the Contact page.
1. Press Command+J (Ctrl+J) and type contact in the Go To Page dialog box. Select the Contact page and click OK.
2. In the Layers panel (Window > Layers), make sure that the Page content layer is selected.
3. Select the Text tool in the Toolbar, and in the first column click and drag to draw a text frame that is four columns wide and approximately 120px tall. With the cursor in the frame, type Click to download our client questionnaire. Select all of the text in the frame.
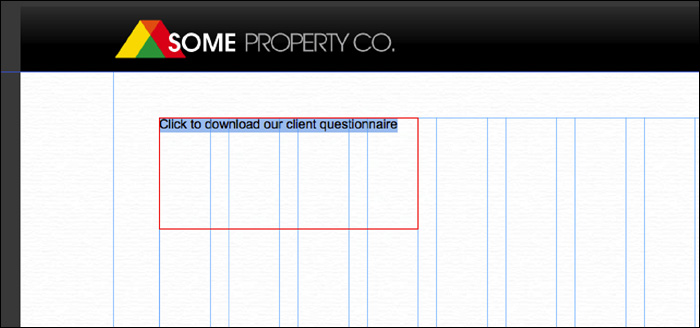
4. In the Paragraph Styles panel, click to apply the Heading style.
5. Click the Align Center button (![]() ) in the Control panel to align the text to center.
) in the Control panel to align the text to center.
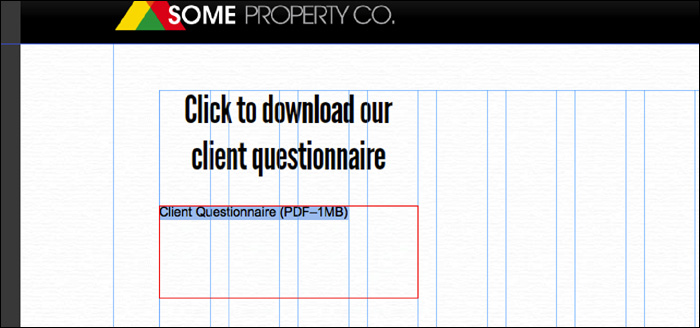
6. With the Text tool, just below the text frame you just created, click and drag to draw another text frame that is four columns wide and approximately 100px tall. Be careful not to just insert the cursor in the text frame above it. With the cursor in the frame, type Client Questionnaire (PDF–1MB). Select all of the text in the frame.
![]() Tip
Tip
It can be helpful to indicate the file format and the file size in the link to alert users before they click to download.
7. In the Paragraph Styles panel, click to apply the Body 18 style.
8. Click the Align Center button in the Control panel to align the text to center.
Now, you’ll understand why you didn’t put all of the text in the same frame. You’ll add a stroke to the top and bottom of the bottom text frame, and work with padding in the Spacing panel.
9. Select the Selection tool and make sure that the second text frame you created is selected. Click the Stroke link in the Control panel and deselect the Make All Stroke Weight Settings The Same button (![]() ). Change the Top and Bottom stroke weights to 2.
). Change the Top and Bottom stroke weights to 2.
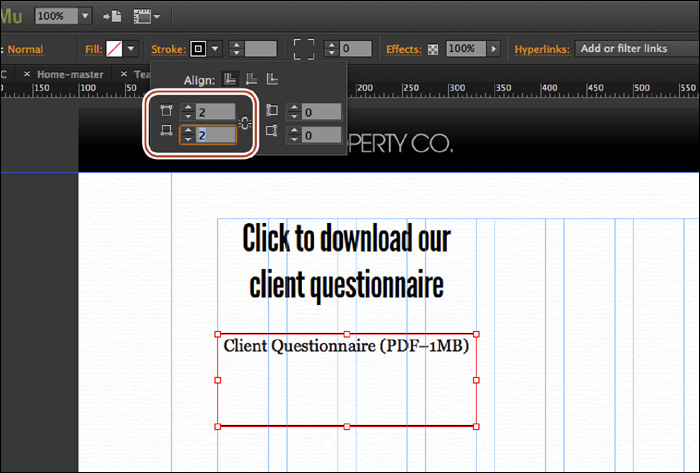
10. Change the Height of the text frame to 60 in the Control panel.
![]() Note
Note
You can also change the Height value in the Transform panel by clicking the Transform link if it appears in the Control panel or by choosing Window > Transform.
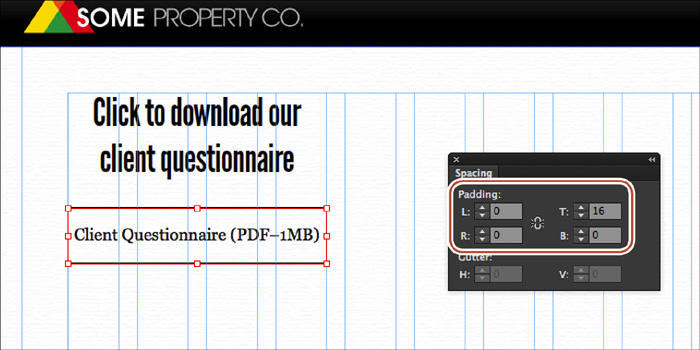
11. Choose Window > Spacing to open the Spacing panel. In the Spacing panel, click the Make All Padding Settings The Same button (![]() ) to turn it off (it should look like this:
) to turn it off (it should look like this: ![]() ) and change the T (top padding) value to approximately 16. The text should be just about vertically centered in the text frame, but you can adjust the top padding if you need to.
) and change the T (top padding) value to approximately 16. The text should be just about vertically centered in the text frame, but you can adjust the top padding if you need to.
![]() Note
Note
In the figure, we moved the Spacing panel closer to the text to make it easier to see in context.
12. Select the Text tool and select the Client Questionnaire (PDF–1MB) text.
Now, you’ll add the link to the PDF file.
13. Click the Add Or Filter Links menu to the right of the word Hyperlinks in the Control panel. Choose Link To File from the Files section at the bottom of the Hyperlinks menu.
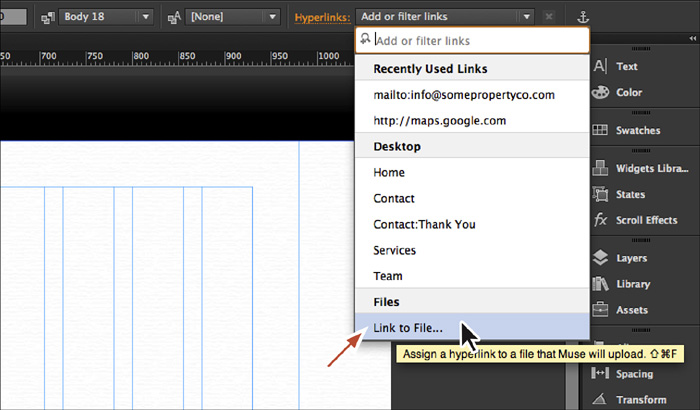
14. In the Import dialog box that appears, select the questions.pdf file from the Lessons > Lesson06 folder and click Open.
The link is created, and the linked text is blue and underlined. You’ll change the appearance later in this lesson.
15. Open the Assets panel (Window > Assets) to see the questions.pdf file listed. That means the PDF file will be uploaded to the server when the site is published or added to the folder of files when the site is exported. You can drag the left edge of the panel to the left to make it wider, as shown in the figure (the small double arrow).
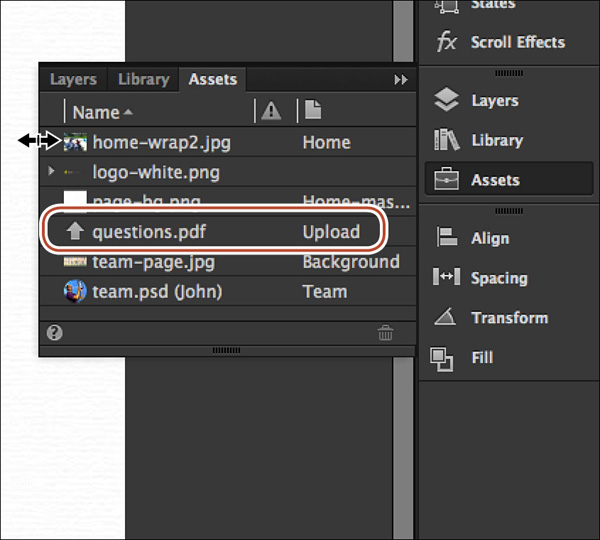
An arrow appears to the left of the name in the Assets panel, and the word Upload appears in the Page column, indicating that the file will be uploaded when the site is published or added to the folder of files when the site is exported.
Editing link properties
By default, links you create open the linked page or site in the same window or tab, replacing the current page. You can change this setting to make external links open in another browser window or tab so that your site remains open in the existing browser window, encouraging visitors to remain on your site.
1. Click the Team page tab at the top of the Document window to open that page in Design mode.
2. With the Text tool, select the linked text “San Diego” in the second paragraph.
3. Click the word Hyperlinks in the Control panel to see the Hyperlinks options.
![]() Note
Note
To make changes to linked text, you must use the Text tool to select all of the text that is linked. The Hyperlinks menu and Hyperlinks options are dimmed if you simply insert the cursor in the linked text.
4. In the Hyperlinks Options menu, select Open The Link In A New Window Or Tab.
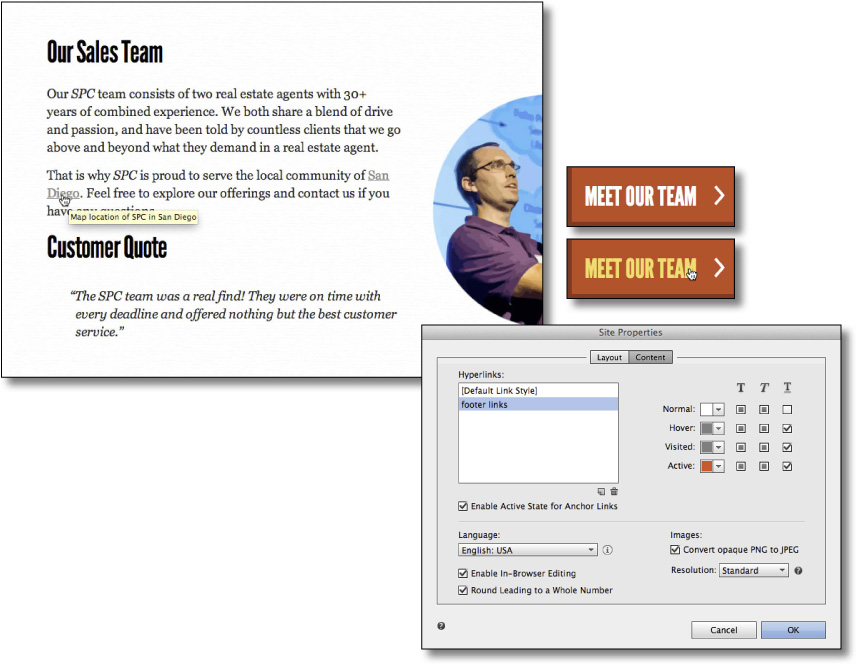
5. In the Title field, type Map location of SPC in San Diego.
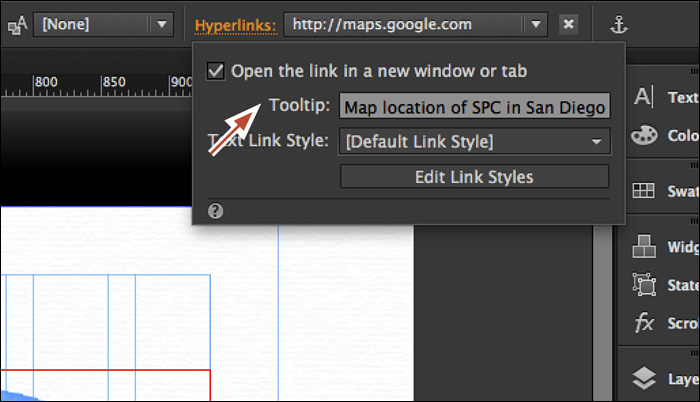
A link title can be beneficial in several ways: It displays as a tooltip in some browsers when the cursor is over the text link on the page, it can be read aloud by screen readers, and it can give more information to search engines, among other things. The title text provides information about where the link will send the user and can contain keywords and other relevant information.
6. Press the Esc key to hide the Hyperlinks options.
7. Choose File > Save Site.
Styling your text links
When you create text links, you’ll likely want to change their appearance to better match your design and to differentiate the various types of links with unique styling. For instance, in the SPC site, the links in the footer will need to be white, or a lighter color, to be readable in the footer, but links in the page area will need to be a darker color to be readable. Of course, all of your links should still give the appearance of being a link and clickable.
In this exercise, you’ll edit the default appearance of the links, called link styles, and create styling for different types of links.
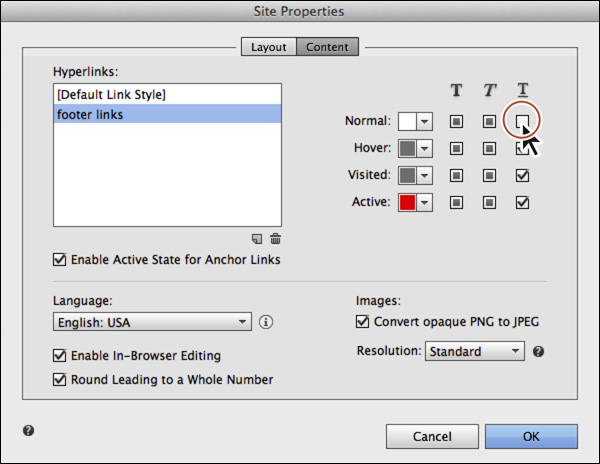
1. Choose File > Site Properties and click the Content tab.
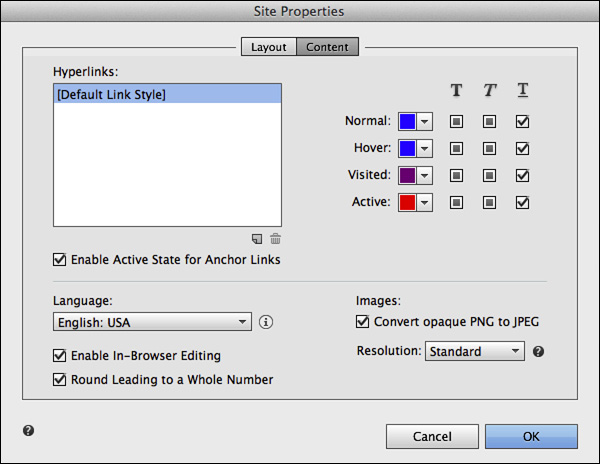
Every site in Muse has default formatting for the text links, which is blue and underlined. That default style is called [Default Link Style] and is listed in the Site Properties dialog box. You can change the appearance of the default link style and all text links in your site will change to match. Link styles also have four states: normal, hover, visited, and active. See the sidebar “About link states” to learn more about states. For each state, you can change the color, add bold or italic, and remove or retain the underline.
![]() Tip
Tip
With the text selected, the cursor in text, or a text frame selected, you can also click the word Hyperlinks in the Control panel, and then click the Edit Link Styles button in the Hyperlink options to open the Site Properties dialog box.
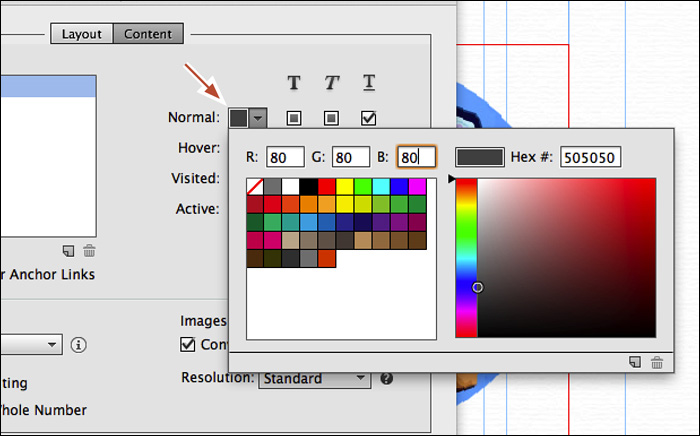
2. Click the Normal color, and in the Color Picker that appears, change the color values to R: 80, G: 80, B: 80 (a dark gray). Click away from the Color Picker panel to hide it and return to the Site Properties dialog box.
![]() Note
Note
If you want to edit the bold, italic, or underline attributes, you can click several times on one of the boxes in the Bold, Italic, or Underline columns. As you click, you’ll see three selection options: a check mark, a blank box, and a box with a filled box inside. A check mark indicates that the formatting is applied to the link; for instance, a check mark in the Underline column tells the browser to underline the link and write that in the code. A blank box tells Muse to write the code for underline but set it at the default of no underline. A box with a filled box inside tells Muse not to write anything in the code for underline—leaving the formatting at the default (no underline).
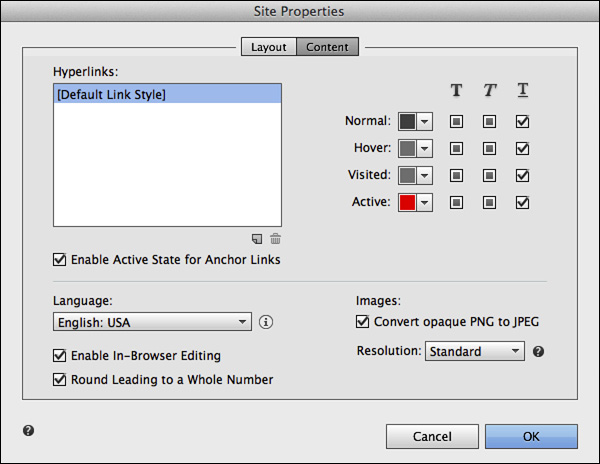
3. Change the color for Hover to the FooterStroke color (you can try another color if you like), and leave the rest of the options for Hover at the defaults.
4. Change the color for Visited to the FooterStroke color, and leave the rest of the options at the defaults.
5. Leave the Active options at their defaults. You can always experiment later. Leave the dialog box open for the next steps.
6. Click the New Link Style button (![]() ) below the Hyperlinks section of the Site Properties dialog box.
) below the Hyperlinks section of the Site Properties dialog box.
Muse creates a new link style in the Site Properties dialog box that is an exact copy of the default link style. The default link style applies to every link by default, but you can apply your new style to text links that you want to look and behave differently. This new link style will be available for use on every page within the current site only.
7. Double-click to select the new style named “[Default Link Style] copy,” and rename it footer links.
8. Leave the settings for the four states at the defaults, except for the Normal state. In the Normal state, change the color to white and click the Underline option to remove the check from the box. Click OK.
![]() Note
Note
Later, you can change the appearance of the link styles or create more in the Site Properties dialog box. A Delete button enables you to remove any link styles that you don’t want to keep. You can use these link styles throughout your site.
![]() Tip
Tip
You can also apply link styles in the Text panel (Window > Text).
9. Click the Home-master page tab at the top of the Document window to open that page in Design mode. Scroll down the page to see the email link in the footer, if necessary.
![]() Note
Note
If you see the visited link appearance on some of the links when you test the page, the reason is that your browser has cached (you’ve visited them before) those links. You can clear the browser’s cache.
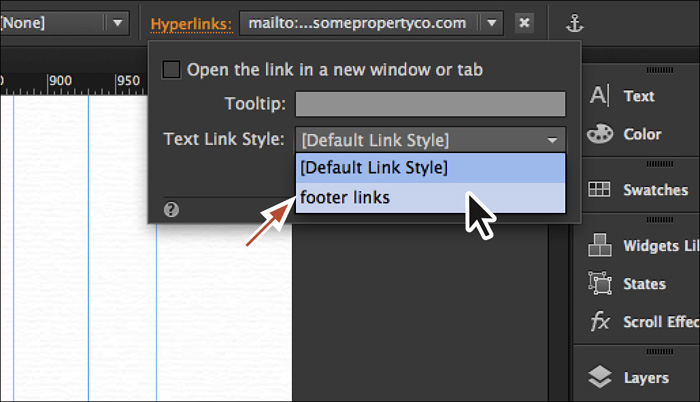
10. With the Text tool, select the [email protected] text, click the word Hyperlink in the Control panel and select the style named “footer links” from the Text Link Style menu.
![]() Tip
Tip
You can also apply link styles in the Text panel when text or text frames are selected.
11. Choose File > Save Site, and close all open pages, returning to Plan mode.
Working with buttons
On the web, designers use buttons as well as links to link to other content, other pages, or other websites. A button is usually styled to look more three dimensional so it resembles a physical button that you can press. Buttons tend to appear on a web page less frequently than text links. Site designers use them primarily to encourage users to do something or as a call to action on a website, giving them action names like Buy, Sign Up, Search, or View My Portfolio.
Creating a button in Muse
You can create a button from almost any object in your design—text frames, image frames, and rectangle shapes. Muse lets you change the appearance of the button object with states, a background color and image, strokes, effects like drop shadows, rounded corners, and much more.
In this exercise, you’ll create a button that links to the Team page.
1. In Plan mode, double-click the Home page thumbnail to open the page in Design mode.
2. Choose View > Fit Page In Window.
3. In the Layers panel (Window > Layers), make sure that the Page content layer is selected.
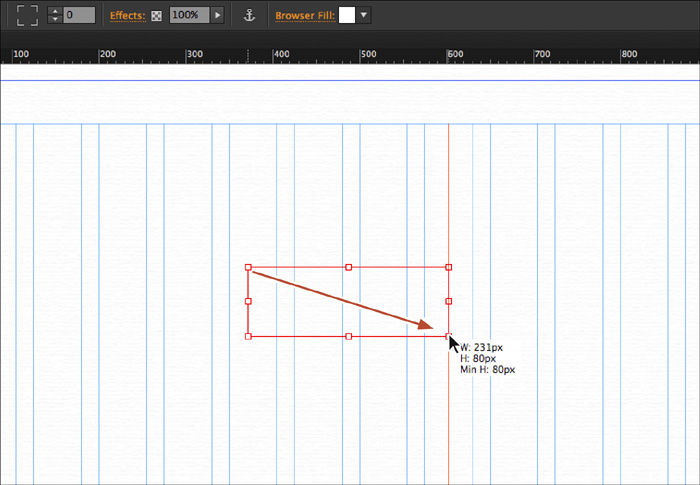
4. With the Text tool selected, toward the top of the page, approximately in the center, click and drag to create a text frame that is roughly 230 pixels wide by 80 pixels in height. Type MEET OUR TEAM.
![]() Note
Note
Don’t worry if the frame isn’t positioned to match the figure exactly. Later, you’ll move it into its final position.
![]() Tip
Tip
Don’t forget; you can type the text in lowercase and choose Edit > Change Case > UPPERCASE to make it uppercase.
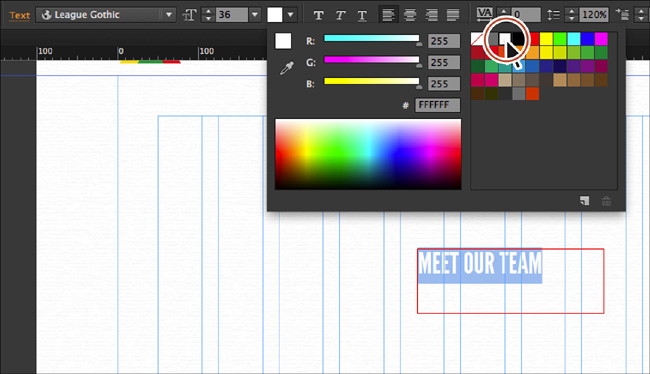
5. Select the text. In the Control panel, change the font to the Web Font League Gothic, set Font Size to 36, and change the color to white.
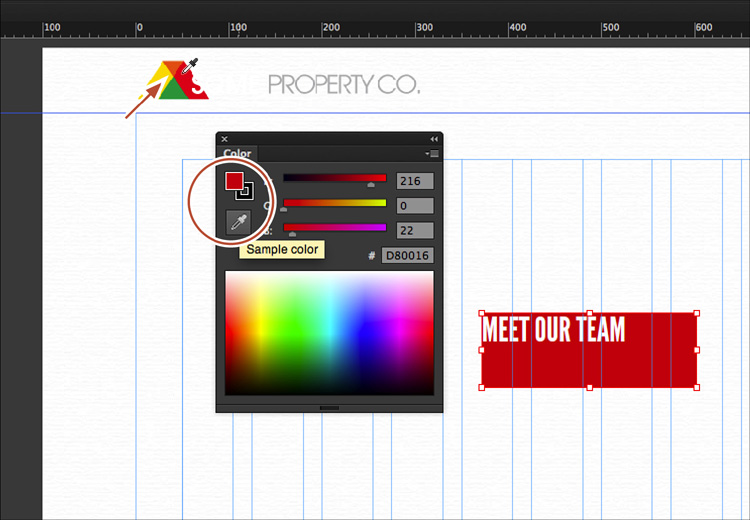
6. Select the Selection tool, and Muse selects the text frame. Open the Color panel (Window > Color). Select the Set Fill Color box, and then click the Eyedropper tool. Position the pointer over the red color in the header logo (you may need to scroll up in the page), click to sample the red, and apply it to the text frame background.
![]() Note
Note
We dragged the Color panel closer to the content in the page so that the next few steps are easier for you to see.
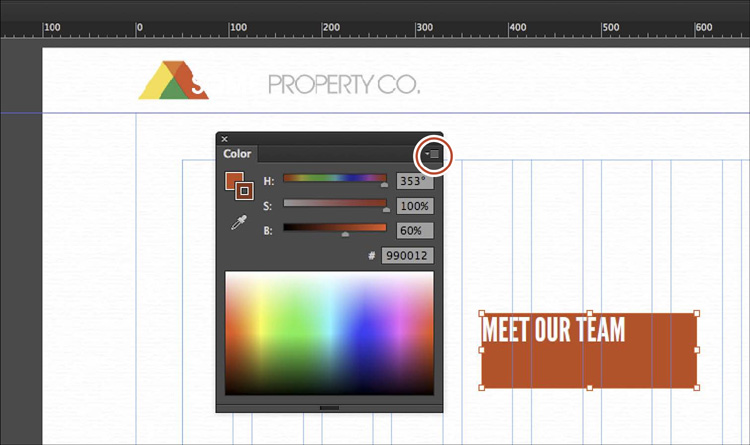
7. Select the Set Stroke Color box in the Color panel and select the Eyedropper tool. Sample the red color that now fills the text frame. Click the Color panel icon (![]() ) in the upper-right corner of the panel (circled in the following figure) and choose HSB Sliders from the menu. Change the Brightness value to 60%.
) in the upper-right corner of the panel (circled in the following figure) and choose HSB Sliders from the menu. Change the Brightness value to 60%.
8. Click the Color panel icon in the upper-right corner of the panel and choose RGB Sliders from the menu.
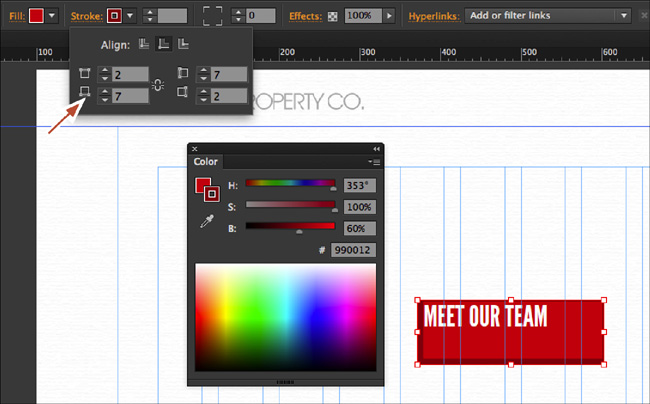
9. Click the Stroke link in the Control panel and click the Align Stroke To Inside button (![]() ). Make sure that Make All Stroke Settings The Same (
). Make sure that Make All Stroke Settings The Same (![]() ) is turned enabled. Change the Top value to 2 by clicking the up arrow to the left of the field twice and all values will change. Click the Make All Stroke Settings The Same icon to disable it (
) is turned enabled. Change the Top value to 2 by clicking the up arrow to the left of the field twice and all values will change. Click the Make All Stroke Settings The Same icon to disable it (![]() ) and change the left and bottom values to 7.
) and change the left and bottom values to 7.
![]() Tip
Tip
Because you are applying the red color multiple times, it may be a good idea to save the color as a custom, named swatch.
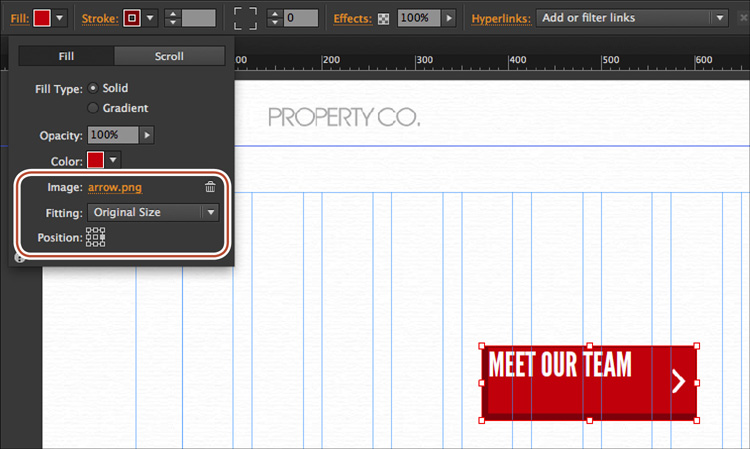
10. Click the Fill link in the Control panel, and click the Add Image link to select a background image for the text frame. Navigate to the images folder in the Lessons folder, and choose the image named arrow.png. Click Open. Make sure that Original Size is chosen in the Fitting menu and that center-right (![]() ) is selected for the Position option.
) is selected for the Position option.
Next, you’ll work with the Spacing panel to add spacing between the edges of the text frame and the text inside.
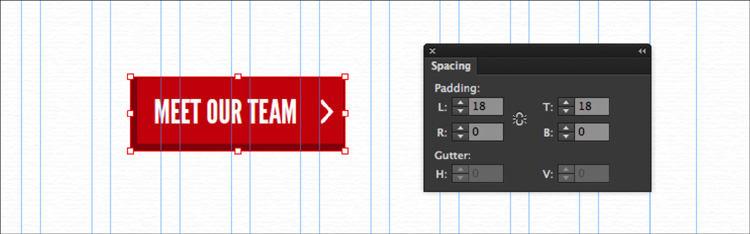
11. Click the Spacing panel tab (Window > Spacing) on the right side of the workspace to reveal the panel. Make sure that the Make All Padding Settings The Same button is toggled off (![]() ). Change the left and top padding values to 18, and ensure that the right and bottom padding values are 0.
). Change the left and top padding values to 18, and ensure that the right and bottom padding values are 0.
![]() Note
Note
We dragged the Spacing panel closer to the content in the page.
12. Click the Preview mode link and check out the new button you’ve started. Click the Design mode link to return to the page in Design mode, leaving the text frame selected.
After previewing, you may want to adjust the height of the text frame a few pixels with the Selection tool if the text is not centered with the arrow.
13. Choose File > Save Site.
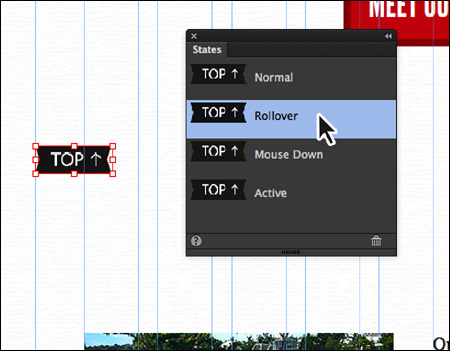
Using the States panel to add button states
Muse allows you to add states to your button. As you’ve learned previously, states are useful for changing a button’s appearance when visitors interact with it. A state can be used to indicate that the button will perform an action. You don’t have to add states to a button, but as you’ll see, sometimes it can be beneficial to alert visitors that something will happen when the button is clicked.
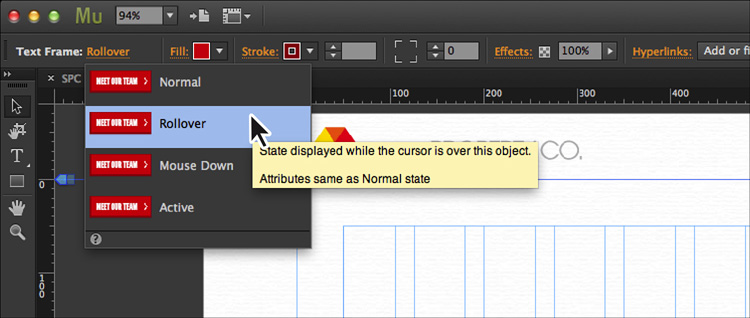
1. With the MEET OUR TEAM text frame still selected, click the Normal link in the Selection Indicator at the left end of the Control panel. Click the Rollover state in the States menu that appears.
![]() Note
Note
You must have the frame selected, not the text, in order to edit the states using the States menu because states can’t be applied to selected text.
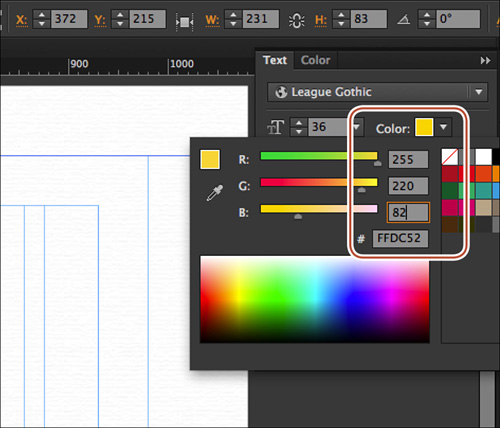
2. In the Text panel, change the color values of the text to R: 255, G: 220, B: 82 (yellow).
This is a very simple rollover option, but instead you could have replaced the background image (or repositioned it), added an underline to the text, or applied any number of changes to the text frame or text.
![]() Tip
Tip
You can also access the States panel in the workspace by choosing Window > States.
3. Click the Rollover link in the Selection Indicator on the left end of the Control panel to see the States menu again.
In the States menu, you’ll see that the Mouse Down state looks the same as the Rollover state. You could change the appearance of the Mouse Down or Active (Normal) state if you like, but in this case it’s not necessary.
4. Click the Preview mode link to test the button. Hover over anywhere in the text frame, and you’ll see the rollover state.
![]() Tip
Tip
As you’ll discover in Lesson 7, “Working with Widgets,” you can simply drag a built-in States Button widget from the Widgets Library panel to use as a starting point for your button.
5. Click the Design mode link to return to the Home page in Design mode.
6. Choose File > Save Site.
Adding a link to a button
Adding a link to a button typically involves selecting the button (frame), not the contents, before adding the link. You’ll add a link to a button now.
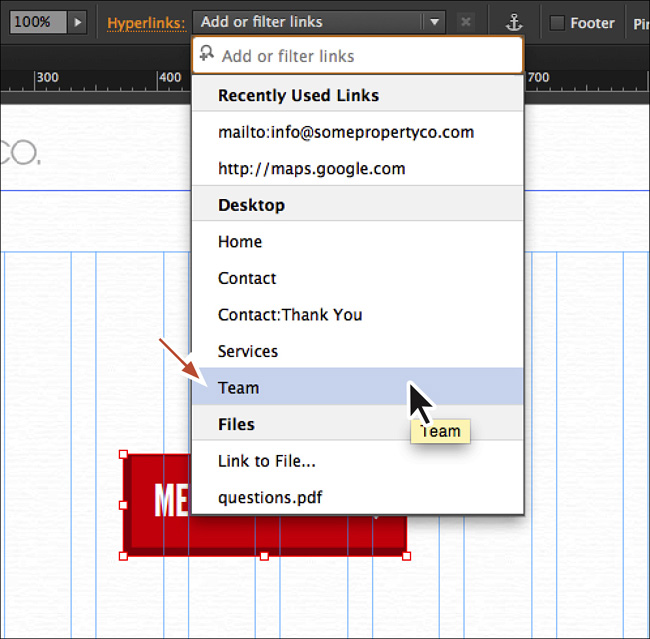
1. With the text frame still selected, click the Add Or Filter Links menu to the right of the word Hyperlinks in the Control panel. Choose Team from the Desktop category in the menu.
2. Press Command+P (Ctrl+P) to preview the new button.
3. Click the Design mode link to return to the page in Design mode, leaving the text frame selected.
4. Choose File > Save Site.
Placing a Photoshop button
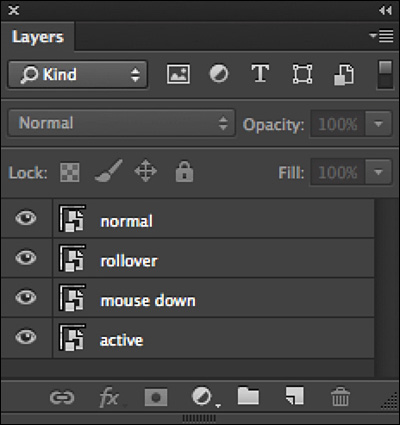
You can place a button created in Photoshop into Muse by choosing File > Place Photoshop Button. When you place a Photoshop button (.psd file) in Muse, you can select a single layer for each state that you want the button to have. For any states that you don’t want to use in Muse, don’t include a layer with the name of that state in the Photoshop file. Also, ensure that any layers you want to display in Muse have content on them.
![]() Tip
Tip
Because the layers in a group in your .psd file will appear in the Photoshop Import Options but the groupings will be ignored, you’re better off creating Smart Objects from your layers with multiple layers of content in each Smart Object layer. Smart Objects are layers that can contain image data from raster or vector images, such as Adobe Photoshop or Adobe Illustrator files.
Setting up a button in Photoshop
Next, you’ll place a button that allows the user to scroll back to the top of the page as they go further down the page.
![]() Note
Note
When naming the layers in Photoshop to match a Muse state name like Normal, the names are not case sensitive. For example, in Photoshop you could name a layer normal, Normal, NORMAL, or any combination of uppercase and lowercase letters. Muse would still recognize it and assign it to the Normal state.
1. Choose Window > Reset Panels.
2. With the Home page still showing in Design mode, choose View > Fit Page In Window.
3. Choose File > Place Photoshop Button. Navigate to the images folder in the Lessons folder, and select the image named backtotop-button.psd. Click Open.
![]() Note
Note
Placing a Photoshop button creates a link to the original .psd file and adds it to the list in the Assets panel. As with other assets listed in the panel, you can relink the button to another Photoshop file, embed the link, and more.
![]() Tip
Tip
You don’t have to name the Photoshop layers the same as the states. You can name them whatever you like and simply choose them from the menus in the Photoshop Import Options dialog box.
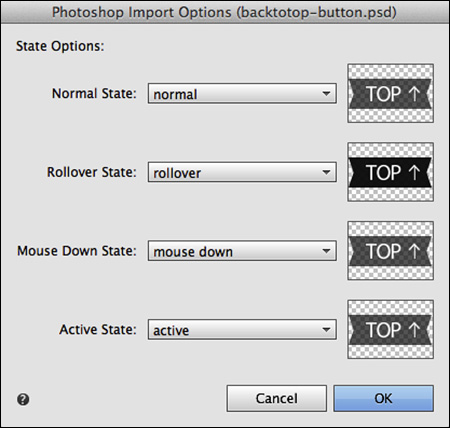
In the Photoshop Import Options dialog box, Muse assigns layers in the Photoshop file to a state of the same name, if those layers are present. For each state of the button in Muse, you can choose a different layer in the Photoshop file. Notice that each state has the layer of the same name from the Photoshop file selected automatically.
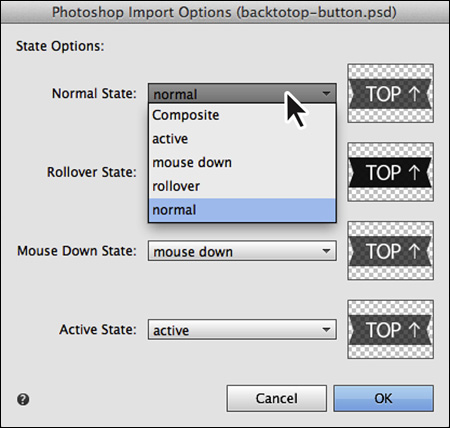
4. Click the Normal State menu, and you’ll see the Photoshop layers in the file listed as well as a Composite option. Leave the normal layer selected and click OK.
![]() Note
Note
Any layers in the Photoshop file that are empty will not appear in the state menus in the Photoshop Import Options dialog box.
Selecting the Composite option for the Normal state would show all of the layer content visible in Photoshop when the file was last saved.
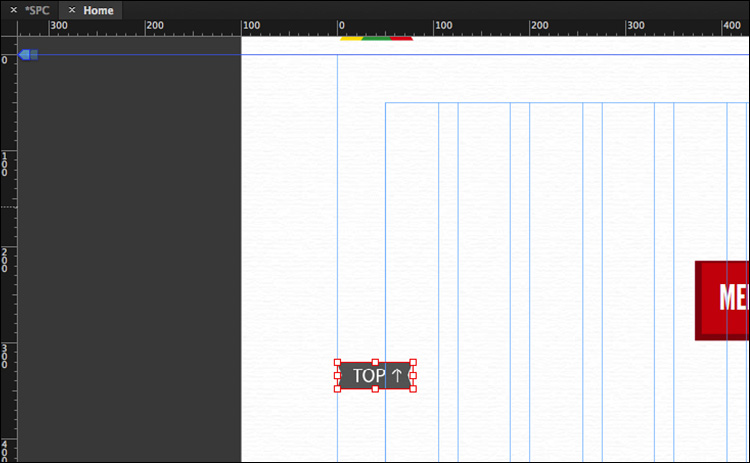
5. Click to place the button on the left edge of the page. In the Control panel, change the X value to 0 and the Y value to 320. The vertical position may seem odd right now, but it will make sense when you add a scroll effect to it in Lesson 8, “Applying Effects and Graphic Styles.”
![]() Note
Note
You can also change the X and Y values in the Transform panel by clicking the Transform link if it appears in the Control panel or by choosing Window > Transform.
6. With the Selection tool selected, drag the image and text group that are below the “back to TOP” button a little farther down the page to give some space.
![]() Tip
Tip
With the button frame selected, if you click the Fill link in the Control panel, you’ll see that the layers in the Photoshop file become background images in the states of the button. This is similar to how you added the arrow to the MEET THE TEAM button on the Home page.
7. Open the States panel by choosing Window > States (we moved ours closer to the page content). Click the Rollover state in the States panel; notice that Muse is using the rollover layer from Photoshop as the rollover state. Muse also uses it as the Down state for this button, whereas the normal layer from Photoshop is used as the Active (Normal) state.
You can select each state and apply different effects, like adding a drop shadow or even rounded corners. When you publish or export the site, Muse will save the states as separate images.
With the Photoshop button now on the page, you need to add some sort of interactivity to it. In this case, you’ll add a link that will scroll to the top of the page.
Working with anchors
Long pages with a lot of vertical content to scroll through can be cumbersome for visitors to navigate. You can alleviate this issue in Muse by creating internal links that make the page jump to a specified section when a visitor clicks the link. The commonly used Back to Top link, which quickly scrolls to the top of the page when clicked, is a good example of this type of internal link.
To link to a part of a page, you need to insert an anchor at the desired spot and then link to that anchor. The anchors are invisible to visitors but allow you to create internal links to different parts of a page. You can create multiple anchors on a single page; however, each anchor must have a unique name.
Linking to anchors
The first step toward aiding visitors in scrolling long pages is to insert the anchors to which you will later link. Let’s do that now.
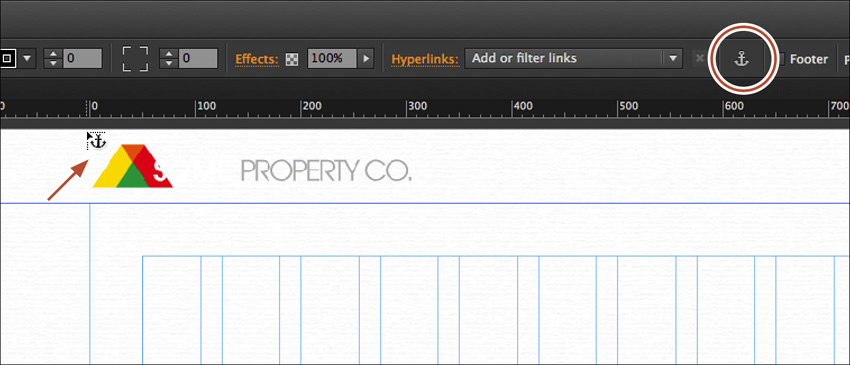
1. With the Home page still showing in Design mode, click the Anchor button (![]() ) in the Control panel. The pointer will change to a Place Gun. Position the Place Gun at the very top of the page below the ruler and toward the left edge of the header (you may need to scroll up). Click to insert an anchor and open the Rename An Anchor dialog box.
) in the Control panel. The pointer will change to a Place Gun. Position the Place Gun at the very top of the page below the ruler and toward the left edge of the header (you may need to scroll up). Click to insert an anchor and open the Rename An Anchor dialog box.
![]() Tip
Tip
You can also choose Object > Insert Link Anchor to insert an anchor. If you click multiple times on the Anchor button in the Control panel, the number of times you click is the number of anchors you can place. The Place Gun cursor shows a number next to the anchor icon, indicating the number of anchors you can create. Clicking the Anchor button twice loads two anchors into the Place Gun that you can then place.
2. In the Rename An Anchor dialog box, change the name to top and click OK.
You should now see the anchor icon on the page with the word “top” to the right. With the Selection tool you can move the anchor, or you can select it and press Delete (Backspace) to remove it. If you need to rename the anchor, right-click the anchor icon and choose Rename Anchor.
Now that the anchor is in place, you can create a link to it. You’ll apply the link to the Photoshop button you placed previously.
![]() Note
Note
You can name anchors anything you want, just keep it simple. Anchor names cannot start with a number, and Muse will warn you if you use an illegal character.
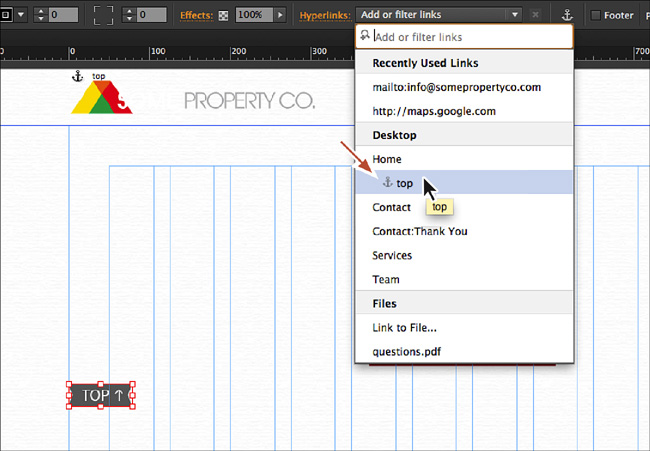
3. With the Selection tool selected, click the Photoshop button on the left side of the page to select the button that says “TOP.”
4. Click the arrow to the right of the Hyperlink field in the Control panel. In the menu that appears, choose “top” below the Home page in the Desktop category.
![]() Tip
Tip
You can also cut or copy and paste an anchor on the page when it’s selected, or press Option (Alt) while you drag the anchor with the Selection tool to create a copy, and then rename it.
So that the page is tall enough to preview the scrolling, you’ll change the minimum height of the page and drag the image and text group down the page.
5. Choose Page > Page Properties. In the Page Properties dialog box change the Min Height value to 1300 and click OK.
6. With the Selection tool, Shift-drag the group below the button (that contains the image and text) down. Make sure that the Y value in the Control panel (or Transform panel) is roughly 700. The page content should look something like the following figure (we zoomed out to see everything).
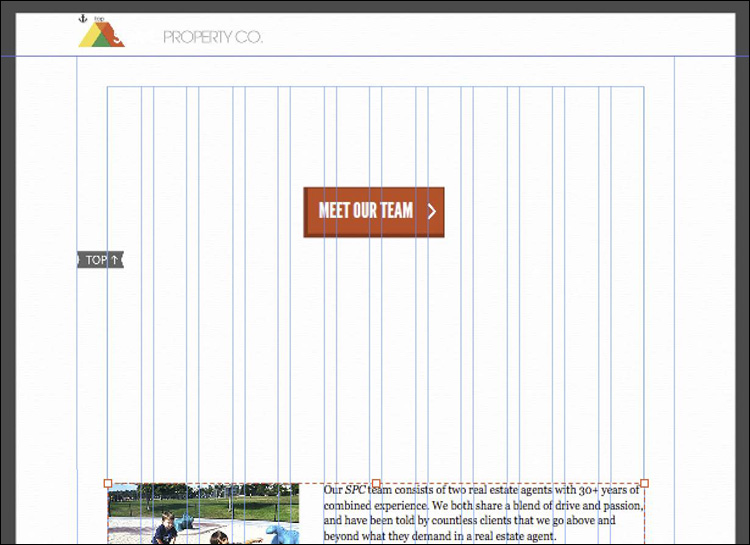
7. Click the Preview mode link and scroll down the page, making sure you can still see the TOP button. Click the TOP button to return to the top of the page.
Notice that the page scrolls up smoothly. Also, notice that the TOP button moves with the rest of the page content.
8. Click the Design mode link to return to the Home page.
Next, you’ll “pin” the TOP button in place so that it stays in the same relative position in the browser window as the page content scrolls beneath it.
Pinning content
You’ve invested a lot of time learning how to reposition content on a page and can now easily move an image in relation to the other elements (images, text, and media) that also exist on the page. But how do you make something always stay visible when you scroll in the browser window? If a page is long (contains a lot of vertical content), visitors no longer can see content from the top of the page when they scroll down. What if you wanted a Twitter follow button, menu, or just an image to always be visible as the rest of the content scrolls? You need to pin the content. The Control panel makes pinning content easy. You simply set the pinned content, such as an image, to a specific location in relation to the edge of the browser window. It always stays in one spot regardless of other scrolling page elements.
The pinned element will move to maintain its pinned position in relation to the browser if the visitor resizes the browser window, but the pinned element will not move if the visitor scrolls the page content horizontally or vertically.
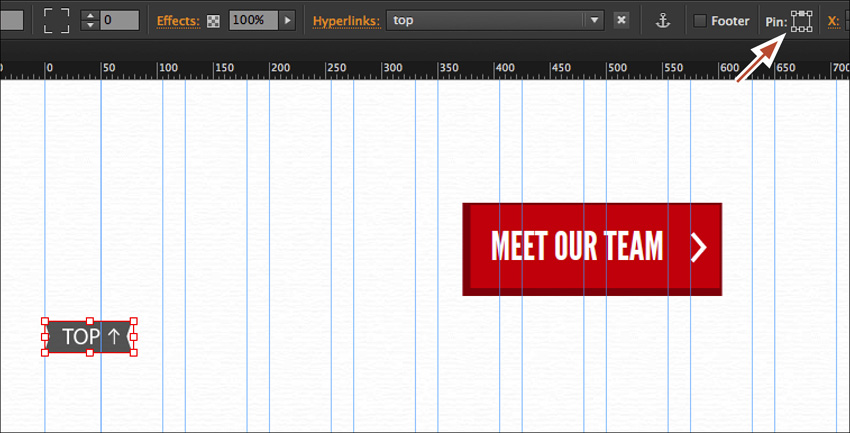
Next, you’ll pin the TOP button.
1. With the TOP button still selected on the page, click the top-center position of the six possible options in the Pin tool located in the Control panel.
2. Click the Preview mode link and decrease and increase the width of the Preview window by dragging the bottom-right resize handle. Scroll down the page to see that the TOP button is stuck in position vertically.
3. Click the Design mode link and close all open pages, returning to Plan mode.
4. Choose File > Save Site and close all open pages (including Preview) and return to Plan mode.
In the next lesson, Lesson 7, you’ll learn what widgets are and add a few to your pages. If you are going to jump right into the next lesson, you can leave the SPC site open.
Review questions
1. Name and describe the three generic types of links.
2. Briefly describe the benefits of adding link titles.
3. How can you apply a link to text without changing the appearance of that text?
4. What is the purpose of adding anchors?
5. What is the benefit of placing a .psd file using File > Place Photoshop Button?
6. What is meant by pinning content?
Review answers
1. The three generic types of links that you can create in Muse are internal, external, and email. Internal links take the user to another part of the same document or to another page, document, or layout in the site. An external hyperlink is designed to take the user to another website or web host. An email link is used to launch the visitor’s default email program and compose an email.
2. A link title displays as a tooltip in some browsers when the cursor hovers over the text link on the page. It can be read aloud by screen readers, and it can give more information to search engines, among other things.
3. If you select the text frame but not the text, and then apply a link, the appearance of the text within the frame isn’t changed.
4. An anchor allows you to link to a part of a page. Anchors are invisible to visitors. They add code that enables you to create links that jump to a specific section of a longer or wider page.
5. Placing a layered Photoshop file using the Place Photoshop Button command opens the Photoshop Import Options dialog box. In this dialog box you can assign layers in the Photoshop file to the states in the button.
6. Pinned content is set to a specific location in relation to the browser window regardless of other scrolling page elements or when a browser window is resized.