
1. An Introduction to Adobe Muse
Lesson overview
• Understand what Adobe Muse is
• Work with a typical Muse workflow
• Work with the Welcome screen
• Understand and navigate the different modes
• Work in Plan mode
• Work in Design mode
• Work with the Muse workspace
• Zoom and pan
• Preview your site
To make the most of Adobe Muse, you need to know how to navigate the workspace. The workspace consists of the menu bar, Toolbar, Control panel, Document window, default panels, and modes.
A typical Muse web workflow
Before you get started with your site in Muse, it’s a good idea to understand the typical Muse workflow. In a print design workflow, you use Adobe InDesign CC as a page layout tool and a combination of Adobe Photoshop CC and Adobe Illustrator CC for creating graphics. The same can hold true for creating sites in Muse, except that Muse replaces InDesign CC for the website design and creation process.
![]() Note
Note
The workflow steps are a general guide and may not be the same for every website you create. Your process may be different. As you’ll learn, the bigger or more complex a site is, the more planning and preparation is typically needed.
As you step into Muse, you’ll quickly learn that its easy-to-follow workflow is similar to your print design workflow, with just a few adjustments. As with most creative programs, the Muse workflow is flexible and easily adapts to your own work style. The typical Muse workflow from concept to published website follows.
1. Create a site concept.
2. Create your Muse site file.
3. Plan and edit your site (add and organize pages).
4. Wireframe your concept (outline the structure and elements).
5. Design your pages.
6. Preview and test your pages.
7. Publish your site.
To get a sense of what you’ll be learning in the lessons that follow, let’s take a closer look at each of the workflow steps.
1. Create a site concept
At the outset of the creation process, you should gather information from those involved (like the client) to discuss the purpose of the site. To do so, you can ask such questions as:
• What does your company do?
• Why are you building this site/what are your goals?
• What are our/my deliverables?
• Who are your competitors, and what do you like and dislike about their sites?
![]() Tip
Tip
For suggestions on the type of questions to ask clients in the initial stages of the website creation process, check out the PDF file named client_questions.pdf in the Lessons > Lesson01 folder.
Obtaining answers to these questions (and more) in advance can make your creative process more efficient and ensure that you achieve all the site’s objectives. These answers can also help you create a project proposal for a potential client that might include a cost estimate, once you know what is needed. For most websites, investing time in some forethought and preplanning will go a long way toward avoiding unnecessary issues later in the process.
With the site scope, function, and goals defined, you can begin to create the site file in Muse.
2. Create your Muse site file
After coming up with the concept for your site, the first step within Muse is as easy as creating a new document in a program like Adobe InDesign CC or Illustrator CC.
To begin, you create a site file, which has the file extension of .muse. The site file is similar to an InDesign CC file, because it contains the pages as well as master pages for your entire website. When you create a site file, you’ll initially decide between designing a Desktop, Tablet, or Phone layout. Using Muse, you can design unique layouts for desktop, tablets, and smartphones that are contained within a single Muse project file. This allows you to optimize your design so that, for instance, not everything in the desktop layout is viewed on a smartphone. Behind the scenes, code in the pages detects the browser and device used by the visitor and automatically loads the appropriate Tablet, Phone, or Desktop layout. If you choose to design for desktop only, the site content will simply scale to fit the width in device browsers.
Throughout this book we’ll focus on building the design for desktop browsers, and later, in Lesson 10, “Designing for Mobile Devices,” show you how to optimize your design content for tablets and smartphones.
3. Plan and edit your site
When you open your site file in Muse, you enter Plan mode, where you can generate a site map. Your site map shows the number of pages in your site, how the pages will be ordered, and how they connect to each other in the site navigation. Plan mode is also where you can add (and switch between) unique layouts for the different devices (desktop, tablet, and phone). This is optional, depending on whether you feel the Muse site content needs to be optimized for mobile devices. You’ll learn more about alternate layouts in Lesson 10.
![]() Note
Note
The figures in this book are taken using the Mac operating system, and position of the menus will be different from what you see, especially if you are running Windows.
4. Wireframe your concept
With your site map created, your next major step is to create your site design, but don’t jump into the designing process just yet. Taking some time now to wireframe your layout may ultimately save you time and make creating your site easier.
A wireframe is basically the designer’s version of an outline. It shows the site structure, as well as the positioning of such basic elements as the header, footer, sidebar, navigation, and others. The benefit of starting with a wireframe is that it gives everyone involved (including the client) a simple way to envision the site layout and decide where content should be placed. The actual design, including fonts, colors, and styles, are not visible in a wireframe.
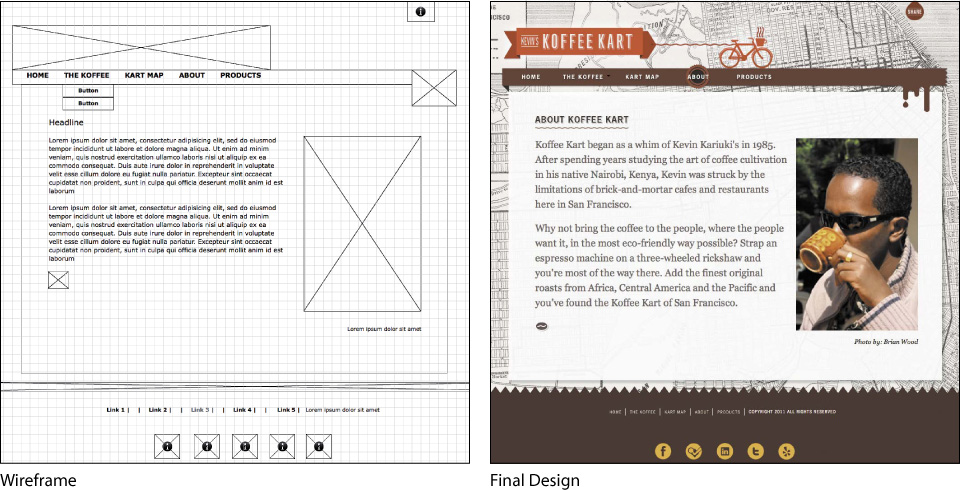
Generally speaking, you should make one wireframe for each unique page or section on a website. You can create them in several ways—from simply sketching on paper to using dedicated wireframing software or a program like Photoshop or Illustrator. Once your wireframes are created and approved, you can more confidently populate the site’s pages with design content like graphics and text.
5. Design your pages
After you plan your site, set up a site map, and, ideally, wireframe your pages, you can approach the page design from either of two routes. For one, you can start your design in a program like Photoshop or Illustrator; save the images in the desired format, .jpg, .gif, or .png; and then assemble the pieces in Muse (even pasting them directly from Photoshop).
Alternatively, you can start the design phase right in Muse, similar to the way you approach page layout in InDesign CC. You can then place web-supported images like .gif, .jpg, .png, or .psd (Photoshop) files as you design your pages. You can add text, format that text using familiar formatting options, and even create character and paragraph styles to control the text formatting throughout your site. Muse also supplies lots of prebuilt, but fully customizable, widgets you can drag and drop onto your pages, such as navigation menus, slideshows, social media, and much more that you’ll learn how to use in the lessons.
6. Preview and test your pages
As you design and add content to your pages, you can use Preview mode in Muse to see how your site will look to visitors. In addition, you can test your sites in the default browser on your system. If you decide to create unique layouts for mobile devices (like smartphones and/or tablets), Preview mode also allows you to see the design in various mobile sizes in both portrait and landscape orientations.
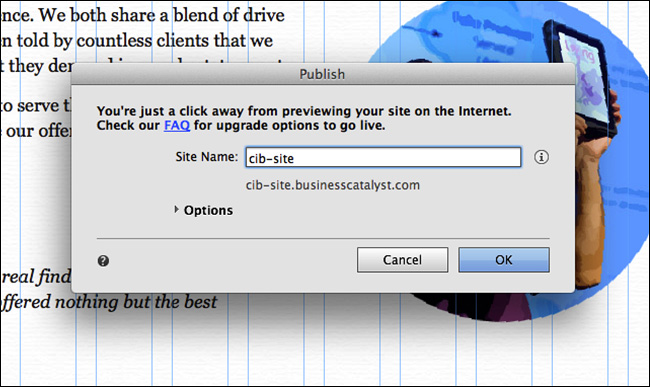
7. Publish your site
The last step in the process is publishing your site. When your site is ready, you can share it with the world by hosting it using Adobe hosting, uploading the site content from within Muse to a host of your choice, or exporting your site as HTML and hosting it with a different hosting provider of your choice.
Now that you’ve seen a general process for creating a website in Muse, it’s time to explore the Muse workspace.
Touring the workspace
In this lesson, you’ll learn the fundamentals of the Muse workspace by touring key features and becoming familiar with some commonly used tools.
The Muse workspace includes toolbars and panels that let you view, create, and edit Muse documents. You can also display multiple documents in a single window with tabs for each document. If you are familiar with the workspace in other Adobe applications, like InDesign or Illustrator, you’ll feel right at home in Muse.
The workspace is an integrated document layout with panel sets that are docked by default on the side (or wherever you drag them on your desktop). Panel groups are initially docked together in default groups on the right side of the workspace, but you can undock them from each other if you want to customize your workspace.
Muse color themes
Muse, like other Adobe applications, including InDesign CC, Photoshop CC, and Illustrator CC, has a darker user interface that you can adjust if you like. Next, you’ll see where you can adjust the brightness of the user interface.
1. Launch Adobe Muse. Muse opens and displays the Welcome screen, which you can use to create a new site, open a recently opened site, and learn more about working with Muse.
2. Choose Adobe Muse CC > Preferences (Edit > Preferences).
3. Click one of the lighter gray color themes to see the Muse interface change color.
Depending on your preference, you can choose one of four shades of gray.
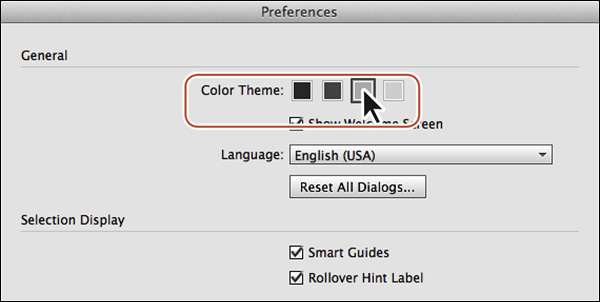
4. Click Cancel to close the Preferences dialog box without saving. Know that if you decide to change the Color Theme preference, the figures in the book will not match what you see.
Understanding modes
In the upper-right corner of the Muse Application window, notice the links for three main modes: Plan, Design, and Preview. When you select a mode, Muse displays it in the Document window. Each of these modes represents a step in the website creation process, as the previous section “A typical Muse web workflow” explained.
![]() Note
Note
If you have not already downloaded the project files for this lesson to your computer from your Account page, make sure to do so now. See “Getting Started” at the beginning of the book.
Next, you’ll open an existing site and briefly explore the different modes available.
Working in Plan mode
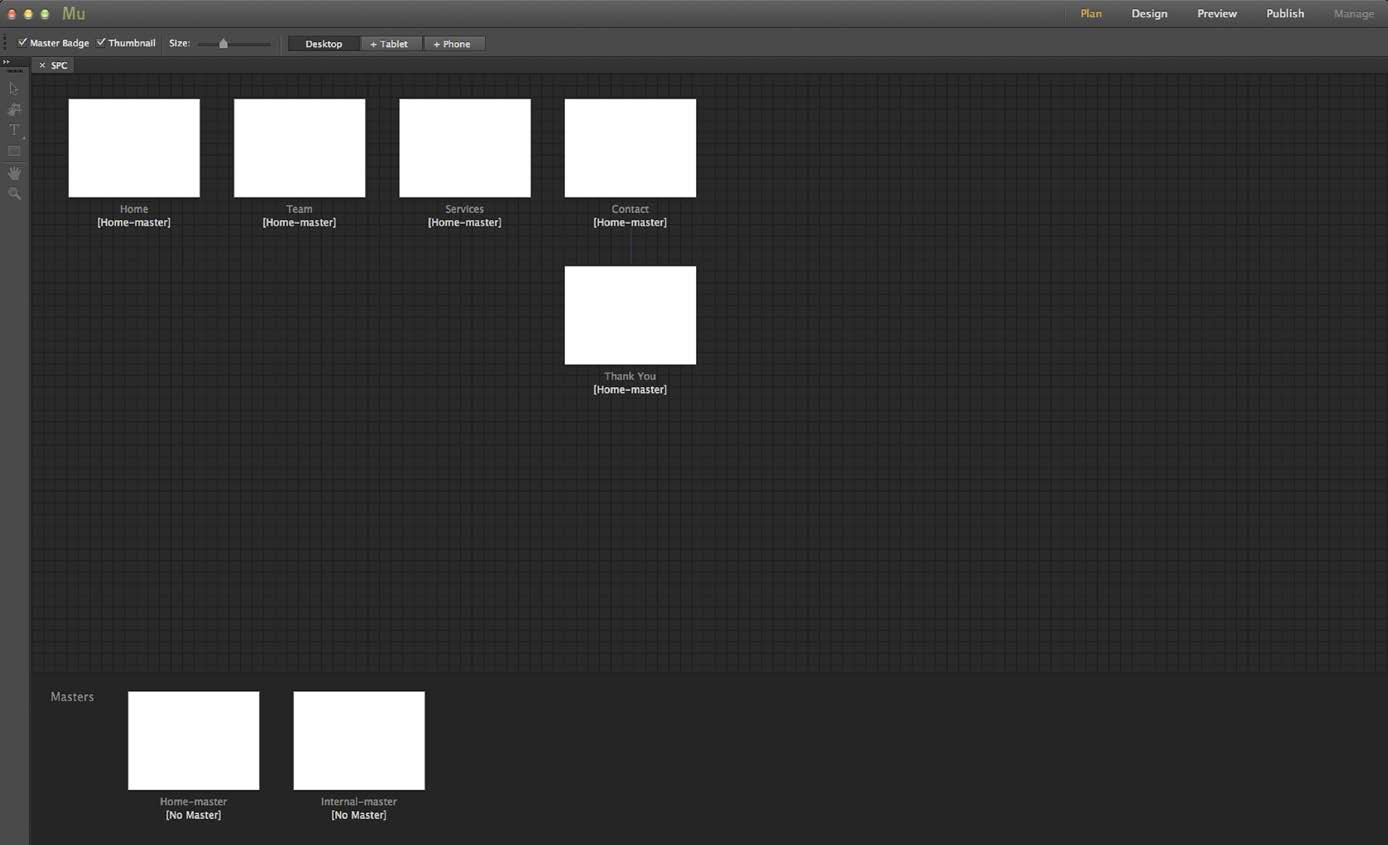
Plan mode displays your site map (also called a site plan), which shows the pages in your site and how they are connected to each other, as well as master pages, which can contain consistent design elements that appear on multiple pages of your site. Adobe Muse also has built-in support for tablets and smartphones. In Plan mode, you can create unique site maps—called alternate layouts—with pages and master pages for tablets and/or phones. You’ll explore Plan mode and its options further in Lesson 2 when you create your own site file, and explore working with layouts for tablets and phones in Lesson 10.
![]() Note
Note
The thumbnails you see in Plan mode may be a different size than what is shown in the figure. That’s OK.
1. Choose File > Open Site, and open the L1_start.muse file in the Lesson01 folder, which is located in the Lessons folder on your hard drive.
When you open a .muse site file, Muse displays Plan mode by default. You can tell you are in Plan mode because the word “Plan” is highlighted in either blue or orange in the upper-right corner of the Application window.
![]() Note
Note
You may see a warning for missing fonts or missing/modified images. You can dismiss these dialog boxes.
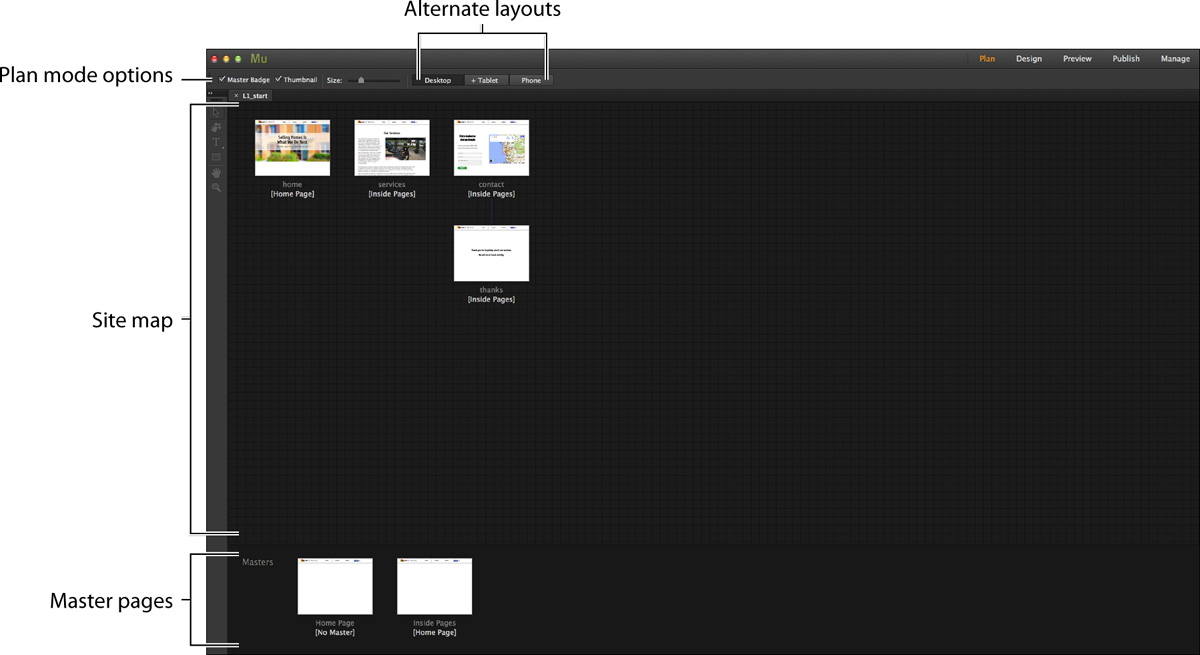
2. Move the pointer over the page thumbnails, and you’ll see that you can interact with them. Pages can be added, deleted, and rearranged in the site map.
In Plan mode you’ll see three buttons above the site map thumbnails: Desktop, Tablet, and Phone. At the moment, the Desktop layout option is selected. When you create your own site, you can start creating with Desktop, Phone, or Tablet. You can create a new layout at anytime by clicking the desired button, depending on which generic device size you want to optimize your pages for. Layouts that have not yet been created display a plus (+) sign next to their name.
3. Click the Phone button above the site map to reveal alternate pages for the phone version of the site.
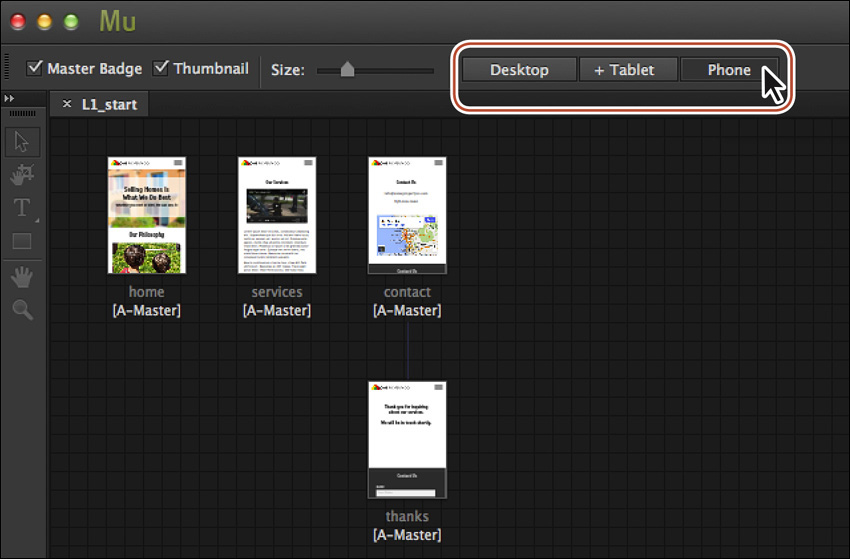
4. Click the Desktop button to the left of the Phone button to show the Desktop site map.
Next, you’ll explore the components of Design mode.
Working in Design mode
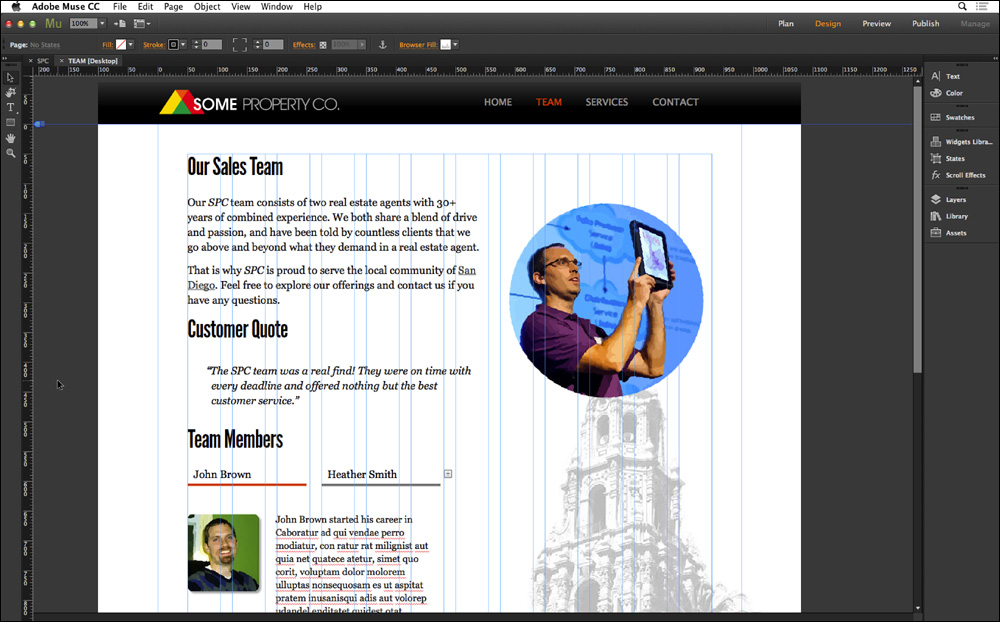
Design mode is where you create the layout for each page of your site by adding text, images, links, and more.
1. In Plan mode, click the Design mode link in the upper-right corner of the Application window.
When you click the Design mode link, the first page of the website opens and appears in a separate tab at the top left of the Document window. In this case, the tab for the page shows home [Desktop], which is the name and the title of the page. The word Desktop on the tab indicates that the page is in the Desktop layout.
![]() Tip
Tip
You can also enter Design mode by double-clicking a page thumbnail in Plan mode, by choosing View > Design Mode, or by pressing Command+I (Ctrl+I).
Notice that more options, tools, and panels now appear as well. In Design mode, you’ll see the Toolbar on the left (which is now active), Control panel on top, and panel groups that are docked on the right side of the Application window, similar to other Adobe applications, like InDesign CC. All of these features make up the Muse workspace. As with other Adobe applications, you can customize the workspace in Muse, and that’s what you’ll do next. First, take a moment to familiarize yourself with the names of these workspace components.
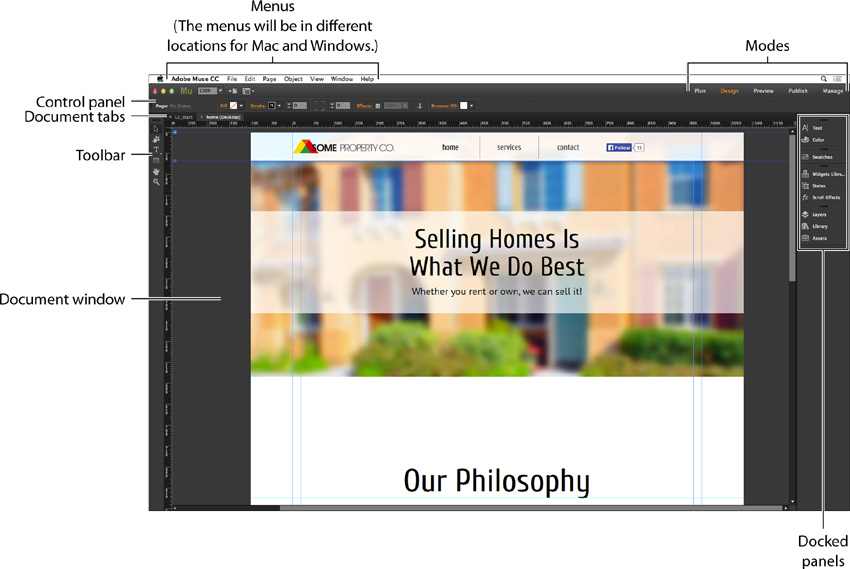
The Toolbar
In Design mode, the Toolbar (Window > Toolbar) is docked on the left side of the application window and contains a series of tools. If you are familiar with other Adobe applications, like InDesign CC, you’ll see some familiar tools. As you work through the lessons, you’ll learn more about the functions of each tool.
![]() Note
Note
The Text tool has a hidden tool beneath it, which is indicated by a little triangle off the lower-right corner of the tool icon. If you position the pointer over the Text tool, click and hold down, the available tools will appear in a submenu.
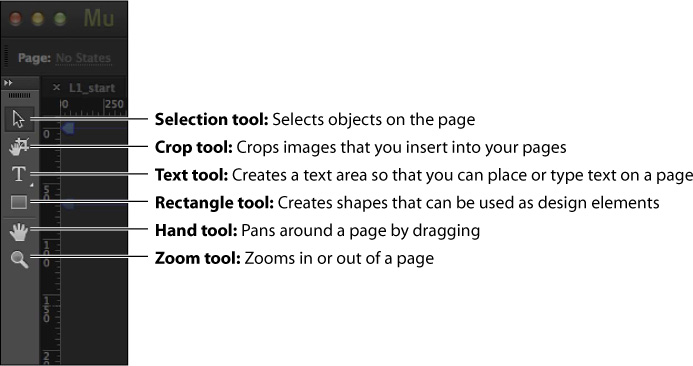
As in other Adobe applications, you can select a tool from the Toolbar by clicking it or pressing a keyboard shortcut. Let’s do that now.
![]() Tip
Tip
The keyboard shortcuts in Muse, like those in InDesign CC and Photoshop CC, are spring-loaded tool shortcuts. This means that you can hold down a tool’s shortcut key to switch to that tool temporarily. When you are finished using the tool, you can simply release the shortcut key to return to the previously selected tool. Spring-loaded tool shortcuts can help you work faster, saving you time that adds up over the life of a project.
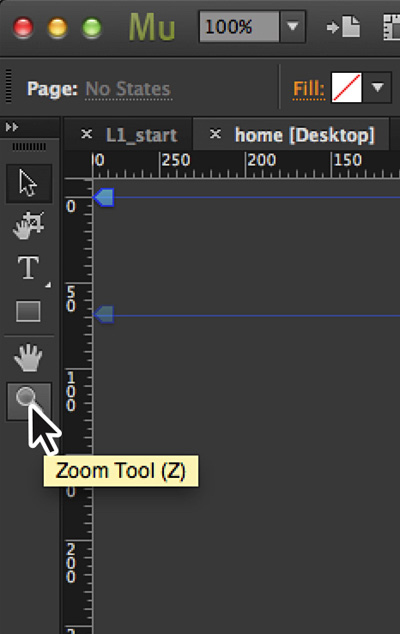
1. Hover over the Zoom tool (![]() ) in the Toolbar. Notice that Muse displays the tool’s name and keyboard shortcut. Every tool in the Toolbar has a keyboard shortcut associated with it. Click to select the Zoom tool.
) in the Toolbar. Notice that Muse displays the tool’s name and keyboard shortcut. Every tool in the Toolbar has a keyboard shortcut associated with it. Click to select the Zoom tool.
2. Press the V key to select the Selection tool (![]() ).
).
The Control panel
The Control panel offers quick access to options and commands related to the current page item or objects you select. By default, Muse displays the Control panel horizontally across the top of the Document window. You can open and close it by choosing Window > Control, if necessary. In the Window menu, a check mark to the left of the word Control indicates that the Control panel is open in the workspace.
![]() Tip
Tip
You can drag the Control panel from the left end out into the workspace to make it a free-floating panel. You can dock it again by dragging it from the left end to just below the green Muse icon (the Mu) in the upper-left corner of the Application window.
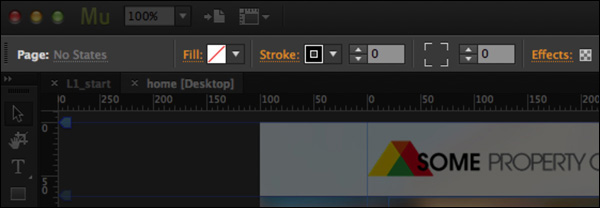
Options displayed in the Control panel vary depending on the type of object you select. As you progress through each lesson, you’ll also notice that some of the options displayed in the Control panel are also found within other panels in Muse.
When you first open a page, with nothing selected, you see the word Page on the left end of the Control panel. This is called the Selection Indicator. When you select content on the page, the currently selected object is named here. For example, Page indicates that the options currently displayed in the Control panel will affect the large, white page box in the Document window (you’ll learn more about the page area in a later lesson).
Next, you’ll select content on the page to see how the Selection Indicator works.
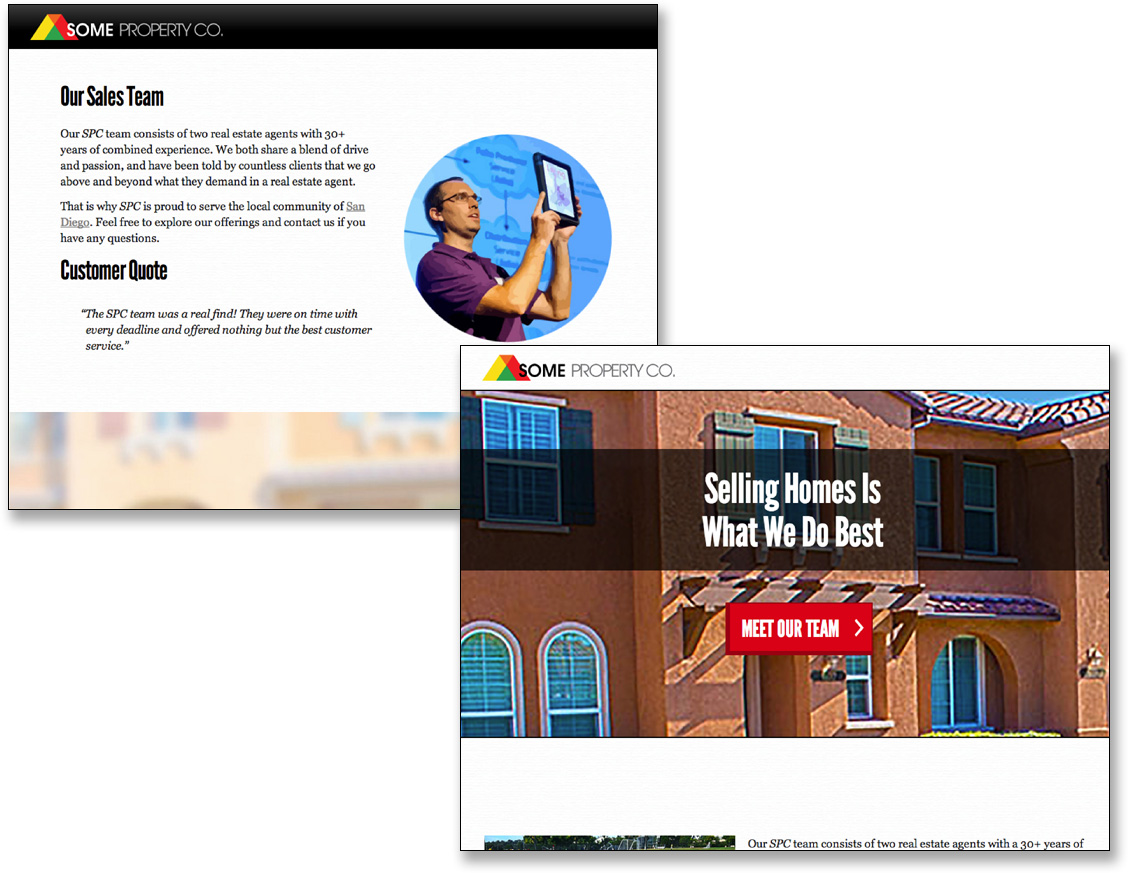
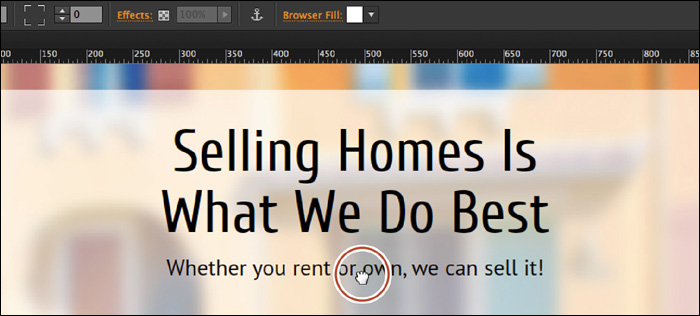
1. With the Selection tool (![]() ) still selected, position the pointer over the “Selling Homes Is What We Do Best” text. You should see a Text Frame tooltip appear next to the pointer, indicating that if you click, you’ll select a text frame. Click to select the text frame.
) still selected, position the pointer over the “Selling Homes Is What We Do Best” text. You should see a Text Frame tooltip appear next to the pointer, indicating that if you click, you’ll select a text frame. Click to select the text frame.
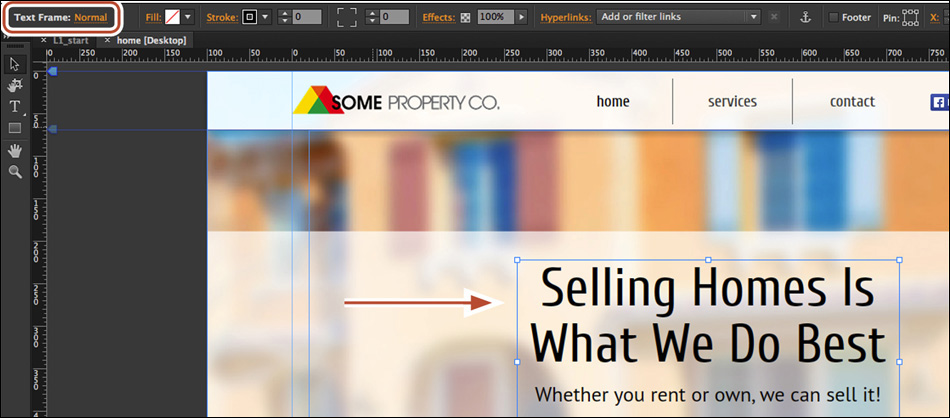
On the left end of the Control panel, you now see the words Text Frame to indicate that you selected a text frame on the page. Notice also that the options in the Control panel have changed. Any changes you make in the Control panel will affect the selected object.
![]() Tip
Tip
You can get more information about each option in the Control panel by hovering over an icon or option label with the pointer to view its tooltip.
2. Choose Edit > Deselect All to deselect the text frame.
Throughout the lessons in this book, you’ll be using the Control panel to format content on your pages and learn more about those options.
Working with panels
Panels, which are listed in the Window menu, give you quick access to many tools and features that make modifying content easier. By default, some panels are docked and appear on the right side of the workspace.
Muse, like other Adobe applications, lets you manage your panels to make more important panels easier to see or access. Next, you’ll experiment with hiding, closing, and opening panels.
1. Choose Window > Reset Panels to reset the panels to their default locations.
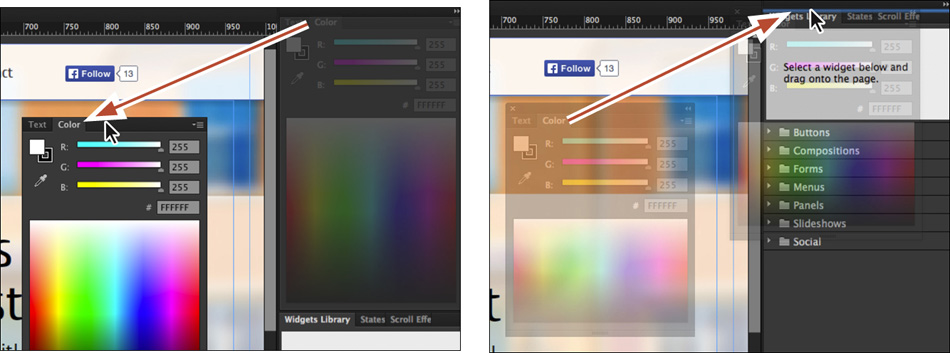
2. Click the Layers panel icon or label in the docked panels on the right side of the workspace to expand the panel, or choose Window > Layers. Notice that the Layers panel appears with other panels as a group.
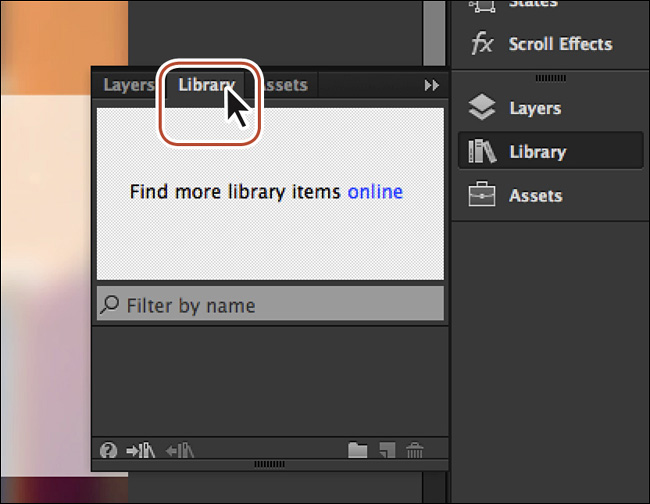
3. Click the Library panel tab in the Layers panel group to view the Library panel.
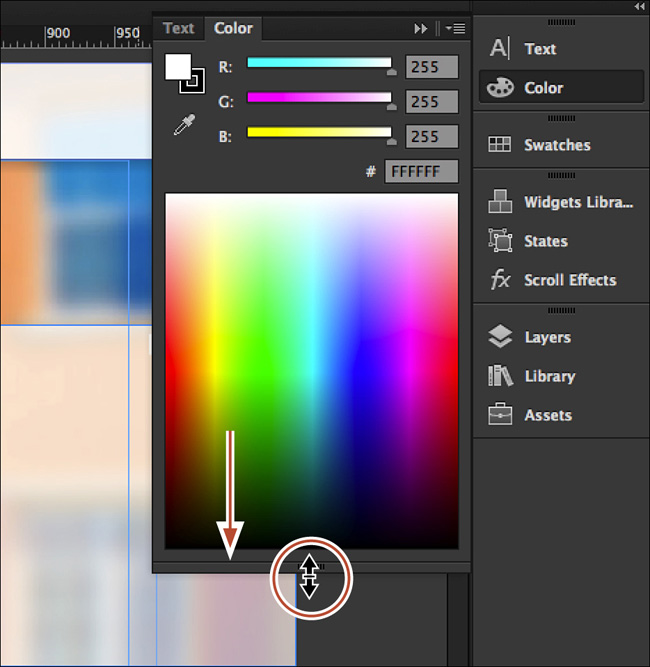
4. Now click the Color panel icon or label. Notice that a new panel group appears and that the panel group that contained the Library panel collapses.
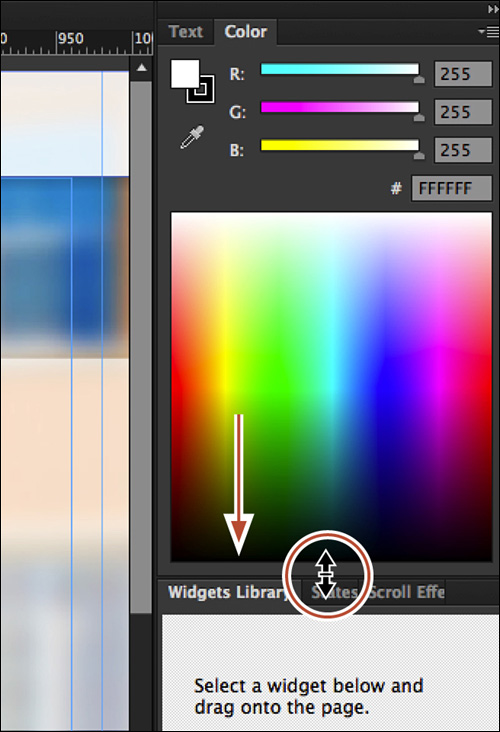
5. Click and drag down the gripper bar at the bottom of the Color panel to resize the panel, showing more of the color spectrum.
![]() Tip
Tip
To find a hidden panel, choose the panel name from the Window menu. A check mark to the left of the panel name indicates that the panel is already open and in front of other panels in its panel group. If you choose a panel name that is already selected in the Window menu, the panel and its group are hidden.
6. Click the Color panel icon (or panel tab) to collapse the panel group.
![]() Tip
Tip
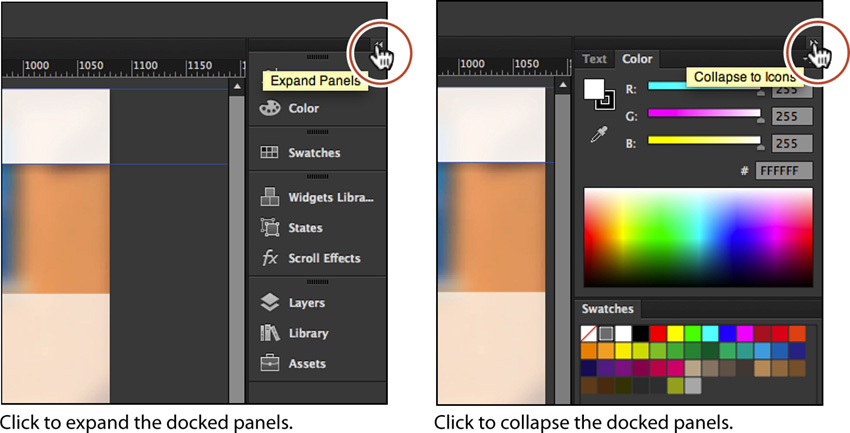
To expand or collapse the panel dock, you can also double-click the panel dock title bar at the top.
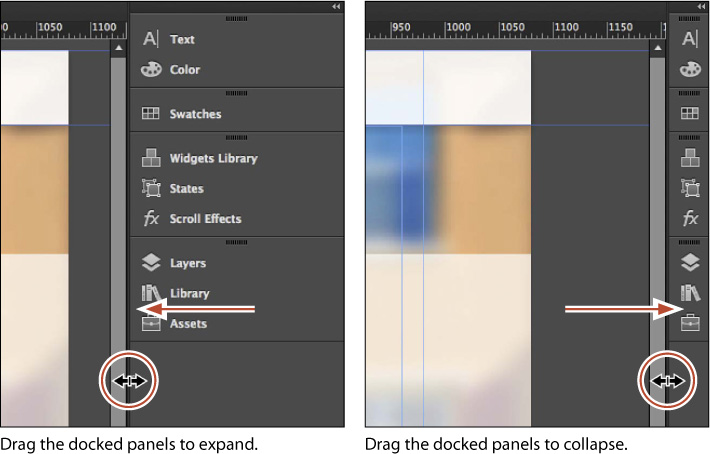
7. Click the double arrow at the top of the dock to expand the panels.
8. Click the double arrow again to collapse the panels.
Use this method to show more than one panel group at a time.
9. To increase the width of all the panels in the dock, drag the left edge of the docked panels to the left. To decrease the width, click and drag the left edge of the docked panels to the right until the text for each panel name disappears.
![]() Tip
Tip
Press Tab to hide all panels. Press Tab again to show them all again. You can hide or show all panels except for the Toolbar and Control panel by pressing Shift+Tab to hide or Shift+Tab to show.
Next, you’ll organize the panels to create more room in your workspace.
10. Choose Window > Reset Panels to reset the workspace.
11. Click the double arrow at the top of the dock to expand the panels (show the contents of the panels).
12. Click the Color panel tab to make sure it’s selected. Double-click the panel tab to minimize the panel. Click the Color panel tab again to maximize the panel. This can also be done when a panel is free-floating (not docked).

Editing panel groups
Panel groups can be docked, undocked, and arranged in either collapsed or expanded modes. Next, you’ll resize and reorganize panel groups, which can make it easier to see more important panels.
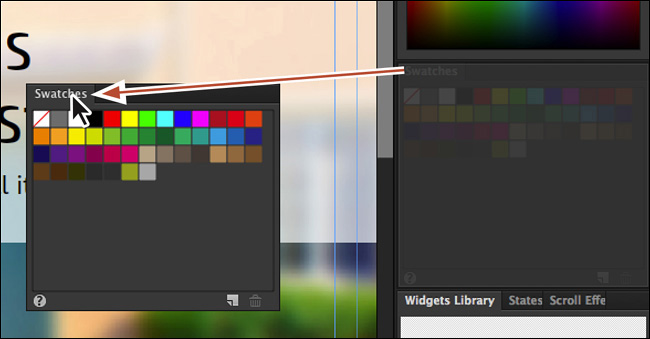
1. Drag the Swatches panel by its tab away from the dock to make it a free- floating panel.
![]() Tip
Tip
To close a free-floating panel, you can right-click a panel tab or title bar (above the tab) and choose Close. You can also right-click a panel tab of a docked panel and choose Close.
Notice that the panel has an X in the upper-left corner on a Mac and in the upper-right corner on Windows for closing the panel, as well as a double arrow in the upper-right corner for collapsing and expanding the panel.
You can also move panels from one panel group to another. By doing so, you can create custom panel groups that contain the panels you use most often.
2. Drag the Swatches panel by the panel tab, the panel title bar, or the area behind the panel tab onto any of the panel tabs in the docked Layers panel group. Release the mouse button when you see a blue line between the panel icons and an outline around the Layers panel group.
3. Click the Color panel tab to show the panel (if necessary), and position the pointer over the bottom of the panel. When the pointer changes to a double arrow, drag down to resize the group.
![]() Note
Note
This step shows how resizing a panel in the dock affects the other panels as well.
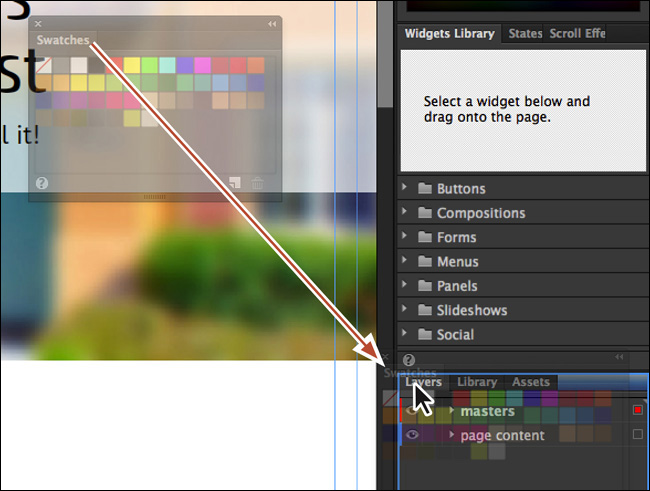
4. With the Color panel showing, drag from the darker gray area to the right of the Color tab to the left, away from the dock. This allows you to remove an entire group from the panel dock.
![]() Note
Note
By default, some panels are already open in the Muse workspace. If there is no check mark next to the panel name in the Window menu, it is in the panel dock and not currently showing.
5. Drag the group from the same dark gray area or the panel title bar back above the Widgets Library panel group. When a single blue line appears, release the mouse button to create a new group in the dock.
Next, you’ll drag a panel from one group to another in the docked panels.
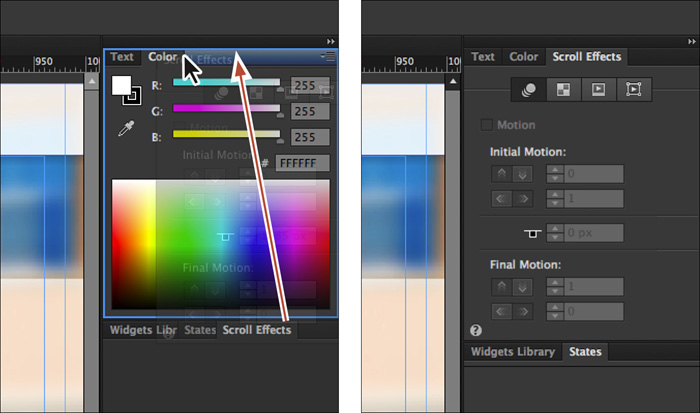
6. Click the Scroll Effects panel tab to show the panel. Drag the panel tab up so that the pointer is over the tabs in the Color panel group. A blue border appears around the Color panel group. Release the mouse button.
Dragging panels into other groups allows you to create new panel groups to suit your work style.
7. Choose Window > Reset Panels to reset the panels to their default locations.
Zooming and panning
When you’re working on pages in a site, you’ll often need to change the magnification level and navigate between pages. In the upper-left corner of the Muse Application window, the Zoom Level menu displays the magnification level, which can range from 5% to 4000%. Using any of the viewing tools and commands affects only the display of the page, not the actual size of the page and contents.
Using the view commands
1. Choose View > Fit Page In Window to display the entire page within the Document window.
![]() Tip
Tip
You can zoom in using the keyboard shortcut Command+= (Ctrl+=).
2. Choose View > Zoom In to enlarge the display of the page.
3. Choose View > Zoom Out to reduce the view of the page.
Each time you use the Zoom In or Zoom Out commands, the view of the page is resized to the closest preset zoom level. A list of the preset zoom levels that appear in the Zoom Level menu is identified by a down arrow next to a percentage.
![]() Tip
Tip
You can zoom out using the keyboard shortcut Command+– (Ctrl+–).
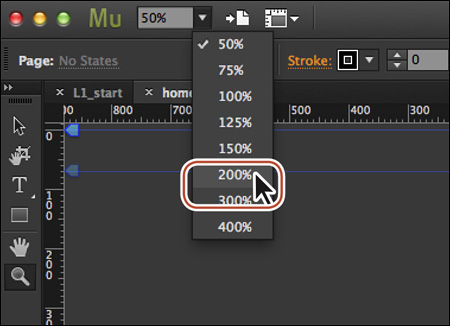
4. Choose 200% from the Zoom Level menu.
5. Select the 200% in the Zoom Level menu field and type 20. Press Return (Enter).
You can type values in the zoom view menu that range from 5% to 4000%. Also, notice that you do not need to type the % symbol.
6. Choose View > Fit Page In Window to display the entire page within the Document window.
The View menu is a quick route to fitting a page to your screen or viewing the page at actual size.
7. Choose View > Actual Size to display the page at actual size.
The page displays at 100%, which is the most accurate reflection of what your site will look like to visitors. The actual size of your page determines how much of it you can see onscreen at 100%.
![]() Tip
Tip
You can also use the keyboard shortcuts Command+0 (Ctrl+0) to fit the page in the Document window.
8. Choose View > Fit Page In Window before continuing to the next section.
![]() Tip
Tip
You can also use the keyboard shortcuts Command+1 (Ctrl+1) to view the page at actual size (100%).
Using the Zoom tool
In addition to the View options, you can use the Zoom tool to magnify and reduce the view of your pages. The Zoom tool allows you to zoom into and out of specific areas of your pages.
1. Click the Zoom tool (![]() ) in the Toolbar to select the tool, and then move the pointer into the Document window. Notice that a plus (+) sign appears at the center of the Zoom tool pointer.
) in the Toolbar to select the tool, and then move the pointer into the Document window. Notice that a plus (+) sign appears at the center of the Zoom tool pointer.
2. Position the Zoom tool over the “Selling Homes Is What We Do Best” text and click once. The artwork displays at a higher magnification.
3. Click two more times, slowly, on the “Some Property Co” logo in the upper-left corner of the page to increase the view again.
Notice that the specific area you clicked is magnified. You can reduce the view of the page in a similar manner.

4. With the Zoom tool still selected, position the pointer over the center of the page and hold down the Option (Alt) key. A minus (–) sign appears at the center of the Zoom tool pointer (![]() ).
).
5. With the Option (Alt) key still pressed, click the artwork twice to reduce the view of the artwork.
6. Choose View > Fit Page In Window.
For a more controlled zoom, you can drag a marquee around a specific area of your artwork. This magnifies only the selected area. You’ll try that next.
7. With the Zoom tool still selected, drag a marquee around the “Selling Homes Is What We Do Best” text. When you see the aqua box, called a marquee, around the area you are dragging, release the mouse button. The area with the marquee surrounding it is now enlarged to fit the Document window.

8. Choose View > Fit Page In Window.
The Zoom tool is used frequently during the editing process to enlarge and reduce the view of the page. For this reason, Muse allows you to select it using the keyboard at anytime without first deselecting any other tool you may be using.
9. Select any other tool in the Toolbar and move the pointer into the Document window.
10. Hold down spacebar+Command (spacebar+Ctrl) to use the Zoom tool. Click or drag to zoom in on any area of the artwork, and then release the keys.
![]() Note
Note
In certain versions of Mac OS, the keyboard shortcuts for the Zoom tool open Spotlight in the Finder. If you decide to use these shortcuts in Muse, you may want to turn off or change those keyboard shortcuts in the Mac System Preferences.
11. To zoom out using the keyboard, hold down Command+Option+spacebar (Ctrl+Alt+spacebar). Click the desired area to reduce the view of the page, and then release the keys.
12. Choose View > Actual Size.
Scrolling through your page
In Muse, much like other Adobe applications, you can use the Hand tool to pan to different areas of a page. Using the Hand tool allows you to push the page around much like you would a piece of paper on your desk.
1. Select the Hand tool (![]() ) in the Toolbar.
) in the Toolbar.
2. Drag up or down in the Document window. As you drag, the page moves with the hand. Notice that at some point you cannot drag any further.
3. Click any other tool except the Text tool (![]() ) in the Toolbar and move the pointer into the Document window.
) in the Toolbar and move the pointer into the Document window.
![]() Note
Note
The spacebar shortcut for the Hand tool does not work when the Text tool is active and your cursor is in text. To access the Hand tool while the Text tool is selected, press Option (Alt).
4. Hold down the spacebar to select the Hand tool temporarily, and then drag the mouse to bring the page back into the center of your view. Release the spacebar.
As with the Zoom tool (![]() ), you can select the Hand tool with a keyboard shortcut without first deselecting the active tool.
), you can select the Hand tool with a keyboard shortcut without first deselecting the active tool.
Preview mode
As you create your designs in Muse, you can use Preview mode to see what your page will look like in a browser (without guides and visual indicators), test your links, view video and widget content, and more. In the case of alternate layouts you create for tablet or phone, you can preview the page in different screen sizes and can toggle between orientations. As you’ll learn in later lessons, you can also preview a page or your entire site in the default browser installed on your computer.
![]() Note
Note
Preview mode does not emulate actual device behaviors for Phone or Tablet alternate layouts. It is intended to get a sense for what the page content will look like in a specific device screen size and orientation. We recommend either testing directly on a device using Edge Inspect or publishing the site to a web host to test it. For more information on Edge Inspect, visit https://creative.adobe.com/products/inspect and http://html.adobe.com/edge/inspect/.
Let’s preview a few of our pages in Preview mode now.
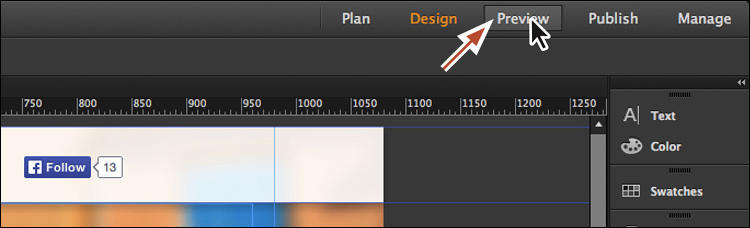
1. With the home [Desktop] page showing in Design mode, click the Preview link in the upper-right corner of the Application window.
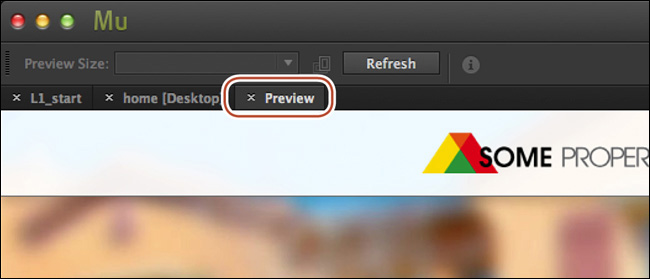
Notice that any animations, such as links, slideshows, videos, and other web media are fully active in Preview mode. Also notice that Preview has a document tab at the top of the Document window (next to the home [Desktop] tab; see the following figure). You can leave Preview open, like you would a page, and simply refresh the preview area by clicking the Refresh button above the Document window.
![]() Note
Note
You may see a warning dialog box indicating missing fonts. Click OK if you see this message.
![]() Tip
Tip
You can also preview a page by pressing Command+P (Ctrl+P).
2. Click the services link in the navigation at the top of the page to display the About page. Preview lets you test links between pages and navigate the site as you would in a browser.
![]() Note
Note
When Design mode is active, clicking the Preview link in the upper-right corner of the Application window previews the active page in the Document window. If you do not have a page open, Muse previews the first page of the site.
3. Press Command+I (Ctrl+I) to return to Design mode.
No matter which page is showing in Preview mode, when you return to Design mode, the same pages that were open remain open.
![]() Note
Note
You cannot make edits to your pages while previewing them. You must return to Design mode to continue editing.
4. Choose File > Close Site to close the .muse site file and any open pages associated with that site, without saving.
Review questions
1. What is a wireframe?
2. Name the modes and briefly describe each.
3. Describe two ways to change a document view.
4. Briefly describe the benefits of working in Preview mode.
Review answers
1. A wireframe is basically the designer’s version of an outline. It shows the site structure and the positioning of such basic elements as the header, footer, sidebar, navigation, and others. The actual design, including fonts, colors, and styles, are typically not visible in a wireframe.
2. The three modes in Muse are Plan, Design, and Preview. Plan mode is used to edit your site map by adding and organizing pages, working with master pages, and creating alternate layouts; Design mode is used to edit your pages; and Preview mode is used to test your site.
3. You can choose commands from the View menu to zoom in or out of a document, or fit it to your Document window; you can also use the Zoom tool in the Toolbar, and click or drag over a document to enlarge or reduce the view. In addition, you can use keyboard shortcuts to magnify or reduce the display of artwork. You can also use the Zoom Level menu to change the magnification of the page within the Document window.
4. Preview mode enables you to see what your page will look like in a browser (without guides), test your links, view video and widget content, view pages optimized for phone and/or tablet (alternate layout pages) at a specific device size and orientation, and more.