
1 Touring Adobe Premiere Pro
Lesson overview
In this lesson, you’ll learn how to do the following:
Perform nonlinear editing.
Understand the standard digital video workflow.
Enhance the workflow with high-level features.
Check out the workspaces.
Customize workspaces.
Set keyboard shortcuts.
This lesson will take about 60 minutes to complete. To get the lesson files used in this chapter, download them from the web page for this book at www.adobepress.com/PremiereCIB2020. For more information, see “Accessing the lesson files and Web Edition” in the Getting Started section at the beginning of this book. Store the files on your computer in a convenient location.
Adobe Premiere Pro is a video-editing system that supports the latest technology and cameras with powerful tools that are intuitive to use and that integrate perfectly with almost every video acquisition source.
Starting the lesson
There is always great demand for high-quality video content, and today’s video producers and editors work in a fast-changing landscape of old and new technologies. Despite rapid change in camera systems and the distribution landscape, particularly with the development of highly influential social media, the goal of video editing is the same: You want to take your source footage and shape it, guided by your original vision, so that you can effectively communicate with your audience.
In Adobe Premiere Pro, you’ll find a video-editing system that supports the latest technology and cameras with powerful tools that are easy to use. These tools integrate perfectly with almost every type of media, including immersive 360° video, as well as a wide range of third-party plug-ins and other post-production tools.
In this lesson, you’ll begin by reviewing the essential post-production workflow that most editors follow, and then you’ll learn about the main components of the Premiere Pro interface and how to create custom workspaces.
Performing nonlinear editing in Premiere Pro
Premiere Pro is a nonlinear editor (NLE). Like a word processing application, Premiere Pro lets you place, replace, and move video, audio, and images anywhere you want in your final edited work. You don’t need to make adjustments in a particular order; you can change any part of your editing project at any time—that’s the nonlinear part of an NLE.
You’ll combine multiple pieces of media, called clips, to create a sequence. You can edit any part of the sequence in any order and then change the contents or move clips so that they play earlier or later. You can blend layers of video together, change the image size, adjust the colors, add special effects, adjust the audio mix, and more.
You can combine multiple sequences and jump to any moment in a video clip or sequence without needing to fast-forward or rewind. In Premiere Pro, organizing the clips you’re working with is like organizing files on your computer.
Premiere Pro supports many media file formats, including XDCAM EX, XDCAMHD 422, DPX, DVCProHD, QuickTime, AVCHD (including AVCCAM and NXCAM), AVC-Intra, DSLR video, and Canon XF. RAW video formats are supported, including media from RED, ARRI, Sony, Canon, and Blackmagic cameras, as well as multiple 360° video and phone camera formats.
![]() Note
Note
The word clip comes from the days of celluloid film editing, where a section of film would be clipped to separate it from a reel.
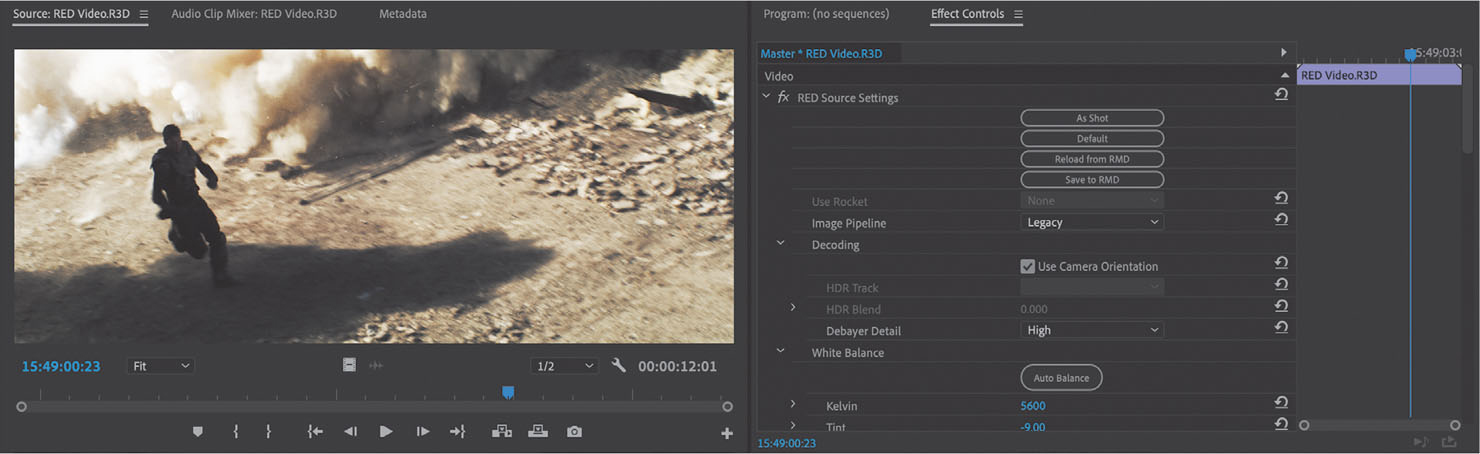
Premiere Pro features native support for RAW media from RED cameras, with settings to control the way the media is interpreted.
Using the standard digital video workflow
As you gain editing experience, you’ll develop your own preferences for the order in which to work on the different aspects of your project. Each stage requires a particular kind of attention and different tools. Also, some projects call for more time spent on one stage than another.
Whether you skip through some stages with a quick mental check or spend hours (even days!) dedicated to perfecting an aspect of your project, you’ll almost certainly go through the following steps:
Acquire your media: This can mean recording original footage, creating new animated content, selecting stock media, or gathering a variety of assets for a project.
Ingest the video to your editing storage: With file-based media, Premiere Pro can read the media files directly, usually with no need for conversion. If you’re working with file-based media, be sure to back up your files to a second location because storage drives sometimes physically fail unexpectedly. With tape-based formats, Premiere Pro (with the appropriate hardware) can convert the video into digital files. For video editing, use fast storage for smooth playback.
Organize your clips: Your project may have a lot of video content to choose from. Invest the time to organize clips into special folders (called bins) in your project. You can add color labels and other metadata (metadata is additional information about the clips) to help keep things organized.
Create a sequence: Selectively combine the parts of the video and audio clips you want into one or more sequences.
Add transitions: Place special transition effects between clips, add video effects, and create composite visuals by placing clips on multiple layers (called tracks in the Timeline panel).
Create or import titles, graphics, and captions: Add them to your sequence along with your video clips.
Adjust the audio mix: Adjust the volume of your audio clips to get the mix just right, and use transitions and effects on your audio clips to improve the sound.
Output: Export your finished project to a file or videotape.
Premiere Pro supports each of these steps with industry-leading tools. A large community of creative and technical professionals is waiting to share their experience and support your development as an editor.
Enhancing the workflow with Premiere Pro
Premiere Pro has easy-to-use tools for video editing. It also has advanced tools for manipulating, adjusting, and fine-tuning your projects.
You may not make use of all of the following features in your first few video projects. However, as your experience and understanding of nonlinear editing grows, you’ll want to expand your capabilities.
It’s beyond the scope of one book to cover all of the expansive creative tools and capabilities of Premiere Pro. Still, this book will enable you to fully post-produce professional projects and get you ready to take your skills to the next level.
The following topics will be covered:
Advanced audio editing: Premiere Pro provides audio effects and editing tools unequaled by any other nonlinear editor. As well as producing a soundtrack mix, you can clean up noisy audio, reduce reverb, make sample-level edits, apply multiple audio effects to audio clips or whole tracks, and use state-of-the-art Virtual Studio Technology (VST) plug-ins.
Color correction and grading: Correct and enhance the look of your footage with advanced color-correction filters, including Lumetri, a dedicated color correction and grading panel. You can make secondary color-correction selections that allow you to adjust isolated colors, adjust selected areas of an image to improve the composition, and automatically match the colors in two images.
Keyframe controls: Premiere Pro gives you precise control over the timing of visual and motion effects without using a dedicated compositing or motion graphics application. Keyframes use a standard interface design; if you learn to use them in Premiere Pro, you’ll know how to use them in all Adobe Creative Cloud products in which they’re available.
Broad hardware support: Choose from a wide range of compatible input and output hardware. Premiere Pro system specifications range from low-cost desktop computers and laptops for video editing up to high-performance workstations that can easily edit 3D stereoscopic, high-definition (HD), 4K, 8K, and 360° video.
GPU acceleration: The Mercury Playback Engine operates in two modes: one that uses only software running in the central processing unit (CPU) for playback and one that uses graphics processing unit (GPU) acceleration for enhanced playback performance. GPU acceleration mode requires a graphics card that meets minimum specifications in your workstation. See helpx.adobe.com/premiere-pro/system-requirements.html for a list of recommended graphics cards. Most modern cards with a minimum of 2 GB of dedicated video memory will work.
Multicamera editing: You can quickly and easily edit productions shot with multiple cameras. Multiple camera sources are displayed in a split-view, and you can choose a camera view by clicking the appropriate screen or using shortcut keys. You can automatically sync multiple camera angles based on clip audio or timecode.
Project management: Manage your media using a single dialog box. View, delete, move, search for, and reorganize clips and bins. Consolidate your projects by copying just the media used in sequences to a single location, and then reclaim storage space by deleting unused media files.
Metadata: Premiere Pro supports Adobe XMP, which stores additional information about media as metadata that multiple applications can access. You can use this metadata to locate clips or communicate important information, such as preferred takes or copyright notices.
Creative titles: Create titles and graphics with the Essential Graphics panel. You can also use graphics created in almost any suitable software. For instance, you can import Adobe Photoshop files as flattened images or as separate layers that you can combine or animate selectively. You also can import and adjust Adobe After Effects motion graphics templates.
Advanced trimming: Use dedicated trimming tools to make precise adjustments to the start and end of clips in sequences. Premiere Pro provides quick, easy trimming keyboard shortcuts, as well as advanced on-screen trimming tools to make complex timing adjustments to multiple clips.
Media encoding: Export your sequence to create a media file that is perfect for your needs. Use the advanced features of Adobe Media Encoder to create copies of your finished sequence in multiple formats, based on presets or your own detailed specifications. You can apply color adjustments, timing changes, and information overlays during export, as well as upload media to social media platforms in a single step.
360° video for VR headsets: Edit and post-produce 360° video footage using a special VR Video display mode that lets you see specific regions of the picture, or view both your video and your edited clips via a VR headset, allowing a more natural and intuitive editing experience. Dedicated visual effects that meet the unique demands of 360° video are included.
Expanding the workflow
Although you can work with Premiere Pro as a stand-alone application, it is also a team player. Premiere Pro is part of Adobe Creative Cloud, which means you have access to several other specialized tools.
Understanding the way these software components work together will improve your efficiency and give you more creative freedom.
Including other applications in the editing workflow
Premiere Pro is a versatile video and audio post-production tool, but it’s just one component of Adobe Creative Cloud—Adobe’s complete print, web, and video environment that includes video-focused software for the following:
High-end 3D motion effects creation
Complex text animation generation
Layered graphics production
Vector artwork creation
Audio production
Media management
To incorporate one or more of these features into a production, you can use other components of Adobe Creative Cloud. The software set has everything you need to produce advanced, professionally finished videos.
Here’s a brief description of the other components:
Premiere Rush: Intuitive mobile and desktop editing tool that can produce projects compatible with Premiere Pro for advanced finishing.
Adobe After Effects: The popular tool of choice for motion graphics, animation, and visual effects artists.
Adobe Character Animator: A tool for creating advanced animation with natural movement for 2D puppets using your webcam for face tracking.
Adobe Photoshop: The industry-standard image-editing and graphics-creation product. You can work with photos, video, and 3D objects to prepare them for your project.
Adobe Audition: The powerful system for audio editing, audio cleanup and sweetening, music creation and adjustment, and multitrack mix creation.
Adobe Illustrator: Professional vector graphics-creation software for print, video, and the Web.
Adobe Media Encoder: A tool that allows you to process files to produce content for any screen directly from Premiere Pro, After Effects, and Audition.
Adobe Dynamic Link: A cross-product technology that enables you to work in real time with media, compositions, and sequences shared between After Effects, Audition, and Premiere Pro.
Exploring the Adobe Creative Cloud video workflow
Your Premiere Pro and Creative Cloud workflow will vary depending on your production needs. Here are a few scenarios:
Use Photoshop to touch up and apply effects to still images and layered image compositions from a digital camera, a scanner, or a video clip. Then use them as source media in Premiere Pro. Changes made in Photoshop update in Premiere Pro.
Send clips directly from the Premiere Pro timeline to Adobe Audition for professional audio cleanup and sweetening. Changes made in Audition update in Premiere Pro.
Send an entire Premiere Pro sequence to Adobe Audition to complete a professional audio mix, including compatible effects and level adjustments; the session can contain video so you can compose and adjust levels in Audition based on the action.
Using Dynamic Link, open video compositions from After Effects in Premiere Pro. Apply special effects, add animation, and add visual elements in After Effects. Adjustments made in After Effects appear in Premiere Pro immediately.
Use After Effects to create motion graphics templates that are directly editable in Premiere Pro. Dedicated controls allow specific types of changes to be made while retaining the original look and feel of the template.
Use Adobe Media Encoder to export video projects in multiple resolutions and codecs for display on websites, display via social media, or archiving. You can use the built-in presets, effects, and social media support to upload directly from Premiere Pro to social media platforms.
Naturally, most of this book focuses on workflows involving only Premiere Pro. However, sidebars will explain ways to include Adobe Creative Cloud components in your workflows for additional effects work and finishing.
Touring the Premiere Pro interface
It’s helpful to begin by getting familiar with the editing interface so you can recognize the tools as you work with them in the following lessons. To make it easier to configure the user interface, Premiere Pro includes workspaces. Workspaces quickly configure the various panels and tools onscreen in ways that are helpful for particular activities, such as editing, special effects work, or audio mixing.
You’ll begin by taking a brief tour of the Editing workspace. You won’t need any files for this tour, but in most of the exercises in this book, you’ll use a Premiere Pro project from this book’s companion DVD (or downloaded lesson files if you are using the eBook). Before you continue, make sure you’ve copied all the lesson folders and contents to your computer storage.
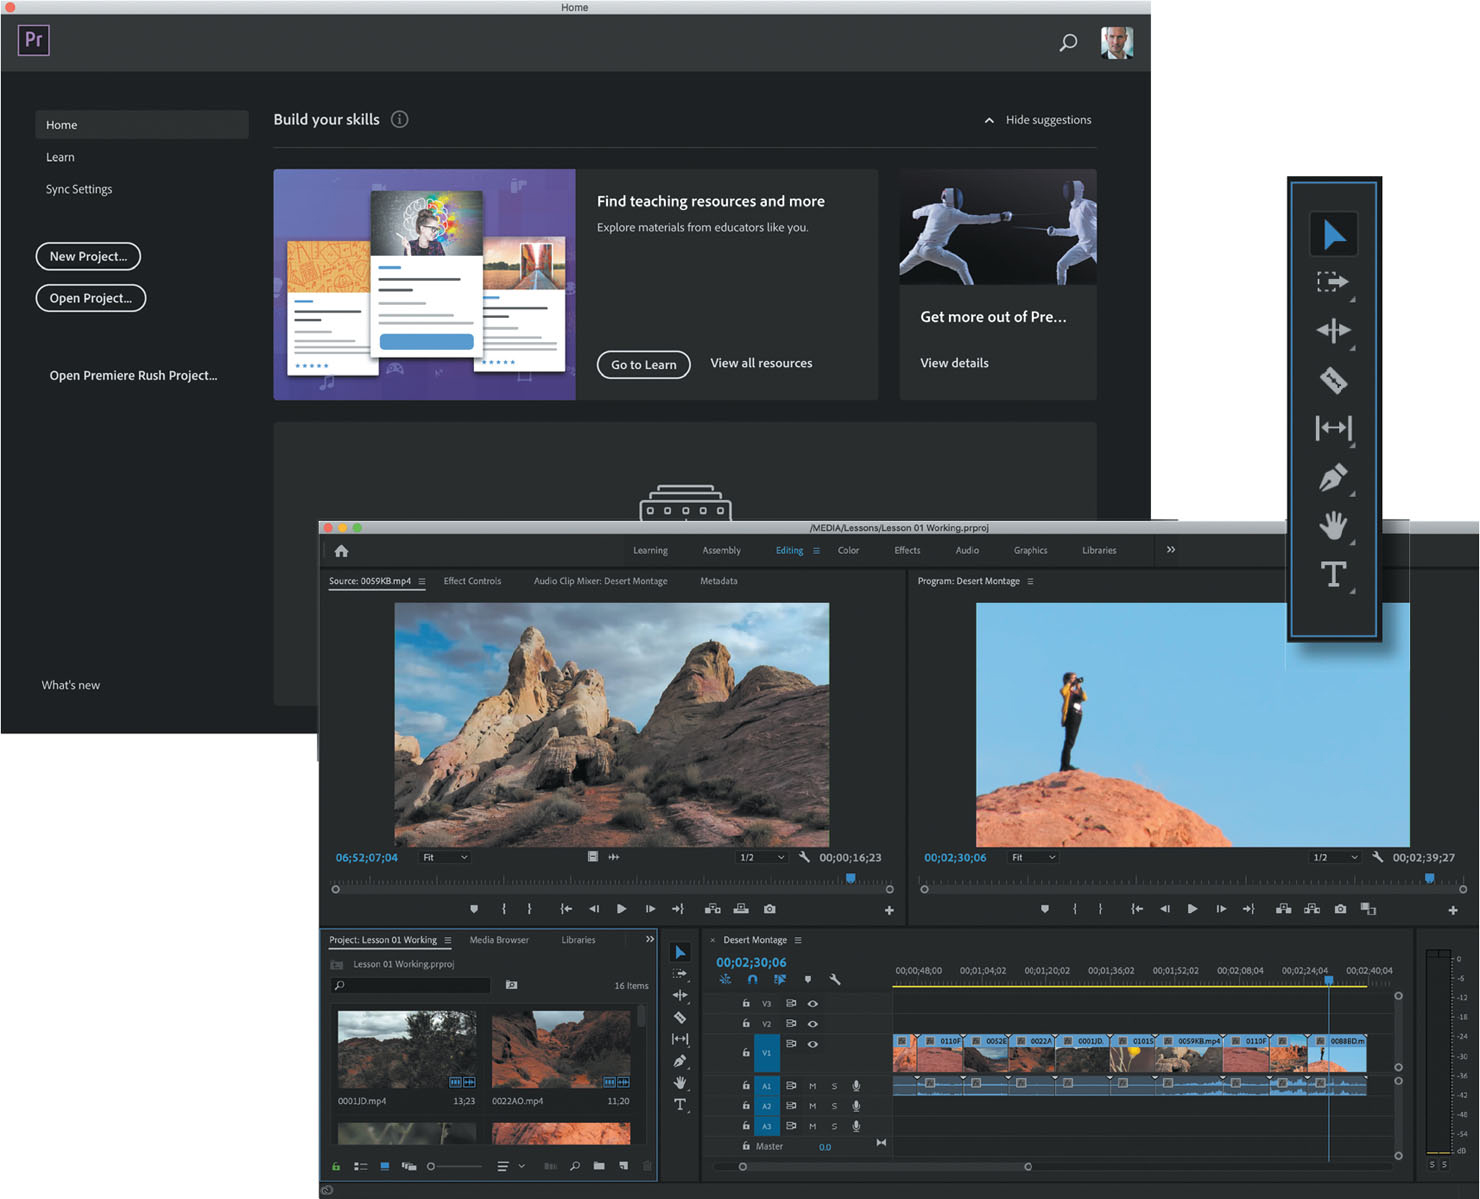
Next, launch Premiere Pro. The Home screen appears.
The first few times you launch Premiere Pro, the Home screen shows links to online training videos that will help you get started.

The Home screen shows links to online training videos when you first start using Premiere Pro.
If you have opened projects previously, a list will appear in the middle of the Home screen. You can hover the pointer over a recent item to see the project file location in a pop-up window. As your list of recent projects gets longer, the links to online training videos are removed to make room for the list.

A Premiere Pro project file contains all your creative decisions for a project, links (referred to as clips) to your selected media files, sequences made by combining those clips, special effects settings, and more. Premiere Pro project files have the extension .prproj.
Whenever you work in Premiere Pro, you will be making adjustments to a project file. You need to create a new project file or open an existing one to use Premiere Pro.
There are a few important buttons on the Home screen, some of which look like text but can actually be clicked (look out for text that works as a button in the Premiere Pro interface):
New Project creates a new empty project file. You can name a Premiere Pro project file anything you like, and it’s a good idea to choose a name that will be easy to identify later (in other words, avoid using the name “New Project”).
Open Project enables you to open an existing project by browsing your storage drive for the project file. You can also double-click an existing project file in the macOS Finder or Windows Explorer to open it in Premiere Pro.
Home takes you back to this screen if you have clicked Sync Settings or Learn.
Sync Settings allows you to synchronize your user settings across multiple computers.
Open Premiere Rush Project opens an existing Premiere Rush project in Premiere Pro. Any projects you created with Premiere Rush will be available here, as long as you used the same login as for Premiere Pro.

Try opening an existing project:
Click Open Project.
In the file navigation dialog box that appears, navigate to the Lessons folder; then double-click the Lesson 01.prproj project file to open the first lesson. Leave the file open for the next exercise.

![]() Note
Note
It’s best to copy all the lesson assets to your computer storage drive and leave them there until you complete this book; some lessons use assets from previous lessons.
After you open an existing project file, a dialog box may open asking where a particular media file is. This will occasionally happen when the original media files are saved on a storage drive (or drive letter) different from the one you’re using. You’ll need to tell Premiere Pro where the file is.
In the dialog box that prompts you to link the media file, you’ll see a list of missing items, with the first already highlighted. Select Locate, at the bottom right.
At the top of the Locate File dialog box you’ll see Last Path (that’s the last known location for the file) and Path (that’s the current location you have browsed to).
Using the folders on the left, navigate to the Lessons/Assets folder, and click Search at the bottom right. Premiere Pro will locate the missing file and highlight it on the right side of the window. Select the file, and click OK. Premiere Pro will remember this location for other missing files and relink them automatically without your needing to link each one individually.
Hands on: Edit your first video
The first series of exercises walks you through editing a simple video. You’ll get hands-on experience using the principal features of Premiere Pro.
Because you are going to make changes to the project file, you’ll start by saving a new version. Then to ensure the steps described here match your screen you’ll reset the user interface of Premiere Pro to its default configuration. After that, you’ll learn about the main editing tools and user interface features in Premiere Pro.
With Lesson 01.prproj open in Premiere Pro, choose File > Save As. Save a copy of the project with the name Lesson 01 Working.prproj.
Choose Window > Workspaces > Editing to make sure the Editing workspace is selected (see “Exploring workspaces” for more information on workspaces).
Choose Window > Workspaces > Reset To Saved Layout to reset the workspace to the default settings.
This project contains a number of video clips. Some have already been edited into a sequence, in the Timeline panel (for more information about panels, see “Exploring workspaces”).

 Note
NoteUnlike other panels, the Timeline panel does not include its own name in its heading. Instead, the name of the current sequence is shown. In this case, it’s Desert Montage.
Let’s add some more clips to the sequence.
Along the top edge of the Timeline panel, named Desert Montage in this project, you’ll see a horizontal bar with a series of numbers.
Connected to that bar, you’ll see a blue playhead control. This works the same way as the playhead when viewing video files in a player.
Drag the playhead to the far left of the Timeline panel.
Press the spacebar to play the current sequence. The Program Monitor (top-right corner of the Premiere Pro interface) displays the contents of the sequence.

In the lower-left corner of the Premiere Pro interface, you will find the Project panel, which contains clips and other assets associated with the current project. The panel name includes the current project name, Project: Lesson 01 Working.
The lower-left corner of the Project panel holds a series of buttons that you use to select different ways of viewing the contents of the panel.

Click Icon View
 if it’s not selected.
Icon View makes it easier to identify clips based on their contents.
Drag the clip with the name 0001JD.mp4 from the Project panel into the existing sequence. Be sure to drag it by the thumbnail image and not the clip name.

Release the new clip at the end of the existing series of clips already in the Timeline panel.
If you line up the new clip with an existing clip, you’ll notice the new clip jumps into position, exactly aligning with the end of the existing clip.
Scroll down in the Project panel and find several more clips of your choice to add to the sequence. Drag each one into the sequence.
At any time, you can position the Timeline playhead at the beginning of the sequence (at its left end), and use the spacebar to start and stop playback.
When you have finished adding several clips to the sequence, play through it to see the result.
You can place the Timeline playhead anywhere and play from that moment.

There is one item you will not be able to drag from the Project panel into the sequence: the sequence itself, called Desert Montage.

The Project panel contains both clips and sequences. You can have as many sequences as you like in a project, and they are identifiable by the icon in the lower-right corner of the clip thumbnail ![]() , which shows multiple clips combined.
, which shows multiple clips combined.
Congratulations! You edited a sequence!
Exploring workspaces
The Premiere Pro interface is divided into panels. Each panel has a particular purpose. For example, the Effects panel lists all the effects available for you to apply to clips, while the Effect Controls panel gives you access to the settings for those effects.
A workspace is a preset arrangement of panels, organized to make particular tasks easier. There’s one for editing, another for working on audio, and another for making color adjustments, for example.
Every panel is accessible from the Window menu, but workspaces are a quicker way to access several panels and have them laid out exactly as you need them, in a single step.
Before you begin, make sure you’re using the default Editing workspace by choosing the Editing workspace option in the Workspaces panel at the top of the screen.
Then, to reset the Editing workspace, click the small panel menu icon ![]() next to the Editing option on the Workspaces panel, and choose Reset To Saved Layout.
next to the Editing option on the Workspaces panel, and choose Reset To Saved Layout.
If the Workspaces panel is not visible, choose Window > Workspaces > Editing. Then reset the Editing workspace by choosing Window > Workspaces > Reset To Saved Layout.
Notice the various workspace names displayed in the Workspaces panel.

Think of these words as buttons you can click; it’s an elegant design feature you’ll discover in a number of areas in Premiere Pro.
If you’re new to nonlinear editing, the default Editing workspace might look like a lot of buttons and menus. Don’t panic. Things become simpler when you know what the buttons are for. The interface is designed to make video editing easy, so commonly used controls are immediately accessible.
Workspaces consist of panels, and you can save space by gathering several panels into a panel group. The names of all the panels in the group are displayed across the top. Click a panel name to bring that panel to the “front” of the group.

When many panels are combined, you may not be able to see all their names. If this is the case, a list of all the panels in the group becomes available. Click the chevron in the upper-right corner of the panel group to access a panel.

You can display any panel by choosing it from the Window menu, so if you can’t locate a panel, just look there.
The principal elements are shown here.

Some of the important interface elements include:
Project panel: This is where you organize your clips (these are the links to your media files), sequences, and graphics in bins. Bins are similar to folders—you can place one bin inside another for more advanced organization of your project.
Timeline panel: This is where you’ll do most of your creative work. You view and work on sequences (the term for video segments edited together) in the Timeline panel. One feature of sequences is that you can nest them (place one sequence inside another sequence). Combining sequences this way, you can break up a production into manageable chunks or create unique special effects.
Tracks: You can layer—or composite—video clips, images, graphics, and titles on an unlimited number of tracks. Video and graphic clips on upper video tracks cover whatever is directly below them on the timeline. Therefore, you need to give clips on higher tracks some form of transparency or reduce their size if you want clips on lower tracks to show.
Monitor panels: Use the Source Monitor (on the left) to view and select parts of clips (your original footage). To view a clip in the Source Monitor, double-click its icon in the Project panel. The Program Monitor (on the right) shows the contents of your current sequence, displayed in the Timeline panel.
Media Browser: This important panel allows you to browse your storage to find media to import into your project. The Media Browser is especially useful for file-based camera media and RAW files.
Libraries: This panel gives access to custom Lumetri color Looks, motion graphics templates, graphics, and shared libraries for collaboration. It also acts as a browser and store for the Adobe Stock service. For more information, go to helpx.adobe.com/premiere-pro/using/creative-cloud-libraries.html.
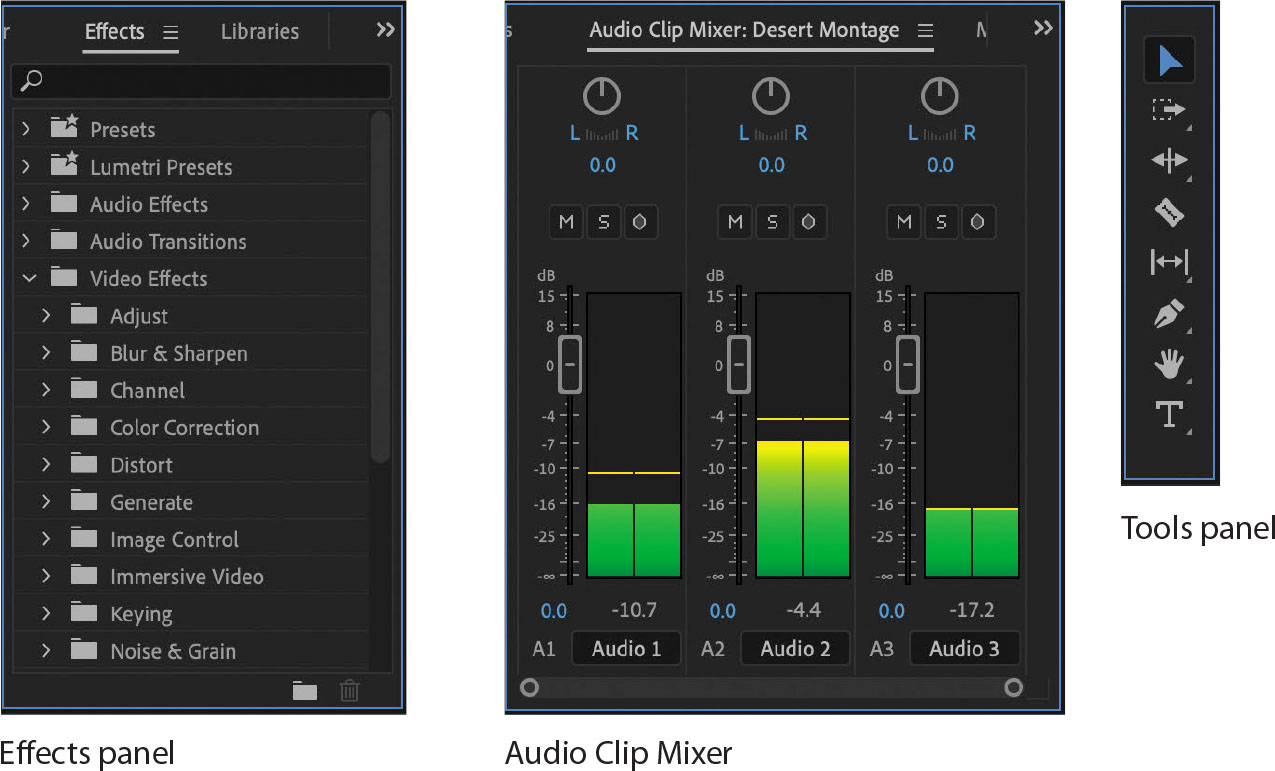
Effects panel: This panel contains most of the effects you will use in your sequences, including video filters, audio effects, and transitions. Effects are grouped by type to make them easier to find, and there’s a search box at the top of the panel. Once applied, the controls for these effects are displayed in the Effect Controls panel.
Effect Controls panel: This panel displays the controls for any effects applied to a clip you select in a sequence or open in the Source Monitor or Project panel. If you select a visual clip in the Timeline panel, Motion, Opacity, and Time Remapping controls are automatically available. Most effect settings are adjustable over time.
Audio Clip Mixer: This panel is based on audio production studio hardware, with volume sliders and pan controls. There is one set of controls for each audio track on the timeline. The adjustments you make are applied to audio clips. There’s also an Audio Track Mixer for applying audio adjustments to tracks rather than clips.
Tools panel: Each icon in this panel gives access to a tool that performs a specific function in the Timeline panel. The Selection tool is context-sensitive, which means it changes function depending on where you click. If your pointer doesn’t work as you expect, check to see you have the right tool selected.
Several tools have a small triangle icon, indicating a menu of additional tools. Press and hold on one of these tools to see the menu of options.
Info panel: The Info panel displays information about any item you select in the Project panel or any clip or transition you select in a sequence.
History panel: This panel tracks the steps you take and lets you easily undo a series of changes. When you select a previous step, all steps that followed it are also undone.
Most panels display their name at the top. When a panel is displayed, the name is underlined, and the panel is outlined in blue. Most panels have a menu next to the name ![]() with options particular to that panel.
with options particular to that panel.
Using the Learning workspace
Although other workspaces are intended to facilitate a particular creative activity, the Learning workspace is an exception. This workspace includes the Learn panel, which offers tutorials to help you build familiarity with the Premiere Pro interface and learn important skills.
You will find the tutorials complement the exercises in this book well, and you may find it helpful to practice first with this book and then explore the relevant tutorials to reinforce the lessons you have learned.
Customizing a workspace
In addition to choosing between the default workspaces, you can adjust the position and location of panels to create a workspace that works best for you. You can create multiple workspaces for different tasks.
As you change the size of a panel or panel group, other panels change size to compensate.
Every panel within a panel group is accessible by clicking its name.
All panels are movable—you can drag a panel from one group to another.
You can drag a panel out of a group to become a separate floating panel.
You can double-click the name of any panel to toggle it between full screen and its original size.
![]() Note
Note
Though “panel” is not part of their names, both the Source Monitor and Program Monitor behave exactly like other panels.
In this exercise, you’ll adjust some panels and save a customized workspace.
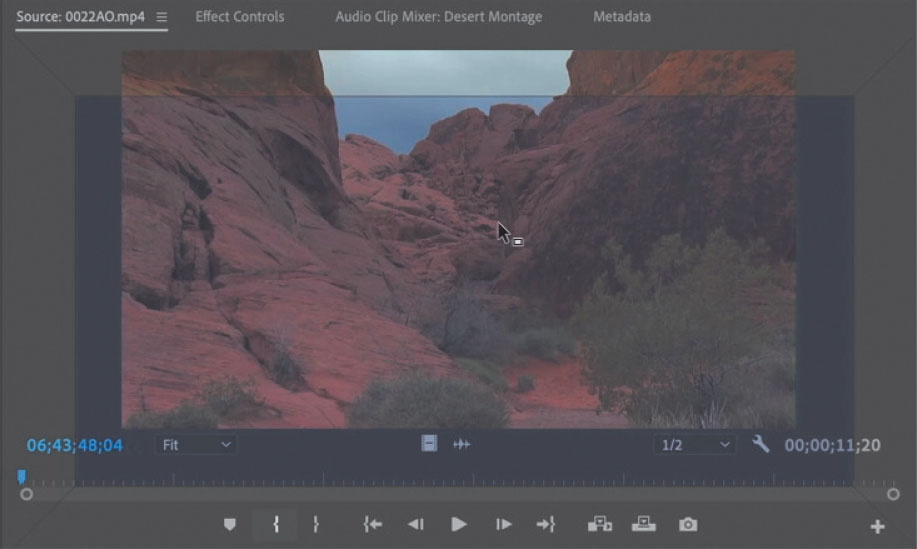
In the Project panel, double-click the icon for the clip 0022AO.mp4 to open it in the Source Monitor. Be careful to double-click the icon and not the name, as clicking the name selects the text, making it ready for renaming.
Position your pointer on the vertical divider between the Source Monitor and the Program Monitor. The pointer will change to a double-headed arrow
 when it’s in the right position. Drag left and right to change the sizes of those panels. You can choose to have different sizes for your video displays, which is useful at different stages of post-production.
Now place the pointer on the horizontal divider between the Program Monitor and the Timeline panel. The pointer will change when it’s in the right position. Drag up and down to change the sizes of these panels.
Click the name of the Media Browser panel (at its top), and drag it to the middle of the Source Monitor until a blue rectangle appears (the drop zone). Release the Media Browser panel to dock it in that panel group.
The drop zone is displayed as a center highlight.
Drag the Effects panel (which is grouped with the Project panel by default) by its name to a point just inside the right edge of its current panel group until a blue trapezoid-shaped area (the drop zone) is highlighted. Release the Effects panel; it is now alone in its own panel group. Remember, if you can’t see the Effects panel, you can choose it from the Window menu.

When you drag a panel by its name, a drop zone is displayed. If the highlighted drop zone is a rectangle, the panel will go into the selected panel group as an additional tab when it’s dropped. If the drop zone is a trapezoid, it will create a new panel group.
You can also pull panels into their own floating windows.
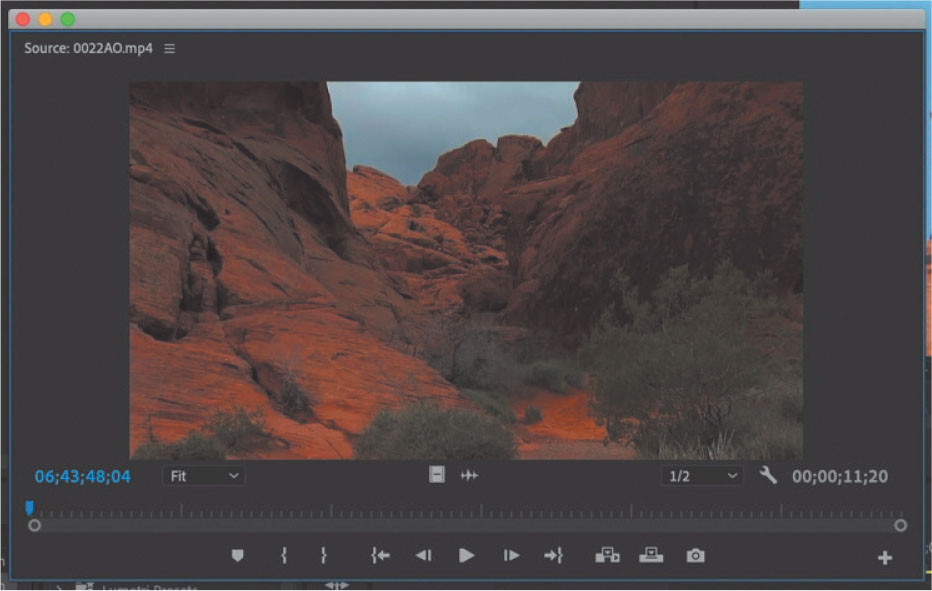
Command-drag (macOS)/Ctrl-drag (Windows) the Source Monitor out of its panel group.
NoteYou may need to resize a panel to see all of its controls.
Drop the Source Monitor anywhere, creating a floating panel. You can resize the panel by dragging a corner or a side.
As you gain experience, you might want to create and save the layout of your panels as a customized workspace. To do so at any time, choose Window > Workspaces > Save As New Workspace. Type a name, and click OK.
If you want to return a workspace to its default layout, choose Window > Workspaces > Reset To Saved Layout, or double-click the workspace name.
Now, to return to a recognizable starting point, choose the preset Editing workspace, and reset it.
![]() Note
Note
You can change the font size in the Project panel by choosing Font Size from the panel menu and then choosing Small, Medium (Default), Large, or Extra Large from the submenu.
Introducing preferences
The more you edit video, the more you’ll want to customize Premiere Pro to match your specific needs. Premiere Pro has several types of settings. For example, panel menus ![]() , which are accessible by clicking the menu button next to a panel name, have options that relate to each panel, while individual clips in a sequence have settings you can access by right-clicking them.
, which are accessible by clicking the menu button next to a panel name, have options that relate to each panel, while individual clips in a sequence have settings you can access by right-clicking them.
The panel name, displayed at the top of each panel, is often referred to as the panel tab. This is the area of a panel you use to move the panel, almost like a handle you can grab the panel by.
There are also application-wide user preferences, which are grouped into a single dialog box for easy access. Preferences will be covered in depth as they relate to the individual lessons in this book. Let’s look at an example.
![]() Note
Note
When opening the Preferences dialog box, it’s not too important which category you choose first, as you can always quickly switch to another.
Choose Premiere Pro > Preferences > Appearance (macOS) or Edit > Preferences > Appearance (Windows).
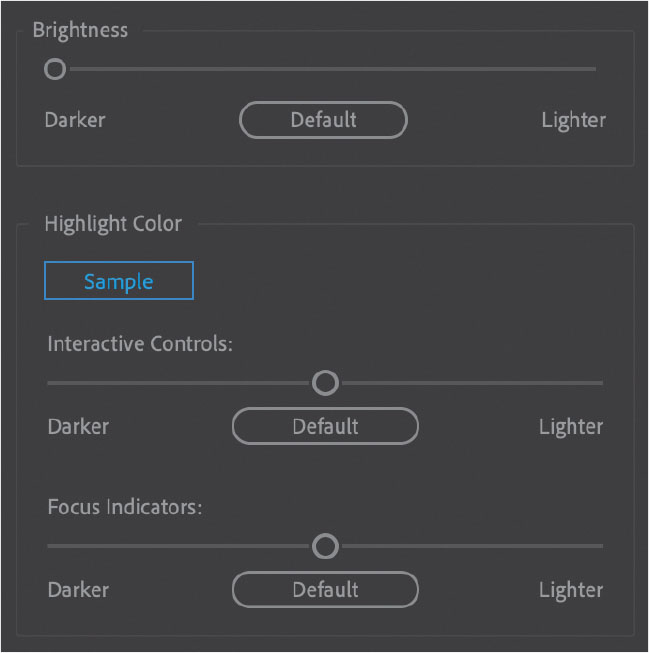
Drag the Brightness slider to the right to suit your preference.
The default brightness is a dark gray to help you see colors correctly (human perception of color is influenced by surrounding colors). There are additional options for controlling the brightness of interface highlights.
Experiment with the Interactive Controls and Focus Indicators brightness sliders. The difference in the onscreen sample is subtle, but adjusting these sliders can make quite a big difference to your editing experience.
Set all three settings to Default by clicking the Default buttons when you have finished.
Switch to the Auto Save preferences by clicking Auto Save on the left.
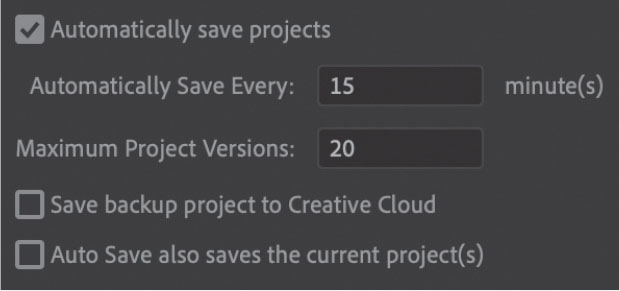
Imagine if you had worked for hours and then there was a power outage. If you hadn’t saved recently, you’d have lost a lot of work. With these options, you can decide how often you would like Premiere Pro to save an automated backup of your project file and how many versions you would like to keep in total. Auto Save backups have the date and time they were created added to the filename.
 Note
NotePremiere Pro allows you to open multiple projects at the same time. For this reason, you’ll see options for “project(s)” rather than just “project.”
Project files are small relative to media files, so it’s usually fine to increase the number of project versions without any impact on system performance.
You’ll notice there’s an option to save a backup project to Creative Cloud.
This option creates an additional backup of your project file in your Creative Cloud Files folder. If you suffer a total system failure while working, you can log in to any Premiere Pro editing system with your Adobe ID to access the backup project file and quickly carry on working.
There’s also the option Auto Save Also Saves The Current Project(s). When this option is selected, saving or auto saving will also create an “emergency project backup”—a project file that is a copy of the current version, with the same name. If you have a sudden system failure (like a power outage), this is the file you will most likely want to open to continue working.
Click Cancel to close the Preferences dialog box without applying any changes.
Using and setting keyboard shortcuts
Premiere Pro makes extensive use of keyboard shortcuts. These are usually faster and easier than clicking—once you know them. Several keyboard shortcuts are shared universally by nonlinear editing systems. The spacebar, for example, starts and stops playback—this even works on some websites.
Some standard keyboard shortcuts come from celluloid film-editing traditions. The I and O keys, for example, are used to set In and Out points for footage and sequences: These special marks indicate the start and end of a desired section and were originally drawn on celluloid directly.
Many shortcuts are available, but not all are assigned a key by default. This allows flexibility when setting up your editing system.
Choose Premiere Pro > Keyboard Shortcuts (macOS) or Edit > Keyboard Shortcuts (Windows).

It can be a little daunting to see the number of keyboard shortcuts available, but by the end of this book you will recognize most of the options displayed here. Some keyboard shortcuts are specific to individual panels.
Open the Commands menu at the top of the dialog box, and choose the name of a panel to create or edit shortcuts for that panel.
Specialized keyboards are available with shortcuts printed on them and color-coded keys. These make it easier to remember commonly used shortcuts.
Click outside of the search box (to deselect it), and try pressing Command (macOS) or Ctrl (Windows).
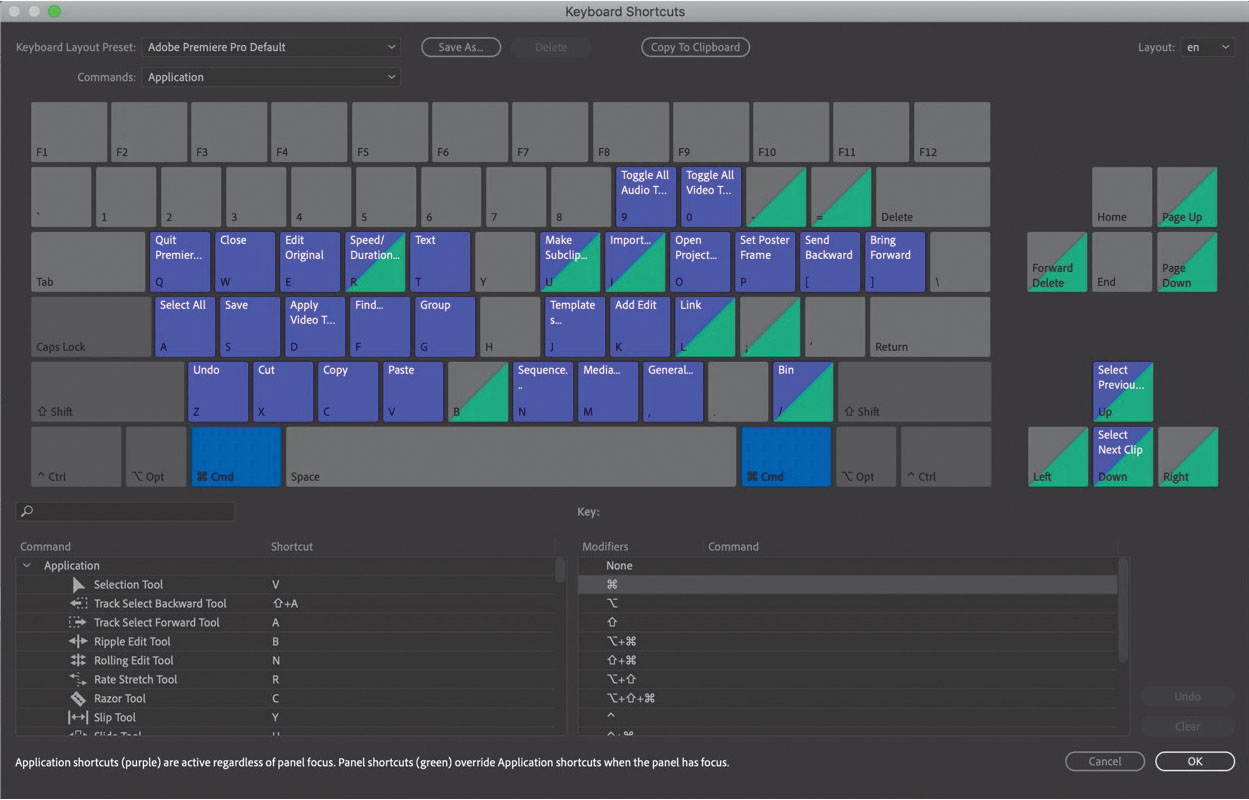
The keyboard shortcut display updates to show the results of combining the modifier key with the character keys. Notice there are many keys without shortcuts assigned when you use a modifier key. These are available for you to assign your own shortcuts.
Try combinations of modifier keys including Shift+Option (macOS) or Shift+Alt (Windows). You can set keyboard shortcuts with any combination of modifier keys.
If you press a character key, or character and modifier key combination, that particular shortcut information is displayed.
The list at the bottom left of the Keyboard Shortcuts dialog box includes every option you can assign to a key—it’s a long list, but there’s a search box at the top to help you find the option you want.
To change a keyboard shortcut do one of the following:
Having found an option you would like to assign to a key, drag it from the list onto the key you would like to use in the upper part of the dialog box. If you hold modifier keys while performing this operation, they’ll be included in the shortcut.
To remove a shortcut, click the key, and choose Clear at the bottom right.
For now, click Cancel.
Close the project file and save any changes.
Moving, backing up, and syncing user settings
User preferences include a number of important options. The defaults work well in most cases, but it’s likely you’ll want to make a few adjustments over time. For example, you might prefer the interface to be brighter than the default.
Premiere Pro includes the option to share your user preferences between multiple computers: When installing Premiere Pro, you will enter your Adobe ID to confirm your software license. You can use the same ID to store your user preferences in Creative Cloud, allowing you to synchronize and update them from any installation of Premiere Pro.
You can sync your preferences while on the Home screen by choosing Sync Settings. You can also sync your preferences while working with Premiere Pro by choosing Premiere Pro > Sync Settings > Sync Settings Now (macOS) or File > Sync Settings > Sync Settings Now (Windows).
Now close Premiere Pro by choosing Premiere Pro > Quit Premiere Pro (macOS) or File > Exit (Windows).
If a dialog box appears asking if you would like to save changes you have made, click Yes.
Review questions
1. Why is Premiere Pro considered a nonlinear editor?
2. Describe the basic video-editing workflow.
3. What is the Media Browser used for?
4. Can you save a customized workspace?
5. What is the purpose of the Source Monitor and the Program Monitor?
6. How can you drag a panel to its own floating panel?
Review answers
1. Premiere Pro lets you place video clips, audio clips, and graphics anywhere in a sequence; rearrange items already in a sequence; add transitions; apply effects; and do any number of other video-editing steps in any order that suits you. You’re not tied to a particular line of action.
2. Transfer media to your computer; create a sequence by combining video, audio, and still-image clips in the Timeline panel; add effects and transitions; add text and graphics; mix your audio; and export the finished product as a video file.
3. The Media Browser allows you to browse and import media files without having to open an external file browser. It’s particularly useful when you’re working with file-based video camera footage because you can easily preview footage.
4. Yes. You can save any customized workspace by choosing Window > Workspaces > Save As New Workspace.
5. You can view and select part of your original footage in the Source Monitor and use the Program Monitor to view the contents of the current sequence displayed in the Timeline panel.
6. Drag the name of the panel while holding down Command (macOS) or Ctrl (Windows).