
Now that some important general security concepts are out of the way, it’s time to talk about web security. If you’re already creating websites with some version of ASP.NET, many of the concepts presented in this chapter will be familiar to you. However, it is important to read this chapter fully before moving on to the next, because in order to understand web security, you need to understand how the web works at a deeper level than a typical web developer would.
Making a Connection
When talking web security, I might as well start where all web sessions must start – establishing a connection. It is easy to take this for granted because browsers and web servers do most of the heavy lifting for us, but understanding how connections work will be important for several topics later on.
HTTPS, SSL, and TLS
If you have HTTP in some places but not others, you might forget to add HTTPS in some important places.
Any sensitive information that is stored in a cookie added via an HTTPS request will be sent via any HTTP calls made, making them vulnerable to man-in-the-middle attacks.
Google (and likely other search engines) have started using HTTPS as a factor in search rankings. In other words, if you don’t have HTTPS set up, your website will show up lower in its search results.1
Chrome2 and Firefox have started showing sites rendered in HTTP as insecure.
Certificates are relatively cheap and HTTPS is easy to set up, so there is really no reason to use unencrypted HTTP anymore.
In other books, you may see the acronym “SSL,” which stands for Secure Socket Layer, for this same concept. I will avoid doing that in this book because it is a little ambiguous. When Netscape first implemented HTTPS in 1995, they had a protocol called SSL to encrypt traffic. In 1999, Transport Layer Security, or TLS, was developed as a more secure version of SSL. But the term “SSL” has stuck, even when referring to “TLS.” Therefore, I will use “HTTPS” when talking about encrypted web traffic, “SSL” to mean the now-obsolete technology replaced by TLS, and “TLS” when talking about HTTPS and attempting to make a distinction between TLS and SSL.
Connection Process
If you’re going to dive into security seriously, you will need to know how connections are made between computers. Since this book is targeted to web developers, I won’t go into all of the socket- and hardware-specific connections that occur because you don’t really need to know them. If you’re interested in learning more, though, I suggest you do a search with your favorite search engine for the OSI model.
- 1.
Your browser sends a “client hello” message to the server. Included in this request are the cryptographic algorithms that are supported by your computer and a nonce (a number that is used only once), which is used to help prevent replay attacks.
- 2.The server responds with a “server hello”. In this message are
The cryptographic algorithms the server chose to use for the connection
The session ID
The server’s digital certificate
A nonce from the server
- 3.
The client verifies the server’s certificate. Steps in this process include checking whether the certificate authority is one of the trusted authorities in the client’s certificate store and checking the certificate against a Certificate Revocation List (CRL).
- 4.
The client sends the server an encryption key. This key is encrypted with the server’s public key. Since the only thing that can decrypt this key is the server’s private key, we can be reasonably certain that that key is safe from theft or modification by eavesdroppers.
- 5.
The server decrypts the encryption key. Now the client and server have agreed on a symmetric encryption algorithm and key to use in all future communications.
Now a secure connection is established between the two machines, along with a cryptographic key to ensure that any future communications will be encrypted. While it doesn’t affect your programming, note that the servers use symmetric encryption to communicate – your certificates and asymmetric encryption are only used to establish the connection.
Anatomy of a Request
Simple GET request
Most of the information seen in Listing 4-1 is out of your control as a web programmer, so I won’t go over the contents of this in detail. The most important thing to note is that the browser sends a lot more information to the server than merely asking for data from a particular URL. There are several name/value pairs here in the form of headers. For now, just note that these headers exist, though I’ll highlight two.
The User-Agent sends a great deal of information about the client, from operating system (in this case, Windows NT 10.0) to browser (Chrome, version 73). If you ever wonder how services like Google Analytics can tell what browser your users are using, look at the User-Agent. There is no information here that you can depend on as a web developer, though. While browsers usually send you reliable information here, realistically people could send whatever they want to.
In the last line, you can see a Cookie being passed to the server. Cookies are a topic worthy of their own discussion, so for now, I’ll define “cookie” as a way to store information on the client side between requests and move on.
Simple POST request
Like the GET request in Listing 4-1, the first line in the POST in Listing 4-2 specifies the method and the location. Cookies are here too, though we’ll talk about the Antiforgery cookie when we talk about preventing CSRF attacks. The most important thing to look at here is the request body, which starts with “Input.Email=” and ends with “Input.RememberMe=false”. Because the data being passed to the server is in the body of the message, it is hidden from most attempts to listen to our communications (again assuming you’re using HTTPS) because it is encrypted.
You may be wondering: why is the data sent in “name=value” format instead of something that developers are more used to seeing, like XML or JSON? The short answer is that while you can send data in many different formats, including XML and JSON, browsers tend to send data in form-encoded format, which comes in “name=value” pairs. You can certainly send data in other formats, but you will need to specify that in the Content-Type header if you do. In this case, the browser decided to send form data in URL-encoded form format, which happens to be encoded data sent as “name=value”.
GET with data in query string
The problem in Listing 4-3 is that it is much easier for a hacker attempting a man-in-the-middle attack to see data in the query string vs. a request body.
- 1.
Browsers, not our code or our servers, are most responsible for determining what goes into these headers.
- 2.
For most usages, it is our responsibility to ensure that these requests are set up in the most secure way possible. While browsers are ultimately responsible for this content, there are many ways in which browsers merely do what we, as web programmers, ask them to do.
- 3.
Anyone who wants to change these headers for malicious purposes can do so fairly easily. Trusting this information enough to have a functional website but not trusting it so much that we’re vulnerable to attacks is a difficult, but necessary, line to find.
We’ll come back to how requests work later in the book, but for now, let’s move on to what responses look like.
Anatomy of a Response
Basic HTTP response
You should notice in Listing 4-4 that the HTML content that the browser uses to create a page for the user is returned in the body of the message. The second most important thing here is the first line: HTTP/1.1 200 OK. The “200 OK” is a response code, which tells the browser generally what to do with the request, and is (mostly) standard across all web languages. Since you should already be familiar with HTML, let’s take a moment to dive into the response codes.
Response Codes
There are many different response codes, some more useful than others. Let’s go over the ones that you as a web developer use on a regular basis, either directly or indirectly.
1XX – Informational
These codes are used to tell the client that everything is ok, but further processing is needed.
100 Continue
Tells a client to continue with this request.
101 Switching Protocols
The client has asked to switch protocols and the server agrees. If you use web sockets with SignalR, you should be aware that SignalR sends a 101 back to the browser to start using web sockets, whose addresses typically start with ws:// or wss:// instead of http:// or https://, for communication.
2XX – Success
As can be expected by the “Success” title, these codes mean that the request was processed as expected. There are several success codes, but only one we really need to know about.
200 OK
Probably the most common response, used when you want to return HTTP content.
3XX – Redirection
3XX status codes mean that a resource has moved. Unfortunately, as we’ll see in a moment, what these statuses mean in the HTTP/1.1 specification vs. how they’ve been implemented in ASP.NET are two different things.
301 Moved Permanently
If a page or website has moved, you can use a 301 response to tell the client that the resource has moved permanently.
302 Found
Example of a 302 Found used as a redirect
In the example in Listing 4-5, the framework is, among other things, asking the browser to navigate to /identity/account/manage/index.
The HTTP/1.1 specifications state that another code, not the 302 Found, should be used for redirections like this.3 But ASP.NET has been doing this since the beginning and there’s no reason to expect it to change now.
303 See Other
This is the status code that should be used in the 302 example according to the specifications, since it’s the status code that should be used whenever a POST has been processed and the browser should navigate to a new page.
307 Temporary Redirect
This is the status code that should be used whenever you state in code to redirect to a new page that isn’t the direct result of a POST processing. ASP.NET Core uses 302s instead.
4XX – Client Errors
These error codes indicate that there is a problem with the request that the client sent.
400 Bad Request
The request itself has an error. Common problems are malformed data, request too large, or Content-Length doesn’t match actual length.
401 Unauthorized
What ASP.NET does instead of sending a 401 when you need to log in
As in the example with the 302 code in Listing 4-5, Listing 4-6 shows the result after I attempted to access /identity/account/manage/index, but instead of a 401 saying I was unauthorized, I got a 302 redirecting me to the login page, except with a query string parameter “ReturnUrl” which tells the login page where to go after successful authentication.
You may be tempted to fix this, but be aware that by default, if IIS sees a 401, it prompts for username and password expecting you to log in using Windows authentication. But this probably isn’t what you want since you probably want the website, not IIS, to handle authentication. You can configure IIS, of course, but unless you have a lot of time on your hands or are building a framework for others to use, leaving this functionality in place will be fine in most cases.
403 Forbidden
This is designed to be used when a request is denied because of a system-level permission issue, such as read access forbidden or HTTPS is required.
404 Not Found
404 Not Found response
If a browser sees something similar to Listing 4-7, it normally shows the user its generic “Page Not Found” page.
5XX – Server Errors
These error codes indicate that there was a problem processing the response from the server’s side. In reality, 4XX error codes could really indicate a server problem, and 5XX error codes could have resulted from a bad request, so the difference between a 4XX error and a 5XX error shouldn’t be taken too seriously.
500 Internal Server Error
500 Internal Server Error response
Listing 4-8 looks like a normal 200 response in most respects, with the same headers and HTML content, except by returning a 500 instead of a 200, the browser knows that an error occurred. I will cover error handling later in the book.
502 Bad Gateway
The textbook definition for this code is that the server received a bad response from an upstream server. I’ve seen this happening most often when .NET Core has not been installed or configured completely on the hosting server.
503 Service Unavailable
This is supposed to mean that the server is down because it is overloaded or some other temporary condition. In my experience, this error is only thrown in a .NET site (Core or otherwise) when something is badly wrong and restarting IIS is the best option.
Headers
Now that I’ve talked about status codes, I’ll dig a little bit further into the other headers that are (and aren’t) returned from ASP.NET Core. First, let’s look at the headers that are included by default.
Default ASP.NET Headers
302 Found response to show headers
Let’s take a look at the headers in Listing 4-9 that are most important:
Cache-Control, Pragma, and Expires
With “no-cache” as the value for Cache-Control and Pragma and an Expires value in the past, the ASP.NET headers are attempting to tell the browser to get content fresh each time.
Server
This header specifies that the server is using Kestrel (i.e., ASP.NET Core) as a web server. Browsers don’t need this information, but it is useful for Microsoft to know what the adoption rates are for its products. This also qualifies as an information leakage issue, since it is also useful information for hackers to know they can focus on the attacks they believe will work best against .NET Core.
Set-Cookie
I will talk about cookies later in the chapter. For now, this is where the server tells your browser what data to store, what its name is, when it expires, etc.
X-Powered-By
Like the Server value, this only serves to provide Microsoft (and others) usage statistics while giving hackers more information than they need to attack your site.
X-SourceFiles
This header is only used when you’re pointing a browser to a .NET Core site hosted in localhost.4 We can safely ignore it.
There are more headers that we, as developers concerned about security, need to know about. Some are easier to add than others.
Security Headers Easily Configured in ASP.NET
The following are headers that aren’t automatically included in requests, but are easily configured within ASP.NET.
Strict-Transport-Security
max-age: Specifies the number of seconds the request to use HTTPS is valid. The value most used is 31536000, or the number of seconds in a year.
includeSubDomains: Is an optional parameter that tells the browser whether the header applies to subdomains.
To make sure that browsers always use HTTPS instead of HTTP, you need to redirect any HTTP requests to the HTTPS version first and then include this header. This is true for two reasons. First, browsers typically ignore this header for HTTP requests. Think of this header as telling the browser to “keep using HTTPS,” not “use HTTPS instead.” Second, most computers when connecting via an API (i.e., when a browser is not involved) will happily ignore this header. Please use this header, just don’t depend on it for setting up HTTPS everywhere.
Cache-Control
public: The response can be stored in any cache, such as the browser or a proxy server.
private: The response can only be stored in the browser’s cache.
no-cache: Despite the name, this does NOT mean that the response cannot be cached. Instead, it means that the cached response must be validated before use.
no-store: The response should not be stored in a cache.
From a security perspective, know that storing authenticated pages in intermediate caches (i.e., using the preceding “public” option) is not safe, and storing pages with sensitive data is not a good idea, so “no-store” should be used judiciously. Unfortunately, there is a bug in the code, and setting this to “no-store” is harder than it should be in ASP.NET. I’ll show you how to fix this in Chapter 10.
There is a related header called “pragma” that controls caching on older browsers. If you don’t want information cached, setting your pragma to “no-cache” can offer some protection.
Watch out for other places where browsers try to help users out by storing information that they probably shouldn’t. In one example unrelated to headers, browsers will store values entered in text fields. These are usually safe, but you do not want browsers storing sensitive information like social security numbers or credit card numbers. In this particular case, you need to add “autocomplete=’false’” to your input attributes with sensitive data to prevent this data storage. But browsers are constantly looking for ways to make users’ lives easier, and unfortunately, sometimes also less secure.
Security Headers Not in ASP.NET by Default
Here are some more headers that should be added to your website to make it more secure. I’ll show you how to do that later in the book. For now, let’s just define what they are.
X-Content-Type-Options
Setting this to “nosniff” tells browsers not to look at content to guess the MIME type of content, such as CSS or JavaScript. This header is a bit outdated because it only prevents attacks that newer browsers prevent without any intervention on the developer’s part, but most security professionals will expect you to have this set on your website.
X-Frame-Options
deny: Prevents the content from rendering in an iframe
sameorigin: Only allows content to be rendered in an iframe if the domain matches
allow-from: Allows the web developer to specific domains in which the content can be rendered in an iframe
The sameorigin option is the most common in websites I’ve worked with, but I strongly advise you to use deny instead. Iframes generally cause more problems than they solve, so you should avoid them if you have another alternative.
X-XSS-Protection
- 1.
Browser support for this header isn’t all that great.6
- 2.
Setting the Content-Security-Policy header makes this header all but completely obsolete.
What is the Content-Security-Policy header? I’m glad you asked.
Content-Security-Policy
Sample CSP header
default-src: This is telling the browser to accept content from the same domain as the host website, along with the domains www.google.com and www.gstatic.com. The latter two would be necessary if you use Google’s CAPTCHA mechanism to help limit spam submissions to a publicly available form.
script-src: This is not only telling the browser that it is ok to load scripts from the host site, www.google.com and www.gstatic.com, it is telling the browser that it is ok to run inline scripts and to allow calls to JavaScript’s eval(). (The latter two might be necessary for some JavaScript frameworks.)
style-src: This is telling the browser that local stylesheets are ok, but also to allow for inline styles.
frame-src: This is telling the browser to deny loading this resource in any iframe.
So, you can probably gather that you can get fairly granular with whether you allow inline scripts, what domains to allow what content, etc. For a complete list of options, please visit https://content-security-policy.com/. www.cspisawesome.com/ is also a great site that has GUI to walk you through the process of creating a CSP header for your website.
CSP headers are hard to get right. This is especially true if you’re using one or more third-party libraries; third-party scripts tend to break when using a strict Content Security Policy (CSP). You may also run into issues when retroactively applying a CSP header to a legacy site because of inline CSS, inline scripts, etc. Try to avoid making an overly permissive policy to make up for sloppy programming when you can. A restrictive CSP header can help prevent the worst effects from most XSS attacks.
Cross-Request Data Storage
Web is stateless by default, meaning each request to the server is treated as a brand-new request/response cycle. All previous requests have been forgotten. We as web developers, of course, need to have some way of storing some information between requests, since at the very least we probably don’t want to force our users to provide their username and password each and every time they try to do anything. Here is a brief overview of storage mechanisms available to us in ASP.NET Core.
Cookies
302 response showing setting a cookie
Request that shows a cookie value that was set earlier
You’ll notice in Listing 4-12 that the .AspNetCore.Identity.Application cookie is identical (outside of line wrapping issues) between the first response from the server to set the cookie and in requests to the server from the browser.
Cookies, like all other information sent in client requests, can be viewed or tampered with at any time for any reason. Therefore, you should never store secure information in cookies, and you should consider adding something called a digital signature to detect tampering if you absolutely must store something that should not be changed, and even then, know that anyone can see the information in the cookie.
Cookie Scoping
Before we move on to the next type of session data storage, it’s worth going over cookie configuration. There are three settings that you can see from the original set header: path, samesite, and httponly. Let’s take a moment to discuss what these terms mean, because .NET does not create cookies with the most secure options by default.
path
This is the path that the cookie can be used in. For instance, if you have one cookie whose path is “/admin”, that cookie will not be available in other folders in the site.
samesite
If you have the setting as “strict”, then the browser only adds the cookie to the request if the request comes from the same site.
If “lax”, then cookies will always be sent to the server, regardless of where the request came from. Cookies are still only sent to the domain that originated them, though.
Cookies generally default to “lax” if you don’t have this set explicitly.
httponly
This flag tells the browser to avoid making this cookie available to JavaScript running on the page. This can help protect the cookie from being stolen by rogue JavaScript running on the page.
We’ll talk about how to change these settings in .NET Core later in the book.
Session Storage
Like its predecessor, ASP.NET Core allows you to store information in session storage , which is basically a term for setting aside memory space somewhere and tying it to a user’s session. ASP.NET Core’s default session storage location is within the same process that the app runs in, but it also supports Redis or SQL Server as a distributed cache storage location.7
- 1.
Storing session information using the Distributed Memory Cache, the default storage location, is easy to set up but can cause problems with your website. If you are not careful with your storage and/or you have a lot of users, the extra session storage can cause memory demands on your server that it can’t handle, causing instability.
- 2.
In ASP.NET Core, sessions are tied to a browser session, not a user session. To see why this is a problem, imagine this scenario: User A logs into your app and then you store information about user A in session. User A logs out, but leaves the browser open. User B accesses the computer and logs in using their own credentials. Because session is tied to a browser session, user B now has access to user A’s session. Any sensitive information stored for user A is now available to user B.
Especially given the session-per-browser issue, I have a hard time recommending using session for any nontrivial purpose. It’d just be too easy to slip up and expose information you didn’t intend to do.
Hidden Fields
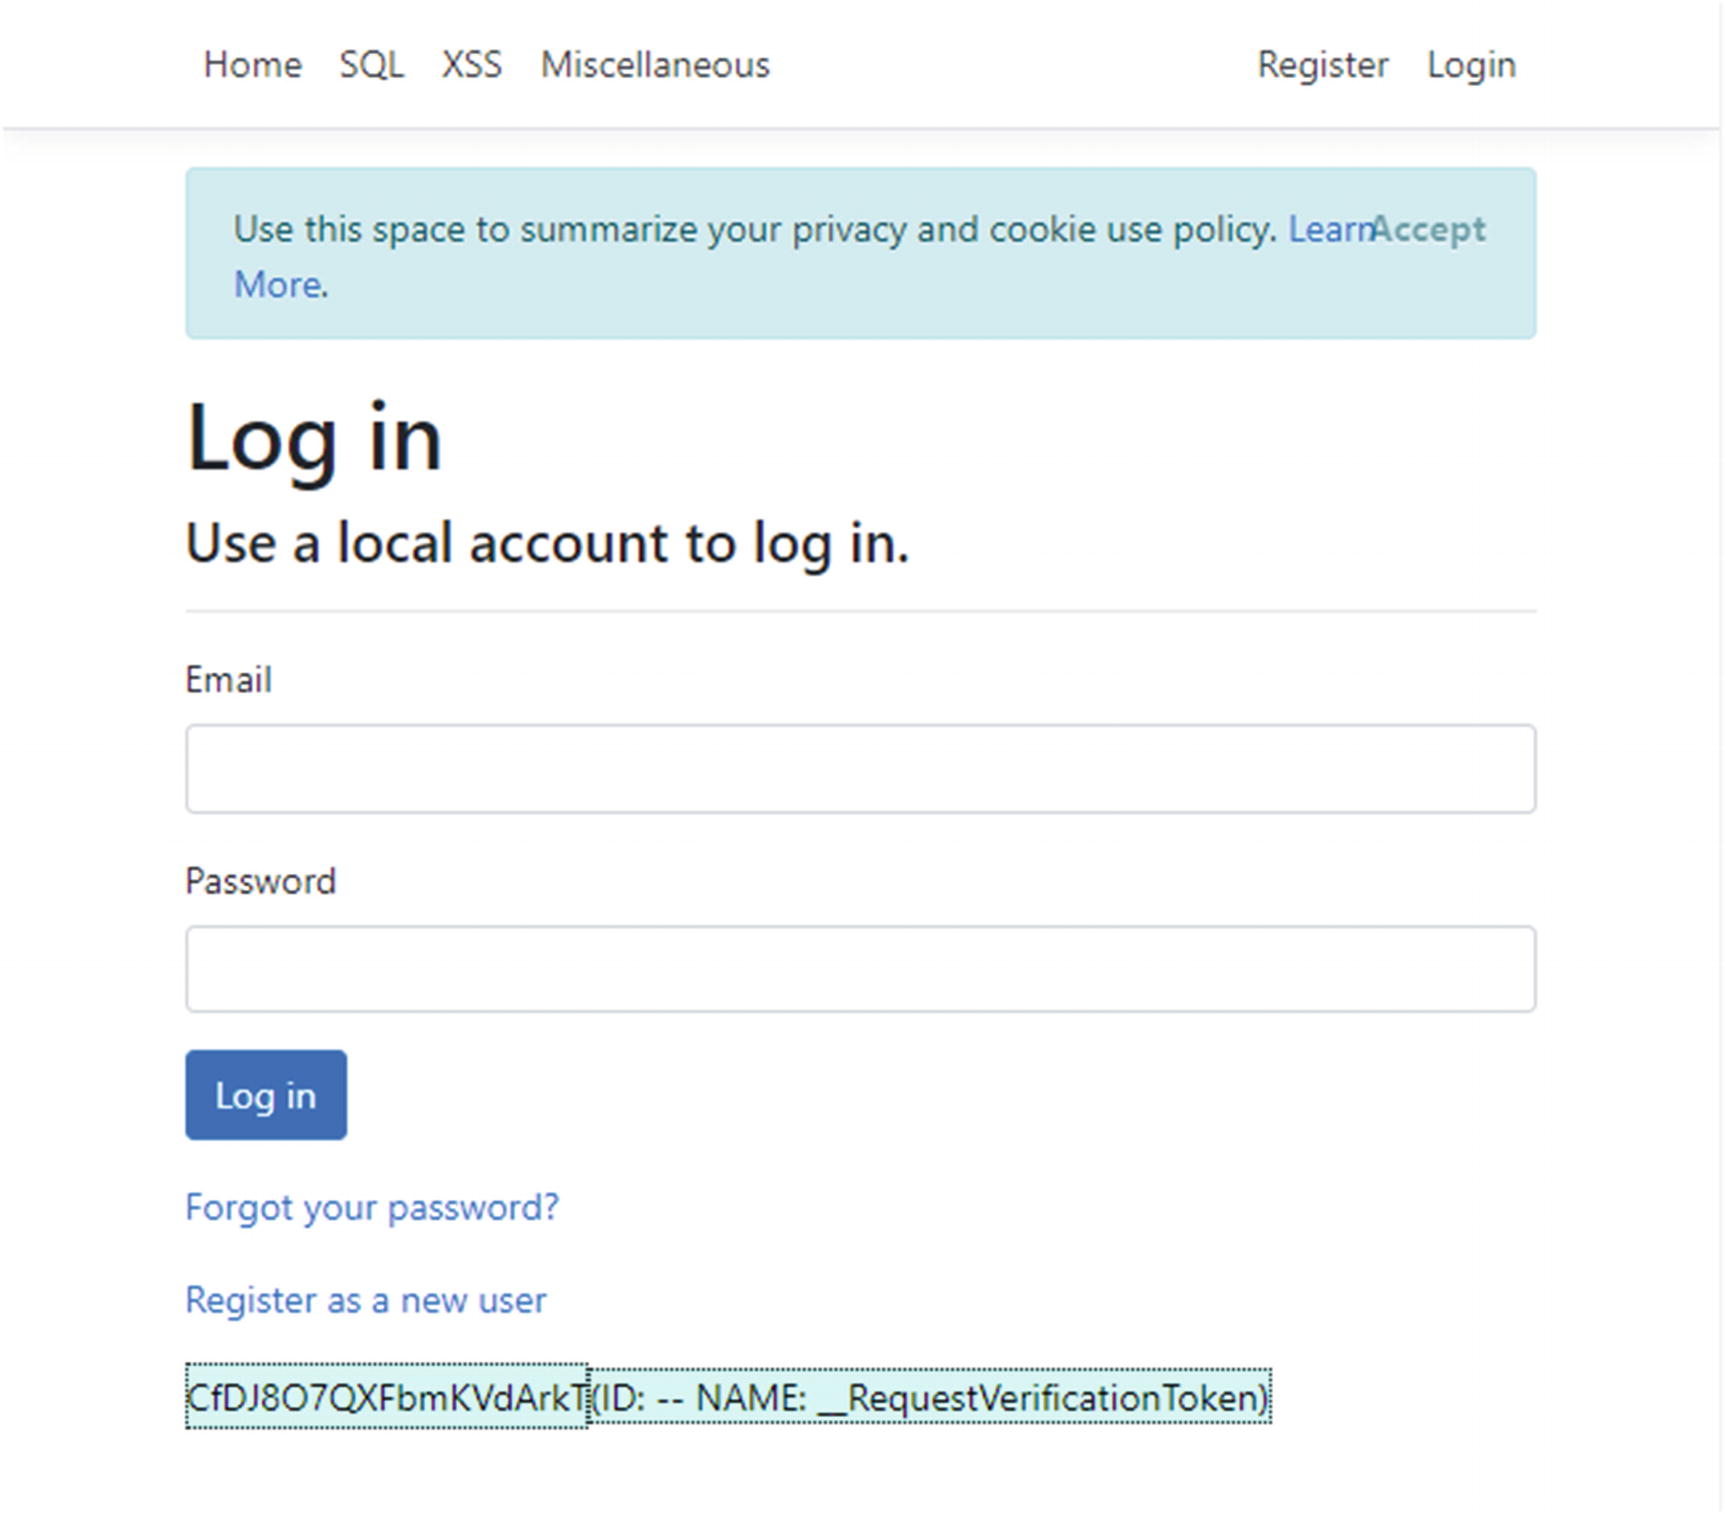
Using the “Edit Hidden Fields” Chrome plugin to see hidden fields on the default login page
- 2.
Listen for traffic between the browser and server and edit as desired. Here is the POST to log in that we showed earlier, this time with just the hidden field highlighted.
POST with hidden field data highlighted
- 3.
Open up the development tools in your browser, find the field, and change it manually.
While there are some uses for hidden fields, they generally should be avoided if you have any other alternative.
HTML 5 Storage
window.localStorage: Data is stored by the browser indefinitely.
window.sessionStorage: Data is stored by the browser until the tab is closed.
These new means to store information are incredibly convenient to use. The problem is that, even if we assume that the browser is 100% secure (which it probably isn’t): if you make any mistake that allows an attacker to execute JavaScript on your page (see “Cross-Site Scripting” in the next chapter), then all of this data is compromised. So, don’t store anything here that isn’t public information.
Cross-Request Data Storage Summary
Unfortunately, as you can see, it’s tough storing cross-request information securely. Every storage method has security issues, and some have scalability issues as well. We’ll address some fixes later in the book, but for now just remember that most of the solutions out there have problems you need to be careful to avoid.
Insecure Direct Object References
It’s likely that you have needed to reference an object ID in your URL, most commonly via a query string (e.g., https://my-site.com/orders?orderId=44) or in the URL itself (e.g., https://my-site.com/orders/detail/44). In some cases, users can access any object that could be referenced, making it irrelevant that this can be changed relatively easily. Other times, though, you want to lock down what a user could potentially see. The example in this paragraph is likely one of the latter – it’s tough to imagine a system where allowing a user to see ALL orders in the system by changing the order ID is desirable behavior.
You need to prevent users from changing the URL to access objects that they normally wouldn’t have access to, but if you forget to implement the preventative measures, you have introduced an Insecure Direct Object Reference (IDOR). This type of vulnerability requires your attention because it is easy to forget during development and easy to miss during testing, but flies under the radar of many security professionals because it is hard to find without specific knowledge of the business rules behind the website being tested.
Burp Suite
Community: A free version that allows you to run a wide variety of attacks against individual web pages
Professional : An affordable product ($399 per year) that includes all the features of the Community edition plus automated scanning
Enterprise : A more expensive product that tracks automated scans
The Community edition is good enough for the vast majority of work in this book, so I suggest you download it here: https://portswigger.net/burp/communitydownload. If you’re running Windows, you can just download and run the installer and the installer will do the rest (including copying the version of Java it needs into the program folder).
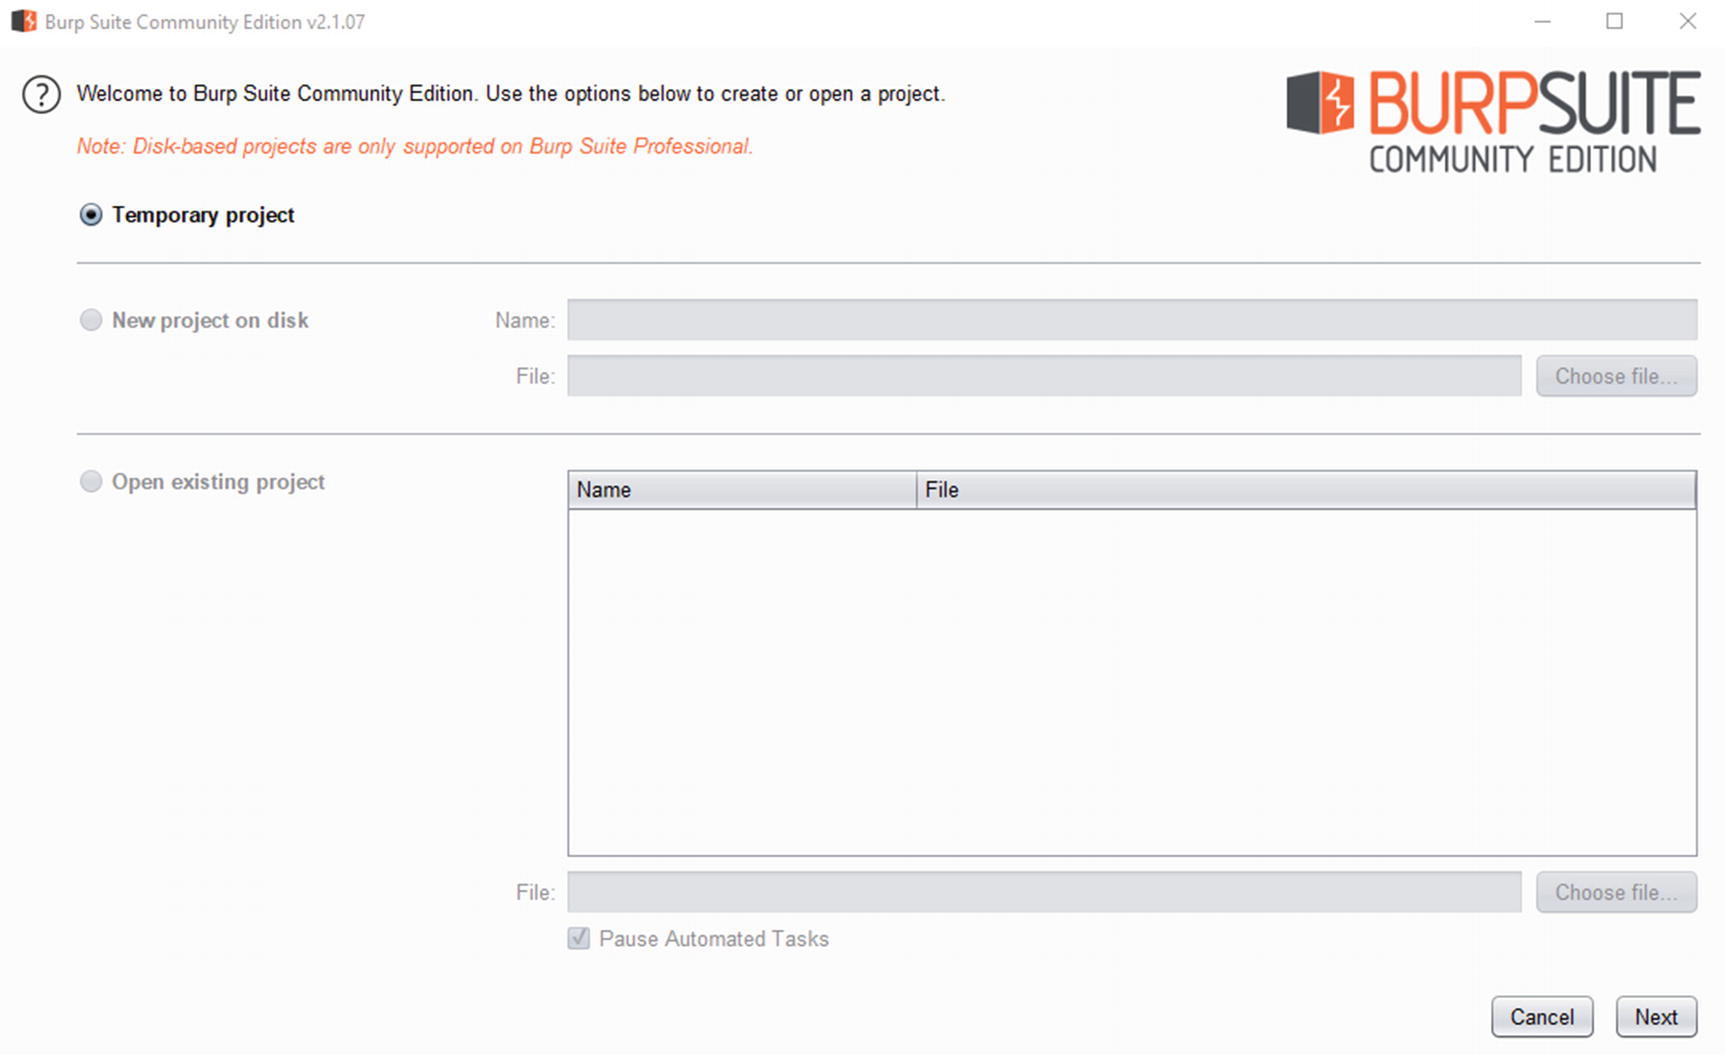
Burp Suite project setup screen

Burp Suite configuration screen

Burp Suite home screen
- 1.
Open Internet Explorer (no, you won’t actually have to use the browser).
- 2.
Click the settings gear in the upper right-hand corner.
- 3.
Click Internet Options.
- 4.
Click the Connections tab.
- 5.
Click LAN settings.
- 6.
Check Use a proxy server for your LAN (These settings will not apply to dial-up or VPN connections).
- 7.
Click the Advanced button.
- 8.
Take note of the current settings – you’ll need to put these back in when you’re done testing.
- 9.
Under HTTP and Secure, use proxy address “localhost” and port “8080”, like the screenshot in Figure 4-5.
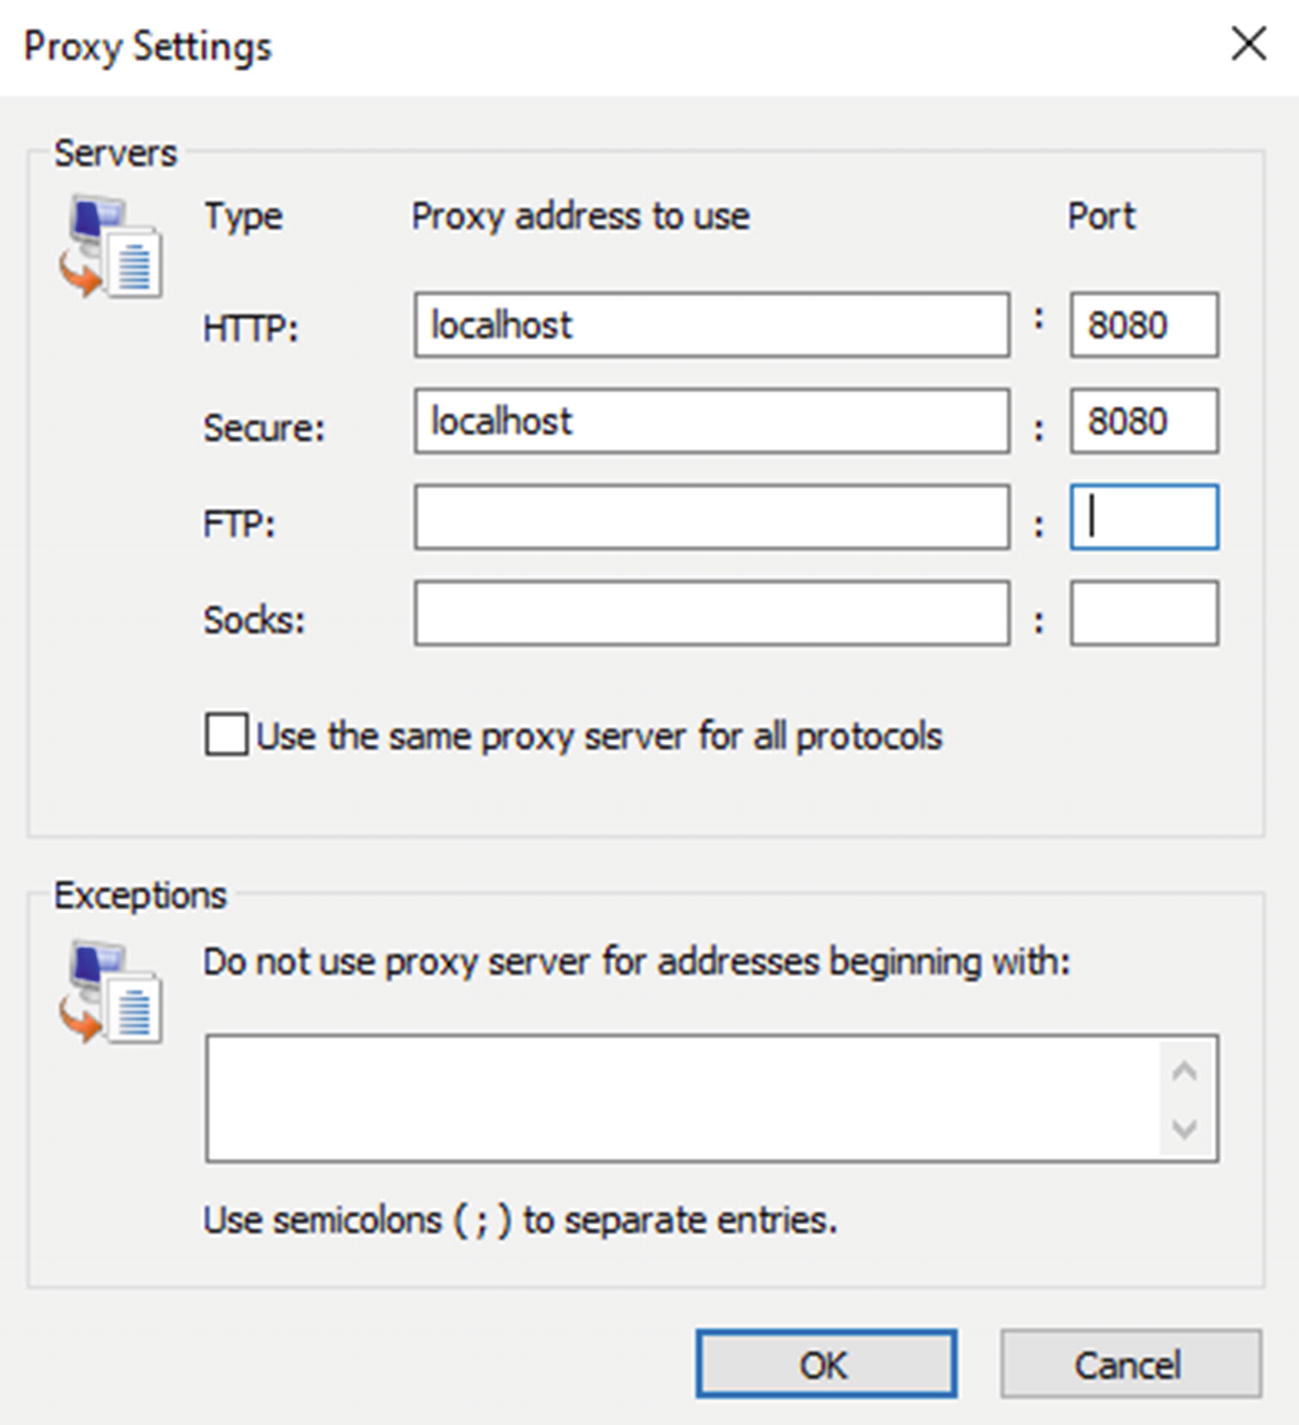
Proxy settings for Burp
- 10.
Click OK on the next three screens to exit out of IE settings.
Tip When you’re running Burp as a proxy, Burp will intercept all requests, and unless you tell it otherwise, it will ask you whether you want to forward the request. This can be very cumbersome if you have a browser open doing something that’s unrelated to testing (like listening to streaming music). I’d suggest closing all browsers and only do testing while the Burp proxy is on.
- 1.
Open the Proxy tab within Burp.
- 2.Open your website.
- a.
You will need to click Forward in order to forward the request onto the app.
- a.
- 3.
Try to log into your app, but use a bad password.
- 4.
In Burp, go to the HTTP history tab in the lower set of tabs.
- 5.
In the list of requests, find the POST that represents your login, similar to what is shown in Figure 4-6.

Login POST in Burp Suite Proxy
- 6.
Right-click the line item, and then click Send to Repeater.
- 7.
In the Request area, change the password field (here, Input.Password) to your real password.
- 8.
Click Send.
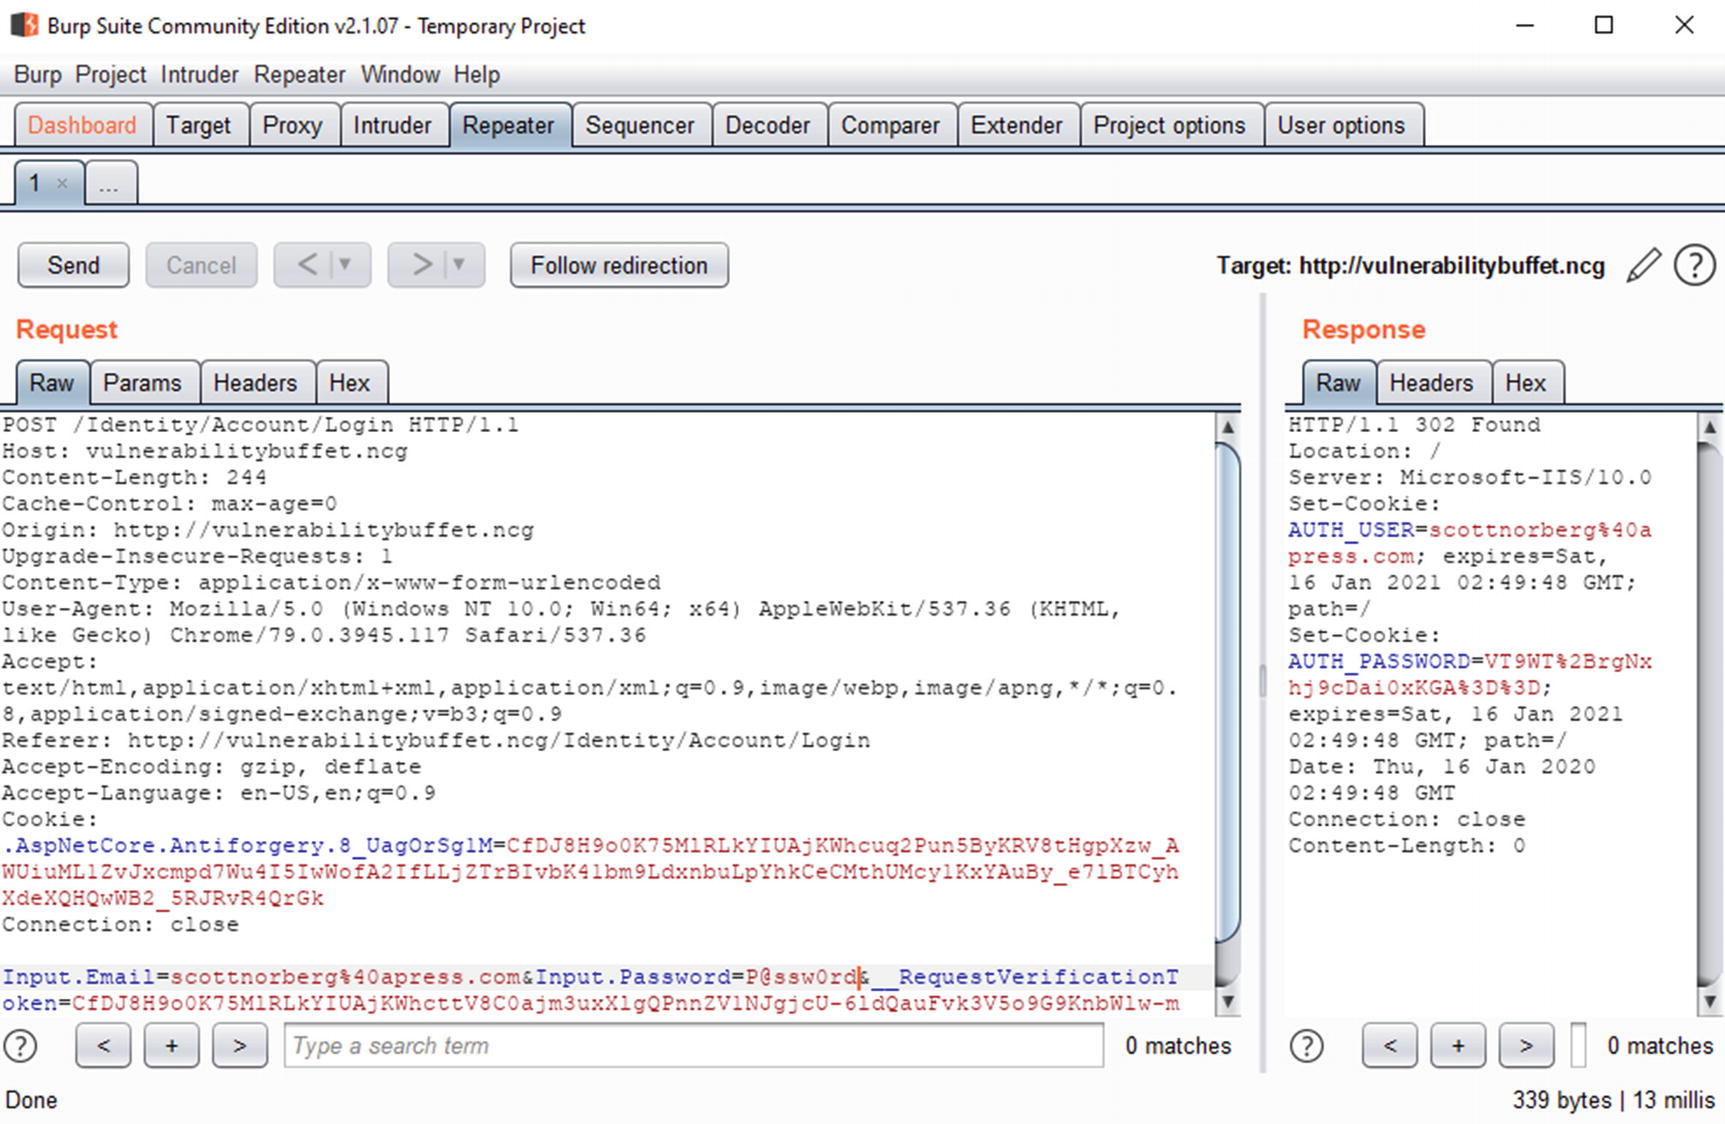
Burp Suite repeater
You should be able to see something in the response that indicates that the login was successful. In this case, there are two new cookies: AUTH_USER and AUTH_PASSWORD, so you can be reasonably sure that the correct login was sent.
Of course, I didn’t have to change just the password – I could have changed other values, including things that are tough to change in browsers like cookies and other headers. Because of this, I’ll use Burp when testing various concepts throughout the book.
Don’t forget to change your proxy settings back to what they were! Otherwise you won’t be able to access the Internet because all the requests are being sent to a nonfunctioning proxy.
OWASP Top Ten
The last topic I’ll cover in this chapter is the OWASP Top Ten list.9 OWASP, the Open Web Application Security Project, is a non-profit organization devoted to promoting application security tools and concepts. In addition to creating several free and open source security tools (including the extremely popular Zed Attack Proxy (ZAP)10 – a tool that scans websites for security vulnerabilities), OWASP puts out documentation intended to help developers and penetration testers improve the security of their web and mobile applications. Perhaps their most famous documentation is their Ten Most Critical Web Application Security Risks. The list gets updated every few years, though disturbingly stays relatively static from list to list, indicating that we as a software development community are doing a terrible job fixing issues that we know are there.
Before I get to the list itself, I’d like to suggest that the list gets a little too much emphasis within the application development security community. Part of the problem is that several of the items on the list are not actionable. For example, #4, XML External Entities, is a specific vulnerability that has a specific fix, but several others seem to be catchalls for general categories of vulnerabilities. Despite the list’s flaws, it can be a good point to start a discussion. Plus, if you are getting into web security, you’ll be expected to know them, so here is the 2017 list.
A1: 2017 – Injection
This category covers most ways in which an attacker can inject their commands in your requests to databases, operating systems, etc. We will cover the most common of these, SQL injection, at the beginning of the next chapter.
A2: 2017 – Broken Authentication
This category covers an extremely wide range of issues around authentication, including vulnerable passwords, session tokens, etc.
The default implementation of ASP.NET Core is not vulnerable in the ways that other web applications built with other frameworks are, but badly implemented integrations with third-party identity providers certainly fall under this category.
A3: 2017 – Sensitive Data Exposure
Most nontrivial websites track sensitive information, such as Personally Identifiable Information. Unfortunately, many websites store this information insecurely and/or make it too easily accessible to malicious users, effectively making personal information public.
Unlike most of the other vulnerabilities in this list, there is not much the ASP.NET Core framework provides you that helps you find and fix issues that fall under this category. There aren’t any methods that I am aware of that are built within the framework that make it easy for developers to mark certain data as sensitive, much less audit where they are available for viewing by users. On top of that, because “sensitive data” is usually very application specific, the security scanners that we’ll talk about in the last chapter can’t find these either.
A4: 2017 – XML External Entities (XXE)
XML document showing an XXE attack
In Listing 4-14, the DOCTYPE, the document declares an entity called “xxe”, which is set to the contents of “http://malicious-site.com”. (This can also be a file on your server, such as your web.config, appsettings.json, system files, or basically anything else on your server that the website itself has access to.) The contents of that site are included in the document by setting the value of “somevalue” to “&xxe;”.
The harm that can be caused by an XXE attack varies greatly depending on the processing that is done on the XML document after the external entity is loaded. If the XML values are written to the page, then an attacker can use an XXE attack to write the contents of system files onto the web page. If the contents are written to a data store, then the attacker can attempt an injection attack and execute their own code.
Code showing the XML Resolver for an XmlDocument being set
If you absolutely need DTD parsing, you should strongly consider writing your own XmlResolver that does only what you need it to do. Otherwise, leave it off to prevent XXE attacks.
A5: 2017 – Broken Access Control
This is OWASP’s category for ensuring that your authorization is set up properly, both in terms of whether the intended users can access a particular resource and in terms of whether intended users can change access to a resource for others.
ASP.NET has mixed success in creating easy ways for developers to create robust access controls. Their role-based model of ensuring that only people in certain roles can hit certain endpoints is fairly robust. There are other scenarios that are lacking, however. I’ll dig into this further later on.
A6: 2017 – Security Misconfiguration
Incomplete or ad hoc configurations
Open cloud storage
Misconfigured HTTP headers (or likely with ASP.NET Core – lack of configuration around HTTP headers)
Verbose error messages
Systems patched and upgraded in a timely fashion
I will cover most of these concepts later in the book.
A7: 2017 – Cross-Site Scripting (XSS)
Cross-Site Scripting (also referred to as XSS) is a vulnerability that allows hackers to insert JavaScript that they wrote into your web pages. (Technically this could be referred to as JavaScript injection and could easily have been lumped into item #1, but for some reason OWASP decided to make this a separate category.)
ASP.NET has made a lot of improvements in this area in the last few years, so you have to try to introduce XSS vulnerabilities as a .NET developer.
A8: 2017 – Insecure Deserialization
Insecure deserialization refers to logic flaws when turning input text (such as JSON) and turning it into objects to use within .NET. You can see some examples in this slide deck from a Black Hat presentation in 2017: www.blackhat.com/docs/us-17/thursday/us-17-Munoz-Friday-The-13th-Json-Attacks.pdf.
When possible, use the most commonly used libraries (like Newtonsoft for JSON formatting).
Keep your libraries up to date with the latest version.
Avoid deserializing untrusted input whenever possible.
Validate the format of all data before deserializing whenever possible.
A9: 2017 – Using Components with Known Vulnerabilities
The title should be fairly self-explanatory – as I talked about earlier in the book, you should be sure that you keep any third-party components that you have installed, including JavaScript frameworks, updated because vulnerabilities do pop up in these libraries. I recently searched the CVE library, a library of vulnerabilities found at cve.mitre.org, for jQuery-related vulnerabilities and found 43 (since 2007) alone. And the version of jQuery and Bootstrap that you get when spinning up a new default website aren’t necessarily the latest and greatest versions available. I’ll show you some tools to help you manage this later in the book, but in the meantime, know that it’s an issue that you should be paying attention to.
A10: 2017 – Insufficient Logging and Monitoring
- 1.
Websites either do not log incidents at all or do not log incidents in a way in which they can be easily parsed.
- 2.
Website logs, if present, are not monitored, so if suspicious activity occurs, incidents are found, investigated, and if appropriate, stopped.
This is incredibly important to website security because in order to catch the bad guys, you have to be able to see them. And if your logging and monitoring is insufficient, you’re not putting yourself in a position to do that. According to the OWASP document that I linked to earlier, time to detect a breach is over 200 days (and usually detected by a third party). This is 200 days that the attacker can live in your systems, stealing your data the entire time.
ASP.NET Core advertises an improved logging framework over previous versions of ASP.NET, so it is tempting to argue that the logging in Core will help you solve the logging and monitoring problem outlined here. Unfortunately, though, the logging in Core is very obviously made to help debug your code, not secure it, and a lot of work is needed to update the system for security purposes. I will cover this in more detail in Chapter 9.
Summary
In this chapter, I covered several topics relating to web security in general. First, I talked in detail about how a connection is made between your server and a user’s browser, and went into detail describing other information that gets sent in these connections that the average developer might not necessarily see. Second, I talked about how web is, by its nature, a stateless protocol, so we need ways to identify a user and save information. Finally, I went over the OWASP Top Ten list and briefly went into how these apply to ASP.NET Core.
Next, in the last chapter before I start diving more deeply into ASP.NET itself, I’ll dive more deeply into many of the attacks that hackers do to get into websites like yours. It’s not my goal that you know enough to become a hacker yourself, but I’m a firm believer that knowing how to attack a website can help you build better defenses.