
At this point, I’ve covered a lot around application development security. I could keep going and cover more about securing your website – there are, after all, a whole family of attacks that target the website’s network, operating system, and even hardware that I haven’t covered. But these typically fall outside the responsibility of most software developers and so fall outside the scope of this book. But I have covered application development security pretty thoroughly, and so it’s time to move on to preventing attacks.
Fortunately for us, Microsoft has worked hard to make programming in ASP.NET safer with every version. When used as designed, Entity Framework helps prevent SQL injection attacks. Content rendering is protected from most XSS attacks. CSRF tokens are added (though not necessarily validated) by default. Unfortunately for us, though, when given a choice between adequate and superior security, the ASP.NET team pretty consistently reaches for the adequate solution. Also, it is not immediately obvious how to keep the website secure if the default functionality doesn’t fit our needs.
To learn how to successfully protect your websites, I’ll first dive into how to protect yourself from malicious input. You should be quite familiar by now with the most common attacks that can be done against your website, but may be wondering how best to protect yourself from them.
Validation Attributes
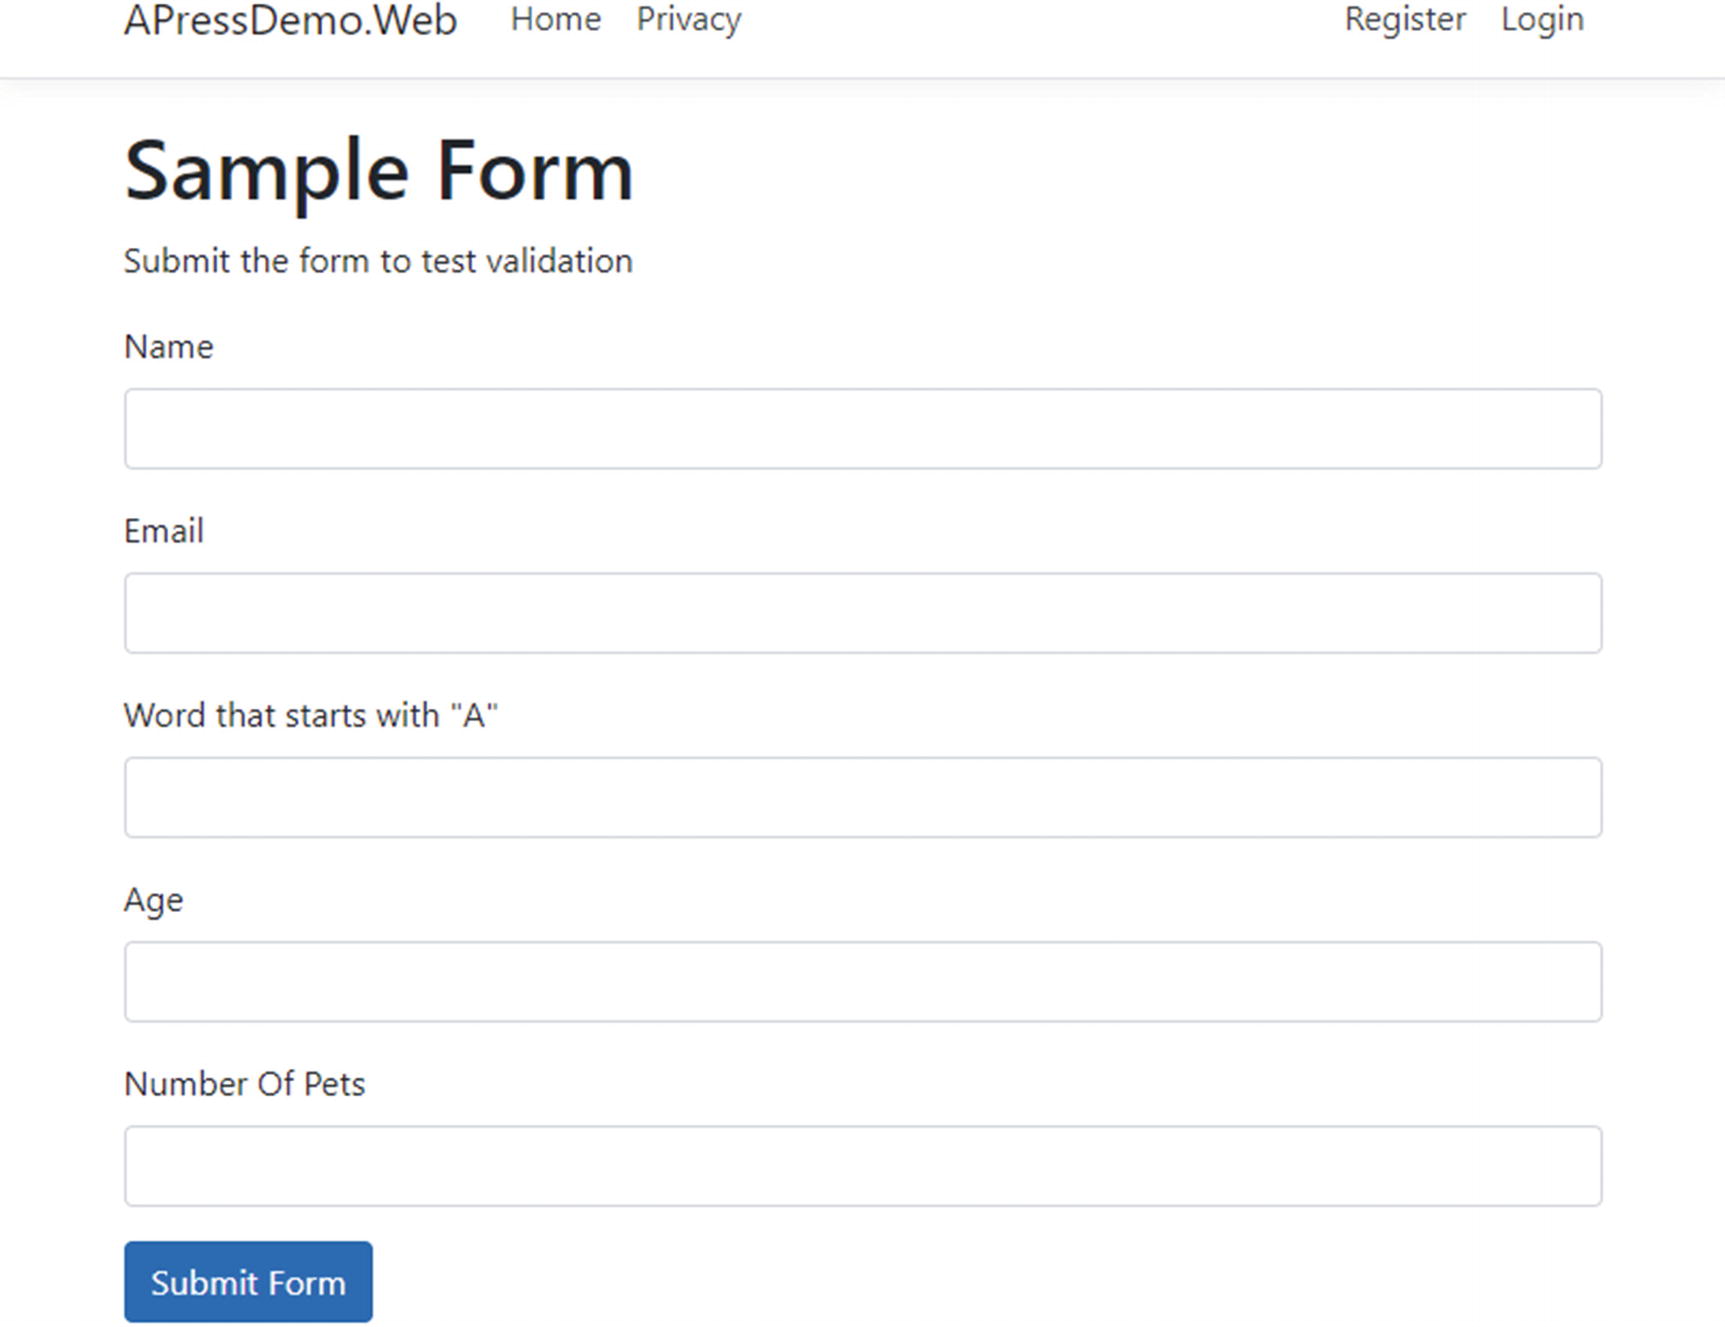
Sample form with five fields
Name: Required field, but doesn’t have any specific format.
Email: Required, and must be in email format.
Word that starts with “A”: This is a word that must start with the letter “A”. (Let’s just pretend that this makes sense in this context.)
Age: The age must be an integer between 18 and 120.
Number Of Pets: This must be an integer smaller than 65,536.
Razor Page with model validation
The Required attribute tells the framework that you expect a value.
The EmailAddress attribute tells the framework that you expect a value in email format. There are other formats available that I’ll get to in a moment.
The RegularExpression attribute can come in handy whenever you want to verify that a field has a particular format, but none of the out-of-the-box options will do.
The StringLength attribute limits the amount of text that can be included, helping prevent a variety of attacks.
Notice that Age and PetCount also have different datatypes, int and ushort, respectively. Whenever possible, you should use a datatype to define your properties – not only is it better for readability, but it also helps limit the number of fields an attacker can use for submitting bad data. Because Age and PetCount are numbers, an attacker realistically can only submit attacks against the other three properties.
[CreditCard]: Validates that the property has a credit card format
[Compare]: Validates that two properties in a model match
[EmailAddress]: Validates that the property is in email format
[Phone]: Validates that the property is in telephone number format
[Range]: Validates that the property value falls within a specified range
[RegularExpression]: Validates that the property value matches a specified regular expression
[Required]: Validates that the field is not null
[StringLength]: Validates that a string property value doesn’t exceed a specified length limit
[Url]: Validates that the property has a URL format
Source code for custom model validator
What’s going on in Listing 6-2? This is a class that inherits from System.ComponentModel.DataAnnotations.ValidationAttribute. To make a valid attribute, all you need to do is override the IsValid method and then return a ValidationResult (with a descriptive error message if a check failed) once you’re able to determine if the check succeeds of fails.
You may also want to use the custom validator when all you need to do is a regular expression match, but you want to return a nicer error message than “The field [name] must match the regular expression [regex].”
If you’re good about putting restrictive data types on all of your data elements, you will go far in preventing many attacks. Not only will hackers need to find input that causes their attack to succeed, they will need to work around any validation you have in place. It is certainly not a cure-all, but it is a good start.
Do be careful when creating regular expression validation. You can easily create filtering that is too restrictive. As one example, you might think that you could accept only letters in the English alphabet for the first name, but you might encounter names like Žarko (like NBA player Žarko Čabarkapa), Karl-Anthony (like NBA player Karl-Anthony Towns), or D'Brickashaw (like NFL player D'Brickashaw Ferguson). What you choose to accept will depend greatly on the purpose and audience of your website.
Before we move on, please take note of the if (ModelState.IsValid) check in the OnPost method. The framework checks the validation automatically, but you have to verify the result of those checks manually. If you don’t, you could have absolutely perfect validation set up and garbage data would get in because a check for validation failure never occurred.
And no, verifying that the data is correct in JavaScript only is not sufficient. Remember how I changed the password and resubmitted the form using Burp Suite in Chapter 4? That bypassed any and all JavaScript checking. Ensuring that the input is correct in JavaScript has no real security value; it only improves the user experience for your site by providing feedback more quickly than a full POST process would.
Controller method for our sample form
Model for our sample MVC form
This is the same class; except this time, it isn’t a nested class within either the Controller or PageModel. Otherwise, the functionality is exactly the same between the Razor Page and the MVC version.
Validating File Uploads
Make sure the extension matches the purpose of the upload. For instance, if you want image files, limit your upload to accepting jpg, gif, and png files only.
Limit the size of the file.
Run a virus scan on the file.
Check the file contents for accurate file signatures.
Validator for image file signatures
You can, of course, change this method to allow for other file formats, run an antivirus checker, check file size, etc. But it’s a place to start.
The code would have been more readable if I had not included the else in each case block and returned ValidationResult.Success in the last line, but in doing so, I would have been failing open. I’d recommend getting in the habit of failing closed, so the method would fail if something unexpected happens. You could easily refactor this code so you have code that looks like “if (IsValidJpg(asFile)) return ValidationResult.Success;” and make the code more readable while continuing to fail closed.
Do not use the original file name in your file system, both to prevent against various operating system attacks and also make it more difficult for a hacker to find the document if they should breach your server.
Do not use the original extension, just in case a script happens to get through. Instead, use an extension that the operating system won’t recognize, like “.webupload”.
Store the files on a server other than the webserver itself. Blob storage, either in the cloud or in a database, is likely safest. Otherwise, save the files on a separate server.
Consider putting your fileserver on an entirely different domain from your main web assets. For example, Twitter puts its images in the “twimg.com” domain. Not only can this help protect you if the image server is compromised, it can help with scalability if many images are uploaded and/or requested at once.
Finally, to protect yourself from files like GIFARs, you can programmatically transform files into something similar, such as transforming images into bitmaps or shrinking them by 1%.
User Input and Retrieving Files
Code to retrieve files from the file system
But what happens with the code in Listing 6-6 if the user submits a “file” with the name “....web.config”? In this case, the user will get your configuration file. Or they can grab your app.config file with the same approach. Or, with enough patience, they may be able to steal some of your sensitive operating system files.
Using Path.GetInvalidFileNameChars()
The same concept holds true if you’re merely reading the contents of a file. Most hackers would be just as happy seeing the contents of sensitive config or operating system files on your screen vs. getting a copy of it.
CSRF Protection
CSRF protection in MVC
Startup.cs change to check for CSRF tokens everywhere
We don’t even have to do that much for Razor Pages – CSRF checking is done automatically there.
CSRF helps protect users against attackers from submitting requests on their behalf. In other words, CSRF helps prevent the attacker from taking advantage of your users’ authentication cookies and performing an action as their victim. What about unauthenticated pages? Is there anything to protect by using CSRF checking in unauthenticated pages? The answer is “yes,” since validating CSRF tokens can serve as a prevention against someone spamming your publicly accessible form (like a Contact Me form) without doing some sort of check. But any hacker can simply make a GET, take the token and header, fill in the data, and POST their content. But since a token shouldn’t harm your user’s experience, there is not really any harm in keeping the token checking for all pages.
HTML generated for our test form (MVC)
Raw request data for form POST
CSRF token vs. cookie
Type | Start of Value |
|---|---|
Token | CfDJ8CJsmj... |
Cookie | CfDJ8NEgho... |
Each of these starts with “CfDJ8”, but differs from there, so you know that ASP.NET is not using the Double-Submit Cookie Pattern. I’ll dig into the source code in a bit to show you what is happening, but first, I want to take you through some attacks against this functionality for two reasons. One, you can see what the token protection does (and doesn’t do) in a live-fire situation without looking at code. Two, it gives you more examples of how attacks happen.

CSRF attack with tokens stolen from another user

CSRF attack with tokens stolen from another site
The text in Figure 6-3 might be a bit small, but I hope you can see in this screenshot that the tokens are different. I kept the authentication token the same, though, so it’s likely that there’s something about the token itself that the site doesn’t like.
Now, can we reuse tokens from one page to the next? I won’t show the screenshot for this one, but I can confirm that, yes, tokens can be reused from one page to the next.

POST with original CSRF tokens
There’s good news and bad news seen in Figure 6-4. The good news is that I didn’t screw anything else up in my tests – it was the token, not some other mistake, that caused the previous screenshots to fail. The bad news? There was nothing preventing me from using the same token over again. And while I don’t have a screenshot for this, my testing yesterday proved that tokens that are 24 hours old are still valid. In short, the CSRF protection in ASP.NET is much better than the Double-Submit Cookie Pattern, but if tokens are stolen, then a hacker can use those tokens on that app on every page for that user forever.
Source code for the DefaultAntiforgeryTokenGenerator3
Listing 6-12 contains a lot of code and you don’t really need to understand every line. But there are two takeaways from this code. One, ASP.NET does indeed incorporate user ID in their CSRF tokens when possible, which should be a very effective way of preventing most CSRF attacks. To successfully pull off a CSRF attack against an ASP.NET site, an attacker would need to have, not guess or manufacture, valid tokens. Two, this code supports additional data being added to the token via the IAntiforgeryAdditionalDataProvider. I’ll explore how this can be used to minimize the harm caused by stolen tokens.
Extending Anti-CSRF Checks with IAntiforgeryAdditionalDataProvider
Source for IAntiforgeryAdditionalDataProvider
Sample implementation of IAntiforgeryAdditionalDataProvider
Adding our additional CSRF check to the framework’s services
With the line of code in Listing 6-15, I’m adding the CSRFExpirationCheck class to the list of services, and telling the framework that it is implementing the IAntiforgeryAdditionalDataProvider interface. Now, whenever the framework (specifically, the DefaultAntiforgeryTokenGenerator class) requests a class that implements this interface, it is the custom CSRFExpirationCheck class that will be returned.
The code for the data provider should be fairly straightforward. GetAdditionalData returns today’s date plus several minutes (I used 10 minutes in this example, anything between 5 and 60 minutes might be appropriate for your needs). ValidateAdditionalData returns true if this date is later than the date the form is actually submitted. With this code, you’d be protected from most forms of token abuse by malicious users.
Include the page URL within the token, then validate against context.Request.Path.
Include both the current page and an expiration date by separating the two with a | (pipe).
Include a nonce and store the nonce in a database. Once the nonce is used, reject future requests that include it.
Use a nonce, but in your nonce storage, include an expiration date and web path. Verify all three on each request.
For most purposes, including an expiration date should be sufficient. It provides significantly more protection than ASP.NET’s CSRF token checking does by itself while not requiring you to create your own nonce store. If you do decide to go the nonce route, you might as well include an expiration date and the current web path.
If you do decide to create and store nonces, be warned that the IAntiforgeryTokenGenerator is a Singleton service, and therefore you cannot use the Scoped Entity Framework service. You can still use database storage, of course; you will just need to find another way of getting the data to and from the database other than the EF service. Either creating a new instance of your database context or using ADO.NET should work just fine.
CSRF and AJAX
What if you want to send a POST via AJAX? If you’re creating the POST data in JavaScript, the CSRF token in the form isn’t sent back. You could include the token as form data in your POST, but that’s a bit awkward. What can you do?
Adding a CSRF token to a jQuery POST
Quite frankly I find this solution awkward and annoying, but it gets the job done with very little extra effort.
When CSRF Tokens Aren’t Enough
For extra sensitive operations, like password change requests or large money transactions, you may want to do more than merely protect your POST with a CSRF token. In these cases, asking the user to submit their password again helps prevent still more CSRF attacks. This action is irritating enough to your users where you won’t want to do it on every form on every page, but most will understand (and perhaps even appreciate) the extra security around the most sensitive actions.
I wouldn’t be surprised if you are thinking that if a password is needed for sensitive actions and the CSRF token can take arbitrary data, then I can include the user’s password in the CSRF token and not harm usability. My advice: do NOT do this. Not only are you not providing any extra protection against CSRF attacks, you’re potentially exposing the user’s password to hackers.
Preventing Spam
If you do go the nonce route with your CSRF tokens and turn on CSRF checking on your publicly accessible forms, you will go a long way toward preventing advertisers (and possibly malicious actors looking to cause a DoS attack) from spamming you with unwanted form submissions. (If you’ve gotten notifications for websites with any sort of Contact Me functionality, you know exactly what I’m talking about.) As I mentioned earlier, it is possible to get around this by performing a request and ensuring that any headers and tokens are returned. So, if you want to prevent even more spam, something a bit more robust is required.
One way to do this is through a CAPTCHA, or a Completely Automated Public Turing test to tell Computers and Humans Apart.5 If you’ve been on the Web, you’ve probably seen them – they’re the checks where you need to write the wavy text seen in an image, perform a simple math problem, or most annoyingly, click all of the cars, lights, signs, etc. in a 4x4 grid of images. Surprisingly, most of these CAPTCHAs are free. One of the most common, reCAPTCHA, offered by Google, is completely free and can be set up in less than an hour.6
The very old ones offered their services for free because they wanted to digitize books. They gave you two words, one to prove that you’re a human and the other to help you read text from a book to be digitized.7 It is unclear to me why the new ones are free, and “free” always makes me suspicious. The newest and most popular ones are offered by Google. Given that it’s Google, I’m guessing that they’re using the reCAPTCHA to get more data on website usage, which is a bit of a privacy risk for your users. Again, reCAPTCHA is incredibly popular, but if privacy is a concern, then perhaps a Google product shouldn’t be your first choice.
One idea I came across recently was having one or two input elements on the page that are either off-screen or otherwise invisible in some way (preferably not by making the input element itself invisible, which would be easy for a bot to find). If those hidden inputs are filled in, then you can be reasonably sure that the submission came from a bot of some kind.
Long story short, though, there is no easy, nice, and dependable way of truly reducing spam without severely affecting your users. There is no “right” answer as to how best to protect your own pages – my advice is to try different options and see what works best for you.
Mass Assignment
Hypothetical blog class
Hypothetical page to edit unpublished blogs
Hypothetical controller method to update an unpublished blog
Aside from missing checks, Listing 6-19 looks like perfectly reasonable code, doesn’t it? But in this case, the ASP.NET framework doesn’t know that you don’t want to update the IsPublished property. An attacker can open Burp and tack on “&IsPublished=true” to the end of the request and publish the blog and, in doing so, completely bypass the administrator approval process. This attack is called mass assignment.
To prevent this attack from happening, you need to make sure that your model objects contain only the properties that you want to update on that particular page. Yes, that likely means that you’ll have duplicated code, since the properties needed on one page probably won’t be exactly the same as properties on another, so you’ll have to create similar (but separate) objects for each page. But doing anything else risks attackers finding and exploiting properties unintentionally exposed via your databinding code.
Controller method with security fixes
We’ve explicitly set each variable we expect to be changed instead of letting any databinding logic do it for us.
Several years ago when I was still somewhat new to MVC, I read advice from Microsoft stating that you shouldn’t use EF classes as your MVC models, but they didn’t really explain why beyond “security concerns.” So, I took their advice, but to avoid writing code that matched identical property names, I wrote a rather nifty method that would match properties from my models and automatically update my EF objects. This is only more secure if protected properties/columns don’t show up in the model objects at all, which again can change with requirements changes or refactoring. Be explicit about what you want to update. It requires more work, and it is tedious work at that, but it’s the right thing to do.
Along these same lines, you should never use your Entity Framework objects as the objects in your model. Why? Mass assignment is too easy to perform. Even if you know for sure that all properties on that page are editable, you never know when requirements change and fields get added. Will you remember to go back and fix all potential mass assignment vulnerabilities? Probably not. So, keep your models and your Entity Framework classes separate.
This goes for data you’re returning to the browser via an AJAX call, too. You’ve seen how trivially easy it is to listen to traffic using tools like Burp Suite. Any and all data you return to the browser can be seen by a user, whether it is shown in the UI or not. Try to get in the habit of only using the data you absolutely need for each and every context.
But wait, there’s more! You don’t actually have to use Burp to take advantage of this vulnerability in this situation! Because of a value shadowing vulnerability within ASP.NET, you can put that value in the query string and it’ll work, too! Just append “&IsPublished=true” to the end of your URL (assuming you have a query string, if not, use “?IsPublished=true” instead), and the ASP.NET object binding code will happily update that property for you.
FromBody: Request body
FromForm: Request body, but form encoded
FromHeader: Request header
FromQuery: Request query string
FromRoute: Request route data
FromServices: Request service as an action parameter
POST method fixed to only accept form data
In all honesty, I find these attributes annoying to code and annoying to read, but please do get in the habit of putting them in on all parameters on all controller methods. Your code will be more secure because of it.
Mass Assignment and Scaffolded Code
- 1.
Right-click your Pages folder.
- 2.
Hover over Add.
- 3.
Click New Scaffolded Item….
- 4.
Click Razor Page using Entity Framework.
- 5.
Click Add.
- 6.
Fill out the form by adding a page name, selecting your class, selecting your data context class, and the operation you want to do (I’ll do Update in the following).
- 7.
Click Add.
Generated Update code for Entity Framework class
You should notice in Listing 6-22 that the EF class is used as a model class, which is exactly the opposite of what I said you should do. To Microsoft’s credit, they include a link in their comments (https://aka.ms/RazorPagesCRUD) that talks about mass assignment (only they call it overposting) and how to prevent it. But they probably could have created a template that created a separate model object and then manually updated the properties between the model and EF class. And then they could have added a comment saying why they didn’t use the EF class directly in the model, including this link. I really don’t understand why they didn’t. Moral of the story here, just because Microsoft does it does not mean that you should do it.
That’s about it for validating input on the way in. In the next section, I’ll talk about how to keep user input safe when displaying it on a page.
Preventing XSS
Safely displaying user-generated content has gotten easier over the years. When I first started with ASP.NET, the <asp:Label> control would happily write any text you gave it, whether that was text you intended or XSS scripts you did not. Fixing the issue wasn’t freakishly hard, but unless you knew you needed to do it, you were vulnerable to XSS (and other injection) attacks. As the years went by, the framework got better and better about preventing XSS attacks without you needing to explicitly do so yourself. There are still areas to improve, especially if you’re using a JavaScript framework of any sort.
XSS Encoding
Page from the Vulnerability Buffet showing user input placed on the page
Search result after an XSS attempt

Script shown on the page
This is great! I didn’t have to do anything at all to encode the content; ASP.NET did everything for me.
Should you encode on the way in or the way out? Security professionals I respect argue either (or both), but both ASP.NET and JavaScript frameworks are clearly moving toward letting any potential XSS into the system and preventing it from being encoded as it is going out. As long as you know this and are careful rendering any user input, this is perfectly fine.
Page from the Vulnerability Buffet that is vulnerable to XSS attacks
@Html.Raw will not encode content, and as you can imagine, using it leaves you vulnerable to XSS attacks. The only time you should use this is if you trust your HTML completely, i.e., content can only come from fully trusted sources.
Example of an HtmlHelper
Page from the Vulnerability Buffet that is vulnerable to XSS attacks
Safer example of an HtmlHelper
Instead of choosing which characters to encode, you can use the System.Net.WebUtility.HtmlEncode method to encode most of the characters you need. (System.Web.HttpUtility.HtmlEncode works too.)
In addition to encoding content, if you recall from Chapter 4, there are headers that you can put in to help stop XSS. Despite what others may think,8 most of these headers don’t do much beyond preventing some of the most obvious reflected XSS. Your site is safer with these headers configured, but they are very far from a complete solution. Remember to encode any outputs that bypass the default encoding methods.
XSS and JavaScript Frameworks
- 1.
Know whether your framework explicitly has a difference between inserting encoded text vs. HTML. For instance, jQuery has both text() and html() methods. Use the text version whenever you can.
- 2.
Be aware of any special characters in your favorite framework, and be sure to encode those characters when rendering them on a page. For instance, Listing 6-29 shows how you could encode brackets for use with AngularJS.
HtmlHelper that encodes text for AngularJS
- 3.
W96hen you set up your CSP headers, resist the temptation of creating overly permissive configurations in order to get your JavaScript framework(s) to work properly. This may be unavoidable when upgrading and/or securing a legacy app, but when creating new apps, security, including compatibility with secure CSP policies, should factor greatly into which framework you choose.
- 4.
When in doubt, test! You can enter scripts without any special tools. I’ve shown you how to use Burp to change requests outside a browser if needed. Later on, I’ll show you how to do more general testing. But test your system for these vulnerabilities!
CSP Headers and Avoiding Inline Code
As long as I’m on the topic of CSP headers, it’s worth taking a minute to talk about what you’ll need to do to get the most from your CSP protection. As you have started to see, much of what attackers want to do is insert their own content on your page. It is much easier to insert content into an attribute (e.g., inline JavaScript or CSS) or by inserting an entirely new element (e.g., a new <script> tag) than it is to alter or add a new JavaScript or CSS file.
Sample CSP header
Since CSP headers are so hard to create, I’d strongly recommend going to https://cspisawesome.com and using their GUI to create your header.
Sample CSP header with nonce
Script tag with nonce
Your first choice should always to keep all CSS and JavaScript in separate files. But if you’re unable to do that for whatever reason, you have other options.
Adding a CSP header with nonce: backend
This example builds the Content Security Policy from scratch in the header. While this will work, it will be a nightmare to maintain if you have several pages that need custom CSP headers and you make frequent changes. Instead, consider a centralized CSP builder which gets altered, not built from scratch, on each page.
Using the nonce on the front end
If you try this, you’ll find that only the first alert, the one in the script block, will be called in modern browsers.
Ads, Trackers, and XSS
One note for those of you who use third-party scripts to display ads, add trackers, etc.: companies can put malicious scripts in these ads. This is common enough that it has a term: malvertising.9 Many high-traffic, well-known sites have been hit with this. AOL was hit a few years ago,10 but this attack continues to be common. Aside from a reason to make sure your CSP headers are set up properly, be aware that this is a risk you need to account for when showing ads or using third-party trackers. It’s easy to sign up for such services, but you need to factor the risk of malvertising when choosing vendors.
Detecting Data Tampering
Hypothetical blog class
Pseudo-class for using hashes to detect data tampering
There isn’t much to this code. When getting the blog for display, double-check to make sure that the hash of the content matches the stored hash. This way you minimize the possibility that a hacker makes an update to your content without you knowing about it. And when you update, make sure that the hash is updated so you don’t flag changes that you make as unauthorized changes.
Summary
This was a wide-ranging chapter that covered many aspects of checking handling user input. The majority of the chapter was spent on verifying user input as it comes in by checking data types and formats, checking file contents, and retrieving files. I talked about CSRF protection and how to extend the native ASP.NET implementation. I also covered mass assignment (or overposting as Microsoft calls it). The chapter ended with a discussion about verifying data as it comes out, both in preventing XSS and in detecting data tampering.
In the next chapter, we’ll do a deep dive into how to successfully authenticate users and effectively authorize them for operations within your website. As with the CSRF checking in this chapter, I will not only go through how Microsoft wants you to use their classes, but I’ll also go over how to extend them for better security.