
Depending on your needs and uses for R, it can be convenient to have a reasonable amount of memory and processor capability. Often this power is necessary only on occasion, and it may not be cost-effective to own the hardware. This is where hosting R on the cloud may be helpful. Cloud instances bring on-demand resources that are readily scaled up or down as each situation requires. These days, there are several tolerable outfits that provide such services at very reasonable prices. The challenge we face is threefold, and we walk through those steps over the next three chapters. We need to get a cloud, we need to administer our cloud’s operating system, and we need to do some fun things with R.
This chapter focuses on getting a cloud. To do that, we need to choose a provider, start up a compute instance in a location we will not ever physically access, and successfully connect to our instance. We are going to make some assumptions along the way, and, given the quickly evolving nature of technology, this may well be obsolete even as we write.
Our first claim is that you, our gentle readers, have access to a Windows-based computer and are most familiar with a Windows environment . We do not suppose you have administrative privileges on your local machine, although it requires a network connection. You also need access to a credit card. Although your work in this chapter doesn’t incur a cost , a credit card is required. Finally, and apologies for those for whom this is not true, we are going to assume that you have no prior knowledge of clouds, networks, or Unix-flavored operating systems.
Disclaimers
There are a few disclaimers we should make at this point. We are in no way endorsing Amazon Web Services (Setting Up with Amazon AWS EC2, 2016) just as we are in no way endorsing Windows. Nevertheless, AWS is convenient, popular, and, as of this writing, offers a free tier of service for 12 months ( http://aws.amazon.com/free/ ). Please be careful with data you place in the cloud; without proper attention to security, it might be easy for that information to find its way to the wrong minds. While we give some brief suggestions on digital safety, these are not enough. The topic of Internet security can and does fill several books; if you have data that should not be faxed or e-mailed, there is much more to be learned before processing that data on a cloud.
With luck, we have not scared you away from this convenient and powerful method of bringing just the right resources to your research and data. We also recommend reading this chapter and the one following first, and dedicating an afternoon or more to the process if you are, like us, cloud novices. We should also mention that we use Google’s Chrome browser; your choice of browser may change the screenshots shown in this chapter. Indeed, AWS itself has semiregular layout changes as new features are added or old functionalities merge. Nevertheless, what you see should look quite close to what we show .
Starting Amazon Web Services
Very few people are polymaths, and living in the cloud can be a bit difficult conceptually. In our experience, being good at mathematical programming does not instantly translate into cloud expertise. Fortunately, the system is fairly well designed to start up quickly after some legwork is done. What you want is access to an Elastic Compute Cloud (EC2) instance. EC2 is a virtual computer that can be customized to have whatever processing power and memory combination you may wish. That is an overly bold statement. However, at the time of this writing, anywhere from 1 processor at 2.4 GHz and 0.5 GiB of memory, to 40 processors at 2.4 GHz and 160 GiB of memory, can constitute a single computer instance.
The first step we take is visiting the Amazon Web Services site ( http://aws.amazon.com/free/ ) and getting a new account, as shown in Figure 11-1. Follow the steps to create a new account, being sure to generate a secure password. This step requires both a credit card and a phone number. Again, we use the Google Chrome browser, and your browser’s view may differ from ours on occasion.
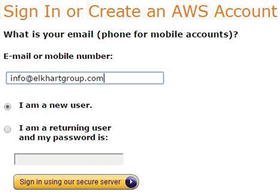
Figure 11-1. Creating a new AWS account
The account you have just created is your top-level account. The recommendation is to create a subaccount that does not have the full rights this one does. In fact, Amazon goes to some pains to convince you to use identity and access management (IAM) to create a secondary account. If you are just a single user who never needs someone else to access this, a secondary account is still beneficial. If you are ever going to have other users, it is a no-brainer decision. From adding a graduate student, to adding a colleague, to adding employees or consultants, it can be helpful to not give away the master key to the castle. Do not be shocked by the plethora of options available; simply scroll down to the Security and Identity portion of AWS and select IAMS from near the end of the middle column, as shown in Figure 11-2. Depending on your browser, IAM may have a key icon or may have no icon at all. There are enough options present that pressing Ctrl+F and then typing Identity & Access Management into the search box may help highlight the text for IAMS. Do not be shy about searching, clicking, and exploring to find it. You can’t hurt anything, and Amazon updates the interface on occasion .

Figure 11-2. The AWS management console with highlighted boxes for the three parts we use in this chapter
Inside IAMS , you need to create both a new group and your first user. Groups are convenient because they allow you to create multiple users who have only certain privileges. On the left side of the screen, select the Groups option and create a new group. We called ours AdvancedR, although yours might be more sensibly named CloudAdmin or something similar. When asked which policy, we recommend AmazonEC2FullAccess , as shown in Figure 11-3.

Figure 11-3. IAMS group policy selection—your view may differ
Next, we create a user . While following directions on the establishment of the user, we recommend using your first name so that you see that account as you and using a different password from your AWS account. Start by selecting the Users tab on the left side. Once there, create your username. Also, this is the stage where, if you are going to have a consultant help you build your cloud, you can create a second user account for them. Be sure the settings are as in Figure 11-4, including deselecting access-key generation .

Figure 11-4. Creating a user on the AWS IAMS
After creating your user(s), select your username(s) by clicking the check box (not clicking the username) and the User Actions tab. From there, add them to your new group. Also from there, select your user(s). From the User Actions drop-down list, select Manage Passwords and then assign a custom password or autogenerate a password. See Figure 11-5.

Figure 11-5. User Actions tab and drop-down box
When you created your account initially, AWS gave you an account identification number. To see this number and link again, click the IAM Dashboard at the top left, as shown in Figure 11-5. The Dashboard has an IAM users sign-in link as well as an option to customize that to a name. Sign out of AWS. Go to your AWS address that follows this pattern: https://YOUR_ID_HERE.signin.aws.amazon.com/console; sign in using your new username and password.
Taking a look at Figure 11-2 again, notice in the top-left corner the link for EC2. Click this link; at the top-right, you can select a region such as Oregon or Sydney. Different regions tend to have variations in cost, and of course, the closer you are geographically to a region, the more likely network upload and download speeds are efficient. As is often the case, there are trade-offs to consider; we recommend selecting the region nearest to you. One warning is that after you select a region, some of what we do is regionally specific. In particular, key pairs (used to access your cloud server) tie to particular regions.
Once you have your region selected, it is time to create a key pair. On the left side is a menu list, and under Network & Security is the Key Pairs link. Select that link, and then click the Create Key Pair button. Give your key pair a name. If you are likely to need cloud instances in different regions, Amazon’s advice to add your region name to the key pair name is sound. Your browser should automatically download the key pair file. Remember where this is saved and keep it safe; this is your only chance to download this file. We use it later in the next section, but for now, we move on to creating a virtual private cloud (VPC). Return to the home screen of Figure 11-2.
One last look at Figure 11-2 shows that in the first column, near the end, under Networking, is VPC. There are several options here; we go with the simplest, one with a single public subnet. Select the Start VPC Wizard and give your VPC a name such as AdvancedR. Stick with the default options and then select Create VPC. As you can see from these options, if you were interested in creating a more advanced structure, that is readily done.
Your cloud is not safe without a firewall, which is called a security group. We are very cautious with our security group. On the left in the VPC Dashboard, notice the Security tab and the Security Groups link. Click that link and then click the Create Security Group button. Give the group a name tag and a name such as AdvancedR, as well as a description. Be sure to select your VPC from that-drop down list at the end and then click the Yes, Create button.
Now, select your AdvancedR security group and notice the options that are at the end of your browser screen, shown in Figure 11-6. What we are about to do is configure which IP addresses are allowed to visit your future cloud instance. This is, of course, not ironclad; however, IP spoofing is way beyond the scope of this chapter. Certainly, this is a good first step, ensuring that you are the only one who knows your server is there. Be sure to select the Inbound Rules tab, select Edit, and add SSH (22) with TCP (6) protocol; you want to put your IP address for the source. Amazon has links to an IP detector, but a simple Google search of ip address returns your public IP address as the top hit. It should be in valid Classless Inter-Domain Routing (CIDR) notation, which means that if your address is 72.18.154.27, you want to type in 72.18.154.27/32 for Source. While we are here, we create rules for ports 80, 443, and 8787—which are HTTP, HTTPS, Shiny, and RStudio Server, respectively. However, we also lock these to just your IP address. This likely prevents others from accessing your server until you are ready. Go ahead and leave the Outbound Rules to allow all traffic to destination 0.0.0.0/0.

Figure 11-6. Security group’s inbound rules with CIDR notation
If your IP address changes often, you may need to relax your rules. We recommend doing so as cautiously as possible, and only after you are through with the basic operating system and safety updates we discuss in Chapter 21. Also notice that as of now, if you were to host a web server on your cloud instance, that website would be visible only from your local computer or network. Later, after we have installed a site, we’ll go back to this screen and make some edits to allow certain parts of our server to be visible to a wider audience.
While a full lesson on CIDR is beyond the scope of this book, a little knowledge makes sense here. The Internet does not use word addresses such as www.elkhartgroup.com . Rather, it uses a series of 32-bit numbers; try typing 72.18.154.27 into your web browser. Computers use binary numbers rather than base 10; they see our website as 01001000.00010010.10011010.00011011. That unique address connects us to a particular machine. The /32 tells AWS that only that machine is allowed; all 32 bits are fixed. Contrastingly, for outbound rules, we need our instance to be able to browse the Web at will. Thus, we use /0 to let it know that none of the bits is fixed. If you are in a corporate or university environment and want some coworkers to be able to access your instance, talk to your IT department to see what the size of your address space is. If we found our IP addresses changed frequently, we might try 72.18.154.0/24, which would allow the range of addresses 72.18.154.0-255 (and would nicely include the .27).
We turn our attention now to creating an EC2 instance. Select the VPC Dashboard link at the top left, and then click the Launch EC2 Instances button. Select the Ubuntu server that is free tier eligible, as shown in Figure 11-7.

Figure 11-7. Ubuntu server selection for starting your first EC2 instance
Next, select the t2.micro type. On the next screen, be sure to select your VPC as the Network setting, and set the Auto-assign Public IP to Enable. You always have the option to Review and Launch or to go through the entire start wizard by selecting Next. Keep selecting Next, and, in the following steps, there is no need to change the storage settings for Root volume; as of this writing, up to 30 GiB are free. For tags, a good name is AdvancedR again (admittedly, the name is getting a shade overused, yet it continues to work). Also, for the security group, be sure to select an existing security group as well as your AdvancedR group before clicking Review and Launch. From there, launch!
Your last step is to select your key pair. Remember, we already downloaded this earlier. Be sure you have that file, and be sure to have the settings of choosing that existing key pair and selecting your AdvancedR key pair. Next, select the acknowledgment check box. Finally, click the Launch Instances button, as in Figure 11-8.

Figure 11-8. Instance key pair settings and final launch
From here you may view your instances , which take you to the EC2 dashboard. It does take some time for the instance to spin up, so, while we are waiting, we’ll go ahead and meet you in the next section.
Accessing Your Instance’s Command Line
You have an instance on AWS, and it is starting and waiting for you to connect to it. Before that can happen, there are some steps to take on Windows.
You need to download both PuTTY(Tatham, 2016) and PuTTYgen, and you want to download the installer for Windows for all files except PuTTYtel from www.chiark.greenend.org.uk/∼sgtatham/putty/download.html . Once that is done, run the file to install. If your local machine does not grant you the privileges to install, you may download each of these one at a time.
It is the PuTTYgenwe want as well as the *.pem file we downloaded as our key pair file earlier. You want the settings as in Figure 11-9. In particular, as you are loading your existing private-key file, you want to change to All Files (*.*) and open your key pair file. You also want SSH-2 RSA as the parameter setting. Once you click to open your key pair file, you see some information appear in the generator. It is safe to ignore all of it and click Save Private Key. PuTTYgen asks if you are willing to save without a passphrase, and after agreeing to that, you may now save the file as a *.ppk file. Keep this file safe! It is your access pass to your server instance.

Figure 11-9. PuTTYgen key generator
We may now connect to our instance. Going back to the EC2 Dashboard, the instance should be running, and there is some information we need from Figure 11-10. The Public IP address is necessary, and of course, the fact that it is running. Be sure to copy the address for your instance.

Figure 11-10. EC2 Dashboard view of our instance with Public IP address and the Actions drop-down menu
Click the Actions drop-down menu, and under Instance Settings go to Get System Log. At the end of the log file, there should be the server’s fingerprint, as shown in Figure 11-11. The first time we connect to our server, we want to check that we successfully connected to the server we were expecting rather than a fake. For safety, remember this or keep that window open and be ready to make a comparison.
Figure 11-11. Server fingerprint (RSA)
Now we finally connect to our server for the first time. Go ahead and start PuTTY. On the navigation menu on the left, choose the SSH option, then the Auth option, and browse for your *.ppk key, as pictured in Figure 11-12.

Figure 11-12. PuTTY configuration for *.ppk key file
Go back to Session in the navigation menu on the left, and enter [email protected] or more generally ubuntu@YOUR_EC2_PublicIP_HERE. Make sure that the Port is set to 22 and that the Connection type is SSH. We recommend saving your session by writing AdvancedR into the Saved Sessions text and clicking Save before proceeding. This makes it easy to access your t2.micro instance in the future. Go ahead and open the connection, and PuTTY gives you a security alert, as in Figure 11-13; you should compare this favorably to Figure 11-10 before proceeding by selecting Yes. If these two fingerprints do not match, something not good at all is probably afoot.

Figure 11-13. PuTTY security alert for server fingerprint
You are now connected to your cloud instance, and you are in the Ubuntu command line ! As shown in Figure 11-14, you have access to the command line and are now ready to move on to using your server as shown in Chapter 21 if you wish.

Figure 11-14. Seeing the command line through PuTTY’s eyes
We wait just a bit before we get to using our server. While we need to take some more steps to get R functional on the cloud, we take on one more section here to allow ourselves the luxury of uploading files to our cloud. There is one command we should teach you before we upload files. It is the exit command, and it is simply the word exit followed by Enter/return. This closes your PuTTY session.
ubuntu@ip-10-0-0-244:∼$ exitUploading Files to Your Instance
We use WinSCP(Prikryl, 2007) to upload files to the cloud. This program may be downloaded from https://winscp.net/eng/download.php (we used the Portable Executables link). We unzipped the files to our desktop and clicked the WinSCP.exe files to open our initial window, which we filled in as shown in Figure 11-15. Specifically, we entered our IP address for the hostname, ensured we were set up to connect to port 22, and entered ubuntu as the username.

Figure 11-15. WinSCP start screen with correct settings
For the password, select Advanced, and in the new window that opens, in the SSH tab and under Authentication, navigate to the same *.ppk file you used for PuTTY. We show the results in Figure 11-16. After clicking OK and then Save, you are ready to log in.

Figure 11-16. WinSCP Advanced key file screen
When you saved, you had the option to create a desktop shortcut, which can be quite convenient if you regularly have files to transfer. At your first login, you see your server’s key fingerprint. Again, just as with PuTTY, be sure to check that against the fingerprint in Figure 11-10. We go ahead and upload that old Chapter 2 file called ch02_link.txt to our /home/ubuntu folder on our server. To do this, on the left side navigate to where you are storing the files you downloaded from our online code packet. Then, drag and drop that text file to the right-hand side. Once it has uploaded, we go ahead and disconnect from the session and close out of the program. Remember the file name, though; we use that file in the next chapter.
Final Thoughts
Both PuTTY and WinSCP have versions that work without installation. Thus, even on a computer on which you do not have administrative rights, you can still access your instance and transfer files back and forth. This can be helpful in the corporate or academic environment, where technology services departments often rule local computer rights with an abundance of caution.
Speaking of caution, you should be cautious with your cloud server. While we build things in a reasonably secure fashion, this is not entirely safe. It is likely somewhat safer than e-mail . Often, research data may have either economic or privacy value. In that case, you undoubtedly want to consider some Internet security texts. Proceed at your risk; this is not a book about securing your cloud!