
Process Customization
As you have seen so far, it is essential to automate the ALM process to realize the benefits of it fully. TFS 2018 can help quite a lot by letting you have one or more process templates on the TFS server that define the way you work with the ALM process.
In this chapter, we look at how you can modify the TFS process templates in both TFS on-premise and in Azure DevOps.
The whole point of an extensible product such as TFS is that you have the ability to customize it to your needs. One of the biggest advantages of TFS is the capability to customize your process template so that you can realize your ALM process in the tools you use for your projects. Let’s take a closer look at how the process template is built and how it can be changed by using the extensible features of TFS.
Modifying the Process Template in TFS 2018 On-Premise
There are two ways to modify the XML files for the project templates. You can use manual customization or you can use Process Editor, which is a Power Tool from Microsoft.
If you are daring, we can edit the XML files manually. This can be done by exporting the files from the TFS server using the witadmin command-line tool (see https://docs.microsoft.com/sv-se/azure/devops/reference/witadmin/witadmin-customize-and-manage-objects-for-tracking-work?view=tfs-2018&viewFallbackFrom=vsts for more information). Or, you can use the Process Template Manager that comes with the TFS Power Tools.

Exporting (download) a work item type from TFS 2018 using the Process Template Manager
Later in the chapter we look at the possibilities of modifying the process template using Azure DevOps.
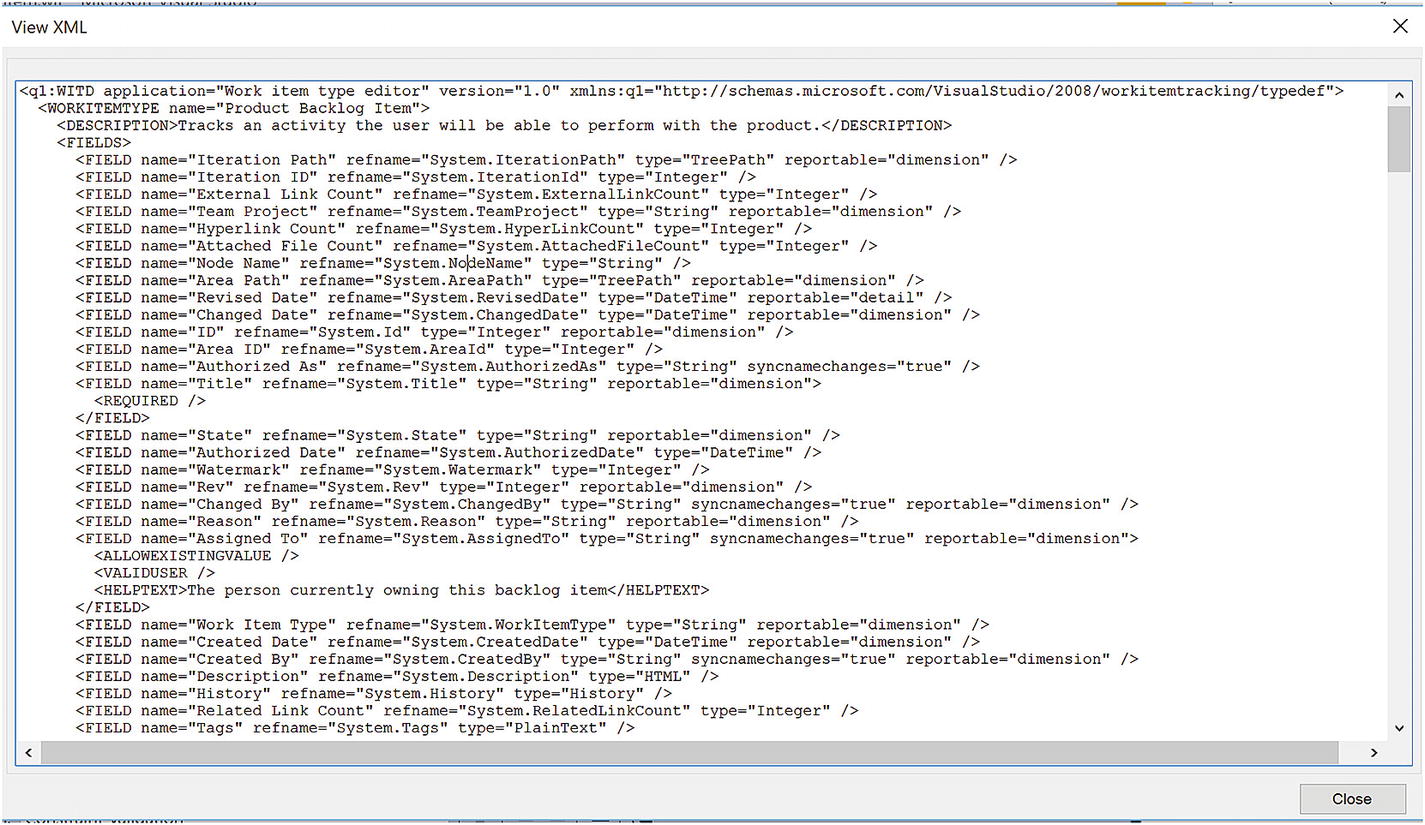
Example of a process template XML file in Visual Studio
The Process Template Editor is a useful tool that Microsoft provides for TFS and Visual Studio. You can find the Power Tool at https://marketplace.visualstudio.com/items?itemName=KarthikBalasubramanianMSFT.TFSProcessTemplateEditor .
The Process Template Editor also provides tools for updating global lists and work item types, as well as for viewing the attributes of work item fields. This tool was formerly provided via TFS 2015 Power Tools (and earlier versions). It is a client extension that needs to be installed by users locally for their own version of Visual Studio.
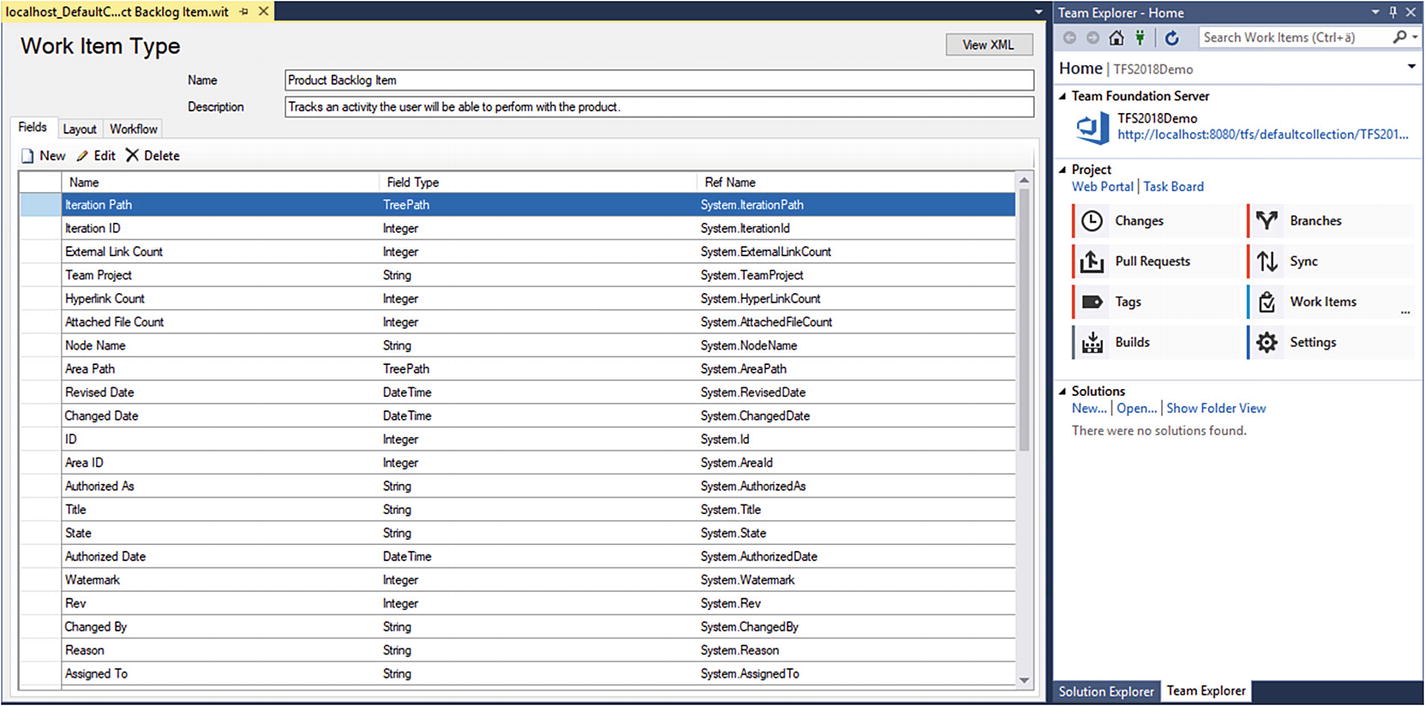
Editing the product backlog work item type from the Scrum process using the Process Template Editor inside Visual Studio
Common Adaptations of the Process Template
What are the most common things people change in the process template? I would say that this depends on your needs, and I strongly suggest you consider your needs before starting to customize the templates. You should gather information to help point out these needs by doing an ALM assessment or other evaluation. Because the process template is a representation of your ALM process, it makes good sense to understand your way of working. What are your organization’s needs? Which information is important in your bugs? How do you handle CRs? How do you handle requirements?
Do an assessment, run some workshops about the results, and talk about what your requirements are for the process templates. Then, select one project to use to pilot the process template and see the results. You will probably need to adjust your template after the pilot, but that is quite all right; that’s the purpose of a pilot.
Add a new field to an existing work item types
Modify the pick list of values for a field
Change the workflow—states, reasons, transitions, actions—of an existing work item type
Edit the layout of a work item form
Add or remove a work item type
Change process configuration or defaults associated with Agile tools
Work Item Types
You can use the work item types that Microsoft ships with Azure DevOps in the three templates. But, as mentioned earlier, we think you should really consider your own needs in the organization and make adjustments to the templates based on them. Your organization might need more work items or might need to extend the information required for them. If your PMs use Microsoft Office Project, you might want to change the mapping between fields in TFS against fields in Project. Another thing to consider is the workflow of the work items. How is the process in your organization? Between which states can a bug transition? Microsoft supplies a set of default work item instances when a project is created that represent tasks that need to be done in all projects. Your organization might have different needs for default work items.
Work Item Queries
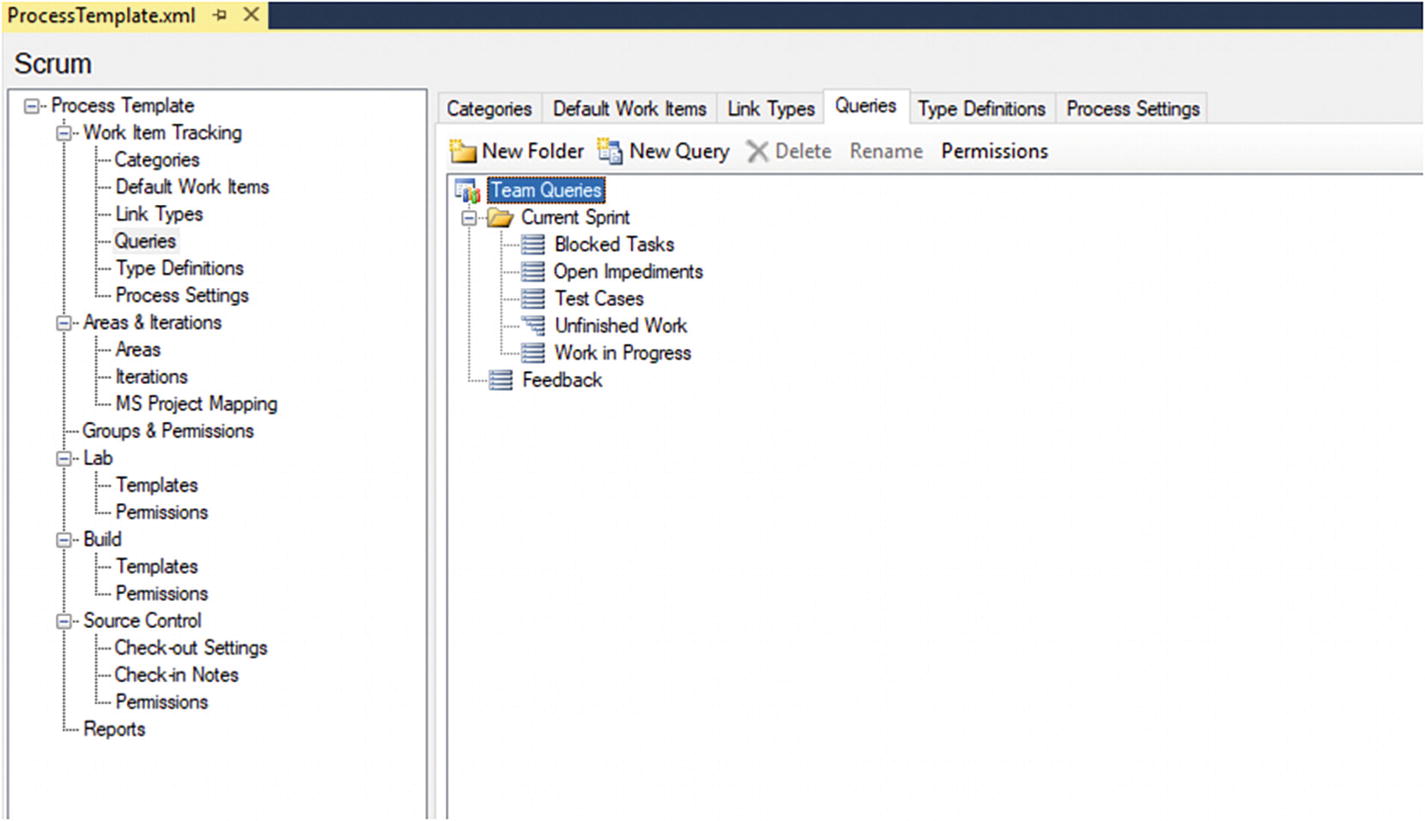
The work item queries in the Scrum process
Reports

A report showing work remaining on a project
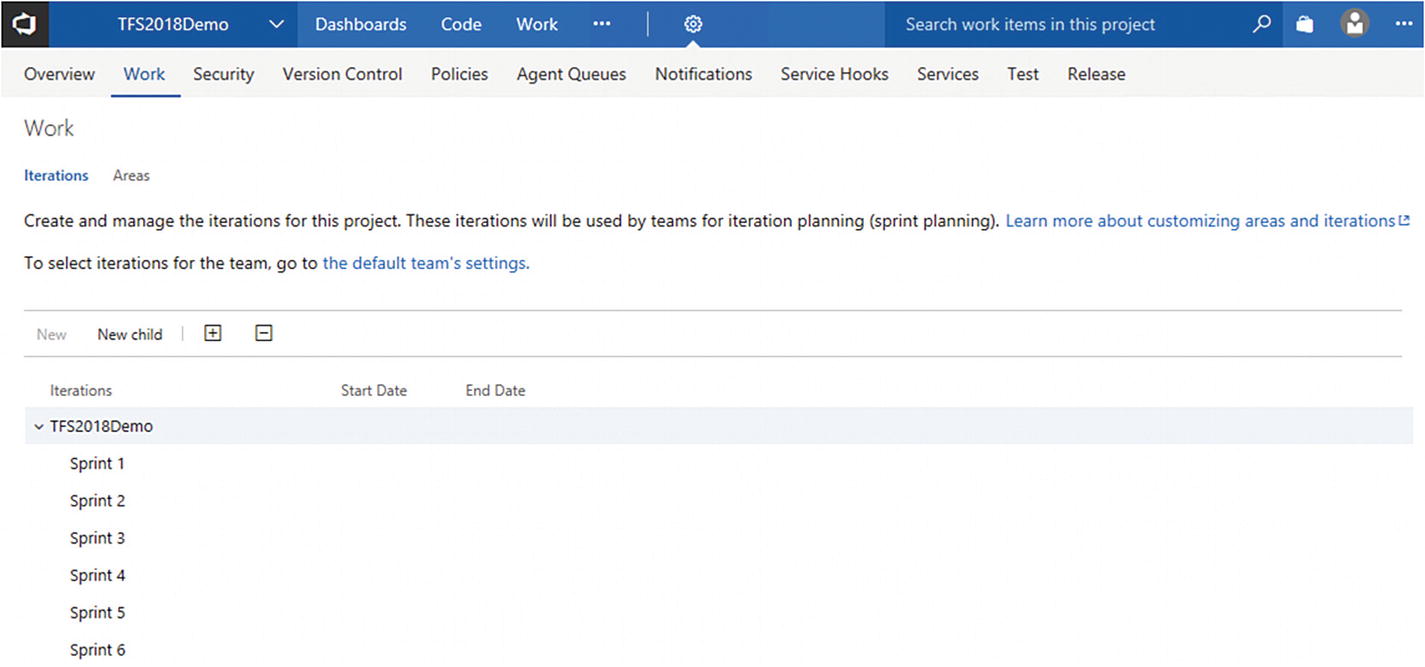
Areas and Iterations
Areas and iterations are interesting concepts. Iterations are what the term sounds like, basically. You use iterations to name the different versions of your project. You can name them anything you want. We have most often used the names Iteration 1, 2, 3, and so on, but how you name them is up to you. You can nest them and build an iteration hierarchy if you want.
Areas are labels you can attach to just about anything. One customer uses labels named after their Windows or web forms in their projects. Another uses them for each component in their system. Then they can use areas and iterations to describe which areas (forms) belong to a certain iteration.
Areas and iterations in the team settings
You can decide what you want to use labels and areas for. In our opinion, they are very useful. They give you enormous freedom in how you set up your projects, so I suggest you make good use of them.
Modifying Work Items
Microsoft encourages modification of process templates. We’ve found that work items are worth modifying. Many organizations have needed information in their work items that is not available in the three Microsoft templates. In these cases, we adjusted the work items to fit the organization better. This strategy has turned out to be very successful in all cases. One thing we changed was the workflow of the work items.
How to Open the Process Template

Starting the Process Template Manager from Team Explorer

Selecting a process to download

Starting the Process Editor from Visual Studio
After you finished editing the downloaded process template, you can rename it and upload it to the server as a new process template available for all new team projects.
Work Item Fields
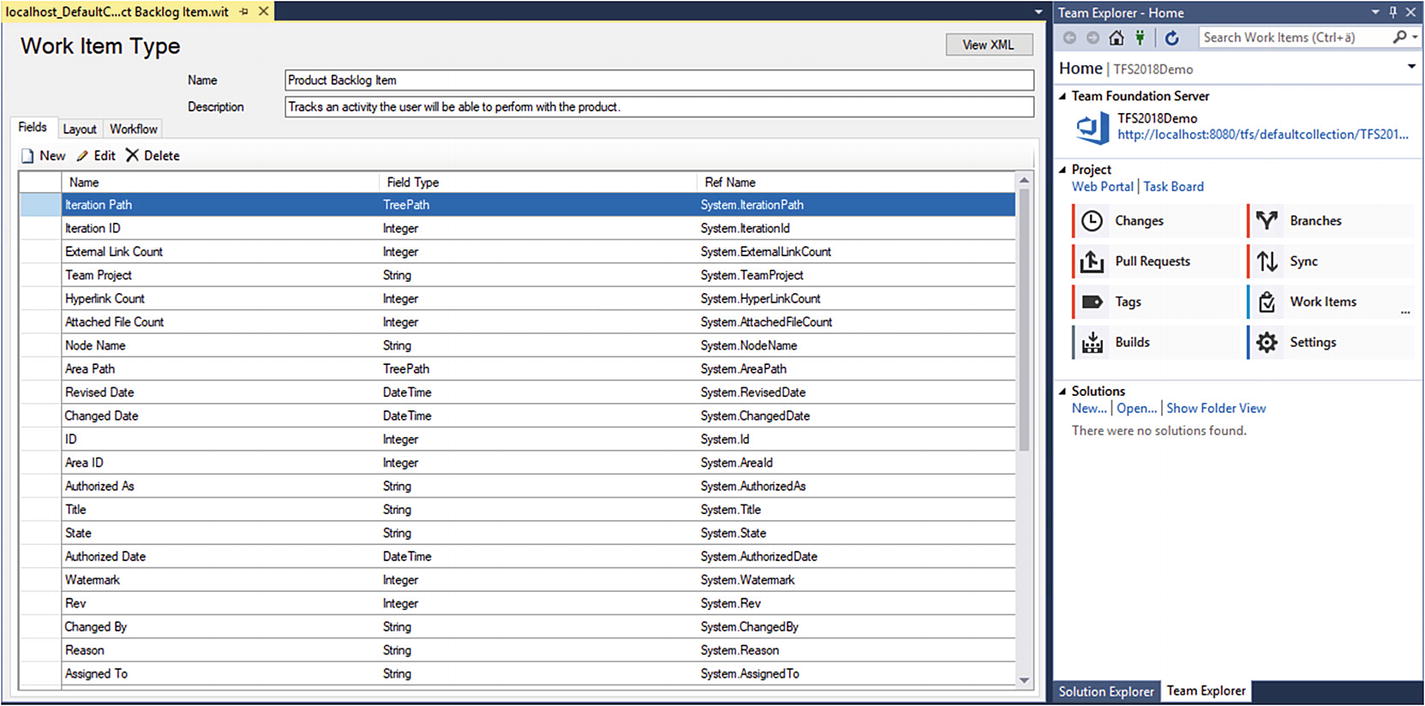
Fields in the PBI work item from the Microsoft Scrum template

Field Definition dialog box

An example of a rule for a PBI work item

The Layout editor for work items

Previewing the layout
Work Item Workflow

An example of a workflow for a PBI work item
New to Approved
New to Removed
Approved to Committed
Approved to Removed
Committed to Done
Removed to New
You can also let automatic transitions occur in the workflow. For example, if a closed bug is reopened because of a new test that shows there are still some errors in the code, you can have the bug reassigned automatically to the person who closed it. In this way, you save some work because you don’t have to hunt down that person yourself.
Modifying the Process Template in Azure DevOps
Before now, it wasn’t possible to modify the process template very much in Azure DevOps (formerly known as VSTS). However, in the latest versions you can adjust quite a lot. There are also many ways you can configure the look and feel of the web access without modifying a process template. Let’s take a look at this because this might be an adequate solution for you in many cases.
Modifications to the Web Access
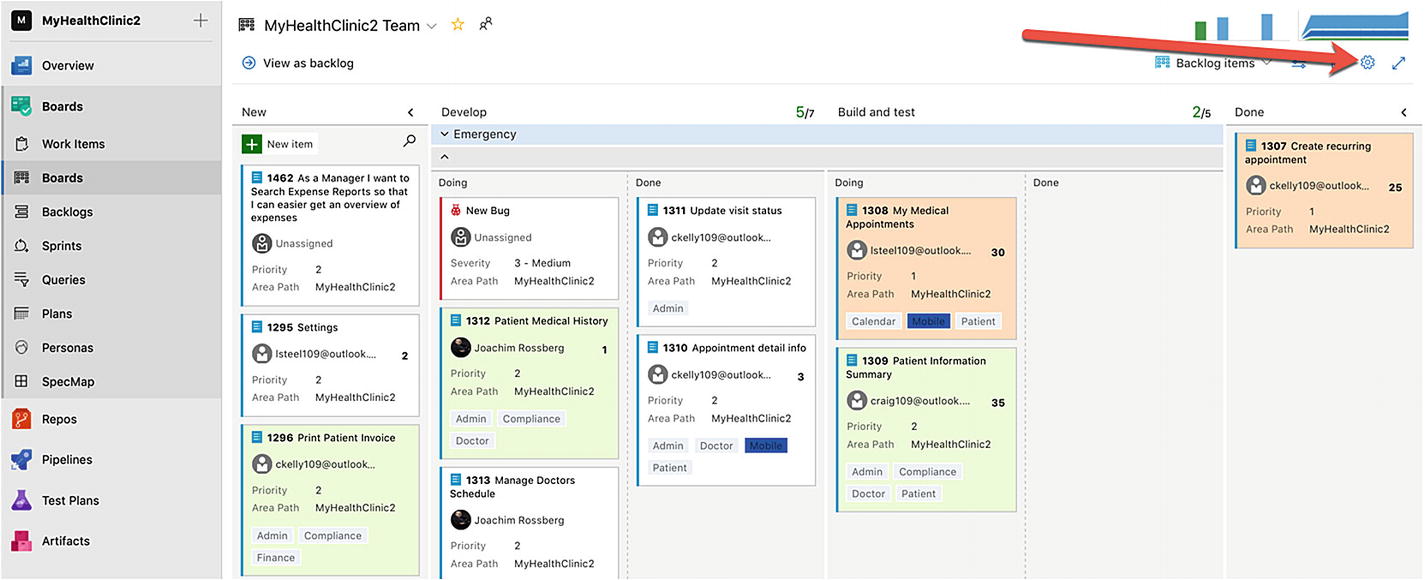
Configuring the Kanban board
Cards
Board
Charts
General
Cards
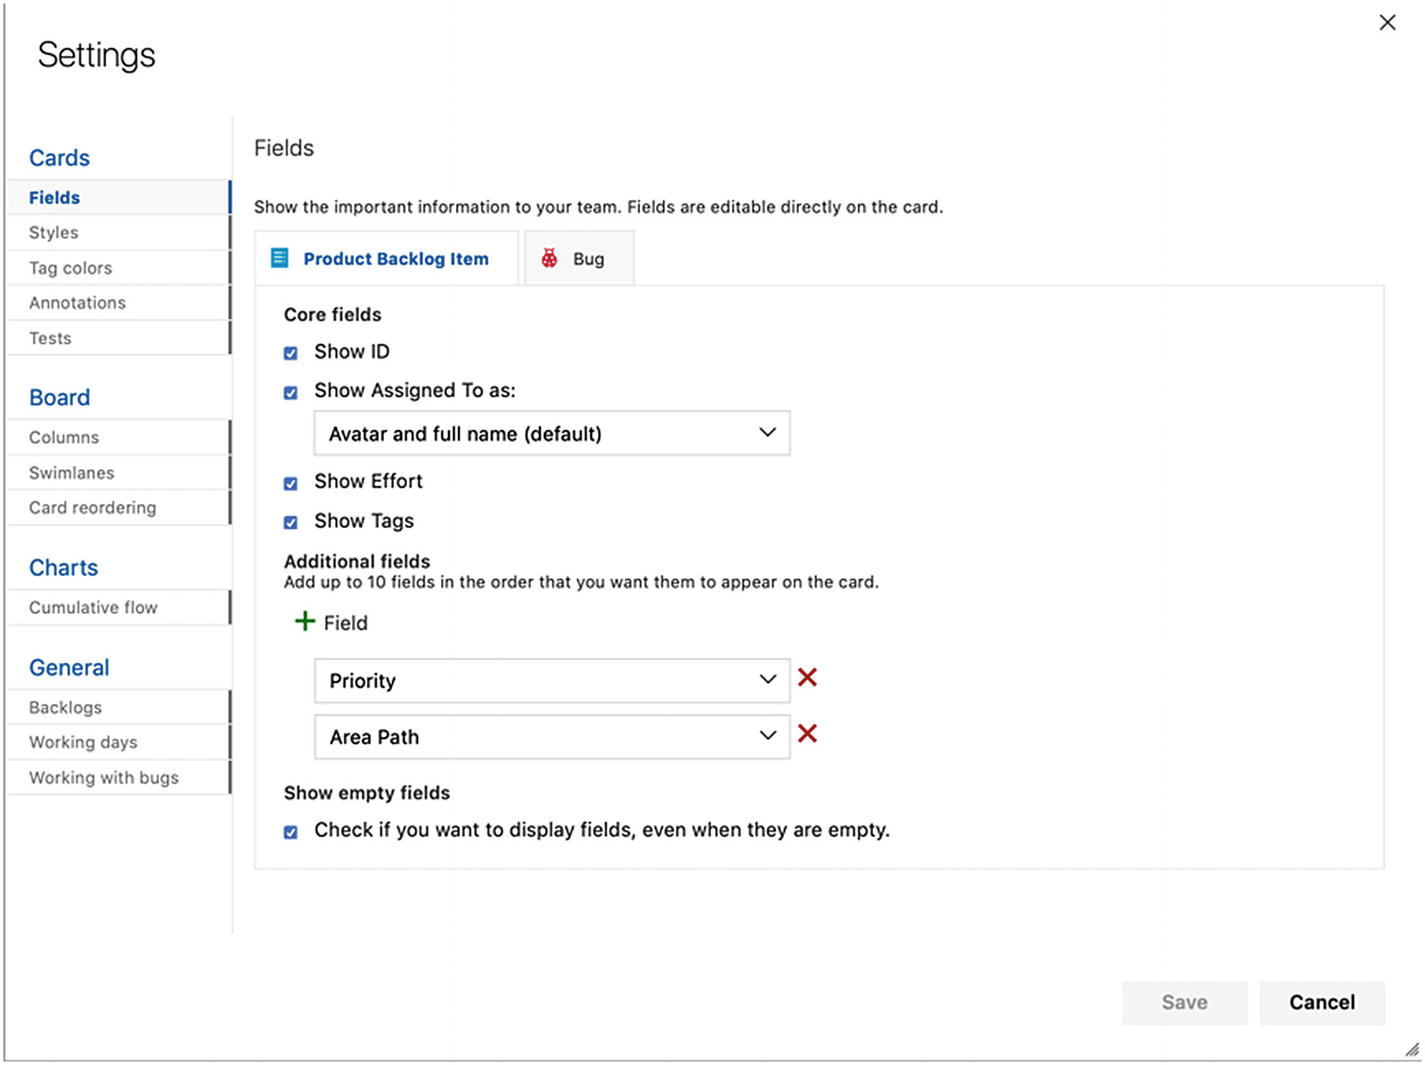
Modifying the GUI
You can change the fields you presents on your cards. Although Microsoft has limited which fields you can show, you still have a fair collection at your disposal.

Changing the color style for bugs

Changing the color code for tags
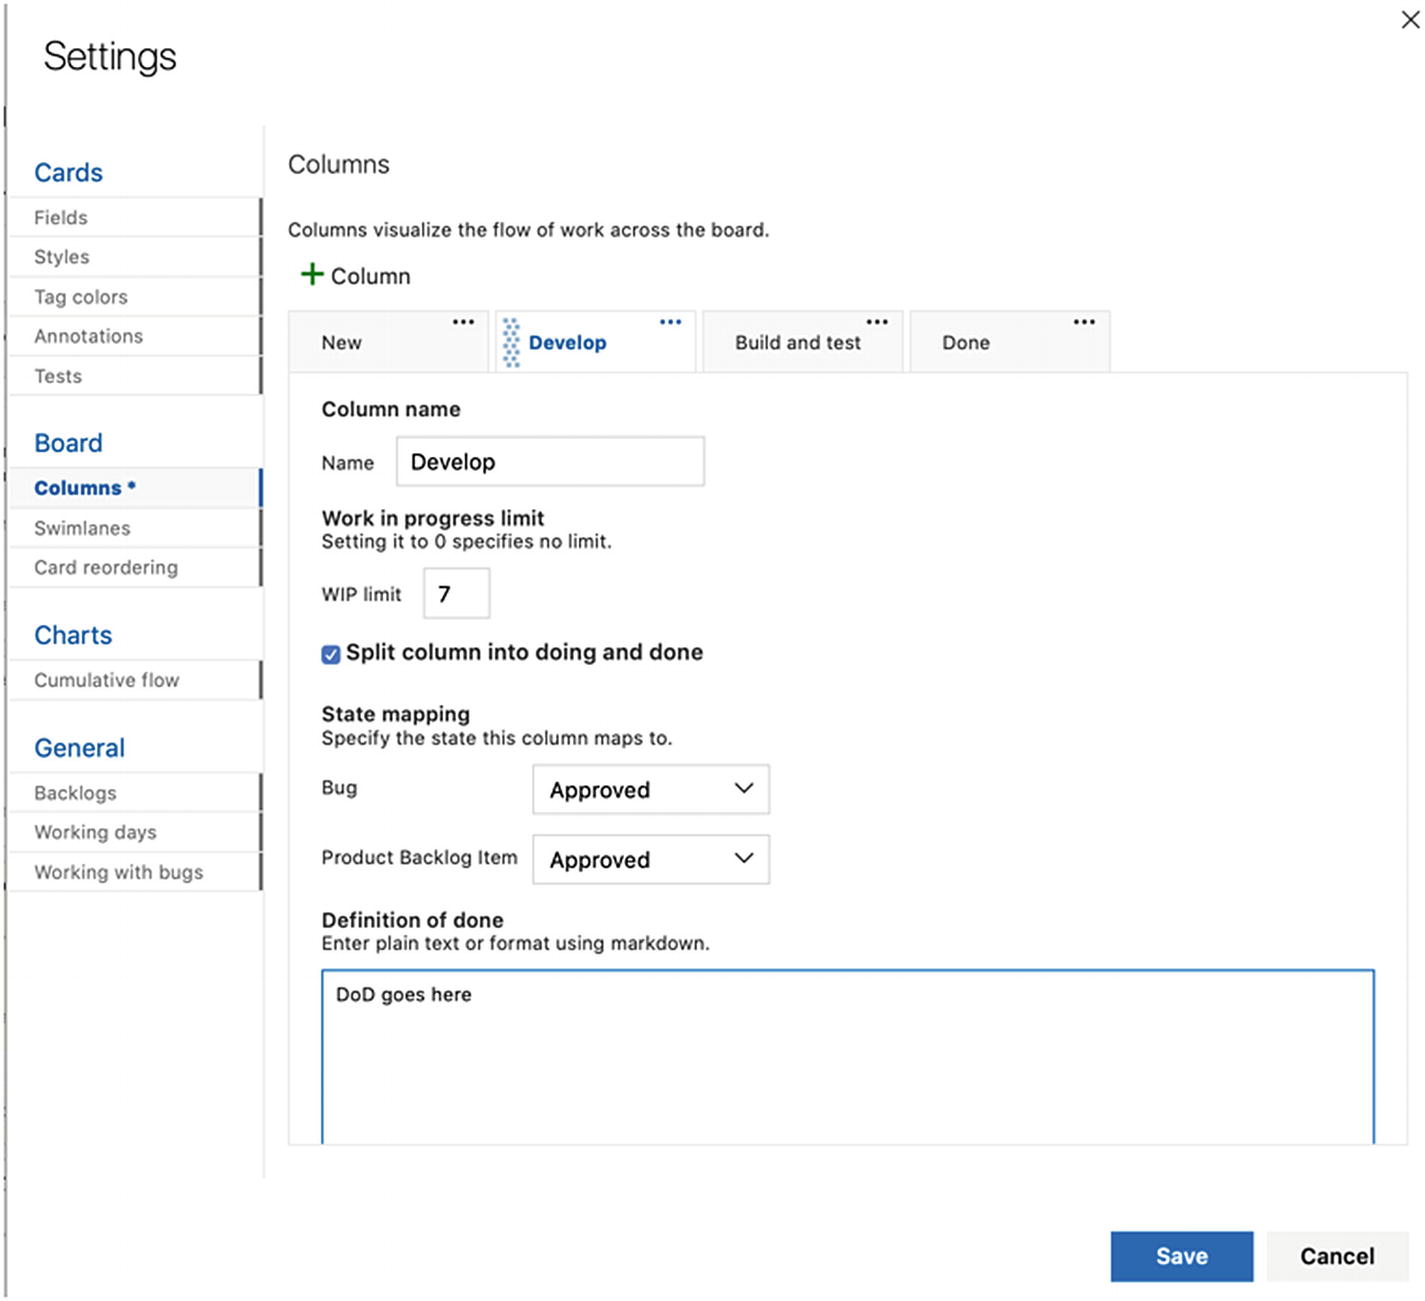
Configuring columns on the board
Another thing you can do is add “swim lanes” to your board. For instance, during a project when I worked as a service manager for a large intranet, we used swim lanes to keep track of different issues that came into the support group. Bugs had their own swim lane and CRs had their own as well. In this way, we increased visibility for all in the maintenance team as well as for stakeholders. Swim lanes are basically just rows in a board that can be used for whatever purpose you want—a nice inclusion by Microsoft.
- 1.
Work items reorder when changing columns, and the backlog reflects the new order.
- 2.
Work items follow the backlog order when changing columns.
The Charts feature does not provide many options. Basically, you can choose the time interval for the cumulative flow diagram. The default is 30 weeks, you can shorten that time span. You can also choose to include the first and last columns of your board.

Showing Epics in Backlog
You can also select the working days you will use during your project. Most people will obviously use Monday through Friday, but you can include weekends as well.
- 1.
Bugs appear on the backlogs and boards with requirements
- 2.
Bugs appear on the backlogs and boards with tasks
- 3.
Bugs do not appear on backlogs and boards
The choice is yours to make. Evaluate which way works best for your team; you can always change it later.
Modifications to the Process Templates in Azure DevOps
In earlier versions of Azure DevOps, it wasn’t possible to change many aspects of a process; you had to use what Microsoft chose for you. These days, however, you have many options to customize you process, which is a great step forward for Azure DevOps.
There still are some differences between the ways you can modify templates. Azure DevOps, for instance, uses a different model than TFS for relating projects and processes. In TFS, process templates are used as starting points for projects and, after a project is created, the project is the scope you customize. In Azure DevOps, a process is shared across multiple projects and this is the scope you customize.
Otherwise, the syntax and structure used in defining a process is basically the same. There are only a few minor differences between templates you customize for Azure DevOps and those you upload to support an on-premises TFS.
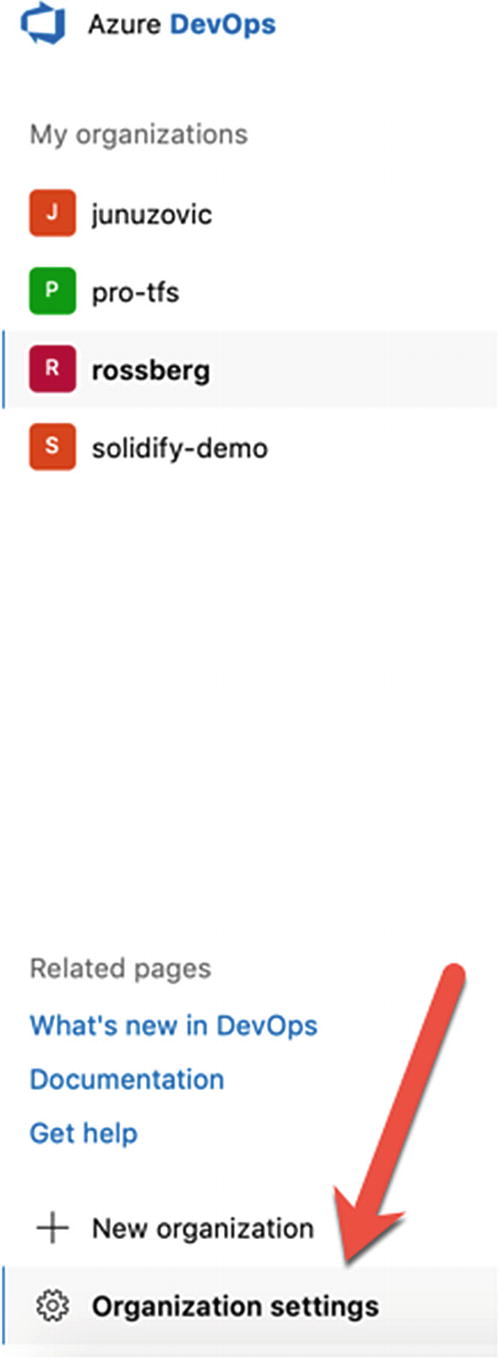
Accessing the organization settings in Azure DevOps

To see the processes in an Azure DevOps instance, make sure you select Organization settings
The changes you make are made on all projects in the collection, not on a single project. In Figure 5-23, you can see the three default processes from Azure DevOps to work with and the two inherited processes.
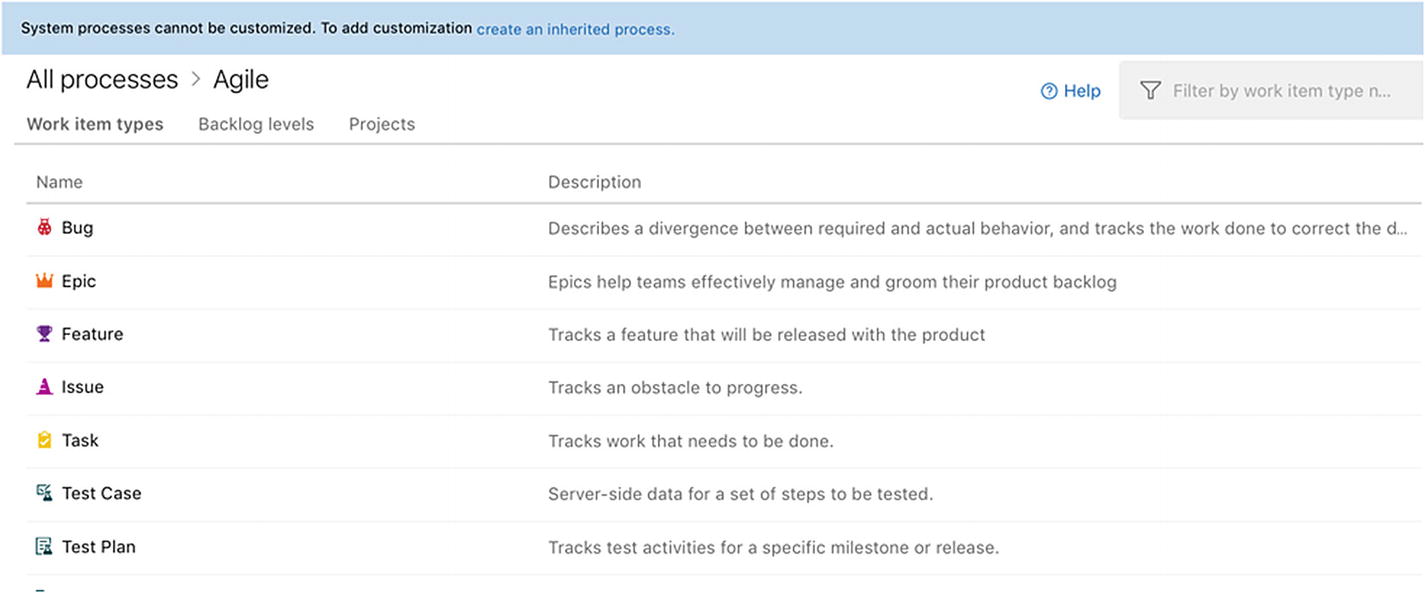
You cannot modify any of the three system processes

Creating a shared process for editing

Accessing Edit mode

Starting to edit the inherited process

The work item types accessed in the inherited Agile process

Changing the User Story work item type
Layout
States
Rules

The User Story form in the Agile process
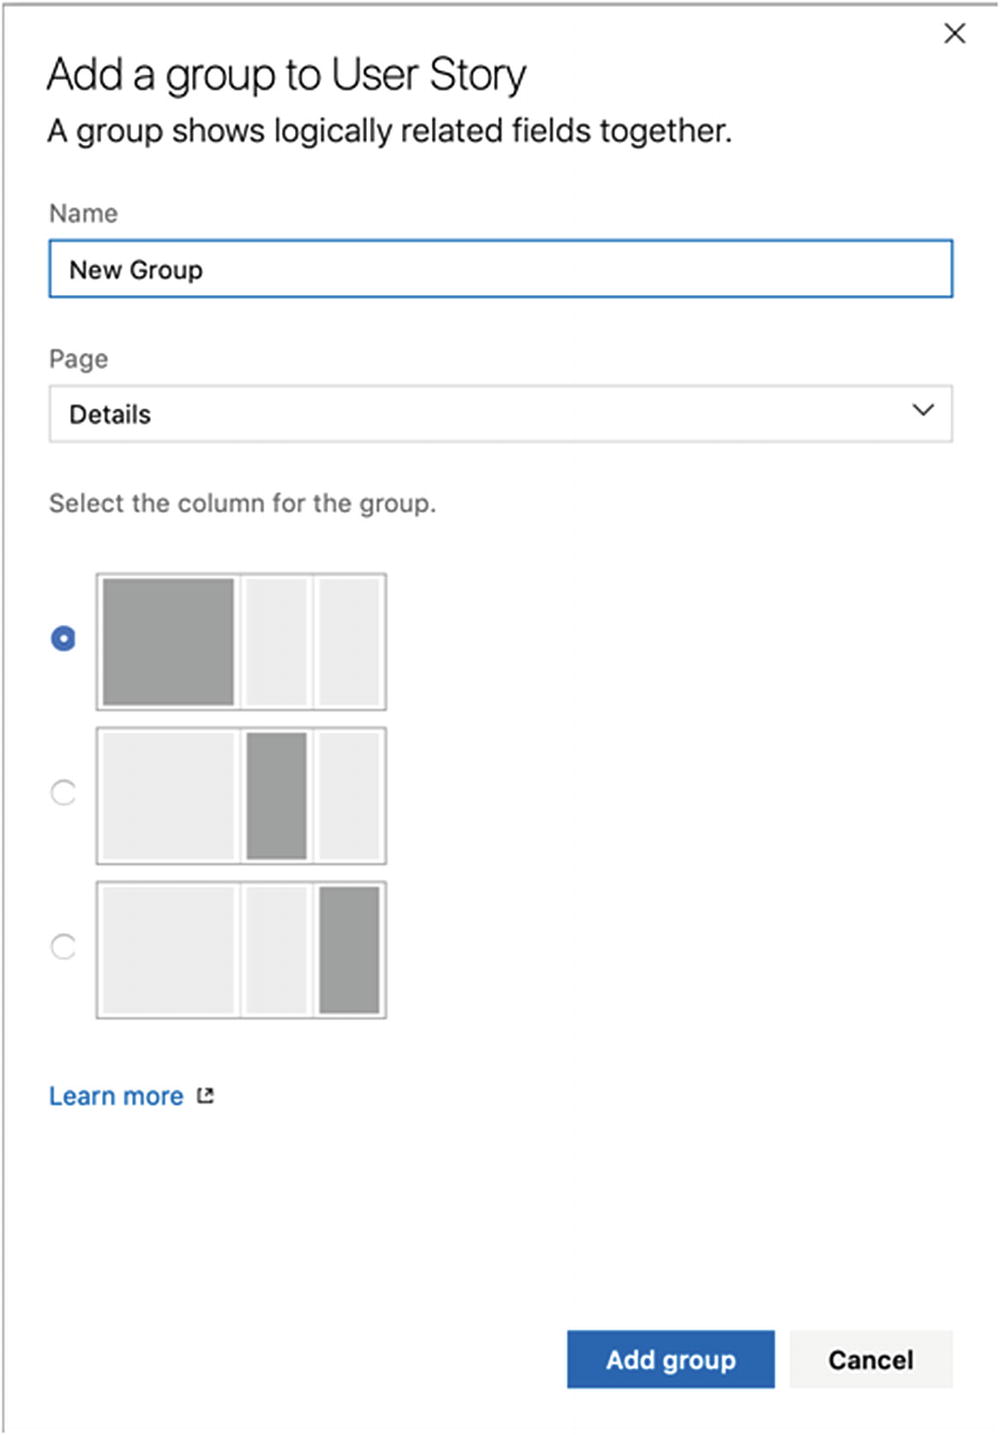
Adding new groups to the User Story

Adding a new group to the User Story
For each group, you can add, edit, or remove fields, so you can configure the group and enter the information your organization thinks is important for a work item type.
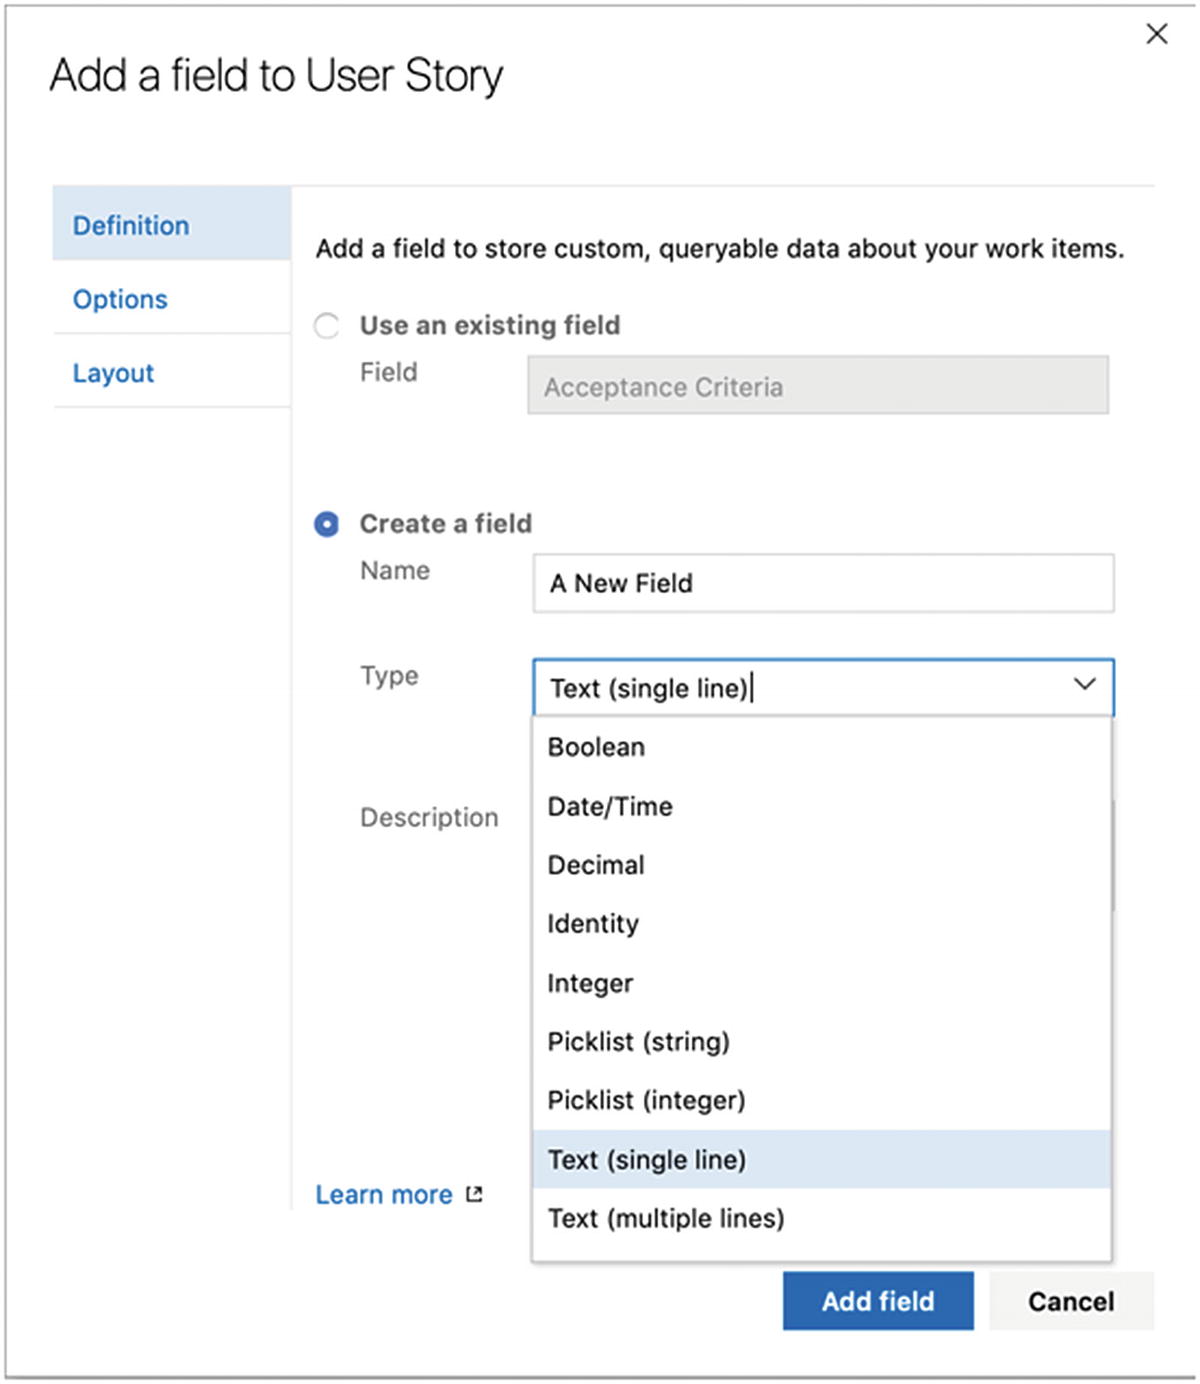
Adding a new field

Editing options for a new field

Editing the layout for a new field
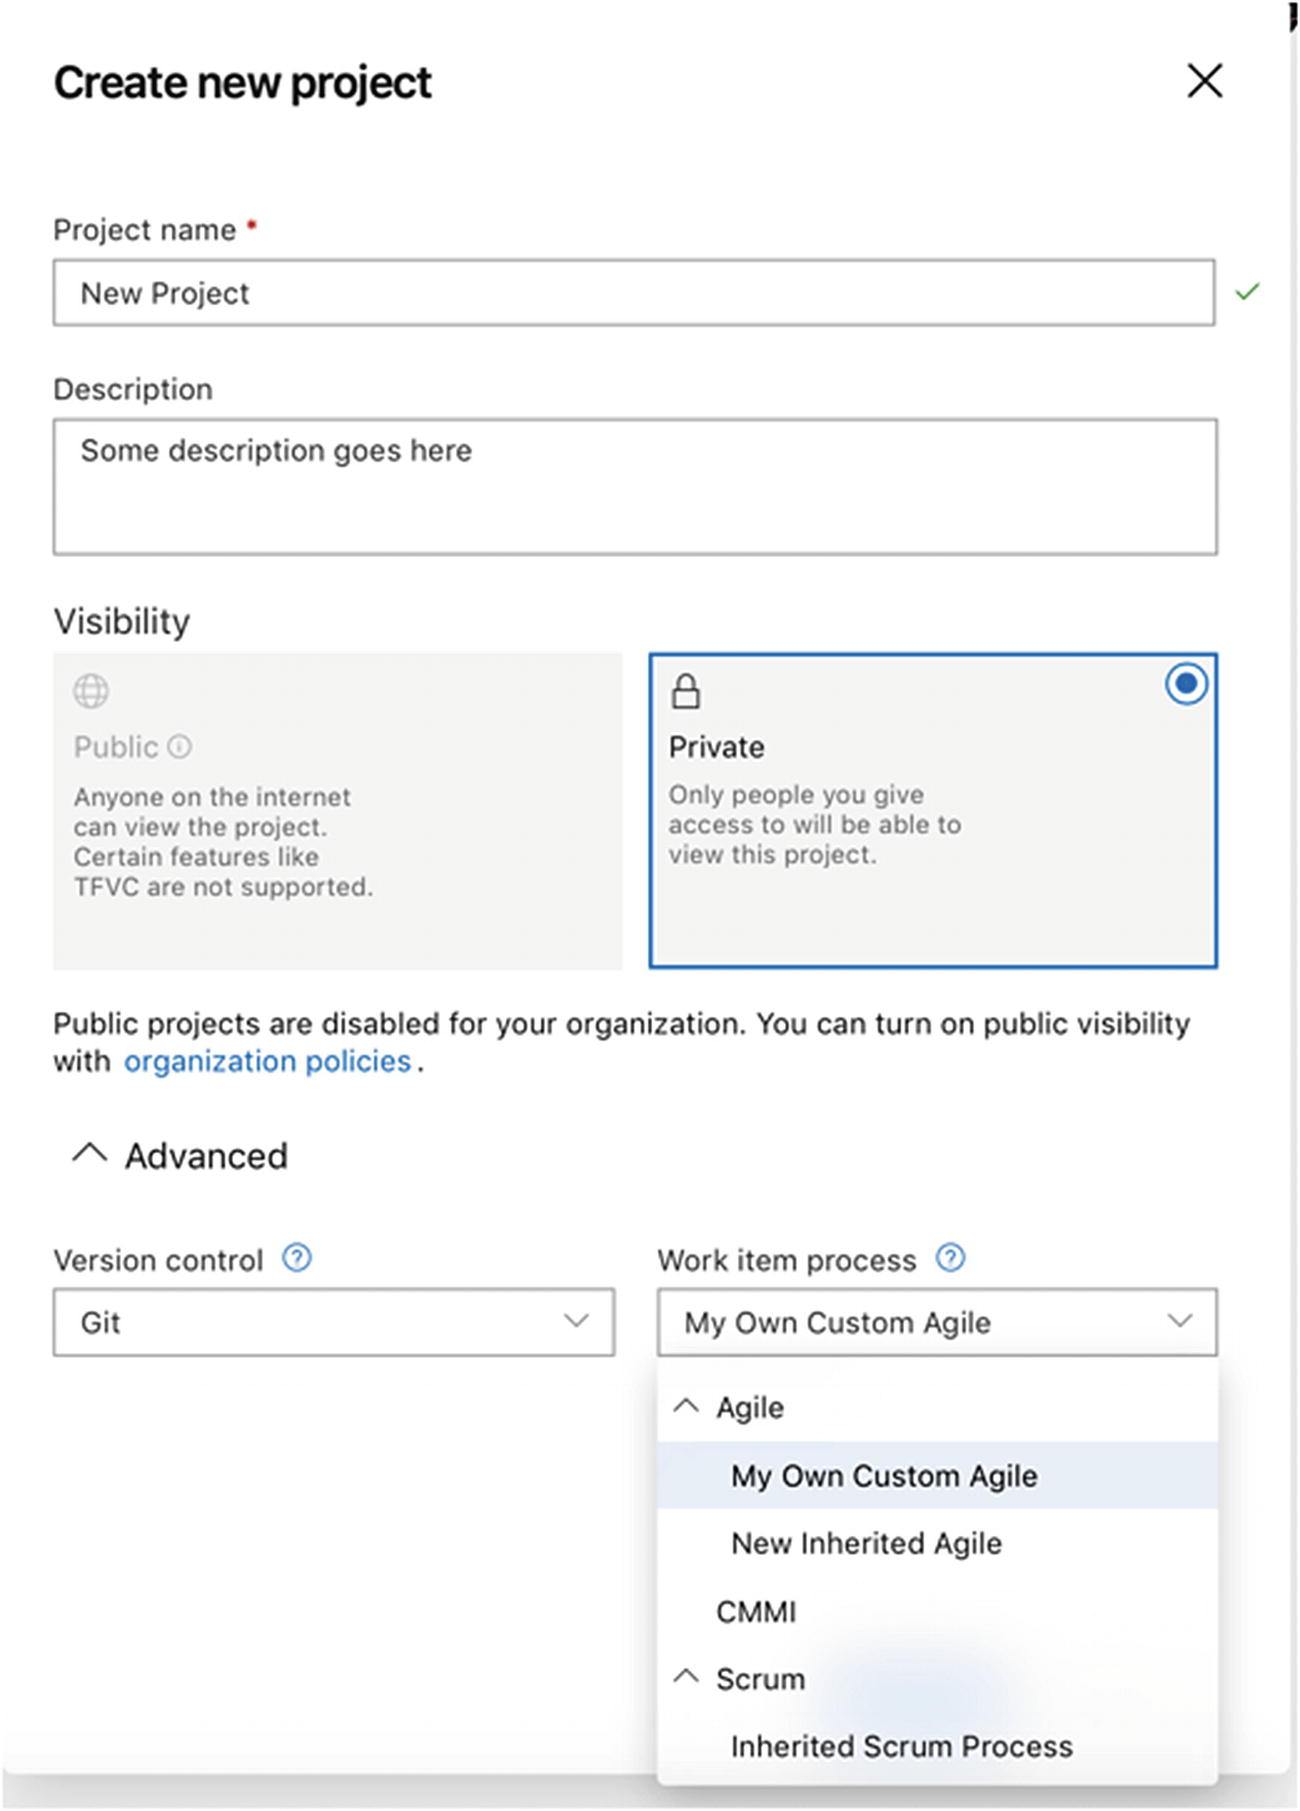
After you create a custom process, you can use it to create new Azure DevOps projects
Summary
In this chapter you have looked at how you can customize your process in TFS on-premise as well as in Azure DevOps. Most customizations can be done on-premise, but Microsoft has added great support for editing a cloud-based Azure DevOps project as well.