
Problem
You have an application that needs to use the device microphone to record audio input.
How It Works
MediaRecorder is quite simple to use. All you need to provide is some basic information about the file format to use for encoding and where to store the data. Listings 5-24 and 5-25 provide examples of how to record an audio file to the device’s SD card, monitoring user actions for when to start and stop.
Important In order to use MediaRecorder to record audio input, you must also declare the android.permission.RECORD_AUDIO permission in the application manifest.
Listing 5-24. res/layout/main.xml
<?xml version="1.0" encoding="utf-8"?>
<LinearLayout
    xmlns:android="http://schemas.android.com/apk/res/android"
    android:orientation="vertical"
    android:layout_width="match_parent"
    android:layout_height="match_parent">
    <Button
        android:id="@+id/startButton"
        android:layout_width="match_parent"
        android:layout_height="wrap_content"
        android:text="Start Recording" />
    <Button
        android:id="@+id/stopButton"
        android:layout_width="match_parent"
        android:layout_height="wrap_content"
        android:text="Stop Recording"
        android:enabled="false" />
</LinearLayout>
Listing 5-25. Activity for Recording Audio
public class RecordActivity extends Activity {

    private MediaRecorder recorder;
    private Button start, stop;
    File path;

    @Override
    public void onCreate(Bundle savedInstanceState) {
        super.onCreate(savedInstanceState);
        setContentView(R.layout.main);

        start = (Button)findViewById(R.id.startButton);
        start.setOnClickListener(startListener);
        stop = (Button)findViewById(R.id.stopButton);
        stop.setOnClickListener(stopListener);

        recorder = new MediaRecorder();
        path = new File(Environment.getExternalStorageDirectory(),
                "myRecording.3gp");

        resetRecorder();
    }

    @Override
    public void onDestroy() {
        super.onDestroy();
        recorder.release();
    }

    private void resetRecorder() {
        recorder.setAudioSource(MediaRecorder.AudioSource.MIC);
        recorder.setOutputFormat(
                MediaRecorder.OutputFormat.THREE_GPP);
        recorder.setAudioEncoder(
                MediaRecorder.AudioEncoder.DEFAULT);
        recorder.setOutputFile(path.getAbsolutePath());
        try {
            recorder.prepare();
        } catch (Exception e) {
            e.printStackTrace();
        }
    }

    private View.OnClickListener startListener =
            new View.OnClickListener() {
        @Override
        public void onClick(View v) {
            try {
                recorder.start();

                start.setEnabled(false);
                stop.setEnabled(true);
            } catch (Exception e) {
                e.printStackTrace();
            }
        }
    };

    private View.OnClickListener stopListener =
            new View.OnClickListener() {
        @Override
        public void onClick(View v) {
            recorder.stop();
            resetRecorder();

            start.setEnabled(true);
            stop.setEnabled(false);
        }
    };
}
The UI for this example is very basic. There are two buttons, and their uses alternate based on the recording state. When the user presses Start, we enable the Stop button and begin recording. When the user presses Stop, we re-enable the Start button and reset the recorder to run again.
MediaRecorder setup is just as straightforward. We create a file on the SD card entitled myRecording.3gp and pass the path in setOutputFile(). The remaining setup methods tell the recorder to use the device microphone as input (AudioSource.MIC), and it will create a 3GP file format for the output using the default encoder.
For now, you could play this audio file by using any of the device’s file browser or media player applications. Later, in Recipe 5-10, we will point out how to play audio back through the application as well.
Problems
Your application requires video capture, but you need more control over the video recording process than Recipe 5-5 provides.
Solution
(API Level 8)
Use MediaRecorderand Camera directly in concert with each other to create your own video-capture activity. This is slightly more complex than working with MediaRecorder in an audio-only context as we did with the previous recipe. We want the user to be able to see the camera preview even during the times that we aren’t recording video, and to do this, we must manage the access to the camera between the two objects.
How It Works
Listings 5-26 through 5-28 illustrate an example of recording video to the device’s external storage.
Listing 5-26. Partial AndroidManifest.xml
<uses-permission android:name="android.permission.RECORD_AUDIO" />
<uses-permission android:name="android.permission.CAMERA" />
<uses-permission
    android:name="android.permission.WRITE_EXTERNAL_STORAGE" />

...

<activity
    android:name=".VideoCaptureActivity"
    android:screenOrientation="portrait" >
    <intent-filter>
        <action android:name="android.intent.action.MAIN" />
        <category
            android:name="android.intent.category.LAUNCHER" />
    </intent-filter>
</activity>
The key element to point out in the manifest is that we have set our activity orientation to be fixed in portrait. There is also a small host of permissions required to access the camera and to make a recording that includes the audio track.
Listing 5-27. res/layout/main.xml
<RelativeLayout
    xmlns:android="http://schemas.android.com/apk/res/android"
    android:layout_width="match_parent"
    android:layout_height="match_parent" >

    <Button
        android:id="@+id/button_record"
        android:layout_width="match_parent"
        android:layout_height="wrap_content"
        android:layout_alignParentBottom="true"
        android:onClick="onRecordClick" />

    <SurfaceView
        android:id="@+id/surface_video"
        android:layout_width="match_parent"
        android:layout_height="match_parent"
        android:layout_above="@id/button_record" />
</RelativeLayout>
Listing 5-28. Activity Capturing Video
public class VideoCaptureActivity extends Activity implements
        SurfaceHolder.Callback {

    private Camera mCamera;
    private MediaRecorder mRecorder;

    private SurfaceView mPreview;
    private Button mRecordButton;

    private boolean mRecording = false;

    @Override
    public void onCreate(Bundle savedInstanceState) {
        super.onCreate(savedInstanceState);
        setContentView(R.layout.main);

        mRecordButton = (Button) findViewById(R.id.button_record);
        mRecordButton.setText("Start Recording");

        mPreview = (SurfaceView) findViewById(R.id.surface_video);
        mPreview.getHolder().addCallback(this);
        mPreview.getHolder()
                .setType(SurfaceHolder.SURFACE_TYPE_PUSH_BUFFERS);

        mCamera = Camera.open();
        //Rotate the preview display to match portrait
        mCamera.setDisplayOrientation(90);
        mRecorder = new MediaRecorder();
    }

    @Override
    protected void onDestroy() {
        mCamera.release();
        mCamera = null;
        super.onDestroy();
    }

    public void onRecordClick(View v) {
        updateRecordingState();
    }

    /*
     * Initialize the camera and recorder.
     * The order of these methods is important because MediaRecorder is
     * a strict state machine that moves through states as each method
     * is called.
     */
    private void initializeRecorder() throws
            IllegalStateException, IOException {
        //Unlock the camera to let MediaRecorder use it
        mCamera.unlock();
        mRecorder.setCamera(mCamera);
        //Update the source settings
        mRecorder.setAudioSource(
                MediaRecorder.AudioSource.CAMCORDER);
        mRecorder.setVideoSource(
                MediaRecorder.VideoSource.CAMERA);
        //Update the output settings
        File recordOutput = new File(
                Environment.getExternalStorageDirectory(),
                "recorded_video.mp4");
        if (recordOutput.exists()) {
            recordOutput.delete();
        }
        CamcorderProfile cpHigh = CamcorderProfile.get(
                CamcorderProfile.QUALITY_HIGH);
        mRecorder.setProfile(cpHigh);
        mRecorder.setOutputFile(recordOutput.getAbsolutePath());
        //Attach the surface to the recorder to allow
        // preview while recording
        mRecorder.setPreviewDisplay(
                mPreview.getHolder().getSurface());

        //Optionally, set limit values on recording
        mRecorder.setMaxDuration(50000); // 50 seconds
        mRecorder.setMaxFileSize(5000000); // Approximately 5MB

        mRecorder.prepare();
    }

    private void updateRecordingState() {
        if (mRecording) {
            mRecording = false;
            //Reset the recorder state for the next recording
            mRecorder.stop();
            mRecorder.reset();
            //Take the camera back to let preview continue
            mCamera.lock();
            mRecordButton.setText("Start Recording");
        } else {
            try {
                //Reset the recorder for the next session
                initializeRecorder();
                //Start recording
                mRecording = true;
                mRecorder.start();
                mRecordButton.setText("Stop Recording");
            } catch (Exception e) {
                //Error occurred initializing recorder
                e.printStackTrace();
            }
        }
    }

    @Override
    public void surfaceCreated(SurfaceHolder holder) {
        //When we get a surface, immediately start camera preview
        try {
            mCamera.setPreviewDisplay(holder);
            mCamera.startPreview();
        } catch (IOException e) {
            e.printStackTrace();
        }
    }

    @Override
    public void surfaceChanged(SurfaceHolder holder, int format,
            int width, int height) { }

    @Override
    public void surfaceDestroyed(SurfaceHolder holder) { }
}
When this activity is first created, it obtains an instance of the device’s camera and sets its display orientation to match the portrait orientation we defined in the manifest. This call will affect how only the preview content is displayed, not the recorded output; we will talk more about this later in the section. When the activity becomes visible, we will receive the surfaceCreated() callback, at which point the Camera begins sending preview data.
When the user decides to press the button and start recording, the Camera is unlocked and handed over to MediaRecorder for use. The recorder is then set up with the proper sources and formats that it should use to capture video, including both a time and file-size limit to keep users from overloading their storage.
Note It is possible to record video with MediaRecorder without having to manage the Camera directly, but you will be unable to modify the display orientation and the application will display only preview frames while recording is taking place.
Once recording is finished, the file is automatically saved to external storage and we reset the recorder instance to be ready if the user wants to record again. We also regain control of the Camera so that preview frames will continue to draw.
Output Format Orientation
(API Level 9)
In our example, we used Camera.setDisplayOrientation() to match the preview display orientation to our portrait activity. However, in some cases, if you play this video back on your computer, the playback will still be in landscape. To fix this problem, we can use the setOrientationHint() method on MediaRecorder. This method takes a value in degrees that would match up with our display orientation and applies that value to the metadata of the video container file (that is, the 3GP or MP4 file) to notify other video player applications that the video should be oriented a certain way.
This may not be necessary because some video players determine orientation based on which dimension of the video size is smaller. It is for this reason, and to keep compatibility with API Level 8, that we have not added it to the example here.
5-9. Adding Speech Recognition
Problem
Your application needs speech-recognition technology in order to interpret voice input.
Solution
Use the classes of the android.speech package to leverage the built-in speech-recognition technology of every Android device. Every Android device that is equipped with voice search (available since Android 1.5) provides applications with the ability to use the built-in SpeechRecognizer to process voice input.
To activate this process, the application needs only to send a RecognizerIntent to the system, where the recognition service will handle recording the voice input and processing it; then it returns to you a list of strings indicating what the recognizer thought it heard.
How It Works
Let’s examine this technology in action. See Listing 5-29.
Listing 5-29. Activity Launching and Processing Speech Recognition
public class RecognizeActivity extends Activity {

    private static final int REQUEST_RECOGNIZE = 100;

    TextView tv;

    @Override
    public void onCreate(Bundle savedInstanceState) {
        super.onCreate(savedInstanceState);
        tv = new TextView(this);
        setContentView(tv);

        Intent intent = new Intent(
                RecognizerIntent.ACTION_RECOGNIZE_SPEECH);
        intent.putExtra(RecognizerIntent.EXTRA_LANGUAGE_MODEL,
                RecognizerIntent.LANGUAGE_MODEL_FREE_FORM);
        intent.putExtra(RecognizerIntent.EXTRA_PROMPT,
                "Tell Me Your Name");
        try {
            startActivityForResult(intent, REQUEST_RECOGNIZE);
        } catch (ActivityNotFoundException e) {
            //If no recognizer exists, download from Google Play
            showDownloadDialog();
        }
    }

    private void showDownloadDialog() {
        AlertDialog.Builder builder =
                new AlertDialog.Builder(this);
        builder.setTitle("Not Available");
        builder.setMessage(
            "There is no recognition application installed."
            + "  Would you like to download one?");
        builder.setPositiveButton("Yes",
                new DialogInterface.OnClickListener() {
            @Override
            public void onClick(DialogInterface dialog,
                    int which) {
                //Download, for example, Google Voice Search
                Intent marketIntent =
                        new Intent(Intent.ACTION_VIEW);
                marketIntent.setData(
                    Uri.parse("market://details?"
                        + "id=com.google.android.voicesearch") );
            }
        });
        builder.setNegativeButton("No", null);
        builder.create().show();
    }

    @Override
    protected void onActivityResult(int requestCode,
            int resultCode, Intent data) {
        if(requestCode == REQUEST_RECOGNIZE &&
                resultCode == Activity.RESULT_OK) {
            ArrayList<String> matches =
                data.getStringArrayListExtra(RecognizerIntent.EXTRA_RESULTS);
            StringBuilder sb = new StringBuilder();
            for(String piece : matches) {
                sb.append(piece);
                sb.append('
'),
            }
            tv.setText(sb.toString());
        } else {
            Toast.makeText(this, "Operation Canceled",
                    Toast.LENGTH_SHORT).show();
        }
    }
}
Note If you are testing your application in the emulator, beware that neither Google Play nor any voice recognizers will likely be installed. It is best to test the operation of this example on a device.
This example automatically starts the speech-recognition activity upon launch of the application and asks the user, “Tell Me Your Name.” Upon receiving speech from the user and processing the result, the activity returns with a list of possible items the user could have said. This list is in order of probability, and so in many cases, it would be prudent to simply call matches.get(0) as the best possible choice and move on. However, this activity takes all the returned values and displays them on the screen for entertainment purposes.
When starting up the SpeechRecognizer, there are a number of extras that can be passed in the Intent to customize the behavior. This example uses the two that are most common:
- EXTRA_LANGUAGE_MODEL: A value to help fine-tune the results from the speech processor.
- Typical speech-to-text queries should use the LANGUAGE_MODEL_FREE_FORM option.
- If shorter request-type queries are being made, LANGUAGE_MODEL_WEB_SEARCH may produce better results.
In addition to these, a handful of other parameters may be useful to pass along:
5-10. Playing Back Audio/Video
Problem
An application needs to play audio or video content, either local or remote, on the device.
Solution
Use the MediaPlayer to play local or streamed media. Whether the content is audio or video, local or remote, MediaPlayer will connect, prepare, and play the associated media efficiently. In this recipe, we will also explore using MediaController and VideoView as simple ways to include interaction and video play in an activity layout.
How It Works
Note Before expecting a specific media clip or stream to play, please read the “Android Supported Media Formats” section of the developer documentation to verify support.
Let’s look at a simple example of just using MediaPlayer to play a sound. See Listing 5-30.
Listing 5-30. Activity Playing Local Sound
public class PlayActivity extends Activity implements
        MediaPlayer.OnCompletionListener {

    private Button mPlay;
    private MediaPlayer mPlayer;

    @Override
    public void onCreate(Bundle savedInstanceState) {
        super.onCreate(savedInstanceState);

        mPlay = new Button(this);
        mPlay.setText("Play Sound");
        mPlay.setOnClickListener(playListener);

        setContentView(mPlay);
    }

    @Override
    public void onDestroy() {
        super.onDestroy();
        if(mPlayer != null) {
            mPlayer.release();
        }
    }

    private View.OnClickListener playListener =
            new View.OnClickListener() {
        @Override
        public void onClick(View v) {
            if(mPlayer == null) {
                try {
                    mPlayer = MediaPlayer.create(PlayActivity.this,
                            R.raw.sound);
                    mPlayer.start();
                } catch (Exception e) {
                    e.printStackTrace();
                }
            } else {
                mPlayer.stop();
                mPlayer.release();
                mPlayer = null;
            }
        }
    };

    //OnCompletionListener Methods
    @Override
    public void onCompletion(MediaPlayer mp) {
        mPlayer.release();
        mPlayer = null;
    }

}
This example uses a button to start and stop playback of a local sound file that is stored in the res/raw directory of a project. MediaPlayer.create()is a convenience method with several forms, intended to construct and prepare a player object in one step. The form used in this example takes a reference to a local resource ID, but create() can also be used to access and play a remote resource using MediaPlayer.create(Context context, Uri uri).
Once created, the example starts playing the sound immediately. While the sound is playing, the user may press the button again to stop play. The activity also implements the MediaPlayer.OnCompletionListener interface, so it receives a callback when the playing operation completes normally.
In either case, after play is stopped, the MediaPlayer instance is released. This method allows the resources to be retained only as long as they are in use, and the sound may be played multiple times. To be sure resources are not unnecessarily retained, the player is also released when the activity is destroyed if it still exists.
If your application needs to play many different sounds, you may consider calling reset() instead of release() when playback is over. Remember, though, to still call release() when the player is no longer needed (or the activity goes away).
Beyond just simple playback, what if the application needs to create an interactive experience for the user to be able to play, pause, and seek through the media? There are methods available on MediaPlayer to implement all these functions with custom UI elements, but Android also provides the MediaController view so you don’t have to. See Listings 5-31 and 5-32.
Listing 5-31. res/layout/main.xml
<?xml version="1.0" encoding="utf-8"?>
<LinearLayout
    xmlns:android="http://schemas.android.com/apk/res/android"
    android:id="@+id/root"
    android:orientation="vertical"
    android:layout_width="match_parent"
    android:layout_height="match_parent">
    <TextView
        android:layout_width="wrap_content"
        android:layout_height="wrap_content"
        android:layout_gravity="center_horizontal"
        android:text="Now Playing..." />
    <ImageView
        android:id="@+id/coverImage"
        android:layout_width="match_parent"
        android:layout_height="match_parent"
        android:scaleType="centerInside" />
</LinearLayout>
Listing 5-32. Activity Playing Audio with a MediaController
public class PlayerActivity extends Activity implements
        MediaController.MediaPlayerControl,
        MediaPlayer.OnBufferingUpdateListener {

    MediaController mController;
    MediaPlayer mPlayer;
    ImageView coverImage;

    int bufferPercent = 0;

    @Override
    public void onCreate(Bundle savedInstanceState) {
        super.onCreate(savedInstanceState);
        setContentView(R.layout.main);

        coverImage = (ImageView)findViewById(R.id.coverImage);

        mController = new MediaController(this);
        mController.setAnchorView(findViewById(R.id.root));
    }

    @Override
    public void onResume() {
        super.onResume();
        mPlayer = new MediaPlayer();
        //Set the audio data source
        try {
            mPlayer.setDataSource(this,
                    Uri.parse("<URI_TO_REMOTE_AUDIO>"));
            mPlayer.prepare();
        } catch (Exception e) {
            e.printStackTrace();
        }
        //Set an image for the album cover
        coverImage.setImageResource(R.drawable.icon);

        mController.setMediaPlayer(this);
        mController.setEnabled(true);
    }

    @Override
    public void onPause() {
        super.onPause();
        mPlayer.release();
        mPlayer = null;
    }

    @Override
    public boolean onTouchEvent(MotionEvent event) {
        mController.show();
        return super.onTouchEvent(event);
    }

    //MediaPlayerControl Methods
    @Override
    public int getBufferPercentage() {
        return bufferPercent;
    }

    @Override
    public int getCurrentPosition() {
        return mPlayer.getCurrentPosition();
    }

    @Override
    public int getDuration() {
        return mPlayer.getDuration();
    }

    @Override
    public boolean isPlaying() {
        return mPlayer.isPlaying();
    }

    @Override
    public void pause() {
        mPlayer.pause();
    }

    @Override
    public void seekTo(int pos) {
        mPlayer.seekTo(pos);
    }

    @Override
    public void start() {
        mPlayer.start();
    }

    //BufferUpdateListener Methods
    @Override
    public void onBufferingUpdate(MediaPlayer mp, int percent) {
        bufferPercent = percent;
    }

    //Android 2.0+ Target Callbacks
    public boolean canPause() {
        return true;
    }

    public boolean canSeekBackward() {
        return true;
    }

    public boolean canSeekForward() {
        return true;
    }
}
This example creates a simple audio player that displays an image for the artist or cover art associated with the audio being played (we just set it to the application icon here). The example still uses a MediaPlayer instance, but this time we are not creating it by using the create() convenience method. Instead we use setDataSource() after the instance is created to set the content. When attaching the content in this manner, the player is not automatically prepared, so we must also call prepare() to ready the player for use.
At this point, the audio is ready to start. We would like the MediaController to handle all playback controls, but MediaController can attach to only objects that implement the MediaController.MediaPlayerControl interface. Strangely, MediaPlayer alone does not implement this interface, so we appoint the activity to do that job instead. Six of the seven methods included in the interface are actually implemented by MediaPlayer, so we just call down to those directly.
LATE ADDITIONS
If your application is targeting API Level 5 or later, there are three additional methods to implement in the MediaController.MediaPlayerControl interface:
These methods simply tell the system whether we want to allow these operations to occur inside this control, so our example returns true for all three. These methods are not required if you target a lower API level (which is why we didn’t provide @Override annotations above them), but you may implement them for best results when running on later versions.
The final method required to use MediaController is getBufferPercentage(). To obtain this data, the activity is also tasked with implementing MediaPlayer.OnBufferingUpdateListener, which updates the buffer percentage as it changes.
MediaController has one trick to its implementation. It is designed as a widget that floats above an active view in its own window and it is visible for only a few seconds at a time. As a result, we do not instantiate the widget in the XML layout of the content view, but rather in code. The link is made between the MediaController and the content view by callingsetAnchorView(), which also determines where the controller will show up onscreen. In this example, we anchor it to the root layout object, so it will display at the bottom of the screen when visible. If the MediaController is anchored to a child view in the hierarchy, it will display next to that child instead.
Also, because of the controller’s separate window, MediaController.show() must not be called from within onCreate(), and doing so will cause a fatal exception. MediaController is designed to be hidden by default and activated by the user. In this example, we override the onTouchEvent() method of the activity to show the controller whenever the user taps the screen. Unless show() is called with a parameter of 0, it will fade out after the amount of time noted by the parameter. Calling show() without any parameter tells it to fade out after the default timeout, which is around 3 seconds. See Figure 5-5.
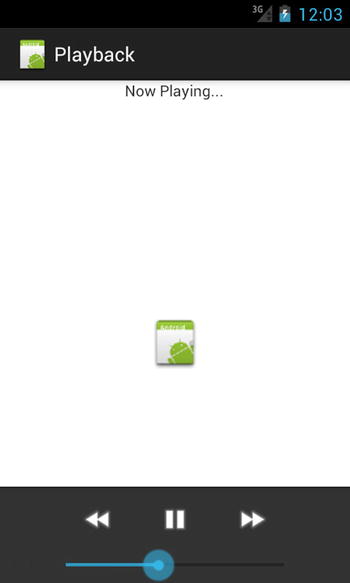
Figure 5-5. Activity using MediaController
Now all features of the audio playback are handled by the standard controller widget. The version of setDataSource() used in this example takes a Uri, making it suitable for loading audio from a ContentProvider or a remote location. Keep in mind that all of this works just as well with local audio files and resources using the alternate forms of setDataSource().
When playing video, typically a full set of playback controls is required to play, pause, and seek through the content. In addition, MediaPlayer must have a reference to a SurfaceHolder onto which it can draw the frames of the video. As we mentioned in the previous example, Android provides APIs to do all of this and create a custom video-playing experience. However, in many cases the most efficient path forward is to let the classes provided with the SDK, namely MediaController and VideoView, do all the heavy lifting.
Let’s take a look at an example of creating a video player in an activity. See Listing 5-33.
Listing 5-33. Activity to Play Video Content
public class VideoActivity extends Activity {

    VideoView videoView;
    MediaController controller;

    @Override
    public void onCreate(Bundle savedInstanceState) {
        super.onCreate(savedInstanceState);
        videoView = new VideoView(this);

        videoView.setVideoURI( Uri.parse("URI_TO_REMOTE_VIDEO") );
        controller = new MediaController(this);
        videoView.setMediaController(controller);
        videoView.start();

        setContentView(videoView);
    }

    @Override
    public void onDestroy() {
        super.onDestroy();
        videoView.stopPlayback();
    }
}
This example passes the URI of a remote video location to VideoView and tells it to handle the rest. VideoView can be embedded in larger XML layout hierarchies as well, although often it is the only thing and is displayed as full-screen, so setting it in code as the only view in the layout tree is not uncommon.
With VideoView, interaction with MediaController is much simpler. VideoView implements the MediaController.MediaPlayerControl interface, so no additional glue logic is required to make the controls functional. VideoView also internally handles the anchoring of the controller to itself, so it displays onscreen in the proper location.
We have one final note about using the MediaPlayer classes to handle remote content. Many media content servers on the Web today do not publicly expose a direct URL to the video container. Either for the purposes of tracking or security, public media URLs can often redirect one or more times before ending up at the true media content. MediaPlayer does not handle this redirect process, and it will return an error when presented with a redirected URL.
If you are unable to directly retrieve locations of the content you want to display in an application, that application must trace the redirect path before handing the URL to MediaPlayer. Listing 5-34 is an example of a simple AsyncTask tracer that will do the job.
Listing 5-34. RedirectTracerTask
public class RedirectTracerTask extends AsyncTask<Uri, Void, Uri> {

    private VideoView mVideo;
    private Uri initialUri;

    public RedirectTracerTask(VideoView video) {
        super();
        mVideo = video;
    }

    @Override
    protected Uri doInBackground(Uri... params) {
        initialUri = params[0];
        String redirected = null;
        try {
          URL url = new URL(initialUri.toString());
          HttpURLConnection connection =
                  (HttpURLConnection)url.openConnection();
          //Once connected, see where you ended up
          redirected = connection.getHeaderField("Location");

          return Uri.parse(redirected);
        } catch (Exception e) {
          e.printStackTrace();
          return null;
        }
    }

    @Override
    protected void onPostExecute(Uri result) {
        if(result != null) {
            mVideo.setVideoURI(result);
        } else {
            mVideo.setVideoURI(initialUri);
        }
    }

}
This helper class tracks down the final location by retrieving it out of the HTTP headers. If there were no redirects in the supplied Uri, the background operation will end up returning null, in which case the original Uri is passed to the VideoView. With this helper class, you can now pass the locations to the view as follows:
VideoView videoView = new VideoView(this);
RedirectTracerTask task = new RedirectTracerTask(videoView);
Uri location = Uri.parse("URI_TO_REMOTE_VIDEO");

task.execute(location);
5-11. Playing Sound Effects
Your application requires a handful of short sound effects that need to be played in response to user interaction with very low latency.
Solution
Use SoundPool to buffer load your sound files into memory and play them back quickly in response to the user’s actions. The Android framework provides SoundPool as a way to decode small sound files and hold them in memory for rapid and repeated playback. It also has some added features where the volume and playback speed of each sound can be controlled at runtime. The sounds themselves can be housed in assets, resources, or just in the device’s filesystem.
How It Works
Let’s take a look at how to use SoundPool to load up some sounds and attach them to Button clicks. See Listings 5-35 and 5-36.
Listing 5-35. res/layout/main.xml
<?xml version="1.0" encoding="utf-8"?>
<LinearLayout
    xmlns:android="http://schemas.android.com/apk/res/android"
    android:layout_width="match_parent"
    android:layout_height="match_parent"
    android:orientation="vertical" >
    <Button
        android:id="@+id/button_beep1"
        android:layout_width="match_parent"
        android:layout_height="wrap_content"
        android:text="Play Beep 1" />
    <Button
        android:id="@+id/button_beep2"
        android:layout_width="match_parent"
        android:layout_height="wrap_content"
        android:text="Play Beep 2" />
    <Button
        android:id="@+id/button_beep3"
        android:layout_width="match_parent"
        android:layout_height="wrap_content"
        android:text="Play Beep 3" />
</LinearLayout>
Listing 5-36. Activity with SoundPool
public class SoundPoolActivity extends Activity implements
        View.OnClickListener {

    private AudioManager mAudioManager;
    private SoundPool mSoundPool;
    private SparseIntArray mSoundMap;

    @Override
    protected void onCreate(Bundle savedInstanceState) {
        super.onCreate(savedInstanceState);
        setContentView(R.layout.main);

        //Get the AudioManager system service
        mAudioManager =
                (AudioManager) getSystemService(AUDIO_SERVICE);
        //Set up pool to only play one sound at a time over the
        // standard speaker output.
        mSoundPool =
                new SoundPool(1, AudioManager.STREAM_MUSIC, 0);

        findViewById(R.id.button_beep1).setOnClickListener(this);
        findViewById(R.id.button_beep2).setOnClickListener(this);
        findViewById(R.id.button_beep3).setOnClickListener(this);

        //Load each sound and save their streamId into a map
        mSoundMap = new SparseIntArray();
        AssetManager manager = getAssets();
        try {
            int streamId;
            streamId = mSoundPool.load(
                    manager.openFd("Beep1.ogg"), 1);
            mSoundMap.put(R.id.button_beep1, streamId);

            streamId = mSoundPool.load(
                    manager.openFd("Beep2.ogg"), 1);
            mSoundMap.put(R.id.button_beep2, streamId);

            streamId = mSoundPool.load(
                    manager.openFd("Beep3.ogg"), 1);
            mSoundMap.put(R.id.button_beep3, streamId);
        } catch (IOException e) {
            Toast.makeText(this, "Error Loading Sound Effects",
                    Toast.LENGTH_SHORT).show();
        }
    }

    @Override
    public void onDestroy() {
        super.onDestroy();
        mSoundPool.release();
        mSoundPool = null;
    }

    @Override
    public void onClick(View v) {
        //Retrieve the appropriate sound ID
        int streamId = mSoundMap.get(v.getId());
        if (streamId > 0) {
            float streamVolumeCurrent = mAudioManager
                   .getStreamVolume(AudioManager.STREAM_MUSIC);
            float streamVolumeMax = mAudioManager
                   .getStreamMaxVolume(AudioManager.STREAM_MUSIC);
            float volume = streamVolumeCurrent / streamVolumeMax;

            //Play the sound at the specified volume, with no loop
            // and at the standard playback rate
            mSoundPool.play(streamId, volume, volume, 1, 0, 1.0f);
        }
    }
}
This example is fairly straightforward. The activity initially loads three sound files from the application’s assets directory into the SoundPool. This step decodes them into raw PCM audio and buffers them in memory. Each time a sound is loaded into the pool with load(), a stream identifier is returned that will be used to play the sound later. We attach each sound to play with a particular button by storing them together as a key/value pair inside of a SparseIntArray.
Note SparseIntArray (and its sibling SparseBooleanArray) is a key/value store similar to a Map. However, it is significantly more efficient at storing primitive data such as integers because it avoids unnecessary object creation caused by auto-boxing. Whenever possible, these classes should be chosen over Map for best performance.
When the user presses one of the buttons, the stream identifier to play and call SoundPool again to play the audio is retrieved. Because the maxStreams property of the SoundPool constructor was set to 1, if the user taps multiple buttons in quick succession, new sounds will cause older ones to stop. If this value is increased, multiple sounds can be played together.
The parameters of the play() method allow the sound to be configured with each access. Features such as looping the sound or playing it back slower or faster than the original source can be controlled from here.
- Looping supports any finite number of loops, or the value can be set to –1 to loop infinitely.
- Rate control supports any value between 0.5 and 2.0 (half-speed to double-speed).
If you want to use SoundPool to dynamically change which sounds are loaded into memory at a given time, without re-creating the pool, you can use the unload() method to remove items from the pool in order to load() more in. When you are completely done with a SoundPool, call release() to relinquish its native resources.
Problem
Your application requires feedback from the device’s accelerometer that goes beyond just understanding whether the device is oriented in portrait or landscape.
Solution
Use SensorManager to receive constant feedback from the accelerometer sensor. SensorManagerprovides a generic abstracted interface for working with sensor hardware on Android devices. The accelerometer is just one of many sensors that an application can register to receive regular updates from.
How It Works
Important Device sensors such as the accelerometer do not exist in the emulator. It is best to test SensorManager code on an Android device.
This example activity registers with SensorManager for accelerometer updates and displays the data onscreen. The raw X/Y/Z data is displayed in a TextView at the bottom of the screen, but in addition the device’s “tilt” is visualized through a simple graph of four views in a TableLayout. See Listings 5-37 and 5-38.
Note It is also recommended that you add android:screenOrientation="portrait" or android:screenOrientation="landscape" to the application’s manifest to keep the activity from trying to rotate as you move and tilt the device.
Listing 5-37. res/layout/main.xml
<?xml version="1.0" encoding="utf-8"?>
<RelativeLayout
    xmlns:android="http://schemas.android.com/apk/res/android"
    android:layout_width="match_parent"
    android:layout_height="match_parent">
    <TableLayout
        android:layout_width="match_parent"
        android:layout_height="match_parent"
        android:stretchColumns="0,1,2">
        <TableRow
            android:layout_weight="1">
            <View
                android:id="@+id/top"
                android:layout_column="1" />
        </TableRow>
        <TableRow
            android:layout_weight="1">
            <View
                android:id="@+id/left"
                android:layout_column="0" />
            <View
                android:id="@+id/right"
                android:layout_column="2" />
        </TableRow>
        <TableRow
            android:layout_weight="1">
            <View
                android:id="@+id/bottom"
                android:layout_column="1" />
        </TableRow>
    </TableLayout>
    <TextView
        android:id="@+id/values"
        android:layout_width="match_parent"
        android:layout_height="wrap_content"
        android:layout_alignParentBottom="true" />
</RelativeLayout>
Listing 5-38. Tilt Monitoring Activity
public class TiltActivity extends Activity implements
        SensorEventListener {

    private SensorManager mSensorManager;
    private Sensor mAccelerometer;
    private TextView valueView;
    private View mTop, mBottom, mLeft, mRight;

    public void onCreate(Bundle savedInstanceState) {
        super.onCreate(savedInstanceState);
        setContentView(R.layout.main);

        mSensorManager =
                (SensorManager)getSystemService(SENSOR_SERVICE);
        mAccelerometer = mSensorManager.getDefaultSensor(
                Sensor.TYPE_ACCELEROMETER);

        valueView = (TextView)findViewById(R.id.values);
        mTop = findViewById(R.id.top);
        mBottom = findViewById(R.id.bottom);
        mLeft = findViewById(R.id.left);
        mRight = findViewById(R.id.right);
    }

    protected void onResume() {
        super.onResume();
        mSensorManager.registerListener(this, mAccelerometer,
            SensorManager.SENSOR_DELAY_UI);
    }

    protected void onPause() {
        super.onPause();
        mSensorManager.unregisterListener(this);
    }

    public void onAccuracyChanged(Sensor sensor, int accuracy) { }

    public void onSensorChanged(SensorEvent event) {
        final float[] values = event.values;
        float x = values[0] / 10;
        float y = values[1] / 10;
        int scaleFactor;

        if(x > 0) {
            scaleFactor = (int)Math.min(x * 255, 255);
            mRight.setBackgroundColor(Color.TRANSPARENT);
            mLeft.setBackgroundColor(
                    Color.argb(scaleFactor, 255, 0, 0));
        } else {
            scaleFactor = (int)Math.min(Math.abs(x) * 255, 255);
            mRight.setBackgroundColor(
                    Color.argb(scaleFactor, 255, 0, 0));
            mLeft.setBackgroundColor(Color.TRANSPARENT);
        }

        if(y > 0) {
            scaleFactor = (int)Math.min(y * 255, 255);
            mTop.setBackgroundColor(Color.TRANSPARENT);
            mBottom.setBackgroundColor(
                    Color.argb(scaleFactor, 255, 0, 0));
        } else {
            scaleFactor = (int)Math.min(Math.abs(y) * 255, 255);
            mTop.setBackgroundColor(
                    Color.argb(scaleFactor, 255, 0, 0));
            mBottom.setBackgroundColor(Color.TRANSPARENT);
        }
        //Display the raw values
        valueView.setText(String.format(
                "X: %1$1.2f, Y: %2$1.2f, Z: %3$1.2f",
                values[0], values[1], values[2]));
    }
}
The orientation of the three axes on the device accelerometer is as follows, from the perspective of looking at the device screen, upright in portrait:
- X: Horizontal axis with positive pointing to the right
- Y: Vertical axis with positive pointing up
- Z: Perpendicular axis with positive pointing back at you
When the activity is visible to the user (between onResume() and onPause()), it registers with SensorManager to receive updates about the accelerometer. When registering, the last parameter to registerListener() defines the update rate. The chosen value, SENSOR_DELAY_UI, is the fastest recommended rate to receive updates and still directly modify the UI with each update.
With each new sensor value, the onSensorChanged() method of our registered listener is called with a SensorEvent value; this event contains the X/Y/Z acceleration values.
Quick science note An accelerometer measures the acceleration due to forces applied. When a device is at rest, the only force operating on it is the force of gravity (∼9.8 m/s2). The output value on each axis is the product of this force (pointing down to the ground) and each orientation vector. When the two are parallel, the value will be at its maximum (∼9.8–10). When the two are perpendicular, the value will be at its minimum (∼0.0). Therefore, a device lying flat on a table will read ∼0.0 for both X and Y, and ∼9.8 for Z.
The example application displays the raw acceleration values for each axis in the TextView at the bottom of the screen. In addition, there is a grid of four Views arranged in a top/bottom/left/right pattern, and we proportionally adjust the background color of this grid based on the orientation. When the device is perfectly flat, both X and Y should be close to zero and the entire screen will be black. As the device tilts, the squares on the low side of the tilt will start to glow red until they are completely red once the device orientation reaches upright in either position.
Tip Try modifying this example with some of the other rate values, such as SENSOR_DELAY_NORMAL. Notice how the change affects the update rate in the example.
In addition, you can shake the device and see alternating grid boxes highlight as the device accelerates in each direction.
SENSOR BATCHING
In Android 4.4 and later, applications can request that the sensors they interact with run in batch mode to reduce overall power consumption when you need to monitor the sensor for an extended period of time. In this mode, sensor events may be queued up in hardware buffers for a period without waking up the application processor each time.
In order to enable batch mode for a sensor, simply utilize a version of SensorManager.registerListener() that takes a maxBatchReportLatencyUs parameter. This parameter tells the hardware how long events can be queued before the batch is sent to the application.
Additionally, if the application needs to get the current batch prior to the next interval, a flush() can be called on the SensorManager to force the sensor to deliver what it has to the listener.
Not all sensors will support batching on all devices, and in these cases the implementation will fall back to the default continuous operation mode.
5-13. Monitoring Compass Orientation
Problem
Your application wants to know which major direction the user is facing by monitoring the device’s compass sensor.
(API Level 3)
SensorManager comes to the rescue once again. Android doesn’t provide a “compass” sensor exactly; instead it includes the necessary methods to infer where the device is pointing based on other sensor data. In this case, the device’s magnetic field sensor will be used with the accelerometer to ascertain in which direction the user is facing.
We can then ask SensorManager for the user’s orientation with respect to the Earth using getOrientation().
How It Works
Important Device sensors such as the accelerometer do not exist in the emulator. It is best to test SensorManager code on an Android device.
As with the previous accelerometer example, we use SensorManager to register for updates on all sensors of interest (in this case, there are two) and to then process the results in onSensorChanged(). This example calculates and displays the user orientation from the device camera’s point of view, as it would be required for an application such as augmented reality. See Listings 5-39 and 5-40.
Listing 5-39. res/layout/main.xml
<?xml version="1.0" encoding="utf-8"?>
<RelativeLayout
    xmlns:android="http://schemas.android.com/apk/res/android"
    android:layout_width="match_parent"
    android:layout_height="match_parent">
    <TextView
        android:id="@+id/direction"
        android:layout_width="wrap_content"
        android:layout_height="wrap_content"
        android:layout_centerInParent="true"
        android:textSize="64dip"
        android:textStyle="bold" />
    <TextView
        android:id="@+id/values"
        android:layout_width="wrap_content"
        android:layout_height="wrap_content"
        android:layout_alignParentBottom="true" />
</RelativeLayout>
Listing 5-40. Activity Monitoring User Orientation
public class CompassActivity extends Activity implements SensorEventListener {

    private SensorManager mSensorManager;
    private Sensor mAccelerometer, mField;
    private TextView valueView, directionView;

    private float[] mGravity = new float[3];
    private float[] mMagnetic = new float[3];

    public void onCreate(Bundle savedInstanceState) {
        super.onCreate(savedInstanceState);
        setContentView(R.layout.main);

        mSensorManager = (SensorManager)getSystemService(SENSOR_SERVICE);
        mAccelerometer =
                mSensorManager.getDefaultSensor(Sensor.TYPE_ACCELEROMETER);
        mField =
                mSensorManager.getDefaultSensor(Sensor.TYPE_MAGNETIC_FIELD);

        valueView = (TextView)findViewById(R.id.values);
        directionView = (TextView)findViewById(R.id.direction);
    }

    protected void onResume() {
        super.onResume();
        mSensorManager.registerListener(this, mAccelerometer,
                SensorManager.SENSOR_DELAY_UI);
        mSensorManager.registerListener(this, mField,
                SensorManager.SENSOR_DELAY_UI);
    }

    protected void onPause() {
        super.onPause();
        mSensorManager.unregisterListener(this);
    }

    //Allocate data arrays once and reuse
    float[] temp = new float[9];
    float[] rotation = new float[9];
    float[] values = new float[3];

    private void updateDirection() {
        //Load rotation matrix into R
        SensorManager.getRotationMatrix(temp, null, mGravity, mMagnetic);
        //Remap to camera's point of view
        SensorManager.remapCoordinateSystem(temp,
                SensorManager.AXIS_X, SensorManager.AXIS_Z, rotation);
        //Return the orientation values
        SensorManager.getOrientation(rotation, values);
        //Convert to degrees
        for (int i=0; i < values.length; i++) {
            Double degrees = (values[i] * 180) / Math.PI;
            values[i] = degrees.floatValue();
        }
        //Display the compass direction
        directionView.setText( getDirectionFromDegrees(values[0]) );
        //Display the raw values
        valueView.setText(
                String.format("Azimuth: %1$1.2f, Pitch: %2$1.2f, Roll: %3$1.2f",
                values[0], values[1], values[2]));
    }

    private String getDirectionFromDegrees(float degrees) {
        if(degrees >= -22.5 && degrees < 22.5) { return "N"; }
        if(degrees >= 22.5 && degrees < 67.5) { return "NE"; }
        if(degrees >= 67.5 && degrees < 112.5) { return "E"; }
        if(degrees >= 112.5 && degrees < 157.5) { return "SE"; }
        if(degrees >= 157.5 || degrees < -157.5) { return "S"; }
        if(degrees >= -157.5 && degrees < -112.5) { return "SW"; }
        if(degrees >= -112.5 && degrees < -67.5) { return "W"; }
        if(degrees >= -67.5 && degrees < -22.5) { return "NW"; }

        return null;
    }

    public void onAccuracyChanged(Sensor sensor, int accuracy) { }

    public void onSensorChanged(SensorEvent event) {
        //Copy the latest values into the correct array
        switch(event.sensor.getType()) {
        case Sensor.TYPE_ACCELEROMETER:
            System.arraycopy(event.values, 0,
                    mGravity, 0,
                    event.values.length);
            break;
        case Sensor.TYPE_MAGNETIC_FIELD:
            System.arraycopy(event.values, 0,
                    mMagnetic, 0,
                    event.values.length);
            break;
        default:
            return;
        }

        if(mGravity != null && mMagnetic != null) {
            updateDirection();
        }
    }
}
This example activity displays the three raw values returned by the sensor calculation at the bottom of the screen in real time. In addition, the compass direction associated with where the user is currently facing is converted and displayed center-stage. As updates are received from the sensors, local copies of the latest values from each are maintained. As soon as we have received at least one reading from both sensors of interest, we allow the UI to begin updating.
updateDirection()is where all the heavy lifting takes place. SensorManager.getOrientation() provides the output information we require to display direction. The method returns no data, and instead an empty float array is passed in for the method to fill in three angle values, and they represent (in order):
- Azimuth: Angle of rotation about an axis pointing directly into the Earth. This is the value of interest in the example.
- Pitch: Angle of rotation about an axis pointing west.
- Roll: Angle of rotation about an axis pointing at magnetic north.
One of the parameters passed to getOrientation() is a float array representing a rotation matrix. The rotation matrix is a representation of how the current coordinate system of the devices is oriented, so the method may provide appropriate rotation angles based on its reference coordinates. The rotation matrix for the device orientation is obtained by using getRotationMatrix(), which takes the latest values from the accelerometer and magnetic field sensor as input. Like getOrientation(), it also returns void; an empty float array of length 9 or 16 (to represent a 3x3 or 4x4 matrix) must be passed in as the first parameter for the method to fill in.
Finally, we want the output of the orientation calculation to be specific to the camera’s point of view. To further transform the obtained rotation, we use the remapCoordinateSystem() method. This method takes four parameters (in order):
- Input array representing the matrix to transform
- Which axis of the world (globe) is aligned with the device’s x axis
- Which axis of the world (globe) is aligned with the device’s y axis
- Empty array to fill in the result
In our example, we want to leave the x axis untouched, so we map X to X. However, we would like to align the device’s y axis (vertical axis) to the world’s z axis (the one pointing into the Earth). This orients the rotation matrix we receive to match up with the device being held vertically upright as if the user is using the camera and looking at the preview on the screen.
With the angular data calculated, we do some data conversion and display the result on the screen. The unit output of getOrientation() is radians, so we first have to convert each result to degrees before displaying it. In addition, we need to convert the azimuth value to a compass direction; getDirectionFromDegrees() is a helper method to return the proper direction based on the range the current reading falls within. Going in a full clockwise circle, the azimuth will read from 0 to 180 degrees from north to south. Continuing around the circle, the azimuth will read –180 to 0 degrees rotating from south to north.
5-14. Retrieving Metadata from Media Content
Problem
Your application needs to gather thumbnail screenshots or other metadata from media content on the device.
Solution
Use MediaMetadataRetriever to read media files and return useful information. This class can read and track information such as album and artist data or data about the content itself, such as the size of a video. In addition, you can use it to grab a screenshot of any frame within a video file, either at a specific time or just any frame that Android considers representative.
MediaMetadataRetrieveris a great option for applications that work with lots of media content from the device and that need to display extra data about the media to enrich the user interface.
How It Works
Listings 5-41 and 5-42 show how to access this extra metadata on the device.
Listing 5-41. res/layout/main.xml
<RelativeLayout
    xmlns:android="http://schemas.android.com/apk/res/android"
    android:layout_width="match_parent"
    android:layout_height="match_parent" >
    <Button
        android:id="@+id/button_select"
        android:layout_width="match_parent"
        android:layout_height="wrap_content"
        android:text="Pick Video"
        android:onClick="onSelectClick" />
    <TextView
        android:id="@+id/text_metadata"
        android:layout_width="wrap_content"
        android:layout_height="wrap_content"
        android:layout_below="@id/button_select"
        android:layout_margin="15dp" />
    <ImageView
        android:id="@+id/image_frame"
        android:layout_width="wrap_content"
        android:layout_height="wrap_content"
        android:layout_alignParentBottom="true"
        android:layout_centerHorizontal="true"
        android:layout_margin="10dp" />
</RelativeLayout>
Listing 5-42. Activity with MediaMetadataRetriever
public class MetadataActivity extends Activity {
    private static final int PICK_VIDEO = 100;

    private ImageView mFrameView;
    private TextView mMetadataView;

    @Override
    public void onCreate(Bundle savedInstanceState) {
        super.onCreate(savedInstanceState);
        setContentView(R.layout.main);

        mFrameView = (ImageView) findViewById(R.id.image_frame);
        mMetadataView =
                (TextView) findViewById(R.id.text_metadata);
    }

    @Override
    protected void onActivityResult(int requestCode,
            int resultCode, Intent data) {
        if (requestCode == PICK_VIDEO
                && resultCode == RESULT_OK
                && data != null) {
            Uri video = data.getData();
            MetadataTask task = new MetadataTask(this, mFrameView,
                    mMetadataView);
            task.execute(video);
        }
    }

    public void onSelectClick(View v) {
        Intent intent = new Intent(Intent.ACTION_GET_CONTENT);
        intent.setType("video/*");
        startActivityForResult(intent, PICK_VIDEO);
    }

    public static class MetadataTask
            extends AsyncTask<Uri, Void, Bundle> {
        private Context mContext;
        private ImageView mFrame;
        private TextView mMetadata;
        private ProgressDialog mProgress;

        public MetadataTask(Context context, ImageView frame,
                TextView metadata) {
            mContext = context;
            mFrame = frame;
            mMetadata = metadata;
        }

        @Override
        protected void onPreExecute() {
            mProgress = ProgressDialog.show(mContext, "",
                    "Analyzing Video File...", true);
        }

        @Override
        protected Bundle doInBackground(Uri... params) {
            Uri video = params[0];
            MediaMetadataRetriever retriever =
                    new MediaMetadataRetriever();
            retriever.setDataSource(mContext, video);

            Bitmap frame = retriever.getFrameAtTime();

            String date = retriever.extractMetadata(
                MediaMetadataRetriever.METADATA_KEY_DATE);
            String duration = retriever.extractMetadata(
                MediaMetadataRetriever.METADATA_KEY_DURATION);
            String width = retriever.extractMetadata(
                MediaMetadataRetriever.METADATA_KEY_VIDEO_WIDTH);
            String height = retriever.extractMetadata(
                MediaMetadataRetriever.METADATA_KEY_VIDEO_HEIGHT);

            Bundle result = new Bundle();
            result.putParcelable("frame", frame);
            result.putString("date", date);
            result.putString("duration", duration);
            result.putString("width", width);
            result.putString("height", height);

            return result;
        }

        @Override
        protected void onPostExecute(Bundle result) {
            if (mProgress != null) {
                mProgress.dismiss();
                mProgress = null;
            }

            Bitmap frame = result.getParcelable("frame");
            mFrame.setImageBitmap(frame);
            String metadata = String.format("Video Date: %s
"
                    + "Video Duration: %s
Video Size: %s x %s",
                    result.getString("date"),
                    result.getString("duration"),
                    result.getString("width"),
                    result.getString("height") );
            mMetadata.setText(metadata);
        }
    }

}
In this example, the user can select a video file from the device to process. Upon receipt of a valid video Uri, the activity starts an AsyncTask to parse some metadata out of the video. We create an AsyncTaskfor this purpose because the process can take a few seconds or more to complete, and we don’t want to block the UI thread while this is going on.
The background task creates a new MediaMetadataRetriever and sets the selected video as its data source. We then call the method getFrameAtTime()to return a Bitmap image of a frame in the video. This method is useful for creating thumbnails for a video in your UI. The version we call takes no parameters, and the frame it returns is semirandom. If you are more interested in a specific frame, there is an alternate version of the method that takes the presentation time (in microseconds) of the where you would like a frame. In this case, it will return a key frame in the video that is closest to the requested time.
In addition to the frame image, we also gather some basic information about the video, including when it was created, how long it is, and how big it is. All the resulting data is packaged into a bundle and passed back from the background thread. The onPostExecute() method of the task is called on the main thread, so we use it to update the UI with the data we retrieved.
5-15. Detecting User Motion
Problem
You would like your application to respond to changes in user behavior, such as whether the device is sitting still, or if the user is currently active and in motion.
Solution
(API Level 8)
Google Play Services includes features to monitor user activity via the ActivityRecognitionClient. The user activity tracking service is a low-power method of receiving regular updates about what a user is doing. The service periodically monitors local sensor data on the device in short bursts rather than relying on high-power means like web services or GPS.
Using this API, applications will receive updates for one of the following events:
- IN_VEHICLE: The user is likely driving or riding in a vehicle, such as a car, bus, or train.
- ON_BICYCLE: The user is likely on a bicycle.
- ON_FOOT: The user is likely walking or running.
- STILL: The user, or at least the device, is currently sitting still.
- TILTING: The device has recently been tilted. This can happen when the device is picked up from rest or an orientation change occurs.
- UNKNOWN: There is not enough data to determine with significant confidence what the user is currently doing.
When working with ActivityRecognitionClient, an application initiates periodic updates by calling requestActivityUpdates(). The parameters this method takes define the frequency of updates to the application and a PendingIntent that will be used to trigger each event.
An application can pass any frequency interval, in milliseconds, that they wish; passing a value of zero will send updates as fast as possible to the application. This rate is not guaranteed by Google Play Services; samples can be delayed if the service requires more sensor samples to make a particular determination. In addition, if multiple applications are requesting activity updates, Google Play Services will deliver updates to all applications and the fastest rate requested.
Each event includes a list of DetectedActivity instances, which wrap the activity type (one of the options described previously) and the level of confidence the service has in its prediction. The list is sorted by confidence so the most probable user activity is first.
Important User activity tracking is part of the Google Play Services library; it is not part of the native SDK at any platform level. However, any application targeting API Level 8 or later and devices inside the Google Play ecosystem can use the mapping library. For more information on including Google Play Services in your project, reference our guide in Chapter 1.
How It Works
Let’s take a look at a basic example application that monitors user activity changes, logs them to the display, and includes a safety precaution that locks the user out from the application if the user attempts to access it while in a car or on a bicycle. We’ll start with Listing 5-43, which is a snippet of the AndroidManfest.xml that reveals the permissions we need to work with this service.
Listing 5-43. Partial AndroidManifest.xml
<manifest
    xmlns:android="http://schemas.android.com/apk/res/android"
    package="com.androidrecipes.usermotionactivity"
    android:versionCode="1"
    android:versionName="1.0" >

    <uses-sdk
        android:minSdkVersion="8"
        android:targetSdkVersion="18" />

    <!--Required permission to User Activity Recognition-->
    <uses-permission android:name=
        "com.google.android.gms.permission.ACTIVITY_RECOGNITION"
    />

    <application ...>

        <!-- Activity, Service, Provider elements -->

    </application>
</manifest>
You can see that we must declare a custom permission in the manifest specifically to read activity recognition data from Google Play Services. Listings 5-44 and 5-45 describe the activity we will use.
Listing 5-44. res/layout/activity_main.xml
<FrameLayout
    xmlns:android="http://schemas.android.com/apk/res/android"
    android:layout_width="match_parent"
    android:layout_height="match_parent">
    <!-- List with transcript enabled to autoscroll content -->
    <ListView
        android:id="@+id/list"
        android:layout_width="match_parent"
        android:layout_height="match_parent"
        android:stackFromBottom="true"
        android:transcriptMode="normal" />

    <!-- Safety Blocking View -->
    <!-- Clickable to consume touch events when visible -->
    <TextView
        android:id="@+id/blocker"
        android:layout_width="match_parent"
        android:layout_height="match_parent"
        android:gravity="center"
        android:clickable="true"
        android:textSize="32dp"
        android:textColor="#F55"
        android:text="Do not operate your device in a vehicle!"
        android:background="#C333"
        android:visibility="gone" />
</FrameLayout>
Listing 5-45. Activity Displaying User Motion
public class MainActivity extends Activity implements
        ServiceConnection,
        UserMotionService.OnActivityChangedListener,
        GooglePlayServicesClient.ConnectionCallbacks,
        GooglePlayServicesClient.OnConnectionFailedListener {
    private static final String TAG = "UserActivity";

    private Intent mServiceIntent;
    private PendingIntent mCallbackIntent;
    private UserMotionService mService;

    private ActivityRecognitionClient mRecognitionClient;
    //Custom list adapter to display results
    private ActivityAdapter mListAdapter;

    private View mBlockingView;

    @Override
    protected void onCreate(Bundle savedInstanceState) {
        super.onCreate(savedInstanceState);
        setContentView(R.layout.activity_main);

        mBlockingView = findViewById(R.id.blocker);

        //Construct a simple list adapter that will display all
        // incoming activity change events from the service.
        ListView list = (ListView) findViewById(R.id.list);

        mListAdapter = new ActivityAdapter(this);
        list.setAdapter(mListAdapter);

        //When the list is clicked, display all the probable
        // activities
        list.setOnItemClickListener(
                new AdapterView.OnItemClickListener() {
            @Override
            public void onItemClick(AdapterView<?> parent, View v,
                    int position, long id) {
                showDetails(mListAdapter.getItem(position));
            }
        });

        //Check if Google Play Services is up-to-date.
        switch (GooglePlayServicesUtil
                .isGooglePlayServicesAvailable(this)) {
            case ConnectionResult.SUCCESS:
                //Do nothing, move on
                break;
            case ConnectionResult.SERVICE_VERSION_UPDATE_REQUIRED:
                Toast.makeText(this,
                        "Activity service requires an update, "
                        + "please open Google Play.",
                        Toast.LENGTH_SHORT).show();
                finish();
                return;
            default:
                Toast.makeText(this,
                        "Activity service is not available.",
                        Toast.LENGTH_SHORT).show();
                finish();
                return;
        }

        //Create a client instance for talking to Google Services
        mRecognitionClient = new ActivityRecognitionClient(
                this,    //Context
                this,    //ConnectionCallbacks
                this);   //OnConnectionFailedListener

        //Create an Intent to bind to the service
        mServiceIntent =
                new Intent(this, UserMotionService.class);

        //Create a PendingIntent for Google Services callbacks
        mCallbackIntent = PendingIntent.getService(this, 0,
                mServiceIntent,
                PendingIntent.FLAG_UPDATE_CURRENT);
    }

    @Override
    protected void onResume() {
        super.onResume();
        //Connect to Google Services and our Service
        mRecognitionClient.connect();
        bindService(mServiceIntent, this, BIND_AUTO_CREATE);
    }

    @Override
    protected void onPause() {
        super.onPause();
        //Disconnect from all services
        mRecognitionClient.removeActivityUpdates(mCallbackIntent);
        mRecognitionClient.disconnect();

        disconnectService();
        unbindService(this);
    }

    /** ServiceConnection Methods */

    public void onServiceConnected(ComponentName name,
            IBinder service) {
        //Attach ourselves to our Service as a callback for events
        mService = ((LocalBinder) service).getService();
        mService.setOnActivityChangedListener(this);
    }

    @Override
    public void onServiceDisconnected(ComponentName name) {
        disconnectService();
    }

    private void disconnectService() {
        if (mService != null) {
            mService.setOnActivityChangedListener(null);
        }
        mService = null;
    }

    /** Google Services Connection Callbacks */

    @Override
    public void onConnected(Bundle connectionHint) {
        //We must wait until the services are connected
        // to request any updates.
        // Request updates at 5 second intervals.
        mRecognitionClient.requestActivityUpdates(5000,
                mCallbackIntent);
    }

    @Override
    public void onDisconnected() {
        Log.w(TAG, "Google Services Disconnected");
    }

    @Override
    public void onConnectionFailed(ConnectionResult result) {
        Log.w(TAG, "Google Services Connection Failure");
    }

    /** OnActivityChangedListener Methods */

    @Override
    public void onUserActivityChanged(int bestChoice,
            int bestConfidence,
            ActivityRecognitionResult newActivity) {
        //Add latest event to the list
        mListAdapter.add(newActivity);
        mListAdapter.notifyDataSetChanged();

        //Determine user action based on our custom algorithm
        switch (bestChoice) {
            case DetectedActivity.IN_VEHICLE:
            case DetectedActivity.ON_BICYCLE:
                mBlockingView.setVisibility(View.VISIBLE);
                break;
            case DetectedActivity.ON_FOOT:
            case DetectedActivity.STILL:
                mBlockingView.setVisibility(View.GONE);
                break;
            default:
                //Ignore other states
                break;
        }
    }

    /*
     * Utility that builds a simple Toast with all the probable
     * activity choices with their confidence values
     */
    private void showDetails(ActivityRecognitionResult activity) {
        StringBuilder sb = new StringBuilder();
        sb.append("Details:");
        for(DetectedActivity element :
                activity.getProbableActivities()) {
            sb.append("
"
                    + UserMotionService.getActivityName(element)
                    + ", " + element.getConfidence() + "% sure");
        }

        Toast.makeText(this, sb.toString(),
                Toast.LENGTH_SHORT).show();
    }

    /*
     * ListAdapter to display each activity result we receive
     * from the service
     */
    private static class ActivityAdapter extends
            ArrayAdapter<ActivityRecognitionResult> {

        public ActivityAdapter(Context context) {
            super(context, android.R.layout.simple_list_item_1);
        }

        @Override
        public View getView(int position, View convertView,
                ViewGroup parent) {
            if (convertView == null) {
                convertView =
                    LayoutInflater.from(getContext()).inflate(
                        android.R.layout.simple_list_item_1,
                        parent,
                        false);
            }
            //Display the most probable activity with its
            // confidence in the list
            TextView tv = (TextView) convertView;
            ActivityRecognitionResult result = getItem(position);
            DetectedActivity newActivity =
                    result.getMostProbableActivity();
            String entry =
                DateFormat.format("hh:mm:ss", result.getTime())
                + ": " +
                UserMotionService.getActivityName(newActivity)
                + ", " + newActivity.getConfidence()
                + "% confidence";
            tv.setText(entry);

            return convertView;
        }
    }
}
In this example, our first order of business is to check whether Google Play Services is available on the device and is up-to-date. With that verified, we can create our ActivityRecognitionClient, an Intent we will need to connect to our service (which we haven’t seen yet), and the PendingIntentthat we will give the recognition services to use in calling us back.
Note Do not confuse Activity, the application component that displays UI, with activity as it is used in this context to describe a user’s physical activity. The word is thrown around a lot in this API, so keep in mind the difference.
When the application is brought to the foreground, we make a connection request to the recognition service. This process is asynchronous, and we will later receive a call in onConnected() when the connection is complete. To ensure that we don’t drain unnecessary power, we remove these updates when going into the background.
During those same events, we bind and unbind with our own service so that binding is active only while we are in the foreground. We will see shortly the significance this service will have in the overall application.
Tip With bound services, onServiceDisconnected() is called only if the service crashes or disconnects unexpectedly. Any cleanup you wish to do when disconnecting explicitly must also be done alongside unbindService().
Once the recognition service is connected to us, we initiate updates using requestActivityUpdates() with an interval of 5 seconds and our PendingIntent, which describes where the updates will go. In our case, the PendingIntent is set to trigger the UserMotionService, and the code for this service is in Listing 5-46.
Listing 5-46. Service Receiving Motion Updates
public class UserMotionService extends IntentService {
    private static final String TAG = "UserMotionService";

    /*
     * Callback interface for detected activity type changes
     */
    public interface OnActivityChangedListener{
        public void onUserActivityChanged(int bestChoice,
                int bestConfidence,
                ActivityRecognitionResult newActivity);
    }

    /* Last detected activity type */
    private DetectedActivity mLastKnownActivity;

    /*
     * Marshals requests from the background thread so the
     * callbacks can be made on the main (UI) thread.
     */
    private CallbackHandler mHandler;
    private static class CallbackHandler extends Handler {
        /* Callback for activity changes */
        private OnActivityChangedListener mCallback;


        public void setCallback(
                OnActivityChangedListener callback) {
            mCallback = callback;
        }

        @Override
        public void handleMessage(Message msg) {
            if (mCallback != null) {
                //Read payload data out of the message and
                // fire callback
                ActivityRecognitionResult newActivity =
                        (ActivityRecognitionResult) msg.obj;
                mCallback.onUserActivityChanged(
                        msg.arg1,
                        msg.arg2,
                        newActivity);
            }
        }
    }

    public UserMotionService() {
        //String is used to name the background thread created
        super("UserMotionService");
        mHandler = new CallbackHandler();
    }

    public void setOnActivityChangedListener(
            OnActivityChangedListener listener) {
        mHandler.setCallback(listener);
    }

    @Override
    public void onDestroy() {
        super.onDestroy();
        Log.w(TAG, "Service is stopping...");
    }

    /*
     * Incoming action events from the framework will come
     * in here.  This is called on a background thread, so
     * we can do long processing here if we wish.
     */
    @Override
    protected void onHandleIntent(Intent intent) {
        if (ActivityRecognitionResult.hasResult(intent)) {
            //Extract the result from the Intent
            ActivityRecognitionResult result =
                  ActivityRecognitionResult.extractResult(intent);
            DetectedActivity activity =
                  result.getMostProbableActivity();
            Log.v(TAG, "New User Activity Event");

            //If the highest probability is UNKNOWN, but the
            // confidence is low, check if another exists and
            // select it instead.
            if (activity.getType() == DetectedActivity.UNKNOWN
                    && activity.getConfidence() < 60
                    && result.getProbableActivities().size() > 1){
                //Select the next probable element
                activity = result.getProbableActivities().get(1);
            }

            //On a change in activity, alert the callback
            if (mLastKnownActivity == null
                    || mLastKnownActivity.getType()
                            != activity.getType()
                    || mLastKnownActivity.getConfidence()
                            != activity.getConfidence()) {
                //Pass the results to the main thread in a Message
                Message msg = Message.obtain(null,
                        0,                         //what
                        activity.getType(),        //arg1
                        activity.getConfidence(),  //arg2
                        result);                   //obj
                mHandler.sendMessage(msg);
            }
            mLastKnownActivity = activity;
        }
    }

    /*
     * This is called when the Activity wants to bind to the
     * service.  We have to provide a wrapper around this instance
     * to pass it back.
     */
    @Override
    public IBinder onBind(Intent intent) {
        return mBinder;
    }

    /*
     * This is a simple wrapper that we can pass to the Activity
     * to allow it direct access to this service.
     */
    private LocalBinder mBinder = new LocalBinder();
    public class LocalBinder extends Binder {
        public UserMotionService getService() {
            return UserMotionService.this;
        }
    }

    /*
     * Utility to get a good display name for each state
     */
    public static String getActivityName(
            DetectedActivity activity) {
        switch(activity.getType()) {
            case DetectedActivity.IN_VEHICLE:
                return "Driving";
            case DetectedActivity.ON_BICYCLE:
                return "Biking";
            case DetectedActivity.ON_FOOT:
                return "Walking";
            case DetectedActivity.STILL:
                return "Not Moving";
            case DetectedActivity.TILTING:
                return "Tilting";
            case DetectedActivity.UNKNOWN:
            default:
                return "No Clue";
        }
    }
}
UserMotionService is an IntentService, which is a service that forwards all Intent commands to a background thread it creates and processes them in the onHandleIntent() method. Its primary advantage is a built-in mechanism to queue up Intent requests and process them in order, in the background, via this method.
When the activity binds to this service, it will be automatically started and returned via onBind() to the caller. The activity will receive the service instance in onServiceConnected(), where we will register the activity as a callback for user activity change events determined in the service. Once the activity unbinds from the service, it will automatically stop itself as well.
Once the point is reached where the activity has registered for update events from Google Play Services, the framework will start triggering the PendingIntent on a regular basis, which results in onHandleIntent() in our service.
For each event, we use the utility methods on ActivityRecognitionResult to unpack the data from the incoming Intent. We then determine what the most probable user activity was. We have customized the algorithm a little bit, in that if the most probable activity is UNKNOWN, but the confidence in that decision is low, we will pick the next best option to return instead. This pattern will work well for any additional custom decision logic you would like to put into your application as well.
Once we have selected the user activity to compare, we check whether this is the same activity type or a change in activity has occurred. In the case of a change, we want to post a callback to the activity that registered itself when we were bound. We use a Handler instead of calling the method directly because onHandleIntent() is running on a background thread, and we want to post our callback on the main thread in case the activity (or other listeners) want to do any work that involves updating the UI.
Summary
This collection of recipes exposed how to integrate maps, user location, and device sensor data about the user’s surroundings into your Android applications. You learned about the many additional APIs that Google provides to Android devices that exist within the Google Play ecosystem. We also discussed how to utilize the device’s camera and microphone, allowing users to capture, and sometimes interpret, what’s around them. Finally, using the media APIs, you learned how to take media content, either captured locally by the user or downloaded remotely from the Web, and play it back from within your applications. In the next chapter, we will discuss how to use Android’s many persistence techniques to store nonvolatile data on the device.