
The key to many successful mobile applications is their ability to connect and interact with remote data sources. Web services and APIs are abundant in today's world, allowing an application to interact with just about any service, from weather forecasts to personal financial information. Bringing this data into the palm of a user's hand and making it accessible from anywhere is one of the greatest powers of the mobile platform. Android builds on the Web foundations that Google is known for and provides a rich toolset for communicating with the outside world.
HTML or image data from the Web needs to be presented in the application without any modification or processing.
(API Level 1)
Display the information in a WebView. WebView is a view widget that can be embedded in any layout to display Web content, both local and remote, in your application. WebView is based on the same open source WebKit technology that powers the Android Browser application; affording applications the same level of power and capability.
WebView has some very desirable properties when displaying assets downloaded from the Web, not the least of which are two-dimensional scrolling (horizontal and vertical at the same time), and zoom controls. A WebView can be the perfect place to house a large image, such as a stadium map, that the user may want to pan and zoom around. Here we will discuss how to do this with assets both local and remote.
The simplest case is displaying an HTML page or image by supplying the URL of the resource to the WebView. The following are a handful of practical uses for this technique in your applications:
Provide access to your corporate site without leaving the application
Display a page of live content from a web server, such as an FAQ section, that can be changed without requiring an upgrade to the application.
Display a large image resource that the user would want to interact with using pan/zoom.
Let's take a look at a simple example that loads a very popular web page, but inside the content view of an Activity instead of opening the Browser (see Listings 3-1 and 3-2).
Example 3.1. Activity Containing a WebView
public class MyActivity extends Activity {
    @Override
    public void onCreate(Bundle savedInstanceState) {
        super.onCreate(savedInstanceState);

        WebView webview = new WebView(this);
        //Enable JavaScript support
        webview.getSettings().setJavaScriptEnabled(true);
        webview.loadUrl("http://www.google.com/");

        setContentView(webview);
    }
}
Note
By default, WebView has JavaScript support disabled. Be sure to enable JavaScript in the WebView.WebSettings object if the content you are displaying requires it.
Example 3.2. AndroidManifest.xml Setting Required Permissions
<?xml version="1.0" encoding="utf-8"?>
<manifest xmlns:android="http://schemas.android.com/apk/res/android"
      package="com.examples.webview"
      android:versionCode="1"
      android:versionName="1.0">
    <application android:icon="@drawable/icon" android:label="@string/app_name">
        <activity android:name=".MyActivity">
            <intent-filter>
                <action android:name="android.intent.action.MAIN" />
                <category android:name="android.intent.category.LAUNCHER" />
            </intent-filter>
</activity>
</application>
<uses-permission android:name="android.permission.INTERNET" />
</manifest>Note
If the content you are loading into WebView is remote, AndroidManifest.xml must declare that it uses the android.permission.INTERNET permission.
The result displays the HTML page in your Activity (see Figure 3-1).
WebView is also quite useful in displaying local content to take advantage of either HTML/CSS formatting or the pan/zoom behavior it provides to its contents. You may use the assets directory of your Android project to store resources you would like to display in a WebView, such as large images or HTML files. To better organize the assets, you may also create directories under assets to store files in.
WebView.loadUrl() can display stored under assets by using the file:///android_asset/<resource path> URL schema. For example, if the file android.jpg was placed into the assets directory, it could be loaded into a WebView using
file:///android_asset/android.jpg
If that same file were placed in a directory named images under assets, WebView could load it with the URL
file:///android_asset/images/android.jpg
In addition, WebView.loadData() will load raw HTML stored in a String resource or variable into the view. Using this technique, preformatted HTML text could be stored in res/values/strings.xml or downloaded from a remote API and displayed in the application.
Listings 3-3 and 3-4 show an example Activity with two WebView widgets stacked vertically on top of one another. The upper view is displaying a large image file stored in the assets directory, and the lower view is displaying an HTML string stored in the applications string resources.
Example 3.3. res/layout/main.xml
<LinearLayout xmlns:android="http://schemas.android.com/apk/res/android"
  android:layout_width="fill_parent"
  android:layout_height="fill_parent"
  android:orientation="vertical">
  <WebView
    android:id="@+id/upperview"
    android:layout_width="fill_parent"
    android:layout_height="fill_parent"
    android:layout_weight="1"
  />
  <WebView
    android:id="@+id/lowerview"
    android:layout_width="fill_parent"
    android:layout_height="fill_parent"
    android:layout_weight="1"
  />
</LinearLayout>
Example 3.4. Activity to Display Local Web Content
public class MyActivity extends Activity {
    @Override
    public void onCreate(Bundle savedInstanceState) {
        super.onCreate(savedInstanceState);
        setContentView(R.layout.main);

        WebView upperView = (WebView)findViewById(R.id.upperview);
        //Zoom feature must be enabled
        upperView.getSettings().setBuiltInZoomControls(true);
        upperView.loadUrl("file:///android_asset/android.jpg");

        WebView lowerView = (WebView)findViewById(R.id.lowerview);
        String htmlString =
            "<h1>Header</h1><p>This is HTML text<br /><i>Formatted in italics</i></p>";
        lowerView.loadData(htmlString, "text/html", "utf-8");
    }
}
When the Activity is displayed, each WebView occupies half of the screen's vertical space. The HTML string is formatted as expected, while the large image can be scrolled both horizontally and vertically; the user may even zoom in or out (see Figure 3-2).

Your application is using a WebView to display content, but also needs to listen and respond to users clicking links on the page.
(API Level 1)
Implement a WebViewClient and attach it to the WebView. WebViewClient and WebChromeClient are two WebKit classes that allow an application to get event callbacks and customize the behavior of the WebView. By default, WebView will pass a URL to the ActivityManager to be handled if no WebViewClient is present, which usually results in any clicked link loading in the Browser application instead of the current WebView.
In Listing 3-5, we create an Activity with a WebView that will handle its own URL loading.
Example 3.5. Activity with a WebView That Handles URLs
public class MyActivity extends Activity {
    @Override
    public void onCreate(Bundle savedInstanceState) {
        super.onCreate(savedInstanceState);

        WebView webview = new WebView(this);
        webview.getSettings().setJavaScriptEnabled(true);
        //Add a client to the view
        webview.setWebViewClient(new WebViewClient());
        webview.loadUrl("http://www.google.com");
        setContentView(webview);
    }
}
In this example, simply providing a plain vanilla WebViewClient to WebView allows it to handle any URL requests itself, instead of passing them up to the ActivityManager, so clicking on a link will load the requested page inside the same view. This is because the default implementation simply returns false for shouldOverrideUrlLoading(), which tells the client to pass the URL to the WebView and not the application.
In this next case, we will take advantage of the WebViewClient.shouldOverrideUrlLoading() callback to intercept and monitor user activity (see Listing 3-6).
Example 3.6. Activity That Intercepts WebView URLs
public class MyActivity extends Activity {
    @Override
    public void onCreate(Bundle savedInstanceState) {
        super.onCreate(savedInstanceState);

        WebView webview = new WebView(this);
        webview.getSettings().setJavaScriptEnabled(true);
        //Add a client to the view
        webview.setWebViewClient(mClient);
        webview.loadUrl("http://www.google.com");
        setContentView(webview);
    }

    private WebViewClient mClient = new WebViewClient() {
        @Override
        public boolean shouldOverrideUrlLoading(WebView view, String url) {
            Uri request = Uri.parse(url);

            if(TextUtils.equals(request.getAuthority(), "www.google.com")) {
                //Allow the load
                return false;
            }

            Toast.makeText(MyActivity.this, "Sorry, buddy", Toast.LENGTH_SHORT).show();
            returntrue;
}
};
}In this example, shouldOverrideUrlLoading() determines whether to load the content back in this WebView based on the url it was passed, keeping the user from leaving Google's site. Uri.getAuthority() returns the hostname portion of a URL, and we use that to check if the link the user clicked is on Google's domain (www.google.com). If we can verify the link is to another Google page, returning false allows the WebView to load the content. If not, we notify the user and returning true tell the WebViewClient that the application has taken care of this URL, and not to allow the WebView to load it.
This technique can be more sophisticated, where the application actually handles the URL by doing something interesting. A custom schema could even be developed to create a full interface between your application and the WebView content.
Your application needs access to the raw HTML of the current contents displayed in a WebView, either to read or modify specific values.
(API Level 1)
Create a JavaScript interface to bridge between the WebView and application code.
WebView.addJavascriptInterface() binds a Java object to JavaScript so that its methods can then be called within the WebView. Using this interface, JavaScript can be used to marshal data between your application code and the WebView's HTML.
Warning
Allowing JavaScript to control your application can inherently present a security threat, allowing remote execution of application code. This interface should be utilized with that possibility in mind.
Let's look at an example of this in action. Listing 3-7 presents a simple HTML form to be loaded into the WebView from local assets. Listing 3-8 is an Activity that uses two JavaScript functions to exchange data between the Activity preferences and content in a WebView.
Example 3.7. assets/form.html
<!DOCTYPE HTML PUBLIC "-//W3C//DTD HTML 4.01//EN"
"http://www.w3.org/TR/html4/strict.dtd">
<html>
<form name="input" action="form.html" method="get">
Enter Email: <input type="text" id="emailAddress" />
<input type="submit" value="Submit" />
</form>
</html>Example 3.8. Activity with JavaScript Bridge Interface
public class MyActivity extends Activity {
@Override
public void onCreate(Bundle savedInstanceState) {
super.onCreate(savedInstanceState);
WebView webview = new WebView(this);
webview.getSettings().setJavaScriptEnabled(true);
webview.setWebViewClient(mClient);
//Attach the custom interface to the view
webview.addJavascriptInterface(new MyJavaScriptInterface(), "BRIDGE");
setContentView(webview);
//Load the form
webview.loadUrl("file:///android_asset/form.html");
}
private static final String JS_SETELEMENT =
"javascript:document.getElementById('%s').value='%s'";
private static final String JS_GETELEMENT =
"javascript:window.BRIDGE.storeElement('%s',document.getElementById('%s').value)";
private static final String ELEMENTID = "emailAddress";
private WebViewClient mClient = new WebViewClient() {
@Override
public boolean shouldOverrideUrlLoading(WebView view, String url) {
//Before leaving the page, attempt to retrieve the email using JavaScript
view.loadUrl(String.format(JS_GETELEMENT, ELEMENTID, ELEMENTID));
return false;
}
@Override
public void onPageFinished(WebView view, String url) {
//When page loads, inject address into page using JavaScript
SharedPreferences prefs = getPreferences(Activity.MODE_PRIVATE);
view.loadUrl(String.format(JS_SETELEMENT, ELEMENTID,
prefs.getString(ELEMENTID, "")));
}
};
privateclass MyJavaScriptInterface {
//Store an element in preferences
@SuppressWarnings("unused")
public void storeElement(String id, String element) {
SharedPreferences.Editor edit =
getPreferences(Activity.MODE_PRIVATE).edit();
edit.putString(id, element);edit.commit();
//If element is valid, raise a Toast
if(!TextUtils.isEmpty(element)) {
Toast.makeText(MyActivity.this, element, Toast.LENGTH_SHORT).show();
}
}
}
}In this somewhat contrived example, a single element form is created in HTML and displayed in a WebView. In the Activity code, we look for a form value in the WebView with the id of "emailAddress," and save its value to SharedPreferences every time a link is clicked on the page (in this case, the submit button of the form) through the shouldOverrideUrlLoading() callback. Whenever the page finished loading (i.e., onPageFinished() is called), we attempt to inject the current value from SharedPreferences back into the web form.
A Java class is created called MyJavaScriptInterface, which defines the method storeElement(). When the view is created, we call the WebView.addJavascriptInterface() method to attach this object to the view, and give it the name BRIDGE. When calling this method, the String parameter is a name used to reference the interface inside of JavaScript code.
We have defined two JavaScript methods as constant Strings here, JS_GETELEMENT and JS_SETELEMENT. These methods are executed on the WebView by being passed to. loadUrl() Notice that JS_GETELEMENT is a reference to calling our custom interface function (referenced as BRIDGE.storeElement), which will call that method on MyJavaScripInterface and store the form element's value in preferences. If the value retrieved from the form is not blank, a Toast will also be raised.
Any JavaScript may be executed on the WebView in this manner, and it does not need to be a method included as part of the custom interface. JS_SETELEMENT, for example, uses pure JavaScript to set the value of the form element on the page.
One popular application of this technique is to remember form data that a user may need to enter in the application, but the form must be Web-based, such as a reservation form or payment form for a Web application that doesn't have a lower-level API to access.
(API Level 3)
Use AsyncTask to download the data in a background thread. AsyncTask is a wrapper class that makes threading long-running operations into the background painless and simple; as well as managing concurrency with an internal thread pool. In addition to handling the background threading, callback methods are also provided before, during, and after the operation executes, allowing you to make any updates required on the main UI thread.
In the context of downloading an image, let's create a subclass of ImageView called WebImageView, which will lazily load an image from a remote source and display it as soon as it is available. The downloading will be performed inside of an AsyncTask operation (see Listing 3-9).
Example 3.9. WebImageView
public class WebImageView extends ImageView {
private Drawable mPlaceholder, mImage;
public WebImageView(Context context) {
this(context, null);
}
public WebImageView(Context context, AttributeSet attrs) {
this(context, attrs, 0);
}
public WebImageView(Context context, AttributeSet attrs, int defaultStyle) {
super(context, attrs, defaultStyle);
}
public void setPlaceholderImage(Drawable drawable) {
mPlaceholder = drawable;
if(mImage == null) {
setImageDrawable(mPlaceholder);
}
}
public void setPlaceholderImage(int resid) {
mPlaceholder = getResources().getDrawable(resid);
if(mImage == null) {
setImageDrawable(mPlaceholder);
}
}
public void setImageUrl(String url) {
DownloadTask task = new DownloadTask();
task.execute(url);}
private class DownloadTask extends AsyncTask<String, Void, Bitmap> {
@Override
protected Bitmap doInBackground(String... params) {
String url = params[0];
try {
URLConnection connection = (new URL(url)).openConnection();
InputStream is = connection.getInputStream();
BufferedInputStream bis = new BufferedInputStream(is);
ByteArrayBuffer baf = new ByteArrayBuffer(50);
int current = 0;
while ((current = bis.read()) != −1) {
baf.append((byte)current);
}
byte[] imageData = baf.toByteArray();
return BitmapFactory.decodeByteArray(imageData, 0, imageData.length);
} catch (Exception exc) {
return null;
}
}
@Override
protectedvoid onPostExecute(Bitmap result) {
mImage = new BitmapDrawable(result);
if(mImage != null) {
setImageDrawable(mImage);
}
}
    };
}As you can see, WebImageView is a simple extension of the Android ImageView widget. The setPlaceholderImage() methods allow a local drawable to be set as the display image until the remote content is finished downloading. The bulk of the interesting work begins once the view has been given a remote URL using setImageUrl(), at which point the custom AsyncTask begins work.
Notice that an AsyncTask is strongly typed with three values for the input parameter, progress value, and result. In this case, a String is passed in to the task's execute method and the background operation should return a Bitmap. The middle value, the progress, we are not using in this example, so it is set as Void. When extending AsyncTask, the only required method to implement is doInBackground(), which defines the chunk of work to be run on a background thread. In the previous example, this is where a connection is made to the remote URL provided and the image data is downloaded. Upon completion, we attempt to create a Bitmap from the downloaded data. If an error occurs at any point, the operation will abort and return null.
The other callback methods defined in AsyncTask, such as onPreExecute(), onPostExecute(), and onProgressUpdate(), are called on the main thread for the purposes of updating the user interface. In the previous example, onPostExecute() is used to update the view's image with the result data.
Note
Android UI classes are not thread-safe. Be sure to use one of the callback methods that occur on the main thread to make any updates to the UI. Do not update views from within doInBackground().
Listings 3-10 and 3-11 show a simple example of using this class in an Activity. Since this class is not part of the android.widget or android.view packages, we must user the fully qualified package name when using it in XML.
Example 3.10. res/layout/main.xml
<?xml version="1.0" encoding="utf-8"?>
<LinearLayout xmlns:android="http://schemas.android.com/apk/res/android"
  android:layout_width="fill_parent"
  android:layout_height="fill_parent"
  android:orientation="vertical">
  <com.examples.WebImageView
    android:id="@+id/webImage"
    android:layout_width="wrap_content"
    android:layout_height="wrap_content"
  />
</LinearLayout>
Example 3.11. Example Activity
public class WebImageActivity extends Activity {
    @Override
    public void onCreate(Bundle savedInstanceState) {
        super.onCreate(savedInstanceState);
        setContentView(R.layout.main);

        WebImageView imageView = (WebImageView)findViewById(R.id.webImage);
        imageView.setPlaceholderImage(R.drawable.icon);
        imageView.setImageUrl("http://apress.com/resource/weblogo/Apress_120x90.gif");
    }
}
In this example we first set a local image (the application icon) as the WebImageView placeholder. This image is displayed immediately to the user. We then tell the view to fetch an image of the Apress logo from the Web. As noted previously, this downloads the image in the background and, when it is complete, replaces the placeholder image in the view. It is this simplicity in creating background operations that had lead the Android team to refer to AsyncTask as "Painless Threading".
The application must download a large resource to the device, such as a movie file, that must not require the user to keep the application active.
(API Level 9)
Use the DownloadManager API. The DownloadManager is a service added to the SDK with API Level 9 that allows a long-running downloads to be handed off and managed completely by the system. The primary advantage of using this service is that DownloadManager will continue attempting to download the resource through failures, connection changes, and even device reboots.
Listing 3-12 is a sample Activity that makes use of DownloadManager to handle the download of a large image file. When complete, the image is displayed in an ImageView. Whenever you utilize DownloadManager to access content from the Web, be sure to declare you are using the android.permission.INTERNET in the application's manifest.
Example 3.12. DownloadManager Sample Activity
public class DownloadActivity extends Activity {

    private staticfinal String DL_ID = "downloadId";
    private SharedPreferences prefs;

    private DownloadManager dm;
    private ImageView imageView;

    @Override
    publicvoid onCreate(Bundle savedInstanceState) {
        super.onCreate(savedInstanceState);
        imageView = new ImageView(this);
        setContentView(imageView);

        prefs = PreferenceManager.getDefaultSharedPreferences(this);
        dm = (DownloadManager)getSystemService(DOWNLOAD_SERVICE);
    }

    @Override
    publicvoid onResume() {
        super.onResume();

        if(!prefs.contains(DL_ID)) {
            //Start the download
            Uri resource = Uri.parse("http://www.bigfoto.com/dog-animal.jpg");
            DownloadManager.Request request = new DownloadManager.Request(resource);
            request.setAllowedNetworkTypes(Request.NETWORK_MOBILE |
                Request.NETWORK_WIFI);
            request.setAllowedOverRoaming(false);
            //Display in the notification bar
            request.setTitle("Download Sample");
            long id = dm.enqueue(request);
            //Save the unique id
            prefs.edit().putLong(DL_ID, id).commit();
        } else {
            //Download already started, check status
queryDownloadStatus();
}
registerReceiver(receiver,
newIntentFilter(DownloadManager.ACTION_DOWNLOAD_COMPLETE));
}
@Override
publicvoid onPause() {
super.onPause();
unregisterReceiver(receiver);
}
private BroadcastReceiver receiver = new BroadcastReceiver() {
@Override
publicvoid onReceive(Context context, Intent intent) {
queryDownloadStatus();
}
};
privatevoid queryDownloadStatus() {
DownloadManager.Query query = new DownloadManager.Query();
query.setFilterById(prefs.getLong(DL_ID, 0));
Cursor c = dm.query(query);
if(c.moveToFirst()) {
int status = c.getInt(c.getColumnIndex(DownloadManager.COLUMN_STATUS));
switch(status) {
case DownloadManager.STATUS_PAUSED:
case DownloadManager.STATUS_PENDING:
case DownloadManager.STATUS_RUNNING:
//Do nothing, still in progress
break;
case DownloadManager.STATUS_SUCCESSFUL:
//Done, display the image
try {
ParcelFileDescriptor file =
dm.openDownloadedFile(prefs.getLong(DL_ID, 0));
FileInputStream fis =
new ParcelFileDescriptor.AutoCloseInputStream(file);
imageView.setImageBitmap(BitmapFactory.decodeStream(fis));
} catch (Exception e) {
e.printStackTrace();
}
break;
case DownloadManager.STATUS_FAILED:
//Clear the download and try again later
dm.remove(prefs.getLong(DL_ID, 0));
prefs.edit().clear().commit();
break;
}
}
}
}Note
As of this book's publishing date, there is a bug in the SDK that throws an Exception claiming android.permission.ACCESS_ALL_DOWNLOADS is required to use DownloadManager. This Exception is actually thrown when android.permission.INTERNET is not in your manifest.
This example does all of its useful work in the Activity.onResume() method so the application can determine the status of the download each time the user returns to the Activity. Downloads within the manager can be references using a long ID value that is returned when DownloadManager.enqueue() is called. In the example, we persist that value in the application's preferences in order to monitor and retrieve the downloaded content at any time.
On first launch of the example application, a DownloadManager.Request object is created to represent the content to download. At a minimum, this request needs the Uri of the remote resource. However, there are many useful properties to set on the request as well to control its behavior. Some of the useful properties include:
Request.setAllowedNetworkTypes()Set specific network types over which the download may be retrieved.
Request.setAllowedOverRoaming()Set if the download is allowed to occur while the device is on a roaming connection.
Request.setTitle()Set a title to be displayed in the system notification for the download.
Request.setDescription()Set a description to be displayed in the system notification for the download.
Once an ID has been obtained, the application uses that value to check the status of the download. By registering a BroadcastReceiver to listen for the ACTION_DOWNLOAD_COMPLETE broadcast, the application will react to the download finishing by setting the image file on the Activity's ImageView. If the Activity is paused while the download completes, upon the next resume the status will be checked and the ImageView content will be set.
It is important to note that the ACTION_DOWNLOAD_COMPLETE is a broadcast sent by the DownloadManager for every download it may be managing. Because of this, we still much check that the download ID we are interested in is really ready.
In the Listing 3-12 example, we never told the DownloadManager where to place the file. Instead, when we wanted to access the file we used the DownloadManager.openDownloadedFile() method with the ID value stored in preferences to get a ParcelFileDescriptor, which can be turned into a stream the application can read from. This is a simple and straightforward way to gain access to the downloaded content, but it has some caveats to be aware of.
Without a specific destination, files are downloaded to the shared download cache, where the system retains the right to delete them at any time to reclaim space. Because of this, downloading in this fashion is a convenient way to get data quickly, but if your needs for the download are more long term, a permanent destination should be specific on external storage using one of the DownloadManager.Request methods:
Request.setDestinationUri()Set the destination to a file Uri located on external storage.
Request.setDestinationInExternalFilesDir()Set the destination to a hidden directory on external storage.
Request.setDestinationInExternalPublicDir()Set the destination to a public directory on external storage.
Note
All destination methods writing to external storage will require your application to declare use of android.permission.WRITE_EXTERNAL_STORAGE in the manifest.
Files without an explicit destination also often get removed when DownloadManager.remove() gets called to clear the entry from the manager list or the user clears the downloads list; files downloaded to external storage will not be removed by the system under these conditions.
Your application needs to access a RESTful API over HTTP to interact with the web services of a remote host.
(API Level 3)
Use the Apache HTTP classes inside of an AsyncTask. Android includes the Apache HTTP components library, which provides a robust method of creating connections to remote APIs. The Apache library includes classes to create GET, POST, PUT, and DELETE requests with ease, as well as providing support for SSL, cookie storage, authentication, and other HTTP requirements that your specific API may have in its HttpClient.
REST stands for Representational State Transfer, and is a common architectural style for web services today. RESTful APIs are typically built using standard HTTP verbs to create requests of the remote resource and the responses are typically returned in a structured document format, such as XML, JSON, or comma separated values (CSV).
Listing 3-13 is an AsyncTask that can process any HttpUriRequest and return the string response.
Example 3.13. AsyncTask Processing HttpRequest
public class RestTask extends AsyncTask<HttpUriRequest, Void, String> {

    public static final String HTTP_RESPONSE = "httpResponse";

    private Context mContext;
    private HttpClient mClient;
    private String mAction;

    public RestTask(Context context, String action) {
        mContext = context;
        mAction = action;
        mClient = new DefaultHttpClient();
    }

    public RestTask(Context context, String action, HttpClient client) {
        mContext = context;
        mAction = action;
        mClient = client;
    }

    @Override
    protected String doInBackground(HttpUriRequest... params) {
        try{
            HttpUriRequest request = params[0];
            HttpResponse serverResponse = mClient.execute(request);

            BasicResponseHandler handler = new BasicResponseHandler();
            String response = handler.handleResponse(serverResponse);
            return response;
        } catch (Exception e) {
            e.printStackTrace();
            return null;
        }
    }

    @Override
    protectedvoid onPostExecute(String result) {
        Intent intent = new Intent(mAction);
        intent.putExtra(HTTP_RESPONSE, result);
        //Broadcast the completion
        mContext.sendBroadcast(intent);
    }

}
The RestTask can be constructed with or without an HttpClient parameter. The reason for allowing this is so multiple requests can use the same client object. This is extremely useful if your API requires cookies to maintain a session or if there is a specific set of required parameters that are easier to set up once (like SSL stores). The task takes an HttpUriRequest parameter to process (of which HttpGet, HttpPost, HttpPut, and HttpDelete are all subclasses) and executes it.
A BasicResponseHandler processes the response, which is a convenience class that abstracts our task from needing to check the response for errors. BasicResponseHandler will return the HTTP response as a string if the response code is 1XX or 2XX, but throw an HttpResponseException if the response code was 300 or greater.
The final important piece of this class exists in onPostExecute(), after the interaction with the API is complete. When constructed, the RestTask takes a String parameter to be the action of an Intent that is broadcast back to all listeners with the API response encapsulated as an extra. This broadcast is the notification mechanism back to the caller of the API that the data is ready for processing.
Now let's use this powerful new tool to create some basic API requests. In the following examples we utilize the Yahoo! Search REST API. This API only has two required parameters for each request:
appid
Unique value to identify that application making the request
query
String representing the search query you want to execute
Visit http://developer.yahoo.com/search to find more information about this API.
A GET request is the simplest and most common request in many public APIs. Parameters that must be sent with the request are encoded into the URL string itself, so no additional data must be provided. Let's create a GET request to search for "Android" (see Listing 3-14).
Example 3.14. Activity Executing API GET Request
public class SearchActivity extends Activity {

    private static final String SEARCH_ACTION = "com.examples.rest.SEARCH";
    private static final String SEARCH_URI =
           "http://search.yahooapis.com/WebSearchService/V1/webSearch?appid=%s&query=%s";

    private TextView result;
    private ProgressDialog progress;

    @Override
    public void onCreate(Bundle savedInstanceState) {
        super.onCreate(savedInstanceState);
result = new TextView(this);
setContentView(result);
//Create the search request
try{
String url = String.format(SEARCH_URI, "YahooDemo","Android");
HttpGet searchRequest = new HttpGet( new URI(url) );
RestTask task = new RestTask(this,SEARCH_ACTION);
task.execute(searchRequest);
//Display progress to the user
progress = ProgressDialog.show(this, "Searching", "Waiting For Results...",
true);
} catch (Exception e) {
e.printStackTrace();
}
}
@Override
public void onResume() {
super.onResume();
registerReceiver(receiver, new IntentFilter(SEARCH_ACTION));
}
@Override
public void onPause() {
super.onPause();
unregisterReceiver(receiver);
}
private BroadcastReceiver receiver = new BroadcastReceiver() {
@Override
public void onReceive(Context context, Intent intent) {
//Clear progress indicator
if(progress != null) {
progress.dismiss();
}
String response = intent.getStringExtra(RestTask.HTTP_RESPONSE);
//Process the response data (here we just display it)
result.setText(response);
}
};
}In the example, we create the type of HTTP request that we need with the URL that we want to connect to (in this case, a GET request to search.yahooapis.com). The URL is stored as a constant format string, and the required parameters for the Yahoo! API (appid and query) are added at runtime just before the request is created.
A RestTask is created with a unique action string to be broadcast upon completion, and the task is executed. The example also defines a BroadcastReceiver and registers it for the same action that was sent to the RestTask. When the task is complete, this receiver will catch the broadcast and the API response can be unpacked and processed. We will discuss parsing structured XML and JSON responses like this one in Recipes 3-7 and 3-8, so for now the example simply displays the raw response to the user interface.
Many times, APIs require that you provide some data as part of the request, perhaps an authentication token or the contents of a search query. The API will require you to send the request over HTTP POST so these values may be encoded into the request body instead of the URL. Let's run our search for "Android" again, but using a POST this time (see Listing 3-15).
Example 3.15. Activity Executing API POST Request
public class SearchActivity extends Activity {

    private static final String SEARCH_ACTION = "com.examples.rest.SEARCH";
    private static final String SEARCH_URI =
            "http://search.yahooapis.com/WebSearchService/V1/webSearch";
    private static final String SEARCH_QUERY = "Android";

    private TextView result;
    private ProgressDialog progress;

    @Override
    public void onCreate(Bundle savedInstanceState) {
        super.onCreate(savedInstanceState);
        setTitle("Activity");
        result = new TextView(this);
        setContentView(result);

        //Create the search request
        try{
            HttpPost searchRequest = new HttpPost( new URI(SEARCH_URI) );
            List<NameValuePair> parameters = new ArrayList<NameValuePair>();
            parameters.add(new BasicNameValuePair("appid","YahooDemo"));
            parameters.add(new BasicNameValuePair("query",SEARCH_QUERY));
            searchRequest.setEntity(new UrlEncodedFormEntity(parameters));

            RestTask task = new RestTask(this,SEARCH_ACTION);
            task.execute(searchRequest);
            //Display progress to the user
            progress = ProgressDialog.show(this, "Searching", "Waiting For Results...",
true);
        } catch (Exception e) {
            e.printStackTrace();
        }
    }

    @Override
    public void onResume() {
        super.onResume();
        registerReceiver(receiver, new IntentFilter(SEARCH_ACTION));
    }

    @Override
    public void onPause() {
        super.onPause();
        unregisterReceiver(receiver);
    }
private BroadcastReceiver receiver = new BroadcastReceiver() {
@Override
public void onReceive(Context context, Intent intent) {
//Clear progress indicator
if(progress != null) {
progress.dismiss();
}
String response = intent.getStringExtra(RestTask.HTTP_RESPONSE);
//Process the response data (here we just display it)
result.setText(response);
}
};
}Notice in this example that the required parameters passed to the API to execute the search are encoded into an HttpEntity instead of passed directly in the request URL. The request created in this case was an HttpPost instance, which is still a subclass of HttpUriRequest (like HttpGet), so we can use the same RestTask to run the operation. As with the GET example, we will discuss parsing structured XML and JSON responses like this one in Recipes 3-7 and 3-8, so for now the example simply displays the raw response to the user interface.
Note
The Apache library bundled with the Android SDK does not include support for Multipart HTTP POSTs. However, MultipartEntity, from the publicly available org.apache.http.mime library, is compatible and can be brought in to your project as an external source.
Another common requirement for working with an API is some form of authentication. Standards are emerging for REST API authentication such as OAuth 2.0, but the most common authentication method is still basic username and password authentication over HTTP. In Listing 3-16, we modify the RestTask to enable authentication in the HTTP header per request.
Example 3.16. RestTask with Basic Authentication
public class RestAuthTask extends AsyncTask<HttpUriRequest, Void, String> {

    publicstaticfinal String HTTP_RESPONSE = "httpResponse";

    private static final String AUTH_USER = "[email protected]";
    private static final String AUTH_PASS = "password";

    private Context mContext;
    private AbstractHttpClient mClient;
    private String mAction;

    public RestAuthTask(Context context, String action, boolean authenticate) {
        mContext = context;
        mAction = action;
mClient = new DefaultHttpClient();
if(authenticate) {
UsernamePasswordCredentials creds =
new UsernamePasswordCredentials(AUTH_USER, AUTH_PASS);
mClient.getCredentialsProvider().setCredentials(AuthScope.ANY, creds);
}
}
public RestAuthTask(Context context, String action, AbstractHttpClient client) {
mContext = context;
mAction = action;
mClient = client;
}
@Override
protected String doInBackground(HttpUriRequest... params) {
try{
HttpUriRequest request = params[0];
HttpResponse serverResponse = mClient.execute(request);
BasicResponseHandler handler = new BasicResponseHandler();
String response = handler.handleResponse(serverResponse);
return response;
} catch (Exception e) {
e.printStackTrace();
return null;
}
}
@Override
protectedvoid onPostExecute(String result) {
Intent intent = new Intent(mAction);
intent.putExtra(HTTP_RESPONSE, result);
//Broadcast the completion
mContext.sendBroadcast(intent);
}
}Basic authentication is added to the HttpClient in the Apache paradigm. Since our example task allows for a specific client object to be passed in for use, which may already have the necessary authentication credentials, we have only modified the case where a default client is created. In this case, a UsernamePasswordCredentials instance is created with the username and password strings, and then set on the client's CredentialsProvider.
Your application needs to parse responses from an API or other source that are formatted in JavaScript Object Notation (JSON).
(API Level 1)
Use the org.json parser classes that are baked into Android. The SDK comes with a very efficient set of classes for parsing JSON formatted strings in the org.json package. Simply create a new JSONObject or JSONArray from the formatted string data and you'll be armed with a set of accessor methods to get primitive data or nested JSONObjects and JSONArrays from within.
This JSON parser is strict by default, meaning that it will halt with an Exception when encountering invalid JSON data or an invalid key. Accessor methods that prefix with "get" will throw a JSONException if the requested value is not found. In some cases this behavior is not ideal, and for the there is a companion set of methods that are prefixed with "opt". These methods will return null instead of throwing an exception when a value for the requested key is not found. In addition, many of them have an overloaded version that also takes a fallback parameter to return instead of null.
Let's look at an example of how to parse a JSON string into useful pieces. Consider the JSON in Listing 3-17.
Example 3.17. Example JSON
{
    "person": {
        "name": "John",
        "age": 30,
        "children": [
            {
                "name": "Billy"
                "age": 5
            },
            {
                "name": "Sarah"
                "age": 7
            },
            {
                "name": "Tommy"
                "age": 9
            }
        ]
    }
}
This defines a single object with three values: name (String), age (Integer), and children. The parameter entitled "children" is an array of three more objects, each with their own name and age. If we were to use org.json to parse this data and display some elements in TextViews, it would look like the examples in Listings 3-18 and 3-19.
Example 3.18. res/layout/main.xml
<?xml version="1.0" encoding="utf-8"?>
<LinearLayout xmlns:android="http://schemas.android.com/apk/res/android"
  android:layout_width="fill_parent"
  android:layout_height="fill_parent"
  android:orientation="vertical">
  <TextView
    android:id="@+id/line1"
    android:layout_width="fill_parent"
    android:layout_height="wrap_content"
  />
  <TextView
    android:id="@+id/line2"
    android:layout_width="fill_parent"
    android:layout_height="wrap_content"
  />
  <TextView
    android:id="@+id/line3"
    android:layout_width="fill_parent"
    android:layout_height="wrap_content"T
  />
</LinearLayout>
Example 3.19. Sample JSON Parsing Activity
public class MyActivity extends Activity {
private static final String JSON_STRING =
"{"person":{"name":"John","age":30,"children":
[{"name":"Billy","age":5}," + ""name":"Sarah","age":7},
{"name":"Tommy","age":9}]}}";
@Override
public void onCreate(Bundle savedInstanceState) {
super.onCreate(savedInstanceState);
setContentView(R.layout.main);
TextView line1 = (TextView)findViewById(R.id.line1);
TextView line2 = (TextView)findViewById(R.id.line2);
TextView line3 = (TextView)findViewById(R.id.line3);
try {
JSONObject person = (new JSONObject(JSON_STRING)).getJSONObject("person");
String name = person.getString("name");
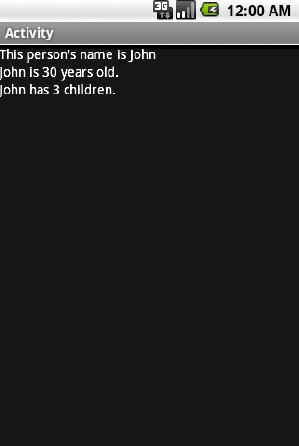
line1.setText("This person's name is " + name);
line2.setText(name + " is " + person.getInt("age") + " years old.");
line3.setText(name + " has " + person.getJSONArray("children").length()
+ " children.");
} catch (JSONException e) {
e.printStackTrace();
}
}
}For this example, the JSON string has been hard-coded as a constant. When the Activity is created, the string is turned into a JSONObject, at which point all its data can be accessed as key-value pairs, just as if it were stored in a Map or Dictionary. All the business logic is wrapped in a try/catch statement since we are using the strict methods for accessing data.
Functions like JSONObject.getString() and JSONObject.getInt() are used to reads primitive data out and place it in the TextView; the getJSONArray() method pulls out the nested "children" array. JSONArray has the same set of accessor methods as JSONObject to read data, but they take an index into the array as a parameter instead of the name of the key. In addition, a JSONArray can return its length, which we used in the example to display how many children the person had.
The result of the sample application is shown in Figure 3-3.
JSON is a very efficient notation; however, it can be difficult for humans to read a raw JSON string, which can make it hard to debug parsing issues. Quite often the JSON you are parsing is coming from a remote source or is not completely familiar to you, and you need to display it for debugging purposes. Both JSONObject and JSONArray have an overloaded toString() method that takes an integer parameter for pretty-printing the data in a returned and indented fashion, making it easier to decipher. Often adding something like myJsonObject.toString(2) to a troublesome section can save time and headache.
(API Level 1)
Implement a subclass of org.xml.sax.helpers.DefaultHandler to parse the data using event-based SAX. Android has three primary methods you can use to parse XML data: DOM, SAX, and Pull. The simplest to implement, and most memory-efficient, of these is the SAX parser. SAX parsing works by traversing the XML data and generating callback events at the beginning and end of each element.
To describe this further, let's look at the format of the XML that is returned when requesting an RSS/ATOM news feed (see Listing 3-20).
Example 3.20. RSS Basic Structure
<rss version="2.0">
  <channel>
    <item>
      <title></title>
      <link></link>
      <description></description>
    </item>
    <item>
      <title></title>
      <link></link>
      <description></description>
    </item>
    <item>
      <title></title>
      <link></link>
      <description></description>
    </item>
    ...
  </channel>
</rss>
Between each of the <title>, <link>, and <description> tags is the value associated with each item. Using SAX, we can parse this data out into an array of items that the application could then display to the user in a list (see Listing 3-21).
Example 3.21. Custom Handler to Parse RSS
public class RSSHandlerextends DefaultHandler {

    public class NewsItem {
        public String title;
        public String link;
        public String description;

        @Override
        public String toString() {
            return title;
        }
    }

    private StringBuffer buf;
    private ArrayList <NewsItem> feedItems;
    private NewsItem item;

    privateboolean inItem = false;

    public ArrayList<NewsItem> getParsedItems() {
        return feedItems;
    }

    //Called at the head of each new element
    @Override
    public void startElement(String uri, String name, String qName, Attributes atts) {
        if("channel".equals(name)) {
            feedItems = new ArrayList<NewsItem>();
        } elseif("item".equals(name)) {
            item = new NewsItem();
            inItem = true;
        } elseif("title".equals(name) && inItem) {
            buf = new StringBuffer();
        } elseif("link".equals(name) && inItem) {
            buf = new StringBuffer();
        } elseif("description".equals(name) && inItem) {
            buf = new StringBuffer();
        }
    }

    //Called at the tail of each element end
    @Override
    public void endElement(String uri, String name, String qName) {
        if("item".equals(name)) {
            feedItems.add(item);
            inItem = false;
        } elseif("title".equals(name) && inItem) {
            item.title = buf.toString();
        } elseif("link".equals(name) && inItem) {
            item.link = buf.toString();
        } elseif("description".equals(name) && inItem) {
            item.description = buf.toString();
        }

        buf = null;
    }
//Called with character data inside elements
@Override
public void characters(char ch[], int start, int length) {
//Don't bother if buffer isn't initialized
if(buf != null) {
for (int i=start; i<start+length; i++) {
buf.append(ch[i]);
}
}
}
}The RSSHandler is notified at the beginning and end of each element via startElement() and endElement(). In between, the characters that make up the element's value are passed into the characters() callback.
When the parser encounters the first element, the list of items is initialized.
When each item element is encountered a new NewsItem model is initialized.
Inside of each item element, data elements are captured in a StringBuffer and inserted into the members of the NewsItem.
When the end of each item is reached, the NewsItem is added to the list.
When parsing is complete, feedItems is a complete list of all the items in the feed.
Let's look at this in action by using some of the tricks from the API example in Recipe 3-6 to download the latest Google News in RSS form (see Listing 3-22).
Example 3.22. Activity That Parses the XML and Displays the Items
public class FeedActivity extends Activity {
    private static final String FEED_ACTION = "com.examples.rest.FEED";
    private static final String FEED_URI = "http://news.google.com/?output=rss";

    private ListView list;
    private ArrayAdapter<NewsItem> adapter;

    @Override
    public void onCreate(Bundle savedInstanceState) {
        super.onCreate(savedInstanceState);

        list = new ListView(this);
        adapter = new ArrayAdapter<NewsItem>(this, android.R.layout.simple_list_item_1,
            android.R.id.text1);
        list.setAdapter(adapter);
        list.setOnItemClickListener(new AdapterView.OnItemClickListener() {
            @Override
            public void onItemClick(AdapterView<?> parent, View v, int position,
            long id) {
NewsItem item = adapter.getItem(position);
//Launch the link in the browser
Intent intent = new Intent(Intent.ACTION_VIEW);
intent.setData(Uri.parse(item.link));
startActivity(intent);
}
});
setContentView(list);
}
@Override
public void onResume() {
super.onResume();
registerReceiver(receiver, new IntentFilter(FEED_ACTION));
//Retrieve the RSS feed
try{
HttpGet feedRequest = new HttpGet( new URI(FEED_URI) );
RestTask task = new RestTask(this,FEED_ACTION);
task.execute(feedRequest);
} catch (Exception e) {
e.printStackTrace();
}
}
@Override
public void onPause() {
super.onPause();
unregisterReceiver(receiver);
}
private BroadcastReceiver receiver = new BroadcastReceiver() {
@Override
public void onReceive(Context context, Intent intent) {
String response = intent.getStringExtra(RestTask.HTTP_RESPONSE);
try {
//Parse the response data using SAX
SAXParserFactory factory = SAXParserFactory.newInstance();
SAXParser p = factory.newSAXParser();
RSSHandler parser = new RSSHandler();
//Run the parsing operation
p.parse(new InputSource(new StringReader(response)), parser);
//Clear all current items from the list
adapter.clear();
//Add all items from the parsed XML
for(NewsItem item : parser.getParsedItems()) {
adapter.add(item);
}
//Tell adapter to update the view
adapter.notifyDataSetChanged();
} catch (Exception e) {
e.printStackTrace();
}
}
};
}The example has been modified to display a ListView, which will be populated by the parsed items from the RSS feed. In the example, we add an OnItemClickListener to the list that will launch the news item's link in the browser.
Once the data is returned from the API in the BroadcastReceiver, Android's built-in SAXParser handles the job of traversing the XML string. SAXParser.parse() uses an instance of our RSSHandler to process the XML, which results in the handler's feedItems list being populated. The receiver then iterates through all the parsed items and adds them to an ArrayAdapter for display in the ListView.
(API Level 1)
Register a BroadcastReceiver to listen for incoming messages, and process them in onReceive(). The operating system will fire a broadcast Intent with the android.provider.Telephony.SMS_RECEIVED action whenever there is an incoming SMS message. Your application can register a BroadcastReceiver to filter for this Intent and process the incoming data.
In previous recipes, we have defined BroadcastReceivers as private internal members to an Activity. In this case, it is probably best to define the receiver separately and register it in AndroidManifest.xml using the <receiver> tag. This will allow your receiver to process the incoming events even when your application is not active. Listings 3-23 and 3-24 show an example receiver that monitors all incoming SMS, and raises a Toast when one arrives from the interesting party.
Example 3.23. Incoming SMS BroadcastReceiver
public class SmsReceiver extends BroadcastReceiver {
    private static final String SHORTCODE = "55443";

    @Override
public void onReceive(Context context, Intent intent) {
Bundle bundle = intent.getExtras();
Object[] messages = (Object[])bundle.get("pdus");
SmsMessage[] sms = new SmsMessage[messages.length];
//Create messages for each incoming PDU
for(int n=0; n < messages.length; n++) {
sms[n] = SmsMessage.createFromPdu((byte[]) messages[n]);
}
for(SmsMessage msg : sms) {
//Verify if the message came from our known sender
if(TextUtils.equals(msg.getOriginatingAddress(), SHORTCODE)) {
Toast.makeText(context,
"Received message from the mothership: "+msg.getMessageBody(),
Toast.LENGTH_SHORT).show();
}
}
}
}Example 3.24. Partial AndroidManifest.xml
<?xml version="1.0" encoding="utf-8"?>
<manifest ...>
    <application ...>
      <receiver android:name=".SmsReceiver">
        <intent-filter>
          <action android:name="android.provider.Telephony.SMS_RECEIVED" />
        </intent-filter>
      </receiver>
    </application>
    <uses-permission android:name="android.permission.RECEIVE_SMS" />
</manifest>
Note
Receiving SMS requires the android.permission.RECEIVE_SMS permission be declared in the manifest!
Incoming SMS messages are passed via the extras of the broadcast Intent as an Object array of byte arrays, each byte array representing an SMS packet data unit (PDU). SmsMessage.createFromPdu() is a convenience method allowing us to create SmsMessage objects from the raw PDU data. With the setup work complete, we can inspect each message to determine if there is something interesting to handle or process. In the example, we compare the originating address of each message against a known short code, and notify the user when one arrives.
At the point in the example where the Toast is raised, you may wish to provide something more useful to the user. Perhaps the SMS message includes an offer code for your application, and you could launch the appropriate Activity to display this information to the user within the application.
(API Level 4)
Use the SMSManager to send text and data SMS messages. SMSManager is a system service that handles sending SMS and providing feedback to the application about the status of the operation. SMSManager provides methods to send text messages using SmsManager.sendTextMessage() and SmsManager.sendMultipartTextMessage(), or data messages using SmsManager.sendDataMessage(). Each of these methods takes PendingIntent parameters to deliver status for the send operation and the message delivery back to a requested destination.
Let's take a look at a simple example Activity that sends an SMS message and monitors its status (see Listing 3-25).
Example 3.25. Activity to Send SMS Messages
public class SmsActivity extends Activity {
    private static final String SHORTCODE = "55443";
    private static final String ACTION_SENT = "com.examples.sms.SENT";
    private static final String ACTION_DELIVERED = "com.examples.sms.DELIVERED";

    @Override
    public void onCreate(Bundle savedInstanceState) {
        super.onCreate(savedInstanceState);

        Button sendButton = new Button(this);
        sendButton.setText("Hail the Mothership");
        sendButton.setOnClickListener(new View.OnClickListener() {
            @Override
            public void onClick(View v) {
                sendSMS("Beam us up!");
            }
        });

        setContentView(sendButton);
    }

    privatevoid sendSMS(String message) {
        PendingIntent sIntent = PendingIntent.getBroadcast(this, 0,
            new Intent(ACTION_SENT), 0);
        PendingIntent dIntent = PendingIntent.getBroadcast(this, 0,
            new Intent(ACTION_DELIVERED), 0);
        //Monitor status of the operation
registerReceiver(sent, new IntentFilter(ACTION_SENT));
registerReceiver(delivered, new IntentFilter(ACTION_DELIVERED));
//Send the message
SmsManager manager = SmsManager.getDefault();
manager.sendTextMessage(SHORTCODE, null, message, sIntent, dIntent);
}
private BroadcastReceiver sent = new BroadcastReceiver(){
@Override
public void onReceive(Context context, Intent intent) {
switch (getResultCode()){
case Activity.RESULT_OK:
//Handle sent success
break;
case SmsManager.RESULT_ERROR_GENERIC_FAILURE:
case SmsManager.RESULT_ERROR_NO_SERVICE:
case SmsManager.RESULT_ERROR_NULL_PDU:
case SmsManager.RESULT_ERROR_RADIO_OFF:
//Handle sent error
break;
}
unregisterReceiver(this);
}
};
private BroadcastReceiver delivered = new BroadcastReceiver(){
@Override
public void onReceive(Context context, Intent intent) {
switch (getResultCode()){
case Activity.RESULT_OK:
//Handle delivery success
break;
case Activity.RESULT_CANCELED:
//Handle delivery failure
break;
}
unregisterReceiver(this);
}
};
}Note
Sending SMS messages requires the android.permission.SEND_SMS permission be declared in the manifest!
In the example, an SMS message is sent out via the SMSManager whenever the user taps the button. Because SMSManager is a system service, the static SMSManager.getDefault() method must be called to get a reference to it. sendTextMessage() takes the destination address (number), service center address, and message as parameters. The service center address should be null to allow SMSManager to use the system default.
Two BroadcastReceivers are registered to receive the callback Intents that will be sent: one for status of the send operation and the other for status of the delivery. The receivers are registered only while the operations are pending, and they unregister themselves as soon as the Intent is processed.
(API Level 5)
Use the Bluetooth APIs introduced in API Level 5 to create a peer-to-peer connection. Bluetooth is a very popular wireless radio technology that is in almost all mobile devices today. Many users think of Bluetooth as a way for their mobile device to connect with a wireless headset or integrate with their vehicles stereo system. However, Bluetooth can also be a simple and effective way for developers to create peer-to-peer connections in their applications.
Note
Bluetooth is not currently supported in the Android emulator. In order to execute the code in this example, it must be run on an Android device. Furthermore, to appropriately test the functionality, two devices running the application simultaneously is required.
Listings 3-26 through 3-28 illustrate an example that uses Bluetooth to find other users nearby and quickly exchange contact information (in this case, just an email address). Connections are made over Bluetooth by discovering available "services" and connecting to them by referencing their unique 128-bit UUID value. This means that the UUID of the service you want to use must either be discovered or known ahead of time.
In this example, the same application is running on both devices on each end of the connection, so we have the freedom to define the UUID in code as a constant because both devices will have a reference to it.
Note
To ensure that the UUID you choose is unique, use one of the many free UUID generators available on the Web.
Example 3.26. AndroidManifest.xml
<?xml version="1.0" encoding="utf-8"?>
<manifest xmlns:android="http://schemas.android.com/apk/res/android"
      android:versionCode="1"
      android:versionName="1.0" package="com.examples.bluetooth">
    <application android:icon="@drawable/icon" android:label="@string/app_name"
        <activity android:name=".ExchangeActivity"
                  android:label="@string/app_name">
            <intent-filter>
                <action android:name="android.intent.action.MAIN" />
                <category android:name="android.intent.category.LAUNCHER" />
            </intent-filter>
        </activity>
    </application>
    <uses-sdk android:minSdkVersion="5" />

    <uses-permission android:name="android.permission.BLUETOOTH"/>
    <uses-permission android:name="android.permission.BLUETOOTH_ADMIN"/>
</manifest>
Note
Remember that android.permission.BLUETOOTH must be declared in the manifest to use these APIs. In addition, android.permission.BLUETOOTH_ADMIN must be declared to make changes to preferences like discoverability, and enable/disable the adapter.
Example 3.27. res/layout/main.xml
<?xml version="1.0" encoding="utf-8"?>
<RelativeLayout xmlns:android="http://schemas.android.com/apk/res/android"
  android:layout_width="fill_parent"
  android:layout_height="fill_parent">
  <TextView
    android:id="@+id/label"
    android:layout_width="wrap_content"
    android:layout_height="wrap_content"
    android:textAppearance="?android:attr/textAppearanceLarge"
    android:text="Enter Your Email:"
  />
  <EditText
    android:id="@+id/emailField"
    android:layout_width="fill_parent"
    android:layout_height="wrap_content"
    android:layout_below="@id/label"
    android:singleLine="true"
    android:inputType="textEmailAddress"
  />
  <Button
    android:id="@+id/scanButton"
    android:layout_width="fill_parent"
    android:layout_height="wrap_content"
    android:layout_alignParentBottom="true"
    android:text="Connect and Share"
  />
  <Button
android:id="@+id/listenButton"
android:layout_width="fill_parent"
android:layout_height="wrap_content"
android:layout_above="@id/scanButton"
android:text="Listen for Sharers"
/>
</RelativeLayout>The user interface for this example consists of an EditText for the user to enter their email address, and two buttons to initiate communication. The button titled "Listen for Sharers" puts the device into Listen Mode. In this mode, the device will accept and communicate with any device that attempts to connect with it. The button titled "Connect and Share" puts the device into Search Mode. In this mode, the device searches for any device that is currently listening and makes a connection (see Listing 3-28).
Example 3.28. Bluetooth Exchange Activity
public classExchangeActivity extends Activity {

    // Unique UUID for this application (generated from the web)
    private static final UUID MY_UUID =
        UUID.fromString("321cb8fa-9066-4f58-935e-ef55d1ae06ec");
    //Friendly name to match while discovering
    private static final String SEARCH_NAME = "bluetooth.recipe";

    BluetoothAdapter mBtAdapter;
    BluetoothSocket mBtSocket;
    Button listenButton, scanButton;
    EditText emailField;

    @Override
    public void onCreate(Bundle savedInstanceState) {
        super.onCreate(savedInstanceState);
        requestWindowFeature(Window.FEATURE_INDETERMINATE_PROGRESS);
        setContentView(R.layout.main);

        //Check the system status
        mBtAdapter = BluetoothAdapter.getDefaultAdapter();
        if(mBtAdapter == null) {
            Toast.makeText(this, "Bluetooth is not supported.",
                Toast.LENGTH_SHORT).show();
            finish();
            return;
        }
        if (!mBtAdapter.isEnabled()) {
            Intent enableIntent = new Intent(BluetoothAdapter.ACTION_REQUEST_ENABLE);
            startActivityForResult(enableIntent, REQUEST_ENABLE);
        }

        emailField = (EditText)findViewById(R.id.emailField);
        listenButton = (Button)findViewById(R.id.listenButton);
        listenButton.setOnClickListener(new View.OnClickListener() {
            @Override
            public void onClick(View v) {
                //Make sure the device is discoverable first
                if (mBtAdapter.getScanMode() !=
BluetoothAdapter.SCAN_MODE_CONNECTABLE_DISCOVERABLE) {
Intent discoverableIntent = new
Intent(BluetoothAdapter.ACTION_REQUEST_DISCOVERABLE);
discoverableIntent.putExtra(BluetoothAdapter.
EXTRA_DISCOVERABLE_DURATION, 300);
startActivityForResult(discoverableIntent, REQUEST_DISCOVERABLE);
return;
}
startListening();
}
});
scanButton = (Button)findViewById(R.id.scanButton);
scanButton.setOnClickListener(new View.OnClickListener() {
@Override
public void onClick(View v) {
mBtAdapter.startDiscovery();
setProgressBarIndeterminateVisibility(true);
}
});
}
@Override
public void onResume() {
super.onResume();
//Register the activity for broadcast intents
IntentFilter filter = new IntentFilter(BluetoothDevice.ACTION_FOUND);
registerReceiver(mReceiver, filter);
filter = new IntentFilter(BluetoothAdapter.ACTION_DISCOVERY_FINISHED);
registerReceiver(mReceiver, filter);
}
@Override
public void onPause() {
super.onPause();
unregisterReceiver(mReceiver);
}
@Override
public void onDestroy() {
super.onDestroy();
try {
if(mBtSocket != null) {
mBtSocket.close();
}
} catch (IOException e) {
e.printStackTrace();
}
}
private static final int REQUEST_ENABLE = 1;
private static final int REQUEST_DISCOVERABLE = 2;
@Override
protectedvoid onActivityResult(int requestCode, int resultCode, Intent data) {
switch(requestCode) {
case REQUEST_ENABLE:
if(resultCode != Activity.RESULT_OK) {Toast.makeText(this, "Bluetooth Not Enabled.",
Toast.LENGTH_SHORT).show();
finish();
}
break;
case REQUEST_DISCOVERABLE:
if(resultCode == Activity.RESULT_CANCELED) {
Toast.makeText(this, "Must be discoverable.",
Toast.LENGTH_SHORT).show();
} else {
startListening();
}
break;
default:
break;
}
}
//Start a server socket and listen
privatevoid startListening() {
AcceptTask task = new AcceptTask();
task.execute(MY_UUID);
setProgressBarIndeterminateVisibility(true);
}
//AsyncTask to accept incoming connections
privateclass AcceptTask extends AsyncTask<UUID,Void,BluetoothSocket> {
@Override
protected BluetoothSocket doInBackground(UUID... params) {
String name = mBtAdapter.getName();
try {
//While listening, set the discovery name to a specific value
mBtAdapter.setName(SEARCH_NAME);
BluetoothServerSocket socket =
mBtAdapter.listenUsingRfcommWithServiceRecord("BluetoothRecipe",
params[0]);
BluetoothSocket connected = socket.accept();
//Reset the BT adapter name
mBtAdapter.setName(name);
return connected;
} catch (IOException e) {
e.printStackTrace();
mBtAdapter.setName(name);
return null;
}
}
@Override
protectedvoid onPostExecute(BluetoothSocket socket) {
if(socket == null) {
return;
}
mBtSocket = socket;
ConnectedTask task = new ConnectedTask();
task.execute(mBtSocket);
}}
//AsyncTask to receive a single line of data and post
privateclass ConnectedTask extends AsyncTask<BluetoothSocket,Void,String> {
@Override
protected String doInBackground(BluetoothSocket... params) {
InputStream in = null;
OutputStream out = null;
try {
//Send your data
out = params[0].getOutputStream();
out.write(emailField.getText().toString().getBytes());
//Receive the other's data
in = params[0].getInputStream();
byte[] buffer = newbyte[1024];
in.read(buffer);
//Create a clean string from results
String result = new String(buffer);
//Close the connection
mBtSocket.close();
return result.trim();
} catch (Exception exc) {
return null;
}
}
@Override
protectedvoid onPostExecute(String result) {
Toast.makeText(ExchangeActivity.this, result, Toast.LENGTH_SHORT).show();
setProgressBarIndeterminateVisibility(false);
}
}
// The BroadcastReceiver that listens for discovered devices
private BroadcastReceiver mReceiver = new BroadcastReceiver() {
@Override
public void onReceive(Context context, Intent intent) {
String action = intent.getAction();
// When discovery finds a device
if (BluetoothDevice.ACTION_FOUND.equals(action)) {
// Get the BluetoothDevice object from the Intent
BluetoothDevice device =
intent.getParcelableExtra(BluetoothDevice.EXTRA_DEVICE);
if(TextUtils.equals(device.getName(), SEARCH_NAME)) {
//Matching device found, connect
mBtAdapter.cancelDiscovery();
try {
mBtSocket = device.createRfcommSocketToServiceRecord(MY_UUID);
mBtSocket.connect();
ConnectedTask task = new ConnectedTask();
task.execute(mBtSocket);
} catch (IOException e) {
e.printStackTrace();
}}
//When discovery is complete
} elseif (BluetoothAdapter.ACTION_DISCOVERY_FINISHED.equals(action)) {
setProgressBarIndeterminateVisibility(false);
}
}
};
}When the application first starts up, it runs some basic checks on the Bluetooth status of the device. If BluetoothAdapter.getDefaultAdapter() returns null, it is an indication that the device does not have Bluetooth support and the application will go no further. Even with Bluetooth on the device, it must be enabled for the application to use it. If Bluetooth is disabled, the preferred method for enabling the adapter is to send an Intent to the system with BluetoothAdapter.ACTION_REQUEST_ENABLE as the action. This notifies the user of the issue, and allows them to enable Bluetooth. A BluetoothAdapter can be manually enabled with the enable() method, but we strongly discourage you from doing this unless you have requested the user's permission another way.
With Bluetooth validated, the application waits for user input. As mentioned previously, the example can be put into one of two modes on each device, Listen Mode or Search Mode. Let's look at the path each mode takes.
Listen Mode
Tapping the "Listen for Sharers" button starts the application listening for incoming connections. In order for a device to accept incoming connections from devices it may not know, it must be set as discoverable. The application verifies this by checking if the adapter's scan mode is equal to SCAN_MODE_CONNECTABLE_DISCOVERABLE. If the adapter does not meet this requirement, another Intent is sent to the system to notify the user that they should allow the device to be discoverable, similar to the method used to request Bluetooth be enabled. If the user accepts this request, the Activity will return a result equal to the length of time they allowed the device to be discoverable; if they cancel the request, the Activity will return Activity.RESULT_CANCELED. Our example monitors for a user canceling in onActivityResult(), and finishes under those conditions.
If the user allows discovery, or if the device was already discoverable, an AcceptTask is created and executed. This task creates a listener socket for the specified UUID of the service we defined, and blocks while waiting for an incoming connection request. Once a valid request is received, it is accepted and the application moves into Connected Mode.
During the period of time while the device is listening, its Bluetooth name is set to a known unique value (SEARCH_NAME) to speed up the discovery process (we'll see more about why in the "Search Mode" section). Once the connection is established, the default name given to the adapter is restored.
Tapping the "Connect and Share" button tells the application to begin searching for another device to connect with. It does this by starting a Bluetooth discovery process and handling the results in a BroadcastReceiver. When a discovery is started via BluetoothAdapter.startDiscovery(), Android will asynchronously call back with broadcasts under two conditions: when another device is found, and when the process is complete.
The private receiver mReceiver is registered at all times when the Activity is visible to the user, and will receive a broadcast with each new discovered device. Recall from the discussion on Listen Mode that the device name of a listening device was set to a unique value. Upon each discovery made, the receiver checks if the device name matches our known value, and attempts to connect when one is found. This is important to the speed of the discovery process because otherwise the only way to validate each device is to attempt a connection to the specific service UUID and see if the operation is successful. The Bluetooth connection process is heavyweight and slow, and should only be done when necessary to keep things performing well.
This method of matching devices also relieves the user of the need to select manually which device they want to connect to. The application is smart enough to find another device that is running the same application and in a listening mode to complete the transfer. Removing the user also means that this value should be unique and obscure so as to avoid finding other devices that may accidentally have the same name.
With a matching device found, we cancel the discovery process (as it is also heavyweight and will slow down the connection) and make a connection to the service's UUID. With a successful connection made, the application moves into Connected Mode.
Connected Mode
Once connected, the application on both devices will create a ConnectedTask to send and receive the user contact information. The connected BluetoothSocket has an InputStream and an OutputStream available to do data transfer. First, the current value of the email text field is packaged up and written to the OutputStream. Then, the InputStream is read to receive the remote device's information. Finally, each device takes the raw data it received and packages it into a clean String to display for the user.
The ConnectedTask.onPostExecute() method is tasked with displaying the results of the exchange to the user; currently, this is done by raising a Toast with the received contents. After the transaction, the connection is closed and both devices are in the same mode and ready to execute another exchange.
For more information on this topic, take a look at the BluetoothChat sample application provided with the Android SDK. This application provides a great demonstration of making a long-lived connection for users to send chat messages between devices.
As we mentioned in the beginning of this section, Bluetooth is found in many wireless devices besides mobile phones and tablets. RFCOMM interfaces also exist in devices like Bluetooth modems and serial adapters. The same APIs that were used to create the peer-to-peer connection between Android devices can also be used to connect to other embedded Bluetooth devices for the purposes of monitoring and control.
The key to establishing a connection with these embedded devices is obtaining the UUID of the RFCOMM services they support. As with the previous example, with the proper UUID we can create a BluetoothSocket and transmit data. However, since the UUID is not known as it was in the last example, we must have a way to discover and obtain it.
The capability to do this exists in the SDK, although it is not documented and is subject to change in future versions.
Discover a UUID
A quick glance at the source code for BluetoothDevice (thanks to Android's open source roots) points out that there are a couple hidden methods that return UUID information for a remote device. The simplest to use is a synchronous (blocking) method called getUuids(), which returns an array of ParcelUuid objects referring to each service. However, since the method is currently hidden, it must be called using Java reflection. Here is an example method for reading the UUIDs of service records from a remote device using reflection:
public ParcelUuid servicesFromDevice(BluetoothDevice device) {
    try {
        Class cl = Class.forName("android.bluetooth.BluetoothDevice");
        Class[] par = {};
        Method method = cl.getMethod("getUuids", par);
        Object[] args = {};
        ParcelUuid[] retval = (ParcelUuid[])method.invoke(device, args);
        return retval;
    } catch (Exception e) {
        e.printStackTrace();
        return null;
    }
}
There is also an asynchronous version of this process named fetchUuidsWithSdp(), which can be called in the same fashion. Because it is asynchronous, the results are returned through a broadcast Intent. Register a BroadcastReceiver for android.bleutooth.device.action.UUID (note the misspelling of Bluetooth) to get a callback with the UUIDs discovered for that device. The ParcelUuid array obtained is an extra passed with the Intent referenced by android.bluetooth.device.extra.UUID, and it is the same as the result of the synchronous example.
(API Level 1)
Keep tabs on the device's connectivity with ConnectivityManager. One of the paramount issues to consider in mobile application design is that the network is not always available for use. As people move about, the speed and capabilities of the network are subject to change. Because of this, an application that uses network resources should always be able to detect if those resources are reachable, and notify the user when they are not.
In addition to reachability, ConnectivityManager can provide the application with information about the connection type. This allows you to make decisions like whether to download a large file because the user is currently roaming and it may cost them a fortune.
Listing 3-29 creates a wrapper method you can place in your code to check for network connectivity.
Example 3.29. ConnectivityManager Wrapper
public boolean isNetworkReachable() {
    ConnectivityManager mManager =
            (ConnectivityManager)context.getSystemService(Context.CONNECTIVITY_SERVICE);
    NetworkInfo current = mManager.getActiveNetworkInfo();
    if(current == null) {
        return false;
    }
    return (current.getState() == NetworkInfo.State.CONNECTED);
}
ConnectivityManager does pretty much all of the work in checking the network status, and this wrapper method is more to simplify having to check all possible network paths each time. Note that ConnectivityManager.getActiveNetworkInfo() will return null if there is no active data connection available, so we must check for that case first. If there is an active network, we can inspect its state, which will return one of the following:
DISCONNECTED
CONNECTING
CONNECTED
DISCONNECTING
When the state returns as CONNECTED, the network is considered stable and we can utilize it to access remote resources.
It is considered good practice to call a reachability check whenever a network request fails, and notify the user that their request failed due to a lack of connectivity. Listing 3-30 is an example of doing this when a network access fails.
Example 3.30. Notify User of Connectivity Failure
try {
    //Attempt to access network resource
    //May throw HttpResponseException or some other IOException on failure
} catch (Exception e) {
    if( !isNetworkReachable() ) {
        AlertDialog.Builder builder = new AlertDialog.Builder(context);
        builder.setTitle("No Network Connection");
        builder.setMessage("The Network is unavailable. Please try your request again later.");
        builder.setPositiveButton("OK",null);
        builder.create().show();
    }
}In cases where it is also essential to know whether the user is connected to a network that charges for bandwidth, we can call NetworkInfo.getType() on the active network connection (see Listing 3-31).
Example 3.31. ConnectivityManager Bandwidth Checking
public boolean isWifiReachable() {
    ConnectivityManager mManager =
            (ConnectivityManager)context.getSystemService(Context.CONNECTIVITY_SERVICE);
    NetworkInfo current = mManager.getActiveNetworkInfo();
    if(current == null) {
        return false;
    }
    return (current.getType() == ConnectivityManager.TYPE_WIFI);
}
This modified version of the reachability check determines if the users is attached to a WiFi connection, typically indicating that they have a faster connection where bandwidth isn't tariffed.
Connecting an Android application to the Web and web services is a great way to add user value in today's connected world. Android's framework for connecting to the Web and other remote hosts makes adding this functionality straightforward. We've explored how to bring the standards of the Web into your application, using HTML and JavaScript to interact with the user, but within a native context. You also saw how to use Android to download content from remote servers and consume it in your application. We also exposed that a web server is not the only host worth connecting to, using Bluetooth and SMS to communicate directly from one device to another. In the next chapter, we will look at using the tools Android provides to interact with a device's hardware resources.