
The Android operating system provides a number of useful services that applications can leverage. Many of these services are designed to allow your application to function within the mobile system in ways beyond just interacting briefly with a user. Applications can schedule themselves for alarms, run background services, and send messages to each other; all of which allows an Android application to integrate to the fullest extent with the mobile device. In addition, Android provides a set of standard interfaces designed to expose all the data collected by its core applications to your software. Through these interfaces, any application may integrate with, add to, and improve upon the core functionality of the platform, thereby enhancing the experience for the user.
Your application is running in the background, with no currently visible interface to the user, but must notify the user of an important event that has occurred.
(API Level 1)
Use NotificationManager to post a status bar notification. Notifications are an unobtrusive way of telling the user that you want their attention. Perhaps new messages have arrived, an update is available, or a long-running job is complete; Notifications are perfect for accomplishing all of these tasks.
A Notification can be posted to the NotificationManager from just about any system component, such as a Service, BroadcastReceiver, or Activity. In this example, we'll look at an Activity that uses a delay to simulate a long-running operation, resulting in a Notification when it is complete.
Example 6.1. Activity Firing a Notification
public class NotificationActivity extends Activity implements View.OnClickListener {

    private static final intNOTE_ID = 100;

    @Override
    public void onCreate(Bundle savedInstanceState) {
        super.onCreate(savedInstanceState);
        Button button = new Button(this);
        button.setText("Post New Notification");
        button.setOnClickListener(this);
        setContentView(button);
    }

    @Override
    public void onClick(View v) {
        //Run 10 seconds after click
        handler.postDelayed(task, 10000);
        Toast.makeText(this, "Notification will post in 10 seconds",
            Toast.LENGTH_SHORT).show();
    }

    private Handler handler = new Handler();
    private Runnable task = new Runnable() {
        @Override
        public void run() {
            NotificationManager manager =
                    (NotificationManager)getSystemService(Context.NOTIFICATION_SERVICE);
            Intent launchIntent = new Intent(getApplicationContext(),
                NotificationActivity.class);
            PendingIntent contentIntent =
                PendingIntent.getActivity(getApplicationContext(), 0, launchIntent, 0);

            //Create notification with the time it was fired
            Notification note = new Notification(R.drawable.icon, "Something Happened",
                    System.currentTimeMillis());
            //Set notification information
            note.setLatestEventInfo(getApplicationContext(), "We're Finished!",
                "Click Here!", contentIntent);
            note.defaults |= Notification.DEFAULT_SOUND;
            note.flags |= Notification.FLAG_AUTO_CANCEL;

            manager.notify(NOTE_ID, note);
        }
    };
}
This example makes use of a Handler to schedule a task to post the Notification ten seconds after the button is clicked by calling Handler.postDelayed() in the button listener. This task will execute regardless of whether the Activity is in the foreground, so if the user gets bored and leaves the application, they will still get notified.
When the scheduled task executes, a new Notification is created. An icon resource and title string may be provided, and these items will display in the status bar at the time the notification occurs. In addition, we pass a time value (in milliseconds) to display in the notification list as the event time. Here, we are setting that value to the time the notification fired, but it may take on a different meaning in your application.
Once the Notification is created, we fill it out with some useful parameters. Using Notification.setLatestEventInfo(), we provide more detailed text to be displayed in the Notifications list when the user pulls down the status bar.
One of the parameters passed to this method is a PendingIntent that points back to our Activity. This Intent makes the Notification interactive, allowing the user to tap the Notification in the list and have the Activity launched.
Note
This Intent will launch a new Activity with each event. If you would rather an existing instance of the Activity respond to the launch, if one exists in the stack, be sure to include Intent flags and manifest parameters appropriately to accomplish this, such as Intent.FLAG_ACTIVITY_CLEAR_TOP and android:launchMode="singleTop".
To enhance the Notification beyond the visual animation in the status bar, the Notification.defaults bitmask is modified to include that the system's default notification sound be played when the Notification fires. Values such as Notification.DEFAULT_VIBRATION and Notification.DEFAULT_LIGHTS may also be added.
Tip
If you would like to customize the sound played with a Notification, set the Notification.sound parameter to a Uri that references a file or ContentProvider to read from.
Adding a series of flags to the Notification.flags bitmask allows further customization of a Notification. This example enables Notification.FLAG_AUTO_CANCEL to signify that the notification should be canceled, or removed from the list, as soon as the user selects it. Without this flag, the notification remains in the list until manually canceled by calling NotificationManager.cancel() or NotificationManager.cancelAll().
The following are some other useful flags to apply:
FLAG_INSISTENTRepeats the
Notificationsounds until the user responds.
FLAG_NO_CLEARDoes not allow the
Notificationto be cleared with the user's "Clear Notifications" button; only through a call tocancel().
Once the Notification is prepared, it is posted to the user with NotificationManager.notify(), which takes an ID parameter as well. Each Notification type in your application should have a unique ID. The manager will only allow one Notification with the same ID in the list at a time, and new instances with the same ID will take the place of those existing. In addition, the ID is required to cancel a specific Notification manually.
When we run this example, an Activity like Figure 6-1 displays a Button to the user. Upon pressing the button, you can see the Notification post some time later, even if the Activity is no longer visible (see Figure 6-2).


Your application needs to run an operation on a timer, such as updating the UI on a scheduled basis.
Use the timed operations provided by a Handler. With Handler, operations can efficiently be scheduled to occur at a specific time, or after a specified delay.
Let's look at an example Activity that displays the current time in a TextView. See Listing 6-2.
Example 6.2. Activity Updated with a Handler
public class TimingActivity extends Activity {

    TextView mClock;
@Override
public void onCreate(Bundle savedInstanceState) {
super.onCreate(savedInstanceState);
mClock = new TextView(this);
setContentView(mClock);
}
private Handler mHandler = new Handler();
private Runnable timerTask = new Runnable() {
@Override
public void run() {
Calendar now = Calendar.getInstance();
mClock.setText(String.format("%02d:%02d:%02d",
now.get(Calendar.HOUR),
now.get(Calendar.MINUTE),
now.get(Calendar.SECOND)) );
//Schedule the next update in one second
mHandler.postDelayed(timerTask,1000);
}
};
@Override
public void onResume() {
super.onResume();
mHandler.post(timerTask);
}
@Override
public void onPause() {
super.onPause();
mHandler.removeCallbacks(timerTask);
}
}Here we've wrapped up the operation of reading the current time and updating the UI into a Runnable named timerTask, which will be triggered by the Handler that has also been created. When the Activity becomes visible, the task is executed as soon as possible with a call to Handler.post(). After the TextView has been updated, the final operation of timerTask is to invoke the Handler to schedule another execution one second (1,000 milliseconds) from now using Handler.postDelayed().
As long as the Activity remains uninterrupted, this cycle will continue, with the UI being updated every second. As soon as the Activity is paused (the user leaves or something else grabs their attention), Handler.removeCallbacks() removes all pending operations and ensures the task will not be called further until the Activity becomes visible once more.
Tip
In this example, we are safe to update the UI because the Handler was created on the main thread. Operations will always execute on the same thread as the Handler that posted them is attached to.
Your application needs to register to run a task periodically, such as checking a server for updates or reminding the user to do something.
(API Level 1)
Utilize the AlarmManager to manage and execute your task. AlarmManager is useful for scheduling future single or repeated operations that need to occur even if your application is not running. AlarmManager is handed a PendingIntent to fire whenever an alarm is scheduled. This Intent can point to any system component, such as an Activity, BroadcastReceiver, or Service, to be executed when the alarm triggers.
It should be noted that this method is best suited to operations that need to occur even when the application code may not be running. The AlarmManager requires too much overhead to be useful for simple timing operations that may be needed while an application is in use. These are better handled using the postAtTime() and postDelayed() methods of a Handler.
Let's take a look at how AlarmManager can be used to trigger a BroadcastReceiver on a regular basis. See Listings 6-3 through 6-5.
Example 6.3. BroadcastReceiver to Be Triggered
public class AlarmReceiver extends BroadcastReceiver {
    @Override
    public void onReceive(Context context, Intent intent) {
        //Perform an interesting operation, we'll just display the current time
        Calendar now = Calendar.getInstance();
        DateFormat formatter = SimpleDateFormat.getTimeInstance();
        Toast.makeText(context, formatter.format(now.getTime()),
            Toast.LENGTH_SHORT).show();
    }
}
Note
A BroadcastReceiver (AlarmReceiver, in this case) must be declared in the manifest with a <receiver> tag in order for AlarmManager to be able to trigger it. Be sure to include one within your <application> tag like so:
<application>
  ...
  <receiver android:name=".AlarmReceiver"></receiver>
</application>
Example 6.4. res/layout/main.xml
<?xml version="1.0" encoding="utf-8"?>
<LinearLayout xmlns:android="http://schemas.android.com/apk/res/android"
  android:orientation="vertical"
  android:layout_width="fill_parent"
  android:layout_height="fill_parent">
  <Button
    android:id="@+id/start"
    android:layout_width="fill_parent"
    android:layout_height="wrap_content"
    android:text="Start Alarm"
  />
  <Button
    android:id="@+id/stop"
    android:layout_width="fill_parent"
    android:layout_height="wrap_content"
    android:text="Cancel Alarm"
  />
</LinearLayout>
Example 6.5. Activity to Register/Unregister Alarms
public class AlarmActivity extends Activity implements View.OnClickListener {

    private PendingIntent mAlarmIntent;

    @Override
    public void onCreate(Bundle savedInstanceState) {
        super.onCreate(savedInstanceState);
        setContentView(R.layout.main);
        //Attach the listener to both buttons
        findViewById(R.id.start).setOnClickListener(this);
        findViewById(R.id.stop).setOnClickListener(this);
        //Create the launch sender
        Intent launchIntent = new Intent(this, AlarmReceiver.class);
        mAlarmIntent = PendingIntent.getBroadcast(this, 0, launchIntent, 0);
    }

    @Override
    public void onClick(View v) {
        AlarmManager manager = (AlarmManager)getSystemService(Context.ALARM_SERVICE);
        long interval = 5*1000; //5 seconds

        switch(v.getId()) {
        case R.id.start:
Toast.makeText(this, "Scheduled", Toast.LENGTH_SHORT).show();
manager.setRepeating(AlarmManager.ELAPSED_REALTIME,
SystemClock.elapsedRealtime()+interval,
interval,
mAlarmIntent);
break;
case R.id.stop:
Toast.makeText(this, "Canceled", Toast.LENGTH_SHORT).show();
manager.cancel(mAlarmIntent);
break;
default:
break;
}
}
}In this example, we have provided a very basic BroadcastReceiver that, when triggered, will simply display the current time as a Toast. That receiver must be registered in the application's manifest with a <receiver> tag. Otherwise, AlarmManager—which is external to your application—will not be aware of how to trigger it. The sample Activity presents two buttons: one to begin firing regular alarms, and the other to cancel them.
The operation to trigger is referenced by a PendingIntent, which will be used to both set and cancel the alarms. We create an Intent referencing the application's BroadcastReceiver directly, and then a PendingIntent from that using getBroadcast() (since we are creating a reference to a BroadcastReceiver).
Note
PendingIntent has creator methods getActivity() and getService() as well. Be sure to reference the correct application component you are triggering when creating this piece.
When the start button is pressed, the Activity registers a repeating alarm using AlarmManager.setRepeating(). In addition to the PendingIntent, this method takes some parameters to determine when to trigger the alarms. The first parameter defines the alarm type, in terms of the units of time to use and whether or not the alarm should occur when the device is in sleep mode. In the example, we chose ELAPSED_REALTIME, which indicates a value (in milliseconds) since the last device boot. In addition, there are three other modes that may be used:
ELAPSED_REALTIME_WAKEUPAlarms times referenced to time elapsed, and will wake the device to trigger if it is asleep.
RTCAlarm times referenced to UTC time.
RTC_WAKEUPAlarm times referenced to UTC time, and will wake the device to trigger if it is asleep.
The following parameters (respectively) refer to the first time the alarm will trigger and the interval on which it should repeat. Since the chosen alarm type is ELAPSED_REALTIME, the start time must also be relative to elapsed time; SystemClock.elapsedRealtime() provides the current time in this format.
The alarm in the example is registered to trigger five seconds after the button is pressed, and then every five seconds after that. Every five seconds, a Toast will come onscreen with the current time value, even if the application is no longer running or in front of the user. When the user displays the Activity and presses the stop button, any pending alarms matching our PendingIntent are immediately canceled... stopping the flow of Toasts.
What if we wanted to schedule an alarm to occur at a specific time? Perhaps once per day at 9:00AM? Setting AlarmManager with some slightly different parameters could accomplish this. See Listing 6-6.
Example 6.6. Precision Alarm
long oneDay = 24*3600*1000; //24 hours
    long firstTime;

    //Get a Calendar (defaults to today)
    //Set the time to 09:00:00
    Calendar startTime = Calendar.getInstance();
    startTime.set(Calendar.HOUR_OF_DAY, 9);
    startTime.set(Calendar.MINUTE, 0);
    startTime.set(Calendar.SECOND, 0);

    //Get a Calendar at the current time
    Calendar now = Calendar.getInstance();

    if(now.before(startTime)) {
        //It's not 9AM yet, start today
        firstTime = startTime.getTimeInMillis();
    } else {
        //Start 9AM tomorrow
        startTime.add(Calendar.DATE, 1);
        firstTime = startTime.getTimeInMillis();
    }

    //Set the alarm
    manager.setRepeating(AlarmManager.RTC_WAKEUP,
                   firstTime,
                   oneDay,
                   mAlarmIntent);
This example uses an alarm that is referenced to real time. A determination is made whether the next occurrence of 9:00AM will be today or tomorrow, and that value is returned as the initial trigger time for the alarm. The calculated value of 24 hours in terms of milliseconds is then passed as the interval so that the alarm triggers once per day from that point forward.
Note
Alarms do not persist through a device reboot. If a device is powered off and then back on, any previously registered alarms must be rescheduled.
Your application needs to execute one or more background operations that will run to completion even if the user suspends the application.
(API Level 3)
Create an Implementation of IntentService to handle the work. IntentService is a wrapper around Android's base Service implementation, the key component to doing work in the background without interaction from the user. IntentService queues incoming work (expressed using Intents), processing each request in turn, and then stops itself when the queue is empty.
IntentService also handles creation of the worker thread needed to do the work in the background, so it is not necessary to use AsyncTask or Java Threads to ensure the operation is properly in the background.
This recipe examines an example of using IntentService to create a central manager of background operations. In the example, the manager will be invoked externally with calls to Context.startService(). The manager will queue up all requests received, and process them individually with a call to onHandleIntent().
Let's take a look at how to construct a simple IntentService implementation to handle a series of background operations. See Listing 6-7.
Example 6.7. IntentService Handling Operations
public class OperationsManager extends IntentService {

    public static final String ACTION_EVENT = "ACTION_EVENT";
    public static final String ACTION_WARNING = "ACTION_WARNING";
    public static final String ACTION_ERROR = "ACTION_ERROR";
    public static final String EXTRA_NAME = "eventName";

    private static final String LOGTAG = "EventLogger";

    private IntentFilter matcher;
public OperationsManager() {
super("OperationsManager");
//Create the filter for matching incoming requests
matcher = new IntentFilter();
matcher.addAction(ACTION_EVENT);
matcher.addAction(ACTION_WARNING);
matcher.addAction(ACTION_ERROR);
}
@Override
protectedvoid onHandleIntent(Intent intent) {
//Check for a valid request
if(!matcher.matchAction(intent.getAction())) {
Toast.makeText(this, "OperationsManager: Invalid Request", Toast.LENGTH_SHORT).show();
return;
}
//Handle each request directly in this method. Don't create more threads.
if(TextUtils.equals(intent.getAction(), ACTION_EVENT)) {
logEvent(intent.getStringExtra(EXTRA_NAME));
}
if(TextUtils.equals(intent.getAction(), ACTION_WARNING)) {
logWarning(intent.getStringExtra(EXTRA_NAME));
}
if(TextUtils.equals(intent.getAction(), ACTION_ERROR)) {
logError(intent.getStringExtra(EXTRA_NAME));
}
}
private void logEvent(String name) {
try {
//Simulate a long network operation by sleeping
Thread.sleep(5000);
Log.i(LOGTAG, name);
} catch (InterruptedException e) {
e.printStackTrace();
}
}
private void logWarning(String name) {
try {
//Simulate a long network operation by sleeping
Thread.sleep(5000);
Log.w(LOGTAG, name);
} catch (InterruptedException e) {
e.printStackTrace();
}
}
private void logError(String name) {
try {
//Simulate a long network operation by sleeping
Thread.sleep(5000);
Log.e(LOGTAG, name);
} catch (InterruptedException e) {
e.printStackTrace();}
}
}Notice that IntentService does not have a default constructor (one that takes no parameters), so a custom implementation must implement a constructor that calls through to super with a service name. This name is of little technical importance, as it is only useful for debugging; Android uses the name provided to name the worker thread that it creates.
All requests are processed by the service through the onHandleIntent() method. This method is called on the provided worker thread, so all work should be done directly here; no new threads or operations should be created. When onHandleIntent() returns, this is the signal to the IntentService to begin processing the next request in the queue.
This example provides three logging operations that can be requested using different action strings on the request Intents. For demonstration purposes, each operation writes the provided message out to the device log using a specific logging level (INFO, WARNING, or ERROR). Note that the message itself is passed as an extra of the request Intent. Use the data and extra fields of each Intent to hold any parameters for the operation, leaving the action field to define the operation type.
The example service maintains an IntentFilter, which is used for convenience to determine whether a valid request has been made. All of the valid actions are added to the filter when the service is created, allowing us to call IntentFilter.matchAction() on any incoming request to determine if it includes an action we can process here.
Listing 6-8 is an example of an Activity calling into this service to perform work.
Example 6.8. AndroidManifest.xml
<?xml version="1.0" encoding="utf-8"?>
<manifest xmlns:android="http://schemas.android.com/apk/res/android"
package="com.examples.sticky"
android:versionCode="1"
android:versionName="1.0">
<uses-sdk android:minSdkVersion="3" />
<application android:icon="@drawable/icon" android:label="@string/app_name">
<activity android:name=".ReportActivity"
android:label="@string/app_name">
<intent-filter>
<action android:name="android.intent.action.MAIN" />
<category android:name="android.intent.category.LAUNCHER" />
</intent-filter>
</activity>
<service android:name=".OperationsManager"></service>
</application>
</manifest>Note
The package attribute in AndroidManifest.xml must match the package you have chosen for your application; "com.examples.sticky" is simply the chosen package for our example here.
Note
Since IntentService is invoked as a Service, it must be declared in the application manifest using a <service> tag.
Example 6.9. Activity Calling IntentService
public class ReportActivity extends Activity {
@Override
public void onCreate(Bundle savedInstanceState) {
super.onCreate(savedInstanceState);
logEvent("CREATE");
}
@Override
public void onStart() {
super.onStart();
logEvent("START");
}
@Override
public void onResume() {
super.onResume();
logEvent("RESUME");
}
@Override
public void onPause() {
super.onPause();
logWarning("PAUSE");
}
@Override
public void onStop() {
super.onStop();
logWarning("STOP");
}
@Override
public void onDestroy() {
super.onDestroy();
logWarning("DESTROY");
}
private void logEvent(String event) {
Intent intent = new Intent(this, OperationsManager.class);
intent.setAction(OperationsManager.ACTION_EVENT);intent.putExtra(OperationsManager.EXTRA_NAME, event);
startService(intent);
}
private void logWarning(String event) {
Intent intent = new Intent(this, OperationsManager.class);
intent.setAction(OperationsManager.ACTION_WARNING);
intent.putExtra(OperationsManager.EXTRA_NAME, event);
startService(intent);
}
}This Activity isn't much to look at, as all the interesting events are sent out through the device log instead of to the user interface. Nevertheless, it helps illustrate the queue processing behavior of the service we created in the previous example. As the Activity becomes visible, it will call through all of its normal life-cycle methods, resulting in three requests made of the logging service. As each request is processed, a line will output to the log and the service will move on.
Tip
These log statements are visible through the logcat tool provided with the SDK. The logcat output from a device or emulator is visible from within most development environments (including Eclipse), or from the command line by typing adb logcat.
Notice also that when the service is finished with all three requests, a notification is sent out the log by the system that the service has been stopped. IntentServices are only around in memory for as long as is required to complete the job; a very useful feature for your services to have, making them a good citizen of the system.
Pressing either the HOME or BACK buttons will cause more of the life-cycle methods to generate requests of the service, and notice that the Pause/Stop/Destroy portion calls a separate operation in the service, causing their messages to be logged as warnings; simply setting the action string of the request intent to a different value controls this.
Notice that messages continue to be output to the log, even after the application is no longer visible (or even if another application is opened instead). This is the power of the Android Service component at work. These operations are protected from the system until they are complete, regardless of user behavior.
In each of the operation methods, a five-second delay has been placed to simulate the time required for an actual request to be made of a remote API or some similar operation. When running this example, it also helps to illustrate that IntentService handles all requests sent to it in a serial fashion with a single worker thread. The example queues multiple requests in succession from each life-cycle method, however the result will still be a log message every five seconds, since IntentService does not start a new request until the current one is complete (essentially, when onHandleIntent() returns).
If your application requires concurrency from sticky background tasks, you may need to create a more customized Service implementation that uses a pool of threads to execute work. The beauty of Android being open source is that you can go directly to the source code for IntentService and use it as a starting point for such an implementation if it is required, minimizing the amount of time and custom code required.
Your application has a component that must be running in the background indefinitely, performing some operation or monitoring certain events to occur.
(API Level 1)
Build the component into a Service. Services are designed as background components that an application may start and leave running for an indefinite amount of time. Services are also given elevated status above other background processes in terms of protection from being killed in low memory conditions.
Services may be started and stopped explicitly for operations that do not require a direct connection to another component (like an Activity). However, if the application must interact directly with the Service, a binding interface is provided to pass data. In these instances, the service may be started and stopped implicitly by the system as is required to fulfill its requested bindings.
The key thing to remember with Service implementations is to always be user-friendly. An indefinite operation most likely should not be started unless the user explicitly requests it. The overall application should probably contain an interface or setting that allows the user to control enabling or disabling such a Service.
Listing 6-10 is an example of a persisted service that is used to track and log the user's location over a certain period.
Example 6.10. Persistent Tracking Service
public class TrackerService extends Service implements LocationListener {
private static final String LOGTAG = "TrackerService";
private LocationManager manager;
private ArrayList<Location> storedLocations;privateboolean isTracking = false;
/* Service Setup Methods */
@Override
public void onCreate() {
manager = (LocationManager)getSystemService(LOCATION_SERVICE);
storedLocations = new ArrayList<Location>();
Log.i(LOGTAG, "Tracking Service Running...");
}
@Override
public void onDestroy() {
manager.removeUpdates(this);
Log.i(LOGTAG, "Tracking Service Stopped...");
}
public void startTracking() {
if(!manager.isProviderEnabled(LocationManager.GPS_PROVIDER)) {
return;
}
Toast.makeText(this, "Starting Tracker", Toast.LENGTH_SHORT).show();
manager.requestLocationUpdates(LocationManager.GPS_PROVIDER, 30000, 0, this);
isTracking = true;
}
public void stopTracking() {
Toast.makeText(this, "Stopping Tracker", Toast.LENGTH_SHORT).show();
manager.removeUpdates(this);
isTracking = false;
}
publicboolean isTracking() {
return isTracking;
}
/* Service Access Methods */
public class TrackerBinder extends Binder {
TrackerService getService() {
return TrackerService.this;
}
}
private final IBinder binder = new TrackerBinder();
@Override
public IBinder onBind(Intent intent) {
return binder;
}
publicint getLocationsCount() {
return storedLocations.size();
}
public ArrayList<Location> getLocations() {
return storedLocations;}
/* LocationListener Methods */
@Override
public void onLocationChanged(Location location) {
Log.i("TrackerService", "Adding new location");
storedLocations.add(location);
}
@Override
public void onProviderDisabled(String provider) { }
@Override
public void onProviderEnabled(String provider) { }
@Override
public void onStatusChanged(String provider, int status, Bundle extras) { }
}This Service's job is to monitor and track the updates it receives from the LocationManager. When the Service is created, it prepares a blank list of Location items and waits to begin tracking. An external component, such as an Activity, can call startTracking() and stopTracking() to enable and disable the flow of location updates to the Service. In addition, methods are exposed to access the list of locations that the Service has logged.
Because this Service requires direct interaction from an Activity or other component, a Binder interface is required. The Binder concept can get complex when Services have to communicate across process boundaries, but for instances like this, where everything is local to the same process, a very simple Binder is created with one method, getService(), to return the Service instance itself to the caller. We'll look at this in more detail from the Activity's perspective in a moment.
When tracking is enabled on the service, it registers for updates with LocationManager, and stores every update received in its locations list. Notice that requestLocationUpdates() was called with a minimum time of 30 seconds. Since this Service is expected to be running for a long time, it is prudent to space out the updates to give the GPS (and consequently the battery) a little rest.
Now let's take a look at a simple Activity that allows the user access into this Service. See Listings 6-11 through 6-13.
Example 6.11. AndroidManifest.xml
<?xml version="1.0" encoding="utf-8"?>
<manifest xmlns:android="http://schemas.android.com/apk/res/android"
package="com.examples.service"
android:versionCode="1"
android:versionName="1.0">
<uses-sdk android:minSdkVersion="1" />
<application android:icon="@drawable/icon" android:label="@string/app_name">
<activity android:name=".ServiceActivity"
android:label="@string/app_name">
<intent-filter>
<action android:name="android.intent.action.MAIN" /><category android:name="android.intent.category.LAUNCHER" />
</intent-filter>
</activity>
<service android:name=".TrackerService"></service>
</application>
<uses-permission android:name="android.permission.ACCESS_FINE_LOCATION"/>
</manifest>Note
The Service must be declared in the application manifest using a <service> tag so Android knows how and where to call on it. Also, for this example the permission android.permission.ACCESS_FINE_LOCATION is required since we are working with the GPS.
Example 6.12. res/layout/main.xml
<?xml version="1.0" encoding="utf-8"?>
<LinearLayout xmlns:android="http://schemas.android.com/apk/res/android"
android:orientation="vertical"
android:layout_width="fill_parent"
android:layout_height="fill_parent">
<Button
android:id="@+id/enable"
android:layout_width="fill_parent"
android:layout_height="wrap_content"
android:text="Start Tracking"
/>
<Button
android:id="@+id/disable"
android:layout_width="fill_parent"
android:layout_height="wrap_content"
android:text="Stop Tracking"
/>
<TextView
android:id="@+id/status"
android:layout_width="fill_parent"
android:layout_height="wrap_content"
/>
</LinearLayout>Example 6.13. Activity Interacting with Service
public class ServiceActivity extends Activity implements View.OnClickListener {
Button enableButton, disableButton;
TextView statusView;
TrackerService trackerService;
Intent serviceIntent;
@Override
public void onCreate(Bundle savedInstanceState) {
super.onCreate(savedInstanceState);
setContentView(R.layout.main);enableButton = (Button)findViewById(R.id.enable);
enableButton.setOnClickListener(this);
disableButton = (Button)findViewById(R.id.disable);
disableButton.setOnClickListener(this);
statusView = (TextView)findViewById(R.id.status);
serviceIntent = new Intent(this, TrackerService.class);
}
@Override
public void onResume() {
super.onResume();
//Starting the service makes it stick, regardless of bindings
startService(serviceIntent);
//Bind to the service
bindService(serviceIntent, serviceConnection, Context.BIND_AUTO_CREATE);
}
@Override
public void onPause() {
super.onPause();
if(!trackerService.isTracking()) {
//Stopping the service let's it die once unbound
stopService(serviceIntent);
}
//Unbind from the service
unbindService(serviceConnection);
}
@Override
public void onClick(View v) {
switch(v.getId()) {
case R.id.enable:
trackerService.startTracking();
break;
case R.id.disable:
trackerService.stopTracking();
break;
default:
break;
}
updateStatus();
}
private void updateStatus() {
if(trackerService.isTracking()) {
statusView.setText(
String.format("Tracking enabled. %d locations
logged.",trackerService.getLocationsCount()));
} else {
statusView.setText("Tracking not currently enabled.");
}
}
private ServiceConnection serviceConnection = new ServiceConnection() {
public void onServiceConnected(ComponentName className, IBinder service) {
trackerService = ((TrackerService.TrackerBinder)service).getService();updateStatus();
}
public void onServiceDisconnected(ComponentName className) {
trackerService = null;
}
};
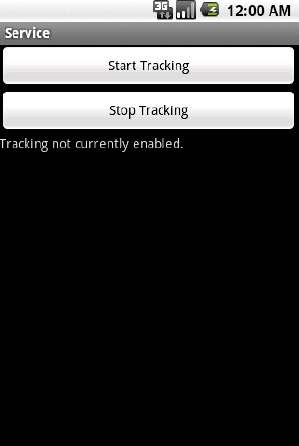
}Figure 6-3 displays the basic Activity with two buttons for the user to enable and disable location tracking behavior, and a text display for the current service status.
While the Activity is visible, it is bound to the TrackerService. This is done with the help of the ServiceConnection interface, which provides callback methods when the binding and unbinding operations are complete. With the Service bound to the Activity, we can now make direct calls on all the public methods exposed by the Service.
However, bindings alone will not allow the Service to stay running long-term; accessing the Service solely through its Binder interface causes it to be created and destroyed automatically along with the lifecycle of this Activity. In this case, we want the Service to persist beyond when this Activity is in memory. In order to accomplish this, the Service is explicitly started via startService() before it is bound. There is no harm in sending start commands to a service that is already running, so we can safely do this in onResume() as well.
The Service will now continue running in memory, even after the Activity unbinds itself. In onPause() the example always checks whether the user has activated tracking, and if not it stops the service first. This allows the Service to die if it is not required for tracking, which keeps the Service from perpetually hanging out in memory if it has no real work to do.
Running this example, and pressing the Start Tracking button will spin up the persisted service and the LocationManager. The user may leave the application at this point and the service will remain running, all the while logging all incoming location updates from the GPS. When the user returns to this application, they can see that the Service is still running and the current number of stored location points is displayed. Pressing Stop Tracking will end the process and allow the Service to die as soon as the user leaves the Activity once more.
Your application requires a specific function that another application on the device is already programmed to do. Instead of overlapping functionality, you would like to launch the other application for the job instead.
(API Level 1)
Use an implicit Intent to tell the system what you are looking to do, and determine if any applications exist to meet the need. Most often, developers use Intents in an explicit fashion to start another Activity or Service, like so:
Intent intent = new Intent(this, NewActivity.class); startActivity(intent);
By declaring the specific component we want to launch, the Intent is very explicit in its delivery. We also have the power to define an Intent in terms of its action, category, data, and type to define a more implicit requirement of what task we want to accomplish.
External applications are always launched within the same Android task as your application when fired in this fashion, so once the operation is complete (or if the user backs out) the user is returned to your application. This keeps the experience seamless, allowing multiple applications to act as one from the user's perspective.
When defining Intents in this fashion, it can be unclear what information you must include, because there is no published standard and it is possible for two applications offering the same service (reading a PDF file, for example) to define slightly different filters to listen for incoming Intents. You want to make sure and provide enough information for the system (or the user) to pick the best application to handle the required task.
The core piece of data to define on almost any implicit Intent is the action; a string value passed either in the constructor or via Intent.setAction(). This value tells Android what you want to do, whether it is to view a piece of content, send a message, select a choice, or what have you. From there, the fields provided are scenario specific, and often multiple combinations can arrive at the same result. Let's take a look at some useful examples.
Components to display PDF documents are not included in the core SDK, although almost every consumer Android device on the market today ships with a PDF reader application, and many more are available on Android Market. Because of this, it may not make sense to go through the trouble of embedding PDF display capabilities in your application.
Instead, the following Listing 6-14 illustrates how to find and launch another app to view the PDF.
Example 6.14. Method to View PDF
private void viewPdf(Uri file) {
Intent intent;
intent = new Intent(Intent.ACTION_VIEW);
intent.setDataAndType(file, "application/pdf");
try {
startActivity(intent);
} catch (ActivityNotFoundException e) {
//No application to view, ask to download one
AlertDialog.Builder builder = new AlertDialog.Builder(this);
builder.setTitle("No Application Found");
builder.setMessage("We could not find an application to view PDFs."
+" Would you like to download one from Android Market?");
builder.setPositiveButton("Yes, Please",
new DialogInterface.OnClickListener() {
@Override
public void onClick(DialogInterface dialog, int which) {
Intent marketIntent = new Intent(Intent.ACTION_VIEW);
marketIntent.setData(Uri.parse("market://details?id=com.adobe.reader"));
startActivity(marketIntent);
}
});
builder.setNegativeButton("No, Thanks", null);
builder.create().show();
}
}This example method will open any local PDF file on the device (internal or external storage) using the best application found. If no application is found on the device to view PDFs, we encourage the user to go to Android Market and download one.
The Intent we create for this is constructed using the generic Intent.ACTION_VIEW action string, telling the system we want to view the data provided in the Intent. The data file itself, and its MIME type are also set to tell the system what kind of data we want to view.
Tip
Intent.setData() and Intent.setType() clear each other's previous values when used. If you need to set both simultaneously, use Intent.setDataAndType(), as in the example.
If startActivity() fails with an ActivityNotFoundException, it means the user does not have an application installed on their device that can view PDFs. We want our users to have the full experience, so if this happens, we present a dialog telling them the problem, and asking if they would like to go to Market and get a reader. If the user presses Yes, we use another implicit Intent to request that Android Market be opened directly to the application page for Adobe Reader, a free application the user may download to view PDF files. We'll discuss the Uri scheme used for this Intent in the next recipe.
Notice that the example method takes a Uri parameter to the local file. Here is an example of how to retrieve a Uri for files located on internal storage:
String filename = NAME_OF YOUR_FILE; File internalFile = getFileStreamPath(filename); Uri internal = Uri.fromFile(internalFile);
The method getFileStreamPath() is called from a Context, so if this code is not in an Activity you must have reference to a Context object to call on. Here's how to create a Uri for files located on external storage:
String filename = NAME_OF YOUR_FILE; File externalFile = new File(Environment.getExternalStorageDirectory(), filename); Uri external = Uri.fromFile(externalFile);
This same example will work for any other document type as well by simply changing the MIME type attached to the Intent.
Another popular feature for developers to include in their applications is a method of sharing the application content with others; through e-mail, text messaging, and prominent social networks. All Android devices include applications for e-mail and text messaging, and most users who wish to share via a social network (like Facebook or Twitter) also have those mobile applications on their device.
As it turns out, this task can also be accomplished using an implicit Intent because most all of these applications respond to the Intent.ACTION_SEND action string in some way.
Listing 6-15 is an example of allowing a user to post to any medium they wish with a single Intent request.
Example 6.15. Sharing Intent
private void shareContent(String update) {
Intent intent = new Intent(Intent.ACTION_SEND);
intent.setType("text/plain");
intent.putExtra(Intent.EXTRA_TEXT, update);
startActivity(Intent.createChooser(intent, "Share..."));
}Here, we tell the system that we have a piece of text that we would like to send, passed in as an extra. This is a very generic request, and we expect more than one application to be able to handle it. By default, Android will present the user with a list of applications to select which they'd like to open. In addition, some devices provide the user with a checkbox to set their selection as a default so the list is never shown again!
We would prefer to have a little more control over this process because we also expect multiple results every time. Therefore, instead of passing the Intent directly to startActivity(), we first pass it through Intent.createChooser(), which allows us to customize the title and guarantee the selection list will always be displayed.
When the user selects a choice, that specific application will launch with the EXTRA_TEXT prepopulated into the message entry box, ready for sharing!
Your application requires a specific function that one of the system applications on the device is already programmed to do. Instead of overlapping functionality, you would like to launch the system application for the job instead.
Use an implicit Intent to tell the system which application you are interested in. Each system application subscribes to a custom Uri scheme that can be inserted as data into an implicit Intent to signify the specific application you need to launch.
External applications are always launched in the same task as your application when fired in this fashion, so once the task is complete (or if the user backs out) the user is returned to your application. This keeps the experience seamless, allowing multiple applications to act as one from the user's perspective.
All of the following examples will construct Intents that can be used to launch system applications in various states. Once constructed, you should launch these applications by passing said Intent to startActivity().
The browser application may be launched to display a web page or run a web search.
To display a web page, construct and launch the following Intent:
Intent pageIntent = new Intent();
pageIntent.setAction(Intent.ACTION_VIEW);
pageIntent.setData(Uri.parse("http://WEB_ADDRESS_TO_VIEW"));This replaces the Uri in the data field with the page you would like to view. To launch a web search inside the browser, construct and launch the following Intent:
Intent searchIntent = new Intent(); searchIntent.setAction(Intent.ACTION_WEB_SEARCH); searchIntent.putExtra(SearchManager.QUERY, STRING_TO_SEARCH);
This places the search query you want to execute as an extra in the Intent.
The dialer application may be launched to place a call to a specific number using the following Intent:
Intent dialIntent = new Intent();
dialIntent.setAction(Intent.ACTION_DIAL);
dialIntent.setData(Uri.Parse("tel:8885551234");This replaces the phone number in the data Uri with the number to call.
Note
This action just brings up the dialer; it does not actually place the call. Intent.ACTION_CALL can be used to actually place the call directly, although Google discourages using this in most cases. Using ACTION_CALL will also require that the android.permission.CALL_PHONE permission be declared in the manifest.
The maps application on the device can be launched to display a location or to provide directions between two points. If you know the latitude and longitude of the location you want to map, then create the following Intent:
Intent mapIntent = new Intent();
mapIntent.setAction(Intent.ACTION_VIEW);
mapIntent.setData(Uri.parse("geo:latitude,longitude"));This replaces the coordinates for latitude and longitude of your location. For example, the Uri
"geo:37.422,122.084"
would map the location of Google headquarters. If you know the address of the location to display, then create the following Intent:
Intent mapIntent = new Intent();
mapIntent.setAction(Intent.ACTION_VIEW);
mapIntent.setData(Uri.parse("geo:0,0?q=ADDRESS"));This inserts the address you would like to map. For example, the Uri
"geo:0,0?q=1600 Amphitheatre Parkway, Mountain View, CA 94043"
would map the address of Google headquarters.
Tip
The Maps application will also accept a Uri where spaces in the Address query are replaced with the "+" character. If you are having trouble encoding a String with spaces in it, try replacing them with "+" instead.
If you would like to display directions between to locations, create the following Intent:
Intent mapIntent = new Intent();
mapIntent.setAction(Intent.ACTION_VIEW);
mapIntent.setData(Uri.parse("http://maps.google.com/maps?saddr=lat,lng&daddr=lat,lng"));This inserts the locations for the start and end address.
It is also allowed for only one of the parameters to be included if you would like to open the maps application with one address open ended. For example, the Uri
"http://maps.google.com/maps?&daddr=37.422,122.084"
would display the maps application with the destination location prepopulated, but allowing the user to enter their own start address.
Any e-mail application on the device can be launched into compose mode using the following Intent:
Intent mailIntent = new Intent();
mailIntent.setAction(Intent.ACTION_SEND);
mailIntent.setType("message/rfc822");
mailIntent.putExtra(Intent.EXTRA_EMAIL, new String[] {"[email protected]"});
mailIntent.putExtra(Intent.EXTRA_CC, new String[] {"[email protected]"});
mailIntent.putExtra(Intent.EXTRA_BCC, new String[] {"[email protected]"});
mailIntent.putExtra(Intent.EXTRA_SUBJECT, "Email Subject");
mailIntent.putExtra(Intent.EXTRA_TEXT, "Body Text");
mailIntent.putExtra(Intent.EXTRA_STREAM, URI_TO_FILE);In this scenario, the action and type fields are the only required pieces to bring up a blank e-mail message. All the remaining extras prepopulate specific fields of the e-mail message. Notice that EXTRA_EMAIL (which fills the To: field), EXTRA_CC, and EXTRA_BCC are passed String arrays, even if there is only one recipient to be placed there. File attachments may also be specified in the Intent using EXTRA_STREAM. The value passed here should be a Uri pointing to the local file to be attached.
If you need to attach more than one file to an e-mail, the requirements change slightly to the following:
Intent mailIntent = new Intent();
mailIntent.setAction(Intent.ACTION_SEND_MULTIPLE);
mailIntent.setType("message/rfc822");
mailIntent.putExtra(Intent.EXTRA_EMAIL, new String[] {"[email protected]"});
mailIntent.putExtra(Intent.EXTRA_CC, new String[] {"[email protected]"});
mailIntent.putExtra(Intent.EXTRA_BCC, new String[] {"[email protected]"});
mailIntent.putExtra(Intent.EXTRA_SUBJECT, "Email Subject");
mailIntent.putExtra(Intent.EXTRA_TEXT, "Body Text");
ArrayList<Uri> files = new ArrayList<Uri>();
files.add(URI_TO_FIRST_FILE);
files.add(URI_TO_SECOND_FILE);
//...Repeat add() as often as necessary to add all the files you need
mailIntent.putParcelableArrayListExtra(Intent.EXTRA_STREAM, files);Notice that the Intent's action string is now ACTION_SEND_MULTIPLE. All the primary fields remain the same as before, except for the data that gets added as the EXTRA_STREAM. This example creates a list of Uris pointing to the files you want to attach and adds them using putParcelableArrayListExtra().
It is not uncommon for users to have multiple applications on their device that can handle this content, so it is usually prudent to wrap either of these constructed Intents with Intent.createChooser() before passing it on to startActivity().
The messages application can be launched into compose mode for a new SMS message using the following Intent:
Intent smsIntent = new Intent();
smsIntent.setAction(Intent.ACTION_VIEW);
smsIntent.setType("vnd.android-dir/mms-sms");
smsIntent.putExtra("address", "8885551234");
smsIntent.putExtra("sms_body", "Body Text");As with composing e-mail, you must set the action and type at a minimum to launch the application with a blank message. Including the address and sms_body extras allows the application to prepopulate the recipient (address) and body text (sms_body) of the message.
Notice that neither of these keys has a constant defined in the Android framework, which means that they are subject to change in the future. However, as of this writing, the keys behave as expected on all versions of Android.
An application may launch the default contact picker for the user to make a selection from their contacts database using the following Intent:
Intent pickIntent = new Intent(); pickIntent.setAction(Intent.ACTION_PICK); pickIntent.setData(URI_TO_CONTACT_TABLE);
This Intent requires the CONTENT_URI of the Contacts table you are interested in to be passed in the data field. Because of the major changes to the Contacts API in API Level 5 (Android 2.0) and later, this may not be the same Uri if you are supporting versions across that boundary.
For example, to pick a person from the contacts list on a device previous to 2.0, we would pass
android.provider.Contacts.People.CONTENT_URI
However, in 2.0 and later, similar data would be gathered by passing
android.provider.ContactsContract.Contacts.CONTENT_URI
Be sure to consult the API documentation with regards to the contact data you need to access.
Android Market can be launched from within an application to display a specific application's details page or to run a search for specific keywords. To launch a specific applications market page, use the following Intent:
Intent marketIntent = new Intent();
marketIntent.setAction(Intent.ACTION_VIEW);
marketIntent.setData(Uri.parse("market://details?id=PACKAGE_NAME_HERE"));This inserts the unique package name (such as "com.adobe.reader") of the application you want to display. If you would like to open the market with a search query, use this Intent:
Intent marketIntent = new Intent();
marketIntent.setAction(Intent.ACTION_VIEW);
marketIntent.setData(Uri.parse("market://search?q=SEARCH_QUERY"));Inserting the query string you would like to search on. The search query itself can take one of three main forms:
q=<simple text string here>In this case, the search will be a keyword style search of the market.
q=pname:<package name here>In this case, the package names will be searched, and only exact matches will return.
q=pub:<developer name here>In this case, the developer name field will be searched, and only exact matches will return.
You've createdan application that is absolutely the best at doing a specific task, and you would like to expose an interface for other applications on the device to be able to run your application.
(API Level 1)
Create an IntentFilter on the Activity or Service you would like to expose, then publicly document the actions, data types, and extras required to access it properly. Recall that the action, category and data/type of an Intent can all be used as criteria to match requests to your application. Any additional required or optional parameters should be passed in as extras.
Let's say that you have created an application that includes an Activity to play a video and marquee the video's title at the top of the screen during playback. You want to allow other applications to play video using your application, so we need to define a useful Intent structure for applications to pass in the required data and then create an IntentFilter on the Activity in the applications manifest to match.
This hypothetical Activity requires two pieces of data to do its job:
The
Uriof a video, either local or remoteA
Stringrepresenting the video's title
If the application specializes in a certain type of video, we could define that a generic action (such as ACTION_VIEW) be used and filter more specifically on the data type of the video content we want to handle. Listing 6-16 is an example of how the Activity would be defined in the manifest to filter Intents in this manner.
Example 6.16. AndroidManifest.xml <activity> Element with Data Type Filter
<activity android:name=".PlayerActivity">
<intent-filter>
<action android:name="android.intent.action.VIEW" />
<category android:name="android.intent.category.DEFAULT" />
<data android:mimeType="video/h264" />
</intent-filter>
</activity>This filter will match any Intent with Uri data that is either explicitly declared as an H.264 video clip, or determined to be H.264 upon inspecting the Uri file. An external application would then be able to call on this Activity to play a video using the following lines of code:
Uri videoFile = A_URI_OF_VIDEO_CONTENT; Intent playIntent = new Intent(Intent.ACTION_VIEW); playIntent.setDataAndType(videoFile, "video/h264"); playIntent.putExtra(Intent.EXTRA_TITLE, "My Video"); startActivity(playIntent);
In some cases, it may be more useful for an external application to directly reference this player as the target, regardless of the type of video they want to pass in. In this case, we would create a unique custom action string for Intents to implement. The filter attached to the Activity in the manifest would then only need to match the custom action string. See Listing 6-17.
Example 6.17. AndroidManifest.xml <activity> Element with Custom Action Filter
<activity android:name=".PlayerActivity">
<intent-filter>
<action android:name="com.examples.myplayer.PLAY" />
<category android:name="android.intent.category.DEFAULT" />
</intent-filter>
</activity>An external application could call on this Activity to play a video using the following code:
Uri videoFile = A_URI_OF_VIDEO_CONTENT;
Intent playIntent = new Intent("com.examples.myplayer.PLAY");
playIntent.setData(videoFile);
playIntent.putExtra(Intent.EXTRA_TITLE, "My Video");
startActivity(playIntent);Regardless of how the Intent is matched to the Activity, once it is launched, we want to inspect the incoming Intent for the two pieces of data the Activity needs to complete its intended purpose. See Listing 6-18.
Example 6.18. Activity Inspecting Intent
public class PlayerActivity extends Activity {
public static final String ACTION_PLAY = "com.examples.myplayer.PLAY";
@Override
public void onCreate(Bundle savedInstanceState) {
super.onCreate(savedInstanceState);
setContentView(R.layout.main);
//Inspect the Intent that launched us
Intent incoming = getIntent();//Get the video URI from the data field
Uri videoUri = incoming.getData();
//Get the optional title extra, if it exists
String title;
if(incoming.hasExtra(Intent.EXTRA_TITLE)) {
title = incoming.getStringExtra(Intent.EXTRA_TITLE);
} else {
title = "";
}
/* Begin playing the video and displaying the title */
}
/* Remainder of the Activity Code */
}When the Activity is launched, the calling Intent can be retrieved with Activity.getIntent(). Since the Uri for the video content is passed in the data field of the Intent, it is unpacked by calling Intent.getData(). We have determined that the video's title is an optional value for calling Intents, so we check the extras bundle to first see if the caller decided to pass it in; if it exists, that value is unpacked from the Intent as well.
Notice that the PlayerActivity in this example did define the custom action string as a constant, but it was not referenced in the sample Intent we constructed above to launch the Activity. Since this call is coming from an external application, it does not have access to the shared public constants defined in this application.
For this reason, it is also a good idea to reuse the Intent extra keys already in the SDK whenever possible, as opposed to defining new constants. In this example, we chose the standard Intent.EXTRA_TITLE to define the optional extra to be passed instead of creating a custom key for this value.
Your application needs to interact directly with the ContentProvider exposed by Android to the user's contacts to add, view, change, or remove information from the database.
Use the interface exposed by ContactsContract to access the data. ContactsContract is a vast ContentProvider API that attempts to aggregate the contact information stored in the system from multiple user accounts into a single data store. The result is a maze of Uris, tables, and columns, from which data may be accessed and modified.
The Contact structure is a hierarchy with three tiers: Contacts, RawContacts, and Data.
A Contact conceptually represents a person, and is an aggregation of all
RawContactsbelieved by Android to represent that same person.A
RawContactsrepresents a collection of Data stored in the device from a specific device account, such as the user's e-mail address book, Facebook account, or otherwise.Data elements are the specific pieces of information attached to each
RawContacts, such as an e-mail address, phone number, or postal address.
The complete API has too many combinations and options for us to cover them all here, so consult the SDK documentation for all the possibilities. We will investigate how to construct the basic building blocks for performing queries and making changes to the contacts data set.
The Android Contacts API boils down to a complex database with multiple tables and joins. Therefore, the methods for accessing the data are no different than those used to access any other SQLite database from an application.
Let's look at an example Activity that lists all contact entries in the database, and the displays more detail when an item is selected. See Listing 6-19.
Note
In order to display information from the Contacts API in your application, you will need to declare android.permission.READ_CONTACTS in the application manifest.
Example 6.19. Activity Displaying Contacts
public class ContactsActivity extends ListActivity implements AdapterView.OnItemClickListener {
Cursor mContacts;
@Override
public void onCreate(Bundle savedInstanceState) {
super.onCreate(savedInstanceState);
// Return all contacts, ordered by name
String[] projection = new String[] { ContactsContract.Contacts._ID,
ContactsContract.Contacts.DISPLAY_NAME };
mContacts = managedQuery(ContactsContract.Contacts.CONTENT_URI,
projection, null, null, ContactsContract.Contacts.DISPLAY_NAME);
// Display all contacts in a ListView
SimpleCursorAdapter mAdapter = new SimpleCursorAdapter(this,
android.R.layout.simple_list_item_1, mContacts,
new String[] { ContactsContract.Contacts.DISPLAY_NAME },
newint[] { android.R.id.text1 });
setListAdapter(mAdapter);// Listen for item selections
getListView().setOnItemClickListener(this);
}
@Override
public void onItemClick(AdapterView<?> parent, View v, int position, long id) {
if (mContacts.moveToPosition(position)) {
int selectedId = mContacts.getInt(0); // _ID column
// Gather email data from email table
Cursor email = getContentResolver().query(
CommonDataKinds.Email.CONTENT_URI,
new String[] { CommonDataKinds.Email.DATA },
ContactsContract.Data.CONTACT_ID + " = " + selectedId, null, null);
// Gather phone data from phone table
Cursor phone = getContentResolver().query(
CommonDataKinds.Phone.CONTENT_URI,
new String[] { CommonDataKinds.Phone.NUMBER },
ContactsContract.Data.CONTACT_ID + " = " + selectedId, null, null);
// Gather addresses from address table
Cursor address = getContentResolver().query(
CommonDataKinds.StructuredPostal.CONTENT_URI,
new String[] { CommonDataKinds.StructuredPostal.FORMATTED_ADDRESS },
ContactsContract.Data.CONTACT_ID + " = " + selectedId, null, null);
//Build the dialog message
StringBuilder sb = new StringBuilder();
sb.append(email.getCount() + " Emails
");
if (email.moveToFirst()) {
do {
sb.append("Email: " + email.getString(0));
sb.append('
'),
} while (email.moveToNext());
sb.append('
'),
}
sb.append(phone.getCount() + " Phone Numbers
");
if (phone.moveToFirst()) {
do {
sb.append("Phone: " + phone.getString(0));
sb.append('
'),
} while (phone.moveToNext());
sb.append('
'),
}
sb.append(address.getCount() + " Addresses
");
if (address.moveToFirst()) {
do {
sb.append("Address:
" + address.getString(0));
} while (address.moveToNext());
sb.append('
'),
}
AlertDialog.Builder builder = new AlertDialog.Builder(this);
builder.setTitle(mContacts.getString(1)); // Display name
builder.setMessage(sb.toString());
builder.setPositiveButton("OK", null);
builder.create().show();
// Finish temporary cursorsemail.close();
phone.close();
address.close();
}
    }
}As you can see, referencing all the tables and columns in this API can result in very verbose code. All of the references to Uris, tables, and columns in this example are inner classes stemming off of ContactsContract. It is important to verify when interacting with the Contacts API that you are referencing the proper classes, as any Contacts classes not stemming from ContactsContract are deprecated and incompatible.
When the Activity is created, we make a simple query on the core Contacts table by calling Activity.managedQuery() with Contacts.CONTENT_URI, requesting only the columns we need to wrap the cursor in a ListAdapter. The resulting cursor is displayed in a list on the user interface. The example leverages the convenience behavior of ListActivity to provide a ListView as the content view so that we do not have to manage these components.
At this point, the user may scroll through all the contact entries on the device, and tap on one to get more information. When a list item is selected, the _ID value of that particular contact is recorded and the application goes out to the other ContactsContract.Data tables to gather more detailed information. Notice that the data for this single contact is spread across multiple tables (e-mails in an e-mail table, phone numbers in a phone table, and so on), requiring multiple queries to obtain.
Each CommonDataKinds table has a unique CONTENT_URI for the query to reference, and a unique set of column aliases for requesting the data. All of the rows in these data tables are linked to the specific contact through the Data.CONTACT_ID, so each cursor asks to only return rows where the values match.
With all the data collected for the selected contact, we iterate through the results to display in a dialog to the user. Since the data in these tables is an aggregation of multiple sources, it is not uncommon for all of these queries to return multiple results. With each cursor, we display the number of results, and then append each value included. When all the data is composed, the dialog is created and shown to the user.
As a final step, all temporary and unmanaged cursors are closed as soon as they are no longer required.
Running the Application
The first thing that you may notice when running this application on a device that has any number of accounts set up is that the list seems insurmountably long, certainly much longer than what shows up when running the Contacts application bundled with the device. The Contacts API allows for storage of grouped entries that may be hidden from the user and are used for internal purposes. Gmail often uses this to store incoming e-mail addresses for quick access, even if the address is not associated with a true contact.
In the next example, we will show how to filter this list, but for now marvel at the amount of data truly stored in the Contacts table.
Now let's look at an example Activity that manipulates the data for a specific contact. See Listing 6-20.
Note
In order to interact with the Contacts API in your application, you must declare android.permission.READ_CONTACTS and android.permission.WRITE_CONTACTS in the application manifest.
Example 6.20. Activity Writing to Contacts API
public class ContactsEditActivity extends ListActivity implements
            AdapterView.OnItemClickListener, DialogInterface.OnClickListener {

    private static final String TEST_EMAIL = "[email protected]";

    private Cursor mContacts, mEmail;
    private int selectedContactId;

    @Override
    public void onCreate(Bundle savedInstanceState) {
        super.onCreate(savedInstanceState);
        // Return all contacts, ordered by name
        String[] projection = new String[] { ContactsContract.Contacts._ID,
                ContactsContract.Contacts.DISPLAY_NAME };
        //List only contacts visible to the user
        mContacts = managedQuery(ContactsContract.Contacts.CONTENT_URI,
                projection,
                ContactsContract.Contacts.IN_VISIBLE_GROUP+" = 1",
                null, ContactsContract.Contacts.DISPLAY_NAME);

        // Display all contacts in a ListView
        SimpleCursorAdapter mAdapter = new SimpleCursorAdapter(this,
                android.R.layout.simple_list_item_1, mContacts,
                new String[] { ContactsContract.Contacts.DISPLAY_NAME },
                newint[] { android.R.id.text1 });

        setListAdapter(mAdapter);
        // Listen for item selections
        getListView().setOnItemClickListener(this);
    }

    @Override
    public void onItemClick(AdapterView<?> parent, View v, int position, long id) {
        if (mContacts.moveToPosition(position)) {
            selectedContactId = mContacts.getInt(0); // _ID column
            // Gather email data from email table
            String[] projection = new String[] { ContactsContract.Data._ID,
                    ContactsContract.CommonDataKinds.Email.DATA };
            mEmail = getContentResolver().query(
ContactsContract.CommonDataKinds.Email.CONTENT_URI,
projection,
ContactsContract.Data.CONTACT_ID+" = "+selectedContactId, null, null);
AlertDialog.Builder builder = new AlertDialog.Builder(this);
builder.setTitle("Email Addresses");
builder.setCursor(mEmail, this, ContactsContract.CommonDataKinds.Email.DATA);
builder.setPositiveButton("Add", this);
builder.setNegativeButton("Cancel", null);
builder.create().show();
}
}
@Override
public void onClick(DialogInterface dialog, int which) {
//Data must be associated with a RAW contact, retrieve the first raw ID
Cursor raw = getContentResolver().query(
ContactsContract.RawContacts.CONTENT_URI,
new String[] { ContactsContract.Contacts._ID },
ContactsContract.Data.CONTACT_ID+" = "+selectedContactId, null, null);
if(!raw.moveToFirst()) {
return;
}
int rawContactId = raw.getInt(0);
ContentValues values = new ContentValues();
switch(which) {
case DialogInterface.BUTTON_POSITIVE:
//User wants to add a new email
values.put(ContactsContract.CommonDataKinds.Email.RAW_CONTACT_ID, rawContactId);
values.put(ContactsContract.Data.MIMETYPE,
ContactsContract.CommonDataKinds.Email.CONTENT_ITEM_TYPE);
values.put(ContactsContract.CommonDataKinds.Email.DATA, TEST_EMAIL);
values.put(ContactsContract.CommonDataKinds.Email.TYPE,
ContactsContract.CommonDataKinds.Email.TYPE_OTHER);
getContentResolver().insert(ContactsContract.Data.CONTENT_URI, values);
break;
default:
//User wants to edit selection
values.put(ContactsContract.CommonDataKinds.Email.DATA, TEST_EMAIL);
values.put(ContactsContract.CommonDataKinds.Email.TYPE,
ContactsContract.CommonDataKinds.Email.TYPE_OTHER);
getContentResolver().update(ContactsContract.Data.CONTENT_URI, values,
ContactsContract.Data._ID+" = "+mEmail.getInt(0), null);
break;
}
//Don't need the email cursor anymore
mEmail.close();
}
}In this example, we start out as before, performing a query for all entries in the Contacts database. This time, we provide a single piece of selection criteria:
ContactsContract.Contacts.IN_VISIBLE_GROUP+" = 1"
The effect of this line is to limit the returned entries to only those that include entries visible to the user through the Contacts user interface. This will (drastically, in some cases) reduce the size of the list displayed in the Activity, and make it more closely match the list displayed in the Contacts application.
When the user selects a contact from this list, a dialog is displayed with a list of all the e-mail entries attached to that contact. If a specific address is selected from the list, that entry is edited; and if the add button is pressed a new e-mail address entry is added. For the purposes of simplifying the example, we do not provide an interface to enter a new e-mail address. Instead, a constant value is inserted, either as a new record or an update to the selected one.
Data elements, such as e-mail addresses, can only be associated with a RawContact. Therefore, when we want to add a new e-mail address, we must obtain the ID of one of the RawContacts represented by the higher-level contact that the user selected. For the purposes of the example we aren't terribly interested in which one, so we retrieve the ID of the first RawContact that matches. This value is only required for doing an insert, since the update references the distinct row ID of the e-mail record already present in the table.
Notice also that the Uri provided in CommonDataKinds that was used as an alias to read this data cannot be used to make updates and changes. Inserts and updates must be called directly on the ContactsContract.DataUri. What this means (besides referencing a different Uri in the operation method) is that an extra piece of metadata, the MIMETYPE, must also be specified. Without setting the MIMETYPE field for inserted data, subsequent queries made may not recognize it as a Contact's e-mail address.
Aggregation at Work
Because this example updates records by adding or editing e-mail addresses with the same value, it offers a unique opportunity to see Android's aggregation operations in real-time. As you run this example application you may take notice of the fact that adding or editing contacts to give them the same e-mail address often triggers Android to start thinking that previously separate Contacts are now the same person. Even in this sample application, as the managed query attached to the core Contacts table updates, notice that certain contacts will disappear as they become aggregated together.
Note
Contact aggregation behavior is not fully implemented on the Android emulator. To see this effect in full you will need to run the code on a real device.
The Android Contacts API introduces one more concept that can be important depending on the scope of the application. Because of this aggregation process that occurs, the distinct row ID that refers to a contact becomes quite volatile; a certain contact may receive a new _ID when it is aggregated together with another one.
If your application requires a long-standing reference to a specific contact, it is recommended that your application persist the ContactsContract.Contacts.LOOKUP_KEY, instead of the row ID. When querying for a Contact using this key, a special Uri is also provided as the ContactsContract.Contacts.CONTENT_LOOKUP_URI. Using these values to query records long-term will protect your application from getting confused by the automatic aggregation process.
Your application needs to import a user-selected media item (audio, video, or image) for display or playback.
(API Level 1)
Use an implicit Intent targeted with Intent.ACTION_GET_CONTENT to bring up a system media picker interface. Firing this Intent with a matching content type for the media of interest (audio, video, or image) will present the user with a picker interface to select an item, and the Intent result will include a Uri pointing to the selection they made.
Let's take a look at this technique used in the context of an example Activity. See Listings 6-21 and 6-22.
Example 6.21. res/layout/main.xml
<?xml version="1.0" encoding="utf-8"?>
<LinearLayout xmlns:android="http://schemas.android.com/apk/res/android"
  android:orientation="vertical"
  android:layout_width="fill_parent"
  android:layout_height="fill_parent">
  <Button
    android:id="@+id/imageButton"
    android:layout_width="fill_parent"
    android:layout_height="wrap_content"
    android:text="Images"
  />
  <Button
    android:id="@+id/videoButton"
    android:layout_width="fill_parent"
    android:layout_height="wrap_content"
    android:text="Video"
  />
<Button
android:id="@+id/audioButton"
android:layout_width="fill_parent"
android:layout_height="wrap_content"
android:text="Audio"
/>
</LinearLayout>Example 6.22. Activity to Pick Media
public class MediaActivity extends Activity implements View.OnClickListener {

    private static final int REQUEST_AUDIO = 1;
    private static final int REQUEST_VIDEO = 2;
    private static final int REQUEST_IMAGE = 3;

    @Override
    public void onCreate(Bundle savedInstanceState) {
        super.onCreate(savedInstanceState);
        setContentView(R.layout.main);

        Button images = (Button)findViewById(R.id.imageButton);
        images.setOnClickListener(this);
        Button videos = (Button)findViewById(R.id.videoButton);
        videos.setOnClickListener(this);
        Button audio = (Button)findViewById(R.id.audioButton);
        audio.setOnClickListener(this);

    }

    @Override
    protectedvoid onActivityResult(int requestCode, int resultCode, Intent data) {

        if(resultCode == Activity.RESULT_OK) {
            //Uri to user selection returned in the Intent
            Uri selectedContent = data.getData();

            if(requestCode == REQUEST_IMAGE) {
                //Display the image
            }
            if(requestCode == REQUEST_VIDEO) {
                //Play the video clip
            }
            if(requestCode == REQUEST_AUDIO) {
                //Play the audio clip
            }
        }
    }

    @Override
    public void onClick(View v) {
        Intent intent = new Intent();
        intent.setAction(Intent.ACTION_GET_CONTENT);
        switch(v.getId()) {
        case R.id.imageButton:
            intent.setType("image/*");
            startActivityForResult(intent, REQUEST_IMAGE);
            return;
case R.id.videoButton:
intent.setType("video/*");
startActivityForResult(intent, REQUEST_VIDEO);
return;
case R.id.audioButton:
intent.setType("audio/*");
startActivityForResult(intent, REQUEST_AUDIO);
return;
default:
return;
}
}
}This example has three buttons for the user to press, each targeting a specific type of media. When the user presses any one of these buttons, an Intent with the Intent.ACTION_GET_CONTENT action string is fired to the system, launching the proper picker Activity. If the user selects a valid item, a content Uri pointing to that item is returned in the result Intent with a status of RESULT_OK. If the user cancels or otherwise backs out of the picker, the status will be RESULT_CANCELED and the Intent's data field will be null.
With the Uri of the media received, the application is now free to play or display the content as is deemed appropriate. Classes like MediaPlayer and VideoView will take a Uri directly to play media content, and the Uri.getPath() method will return a file path for images that can be passed to BitmapFactory.decodeFile().
Your application would like to store media and insert it into the device's global MediaStore so that it is visible to all applications.
(API Level 1)
Utilize the ContentProvider interface exposed by MediaStore to perform inserts. In addition to the media content itself, this interface allows you to insert metadata to tag each item, such as a title, description, or time created. The result of the ContentProvider insert operation is a Uri that the application may use as a destination for the new media.
Let's take a look at an example of inserting an image or video clip into MediaStore. See Listings 6-23 and 6-24.
Example 6.23. res/layout/main.xml
<?xml version="1.0" encoding="utf-8"?>
<LinearLayout xmlns:android="http://schemas.android.com/apk/res/android"
  android:orientation="vertical"
  android:layout_width="fill_parent"
  android:layout_height="fill_parent">
  <Button
    android:id="@+id/imageButton"
    android:layout_width="fill_parent"
    android:layout_height="wrap_content"
    android:text="Images"
  />
  <Button
    android:id="@+id/videoButton"
    android:layout_width="fill_parent"
    android:layout_height="wrap_content"
    android:text="Video"
  />
</LinearLayout>
Example 6.24. Activity Saving Data in the MediaStore
public class StoreActivity extends Activity implements View.OnClickListener {

    private static final intREQUEST_CAPTURE = 100;

    @Override
    public void onCreate(Bundle savedInstanceState) {
        super.onCreate(savedInstanceState);
        setContentView(R.layout.main);

        Button images = (Button)findViewById(R.id.imageButton);
        images.setOnClickListener(this);
        Button videos = (Button)findViewById(R.id.videoButton);
        videos.setOnClickListener(this);
    }

    @Override
    protectedvoid onActivityResult(int requestCode, int resultCode, Intent data) {
        if(requestCode == REQUEST_CAPTURE&& resultCode == Activity.RESULT_OK) {
            Toast.makeText(this, "All Done!", Toast.LENGTH_SHORT).show();
        }
    }

    @Override
    public void onClick(View v) {
        ContentValues values;
        Intent intent;
        Uri storeLocation;

        switch(v.getId()) {
        case R.id.imageButton:
            //Create any metadata for image
            values = new ContentValues(2);
            values.put(MediaStore.Images.ImageColumns.DATE_TAKEN, System.currentTimeMillis());
            values.put(MediaStore.Images.ImageColumns.DESCRIPTION, "Sample Image");
            //Insert metadata and retrieve Uri location for file
storeLocation = getContentResolver().insert(
MediaStore.Images.Media.EXTERNAL_CONTENT_URI, values);
//Start capture with new location as destination
intent = new Intent(MediaStore.ACTION_IMAGE_CAPTURE);
intent.putExtra(MediaStore.EXTRA_OUTPUT, storeLocation);
startActivityForResult(intent, REQUEST_CAPTURE);
return;
case R.id.videoButton:
//Create any metadata for video
values = new ContentValues(2);
values.put(MediaStore.Video.VideoColumns.ARTIST, "Yours Truly");
values.put(MediaStore.Video.VideoColumns.DESCRIPTION, "Sample Video Clip");
//Insert metadata and retrieve Uri location for file
storeLocation = getContentResolver().insert(
MediaStore.Video.Media.EXTERNAL_CONTENT_URI, values);
//Start capture with new location as destination
intent = new Intent(MediaStore.ACTION_VIDEO_CAPTURE);
intent.putExtra(MediaStore.EXTRA_OUTPUT, storeLocation);
startActivityForResult(intent, REQUEST_CAPTURE);
return;
default:
return;
}
}
}Note
Since this example interacts with the Camera hardware, you should run it on a real device to get the full effect. In fact, there is a known bug in emulators running Android 2.2 or later that will cause this example to crash if the Camera is accessed. Earlier emulators will execute the code appropriately, but without real hardware the example is less interesting.
In this example, when the user clicks on either button, metadata that is to be associated with the media itself is inserted into a ContentValues instance. Some of the more common metadata columns that are common to both image and video are:
TITLE: String value for the content titleDESCRIPTION: String value for the content descriptionDATE_TAKEN: Integer value describing the date the media was captured. Fill this field withSystem.currentTimeMillis()to indicate a time of "now"
The ContentValues are then inserted into the MediaStore using the appropriate CONTENT_URI reference. Notice that the metadata is inserted before the media itself is actually captured. The return value from a successful insert is a fully qualified Uri that the application may use as the destination for the media content.
In the previous example, we are using the simplified methods from Chapter 4 of capturing audio and video by requesting that the system applications handle this process. Recall from Chapter 4 that both the audio and video capture Intent can be passed with an extra declaring the destination for the result. This is where we pass the Uri that was returned from insert.
Upon a successful return from the capture Activity, there is nothing more for the application to do. The external application has saved the captured image or video into the location referenced by our MediaStore insert. This data is now visible to all applications, including the system's Gallery application.
In this chapter, you learned how your application can interact directly with the Android operating system. We discussed several methods of placing operations into the background for various lengths of time. You learned how applications can share responsibility, launching each other to best accomplish the task at hand. Finally, we presented how the system exposes the content gathered by its core application suite for your application's use. In the next and final chapter, we will look at how you can leverage the wide array of publicly available Java libraries to further enhance your application.