Chapter 6: Building a Mobile Photo Geotagging Application Using Capacitor and 3D Maps
Angular is a cross-platform JavaScript framework that can be used to build applications for different platforms such as web, desktop, and mobile. Moreover, it allows developers to use the same code base and apply the same web techniques to each platform, enjoying the same experience and performance. In this chapter, we will investigate how we can build mobile applications using Angular.
Ionic is a popular UI toolkit that allows us to build mobile applications using web technologies such as Angular. The Capacitor library greatly enhances Ionic applications by enabling them to run natively on Android and iOS devices. In this chapter, we will use both technologies to build a mobile application that can take geotagged photos and display them on a 3D map.
We will cover the following topics in detail:
- Creating a mobile application with Ionic
- Taking photos with Capacitor
- Storing data in Firebase
- Previewing photos with CesiumJS
Essential background theory and context
Capacitor is a native mobile runtime that enables us to build native Android and iOS applications with web technologies, including Angular. It provides an abstraction API layer for web applications to interact with the native resources of a mobile OS. It does not include a UI layer or any other way of interacting with the user interface.
Ionic is a mobile framework that contains a collection of UI components that we can use in an application built with Capacitor. The main advantage of Ionic is that we maintain a single code base across all native mobile platforms. That is, we write the code once, and it works everywhere. Ionic supports all popular JavaScript frameworks, including Angular.
Important note
When we create a new Ionic application from scratch, we also get Capacitor installed and configured out of the box.
Firebase is a Backend-as-a-Service (BaaS) platform provided by Google that contains a set of tools and services for building applications. Cloud Firestore is a database solution provided by Firebase that features a flexible and scalable NoSQL document-oriented database that can be used in web and mobile applications. Storage is a Firebase service that allows us to interact with a storage mechanism and upload or download files.
CesiumJS is a JavaScript library for creating interactive 3D maps in the browser. It is an open source, cross-platform library that uses WebGL and allows us to share geospatial data on multiple platforms. It is empowered by Cesium, a platform for building high-quality and performant 3D geospatial applications.
Project overview
In this project, we will build a mobile application that can take photos according to the current location and preview them on a map. Initially, we will learn how to create a mobile application using Angular and Ionic. We will then use Capacitor to take photos using the camera of the mobile device and tag them with the current location via the GPS. We will upload those photos in Firebase along with their location data. Finally, we will use CesiumJS to load location data on a 3D globe along with a preview of the photo.
Important note
In this chapter, you will learn how to build a mobile application with Angular and Ionic. To follow up with the project and preview your application, you will need to follow the getting started guide for your development environment (Android or iOS), which you can find in the Further reading section.
Build time: 2 hours
Getting started
You will need the following software and tools to complete the project:
- For Android: Android Studio with a minimum of Android SDK 21 or higher and Android WebView with Chrome 50 or later.
- For iOS: Xcode 11 or above and Xcode Command Line Tools.
- A physical mobile device.
- GitHub material: The related code for this chapter can be found in the Chapter06 folder at https://github.com/PacktPublishing/Angular-Projects-Second-Edition
Creating a mobile application with Ionic
The first step toward building our application is creating a new mobile application using the Ionic toolkit. We will start building our application with the following tasks:
- Scaffolding the application
- Building the main menu
Ionic has a pretty straightforward process for creating a new mobile application from scratch, which can be done from the Ionic website without entering a single line of code.
Scaffolding the application
To create a new Ionic application, we need to head over to https://www.ionicframework.com and complete the following steps:
- Click on the Get Started button that is displayed on the header of the landing page:

Figure 6.1 – Start an Ionic application
You will be redirected to the Create your Ionic App page to fill in all the necessary details to create your Ionic application.
- Enter the name of your application in the App name field:
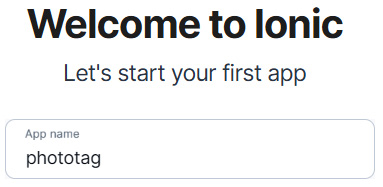
Figure 6.2 – Enter the application name
- Use the Pick an icon field to define the icon of your application. Hover with your mouse over the default icon, and either pick one from the emoji gallery or upload one of your choice.
- Select the brand color of your application in the Pick a theme color field. The brand color is used in various places of an application, such as the background, toolbars, and text. You can select either a predefined color or create a custom one using an RGB combination.
- Choose the layout of your application using the Pick a layout template field. You can select among three different templates. In this project, we will use the MENU template:
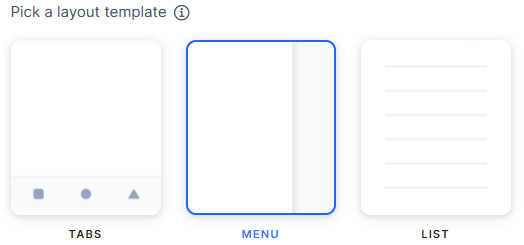
Figure 6.3 – Layout template selection
- Finally, select the JavaScript framework that you want to work with in your mobile application. Currently, Ionic supports the three most popular ones: React, Angular, and Vue. Select Angular and click the Continue button:

Figure 6.4 – JavaScript framework selection
- You will be redirected to the signup page, where you will need to create an Ionic account. You can either create a new one from scratch or select to use one of the free Git services:
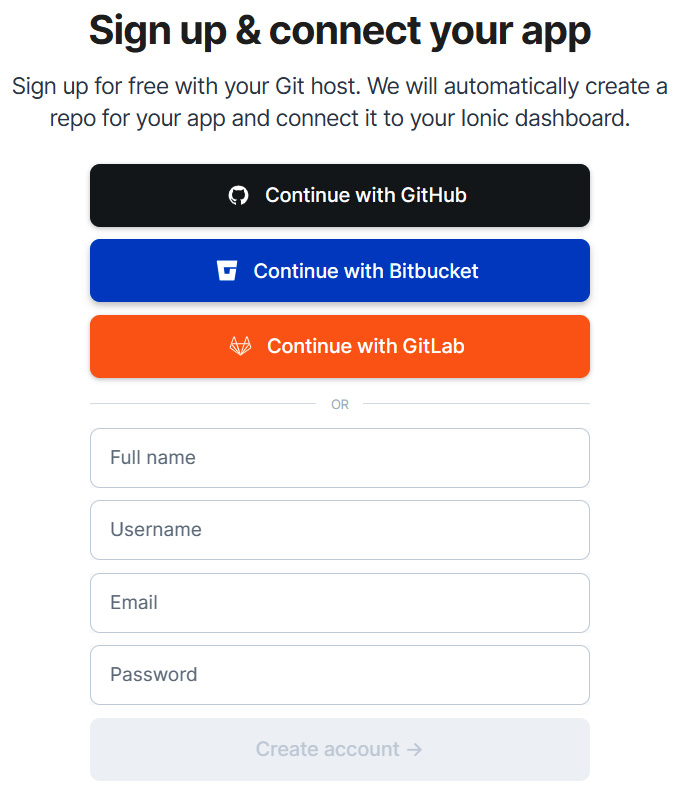
Figure 6.5 – Create an Ionic account
Tip
Ionic will create a repository for your application automatically and connect it with your Ionic dashboard if you select the latter.
For this project, it is recommended to select one of the free Git services available. When you choose to do so, you will be asked to be authorized with the selected Git service.
- Click the Connect button on the Git host of your choice to connect your new Ionic account with the Git service:

Figure 6.6 – Connect to a Git host
- Click the Choose button to select your Git account, and Ionic will start building your application:

Figure 6.7 – Building the Ionic application
After the build has finished, you will be redirected to the Ionic dashboard of your application. From there, you can accomplish specific tasks for your application, such as setting up a Continuous Integration/Development (CI/CD) pipeline, building, and previewing your application.
Ionic has created a sample application for us with some ready-made data. To modify it according to our needs, we need to get a copy of the application locally. Let's see how we can accomplish that in the following section.
Building the main menu
Ionic provides a command-line tool called the Ionic CLI that is used to build and run an Ionic mobile application. Let's see how we can install it and start building the main menu of our application:
- Install the Ionic CLI using the following npm command:
npm install -g @ionic/cli cordova-res
The cordova-res library is used to generate the icons and splash screens of our application for native mobile devices.
- Ionic has already created a Git repository for our Ionic application in our Git host. Clone the repository locally into your system and run the following command to install all the dependencies of the application:
npm install
- Open the main HTML file of the application, index.html, and add the name of your application in the title tag:
<title>Phototag App</title>
- Open the template file of the main component, app.component.html, and remove the second ion-list element. An ion-list element displays a collection of items in a list view.
- Add the name of your application in the ion-list-header element and change the text of the ion-note element:
<ion-list-header>Phototag</ion-list-header>
<ion-note>Capture geotagged photos</ion-note>
An ion-list-header element is the header of a list. An ion-note element is a text element that is used to provide additional information, such as the subtitle of a list.
- Open the TypeScript file of the main component, app.component.ts, and modify it as follows:
import { Component } from '@angular/core';
@Component({
selector: 'app-root',
templateUrl: 'app.component.html',
styleUrls: ['app.component.scss'],
})
export class AppComponent {
public appPages = [
{
title: 'Take a photo',
url: '/capture',
icon: 'camera'
},
{
title: 'View gallery',
url: '/view',
icon: 'globe'
}
];
}
The appPages property contains all the pages of our application. Each page has a title, the URL from which it is accessible, and an icon. Our application will consist of two pages, one that will be used for taking photos using the camera and another for displaying them on a map.
- Run the serve command of the Ionic CLI to start the application:
ionic serve
The preceding command will build your application and open your default browser at http://localhost:8100.
Click on the Menu button, and you should see the following output:
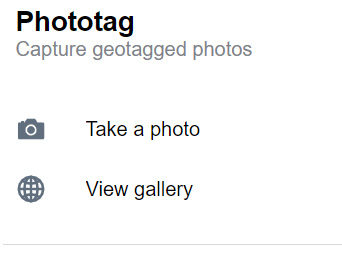
Figure 6.8 – Main menu
Tip
Try to adjust your browser window size to achieve a more realistic view for a mobile device, or use the Device toolbar in the Google Chrome developer tools. You can find more details about the Device toolbar at https://developers.google.com/web/tools/chrome-devtools/device-mode#viewport.
We have learned how to create a new Ionic application using the getting started page of the Ionic website. We also saw how to get the application locally on our machine and make modifications according to our needs.
If we now try to click on a menu item, we will notice that nothing happens since we have not created the necessary pages that will be activated in each case. In the following section, we will learn how to complete this task by building the functionality of the first page.
Taking photos with Capacitor
The first page of our application will allow the user to take photos using the camera. We will use the Capacitor runtime to get access to the native resource of the camera. To implement the page, we need to take the following actions:
- Create the user interface.
- Interact with Capacitor.
Let's start building the user interface of the page.
Creating the user interface
Each page in our application is a different Angular module. To create an Angular module in Ionic, we can use the generate command of the Ionic CLI:
ionic generate page capture
The previous command will perform the following actions:
- Create an Angular module named capture.
- Create a related routing module.
- Create the main component of the module.
- Register the new module in the app-routing.module.ts file.
Let's start building the logic of our new page now:
- First, let's make our page the default one when the user opens the application. Open the app-routing.module.ts file and change the first entry of the routes property:
{
path: '',
redirectTo: 'capture',
pathMatch: 'full'
}
The empty path is called the default routing path, and it is activated when our application starts up. The redirectTo property tells Angular to redirect to the capture path, which will load the page we created.
Tip
You can also remove the folder/:id path as it is no longer needed, and the whole folder module from the application, which is part of the template layout.
- Open the capture.page.html file and replace the contents of the ion-toolbar element as follows:
<ion-header>
<ion-toolbar>
<ion-buttons slot="start">
<ion-menu-button color="primary">
</ion-menu-button>
</ion-buttons>
<ion-title>Take a photo</ion-title>
</ion-toolbar>
</ion-header>
The ion-toolbar element is part of the ion-header element, which is the top navigation bar of the page. It contains an ion-menu-button element for toggling the main menu of the application and an ion-title element that depicts the title of the page.
- Add a second ion-header element inside the ion-content element with the following HTML code:
<ion-content>
<ion-header collapse="condense">
<ion-toolbar>
<ion-title size="large">Take a photo</ion-title>
</ion-toolbar>
</ion-header>
</ion-content>
The header will be displayed when the page is expanded and the main menu is displayed on the screen. The size attribute of the ion-title element is set to large for supporting collapsible large tiles on iOS devices.
- Add the following HTML code immediately after the second header:
<div id="container">
<strong class="capitalize">Take a nice photo with
your camera</strong>
<ion-fab vertical="center" horizontal="center"
slot="fixed">
<ion-fab-button>
<ion-icon name="camera"></ion-icon>
</ion-fab-button>
</ion-fab>
</div>
It contains an ion-fab-button element, which, when clicked, will open the camera of the device to take a photo.
- Finally, let's add some cool styles to our page. Open the capture.page.scss file and enter the following CSS styles:
#container {
text-align: center;
position: absolute;
left: 0;
right: 0;
top: 50%;
transform: translateY(-50%);
}
#container strong {
font-size: 20px;
line-height: 26px;
}
#container ion-fab {
margin-top: 60px;
}
Let's run the application using ionic serve to get a quick preview of what we have built so far:
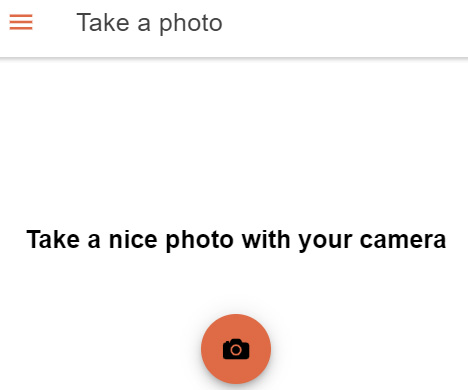
Figure 6.9 – Capture page
The camera button on the page needs to open the camera to take a photo. In the following section, we will learn how to use Capacitor to interact with the camera.
Interacting with Capacitor
Taking photos in our application involves using two APIs from the Capacitor library. The Camera API will open the camera to take a photo, and the Geolocation API will read the current location from the GPS. Let's see how we can use both in our application:
- Execute the following npm command to install both APIs:
npm install @capacitor/camera @capacitor/geolocation
- Create an Angular service using the following Ionic CLI command:
ionic generate service photo
- Open the photo.service.ts file and add the following import statements:
import { Camera, CameraResultType, CameraSource } from '@capacitor/camera';
import { Geolocation } from '@capacitor/geolocation';
- Create a method in the PhotoService class to read the current position from the GPS device:
private async getLocation() {
const location = await
Geolocation.getCurrentPosition();
return location.coords;
}
The getCurrentPosition method of the Geolocation object contains a coords property with various location-based data such as the latitude and the longitude.
- Create another method that calls the getLocation method and opens the camera of the device to take a photo:
async takePhoto() {
await this.getLocation();
await Camera.getPhoto({
resultType: CameraResultType.DataUrl,
source: CameraSource.Camera,
quality: 100
});
}
We use the getPhoto method of the Camera object and pass a configuration object to define the properties for each photo. The resultType property indicates that the photo will be in a data URL format to easily save it later to the cloud. The source property indicates that we will use the camera device to get the photo, and the quality property defines the quality of the actual photo.
- Open the capture.page.ts file and inject PhotoService in the constructor of the CapturePage class:
import { Component, OnInit } from '@angular/core';
import { PhotoService } from '../photo.service';
@Component({
selector: 'app-capture',
templateUrl: './capture.page.html',
styleUrls: ['./capture.page.scss'],
})
export class CapturePage implements OnInit {
constructor(private photoService: PhotoService) { }
ngOnInit() {
}
}
- Create a component method that will call the takePhoto method of the photoService variable:
openCamera() {
this.photoService.takePhoto();
}
- Open the capture.page.html file and bind the click event of the ion-fab-button element to the openCamera component method:
<ion-fab vertical="center" horizontal="center" slot="fixed">
<ion-fab-button (click)="openCamera()">
<ion-icon name="camera"></ion-icon>
</ion-fab-button>
</ion-fab>
We have now added all the necessary pieces to take a photo using the camera of the device. Let's try to run the application on a real device to test the interaction with the camera:
- First, we need to build our application using the following Ionic CLI command:
ionic build
The preceding command will create a www folder in the root folder of your project that contains your application bundle.
- Install the appropriate platform on which you want to run the application using the following command:
npm install @capacitor/<os>
In the previous command, the <os> parameter can be either android or ios. If your application is targeted at both platforms, you must execute the command twice.
- Then, add the installed platform in the capacitor using the following command:
ionic cap add <os>
The cap command is the executable file of the Capacitor library.
The command will create one folder for each platform and will also add the required npm package in the dependencies section of the package.json file.
Important note
You must add the specific platform folder to your source control for it to be available to the rest of the project.
- Finally, run the following command to open the application:
ionic cap open <os>
In the previous command, <os> can be either android or ios. Upon execution, it will open the native mobile project in the respective IDE, Android Studio or Xcode, depending on the platform that you are targeting. The IDE must then be used to run the native application.
Important note
Every time you re-build the application, you need to run the npx cap copy command to copy the application bundle from the www folder into the native mobile project.
- Click on the camera button, and the application will ask for your permission to use the GPS and the camera, respectively.
Important note
You may need to add additional permissions in the native mobile project of your development environment. Check the respective documentation of the APIs on the Capacitor website.
The first page of our application now has a sleek interface that allows the user to interact with the camera. We have also created an Angular service that ensures a seamless interaction with Capacitor to get location-based data and take photos. In the following section, we will see how to save them in the cloud using Firebase.
Storing data in Firebase
The application will be able to store photos and their location in Firebase. We will use the Storage service to upload our photos and the Cloud Firestore database to keep their location. We will further expand our application in the following tasks:
- Creating a Firebase project
- Integrating the AngularFire library
First, we need to set up a new Firebase project for our application.
Creating a Firebase project
We can set up and configure a Firebase project using the Firebase console at https://console.firebase.google.com:
- Click on the Add project button to create a new Firebase project:
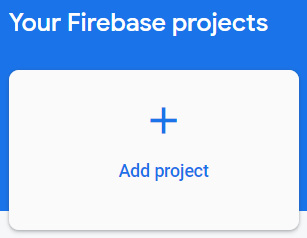
Figure 6.10 – Create a new Firebase project
- Enter a name for your project and click the Continue button:

Figure 6.11 – Enter the project name
Important note
Firebase generates a unique identifier for your project, which is located underneath the project name and is used in various Firebase services.
- Disable Google Analytics for this project and click on the Create project button:

Figure 6.12 – Disable Google Analytics
- Wait for the new project to be created and click on the Continue button. You will be redirected to the dashboard of your new project, which contains a list of options:

Figure 6.13 – Select the type of your application
Click on the third option with the code icon to add Firebase to a web application.
- Enter a name for your application in the App nickname field and click on the Register app button:
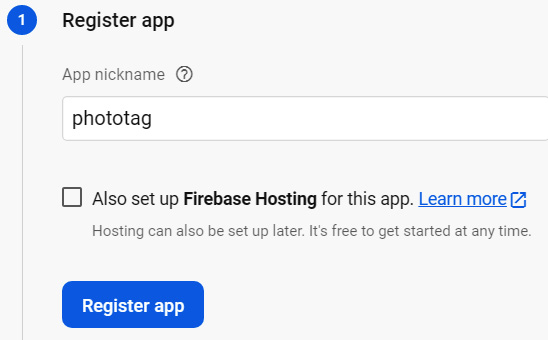
Figure 6.14 – Application registration
- Firebase will generate a configuration that we will use later in the mobile application:
var firebaseConfig = {
apiKey: "<Your API key>",
authDomain: "<Your project auth domain>",
projectId: "<Your project ID>",
storageBucket: "<Your storage bucket>",
messagingSenderId: "<Your messaging sender ID>",
appId: "<Your application ID>"
};
Take a note of the firebaseConfig object and click the Continue to console button.
Tip
The Firebase configuration can also be accessed later at https://console.firebase.google.com/project/<project-id>/settings/general where project-id is the ID of your Firebase project.
- Back in the dashboard console, select the Cloud Firestore option to enable Cloud Firestore in your application:

Figure 6.15 – Enable Cloud Firestore
- Click on the Create database button to create a new Cloud Firestore database:

Figure 6.16 – Create a database
- Select the operation mode of your database. Choose Start in test mode for development purposes and click the Next button:

Figure 6.17 – Select operation mode
Choosing a mode is nothing less than setting rules for your database. Test mode allows faster setup and keeps your data public for 30 days. When you are ready to move your application into production, you can modify the rules of your database accordingly to make your data private.
- Choose a location for your database according to your regional settings and click the Enable button:

Figure 6.18 – Select the database location
Congratulations! You have created a new Cloud Firestore database. In the next section, we will learn how to put the new database into saving data with our mobile application.
Integrating the AngularFire library
The AngularFire library is an Angular library that we can use in an Angular application to interact with Firebase family products such as Cloud Firestore and the Storage service. To install it in our application, run the following command of the Angular CLI:
ng add @angular/fire
The preceding command will ask you to select the Firebase project that we created in the previous section and will modify the structure of the application accordingly to use AngularFire. Let's see now how we can use the AngularFire library in our application:
- Open the srcenvironmentsenvironment.ts file and copy the contents of your Firebase configuration into the environment object as follows:
export const environment = {
production: false,
firebaseConfig: {
apiKey: '<Your API key>',
authDomain: '<Your project auth domain>',
projectId: '<Your project ID>',
storageBucket: '<Your storage bucket>',
messagingSenderId: '<Your messaging sender ID>',
appId: '<Your application ID>'
}
};
The environment.ts file is used when we are running our application in development mode.
- We need the same Firebase configuration when we run the application in production mode. Copy the Firebase configuration contents into the srcenvironmentsenvironment.prod.ts file that is used in production mode.
- Open the app.module.ts file and add the following import statements:
import { AngularFireModule } from '@angular/fire';
import { AngularFirestoreModule } from '@angular/fire/firestore';
import { AngularFireStorageModule } from '@angular/fire/storage';
import { environment } from '../environments/environment';
AngularFireModule is the main module of the AngularFire library. AngularFirestoreModule is a specific module of AngularFire that we need when working with Cloud Firestore databases. AngularFireStorageModule is a module that we can use to interact with the Storage service.
In the preceding code, we also import the environment object that contains the Firebase configuration.
Important note
We import the environment object from the development environment file and not the production one. The Angular framework is smart enough to understand which environment we are currently running our application in and use the appropriate file during runtime.
- Add the AngularFire modules also to the imports array of the @NgModule decorator:
imports: [BrowserModule, IonicModule.forRoot(),
AppRoutingModule,
AngularFireModule.initializeApp
(environment.firebaseConfig),
AngularFirestoreModule,
AngularFireStorageModule
]
In the preceding code, we use the initializeApp method of the AngularFireModule class to register our application with our Firebase project.
- Before moving on, we need to create a model for the data that will be saved in the Cloud Firestore database. Execute the following command of the Ionic CLI to create one:
ionic generate interface photo
- Open the photo.ts file and add the following properties in the Photo interface:
export interface Photo {
url: string;
lat: number;
lng: number;
}
The url property will be the URL of the actual photo, and the lat/lng properties represent the latitude and longitude of the current location.
- Open the photo.service.ts file and add the following import statements:
import { AngularFirestore } from '@angular/fire/firestore';
import { AngularFireStorage } from '@angular/fire/storage';
import { Photo } from './photo';
The AngularFirestore service contains all the necessary methods that we will need to interact with our Cloud Firestore database. The AngularFireStorage service contains methods for uploading files to the Storage service.
- Inject both services into the constructor of the PhotoService class:
constructor(private firestore: AngularFirestore, private storage: AngularFireStorage) {}
- Create the following method to save a photo in Firebase:
private async savePhoto(dataUrl: string, latitude: number, longitude: number) {
const name = new
Date().getUTCMilliseconds().toString();
const upload = await
this.storage.ref(name).putString(dataUrl,
'data_url');
const photoUrl = await upload.ref.getDownloadURL();
await
this.firestore.collection<Photo>('photos').add({
url: photoUrl,
lat: latitude,
lng: longitude
});
}
First, we create a random name for our photo and use the putString method of the storage variable to upload it to Firebase storage. As soon as uploading has been completed, we get a downloadable URL using the getDownloadURL method, which can be used to access that photo. Finally, we use the add method to add a new Photo object in the collection property of the firestore variable. We use the collection property because we want to work with a list of photos in our application.
Tip
The firestore variable also contains a doc property that can be used when we want to work with single objects. The collection property internally keeps a list of doc objects.
- Modify the takePhoto method to call the savePhoto method that we created in step 9:
async takePhoto() {
const {latitude, longitude} = await
this.getLocation();
const cameraPhoto = await Camera.getPhoto({
resultType: CameraResultType.DataUrl,
source: CameraSource.Camera,
quality: 100
});
await this.savePhoto(cameraPhoto.dataUrl, latitude,
longitude);
}
We are now ready to check the full functionality of the photo-shooting process:
- Build the application using the following Ionic CLI command:
ionic build
- Run the following command of Capacitor to copy the application bundle to the native mobile projects:
ionic cap copy
- Open the native mobile project using the open command of Capacitor and run the project using the respective IDE.
- Open the Firebase console of your application and select the Storage option in the Build section. Select the Rules tab, remove the authentication check at line 5 and click the Publish button. The resulting rules should be the following:
rules_version = '2';
service firebase.storage {
match /b/{bucket}/o {
match /{allPaths=**} {
allow read, write;
}
}
}
- Use the application to take a nice photo. To verify that your photo has been successfully uploaded to Firebase, select the Files tab. You should see an entry like the following:

Figure 6.19 – Firebase storage
In the preceding screenshot, the file named 669 is the physical file of the photo that you have taken.
- Similarly, select the Firestore Database option in the Build section, and you should see something like the following:

Figure 6.20 – Cloud Firestore
In the preceding screenshot, the 1oFxxWgQseIwqWUrYBkN entry is the logical object of the photo that contains the URL of the actual file and its location data.
The first page of our application is now feature-complete. We have gone through the full process of taking a photo and uploading it to the cloud along with its location data. We started by setting up and configuring a Firebase project and finished by learning how to use the AngularFire library to interact with that project. In the next section, we will reach our final destination by implementing the second page of our application.
Previewing photos with CesiumJS
The next feature of our application will be to display all the photos that we have taken with the camera on a 3D map. The CesiumJS library provides a viewer with a 3D globe that we can use to visualize various things, such as images in specific locations. This new feature of our application will consist of the following:
- Configuring CesiumJS
- Displaying photos on viewer
We will begin by learning how to set up the CesiumJS library.
Configuring CesiumJS
The CesiumJS library is an npm package that we can install to start working with 3D maps and visualizations:
- Run the following npm command to install CesiumJS:
npm install cesium
- Open the angular.json configuration file and add the following entry in the assets array of the build architect option:
"assets": [
{
"glob": "**/*",
"input": "src/assets",
"output": "assets"
},
{
"glob": "**/*.svg",
"input":
"node_modules/ionicons/dist/ionicons/svg",
"output": "./svg"
},
{
"glob": "**/*",
"input": "node_modules/cesium/Build/Cesium",
"output": "/assets/cesium"
}
]
The preceding entry will copy runtime all CesiumJS source files into a cesium folder inside the assets folder of our application.
- Also add the CesiumJS widgets style sheet file into the styles array of the build section:
"styles": [
"node_modules/cesium/Build/Cesium/Widgets/
widgets.css",
"src/theme/variables.scss",
"src/global.scss"
]
The viewer of CesiumJS contains a toolbar with widgets, including a search bar and a dropdown for selecting a specific type of map, such as Bing Maps or Mapbox.
- Open the main entry point file of our application, main.ts, and add the following line:
// eslint-disable-next-line @typescript-eslint/dot-
// notation
window['CESIUM_BASE_URL'] = '/assets/cesium/';
The CESIUM_BASE_URL global variable indicates the location of the CesiumJS source files.
- Install a custom webpack builder using the following npm command:
npm install -D @angular-builders/custom-webpack
A builder is an Angular library that extends the default functionality of the Angular CLI. The @angular-builders/custom-webpack builder allows us to provide an additional webpack configuration file while building our application. It is beneficial in cases where we want to include additional webpack plugins or override existing functionality.
- Create a new webpack configuration file named extra-webpack.config.js in the root folder of the project and add the following content:
module.exports = {
resolve: {
fallback: {
fs: "empty",
Buffer: false,
http: "empty",
https: "empty",
zlib: "empty"
}
},
module: {
unknownContextCritical: false
}
};
The configuration file will ensure that webpack will not try to load CesiumJS code that cannot understand. CesiumJS uses modules in a format that cannot be statically analyzed from webpack.
- Open the angular.json file and change the builder property of the build architect section to use the custom webpack builder:
"builder": "@angular-builders/custom-webpack:browser"
- Define the path of the custom webpack configuration file in the options property of the build section:
"customWebpackConfig": {
"path": "./extra-webpack.config.js"
}
- Configure the serve architect section to use the custom webpack builder:
"serve": {
"builder": "@angular-builders/custom-webpack:
dev-server",
"options": {
"browserTarget": "app:build"
},
"configurations": {
"production": {
"browserTarget": "app:build:production"
},
"ci": {
"progress": false
}
}
}
- Open the tsconfig.app.json file and add the cesium types in the compilerOptions property:
"compilerOptions": {
"outDir": "./out-tsc/app",
"types": ["cesium"]
}
Now that we have completed the configuration of the CesiumJS library, we can start creating the page for our feature:
- Run the following command of the Ionic CLI to create a new page:
ionic generate page view
- Open the view.page.html file and modify the ion-header element so that it includes a menu toggle button:
<ion-header>
<ion-toolbar>
<ion-buttons slot="start">
<ion-menu-button color="primary">
</ion-menu-button>
</ion-buttons>
<ion-title>View gallery</ion-title>
</ion-toolbar>
</ion-header>
- Add a div element inside the ion-content element that will be the container for our viewer:
<ion-content>
<div #mapContainer></div>
</ion-content>
#mapContainer is a template reference variable and we use it to declare an alias for an element in our template.
- Open the view.page.scss file and set the size of the map container element:
div {
height: 100%;
width: 100%;
}
- Let's create our viewer now. Open the view.page.ts file and modify it as follows:
import { AfterViewInit, Component, OnInit, ElementRef, ViewChild } from '@angular/core';
import { Viewer } from 'cesium';
@Component({
selector: 'app-view',
templateUrl: './view.page.html',
styleUrls: ['./view.page.scss'],
})
export class ViewPage implements OnInit, AfterViewInit {
@ViewChild('mapContainer') content: ElementRef;
constructor() { }
ngOnInit() {
}
ngAfterViewInit() {
const viewer = new
Viewer(this.content.nativeElement);
}
}
We create a new Viewer object inside the ngAfterViewInit method of the component. The ngAfterViewInit method is called when the view of the component has finished loading, and it is defined in the AfterViewInit interface. The constructor of the Viewer class accepts as a parameter the native HTML element on which we want to create the viewer. In our case, we want to attach it to the map container element that we created earlier. Thus, we use the @ViewChild decorator to reference that element by passing the template reference variable name as a parameter.
- Run the application using ionic serve and click on the View gallery option from the main menu. You should see the following output:

Figure 6.21 – View gallery page
Tip
If the map on the viewer is not displayed correctly, try to select a different provider from the map button on the viewer toolbar, next to the question button.
We have now successfully configured the CesiumJS library in our application. In the next section, we will see how to benefit from it and display our photos on the 3D globe of the CesiumJS viewer.
Displaying photos on viewer
The next thing that we need to do for our application to be ready is to display our photos on the map. We will get all the photos from Firebase and add them to the viewer in the specified locations. Let's see how we can accomplish that:
- Create a new Angular service using the following command of the Ionic CLI:
ionic generate service cesium
- Open the cesium.service.ts file and add the following import statements:
import { AngularFirestore } from '@angular/fire/firestore';
import { Cartesian3, Color, PinBuilder, Viewer } from 'cesium';
import { Observable } from 'rxjs';
import { map } from 'rxjs/operators';
import { Photo } from './photo';
- Inject the AngularFirestore service in the constructor of the CesiumService class and create a viewer property, which we will use to store our Viewer object:
export class CesiumService {
private viewer: Viewer;
constructor(private firestore: AngularFirestore) { }
}
- Create a register method to set the viewer property:
register(viewer: Viewer) {
this.viewer = viewer;
}
- Create a method to get the photos collection from Cloud Firestore:
private getPhotos(): Observable<Photo[]> {
return this.firestore.collection<Photo>('photos'). snapshotChanges().pipe(
map(actions => actions.map(a => a.payload.doc.data() as Photo))
);
}
In the preceding method, we call the snapshotChanges method to get the data of the photos collection. We have already learned that a collection consists of doc objects. Thus, we can reach the actual photo object using the data method on the doc property for each action object.
- Create the following method for adding all the photos to the viewer:
addPhotos() {
const pinBuilder = new PinBuilder();
this.getPhotos().subscribe(photos => {
photos.forEach(photo => {
const entity = {
position: Cartesian3.fromDegrees(photo.lng,
photo.lat),
billboard: {
image: pinBuilder.fromColor
(Color.fromCssColorString('#de6b45'),
48).toDataURL()
},
description: `<img width="100%"
style="margin:auto; display: block;"
src="${photo.url}" />`
};
this.viewer.entities.add(entity);
});
});
}
The location of each photo on the viewer will be displayed as a pin. Thus, we need to initialize a PinBuilder object first. The preceding method subscribes to the getPhotos method to get all photos from Cloud Firestore. For each photo, it creates an entity object that contains the position, which is the location of the photo in degrees, and a billboard property that displays a pin of 48 pixels in size. It also defines a description property that will display the actual image of the photo when we click on the pin.
Each entity object is added to the entities collection of viewer using its add method.
- The description of each entity is displayed inside an info box. Open the global.scss file that contains the global styles of the application and add the following CSS styles for the info box:
.cesium-infoBox, .cesium-infoBox-iframe {
height: 100% !important;
width: 100%;
}
- Now, let's use CesiumService from our page. Open the view.page.ts file and inject the CesiumService class into the constructor of the ViewPage class:
import { AfterViewInit, Component, OnInit, ElementRef, ViewChild } from '@angular/core';
import { Viewer } from 'cesium';
import { CesiumService } from '../cesium.service';
@Component({
selector: 'app-view',
templateUrl: './view.page.html',
styleUrls: ['./view.page.scss'],
})
export class ViewPage implements OnInit, AfterViewInit {
@ViewChild('mapContainer') content: ElementRef;
constructor(private cesiumService: CesiumService) {}
ngOnInit() {
}
ngAfterViewInit() {
const viewer = new
Viewer(this.content.nativeElement);
}
}
- Modify the ngAfterViewInit method to register the viewer and add the photos:
ngAfterViewInit() {
this.cesiumService.register(new
Viewer(this.content.nativeElement));
this.cesiumService.addPhotos();
}
We are now set to view our photos on the map:
- Run the application using the ionic serve command.
- Use the application to take some nice photos, preferably in different locations.
- Select the View gallery option from the main menu, and you should get an output like the following:

Figure 6.22 – Photos on the map
- Click on one of the pins on the map and you should see your photo:
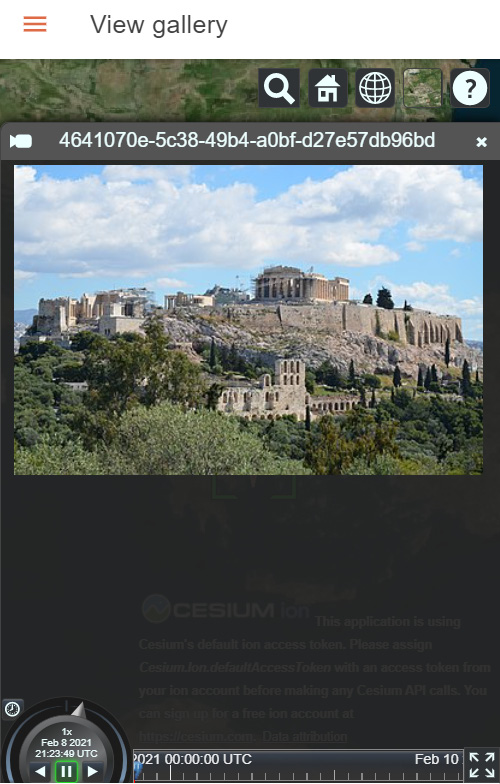
Figure 6.23 – Photo display
We now have a complete mobile application for taking geotagged photos and displaying them on a map. We saw how to set up the CesiumJS library and get our photos from Cloud Firestore. The API of the CesiumJS viewer provided us with an easy way to visualize our photos on the map and interact with them.
Summary
In this chapter, we built a mobile application for taking photos, tagging them with the current location, and displaying them on a 3D map. Initially, we learned how to create a new mobile application using the Ionic framework. We built the application locally, and then we integrated Capacitor to interact with the camera and the GPS device. The camera was used to take photos and the GPS to mark them with the location.
Later on, we used Firebase services to store our photo files and data in the cloud. Finally, we learned how to retrieve the stored photos from Firebase and displayed them on a 3D globe using the CesiumJS library.
In the next chapter, we will investigate another way to prerender content in Angular. We will use server-side rendering techniques to create a GitHub portfolio website.
Practice questions
- Which toolkit can we use to create a UI in a Capacitor application?
- Which method do we use to take photos with the camera in a Capacitor application?
- How do we read the current location in a Capacitor application?
- How do we add a menu toggle button with Ionic?
- Which Capacitor command do we use to sync the application bundle with native mobile projects?
- What is the difference between test and production mode in Cloud Firestore?
- Which method do we use to initialize an application with the AngularFire library?
- Which method do we use to fetch data from a Cloud Firestore collection?
- How do we create a pin using the CesiumJS library?
- How do we convert latitude and longitude to degrees using CesiumJS?
Further reading
- Getting started with Capacitor: https://capacitorjs.com/docs/getting-started
- Android getting started guide for Capacitor: https://capacitorjs.com/docs/android#getting-started
- iOS getting started guide for Capacitor: https://capacitorjs.com/docs/ios#getting-started
- Angular development with Ionic: https://ionicframework.com/docs/angular/overview
- AngularFire library documentation: https://firebaseopensource.com/projects/angular/angularfire2/
- CesiumJS quick start guide: https://cesium.com/docs/tutorials/quick-start/
- CesiumJS and Angular article: https://cesium.com/blog/2018/03/12/cesium-and-angular/