Chapter 8: Building an Enterprise Portal Using Nx Monorepo Tools and NgRx
Typical enterprise applications usually consist of a backend and a frontend system. The backend is responsible for interacting with a database for data persistence and exposes a REST API. The frontend communicates with the backend system via the REST interface to exchange data. In some cases, the frontend system can consist of more than one application, including a web interface or a mobile application. Keeping all these applications and systems in separate source control repositories does not scale well, and it is not easy to maintain and build. Alternatively, we can follow monorepo architecture for such large enterprise applications, where each application resides in a separate location inside the same repository.
A popular tool in the Angular ecosystem that embraces monorepo architecture is Nx Dev Tools. Combining an Nx monorepo application with a state management library can significantly level up your application. NgRx, a popular state management library for Angular applications, can help us keep a consistent and manageable state globally.
In this chapter, we will investigate both technologies by building an enterprise portal application for visiting points of interest (POIs). We will cover the following topics:
- Creating a monorepo application using Nx
- Creating user-specific portals
- Managing application state with NgRx
- Visualizing data with graphs
Essential background theory and context
Nx Dev Tools is a suite of development tools and libraries for building web applications based on monorepo architecture. A typical Nx application can contain many applications and shared libraries inside a single workspace. The flexibility of monorepo architecture allows for any type of application, backend or frontend, to use the same libraries inside the workspace.
Important note
In this project, we will consider only frontend applications built with the Angular framework.
Nx Dev Tools provides developers with the following features:
- Centralized management of application dependencies: Each application has the same version of the Angular framework so that it is easy to update all at once.
- Fast builds: The build process of an Nx application involves only those artifacts that have been changed and does not do a complete rebuild of the entire monorepo.
- Distributed caching: Each build of the application can be cached locally or to the cloud, using Nx Cloud, to improve the build process of other developers that build similar artifacts.
In a large Angular enterprise application, maintaining a consistent global state is a tedious process. The use of @Input and @Output decorators to communicate between Angular components is not always viable, especially when there are many levels of components that need to share the same state.
NgRx is a library that provides efficient management of the global application state powered by the RxJS library. The main building blocks of NgRx are the following:
- Store: The central storage that keeps the global state of the application.
- Reducer: A function that listens to a specific event and interacts directly with the store. Reducers derive a new state of the application based on the existing one from the store.
- Action: A unique event that is dispatched from components and services and triggers a reducer. Actions can be any type of such interaction initiated by the user or an external source such as an HTTP call.
- Effect: Handles interaction with external sources such as making an HTTP call or exchanging data with the local storage. Effects take care of side effects in an application by hiding the business logic from components.
- Selector: A function that selects the application state or a specific part of it (slice) from the store. Selectors support memoization, a technique where they can return the same state if called with the same parameters, greatly enhancing the performance of an application.
Project overview
In this project, we will build an Angular enterprise application for managing POI visits on a map. The application will consist of two portals where one will allow a visitor to select a POI from a list and view its location on a map. Another portal will allow an administrator to view the traffic of each POI.
First, we will build an Angular application from scratch using Nx Dev Tools. We will then create the skeleton of each portal by adding the essential components of our application. After we have scaffolded our application, we will start adding the functionality of the visitor portal using NgRx. Finally, we will implement the administrator portal and learn how to use an Angular library for visualizing data in a graph.
Build time: 3 hours
Getting started
The following software tools are required for completing this project:
- Nx Console: A VSCode extension that provides a graphical interface for working with Nx Dev Tools. You can find out more about installing it in Chapter 1, Creating Your First Web Application in Angular.
- GitHub material: The code related to this chapter can be found in the Chapter08 folder at https://github.com/PacktPublishing/Angular-Projects-Second-Edition.
Creating a monorepo application using Nx
Nx Dev Tools provides developers with tools for working with monorepos, including the following:
- create-nx-workspace: An npm package that scaffolds a new Nx monorepo application.
- Nx CLI: A command-line interface that runs commands against a monorepo application. Nx CLI extends the Angular CLI to provide more commands, and it is faster due to the distributed caching mechanism.
Tip
It is recommended to use the Quick Open feature of VSCode when working with Nx monorepos. The number of generated folders and files will significantly increase, and it will be challenging to navigate through them. You can find out more at https://code.visualstudio.com/docs/editor/editingevolved#_quick-file-navigation.
When we use the preceding npm package to create a new Nx monorepo workspace, it will check whether Nx CLI has already been installed. To install Nx CLI, run the following command in a terminal:
npm install -g nx
The preceding command will install the nx npm package globally on our system. We can now scaffold a new Nx monorepo workspace using the following command:
npx create-nx-workspace packt --appName=tour --preset=angular --style=css --linter=eslint --nx-cloud=false --routing
The preceding command uses npx, an npm command-line tool that allows us to execute an npm package without installing it first. It executes the create-nx-workspace package passing the following options:
- packt: The name of the Nx monorepo workspace. In large enterprise environments, we typically use the organization name.
- --appName=tour: The name of the application.
- --preset=angular: Nx supports applications built with various JavaScript frameworks. The preset option defines what type of application we want to build.
- --style=css: Indicates that our application will use the CSS stylesheet format.
- --linter=eslint: Configures our application to use ESLint as the default linter.
- --nx-cloud=false: Disables Nx Cloud for our application.
- --routing: Enables Angular routing in the application.
Important note
Creating a new Nx workspace may take some time to complete, as it installs all the necessary packages for an enterprise environment.
After the creation of the workspace has been completed, we can run it to verify that everything has been set up correctly:
- Open the project in the VSCode editor and click on the Nx Console menu in the VSCode sidebar.
- Select the Serve option from the GENERATE & RUN TARGET pane:
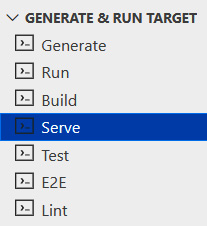
Figure 8.1 – Serve option
- In the dialog that appears, select the application that we created:

Figure 8.2 – Application selection
- Click on the Run button of the Serve tab to build the application and open your browser at http://localhost:4200:
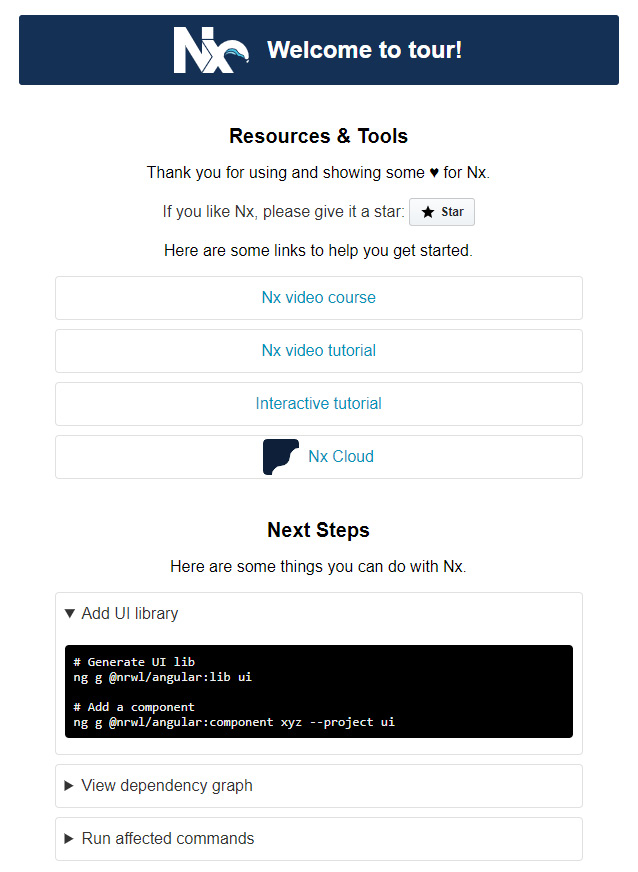
Figure 8.3 – Minimal Nx application
Congratulations! Your new application has been configured correctly! Nx creates a minimal skeleton application just like Angular CLI does for our convenience so that we can build our features on top of that.
In the next section, we will dive deeper into Nx Dev Tools by creating the administrator and visitor portals in our workspace.
Creating user-specific portals
Our application will consist of two portals that different users will use. Visitors will be able to view a list of POIs and select them on a map. Administrators will be able to view statistics for each POI. We will learn more about how to use Nx Dev Tools in the following sections:
- Building the visitor portal
- Building the administrator portal
Each portal will be a separate Nx library that will be loaded according to the URL entered in the address bar of the browser. Organizing our code in libraries allows us to reuse it between different applications and build and test it individually. We will start building the visitor portal in the following section.
Building the visitor portal
The visitor portal will be a library inside the Nx workspace that will be loaded by default. Let's see how we can build that library with Nx Console:
- Run Nx Console from the VSCode sidebar and select the Generate option from the GENERATE & RUN TARGET pane:
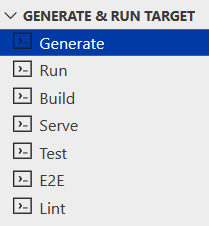
Figure 8.4 – Generate option
- Select the @nrwl/angular – library option from the dialog that appears. The @nrwl/angular namespace contains schematics that we can execute in an Nx monorepo for Angular applications.
Important note
If you do not see the option in the dialog, restart VSCode.
- Enter visitor as the name of the library and click the Run button in the Generate tab:
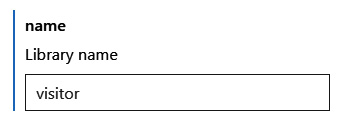
Figure 8.5 – Library name
Tip
When you were typing the name of the library, you may have noticed that Nx was running the generate command in the terminal. Well, it did not run it actually. Instead, it was mimicking the effect of running the command in your system; a technique called dry run.
Nx will create the visitor library inside the libs folder of our workspace. The library does not contain any components yet. According to the project specifications, the visitor portal will contain a list of POIs where the user will be able to select them and view their location on a map. Thus, we need to create an Angular component with the following layout:
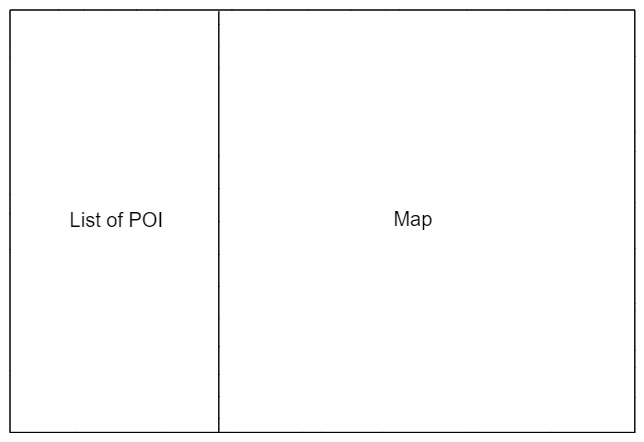
Figure 8.6 – Visitor portal layout
In the previous diagram, the portal consists of the sidebar that displays a POI list and the main content area for displaying the map. Instead of creating the layout from scratch, we will use Angular Material, which contains a handful of ready-made layouts, including one with a sidebar.
Before working with Angular Material, we need to install it in our application with the following command:
ng add @angular/material --theme=deeppurple-amber --typography=true --animations=true
We use the ng add command of the Angular CLI to install the @angular/material npm package, passing additional options. You can learn more about the installation of Angular Material and its available options in Chapter 4, Building a PWA Weather Application Using Angular Service Worker.
Installing Angular Material in our application will also install the @angular/cdk npm package. @angular/cdk is called the Component Dev Kit (CDK) and contains specific behaviors and interactions used to build Angular Material.
Important note
The CDK can be used to build custom UI libraries without the need to rely on Angular Material. We will learn how to build such libraries in Chapter 9, Building a Component UI Library Using Angular CLI and Angular CDK.
The Angular Material library contains the following component templates that we can use:
- address-form: It uses Angular Material form controls for entering information about addresses.
- navigation: It contains a side navigation component along with a content placeholder and a title bar.
- dashboard: It consists of multiple Angular Material card and menu components that are organized in a grid layout.
- table: It displays an Angular Material table with sorting and filtering enabled.
- tree: It represents a visual folder structure in a tree view.
In our case, we will use the navigation component because we need a sidebar. Let's see how we can generate that component:
- Open Nx Console from the VSCode sidebar and select the Generate option.
- Select the @angular/material – navigation option from the dialog that appears. The @angular/material namespace contains schematics that we can run to create Angular Material components.
- Enter the name of the component:
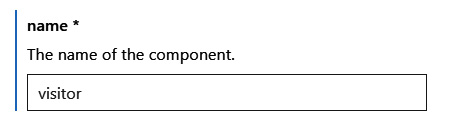
Figure 8.7 – Component name
- Select the visitor library from the project dropdown that we created earlier:

Figure 8.8 – Project selection
Important note
If the library does not appear in the dropdown, restart VSCode.
- Check the flat option so that the component will not be generated in a separate folder:

Figure 8.9 – The flat option
The component will be the main one of the library, so we want to have it in the same folder with its related module file.
- Enter the folder where the component will be created:

Figure 8.10 – Component folder
Tip
There is no need to define the module where the component will be created because the Angular CLI can deduce it directly from the path option.
- Click the Run button to generate the component.
Nx Console will create the visitor component in the visitor library of the Nx workspace. We now need to connect it with the main application of the workspace:
- Open the app.component.css file and remove all CSS styles because our application will be styled using the Angular Material library.
- Open the app.component.html file and replace its content with the following HTML template:
<router-outlet></router-outlet>
The router-outlet component is part of the Angular router and is a placeholder where we will load our portals.
- Open the app.module.ts file and add a route configuration that will load the visitor portal when the URL contains the tour path:
import { RouterModule } from '@angular/router';
@NgModule({
declarations: [AppComponent],
imports: [BrowserModule, BrowserAnimationsModule,
RouterModule.forRoot([
{ path: 'tour', loadChildren: () =>
import('@packt/visitor').then(m =>
m.VisitorModule) },
{ path: '', pathMatch: 'full', redirectTo:
'tour' }
])
],
providers: [],
bootstrap: [AppComponent],
})
The route configuration contains two paths. The default path, denoted by the empty string, redirects to the tour path. The tour path lazily loads the module of the visitor library.
The @packt prefix in the import method is the organization name that we configured when creating the Nx workspace. When we want to import an artifact of our project, we will import it directly from the @packt namespace. It behaves as a path alias in our project.
- Open the visitor.module.ts file and add a route configuration to load the visitor component that we created:
import { RouterModule } from '@angular/router';
@NgModule({
imports: [CommonModule, LayoutModule,
MatToolbarModule, MatButtonModule,
MatSidenavModule, MatIconModule, MatListModule,
RouterModule.forChild([
{ path: '', component: VisitorComponent }
])
],
declarations: [VisitorComponent],
})
The route configuration will activate VisitorComponent by default as soon as VisitorModule is loaded using the tour path in step 3.
If we now run the Serve command from Nx Console and navigate to http://localhost:4200, we should see the following output:
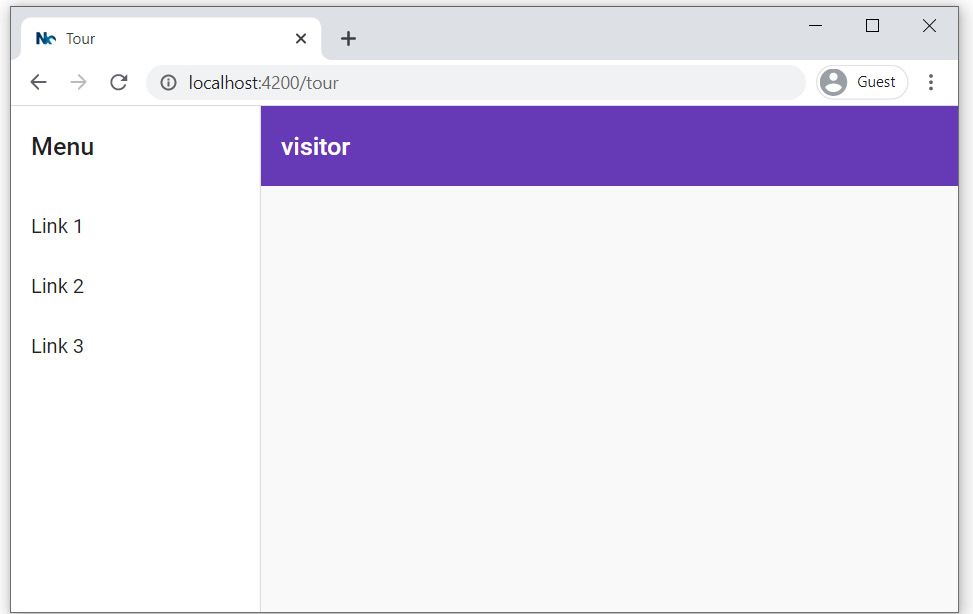
Figure 8.11 – Visitor portal
The Angular router will redirect us to http://localhost:4200/tour, and it will display the visitor portal. It currently contains some demo data that Angular Material entered when we generated the navigation component. We will revisit it in the Managing application state with NgRx section to implement the full functionality using NgRx. For the time being, we will continue by building the administrator portal in the next section.
Building the administrator portal
The administrator portal will be an Nx library with a single component, just like the visitor portal, except that it will not be based on an Angular Material template. Let's start scaffolding the structure of the library using Nx Console:
- Run Nx Console from the VSCode sidebar and select the Generate option.
- In the dialog that appears, select the @nrwl/angular – library option.
- Enter admin as the name of the library and click the Run button:

Figure 8.12 – Library name
- Click the Generate option from Nx Console again and select the @schematics/angular – component option. The @schematics/angular namespace contains schematics that we can run in an Angular application using the Angular CLI.
- Enter the same name for the component as that of the library:
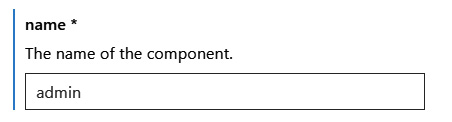
Figure 8.13 – Component name
- Select the library that we created in the project drop-down list:
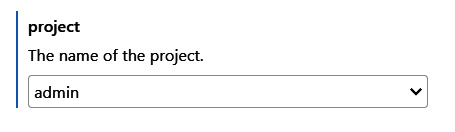
Figure 8.14 – Project selection
Important note
If the library does not appear in the dropdown, restart VSCode.
- Check the flat option so that the component will be created in the same folder with the module file of the library:

Figure 8.15 – The flat option
- Enter the folder where the component will be created and click the Run button:

Figure 8.16 – Component folder
The Angular CLI will create the admin component inside the folder of the admin library. We now need to wire up the admin library to the monorepo application:
- Open the app.module.ts file and add a new route configuration object for the admin library:
RouterModule.forRoot([
{ path: 'admin', loadChildren: () =>
import('@packt/admin').then(m => m.AdminModule) },
{ path: 'tour', loadChildren: () =>
import('@packt/visitor').then(m => m.VisitorModule)
},
{ path: '', pathMatch: 'full', redirectTo: 'tour' }
])
- Open the admin.module.ts file and add a route configuration to activate AdminComponent by default:
import { NgModule } from '@angular/core';
import { CommonModule } from '@angular/common';
import { AdminComponent } from './admin.component';
import { RouterModule } from '@angular/router';
@NgModule({
imports: [
CommonModule,
RouterModule.forChild([
{ path: '', component: AdminComponent }
])
],
declarations: [
AdminComponent
],
})
export class AdminModule {}
- Use the Serve option of Nx Console to run the application and navigate to http://localhost:4200.
- Edit the URL address of the browser and change it to http://localhost:4200/admin:
![]()
Figure 8.17 – Administrator portal
The page will display the default template of the main component of the administrator library.
We have now completed the scaffolding of our enterprise application. First, we created the Nx monorepo workspace that will host the portals of the application. Then, we used Nx Console to generate our portals along with their main components. We also installed Angular Material to use its UI elements in our components.
In the next section, we will implement the functionality of the visitor portal using NgRx.
Managing application state with NgRx
The visitor portal will allow the user to see a list of available POIs and select one to view its location on a map. The list of available POIs and the selection of a POI is the global state of our application. We will integrate NgRx for managing the application state in the visitor portal by completing the following tasks:
- Configuring the state
- Interacting with the store
Let's begin by configuring the state of our application in the following section.
Configuring the state
Our application will consist of a root state for the whole application and a feature state for the visitor portal. We will start by executing the following command to create the root state:
nx generate ngrx app --root --no-interactive --project=tour --module=apps/tour/src/app/app.module.ts
The preceding command uses the generate command of Nx CLI, passing the following options:
- ngrx: Indicates that we want to set up an NgRx state
- app: The name of the state
- --root: Indicates that we want to configure a root state
- --no-interactive: Disables interactive input prompts
- --project=tour: The name of the application in our workspace
- --module=apps/tour/src/app/app.module.ts: Registers the state with the main Angular module of our application
The previous command will add all necessary NgRx npm packages in the package.json file and install them. It will also modify the app.module.ts file to configure all NgRx-related artifacts such as the store, effects, and Store DevTools.
Tip
Store DevTools is an npm package of the NgRx library that provides debugging, monitoring, and instrumentation capabilities to the state of an NgRx application. It must be used in conjunction with the Redux DevTools browser extension, which can be found at https://github.com/zalmoxisus/redux-devtools-extension.
The visitor library itself will not manage the data for the state of the visitor portal. Instead, we will create a new library in our Nx workspace that will fetch and store data in the feature state. Execute the following command of Nx CLI to create a new library:
nx generate lib poi
The preceding command will generate the poi library in our Nx monorepo.
Tip
The generate command of Nx CLI that we used has the same effect as creating the library using Nx Console.
Now that we have created the library, we can set up the feature state using the following command:
nx generate ngrx poi --project=poi --no-interactive --module=libs/poi/src/lib/poi.module.ts --barrels
The preceding command uses the generate command of Nx CLI to register a feature state passing additional options:
- ngrx: Indicates that we want to set up an NgRx state.
- poi: The name of the state.
- --project=poi: The name of the library in our workspace.
- --no-interactive: Disables interactive input prompts.
- --module=libs/poi/src/lib/poi.module.ts: Registers the state with the Angular module of our library.
- --barrels: Indicates to use barrel files to re-export NgRx artifacts such as selectors and state. The name of a barrel file is usually index.ts by convention.
The preceding command will create a folder, named +state by convention, inside our library that contains the following files:
- poi.actions.ts: Defines NgRx actions for the feature state
- poi.effects.ts: Defines NgRx effects for the feature state
- poi.models.ts: Defines an entity interface for POI data
- poi.reducer.ts: Defines NgRx reducers for the feature state
- poi.selectors.ts: Defines NgRx selectors for the feature state
Nx CLI has done most of the job by adding the necessary content in the previous files, eliminating the boilerplate code for us. We now need to create an Angular service in the library that will fetch the POI data:
- Open the poi.models.ts file and add the following properties to the PoiEntity interface:
export interface PoiEntity {
id: string | number; // Primary ID
name: string;
lat: number;
lng: number;
description: string;
imgUrl: string;
}
- Execute the following command to generate the Angular service:
nx generate service poi --project=poi
The preceding command will create an Angular service called poi in the poi library.
- Open the poi.service.ts file and add the following import statements:
import { HttpClient } from '@angular/common/http';
import { Observable } from 'rxjs';
import { PoiEntity } from '..';
- Inject HttpClient in the constructor of the PoiService class and create a method to get POI data from the assets/poi.json file:
export class PoiService {
constructor(private http: HttpClient) {}
getAll(): Observable<PoiEntity[]> {
return
this.http.get<PoiEntity[]>('assets/poi.json');
}
}
We use the built-in HTTP client of the Angular framework to get POI data by initiating a GET HTTP request.
Important note
You can get the poi.json file from the GitHub repository of the Getting started section and copy it to the apps oursrcassets folder of your workspace.
- Open the poi.effects.ts file and add the following import statements:
import { map } from 'rxjs/operators';
import { PoiService } from '../poi.service';
- Inject PoiService in the constructor of the PoiEffects class:
constructor(private actions$: Actions, private poiService: PoiService) {}
- Modify the init$ property to use the poiService variable:
init$ = createEffect(() =>
this.actions$.pipe(
ofType(PoiActions.init),
fetch({
run: (action) => {
return this.poiService.getAll().pipe(
map(pois => PoiActions.loadPoiSuccess({ poi:
pois }))
)
},
onError: (action, error) => {
console.error('Error', error);
return PoiActions.loadPoiFailure({ error });
},
})
)
);
The effect is responsible for listening to all actions that are dispatched in the store. As soon as a PoiActions.init action is dispatched, the init$ property is triggered and calls the getAll method of the poiService variable. The init$ property knows which action to listen for by the parameters in the ofType operator.
Tip
The ofType operator can accept more than one action.
If the data is fetched successfully, the effect will dispatch a new action in the store, PoiActions.loadPoiSuccess, with POI data as the payload. If there is a failure getting the data, it will dispatch a PoiActions.loadPoiFailure action in the store.
- Open the app.module.ts file and import HttpClientModule from the @angular/common/http namespace:
import { HttpClientModule } from
'@angular/common/http';
Add the HttpClientModule class also in the imports array of the @NgModule decorator.
The global state of our application is now configured and ready to be used. In the following section, we will create additional Angular components in the visitor library that will interact with the feature state of our application.
Interacting with the store
The visitor portal will interact with the feature state of our application through two Angular components. One component will display the list of POIs and allow the user to select one. The other component will display a Google Maps map and display the selected POI on it.
Initially, we will build the component that displays the list of POIs:
- Open the visitor.module.ts file and add the following import statement:
import { PoiModule } from '@packt/poi';
- Add PoiModule in the imports array of the @NgModule decorator:
@NgModule({
imports: [CommonModule, LayoutModule,
MatToolbarModule, MatButtonModule,
MatSidenavModule, MatIconModule, MatListModule,
RouterModule.forChild([
{ path: '', component: VisitorComponent }
]),
PoiModule
],
declarations: [VisitorComponent],
})
We import PoiModule so that the poi feature state is registered in the store as soon as the visitor portal is loaded.
- Execute the following command of Nx CLI to create the Angular component:
nx generate component poi-list --project=visitor
- Open the poi-list.component.ts file and add the following import statements:
import { Store } from '@ngrx/store';
import { PoiActions, PoiSelectors } from '@packt/poi';
- Inject the Store service in the constructor of the PoiListComponent class:
constructor(private store: Store) { }
- Dispatch the PoiActions.init action in the store to fetch POI data when the component is initialized:
ngOnInit(): void {
this.store.dispatch(PoiActions.init());
}
We execute the action as a method and pass its result to the dispatch method of the store variable.
- Create a component property that invokes the PoiSelectors.getAllPoi selector to list POI data from the store:
pois$ = this.store.select(PoiSelectors.getAllPoi);
We use the select method of the store variable to execute the selector.
Important note
We did not create the PoiSelectors.getAllPoi selector. NgRx did it for us when we generated the feature state in the poi library.
- Open the poi-list.component.html file and replace its content with the following HTML template:
<mat-action-list *ngFor="let poi of pois$ | async">
<button mat-list-item>{{poi.name}}</button>
</mat-action-list>
We use the mat-action-list component of the Angular Material library to display each POI as a single action item. We subscribe to the pois$ property using the async pipe and create a button element with the mat-list-item directive for each POI.
- Open the visitor.component.html file and replace the mat-nav-list component with the selector of the Angular component that we created:
<mat-sidenav #drawer class="sidenav" fixedInViewport
[attr.role]="(isHandset$ | async) ? 'dialog' :
'navigation'"
[mode]="(isHandset$ | async) ? 'over' : 'side'"
[opened]="(isHandset$ | async) === false">
<mat-toolbar>Menu</mat-toolbar>
<packt-poi-list></packt-poi-list>
</mat-sidenav>
Use Nx Console to start the application, and you should see the following output in the menu sidebar:
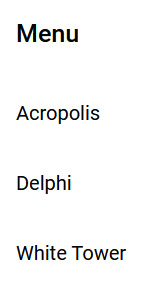
Figure 8.18 – List of POIs
We have already created the Angular component that will display the list of available POIs. Let's see now how to create the component to display a POI on the map using Google Maps.
The Angular Material library contains a component for Google Maps that we can use in our application:
- Run the following command of the npm client to install the Google Maps component:
npm install @angular/google-maps
- Open the visitor.module.ts file and add the following import statement:
import { GoogleMapsModule } from '@angular/google-
maps';
- Add GoogleMapsModule into the imports array of the @NgModule decorator:
@NgModule({
imports: [CommonModule, LayoutModule,
MatToolbarModule, MatButtonModule,
MatSidenavModule, MatIconModule, MatListModule,
RouterModule.forChild([
{ path: '', component: VisitorComponent }
]),
PoiModule,
GoogleMapsModule
],
declarations: [VisitorComponent, PoiListComponent],
})
- Open the index.html file of the application and include the Google Maps JavaScript API inside the head element:
<script src="https://maps.googleapis.com/maps/api/js">
</script>
Now that we have installed and registered Google Maps in our application, let's create the Angular component that will host it:
- Execute the following command of Nx CLI to create a new Angular component:
nx generate component map --project=visitor
- Open the map.component.ts file and add the following import statements:
import { Store } from '@ngrx/store';
import { PoiSelectors } from '@packt/poi';
- Inject the Store service in the constructor of the MapComponent class and declare a property to get the selected POI from the store:
export class MapComponent implements OnInit {
poi$ = this.store.select(PoiSelectors.getSelected);
constructor(private store: Store) { }
ngOnInit(): void {
}
}
- Open the map.component.html file and replace its content with the following HTML template:
<google-map height="100%" width="auto" *ngIf="poi$ |
async as poi" [center]="poi">
<map-marker [position]="poi"></map-marker>
</google-map>
In the preceding template, we subscribe to the poi$ property using the async pipe. As soon as we get a selected POI from the store, we display a google-map component and set the center of the map to the POI coordinates. Furthermore, we add a marker on the map in the specified POI coordinates.
- Open the visitor.component.html file and replace the contents of the mat-sidenav-content component with the selector of MapComponent:
<mat-sidenav-content>
<mat-toolbar color="primary">
<button
type="button"
aria-label="Toggle sidenav"
mat-icon-button
(click)="drawer.toggle()"
*ngIf="isHandset$ | async">
<mat-icon aria-label="Side nav toggle icon">
menu</mat-icon>
</button>
<span>visitor</span>
</mat-toolbar>
<packt-map></packt-map>
</mat-sidenav-content>
The Angular component that we created will show the location of a POI on the map as soon as we select it from the list. If you try to select a POI from the list, you will notice that nothing happens. Why is that?
The global state of the application does not currently know when a POI has been selected. We need to add the necessary code for setting the selected POI and interacting with the store:
- Open the poi.actions.ts file and add a new action for passing the ID of the selected POI:
export const selectPoi = createAction(
'[Poi/API] Select Poi',
props<{ poiId: string | number }>()
);
- Open the poi.reducer.ts file and add a new statement in the poiReducer property that will listen to the selectPoi action and save the selected POI in the store:
const poiReducer = createReducer(
initialState,
on(PoiActions.init, (state) => ({ ...state, loaded:
false, error: null })),
on(PoiActions.loadPoiSuccess, (state, { poi }) =>
poiAdapter.setAll(poi, { ...state, loaded: true })
),
on(PoiActions.loadPoiFailure, (state, { error }) =>
({ ...state, error })),
on(PoiActions.selectPoi, (state, { poiId }) => ({
...state, selectedId: poiId }))
);
- Open the poi-list.component.ts file and import the PoiEntity interface:
import { Component, OnInit } from '@angular/core';
import { Store } from '@ngrx/store';
import { PoiActions, PoiEntity, PoiSelectors } from
'@packt/poi';
- Create a new method to dispatch the selectPoi action to the store along with the selected PoiEntity:
selectPoi(poi: PoiEntity) {
this.store.dispatch(PoiActions.selectPoi({poiId:
poi.id}));
}
- Open the poi-list.component.html file and bind the selectPoi method to the click event of the button element:
<mat-action-list *ngFor="let poi of pois$ | async">
<button mat-list-item
(click)=»selectPoi(poi)»>{{poi.name}}</button>
</mat-action-list>
To see the new functionality in action, run the application using the Serve option from Nx Console and select a POI from the list. The output of the application should look like the following:
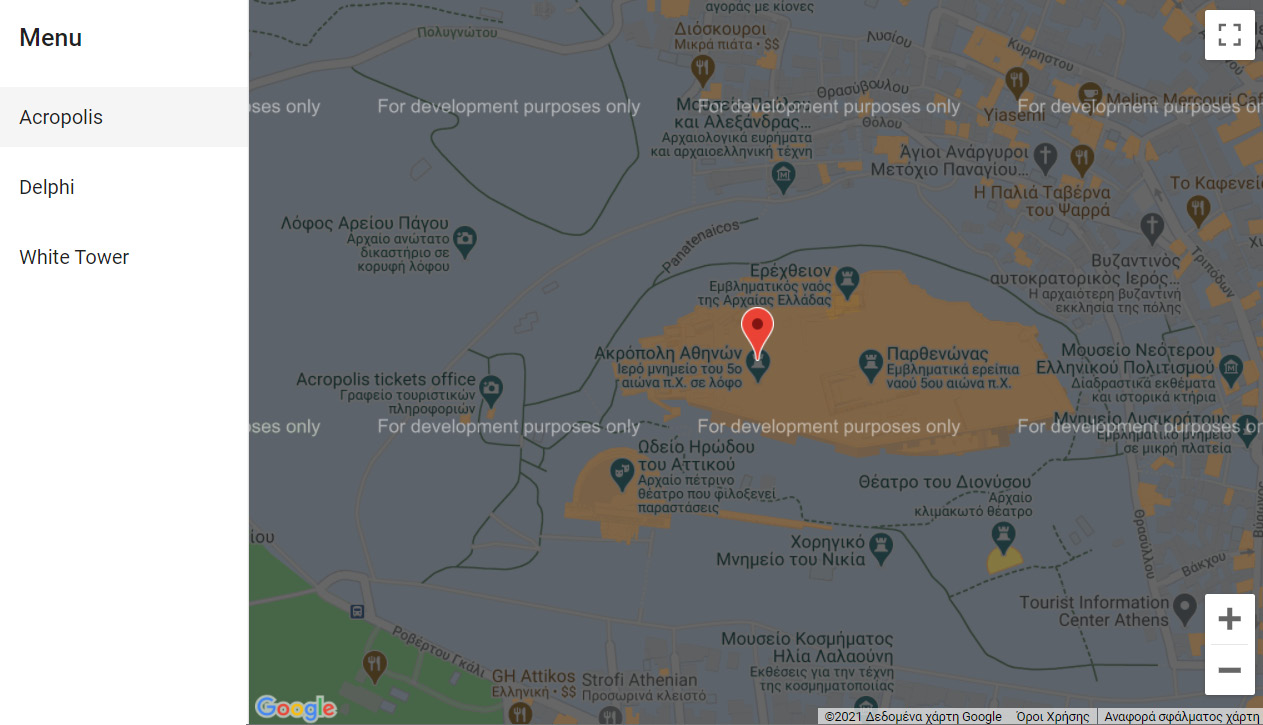
Figure 8.19 – POI selection
Important note
We are using Google Maps in development mode in this project. For production environments, you should get an API key at https://developers.google.com/maps/gmp-get-started and include it in the Google Maps JavaScript API script that you load in the index.html file such as <script src="https://maps.googleapis.com/maps/api/js?key=YOUR_API_KEY"></script>.
We have now completed all the required features for the portal of our visitors. Well done! Implementing the basic functionality of the visitor portal required interacting with NgRx for managing the global state of our application. The global state was separated into the root state for the application and the feature state for the visitor portal. The latter was used in the visitor library to create Angular components for displaying a POI list and selecting one to view in Google Maps.
In the next section, we will build the administrator portal to get visit statistics for each POI.
Visualizing data with graphs
The administrator portal will be responsible for displaying traffic visits for each POI using a chart. Traffic will be generated when a visitor visits a POI by clicking its marker on the map. The application will persist visit data in the local storage of the browser. It will keep a record for each visit containing the ID of the POI and the total visits. The administrator portal will consist of the following features:
- Persisting visit data in the store
- Displaying visit statistics
We will start building the administrator portal by implementing the mechanism of keeping track of visits in the following section.
Persisting visit data in the store
Our application does not record traffic statistics for POIs yet. Let's see how we can accomplish this task:
- Open the map.component.html file and add a map-info-window component:
<google-map height="100%" width="auto" *ngIf="poi$ |
async as poi" [center]="poi">
<map-marker [position]="poi"></map-marker>
<map-info-window>
<mat-card>
<mat-card-header>
<mat-card-title>{{poi.name}}</mat-card-title>
</mat-card-header>
<img mat-card-image [src]="poi.imgUrl">
<mat-card-content>
<p>{{poi.description}}</p>
</mat-card-content>
</mat-card>
</map-info-window>
</google-map>
The map-info-window component is a pop-up window that displays additional information about the current map marker. It displays the title, image, and description of a POI as an Angular Material card component.
The mat-card component contains a header denoted by the mat-card-header component and an image denoted by the img element with the mat-card-image directive. The mat-card-content component indicates the main content of the card.
- Open the visitor.module.ts file and import MatCardModule:
import { MatCardModule } from
'@angular/material/card';
@NgModule({
imports: [CommonModule, LayoutModule,
MatToolbarModule, MatButtonModule,
MatSidenavModule, MatIconModule, MatListModule,
RouterModule.forChild([
{ path: '', component: VisitorComponent }
]),
PoiModule,
GoogleMapsModule,
MatCardModule
],
declarations: [VisitorComponent, PoiListComponent,
MapComponent],
})
The MatCardModule class is an Angular Material module that exposes all components that we need for creating a card component.
- Open the map.component.ts file and add the following import statements:
import { Component, OnInit, ViewChild } from
'@angular/core';
import { Store } from '@ngrx/store';
import { PoiSelectors } from '@packt/poi';
import { MapInfoWindow, MapMarker } from
'@angular/google-maps';
- Declare a component property to get a reference to the information window using the @ViewChild decorator:
@ViewChild(MapInfoWindow) info: MapInfoWindow |
undefined;
- Create a method for opening the information window:
showInfo(marker: MapMarker) {
this.info?.open(marker);
}
In the preceding code, we call the open method of the information window reference, passing the associated map marker as a parameter.
- Open the map.component.html file and bind the showInfo component method to the mapClick event of the map-marker component:
<map-marker #marker="mapMarker" [position]="poi" (mapClick)="showInfo(marker)"></map-marker>
We create the marker template reference variable to get a reference to the mapMarker object and pass it as a parameter in the showInfo method.
- Run the application using the Serve option of Nx Console and select a POI from the list.
- Click on the POI marker on the map, and you should get an output similar to the following:

Figure 8.20 – Map information window
We consider that a POI is visited when the visitor clicks on the map marker and the information window appears. Our application will then notify the store of that action to save it in the local storage. Let's create the logic for interacting with the store:
- Open the poi.actions.ts file and create a new action indicating that a POI has been visited:
export const visitPoi = createAction(
'[Poi/API] Visit Poi',
props<{ poiId: string | number }>()
)
- Open the poi.effects.ts file and add the following import statement:
import { EMPTY } from 'rxjs';
- Create a new effect that listens to the visitPoi action and increases the total visits of the specified poiId by one:
visit$ = createEffect(() =>
this.actions$.pipe(
ofType(PoiActions.visitPoi),
fetch({
run: action => {
const stat = localStorage.getItem('tour-' +
action.poiId);
const total = stat ? Number(stat) + 1 : 1;
localStorage.setItem('tour-' + action.poiId,
total.toString());
return EMPTY;
}
})
)
);
In the preceding code, we fetch the local storage key that begins with the word tour- followed by the POI ID. If there is one, we increment it by one and update the local storage. Otherwise, we initialize it to one.
Tip
In a real case, it would be better to abstract the logic of localStorage in an Angular service that would act as a wrapper over the global localStorage object. We encourage you to create such a service while building this project.
The run method of the effect returns the EMPTY RxJS operator, which causes the observable to complete with no value.
- Open the map.component.ts file and import PoiActions from the @packt/poi namespace:
import { PoiActions, PoiSelectors } from '@packt/poi';
- Modify the showInfo component method so that it dispatches a visitPoi action to the store:
showInfo(marker: MapMarker, poiId: string | number) {
this.store.dispatch(PoiActions.visitPoi({ poiId }));
this.info?.open(marker);
}
- Finally, open the map.component.html file and pass the selected POI ID into the showInfo method:
<map-marker #marker="mapMarker" [position]="poi"
(mapClick)="showInfo(marker, poi.id)"></map-marker>
Our application can now record the visits of each POI and keep them in the local storage of the browser. In the following section, we will create the main component of the administrator portal that leverages visit data.
Displaying visit statistics
The administrator portal will display visit statistics on its main component with a graph. We will use the ng2-charts library for visualizing data on a pie chart. Let's see how to add the required functionality in that component:
- Install the ng2-charts library using the following command:
npm install ng2-charts [email protected]
The preceding command will also install the chart.js library, which is at the core of the ng2-charts library.
- Open the admin.module.ts file and import PoiModule from the @packt/poi namespace and ChartsModule from the ng2-charts npm package:
import { NgModule } from '@angular/core';
import { CommonModule } from '@angular/common';
import { AdminComponent } from './admin.component';
import { RouterModule } from '@angular/router';
import { PoiModule } from '@packt/poi';
import { ChartsModule } from 'ng2-charts';
@NgModule({
imports: [
CommonModule,
RouterModule.forChild([
{ path: '', component: AdminComponent }
]),
PoiModule,
ChartsModule
],
declarations: [
AdminComponent
],
})
export class AdminModule {}
- Open the angular.json file and add the following property in the options property of the build section:
"options": {
"outputPath": "dist/apps/tour",
"index": "apps/tour/src/index.html",
"main": "apps/tour/src/main.ts",
"polyfills": "apps/tour/src/polyfills.ts",
"tsConfig": "apps/tour/tsconfig.app.json",
"assets": ["apps/tour/src/favicon.ico",
"apps/tour/src/assets"],
"styles": [
"./node_modules/@angular/material/prebuilt-
themes/deeppurple-amber.css",
"apps/tour/src/styles.css"
],
"scripts": [],
"allowedCommonJsDependencies": ["chart.js"]
}
The chart.js npm package is a CommonJS module. The Angular CLI displays a warning when using a CommonJS module because it can prevent it from optimizing your application, resulting in large bundle sizes. Setting the allowedCommonJsDependencies option will not display the warning while building the application.
- Open the admin.component.ts file and add the following import statements:
import { Component, OnDestroy, OnInit } from '@angular/core';
import { Store } from '@ngrx/store';
import { PoiActions, PoiEntity, PoiSelectors } from
'@packt/poi';
import { Subscription } from 'rxjs';
- Modify the AdminComponent class so that it interacts with the application store for getting POI data:
export class AdminComponent implements OnInit,
OnDestroy {
private subscription: Subscription | undefined;
constructor(private store: Store) { }
ngOnInit(): void {
this.subscription = this.store.select(
PoiSelectors.getAllPoi).subscribe();
this.store.dispatch(PoiActions.init());
}
ngOnDestroy() {
this.subscription?.unsubscribe();
}
}
In the preceding code, we subscribe to the getAllPoi selector manually using a subscription property instead of using an async pipe. In this case, we must also unsubscribe manually in the ngOnDestroy life cycle hook of the component, using the unsubscribe method. If we fail to do so, we may introduce a memory leak in our application.
Now that we have set up the interaction with the store, we can get statistics from the local storage and create our pie chart:
- Execute the following command of Nx CLI to create a service in the admin library:
nx generate service admin --project=admin
- Open the admin.service.ts file and add the following import statement:
import { PoiEntity } from '@packt/poi';
- Create a method to get all saved traffic statistics from the local storage of the browser:
getStatistics(pois: PoiEntity[]): number[] {
return pois.map(poi => {
const stat = localStorage.getItem('tour-' +
poi.id) ?? 0;
return +stat;
});
}
In the preceding method, we get the traffic of each POI based on its id property. We convert the stat property to a number by adding the + prefix.
- Open the admin.component.ts file and add the following import statements:
import { Label } from 'ng2-charts';
import { AdminService } from './admin.service';
- Declare component properties for the labels and the actual data that we will display on the pie graph and inject AdminService in the constructor of the AdminComponent class:
data: number[] = [];
labels: Label[] = [];
constructor(private store: Store, private
adminService: AdminService) { }
- Create a component method to set the labels and the data of the graph:
private buildChart(pois: PoiEntity[]) {
this.labels = pois.map(poi => poi.name);
this.data = this.adminService.getStatistics(pois);
}
The graph labels are the titles of the POI, and the data is coming from the getStatistics method of the adminService variable.
- Call the buildChart method inside the subscribe method of the getAllPoi selector:
ngOnInit(): void {
this.subscription = this.store.select(
PoiSelectors.getAllPoi).subscribe(pois => {
this.buildChart(pois);
});
this.store.dispatch(PoiActions.init());
}
- Finally, open the admin.component.html file and replace its content with the following HTML template:
<div class="chart" *ngIf="data.length">
<canvas height="100" baseChart
[data]="data"
[labels]="labels"
chartType="pie">
</canvas>
</div>
In the preceding template, we use the baseChart directive to convert the canvas element to a graph. The graph is set to pie using the chartType property and the data and labels properties from the respective component properties.
If we now run our application using Nx Console, visit some POI from the map, and switch to the http://localhost:4200/admin URL, we should see the following output:
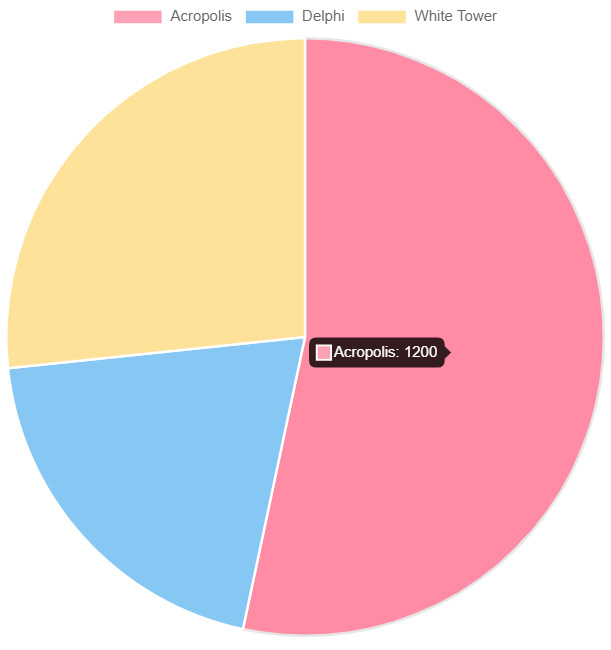
Figure 8.21 – POI statistics
An administrator can now have a complete overview of how each POI is doing from a visit perspective. Our administrator portal has now been completed. The visitor portal can interact with the store and save visit statistics for each POI in the local storage of the browser. The administrator portal can then fetch that data and display it on a pie chart using the ng2-charts library.
Summary
In this project, we built an enterprise portal application for visiting POIs on a map and displaying visit statistics for each one. First, we saw how to use Nx Dev Tools to scaffold a new Nx monorepo application. Then, we created two different portals for our application, a visitor and an administrator one. We learned how to use the NgRx library in the visitor portal to maintain and manage the state of our application. Finally, we saw how to use a chart library in the administrator portal for displaying statistics for each POI.
In the next chapter, we will use the Angular CLI to build a UI component library using the Angular CDK.
Practice questions
Let's take a look at a few practice questions:
- Which npm package creates an Nx monorepo application?
- What are the differences between the Angular CLI and Nx CLI?
- How can we enable NgRx in the library of a monorepo?
- How do we select data from the store?
- How do we interact with HTTP in NgRx?
- Where do we modify the state of an NgRx store?
- What is the difference between a root and a feature state?
- Which npm package can we use for Google Maps in an Angular application?
- How can we subscribe to an NgRx selector manually?
- Which component do we use for displaying additional information on Google Maps?
Further reading
Here are some links to build upon what we learned in the chapter:
- Nx Dev Tools: https://nx.dev/
- Nx CLI: https://nx.dev/latest/angular/getting-started/cli-overview
- NgRx: https://ngrx.io/
- NgRx store guide: https://ngrx.io/guide/store
- Angular Material card component: https://material.angular.io/components/card/overview
- Angular Google Maps: https://github.com/angular/components/tree/master/src/google-maps
- ng2-charts: https://valor-software.com/ng2-charts/
- create-nx-workspace: https://www.npmjs.com/package/create-nx-workspace