HyperText Markup Language (HTML) was created in 1990 by Tim Berners-Lee—a famous physics and computer scientist—while he was working at CERN, the European Organization for Nuclear Research. He was motivated about discovering a better solution to share information among the researchers of the institution. To support that, he also created the HyperText Transfer Protocol (HTTP) and its first server, giving rise to the World Wide Web (WWW).
In the beginning, HTML was used just to create static documents with hyperlinks, allowing the navigation between them. However, in 1993, with the creation of Common Gateway Interface (CGI), it became possible to exhibit dynamic content generated by server-side applications. One of the first languages used for this purpose was Perl, followed by other languages such as Java, PHP, Ruby, and Python.
Because of that, interacting with any complex application through the browser wasn't an enjoyable task and it was hard to experience the same level of interaction provided by desktop applications. However, the technology kept moving forward, at first with technologies such as Flash and Silverlight, which provided an amazing user experience through the usage of plugins.
At the same time, the new versions of JavaScript, HTML, and CSS had been growing in popularity really fast, transforming the future of the Web by achieving a high level of user experience without using any proprietary plugin.
AngularJS is a part of this new generation of libraries and frameworks that came to support the development of more productive, flexible, maintainable, and testable web applications.
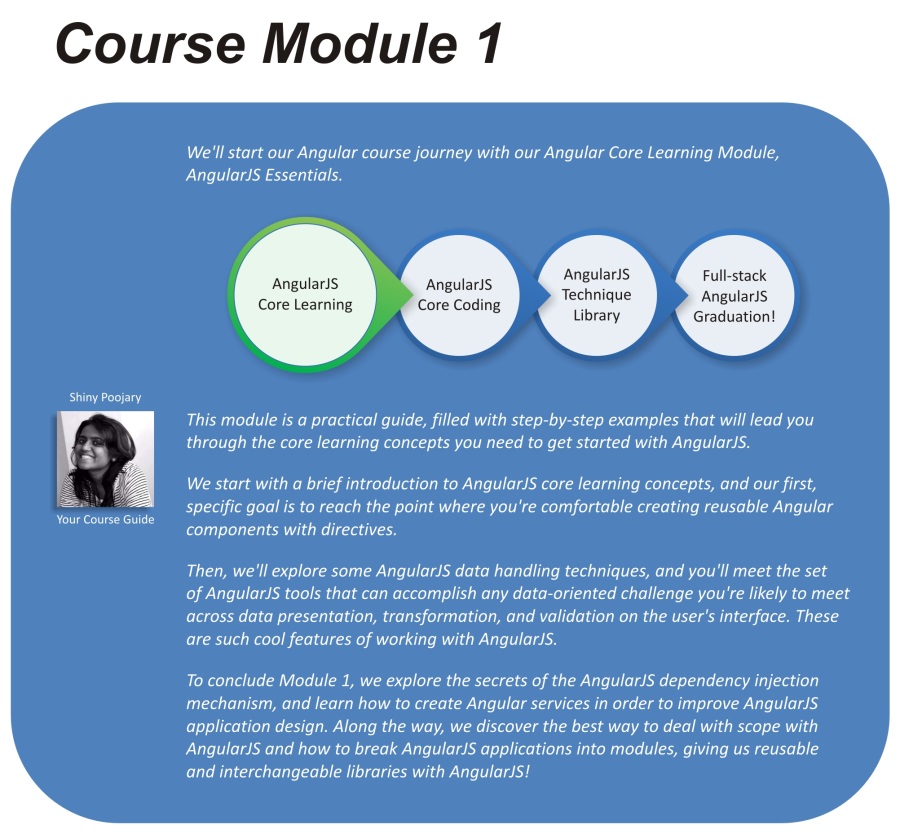
This Lesson will introduce you to the most important concepts of AngularJS. The topics that we'll be covering in this Lesson are:
- Introduction to AngularJS
- Understanding the architectural concepts
- Setting up the framework
- Organizing the code
Created by Miško Hevery and Adam Abrons in 2009, AngularJS is an open source, client-side JavaScript framework that promotes a high-productivity web development experience.
It was built on the belief that declarative programming is the best choice to construct the user interface, while imperative programming is much better and preferred to implement an application's business logic.
To achieve this, AngularJS empowers traditional HTML by extending its current vocabulary, making the life of developers easier.
The result is the development of expressive, reusable, and maintainable application components, leaving behind a lot of unnecessary code and keeping the team focused on the valuable and important things.
In 2010, Miško Hevery was working at Google on a project called Feedback. Based on Google Web Toolkit (GWT), the Feedback project was reaching more than 17.000 lines of code and the team was not satisfied with their productivity. Because of that, Miško made a bet with his manager that he could rewrite the project in 2 weeks using his framework.
After 3 weeks and only 1.500 lines of code, he delivered the project! Nowadays, the framework is used by more than 100 projects just at Google, and it is maintained by its own internal team, in which Miško takes part.
The name of the framework was given by Adam Abrons, and it was inspired by the angle brackets of the HTML elements.
It's been a long time since the famous Model-View-Controller (MVC) pattern started to gain popularity in the software development industry and became one of the legends of the enterprise architecture design.
Basically, the model represents the knowledge that the view is responsible for presenting, while the controller mediates the relationship between model and view. However, these concepts are a little bit abstract, and this pattern may have different implementations depending on the language, platform, and purpose of the application.
After a lot of discussions about which architectural pattern the framework follows, its authors declared that from now on, AngularJS would adopt Model-View-Whatever (MVW). Regardless of the name, the most important benefit is that the framework provides a clear separation of the concerns between the application layers, providing modularity, flexibility, and testability.
In terms of concepts, a typical AngularJS application consists primarily of a view, model, and controller, but there are other important components, such as services, directives, and filters.
The view, also called template, is entirely written in HTML, which provides a great opportunity to see web designers and JavaScript developers working side by side. It also takes advantage of the directives mechanism, which is a type of extension of the HTML vocabulary that brings the ability to perform programming language tasks such as iterating over an array or even evaluating an expression conditionally.
Behind the view, there is the controller. At first, the controller contains all the business logic implementation used by the view. However, as the application grows, it becomes really important to perform some refactoring activities, such as moving the code from the controller to other components (for example, services) in order to keep the cohesion high.
The connection between the view and the controller is done by a shared object called scope. It is located between them and is used to exchange information related to the model.
The model is a simple Plain-Old-JavaScript-Object (POJO). It looks very clear and easy to understand, bringing simplicity to the development by not requiring any special syntax to be created.
The following diagram exhibits the interaction between the AngularJS architecture components:
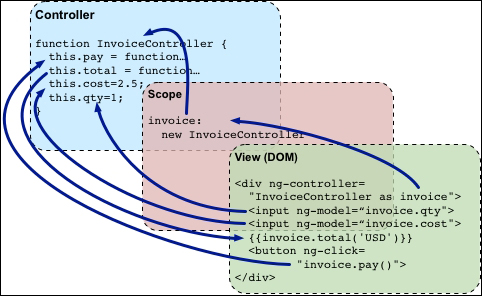
Source: Official documentation (www.angularjs.org)
The configuration process is very simple and in order to set up the framework, we start by importing the angular.js script to our HTML file. After that, we need to create the application module by calling the module function from the Angular's API, with its name and dependencies.
With the module already created, we just need to place the ng-app attribute with the module's name inside the html element or any other element that surrounds the application. This attribute is important because it supports the initialization process of the framework that we will study in the later Lessons.
In the following code, there is an introductory application about a parking lot. At first, we are able to add and also list the parked cars, storing its plate in memory. Throughout the book, we will evolve this parking control application by incorporating each newly studied concept.
Note
Downloading the example code
The code files for all the four parts of the course are available at https://github.com/shinypoojary09/AngularJS_Course.git.
index.html – Parking Lot Application

<!doctype html>
<!-- Declaring the ng-app -->
<html ng-app="parking">
  <head>
    <title>Parking</title>
    <!-- Importing the angular.js script -->
    <script src="angular.js"></script>
    <script>
      // Creating the module called parking
      var parking = angular.module("parking", []);
      // Registering the parkingCtrl to the parking module
      parking.controller("parkingCtrl", function ($scope) {
        // Binding the car's array to the scope
        $scope.cars = [
          {plate: '6MBV006'},
          {plate: '5BBM299'},
          {plate: '5AOJ230'}
        ];
        // Binding the park function to the scope
        $scope.park = function (car) {
          $scope.cars.push(angular.copy(car));
          delete $scope.car;
        };
      });
    </script>
  </head>
  <!-- Attaching the view to the parkingCtrl -->
  <body ng-controller="parkingCtrl">
    <h3>[Packt] Parking</h3>
    <table>
      <thead>
        <tr>
          <th>Plate</th>
        </tr>
      </thead>
      <tbody>
        <!-- Iterating over the cars -->
        <tr ng-repeat="car in cars">
          <!-- Showing the car's plate -->
          <td>{{car.plate}}</td>
        </tr>
      </tbody>
    </table>
    <!-- Binding the car object, with plate, to the scope -->
    <input type="text" ng-model="car.plate"/>
    <!-- Binding the park function to the click event -->
    <button ng-click="park(car)">Park</button>
  </body>
</html>
Apart from learning how to set up the framework in this section, we also introduced some directives that we are going to study in the Lesson 2, Creating Reusable Components with Directives.
The ngController directive is used to bind the parkingCtrl controller to the view, whereas the ngRepeat directive iterates over the car's array. Also, we employed expressions such as {{car.plate}} to display the plate of the car. Finally, to add new cars, we applied the ngModel directive, which creates a new object called car with the plate property, passing it as a parameter of the park function, called through the ngClick directive.
To improve the loading page's performance, you are recommended to use the minified and obfuscated version of the script that can be identified by angular.min.js. Both minified and regular distributions of the framework can be found on the official site of AngularJS (http://www.angularjs.org) or in the Google Content Delivery Network (CDN).
As soon as we start coding our views, controllers, services, and other pieces of the application, as it used to happen in the past with many other languages and frameworks, one question will certainly come up: "how do we organize the code?"
Most software developers struggle to decide on a lot of factors. This includes figuring out which is the best approach to follow (not only regarding the directory layout, but also about the file in which each script should be placed), whether it is a good idea to break up the application into separated modules, and so on.
This is a tough decision and there are many different ways to decide on these factors, but in most cases, it will depend simply on the purpose and the size of the application. For the time being, our challenge is to define an initial strategy that allows the team to evolve and enhance the architecture alongside application development. The answers related to deciding on the factors will certainly keep coming up as time goes on, but we should be able to perform some refactoring activities to keep the architecture healthy and up to date.
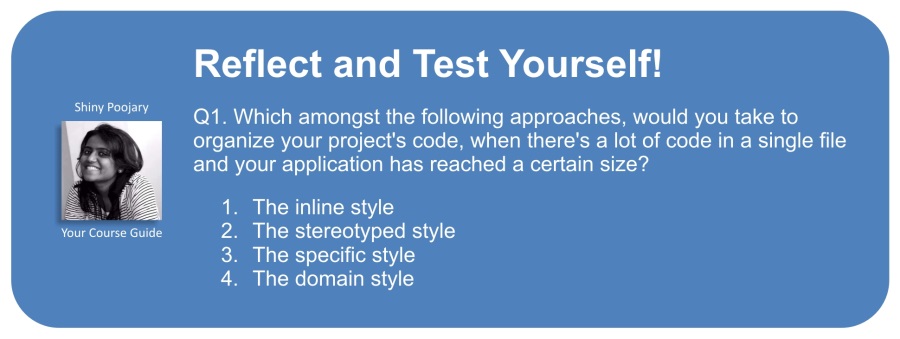
There are many ways, tendencies, and techniques to organize the project's code within files and directories. However, it would be impossible to describe all of them in detail, and we will present the most used and discussed styles in the JavaScript community.
Throughout the book, we will apply each of the following styles to our project as far as it evolves.
Imagine that you need to develop a fast and disposable application prototype. The purpose of the project is just to make a presentation or to evaluate a potential product idea. The only project structure that we may need is the old and good index.html file with inline declarations for the scripts and style:
app/                     -> files of the application
  index.html             -> main html file
  angular.js             -> AngularJS script
If the application is accepted, based on the prototype evaluation, and becomes a new project, it is highly recommended that you create a whole structure from scratch based on one of the following styles.
This approach is appropriate for small apps with a limited number of components such as controllers, services, directives, and filters. In this situation, creating a single file for each script may be a waste. Thus, it could be interesting to keep all the components in the same file in a stereotyped way as shown in the following code:
app/                    -> files of the application
  css/                  -> css files
    app.css             -> default stylesheet
  js/                   -> javascript application components
    app.js              -> main application script
    controllers.js      -> all controllers script
    directives.js       -> all directives script
    filters.js          -> all filters script
    services.js         -> all services script
  lib/                  -> javascript libraries
    angular.js          -> AngularJS script
  partials/             -> partial view directory
    login.html          -> login view
    parking.html        -> parking view
    car.html            -> car view
  index.html            -> main html file
With the application growing, the team may choose to break up some files by shifting to the specific style step by step.
Keeping a lot of code inside the same file is really hard to maintain. When the application reaches a certain size, the best choice might be to start splitting the scripts into specific ones as soon as possible. Otherwise, we may have a lot of unnecessary and boring tasks in the future. The code is as follows:
app/                    -> files of the application
  css/                  -> css files
    app.css             -> default stylesheet
  js/                   -> javascript application components
    controllers/        -> controllers directory
      loginCtrl.js      -> login controller
      parkingCtrl.js    -> parking controller
      carCtrl.js        -> car controller
    directives/         -> directives directory
    filters/            -> filters directory
    services/           -> services directory
    app.js              -> main application script
  lib/                  -> javascript libraries
    angular.js          -> AngularJS script
  partials/             -> partial view directory
    login.html          -> login view
    parking.html        -> parking view
    car.html            -> car view
  index.html            -> main html file
In this approach, if the number of files in each directory becomes oversized, it is better to start thinking about adopting another strategy, such as the domain style.
With a complex domain model and hundreds of components, an enterprise application can easily become a mess if certain concerns are overlooked. One of the best ways to organize the code in this situation is by distributing each component in a domain-named folder structure. The code is as follows:
app/                    -> files of the application
  application/          -> application module directory
    app.css             -> main application stylesheet
    app.js              -> main application script
  login/                -> login module directory
    login.css           -> login stylesheet
    loginCtrl.js        -> login controller
    login.html          -> login view
  parking/              -> parking module directory
    parking.css         -> parking stylesheet
    parkingCtrl.js      -> parking controller
    parking.html        -> parking view
  car/                  -> car module directory
    car.css             -> car stylesheet
    carCtrl.js          -> car controller
    car.html            -> car view
  lib/                  -> javascript libraries
    angular.js          -> AngularJS script
  index.html            -> main html file