
Chapter 8 was about securing devices. Part of security is securing the connections between devices. Chapter 10 was about directory services. Most of the protocols for single sign-on for directory services were developed in a time when most of an organization’s devices were on a single network and most resources were located behind a firewall. Today, devices are spread all around the world, and devices access multiple sites built by multiple Software as a Service vendors, who organizations want to use the same credentials to access their account as they use when those users are in the office.
The evolution of single sign-on has been toward thinking about those user accounts in a different way. We now use the term Identity and the engines that provide those identities as Identity Providers, or IdPs. Windows, Linux, and Apple are all developing technology in their operating systems to keep up with the rapidly changing pace of IdPs with new standards being developed on the fly to meet the needs of an increasingly global workforce.
We also looked at personalizing the user environment in Chapter 10. Part of that user environment now includes accounting for those identities and crafting a workflow as seamless as possible between the apps we run on devices and the sites we access as a routine part of doing our jobs. In this chapter, we’ll look at what an IdP is, how Apple devices work with IdPs, and what technologies can be put in place to make the lives of our coworkers better, starting with the fundamental technologies required to understand an IdP properly.
Use IdPs for User Identities
Okta
Ping Identity
Microsoft Azure
Google
OneLogin
VMware
Salesforce Communities
Duo Security
The real promise of an IdP is that by providing single sign-on services, an IdP removes the need for passwords. As usual, the IT industry can’t just have one way of doing things, so most IdPs support two main protocols: OpenID Connect (built on top of OAuth 2.0) and SAML. As an example of working with both, https://developer.okta.com/docs/api/resources/oidc is the OpenID Connect documentation for Okta, and www.okta.com/integrate/documentation/saml/ is the SAML documentation. Developers who decided to implement single sign-on into their web apps using either can then allow Okta to connect to them and federate customers who decide to use both services. Since much of the technology used in an IdP came out of the REST frameworks, we’ll go in deeper with REST.
REST and Web Authentication
When you open a web page, a web browser once accessed a flat HTML file from a web server and then rendered what was on that web server in your web browser. As “the Web” matured, different pieces of data in those pages told browsers to do different things. At this point, most pages you view access a page that appears to be a flat HTML file, when it is in fact a dynamic representation of information created by dozens (if not thousands) of scripts. Those scripts are often lightweight pieces of code processed using Application Programming Interfaces, or APIs.
Some APIs are publicly accessible. Others require authentication and authorization. The authentication is usually sent in the header of a request for information from the API endpoint. The technology behind modern web authentication has been adopted to work with standard REST endpoints. REST, or representational state transfer, is a standard for communicating between websites. One of the easiest ways to send data to a REST endpoint is using the curl command through the macOS Terminal application.
The output provides the data available at that endpoint the POST command is sent to. There are multiple types of web authentication that have become standard over the past few years. Once a session has been authenticated, most standard web applications now communicate by sending small pieces of data in a normalized JSON format, which we’ll describe in the next section of this chapter.
JSON
Because we need more structure, we have various formats, such as SOAP (short for Simple Object Access Protocol) or the more modern JSON. JavaScript Object Notation (or json for short) is a lightweight format for exchanging data that has become a standard for the Web. Similar in origin to the XML used in a property list or SOAP, json removes the need for all the <> symbols and definitions, making it easier on the human eyes while still easy to parse and generate programmatically.
Those claims submitted in a JWT are encoded in a json object, signed using a JWS or JSON Web Signature and encrypted using JWE (or JSON Web Encryption).
Use JWTs As Service Accounts
Everything that is old becomes new again. Much as RADIUS, an earlier authentication type for wireless networks and VPNs, used a preshared key to validate a party prior to decryption and much as Kerberos had clients submit a ticket granting ticket rather than a password, JWT is a modern evolution to that same type of transaction, complete with its own acronyms but without the trappings of 20–30 years of technical debt. In short, a JWT is a credential used to grant access to a resource.
In the preceding example, we snuck something else in there: iat indicates the time the token was issued, and exp indicates the expiration time of the token. The signature is where it gets a bit more cryptographically challenging. To get the signature, you base64url encode the header (which we did by piping it into openssl, but next time adding the payload). You then concatenate the two using a period to indicate a field separator and then encrypt the whole thing with a secret key. The standard encryption algorithm in our experience seems to be HMAC-SHA256, but you can go as high as PS384 if you have the horsepower to do all that work on the fly for all the transactions that might come through.

A screenshot titled J W T contains two parts. On the left is the encoded column, while on the right is the decoded column. The decoded columns contain the header, payload, and verify signature parts. The text on the left corner reads Signature verified.
JWT.io
Another great project is jwtbuilder, which does much of the same but without hitting the website, at http://jwtbuilder.jamiekurtz.com. There are different schemas for JWTs, so you might see “Authorization: Bearer” in the header of a user agent (e.g., via Postman). We’ll take a look at obtaining bearer tokens next.
Bearer Tokens
But if these tokens are used to connect between sites, who cares about how we create a Bearer Token, how might a rest endpoint give us one, and what that token is used for? Those tokens become the foundation of OAuth, which is suddenly where words like Facebook, Okta, Azure, Amazon, and Ping Identity start to come into play.
OAuth
OAuth is short for Open Authorization and per RFC 6749 (https://tools.ietf.org/html/rfc6749) is an open standard for using tokens to authenticate and authorize services, including use over public networks such as the Internet. It was invented by then lead developer at Twitter, Blaine Cook, in 2006 so other organizations could connect to another service using their Twitter account. OAuth continued to evolve over the next few years until 2012 when Oauth 2.0 was released, which added flows for web applications, mobile devices, IoT devices, and desktop apps, making it one of the most widely used authentication platforms today.
OAuth 2 allows those applications to obtain access in a way that is limited to only what an account needs to user accounts typically using standard REST endpoints. OAuth 2 delegates the actual user authentication to the service that hosts the user account, which can then change what an application is granted to access or have an account quickly disabled. OAuth 2.0 allows for account information to be traded between services via OAuth providers, which include organizations like Amazon, Box, Dropbox, Etsy, Facebook, GitHub, Google, Instagram, LinkedIn, Microsoft, PayPal, Reddit, Salesforce.com, Stack Exchange, Trello, Twitter, and Yahoo.
Resource Owner: The Resource Owner is the user who allows (or authorizes) an application to access their account information. The Resource Owner can then identify what scope that service or application has, for example, when you authorize another site like OpenTable to use your Facebook account so you don’t have to create yet another account. When you do that, you should see a list of the permissions that other site has. You are the Resource Owner, and those permissions are scopes.
Client: The application that wants to access the information owned by the Resource Owner. In the preceding example, this would be OpenTable.
Resource Server and Authorization Server: While defined separately, these are usually hosted in the same place and are the protected user accounts that should only have access delegated to by the Resource Owner. In the preceding example, this would be Facebook. At work, this might be Okta, Ping, OneLogin, or Azure AD.
Client ID: The unique identifier for that client.
Redirect URI: The URL the authorization server calls once it’s finished processing the login. This provides an extra layer of security because the response is sent from the server to a specific URL.
Response type: Indicates that the authorization server provides an authorization code to clients which will then be used to get access tokens.
Scope: What level of access or what accesses this specifies at a granular level, the “scope” of the access to the resource, that is, are we requesting authorization to read the resources, modify the resources, etc.?
At this point, you’ve used OAuth to communicate with the web service, and you can then access additional resources without reauthenticating. If we were still using the OpenTable analogy, we’d say it’s time to go to dinner and talk about the services built on top of OAuth 2.0 and these standard token formats, which brings us to using an IdP to provide a user identity.
WebAuthn
The Web Authentication API (commonly referred to as WebAuthn) is an API specification for servers to register and authenticate a user using a public key instead of a password. WebAuthn allows servers to take use of the authentication built into a mobile device, like Apple Touch ID or Face ID, and then use a keypair from the device instead of a password when accessing a given server, such as those that host a website like Jamf Pro. The keypair is a common pair of keys with a public key as simply an identifier (kinda like a username) and the private key as a random or cryptographically generated representation of a password. Because we trust the local security of the device, we can then trust the key and a credential ID that is issued just for each server, with that pair representing an “identity.” The web server only ever receives the public key, and so if compromised, the public key isn’t useful.
WebAuthn was developed by the W3C and FIDO organizations, which added WebAuthn to FIDO2. WebAuthn is added to the Safari browsers from Apple, meaning support is now provided from Chrome, Firefox, and Microsoft Edge. Google, Mozilla, and Microsoft helped develop the standard and so released support for Chrome, Firefox, and Microsoft Edge early on. Apple first added WebAuthn support to Safari in a Technology Preview in 2018. Apple announced all Safari browsers would also support WebAuthn at WWDC in 2019. Apple further added WebAuthn functionality to Keychain to develop a feature they called Passkeys. To learn more about Passkeys, see the 2022 WWDC session introducing them: https://developer.apple.com/videos/play/wwdc2022/10092/.
OpenID Connect
OpenID Connect is a simple identity layer that sits on top of OAuth 2.0. OpenID Connect allows client devices and apps that run on those devices to verify the identity of users. This is done by authenticating to an authorization server and then receiving various pieces of metadata about the user in JSON. Those JWTs from earlier in this chapter are great for service accounts but not typically used by themselves for dynamic user authentication.
OpenID Connect is similar to the OAuth 2.0 flow we described earlier in this chapter. In addition, the authorization server (or endpoint) also provides an ID token (as well as a token endpoint) as a JWT in addition to the access token in a standard OAuth 2.0 flow. Additionally, because it’s a hosted service specifically meant to provide identity information, there is a userinfo endpoint, a logout endpoint, a keys endpoint to view public keys, and a revoke endpoint so the user can disconnect their account. The authorize endpoint is also used to refresh tokens.
The id-token is the added piece in OpenID Connect, and the userinfo endpoint can provide additional information prior to authorization when needed. Now that we’ve covered OpenID Connect, let’s look at SAML.
SAML
SAML, or Security Assertion Markup Language, uses similar signed and encrypted secure tokens for authentication and authorization data. SAML is a little older and so communicates over a standardized XML format.

A screenshot of the S A M L tool website. It contains two columns, namely S A M L TOKEN ENCODED and S A M L TOKEN DECODED. At the bottom is the S A M L INFO.
samltool.io
All that extra information you see in addition to what’s in OpenID Connect though includes a lot of standardization. Those standards mean there are shared repositories of code that developers can use to quickly build features (such as a framework for iOS development or Spring Security for Java). This also means that in some cases it’s easier for different vendors to work well with one another.

A screenshot explains how to connect Kandji with a S C I M provider. The text at the center reads Copy token and configure with your identity provider. Below is the password textbox, and at the bottom is the checkbox.
Configuring SCIM in Kandji

A screenshot of the jump cloud window with pricing tab is active. The S S O option is selected in the left pane, and a identity management tab is active.
.
The most important thing to know about OpenID Connect and SAML is that if you configure everything properly, most of the work will happen behind the scenes, and administrators only need to know the preceding terms to fill in the paths and select the correct fields when configuring an IdP to work with web apps. Most third-party providers will have support teams to help configure those settings as needed. Now that we’ve covered enough of what’s happening behind the scenes, we should have enough information to set up an IdP properly.
Cookies
A cookie is a small amount of data that a website creates and stores on your computer using a special handler built into your web browser. Cookies can do a number of things, but the most common is to store login data, such as a username, or some kind of session tracking information. Cookies can also store preferences, a key to remember your identity, or a callback URL.
There are session and persistent cookies. Session cookies are deleted whenever you close a browser and often store information like shopping carts or callbacks. These are deleted when the browser closes. Persistent cookies still have an expiration date but are typically used to remember an identity, which is usually a key used to derive personal information on the server.

A screenshot of a privacy settings window has a dialog box reads, these websites have stored data that can be used to track your browsing. Dropbox dot com is typed in the search window.
Cookies in Safari
In Safari, session cookies are stored in /Users/ce/Library/Caches/com.apple.Safari, and persistent cookies are stored in /Users/ce/Library/Cookies. These directories are protected, and so you cannot browse inside them. Since cookies are stored in a different location for each web browser, if you switch browsers, new cookies will need to be created. Apple has put cookies under privacy and made it difficult to access them. While disabling cookies does provide additional privacy, it can cause various websites to stop working as intended, especially those of identity providers.
ASWebAuthSession
ASWebAuthenticationSession is an API that launches a Safari View Controller for a sign-in URL, making it easier to authenticate users in a low-code scenario. That provides the user with an authentication dialog that allows a user to authenticate through a service, such as an OAuth provider. Upon a successful authentication, the OAuth service responds with an auth token and fires up a completion handler. To use ASWebAuthenticationSession, first read https://developer.apple.com/documentation/authenticationservices/aswebauthenticationsession and then import AuthenticationServices into a project.
This goes in the code wherever you want the login window to appear. All cookies that are accessed using ASWebAuthenticationSession other than session cookies can then be shared with the web browser. As we covered earlier in the chapter, according to the developer, those cookies can then be used to store different types of metadata.
There are much better and more thorough handlers out there such as https://github.com/OAuthSwift/OAuthSwift/blob/master/Sources/OAuthSwiftURLHandlerType.swift. The preceding code was really mostly meant to show the well-known endpoints for OAuth in use, how the token is passed, and the callback. The code to get much of this working is fairly straightforward for developers. It gets challenging though for developers to read between the lines of a rapidly changing ecosystem. Tools like Postman make it easier to spoof some of these methods of persistence and substantiation of new objects, but one wrong line of code could leak information or the ability to spoof a connection
Now that we better understand what the IdP is and how it works, let’s actually look at how it works to configure aspects of an Apple deployment with a cloud provider. To show a standard identity provider in action, we’ll log in to an existing Azure Active Directory account.
Work with Azure Active Directory
The first part of this chapter was about the underlying technology used for modern authentication. Previous chapters covered what we might call “legacy authentication,” and solutions like Okta’s Fastpass help bridge the gap (to set up Okta, see Appendix E).
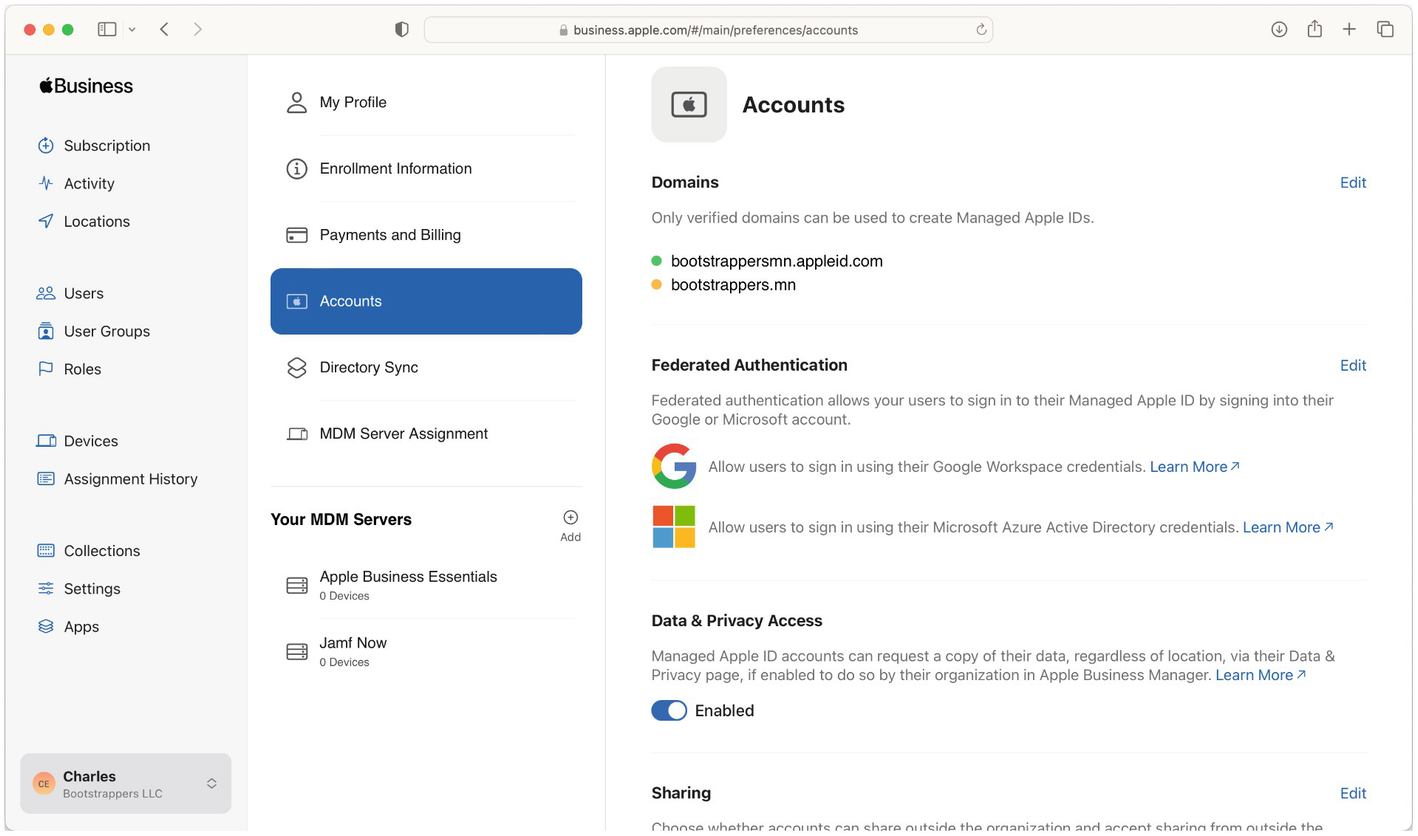
A screenshot of the business page on the apple website. The accounts tab is selected in the page options. Domains and authentication methods are selected on the right.
Managed Apple ID setup in Apple Business Manager

A screenshot of the jump cloud console explains the authentication endpoint configuration. On the left panel, the S S O option is selected. On the right, the Identity Management section is present under the Pricing tab, in the jam f new application panel. The Configuration settings section includes Test Connection and Activate option. The S C I M type A P I and S C I M version 2.0 are selected.
Select between Google Workspace and Azure

A screenshot of the Apple Business Manager portal explains how to configure the Managed Apple I D in the Apple Business Manager. The direction to open the federated authentication on the right is as follows. In the bottom left corner, Charles is selected. Selected the Accounts option and then the Edit button.
Link accounts to the IdP

A screenshot of the Azure Active Directory admin center. The direction to open the Audit Logs Details screen is present. On the left, Dashboard is selected, then Bootstrappers. M N, and then the Audit Logs option.
Provide the necessary permissions

A screenshot titled federated authentication illustrates the two sign-in options. They are Google Workspace and Microsoft Azure A D. At the bottom, and the text reads Connect.
Check the audit logs to make sure it works
Now the identity provider has been provided. The Managed Apple IDs that are created can use existing credentials from within Azure Active Directory. These can coexist with personal Apple IDs on devices owned by an employee and provide access to some iCloud features. Accounts are created the first time the user signs in to an Apple device. Those accounts won’t have Email but will have FaceTime and iMessage access. The accounts can collaborate with others who use iCloud apps and be disabled when the underlying Azure account is disabled. Some features like Apple Pay, Wallet, Find My, and iCloud Keychain will not work on these types of accounts as each of those is handled either by a personal Apple ID or by a feature within an MDM, like Lost Mode (compared to Find My).
The domain will need to be verified. This is done on the same screen, by creating a text record in the DNS for the domain registered. Any existing personal Apple IDs in the domain would then receive an email to change the email address so it doesn’t use the TLD of the domain that was just configured. This can be tricky as most users who have used Apple devices in an organization, especially those that used older versions of VPP, likely have accounts. However, it’s a process to start sooner rather than later. If there is an existing personal Apple ID in the domain, a Managed Apple ID will not be provisioned until that situation is resolved. Once the Azure tenant and Apple Business Manager are linked, it’s time to set up SCIM.

A screenshot titled connect to Microsoft Azure Active Directory illustrates how to sign in with Microsoft and log in with administrative rights. The Sign in with Microsoft option is at the center.
Set up SCIM

A screenshot of the Permissions Requested window. A Microsoft logo is at the top left. Below are the necessary permissions listed. The text at the bottom reads Cancel and Accept.
Federate domains
It’s then possible to provision Managed Apple IDs. There are a number of other SAML, OIDC, and identity providers. We cover Okta in Appendix E, but there’s also JumpCloud, Auth0, Ping Identity, and a host of others. Once Enterprise Applications are federated, users can see SAML responses from Apple, Microsoft, Google, and others.
View SAML Responses
Open Safari.
From the Safari menu, click Preferences.
Click the Advanced tab.
Check the box for “Show Develop menu in the menu bar.”
Select Show Web Inspector from the newly displayed Develop menu.
Select the Resources tab.
Log in to a site.
View the Requests by filtering for SAMLResponse.
Decode the response from base64.
Chances are you won’t be able to decipher much of the SAML response. This is by design, and as you get more accustomed to troubleshooting SAML responses, you’ll pick up a few tricks here and there. One of our favorite would be SAML Tracer.

A screenshot of the Apple Business Manager portal explains how to set up S C I M. The path to open the Directory Sync screen on the right is as follows. From preference, the Directory Sync is selected, then the Edit button.
SAML Tracer
The same plug-in is available for Chrome browsers as well. Now that we’ve gotten used to SAML, let’s look at OAuth, starting with using Jamf Connect for the Mac.
Use Jamf Connect to Authenticate to an IdP at the Login Window
Jamf Connect Login: Login window that helps administrators create accounts on machines and authenticates an end user to an identity provider.
Jamf Connect Verify: Used for keeping the local account and web identity provider in sync. Then it handles the authentication and any following authorization for handling Kerberos tickets, linking legacy identity to more modern forms of identities.
Jamf Connect Sync: Does the same as the preceding tool, but specifically for Okta.

A screenshot of Directory Sync illustrates how to federate domains. The warning symbol is present below the text Microsoft Azure A D Sync. The Generate Token link is present below the Tokens section as well.
Jamf Connect installation
The developers of Jamf Connect have indicated to the authors of this book that they plan to merge these into one app in the next year; however, understanding them as stand-alone apps helps keep the tasks being performed separate. We’ll start with setting up Jamf Connect Login.
Configure Jamf Connect Login
The macOS login window is pluggable, meaning that developers can write tools that extend the functionality of the login window. Jamf Connect Login is an authorization plug-in for the login window, similar to a PAM module, or pluggable authentication module. There aren’t a ton of PAM modules out there, and the technology has never been standardized, but Jamf Connect Login also comes with a PAM module in order to facilitate managing the login at a sudo prompt when using Terminal. But they have been around for a long time in variants of Unix and Linux and are commonly used to integrate authentication schemes between languages and through APIs. The API being used here is the login window.
The authchanger command also supports a number of other flags such as -prelogin to provide a mechanism to use before the user interface shows up or -preAuth to give a mechanism to be used between the login interface and actual authentication (e.g., if you need to alter data prior to authentication. We won’t get into more advanced preflight and postflight scripting to customize how things work, but know that these are options as your environment matures.
Now that we’ve covered how this works once installed, we’ll customize the package for the specific identity provider and well-known URLs in use by your identity provider. To get started, customize the package for installation. We’ll use Okta to continue on with the previous walk-throughs. Start by opening the Jamf Connect DMG available from Jamf. Then open the example plist in a text editor and provide the AuthServerpreference key.

A screenshot of the S A M L tracer window. It has the list of S A M L requests at the top and the decoded S A M L responses at the bottom. At the top, the Filter resources option is selected.
PPPC options for Jamf Connect

A screenshot titled Install Jamf Connect explains the installation of Jamf Connect. It includes packages such as Menu Bar App and Login Window, and corresponding to it are the sizes of them.
Configure a Jamf Connect profile
There are lots of other keys that give the ability to get more granular with the setup experience as well, but we will leave you with some surprises for when you read the product manual. Once the package is installed and the preferences in place, it’s time to test the first login!
A screenshot illustrates the P P P C options for Jamf Connect. The enable certificate-based authentication, enable push notifications, Jamf management framework, Jamf Connect, Jamf management framework, and self-service checkboxes are selected.
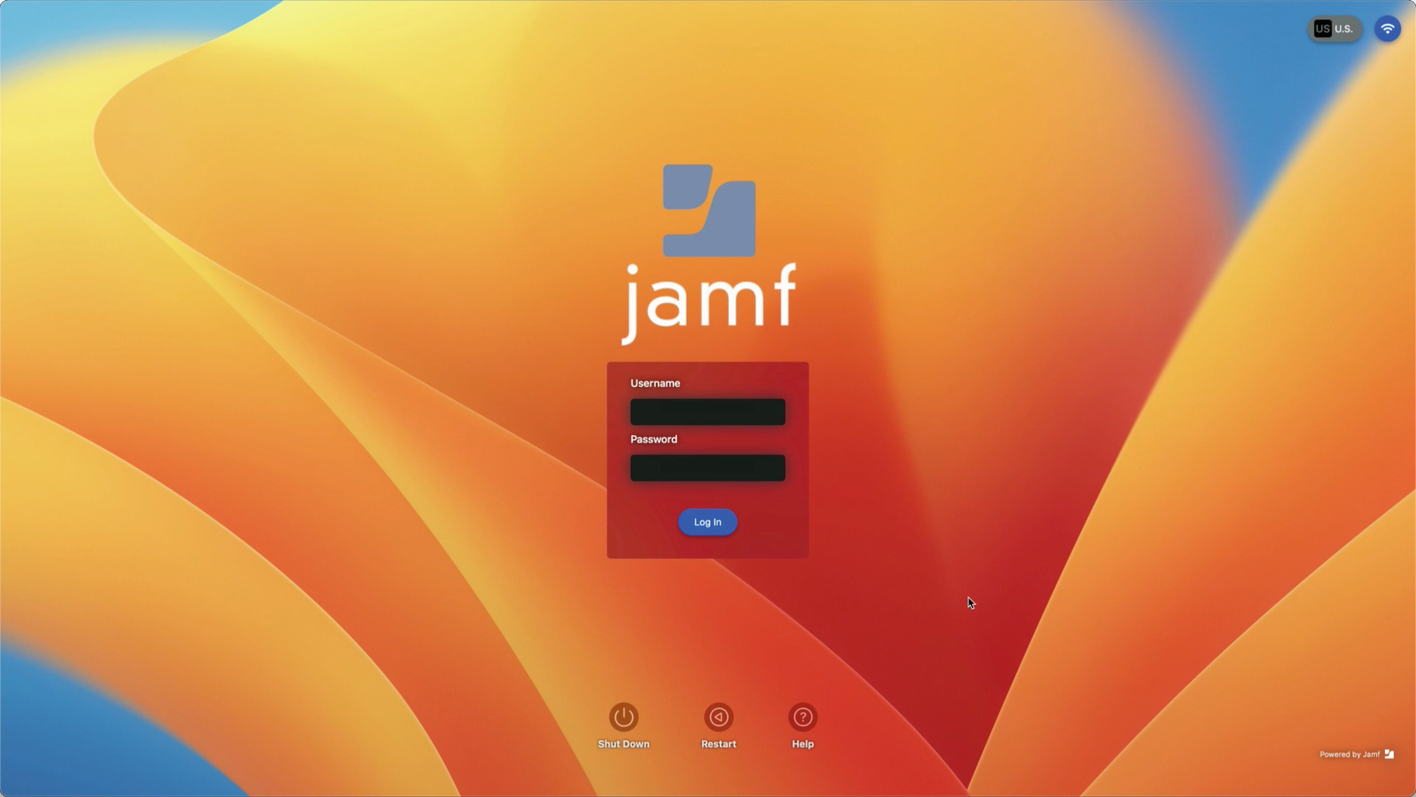
The Jamf Connect login window

A screenshot of the Jamf Connect configuration profile. On the left, select Jamf Applications. On the right, list the preference domain properties.
Multifactor authentication with Jamf Connect

A screenshot of the Jamf Connect log-in window.
Signing in with the Jamf Connect menu
This gives you enough information to troubleshoot should you need to. If you so choose (and you should since you’re paying for it), you can also get the passwords synchronized for Okta, using Jamf Connect Sync. Jamf Connect Sync is similar: a package and a profile that sends the AuthServer preference key to the com.jamf.connect.sync defaults domain. This is a string to your Okta instance. Once installed, the login window can be branded for your organization, have login policies, etc.
Jamf Connect for Mac can be useful in any Mac environment with an investment in an identity provider where Macs are used. Jamf Connect is an entirely different tool, and so we’ll cover that in the following section.
Alternatives to Jamf Connect

A screenshot illustrates the Microsoft sign-in screen for the first authentication with Jamf Connect.
Build Kandji Passport in the web interface

A screenshot titled Sign in contains the User name and password textbox for the sign-in procedure manually. The text at the center reads Connect.
Most of the tools have property lists to configure options, like this one for Kandji
Another option is what Apple calls Platform SSO, part of a more comprehensive strategy to deal with federated identities from Apple – documented at https://developer.apple.com/documentation/authenticationservices. As of the time of this writing, all of the platform single sign-on options are still in beta, and the only third-party vendor to work with it fully is Microsoft. This is built into the Microsoft Authenticator app for iOS and iPadOS devices and the Intune Company Portal for macOS-based devices. The Platform SSO extension is likely to be used by many other vendors as it’s an extension, and on the MDM side, it’s just a profile that can be easily configured.
Use Azure AD for Conditional Access
Conditional Access is a feature of Azure Active Directory that controls access to cloud-based or SaaS apps based on where a device meets a number of conditions, such as whether the device has a security posture that meets the requirements of an organization. This is also available with Google’s BeyondCorp (or BeyondTrust) service(s) and a number of other tools that isolate the security posture of a device before granting access to the user account to log in to any services.
Conditional Access allows an administrator to then build policies that are enforced at any point during the authentication and authorization process to access a resource. Gating access to content based on the security posture of a device is a growing requirement for any type of environment and is therefore a growing requirement for administrators of any device, including Apple devices. A number of MDM or identity products have then introduced features to allow for this, many leveraging the Microsoft APIs for Intune or Office 365 to gate access.
Each of those MDM developers has their own strategy and outcomes. Some have built their own app ecosystem, others have chosen to use proxies, or ZTNA (Zero Trust Network Access) solutions, where vendors pretend to be doing more complicated tasks than proxies. Some do a pure API-level integration with an identity provider or SaaS solution. Deciphering what is happening and exactly what outcomes to expect during the planning phase can then be a challenge as engineers navigate through marketing speak.
We’ll start our review of Conditional Access integrations by looking at the Jamf and Intune integration. This integration allows organizations to make sure only trusted users on Macs that meet a given security posture are given access to applications or other resources owned by an organization. This is done by flowing information from Jamf Pro into the Microsoft Intune database, which Jamf Pro pushes there using the Microsoft Graph API. Based on smart group membership access, applications are set up in Azure Active Directory, and then if a device meets requirements, they are given access to those apps. Additionally, the Jamf Self Service app can put a machine into compliance if it falls out of compliance.
Configure the Jamf Integration with Intune
There are a few requirements to be aware of before configuring the Jamf Intune Conditional Access integration. The Jamf Intune integration requires an account to access a Jamf Pro instance. This account should also have Conditional Access privileges. Additionally, you’ll need an account with Intune. Finally, you’ll need devices running a minimum of macOS 10.11 in order for machines to be configured.

A screenshot of the Kandji Passport dashboard. The library option is selected on the left navigation bar. On the right, two sections are present, namely Authentication configuration and User provisioning.
Jamf Pro settings
At the Conditional Access screen, click the Edit button. Here, you will have the following settings available. To begin the process of linking accounts, check the box for Enable Intune Integration for macOS. This enables the integration. When this setting is selected, Jamf Pro will send inventory updates to Microsoft Intune. Clear the selection if you want to disable the connection, but save your configuration once we’re done.

A screenshot lists the configuration property list. The column headers are key, type, and value.
Federation to Microsoft from Jamf Pro

A screenshot of the Jamf Pro dashboard. On the left, select the settings option. On the right, highlight conditional access in the Global Management section.
Configuring the grant type

A screenshot of the Jamf Pro dashboard illustrates the federation to Microsoft. The Global option is set to default from the Sovereign Cloud field.
Configure the Jamf Pro Connector in Azure

A screenshot contains the Permissions Requested window. A Microsoft logo is at the top left. Below are the necessary permissions listed. The text at the bottom reads Cancel and Accept.
Finalize the Intune integration settings in Jamf Pro

A screenshot represents the configuration of the Jamf Pro Connector in Microsoft Azure. On the right are the properties of the Connector in Azure.
Kandji integration with Google Workspace
Once you’ve configured settings as needed, the integration will automatically synchronize devices on a schedule and apply any necessary compliance policies to computers. A valuable testing step is to manually trigger Jamf Pro to send an inventory update to Microsoft Intune. This allows Jamf Pro to send computer inventory information to Microsoft Intune outside of the regular synchronization process. To manually send an update, just click the Send Update button once configured.
Azure Active Directory ID information for users and computers appears in the Local User Account category for a computer’s inventory information in Jamf Pro. For more on setting up this integration, see https://docs.jamf.com/10.24.1/jamf-pro/administrator-guide/Microsoft_Intune_Integration.html.
Beyond Authentication
Now that we’ve gone through how common tools provision identity information through OAuth Connect and SAML, let’s take a much more user-centric approach. Because an IdP is so integral to the future of device management, a number of device management vendors have chosen to release their own identity provider, hoping to reduce the friction required and build a better user experience for customers. MobileIron Access and VMware Identity Manager are two such products.
VMware Identity Manager works in conjunction with the VMware approach that in order to simplify the user experience, you want to provide users with one pane of glass to access web, mobile, SaaS, and legacy apps. Having a user provide credentials at provisioning time and then simply accessing those resources through Identity Manager allows VMware to save end users time and build a great user experience by using the Self Service App Store as a means to see all of that. Bolt multifactor authentication and the in-depth knowledge of what’s on a device and how the device is configured that the device management piece brings in and you have a pretty complete solution. This is the goal of Workspace ONE, using the Workspace ONE Intelligent Hub. For more on Workspace ONE, see https://docs.vmware.com/en/VMware-Workspace-ONE/index.html.
Multifactor Authentication
Multifactor authentication combines two or more independent credentials to authenticate. Think of these as something the user knows, like a password; something the user is, like a fingerprint or Face ID verification; and something a user has, like a security token. This provides a layered defense. A password can be written on a sticky note. But the chances of the sticky note making it into the hands of someone who can unlock a phone through Touch ID and accept a prompt increase the security of that transaction.
There are a variety of factors that go into the need for multifactor authentication. Maybe a local password database gets compromised. Those passwords are often reused across a number of different sites. Messaging a phone when the password is used then reduces the risk that the password alone can give an attacker access to a given resource.
An early example might be swiping an ATM card (something you have) and then entering a PIN (something you know). A modern representation would be entering a username and password in a website and then entering a code sent to your phone via text message – or to make this process even simpler now, entering your Apple ID and then just tapping Allow on your phone. While Apple began to adopt multifactor authentication with iCloud, that’s for accessing Apple services.
Many vendors are looking to give organizations access to similar levels of security. If you’re reading this book, chances are you were exposed to an RSA SecurID in your career. This was the standard in token-based multifactor authentication for a long time. But why use physical tokens when we can replace the function that those provide with an app? Salesforce Authenticator and Microsoft Authenticator are two such apps.
Microsoft Authenticator
The Microsoft Authenticator app (available for iOS and Android) is used to sign in, back up, and recover account credentials and adds a two-step verification to the signing process for integrated products. Microsoft Authenticator also has the option to require biometric (Touch ID or Face ID) or a PIN code to get that second step for verification. The administrator can choose to require that or allow a user to configure it.
The Microsoft Authenticator app also supports one-time passcodes. Here, a time-based, one-time passcode secures an online account that’s been configured to work with the TOTP standard, providing added security. An example of using this option would be an integration with GitHub. To configure GitHub for two-factor authentication, go to the Settings page, then Security, and select “Personal settings” in the sidebar. Click Enable two-factor authentication and then select the option to “Set up using an app.”
Make sure to keep the security codes when you’re prompted with them. Your account is lost if you lose them. Like really, really lost. When you see the QR code, open the Microsoft Authenticator app, select “Add account,” and then enter the text at the top of the site.
This process is similar to how you set up a SmartThings bridge to manage the lights in your home, various HomeKit-enabled devices, and other IoT-based authentication flows. The fact that you have a short amount of time to enter codes keeps the transactions secure, and the simplicity of the QR code workflow in exchange for a token keeps our coworkers from doing wonky things.
Finally, Microsoft Authenticator has the Apple Platform SSO extensions built in. As of the time of this writing, it’s one of the only tools to support this new approach to SSO, and there aren’t a lot of tools that work with it, but that should change over the course of the next few years.
MobileIron Access
MobileIron Authenticator is another such an app. MobileIron Access starts with using MobileIron Authenticator as a soft token app that replaces hard tokens with an automated setup experience that provides a one-touch activation process. Once configured, users verify login attempts with the app in much the same way that Apple prompts you on iCloud-enabled devices when you access various services for the first time on a device. Apple devices will push that notification through APNs and then aggregate information from security products, apps, the state of the device, and the user location.
This provides a framework for remediation workflows. So if a user violates a given policy, MobileIron Access will then silo the user into a group and gate access to various resources until the device no longer violates that policy. Users can run their own remediation flows and will be prompted on the device to perform given tasks that get the device back into a state where it can be trusted again.
All of this does require that each part of the ecosystem is aware of the type of transaction being performed when replacing a password with a push notification response. For example, if you’re using OAuth to provide a single sign-on to a site, and that site will send a push notification to MobileIron Authenticator, then the site needs to have code in the authentication page that does that instead of prompting the user for the password. This would then put the task of brokering the OAuth token on MobileIron instead of on a handler that runs when the login button is clicked.
Putting the job of authenticating users into a new flow is more secure and provides the benefit that the single sign-on transaction can be based on the context of the user, device, and ecosystem requesting access; however, this can limit the vendors you work with.
For more on MobileIron Access, see https://community.mobileiron.com/docs/DOC-4417 or https://help.ivanti.com/mi/help/en_us/ACC/46/gd/Content/AccessGuide/About_multi_factor_authe.htm for MobileIron Authenticator.
Conditional Access for Google Workspace
Google Workspace has an option for Conditional Access through their BeyondCorp Enterprise integration. As of the printing of this book, Google Workspace (formerly known as G Suite) doesn’t allow for creating a device in Google Directory easily. This means that you would need to routinely manually upload a list of device serial numbers in order to get devices into Google Workspace. Once devices are in Google Workspace, you can build a Google Cloud Function that takes output from a webhook and changes the state of that device.
Tools like Kandji and others can integrate with a Google Workspace domain to do things like import user accounts, but that’s using Google as an identity provider, not a Conditional Access provider – although similar functionality can be scripted among MDM providers.
These and other directory integrations with other vendors don’t get an organization all the way to a BeyondCorp integration. Instead, customers need to contact Google to buy BeyondCorp licensing or do manual integrations themselves. Once the environment is integrated with Google, so the status of a device can be seen in tools like Kandji, it can then be reported back to Google Workspace as needed. The easiest way to tackle that is to use Google’s cloud offering, GCP (Google Cloud Platform), to script device trust manually. If the device doesn’t meet the required attributes in the MDM or device management suite, then automate disabling accounts or restricting access to various resources.
Obtain Your CustomerID from Google Workspace
The first thing that’s required to work with GCP is a valid login to https://admin.google.com/. Once logged in, a CustomerID will be necessary to programmatically connect. There are a few ways to grab a CustomerID from Google Workspace. This is important when configuring SSO or when interfacing between Google Workspace, G Suite, or GCP programmatically (through their lovely API).

A screenshot of the Jamf Pro dashboard illustrates the Intune integration settings. The Enable Intune integration for macOS checkbox is enabled.
Obtain your Google URLs
Provision a Google Cloud Function Resource
Google Cloud Functions (GCFs) provide a streamlined method for running a simple microservice leveraging custom functions as well as SDKs for any Google service that can be imported into your script. Currently, node.js is the only nonbeta language you can build scripts in. Before you set up Google Cloud Functions to work with a Google Workspace domain, first provide the account of a developer with the appropriate permissions. Google Workspace has a number of features exposed to their API by importing SDKs into projects. As an example, the Admin SDK provides us with endpoints and classes that make developing microservices to perform actions in the G Suite admin portal easier. In this section, we’ll import that SDK, although the tasks for importing other SDKs are similar.
Enable the Necessary APIs

A screenshot of the Kandji dashboard illustrates the integration with Google Workspace. On the right is the integration section. The context menu below Directory Integrations lists the options such as view details, rename, sync users, and delete integration.
Configure OAuth
A screenshot titled Admin contains the security settings on the right. It includes S O with S A M L Authentication and then the Google Identity Provider details, and the entity I D as well.
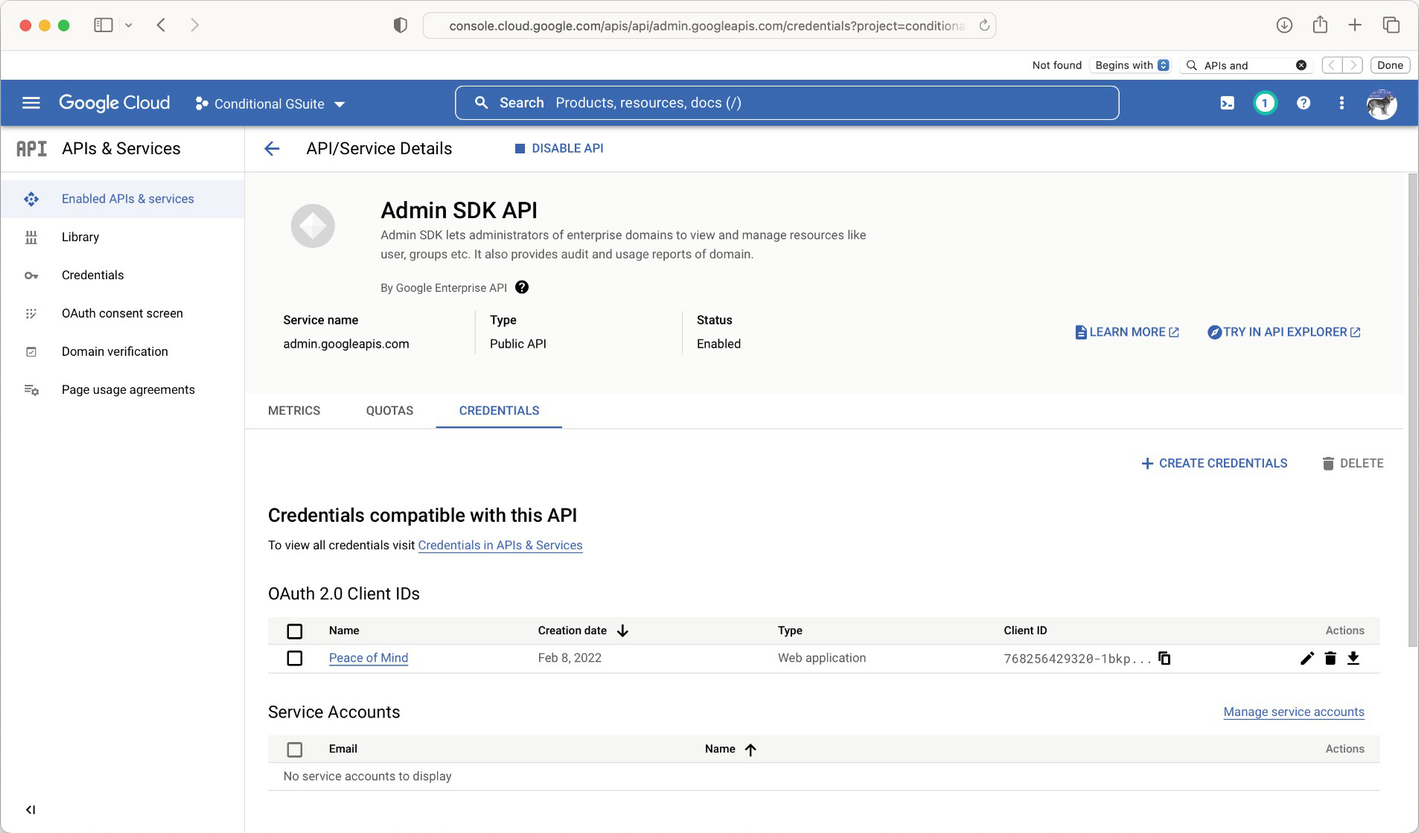
Credentials for the Admin SDK
Create a Service Account

A screenshot of the Google Cloud platform. At the center, A P I library section is present. It includes Google Chat A P I, Admin S D K A P I, Audit A P I, Cal D A V A P I, and Gmail A P I.
View service accounts

A screenshot of the Google Cloud platform contains the credentials for Admin S D K A P I.
Create a new Google service account for your Cloud Function
Provide a project name and a location (if your organization uses locations); otherwise, leave that set to No Organization and click CREATE. Now that you’ve set up a project, let’s create the actual function.
Create Your Google Cloud Function
The Google Cloud Function is then a microservice that can be called routinely, similar to the process that the Jamf Connect for iOS app performs (or any of the competitors). This might be sending some json from an app to perform a task from an app or sending a webhook to the function to perform an action. To get started with functions, click Cloud Function at the bottom of the Google Cloud Platform dashboard and then click Enable Billing. Given the word Billing is present, this will require a credit card, although less than a penny was spent writing this section of the book. If necessary, click UPGRADE.
The function API will also need to be enabled for billing, if it hasn’t already been for the account used. To do so, click Enable API. Once all of this is done, there should be a button that says Create function. Click that and then you’ll be able to provide settings for the function.
Name: How the function is called in the admin panel.
Memory allocated: How much memory the function can consume.
Trigger: Most will use HTTP for our purposes.
URL: The URL you use to call the function.
Source: The code (typically node.js) that is run.

A screenshot of the Google Cloud platform illustrates how to view the service accounts. On the left navigation bar, the Service Accounts option is selected. The Service accounts section is on the right.
Create a Google Cloud Function
The package.json allows us to leverage this function in a multitenant fashion.

A screenshot of the Google Cloud platform illustrates how to create a new Google service account for the Cloud Function. The service account details section includes the service account name, service account I D, and service account description options.
Add code to the function
Now that we have a sample up, let’s actually build a script we can paste into the function in the next section.
Write Your Script
In the following example, we’ll use the Google Directory integration with G Suite, which allows you to manage which devices have access to G Suite. This allows you to control access based on a variety of factors.
The webhook will then output when a device is approved or blocked. This could be triggered by a number of services that are integrated with an MDM, a configuration management solution, a fully separate automation-only tool, etc.
Duo Trusted Endpoints
Another approach is what Duo Security does with their Trusted Endpoints product. Trusted Endpoints allows an administrator to configure a Trusted Endpoints policy. The Trusted Endpoints policy gates access from devices to applications. This is done based on whether a certificate is on the device. As an example, the integration shown at https://duo.com/docs/jamf-jss for Jamf checks that a Jamf enrollment certificate is on a device, and some apps are only accessible if so.
A screenshot of the Google Cloud platform illustrates how to create a Google Cloud Function. It includes name, trigger, U R L, and authentication.
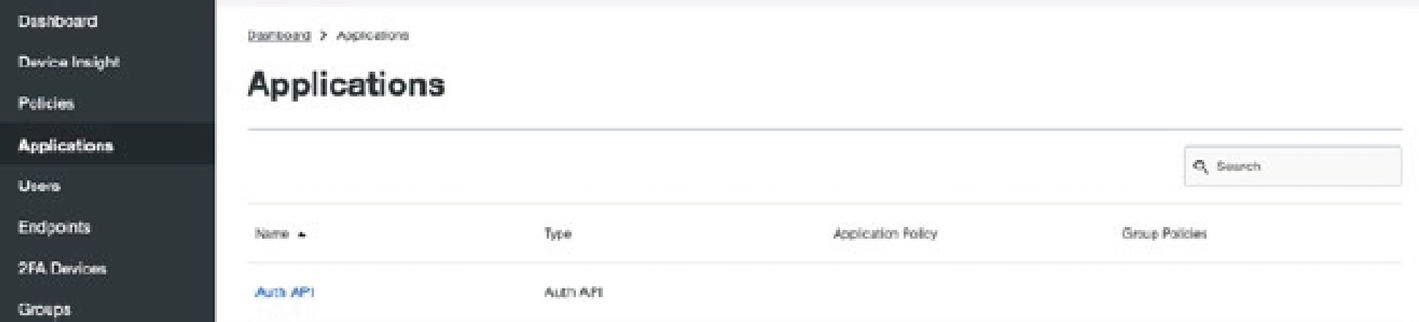
The Duo Applications list

A screenshot of the Google Cloud platform illustrates how to add code to the function. Two sections, such as run time and point on the left and right, respectively. At the bottom left corner, the text reads PREVIOUS, DEPLOY, and CANCEL.
Authentications in Duo
Duo also has integrations with Sophos, MobileIron, LANDESK, Google G Suite, AirWatch/Workspace ONE, and a generic option for providing integration with management solutions they don’t have an actual integration with (so some customization may be necessary).
Managed Apple IDs Continued
You use an Apple ID to access iCloud, install apps, and consume media in the Apple ecosystem. A Managed Apple ID is a type of Apple ID used to deploy apps and books as well as to configure devices. We’ll cover how Managed Apple IDs are used in schools and business separately.
Managed Apple IDs also allow an administrator to accept Apple’s terms and conditions on behalf of people who are usually not old enough to do so, like in schools. Managed Apple IDs that are provisioned through Apple School Manager (ASM) also come with 200GB of space in iCloud. These IDs should be unique, and many organizations create a subdomain just for them (e.g., appleid.company.com). But one of the most helpful is that Managed Apple IDs can be generated in bulk.
Managed Apple IDs in Schools
Managed Apple IDs require device supervisions and DEP enrollment. Once set up, administrators can assign VPP licenses to Managed Apple IDs for books and apps. However, students can’t buy apps or books on their own. There are some teacher-centric options for Managed Apple IDs. Teachers can reset Managed Apple ID passwords through the Classroom app and collaborate with students in Keynote, Numbers, and Pages.
As mentioned, each Managed Apple ID should be unique (as with MAIDs for Apple Business Manager). This involves a unique username within a subdomain and not using an existing Apple ID. You can use modifiers (e.g., instead of using [email protected], you can use [email protected]). This allows some options around moving an address for an existing Apple ID out of the way and then bringing it back. Or you could walk away from the old domain and move to [email protected].
Managed Apple IDs for Business
Apple announced Managed Apple IDs for Apple Business Manager at Managed Apple IDs are created for employees who sign in and manage functions of Apple Business Manager. Managed Apple IDs for Apple Business Manager are different. Managed Apple IDs in Apple Business Manager are to be used for managing tasks in Apple Business Manager only. There is no Apple Schoolwork or Apple Classroom app that users would require a Managed Apple ID for. There is no PowerSchool to source the accounts from.
There is also no extra 200GB of iCloud storage. This means the only things administrators do with those IDs are acquire content, supervise devices with device enrollment, and manage a handful of IT users that handle those roles. That doesn’t mean that Apple will not change these capabilities in a future release, but for now there is likely little reason to add Azure federation if only IT teams are using a Managed Apple ID. For more on Apple Business Manager and Managed Apple IDs, see https://help.apple.com/businessmanager/en.lproj/static.html#tes55db2af4a.
Webhooks
A webhook is a small web trigger that, when fired, can easily send amount of small json to a web listener. Most modern software solutions support webhooks. They provide an easy way to trigger events from a piece of software to happen in another piece of software.

A screenshot describes the application list. On the left is the navigation bar, while on the right is the Applications screen.
Registering Webhooks
A screenshot of the Duo dashboard illustrates the traffic, which highlights the performance. It reads 347 Authentications.
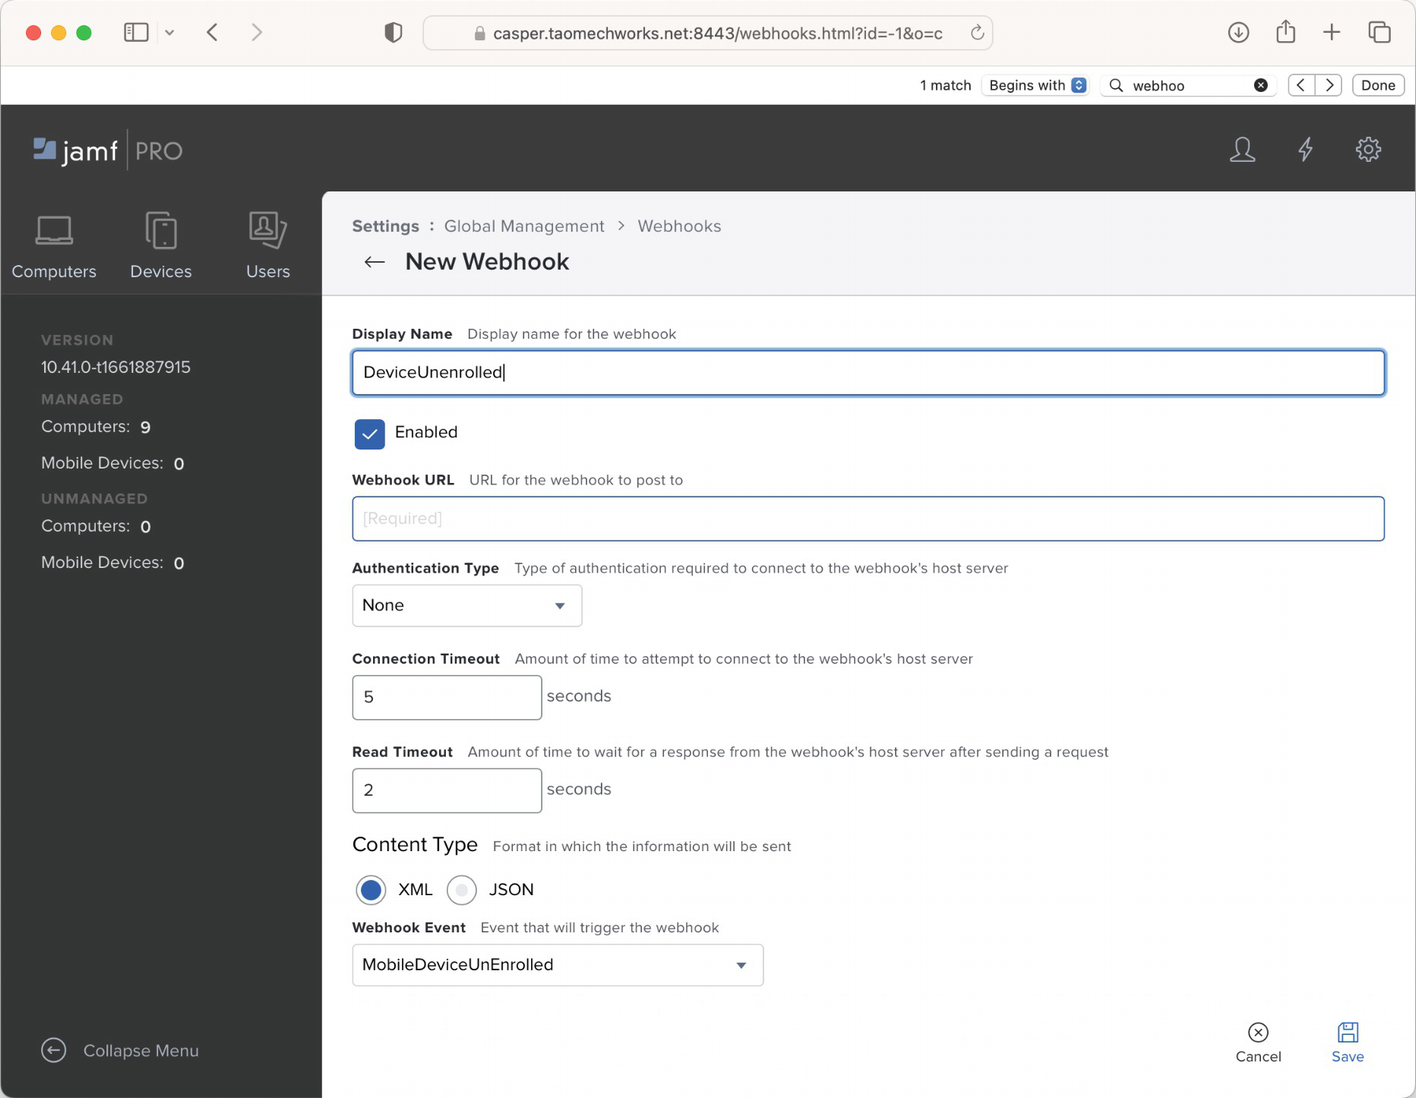
New Webhook screen
Display Name: The name used to identify the webhook in Jamf Pro.
Enabled: Check to enable the webhook; uncheck the box to disable the webhook.
Webhook URL: The URL that the json or xml will be sent to (note that you’ll need something at this URL to accept your webhook).
Authentication Type: None is used for an anonymous webhook, and basic can be used to send a username and password to the webhook listener.
Connection Timeout: How long the webhook will attempt to open a connection before sending data.
Read Timeout: How long the webhook will attempt to send data for before it turns off.
Content Type: Choose to send information via xml or json.
Webhook Event: The type of event that Jamf Pro can send a hook based on.
ComputerAdded
ComputerCheckin
ComputerInventoryCompleted
ComputerPatchPolicyCompleted
ComputerPolicyFinished
ComputerPushCapabilityChanged
DeviceRateLimited
JSSShutdown
JSSStartup
MobileDeviceCheckin
MobileDeviceCommandCompleted
MobileDeviceEnrolled
PatchSoftwareTitleUpdated
PushSent
RestAPIOperation
SCEPChallenge
SmartGroupComputerMembershipChange
SmartGroupMobileDeviceMembershipChange
An example of a full workflow would be what we did to trigger a Zapier action, documented at http://krypted.com/mac-os-x/add-jamf-pro-smart-group-google-doc-using-zapier/. Here, we look at sending smart group membership changes to a Google sheet so we can analyze it with other tools, a pretty standard use case.

A photo of the Jamf pro dashboard contains the Webhooks section on the right. The section has column headers, namely name, event, and U R L.
SimpleMDM webhooks
While webhooks make for a great enhancement to how you manage devices, they also represent a fundamental building block of technology: the callback URL (or URI), which we reviewed earlier in the chapter while describing the fundamental building blocks of tools like OpenID Connect and SAML which are the basis for all modern Federated Identity Providers.
Working with the Keychain
Keychain Access is an application that uses a small database in macOS that allows users to store secure pieces of information. It first appeared as a password manager in Mac OS 8.6 and has evolved ever since. A Keychain can contain a number of data types, including passwords, keys, certificates, and notes. You can interact with the keychain programmatically in macOS. This means that you have a number of options for pushing accounts and settings to devices from a centralized portal, app, or service.

A screenshot of the Jamf Pro dashboard contains the New Webhook screen. It has fields such as Display Name, Enabled, Webhook U R L, Authentication Type, Connection Timeout, Read Timeout, Content-Type, and Webhook Event from top to bottom, respectively.
Keychains

A screenshot titled w w w dot krypted dot open bracket admin close bracket contains two panes. They are attributes and access control. The fields listed below are name, kind, account, where, comments, and show password.
View a Keychain entry
The reason keychains are an important part of the identity story is twofold: keychains are password management databases. By nature, they store passwords and certificates, and you can flow identity information to them and retrieve information back from them. The second part of keychains that are important to identities involves how that information can be accessed programmatically and biometrically from both Mac and iOS. Much of the technology works similarly on Mac and iOS, although we have more visibility into what’s happening under the hood with tools when using a Mac, as we can see logs and we can view keys and passwords using Keychain Utility.
Directly manipulating keychains should be considered a legacy workflow; however, in the absence of better APIs and options, sometimes it’s the only option to get a task done. This is how some of the login tools work, to keep passwords in sync. The preferred modern way is to use keys with such workflows, as in how WebAuthn works. However, it’s not uncommon to see machines with a keychain password that hasn’t changed in five or seven years, so if the password for the IdP is in a keychain, this is a potential security risk.
Summary
IdPs are quickly replacing or augmenting the directory services solutions that became widely used in enterprises with the advent of Active Directory in the early 2000s. Tools like Azure Active Directory, Google Identity Access Management, Okta, OneLogin, JumpCloud, and PingFederate have now replaced some of the single sign-on functionality given the increasingly distributed nature of organizations and the increasing reliance on web apps. It’s clear that thus far Apple programs to manage schools and businesses focus on Azure and Google – but these are open standards, so those may expand in the next few years.
As we showed throughout this chapter, federated identities are able to provide an added layer of security for the Apple platform. Those federated identities can have a layer of multifactor authentication (MFA), which is increasingly moving away from physical tokens and into a world where a “soft token” or app is used. This reduces the cost of MFA and lets our coworkers do more with that phone they increasingly have on them at all times. The beauty of those devices is also that they already have another layer of security: a face or fingerprint.
We see this industry in its infancy today. Some vendors may seem like they’re getting big or getting acquired for large sums of money, but the technology is changing quickly. This pace of innovation is being caused by the rapid uptake in usage by key vendors but also by enterprises that see the quick shift to mobile endpoints as one of the largest potential security threats in their fleets. As you plan out how identity fits into your organization (or how the identity plan fits into the Apple fleet of devices), think about the end result. That result should be that data allowed on devices is gated by the security posture of the organization. When done right, admins can get granular control over this data while still providing a great experience for your coworkers.
We don’t go into Zero Trust Network Access solutions (ZTNA) much in the chapter but instead look at the links between the IdP, Apple, and the devices – and expand some into Conditional Access solutions. ZTNA is a solution where traffic is routed through a tunnel and analyzed, and while it isn’t the most private solution, it does give administrators the most telemetry into what happens on devices. Expect more large-scale integrations between ZTNA and device management based on that telemetry where there aren’t yet holistic ecosystems in the future (we’ll be happy to document them further once those are there even if the buzzwordy acronym changes).
Given that everything on the Apple platform is changing so fast, now that we’ve gone through how to deploy and manage Apple devices through the first 12 chapters of this book, we’ll continue with projects like we just made with ZTNA and turn our attention to the future in Chapter 13.