4. Import
Ingesting media into Final Cut Pro is when and where the postproduction workflow starts. This is also when the foundation for good media management is set. There are three main paths for ingesting media: importing from a camera (file- and tape-based), importing files, and importing from iMovie.
Import From a Camera (File-Based)
When importing from a supported camera, a card reader, or a folder of the device’s files, you can use File > Import from Camera. This method provides the benefits of simultaneously viewing all video files of the camera or device, joining spanned clips, and allowing you to select portions of a clip for import.
Importing spanned clips works when all of the source media cards or camera archives of the source media are mounted at once. See the Final Cut Pro Help file for more information.
Create an Archive from Tapeless Media
One of the first steps to importing, especially with tapeless media, is to make a camera archive to quickly offload the card and create a copy of it for archiving purposes.
Note
Importing and archiving simultaneously is supported with tapeless media. After you start the archiving process, you may import clips from the file-based source even if the archiving process has not completed.
1. Connect the supported camera or device (set to the appropriate playback mode), or insert the card (SD/SDHC/SDXC) into your computer.
2. Choose File > Import from Camera. The supported device appears in the Cameras section of the Camera Import window.
3. Select the device under Cameras and then click Create Archive.
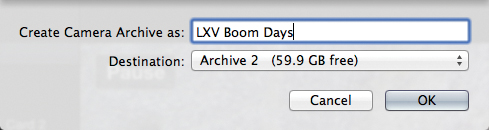
4. Name the camera archive and select a destination volume. Click OK.
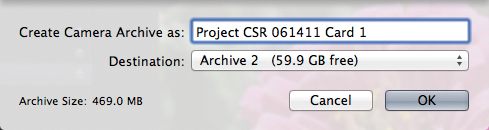
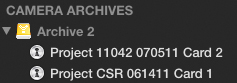
Final Cut Pro creates a Final Cut Camera Archives folder at the root level of the selected volume, if necessary, to store the archive. A progress clock appears next to the camera archive during creation. When finished, the archive and any other camera archives available on a connected volume are listed by volume in the Camera Archives list.
5. Import the media into an Event by using either the archive or, if the archive has not completed, the source media.
Tip
Don’t forget to eject (unmount) cards, devices, and camera archives when they are no longer needed.
Note
Camera archives may be managed in the Finder.
File-Based Import
Importing from a tapeless device is a quick process using the Camera Import window.
Some file-based cameras may not be supported via this import method, especially when still images are in the same folder as the video files. See “Import from A Source Media Folder,” later in this chapter.
1. Connect the supported camera (set to the appropriate playback mode), or insert the card (SDHC, for example) into your computer.
2. Select File > Import from Camera, or click the camera icon on the left side of the Toolbar.
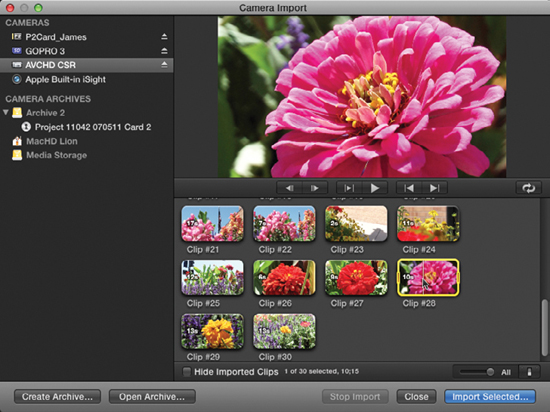
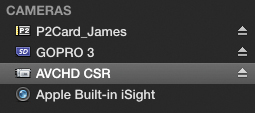
3. Select the device in the Cameras section of the Camera Import window.
![]()
4. To preview a clip, move the skimmer across it. Optionally, you may use the transport controls.
5. If you wish to import all of the clips, click Import All; otherwise, Command-click to select multiple clips, and click Import Selected.
6. Alternatively, you can import only a portion of a clip by dragging across the desired media within the clip to set a range selection. Click Import Selected before selecting a different range of the same or another clip.
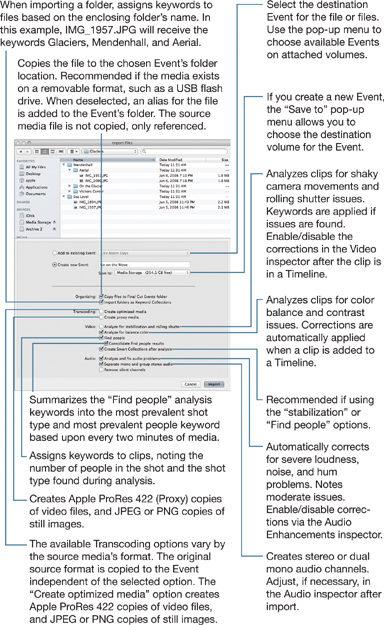
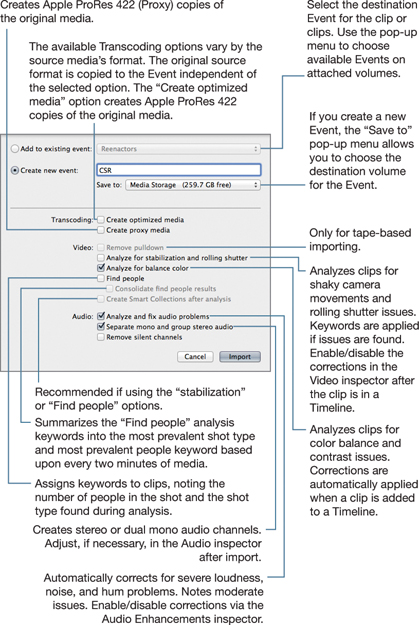
7. Choose the desired import options from the dialog. Click Import.
8. You may click Close while the import is in progress, but do not eject the card.
9. Click the Background Tasks button in the Dashboard.

Tip
The default selections are set via the Import pane of Final Cut Pro > Preferences.
Note
Range selection within a clip for importing may not yield usable media from some file-based formats. Instead, select the entire clip for importing.
Import from a Camera Archive
Creating camera archives is covered earlier in this chapter. If the camera archive is in the Final Cut Camera Archives folder on a connected volume, the archive automatically appears in the Camera Archives list in the Camera Import window.
1. Select the camera archive from the list. The archive will mount, displaying its contents.
2. Import desired clips, starting at step 4 of the “File-Based Import” instructions earlier in this chapter.
If a camera archive is not listed, you may have removed it from the Final Cut Camera Archives folder (or the folder is not at the root level of the volume).
1. In the Camera Import window, click Open Archive.
2. Navigate to the archive file, select the file, and click Open.
3. Select the archive from the Cameras section of the Camera Import window.
4. Import desired clips, starting at step 4 of the “File-Based Import” instructions earlier in this chapter.
Import from a Source Media Folder
The Camera Import window may not recognize the file structure of a card, which results in the card not appearing in the Cameras list. Or you may have a folder or disk image of supported video files that you want to import. You can use the Open Archive command to view and import the supported media.
Note
For files in an unsupported folder structure or in a folder containing a mix of supported and unsupported files, follow the instructions in the “Import Files” section of this chapter.
1. In the Camera Import window, click Open Archive.
2. Navigate to the folder or disk image, select the folder, and click Open.
3. Select the folder from the Cameras section of the Camera Import window.
4. Optionally, you can create a camera archive of the selected folder by clicking Create Archive, naming the archive, and choosing the destination volume.
5. Import desired clips from the folder, starting at step 4 of the “File-Based Import” instructions earlier in this chapter.
Import From a Camera (Tape-Based)
Final Cut Pro provides support for importing via FireWire for a variety of formats. For a list of compatible cameras, you can refer to http://help.apple.com/finalcutpro/cameras.
Create an Archive from Tape
Creating a camera archive from tape-based media allows you to access the media as if it had originated on tapeless media. Import occurs quickly both in the present and in any future uses of the archive.
1. Connect the supported tape-based camera or deck to your computer via FireWire, and set the device to the VTR/VCR mode.
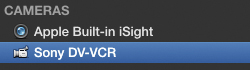
2. Choose Import from Camera. The supported camera or deck appears in the Cameras section of the Camera Import window.
3. With the tape inserted in the device, select the device under Cameras and then click Create Archive.
4. Name the camera archive and select a destination volume. Click OK.
Final Cut Pro will create a Final Cut Camera Archives folder at the root level of the selected volume, if necessary, to store the archive. The device begins playback.
5. The archiving stops when the end of the tape is reached or when you click Stop Import.
When finished, the archive and any other camera archives available on a connected volume are listed by volume in the Camera Archives list.
6. Import the media into an Event using the instructions in the “Import from a Camera Archive” section earlier in this chapter.
Tape-Based and Live Import
If you do not create a camera archive of your tape, or you want to import a live feed, follow these steps to record a stream of video to an Event. The stream can originate from tape playback or live feed from a FireWire-connected camera. Another option is to record from the computer’s built-in FaceTime or iSight camera.
1. Connect the supported tape-based camera or deck to your computer via FireWire, and set the device to the VTR/VCR mode.
2. Choose Import from Camera. The supported camera or deck appears in the Cameras section of the Camera Import window.
3. If importing from tape, use the transport controls (J, K, L keyboard shortcuts) to cue the tape to the start of the desired media.
4. Click Import and then set the import options in the window (tape playback will pause).
5. Click Import. Refer to “File-Based Import” for import options such as media analysis.
6. After the end of the desired media plays, click Stop Import or press the Escape key.
7. If additional media is needed, repeat from step 3; otherwise, click Close.
Import Files
An additional method of getting files such as video, music, and stills into an Event or Timeline is through File > Import > Files. An advantage of this method over the Import from Camera function is that you can choose whether to copy or simply reference the source media files.
1. Choose File > Import > Files from the menu bar.
2. Navigate to the desired file or files and select the appropriate settings. Click Import.
Final Cut Pro allows you to import files by dragging them from the Finder (or another application) directly to an Event, a Keyword Collection, or the Timeline. Be aware that the Import pane of Final Cut Pro’s Preferences window will determine if the files are copied, transcoded, or analyzed during import. See Chapter 10 for more on setting preferences.