
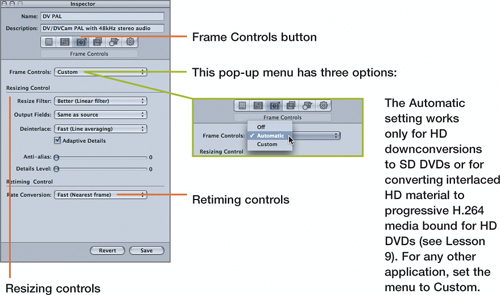
10. Working with Frame Controls
Frame Controls employ Optical Flow technology (also used in Apple’s Shake), which allows motion tracking of every pixel vector from one movie frame to the next. When that calculation is completed for a given frame rate and given frame size, Compressor can place those pixels more intelligently in different frame rates and sizes. Compared with inferior conversion techniques like blending and scaling, Optical Flow produces amazing results, but those massive increases in quality come at the expense of lengthy encoding times.
Frame Controls are most often used for converting from one video format (standard) to another or converting frame rates between interlaced and progressive modes. You can achieve broadcast-level transcoding in Compressor at levels of quality previously reserved only for hardware converters. As a general rule, though, when working with frame controls, you have to choose between better quality and faster encoding.
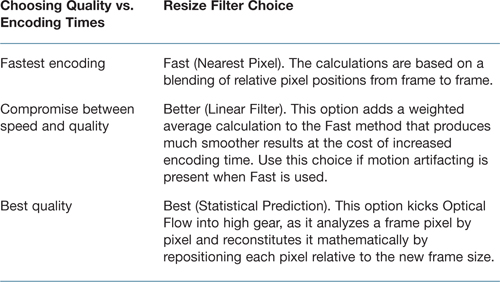
Resizing Controls
When source media is transformed from one frame size to another—in converting NTSC footage to PAL, for example—the resizing controls can be used to increase the conversion quality significantly.
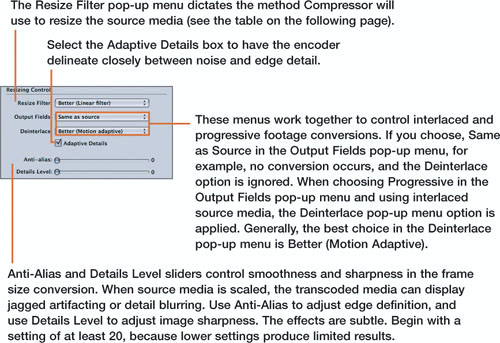
Deselect the Adaptive Details box when encoding for Video iPods or for media that will be viewed on progressive computer displays. Deselecting this box allows Compressor to utilize the same deinterlacing algorithms used by Apple’s DVD Player. The resulting encoding times will be significantly shorter than with the box selected.
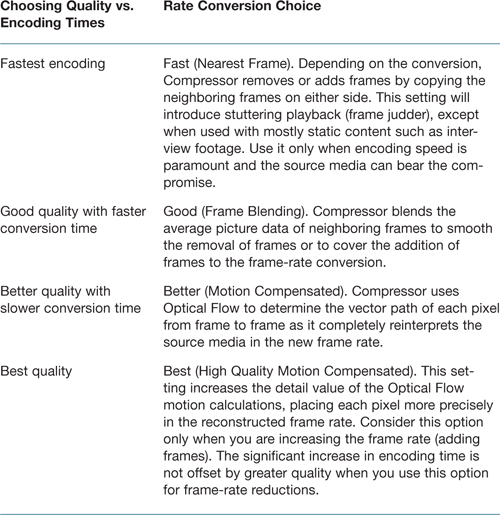
Retiming Controls
When changes in frame rate are introduced into a conversion—such as in converting 29.97 fps NTSC to 25 fps PAL—the retiming controls can be used to increase the output quality significantly.
![]()
Using Frame Controls
None of the settings in the Frame Controls pane appears in the Preview window, so a real-time preview of their impact is not available. But because of the potentially lengthy encoding times when frame controls are applied, you will want to use a test-clip workflow (see Lesson 7) to audition the various settings on small sections of the source media. This carries a twofold benefit: You will not waste time encoding the entire media with an unsatisfactory setting, and you can estimate encoding times for the entire media based on the test time. That is, if 1 minute of footage is encoded in 10 minutes, it will take roughly 10 hours to encode 1 hour of footage with the same settings.