3. Working with Presets
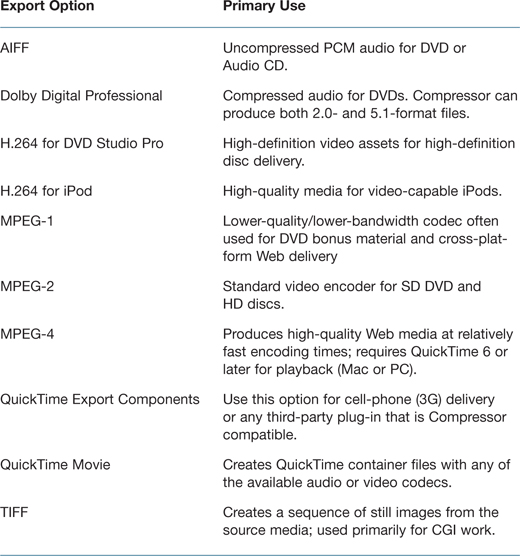
Compressor encodes source media according to a collection of parameter settings, also known as a preset. Fortunately, the Settings menu in Compressor has a library of Apple presets for the most common digital media distribution platforms:
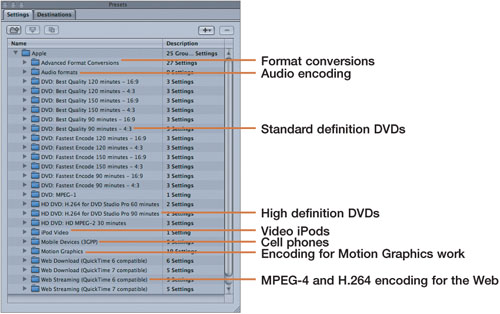
Applying the Apple Presets
The Apple presets can be accessed and applied in three ways:
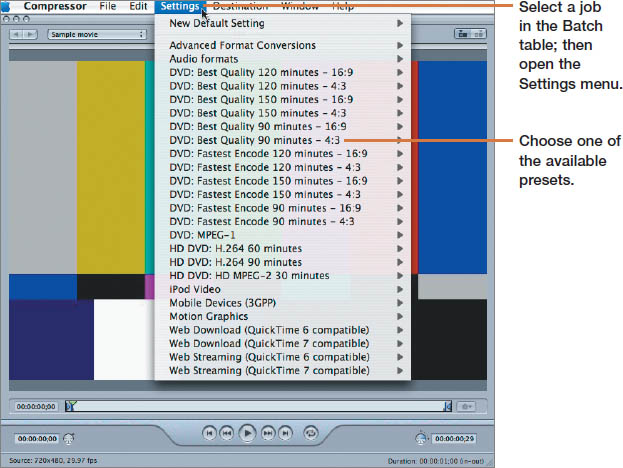
This is the easiest and most direct way to apply a preset.
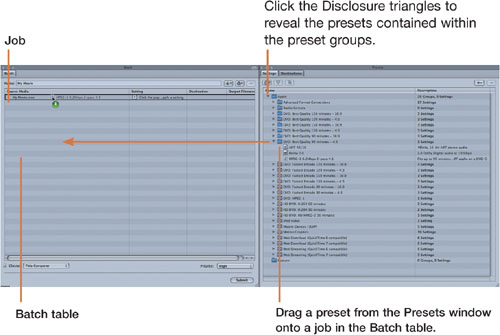
Drag a preset from the Presets window onto a job in the Batch table.
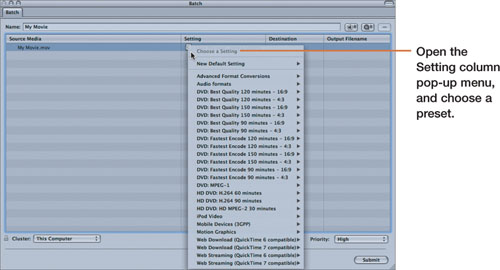
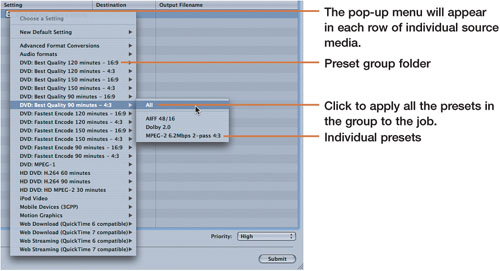
Choose a preset from the pop-up menu in the Setting column of the Batch table.
Modifying the Apple Presets
The most convenient way to create a custom preset is to modify a preexisting Apple preset and then save the modifications as a unique setting.
If, for example, your target bandwidth for a Web-encoding project falls between the 300k and 800k standard MPEG-4 presets, you can modify one parameter of an Apple preset—bandwidth, in this case. This is easier than creating a new MPEG-4 preset.

Making Temporary Modifications to Presets
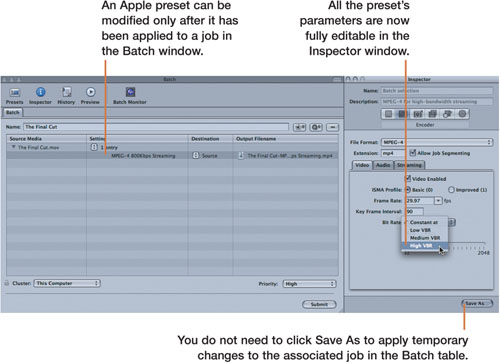
Note
The Apple preset parameters remain unaltered in the Settings tab of the Presets window.
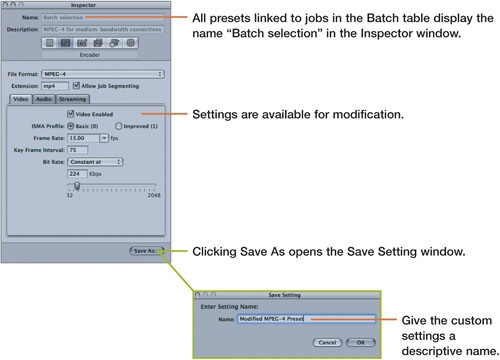
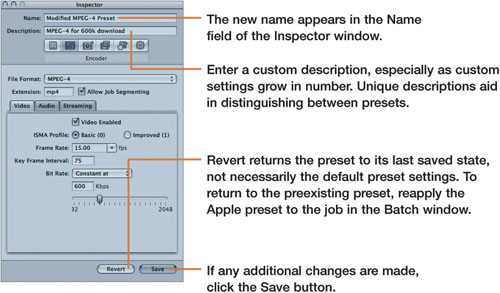
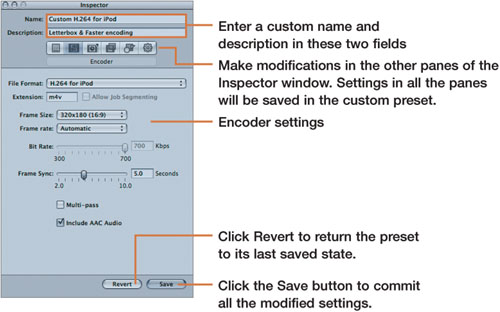
Saving Temporary Modifications to Presets
Open a preset from the Batch table into the Inspector window (if it is not already open). Notice that the name given to the preset in the Name field is “Batch selection” and that both the Name and Description fields remain shadowed.
Compressor also adds custom presets to both the Settings menu and the Settings pop-up menu in the Batch window. In both cases, custom presets appear below a thin gray line at the bottom of the list and can be applied to jobs just like any of the Apple presets.
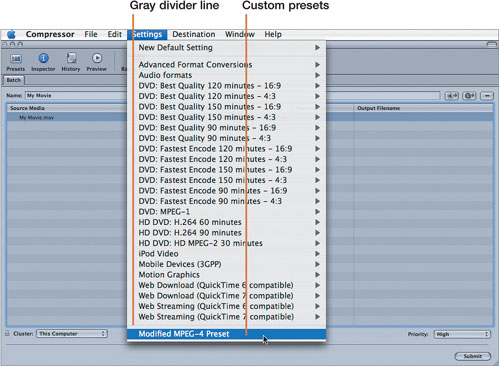
Selecting a custom preset from the Settings menu.
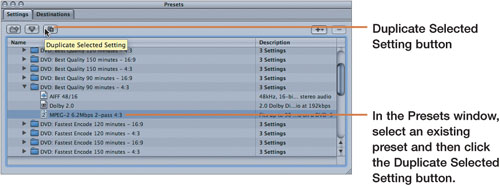
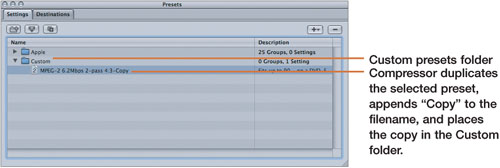
As previously mentioned, Apple presets cannot be modified in the Presets window, but Compressor allows you to duplicate presets with a single click. After a preset is duplicated, you can modify the copy and save it as a new preset.
Creating Custom Presets
Creating custom presets requires just a few additional steps and a little planning.
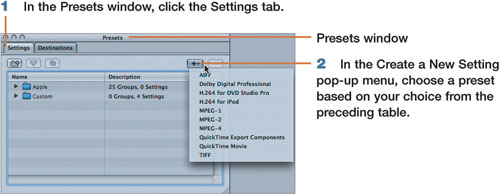
First, you need to decide what type of encoding process the preset should address. Compressor offers the following options for custom presets:
To create a custom preset:
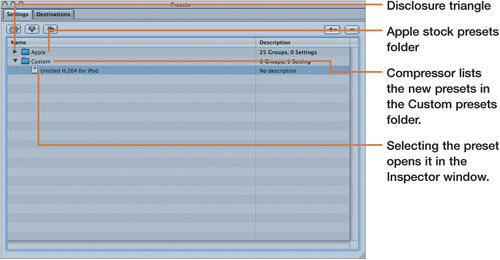
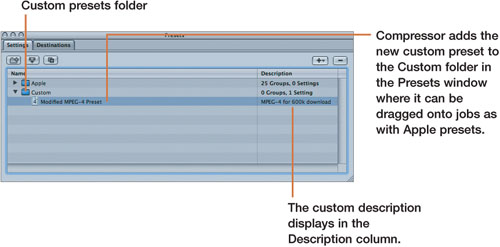
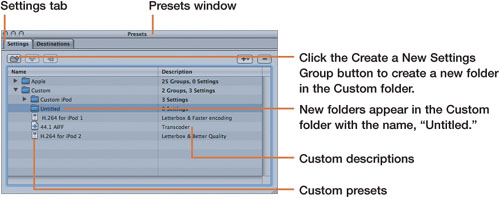
Click the disclosure triangle to reveal the Custom folder’s contents.
Unlike the Apple presets, custom presets are fully editable in the Presets window. Select any preset in the Custom folder, make the desired changes, and click Save.
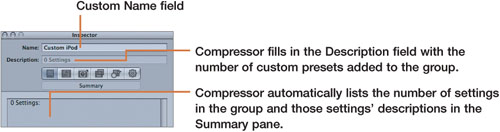
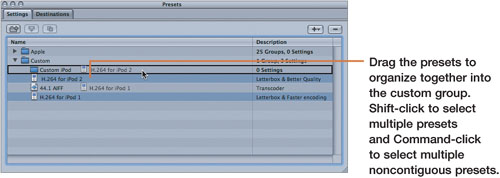
Organizing Custom Presets
Custom presets can be organized into specialized folders, just like the Apple presets.
Selecting a folder in the Presets window will open it in the Inspector window where you can edit its parameters.
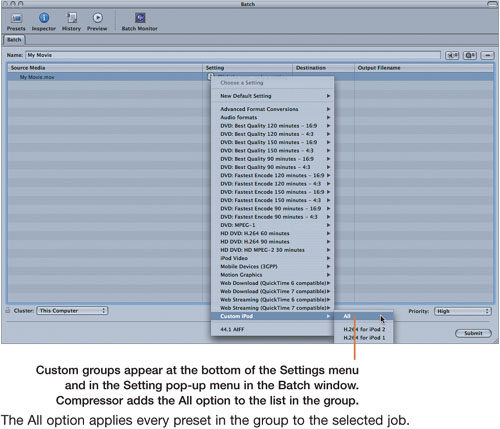
The All option applies every preset in the group to the selected job.
Working with Droplets
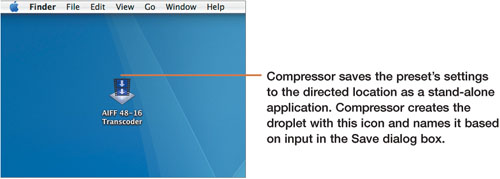
When presets grow up and graduate, they become droplets. Compressor uses droplets to pack presets into an application suitcase so that they can stand alone in the Finder and run entirely outside Compressor.
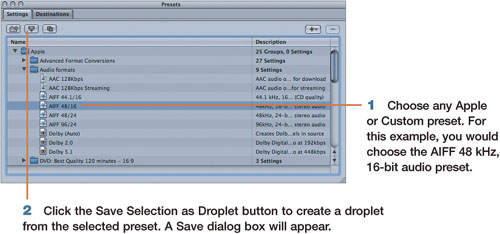
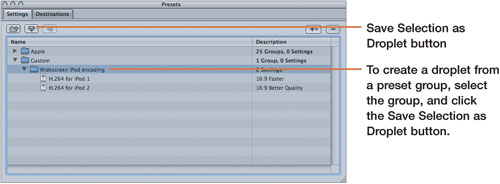
You can create droplets from any standard or custom preset in the Presets window. Droplets can be quite handy, especially for repetitive encoding tasks in which settings do not change from job to job.
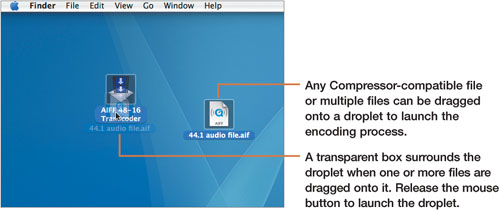
Creating a Single Preset Droplet
The following example creates a droplet that produces a 16-bit, 48 kHz audio file. It is common in Final Cut Pro sequences to encounter audio files sampled at rates other than 48 kHz, such as 44.1 kHz audio copied from CDs. Using a droplet to convert the files quickly via drag-and-drop is much more efficient than repeating multiple conversion steps inside Compressor.
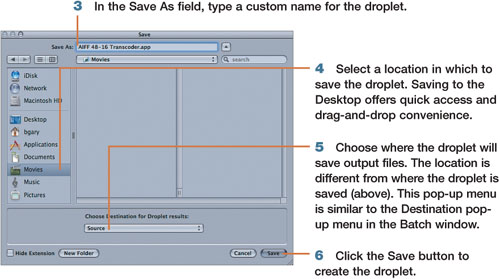
As in most Save dialog boxes, you can create a new folder if one does not exist.
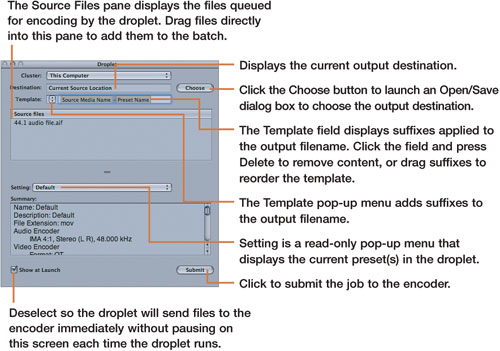
The droplet connects to the encoder services and then opens the Droplet window, which details the impending process.
Although running Compressor is not a requirement for launching a droplet, Compressor must be installed on any computer on which you plan to run droplets.
Creating a Multiple Preset Droplet
In the preceding example, one preset was used to create the droplet. Compressor also allows the creation of droplets from preset groups.
In the Save dialog box that opens, follow the same steps as when creating a single preset droplet.
Any file dropped onto a multiple preset droplet will have all the presets in the group applied to it. If you have MPEG-2 and Dolby Digital audio presets in a droplet, for example, any file encoded by the droplet will produce two output files: one MPEG-2 video and one Dolby audio.