
 CHAPTER 5
OIL
Fuchsia

1 Begin by mixing one part liquin and one part turpentine in a glass jar, and set aside a small amount in another lidded jar to use later. This is known as a “medium mixture.” To tone the canvas, mix a quarter-size dollop of the medium mixture with an equal size dollop of sap green using a palette knife or large flat brush until you have a transparent hue. (It may be necessary to keep adding medium until the paint becomes transparent.) Apply the mixture to the entire canvas in loose, quick strokes, emphasizing the areas of foliage.
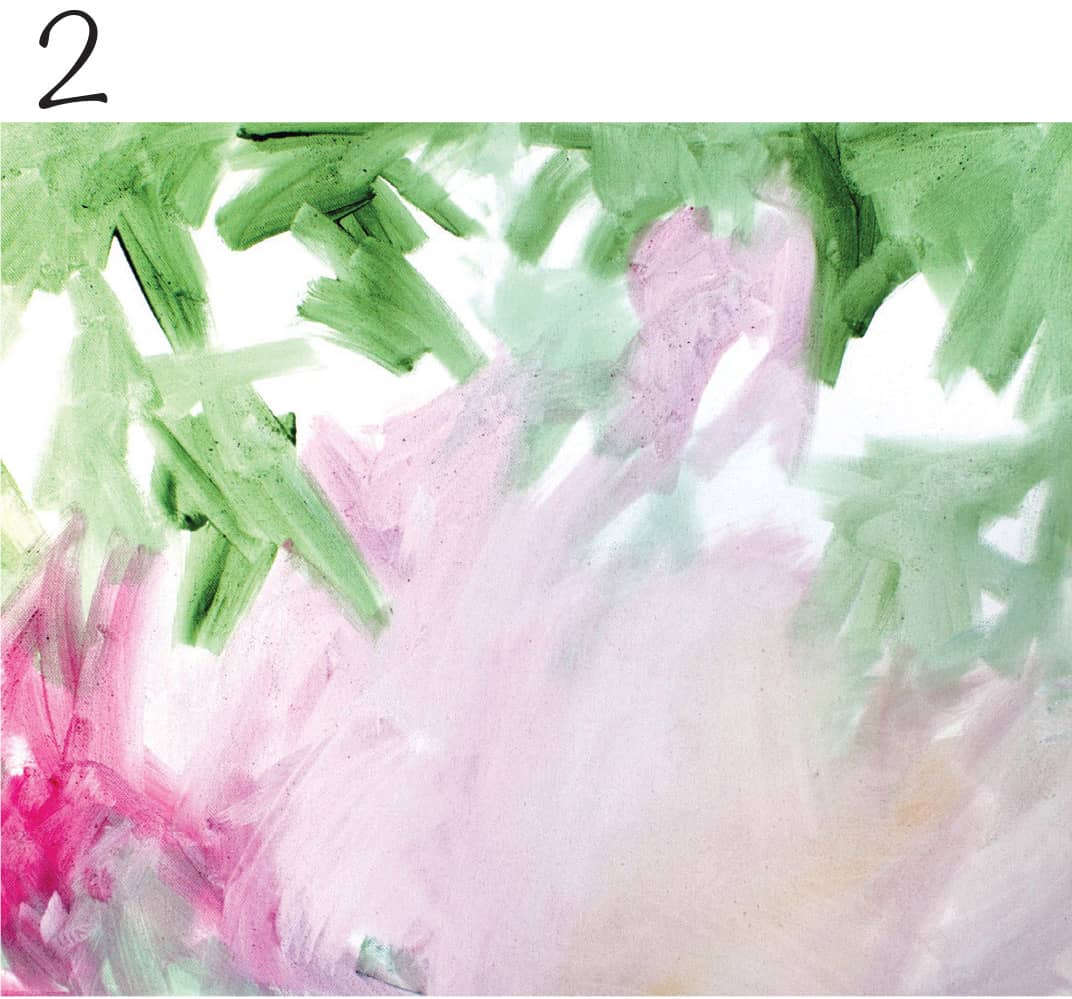
2 Next mix a small dollop of medium with phthalo red rose until you have a transparent hue. Continue the underpainting by applying the mixture with a broad flat brush and loose strokes across the areas of the canvas that will be the fuchsia blossoms. To lighten areas of paint, brush on clear liquin using a broad flat brush. The underpainting creates a wet surface for the steps that follow.
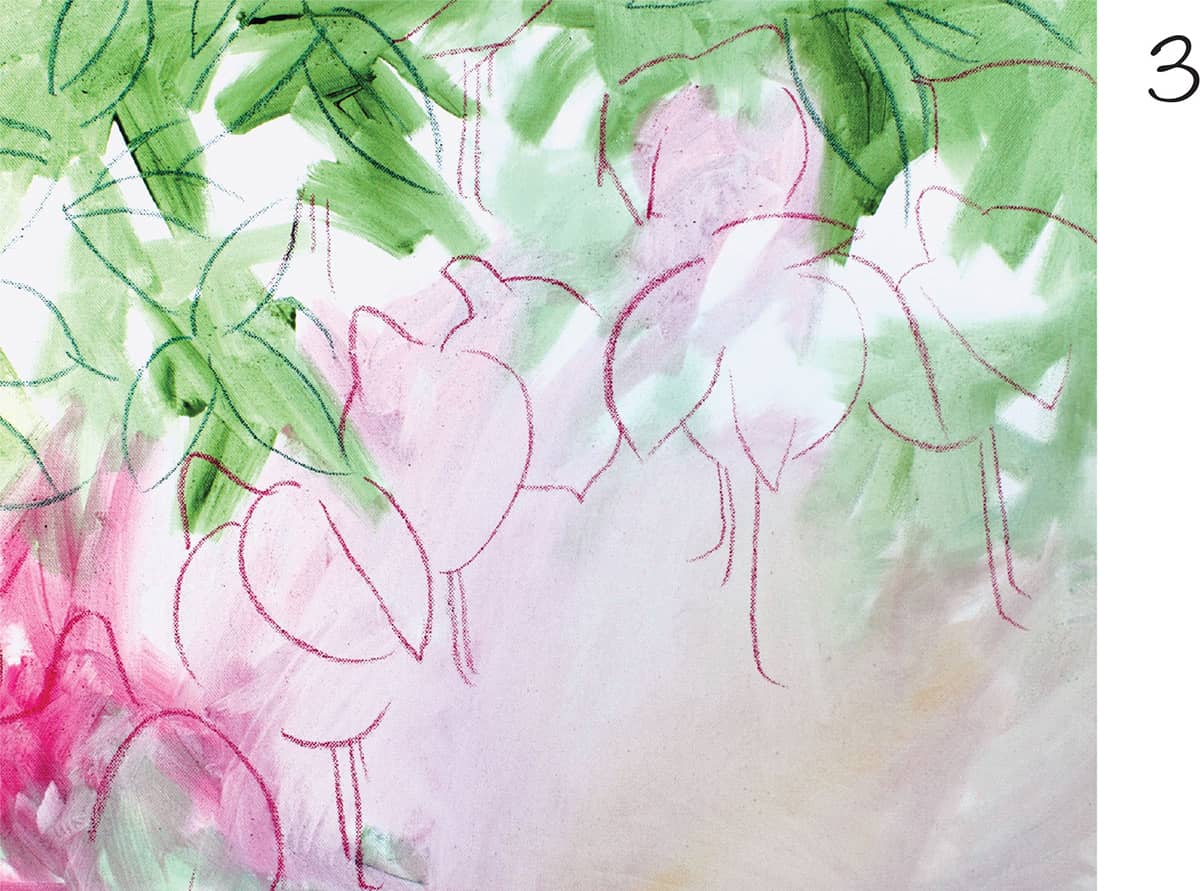
3 Using the kelly green oil pastel, draw the outlines of the leaves in thin, continuous lines. Do the same using the red rose oil pastel or phthalo red rose paint for the fuchsia blossoms.
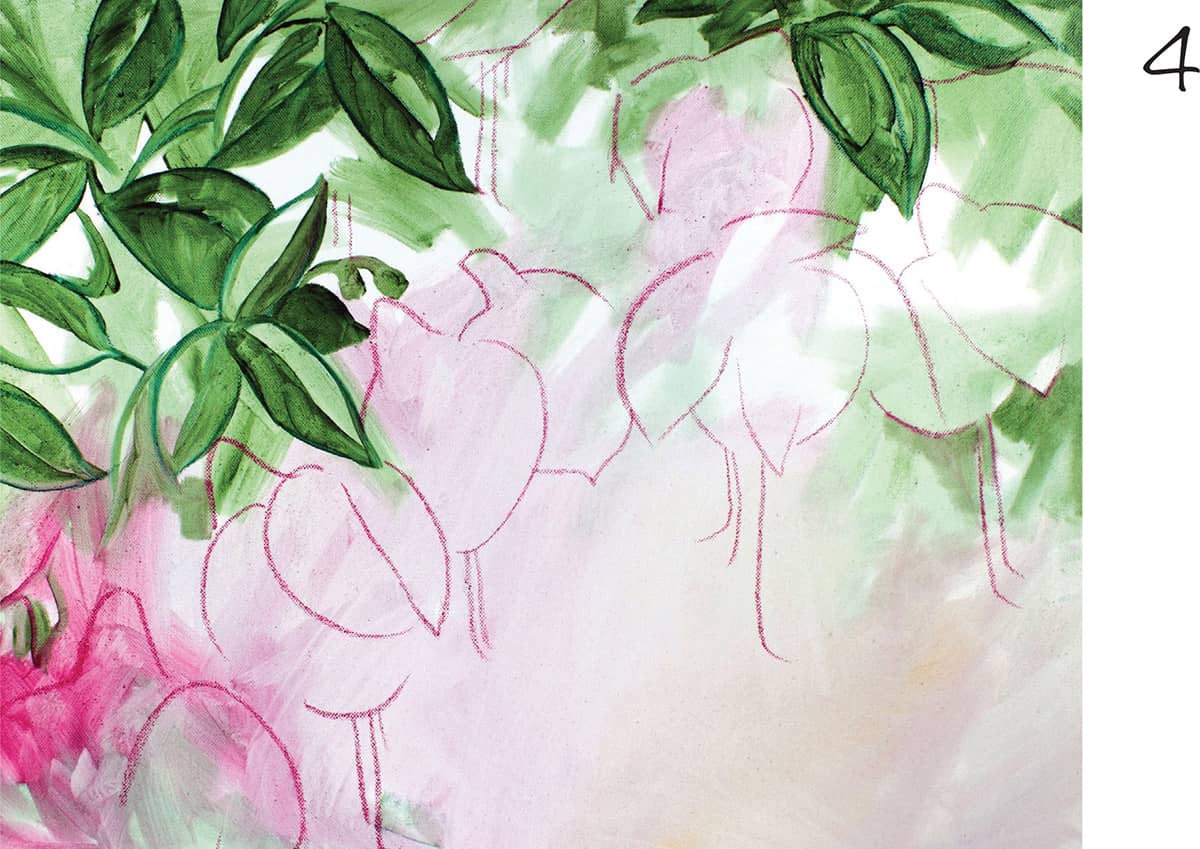
4 Place one dab each of sap green, yellow green, and titanium white on the palette. Load a small flat brush with the medium mixture from Step 1, and a bit of sap green to begin painting in the leaves. Follow this same process with the yellow green and titanium white, always working from darkest to lightest.

5 Place one dab each of quinacridone rose, crimson, phthalo violet, and titanium white on the palette. Following the directions from Step 4, begin filling in the fuchsia blossoms, again working from darkest to lightest. Make sure to clean your brushes each time before changing colors.

6 With the primary shapes established, further define and sharpen the leaves and blossoms, and blend and soften areas of less focal interest. To sharpen edges, use the side of a soft, flat brush, loaded with paint and less medium than in previous steps. Then use a soft flat brush to gently blend and soften edges that move away from the central focal point. Finally, use titanium white and flat, bold strokes to add highlights where needed.
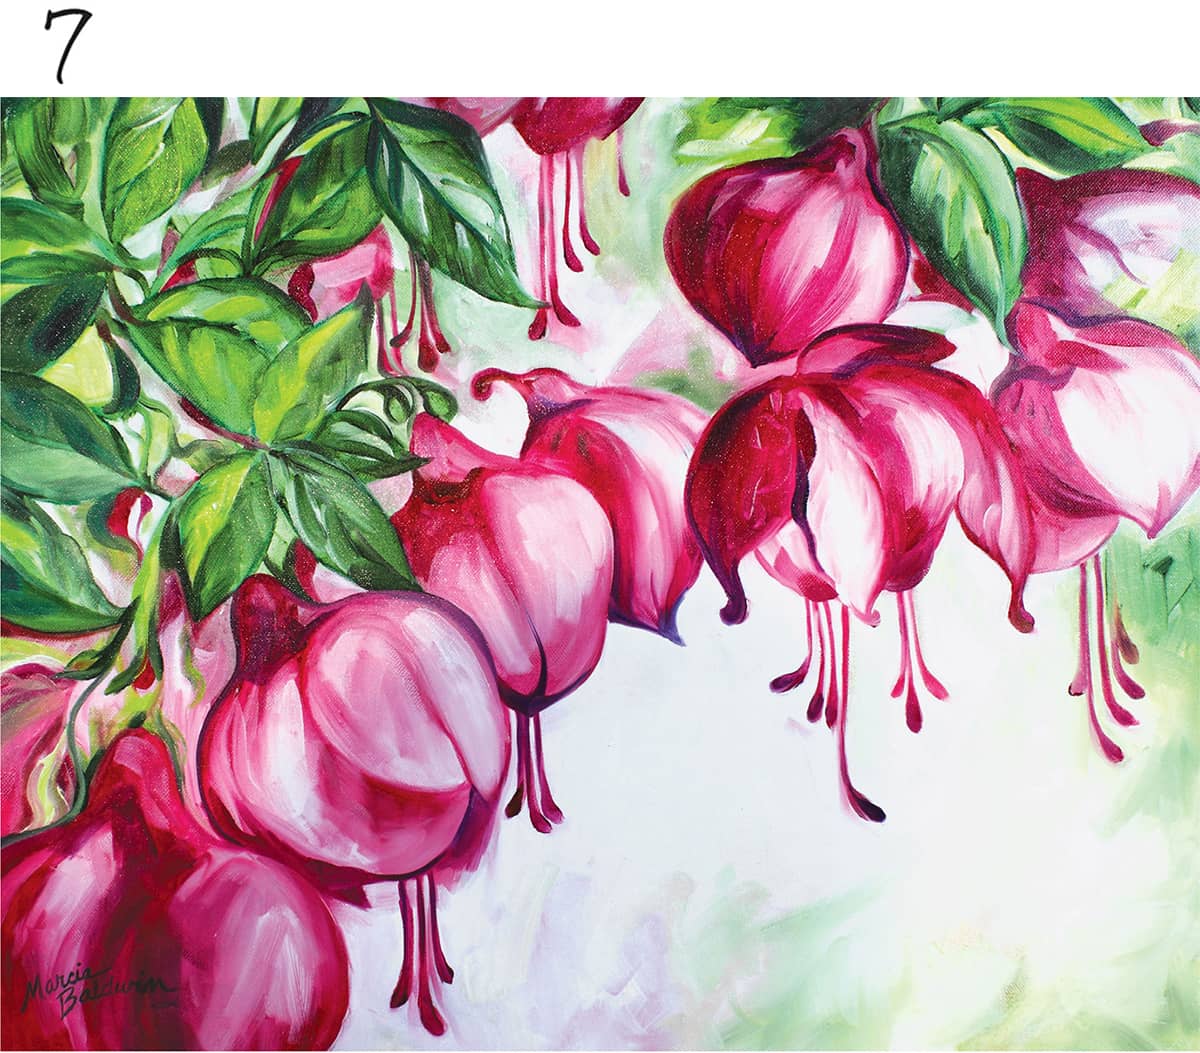
7 Add a bit of titanium white to sharpen some of the blossom edges to give them a clean finish. Use some titanium white to soften the edges around the foliage.
Peonies

1 Tone a canvas with thinned cadmium red medium. Then loosely sketch the subject in soft vine charcoal.
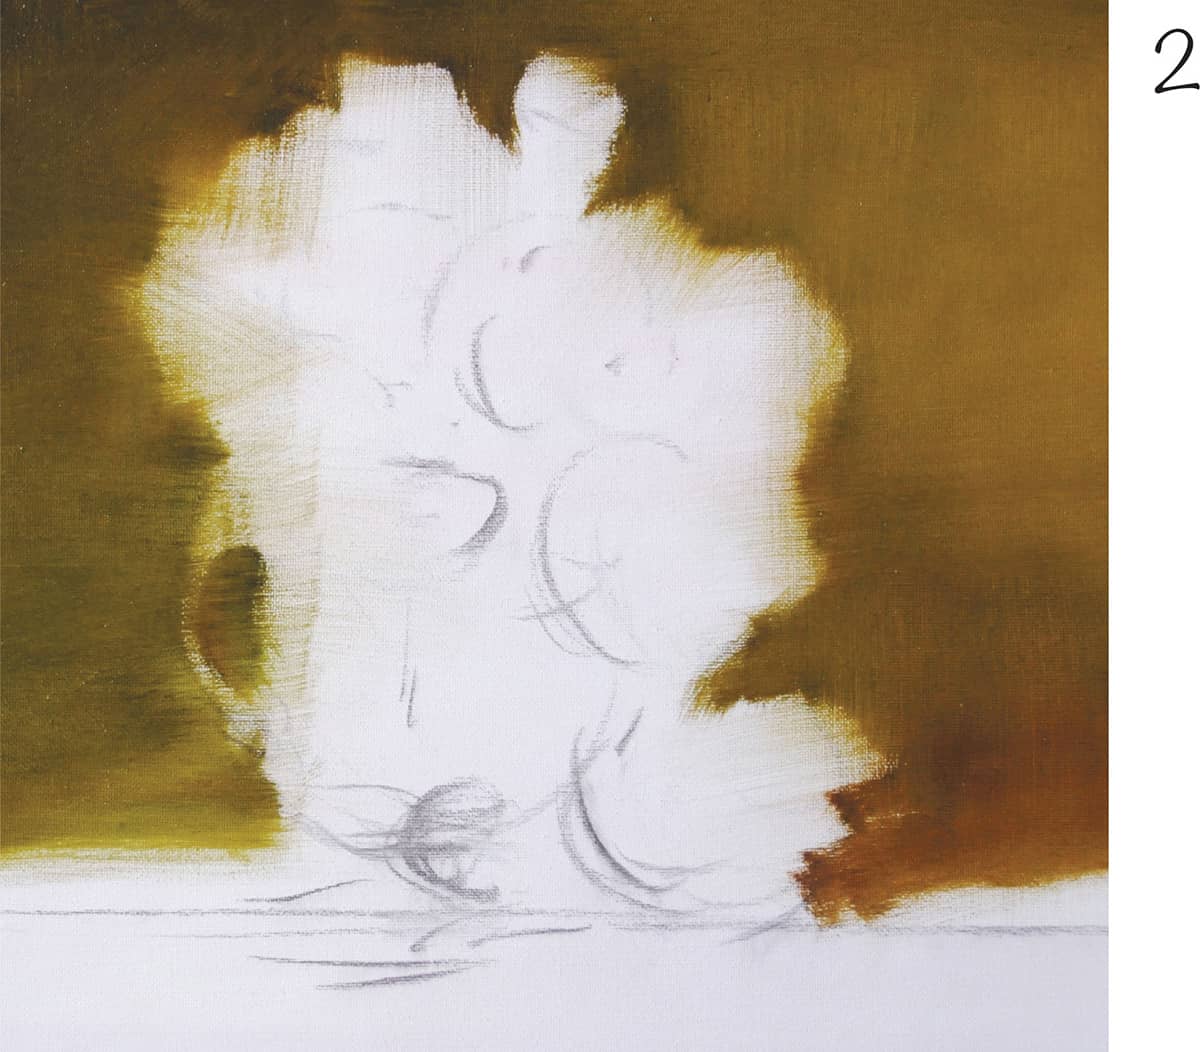
2 Using a #2 white bristle brush, apply raw umber thinned with oil medium. Brush off any charcoal with a 1-inch soft bristle brush and paint the background with a mixture of burnt sienna and phthalo green. A 2-inch brush is ideal for painting backgrounds.
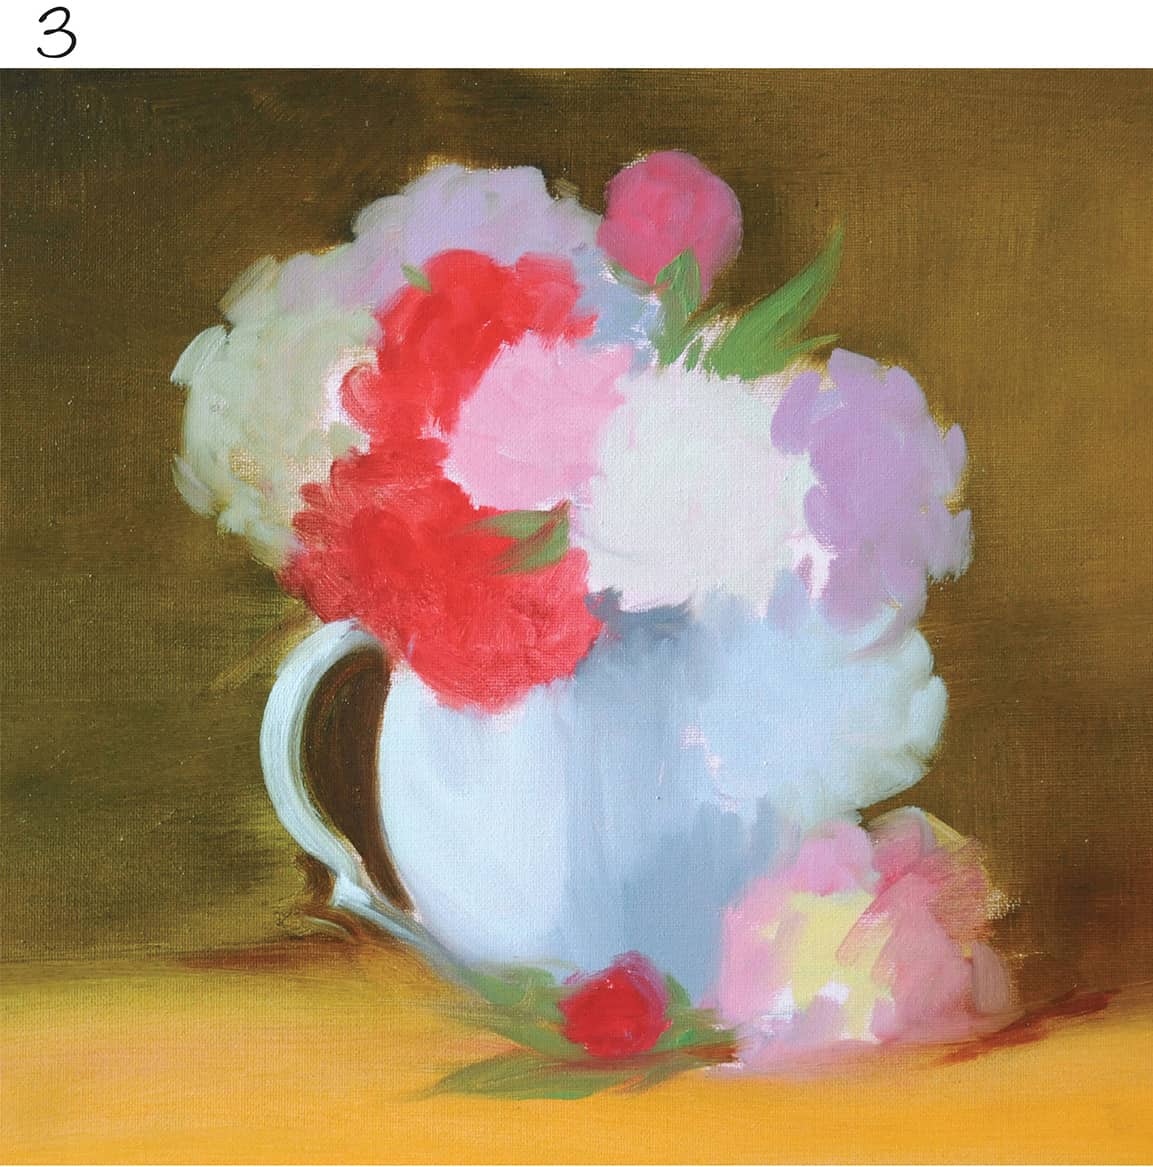
3 Block in the local colors with flat middle values. For the white peony, mix ivory, black, and white to make gray. For the pink peonies, use a mixture of alizarin crimson and gray. And for the red peonies, use cadmium red medium. Add magenta to the alizarin crimson in the foreground flower. The vase is simply gray and the table is blocked in with yellow ochre.

4 Begin to add the darker values of the shadows on the flowers. Use a darker-value gray for the white peony. For the pink peony, use a darker pink made with alizarin crimson and a darker gray. The dark red is a mixture of alizarin crimson and cadmium red medium. Notice how the form of the objects is starting to develop.
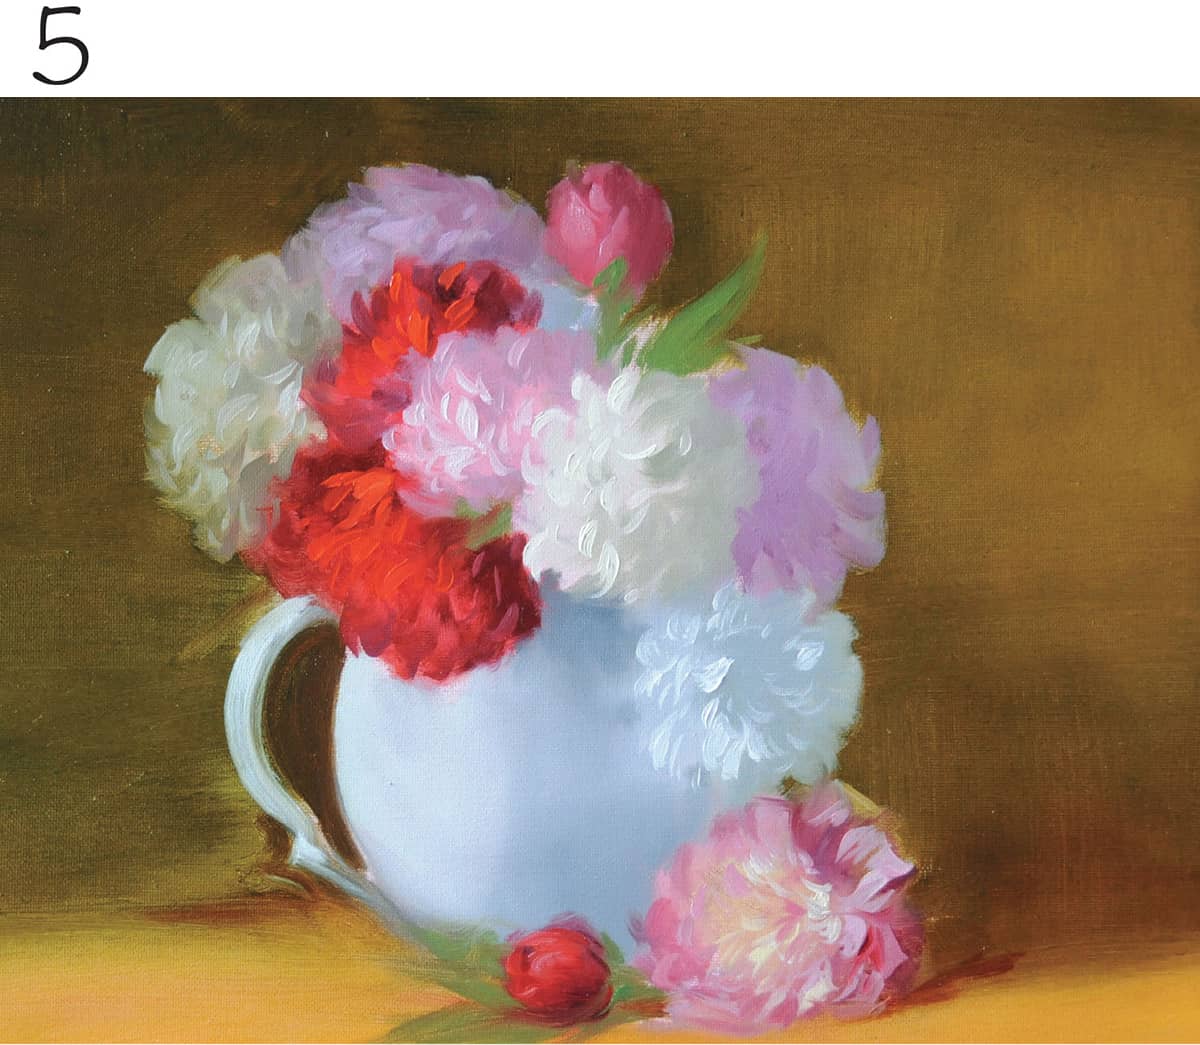
5 Next build the light in the painting, beginning with your lightest light; the white peony on the right of the bouquet in the composition. Use a #6 sable brush loaded with titanium white and a tiny bit of cadmium lemon yellow to “draw” each petal as it relates to the larger spherical form. Moving away from the white flower, treat the pinks and reds in the same way. Use pure cadmium red light for the lights on the red peonies.

6 To further develop and sharpen the forms, intensify some darks in the shadow areas. Then develop the leaves, defining them with a #6 sable brush. Develop the form of the vase.

7 Add more leaves to emphasize the movement and rhythm of the floral composition.
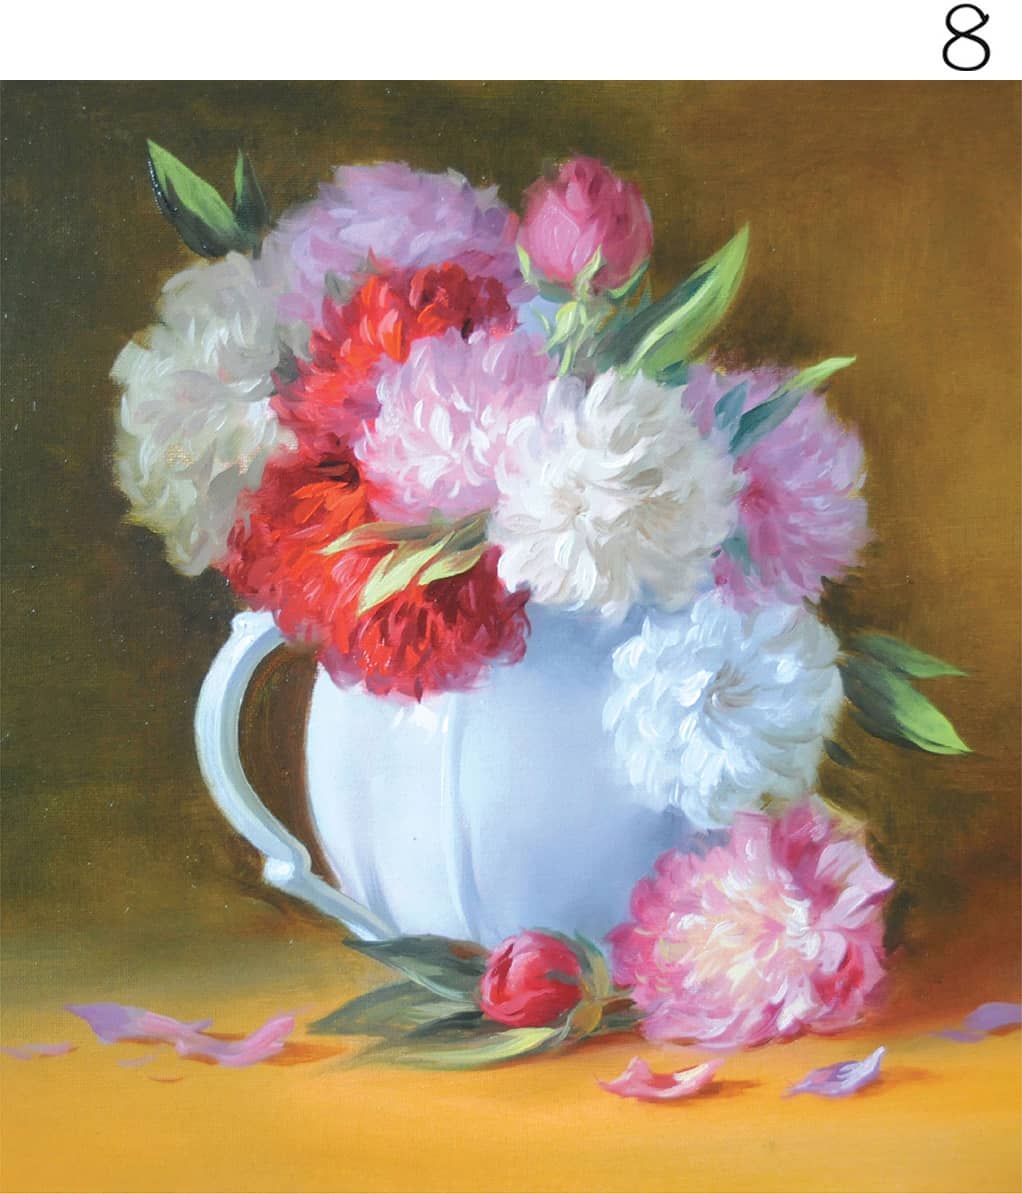
8 At this stage, whatever you do, do for the “sake of the painting.” In this case, add fallen petals to the table. Then darken the table on the left with a mixture of yellow ochre and raw umber to increase the focus of the painting. Continue refining the flower petals with a #2 sable brush. Add gray halftones on the table to create an atmospheric transition from the warm light into the warm shadow. Finally, add a pure white highlight on the porcelain vase.
White Roses
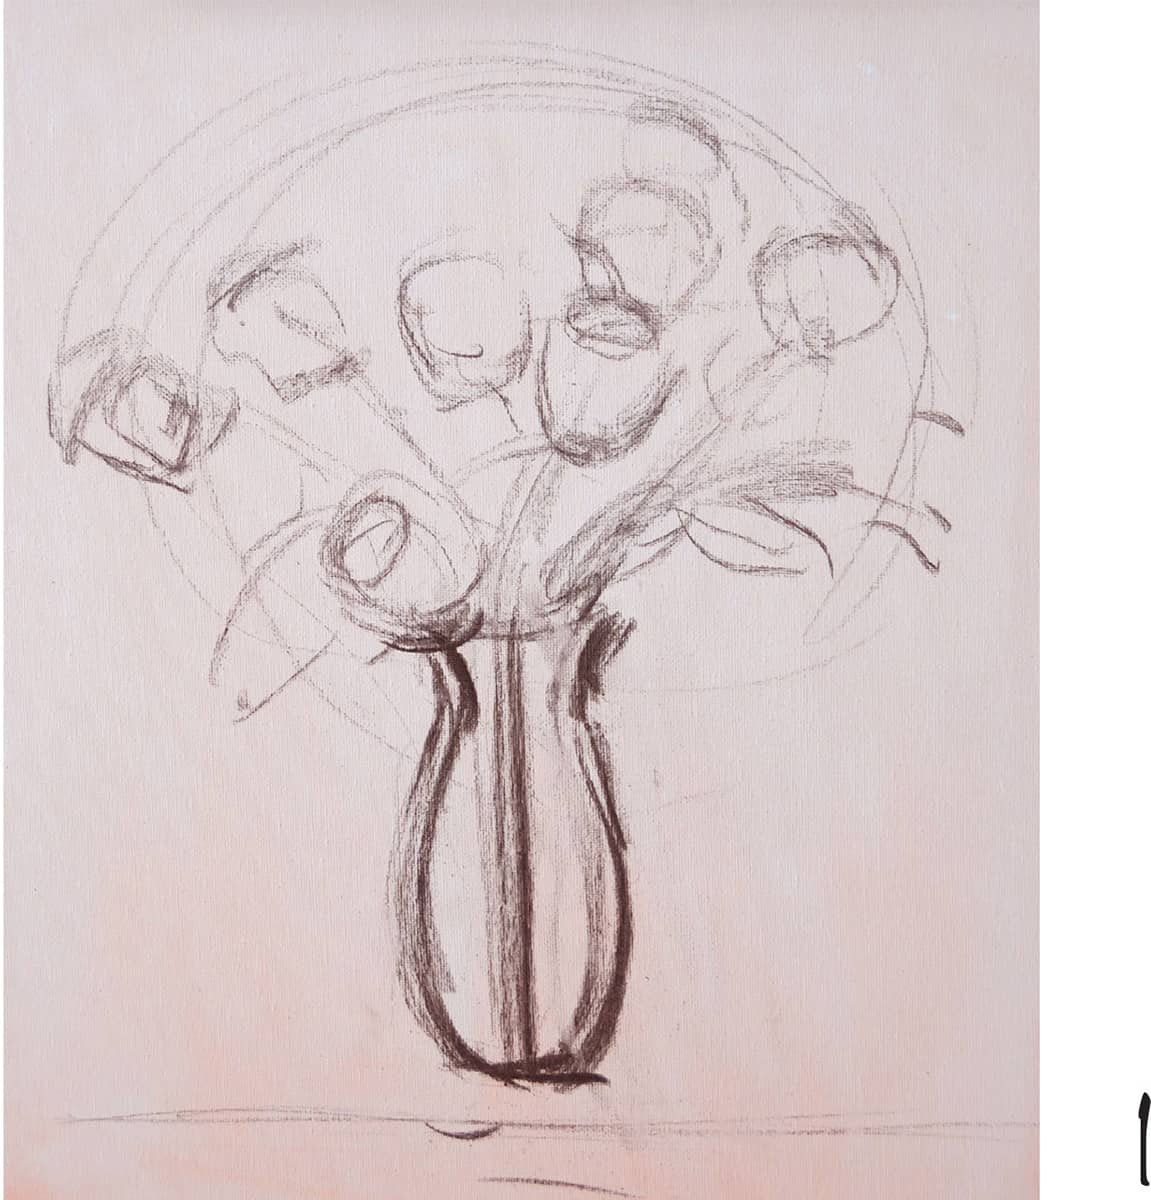
1 Sketch the composition with soft vine charcoal. Draw a light horizontal line about two inches from the bottom and begin the composition above the line. For the vase, draw a vertical line in the middle and develop the shape symmetrically on each side.

2 Apply raw umber thinned with oil medium using a #2 bristle brush. Then brush off the charcoal with a large, soft 1-inch brush. Next paint the background with a mixture of ivory black and cadmium red medium.
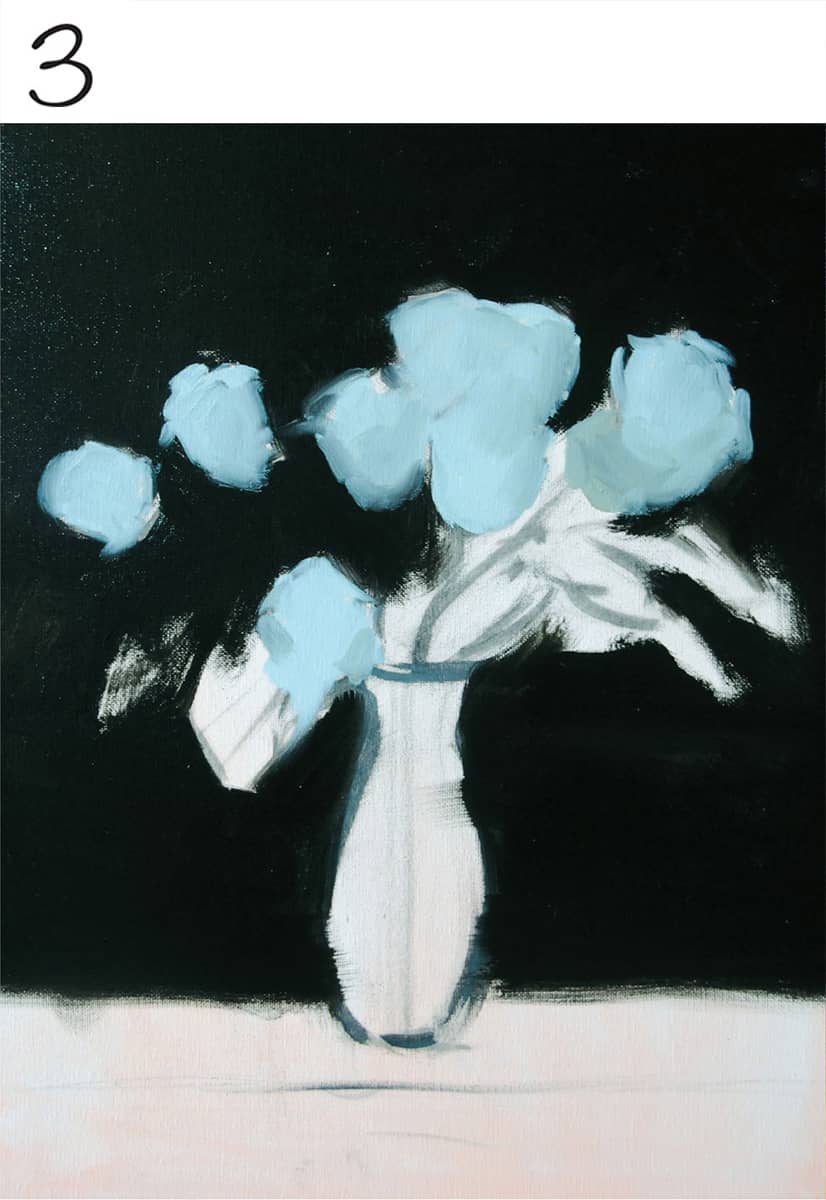
3 Use a flat color mixture of ivory black and white and a touch of lemon yellow to block in the roses.

4 Next mass in the flat local colors of the leaves, vase, and table—all in their middle tones. The leaves are a mixture of gray and lemon yellow. (Ivory black and lemon yellow also make a nice green for leaves.) The table is yellow ochre in the light and raw umber in the dark, and the vase has a middle tone mixture of gray and yellow ochre.

5 To give the flowers shape, begin adding shadows to each rose using a mixture of gray and a tiny bit of lemon yellow. Pay attention to the direction of your light source when developing form.

6 Using a #2 bristle brush loaded with titanium white, develop the most illuminated roses on the right side of the composition. Notice how the egg-shaped roses merge into each other, creating lost and found edges.
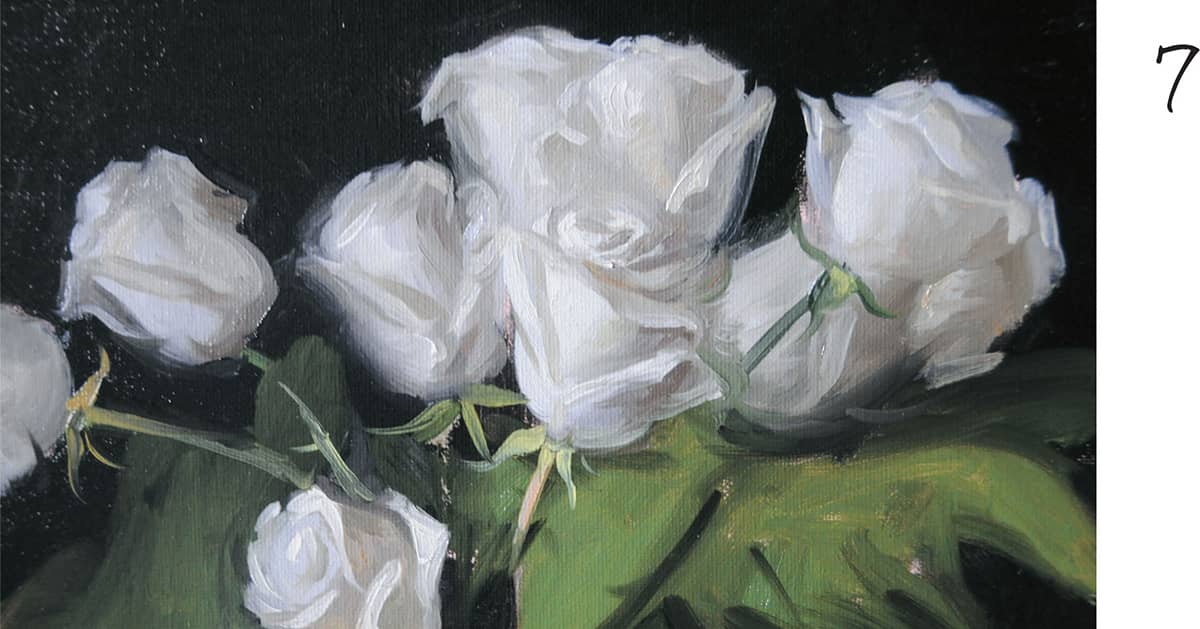
7 To refine the roses, draw petals around the egg-shaped forms with a #6 round sable brush. Envision the rose petals unfolding in a spiral as you follow the flower’s form.
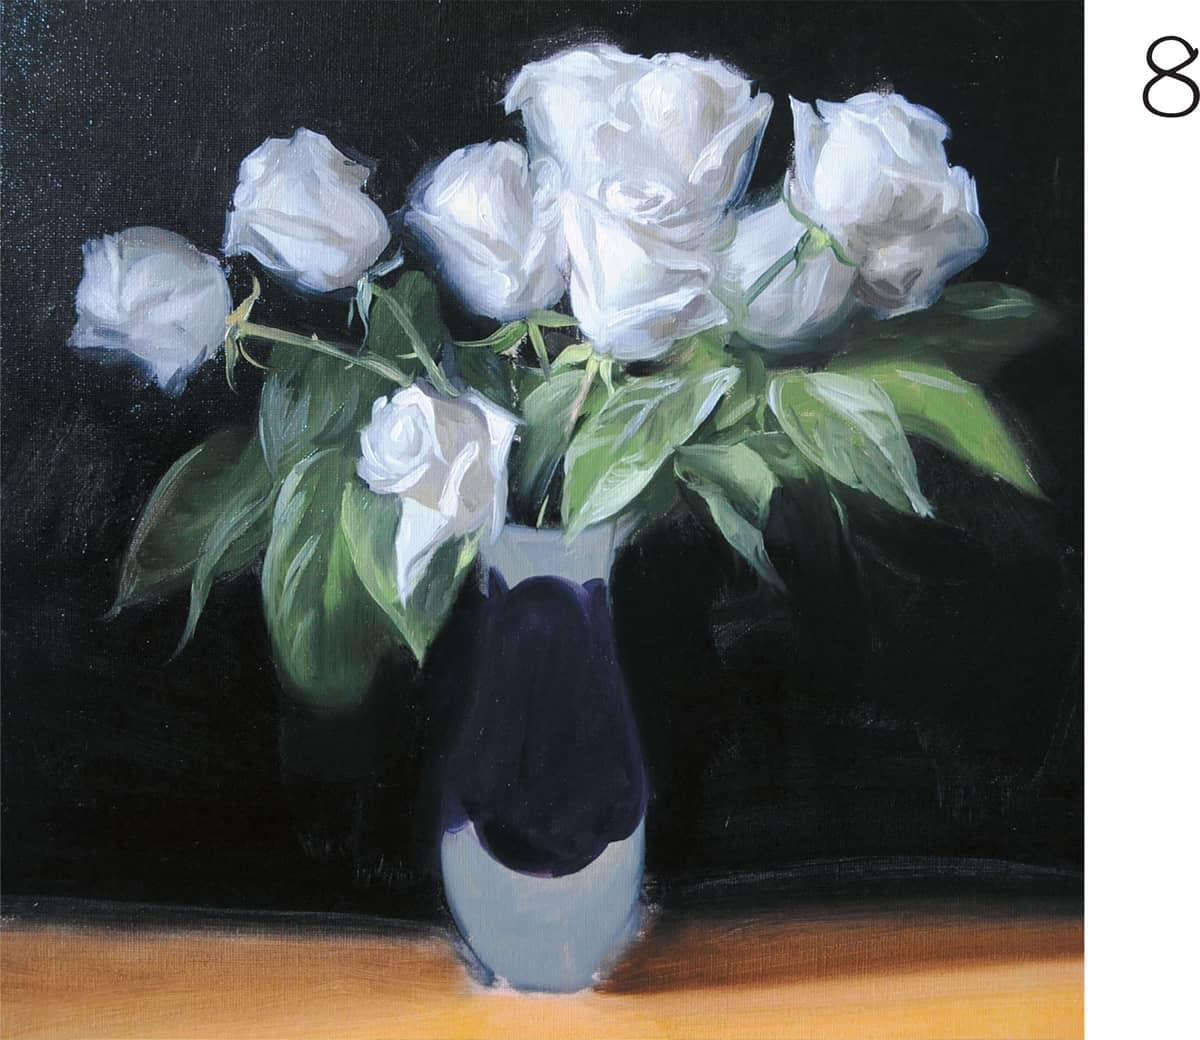
8 Mass in the dark of the silver vase with a mixture of alizarin crimson and ultramarine blue. When painting silver or other metallic objects, it’s important to note how the edges of such masses are crisp and sharp. Next, develop the light on the leaves with gray highlights.

9 Now finish the vase by observing and painting the lights with lighter gray mixtures of ivory black and white; then adding pure white highlights.
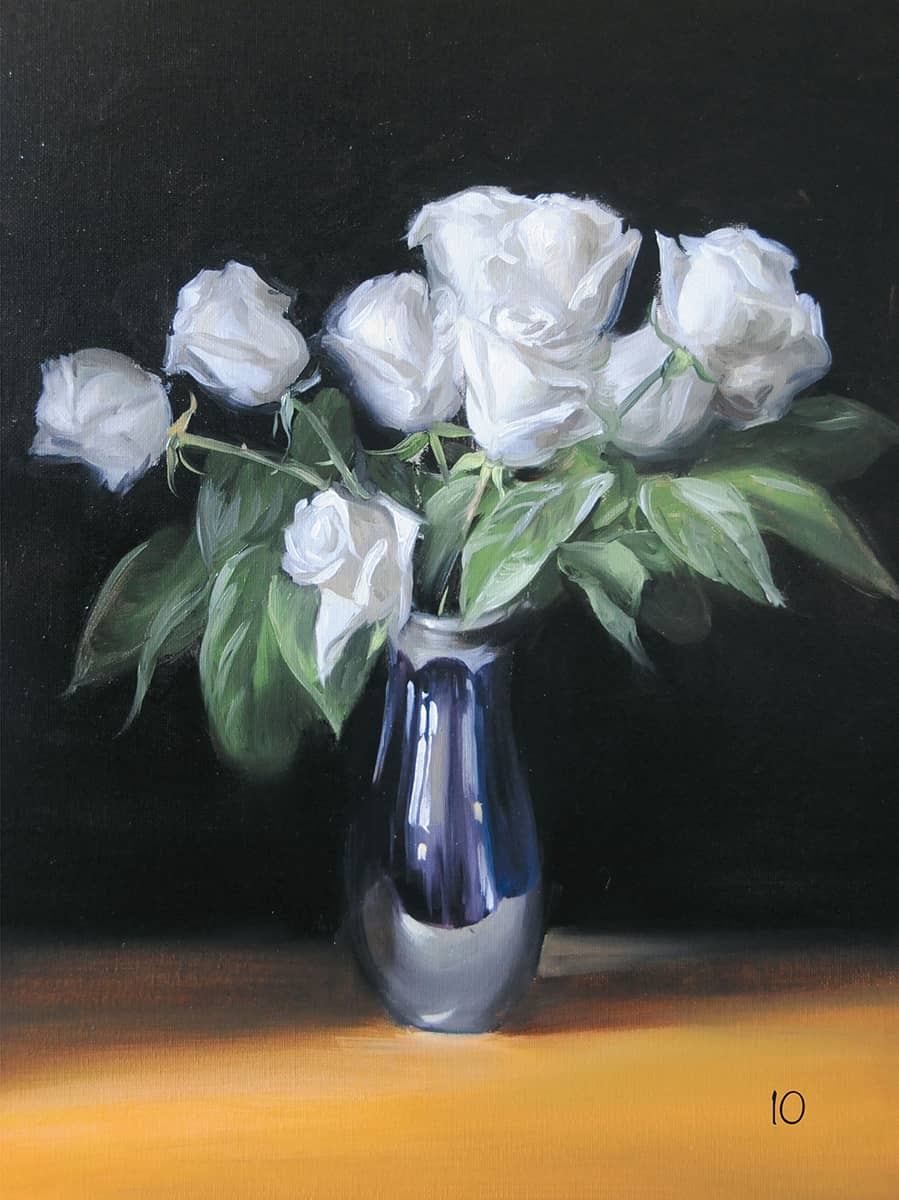
10 After completing the table, make note of any lost and found edges, especially where the vase appears and disappears into the background. The roses on the left of the canvas are cooler and darker as they recede into the shadows.
Hydrangeas

1 Working on a toned 16″ x 20″ canvas, begin drawing with a #2 white bristle filbert brush loaded with thinned ultramarine blue. Think in terms of the largest forms at this initial stage, keeping in mind that hydrangeas are spherical.
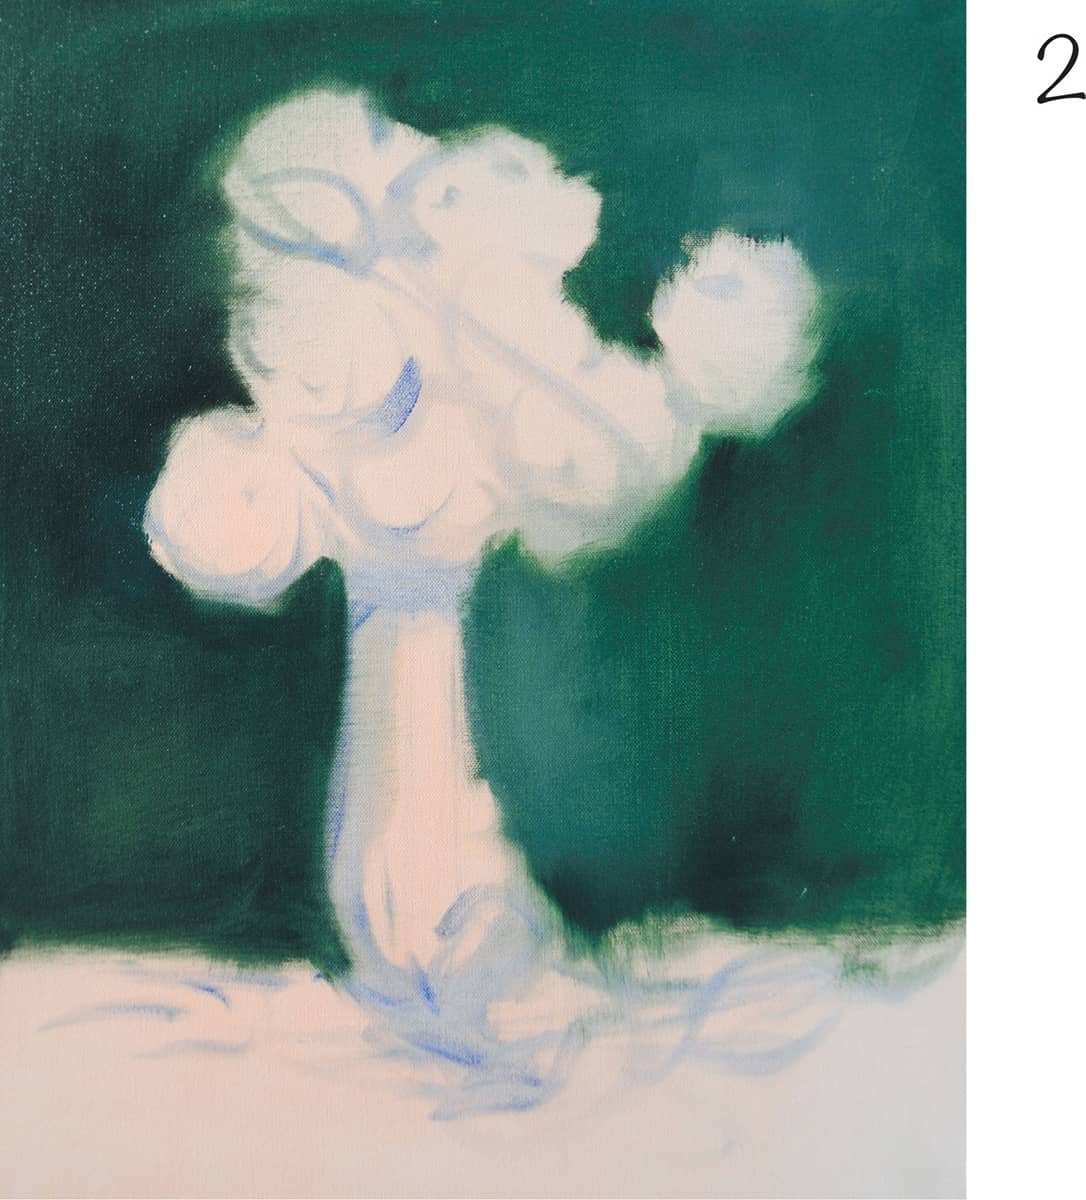
2 Block in the background with a 2-inch white bristle flat brush. Use phthalo green and ivory black for the darker areas, and phthalo green and gray (a mix of ivory black and white) for the lighter areas.
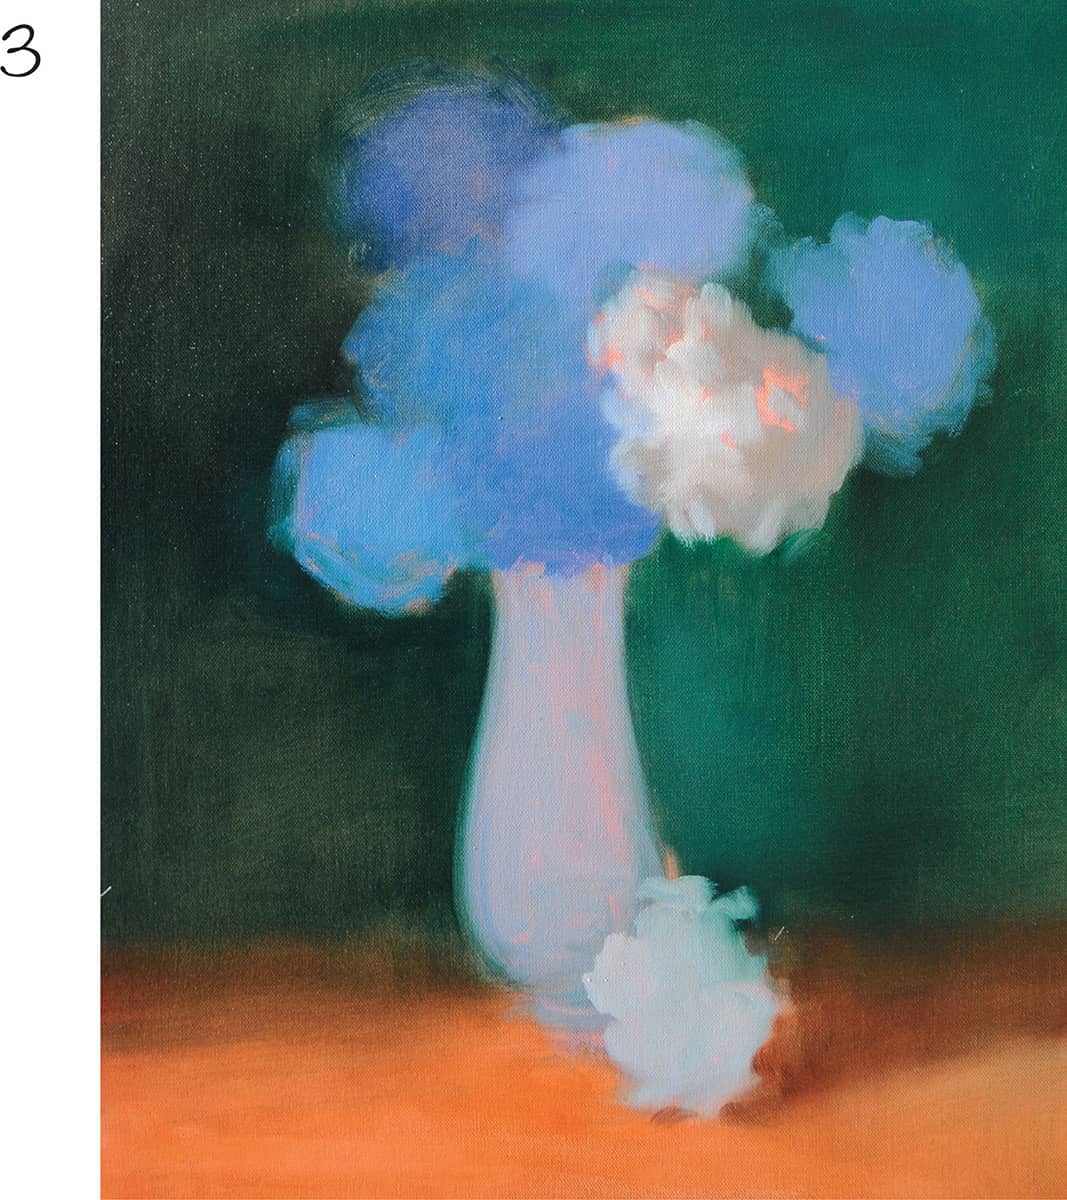
3 Block in the middle values with a mix of cerulean blue, ultramarine blue, and gray for the blue hydrangeas. Use gray for the vase and yellow ochre for the table. For the shadows, mix raw umber with cadmium red light. Block in the white hydrangeas with light gray and a bit of cadmium yellow light.

4 When everything is blocked in, begin working on the light effect and defining the petals. Load a #6 sable brush with a mixture of titanium white and a touch of cadmium yellow light. Then paint each petal individually to suggest the character of the hydrangea.

5 Begin building the lights on the blue hydrangeas as they relate to the white one, which is the focal point of the painting. Use a #6 sable brush to pull out the petals from the mass of each flower. The lights are achieved with a mixture of cerulean blue, ultramarine blue, and titanium white.

6 Add the darker values to the blue hydrangeas with a mixture of ultramarine blue and gray, continuing to build the spherical shapes of each flower. Next use a darker gray for the shadow on the vase, and then add some leaves that contribute to the rhythm of the composition.

7 To create more dimension, add some reflected lights on the flowers. Then use ultramarine blue to paint the design on the vase. For the table, use grays to add more half tones that create a transition between warm light and warm shadow. Paint a few loose petals on the table. Note that the white petals are in the brightest light.
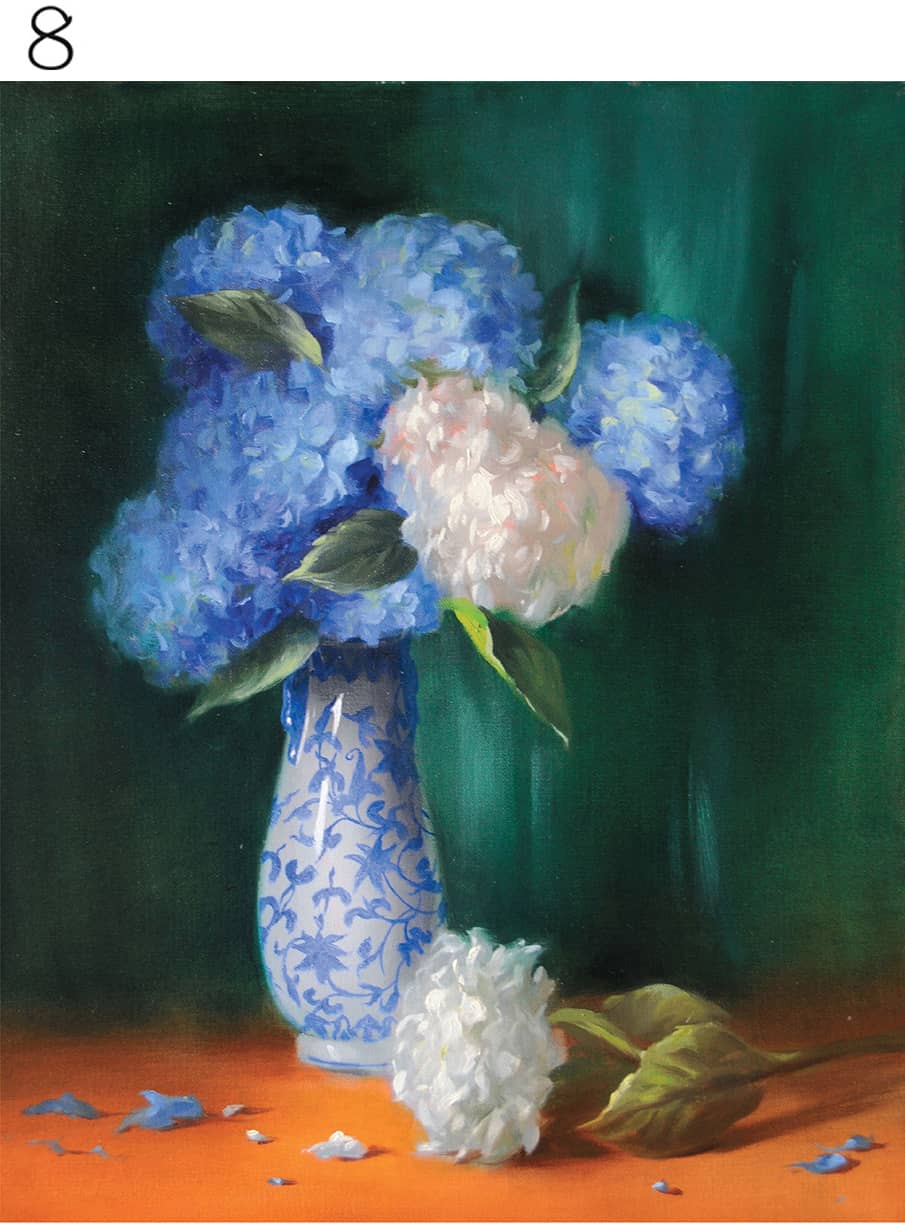
8 For the final touch on the vase, glaze a thin shadow with Payne’s gray and add the white highlights. This completes the porcelain texture.

DETAIL This close-up shows the modeling of the flowers. Think of them as out of focus when you begin, and sharper, with more detail, as you develop them. Remember to start in the middle and build your lights and darks.
Lilacs
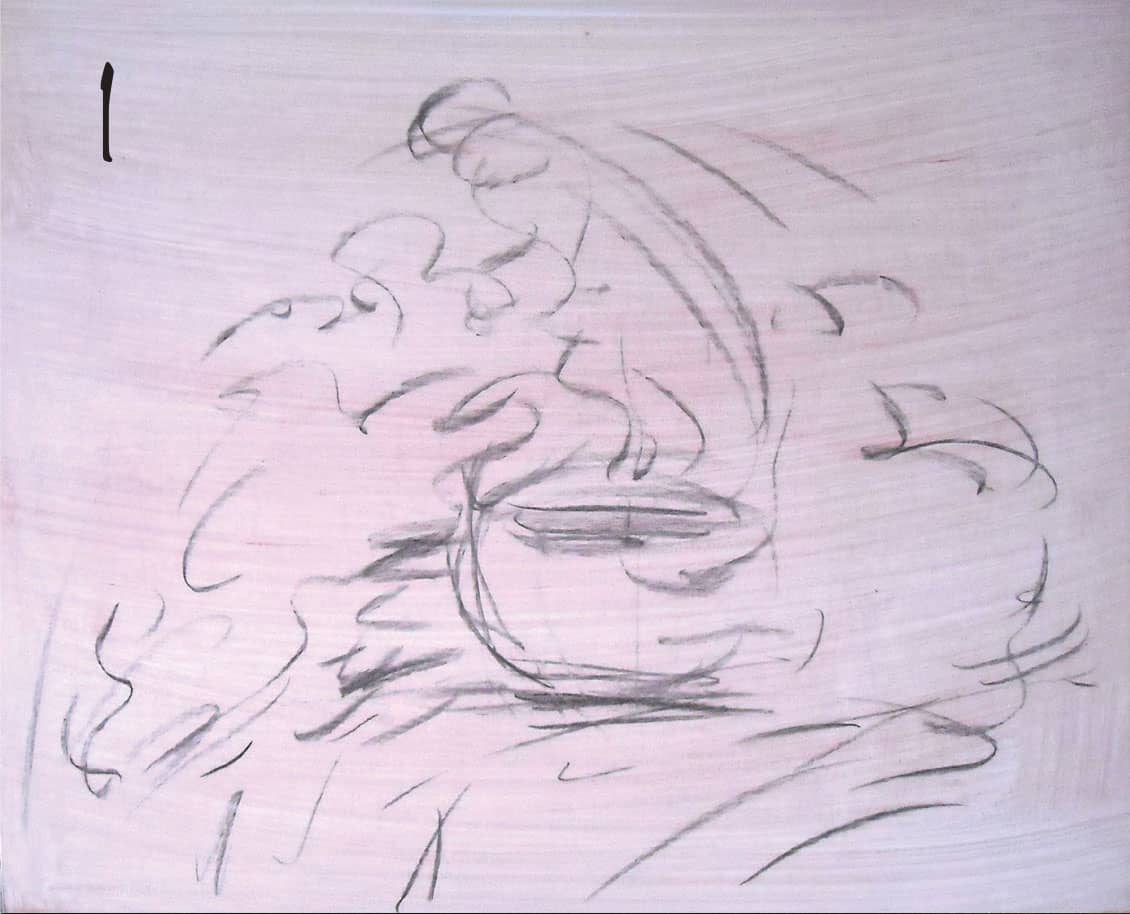
1 Tone a gessoed panel with pink by wiping a mix of cadmium red medium (or terra rosa) and turpentine across the surface with a soft cloth. For a quicker drying time, you can use watercolor paint for this step. Once dry, use soft vine charcoal to sketch the subject with loose, gestural marks that indicate the position of the objects and suggest the flow of the composition. Always try to create compositions that feature a sense of movement, or “dynamic action.”
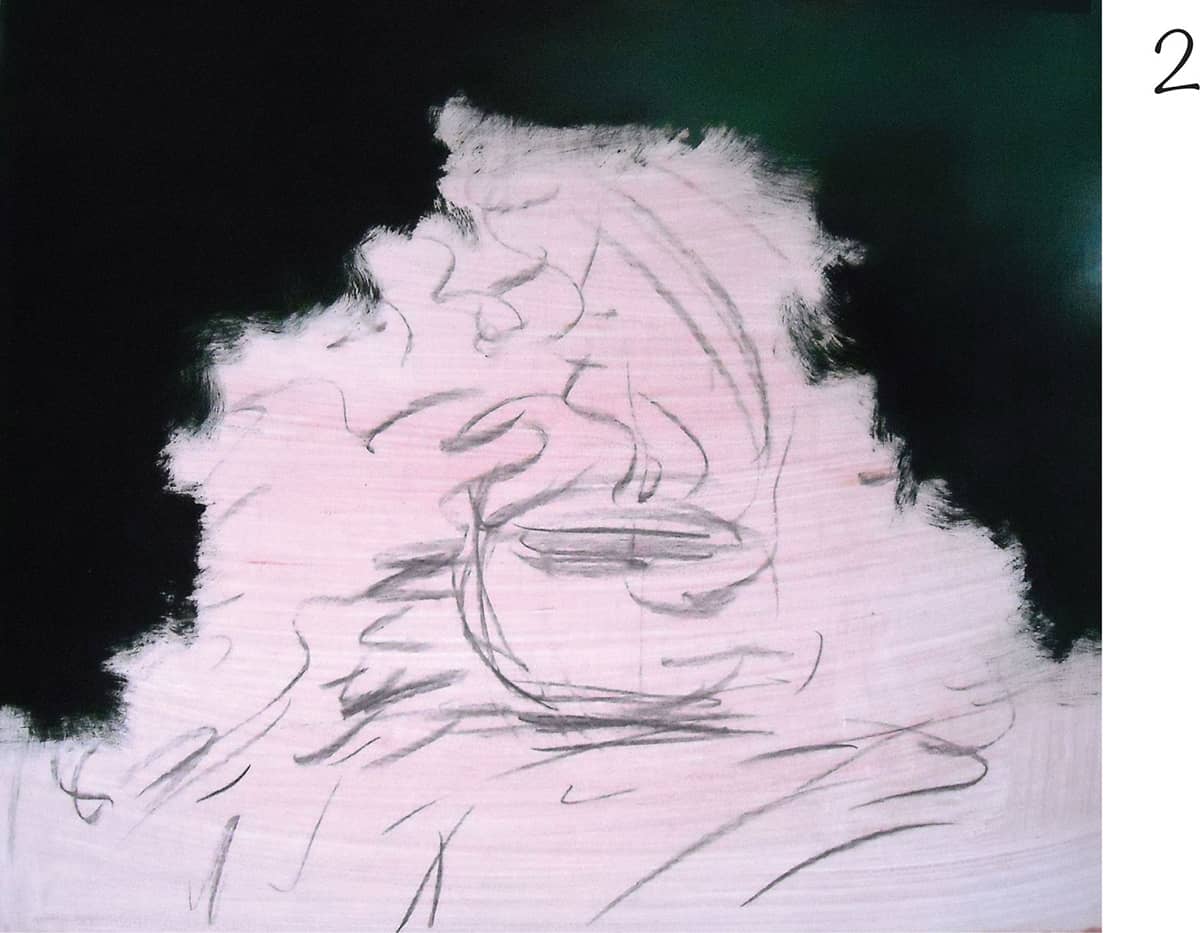
2 Create a dark green mixture of phthalo green, ivory black, and cadmium lemon yellow. Using a 1- to 2-inch flat bristle brush, apply this mixture on the far left background, adding white as you move to the right toward the lighter areas.

3 Block in the shadows of the lilacs with filbert bristle brushes and dark violet mixtures of alizarin crimson, ultramarine blue, and titanium white. Allow for variation within the masses of color, reserving the cooler, darker tones for the shadowed area at right. Stroke a few warm shadows on the pot and tablecloth using yellow ochre darkened with ultramarine blue.

4 Block in the light masses of the flowers using a lighter value of the violet mixture from step 3, adding more white as needed. Continue blocking in the brass bowl with a mixture of yellow ochre and ultramarine blue.

5 Block in the darkest shadows of the tablecloth with gray, using a mix of titanium white and ivory black. Then create a green mix of ultramarine blue and lemon yellow toned down with gray and apply it to the green tablecloth. Next, return to the flowers and build the lightest values, using ultramarine blue, alizarin crimson, and plenty of titanium white.
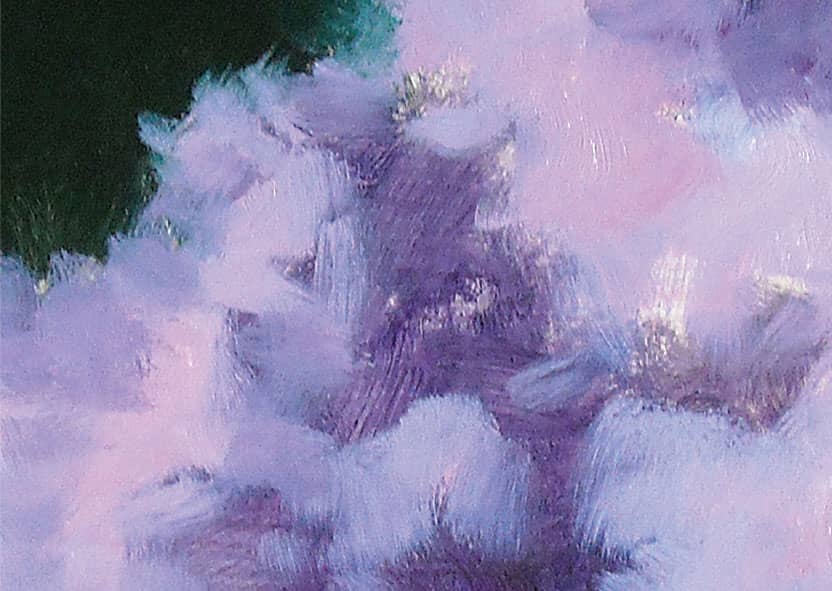
FLOWER MASS DETAIL As you mass in areas of a painting, use large brushes and keep your strokes loose and energetic. Notice the difference in opacity between the deep, transparent shadows and the opaque lights, which communicates depth even in this early stage.

6 Further develop the texture of the flowers, following the rhythm and shapes of the petals using a small filbert brush loaded with paint.

7 Begin working on the brass bowl by establishing the darks with a mixture of ultramarine blue and alizarin crimson. Paint the design of the bowl with a mixture of yellow ochre, cadmium yellow medium, and white.

8 Continue to develop the details with a round Kolinsky sable brush. Paint the tablecloth with grays, building up the light to pure white. Then paint the texture of the rest of the lilacs. Notice the reflected light coming from the right as it hits the flowers and the bowl. For these areas, use yellow ochre.
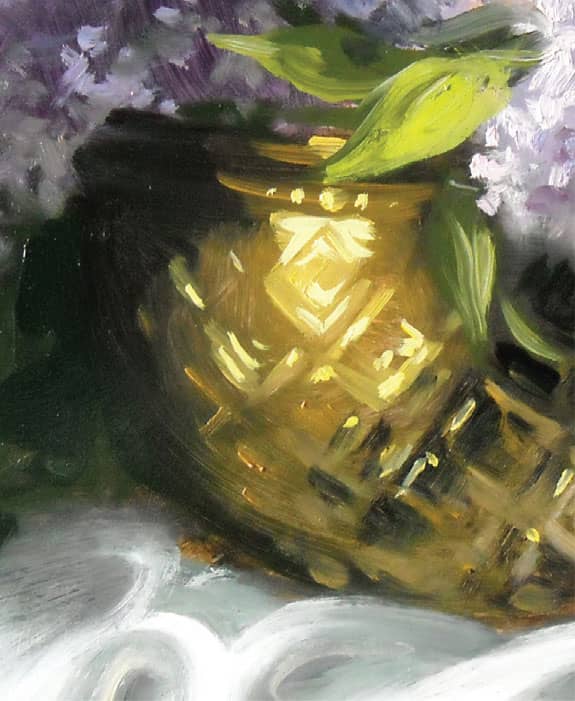
BRASS DETAIL For a more luminous painting, keep the darks transparent and build the lights with opaque layers of paint. Make each stroke count by following the form as you pull the brush.