
 CHAPTER 6
WATERCOLOR
Tulips
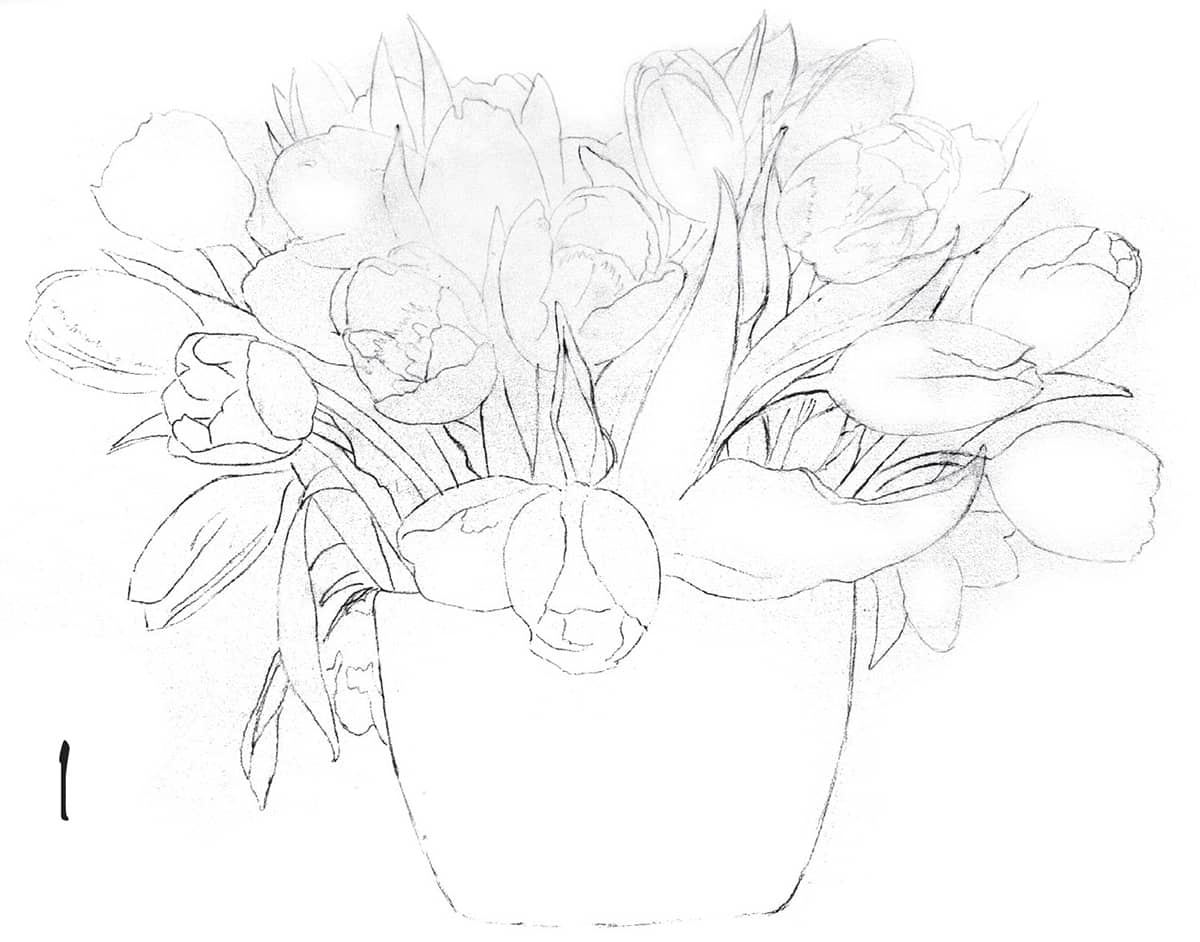
1 Create a loose line drawing of the composition.

2 Paint masking fluid around the outer edges before wetting the entire background. Then drop in diluted colors—rose and yellow at the top, rose and cerulean blue on the right, and cerulean blue and yellow at the bottom. Mix the colors, and allow them to blend by tilting the painting. If an area begins to dry, mist it with a spray bottle. Then spatter yellow with a toothbrush.

3 Once dry, peel off the masking and work on the flowers. Keep each color—rose, yellow, and cerulean blue—separate, and use only clean water. Apply a light wash of color.
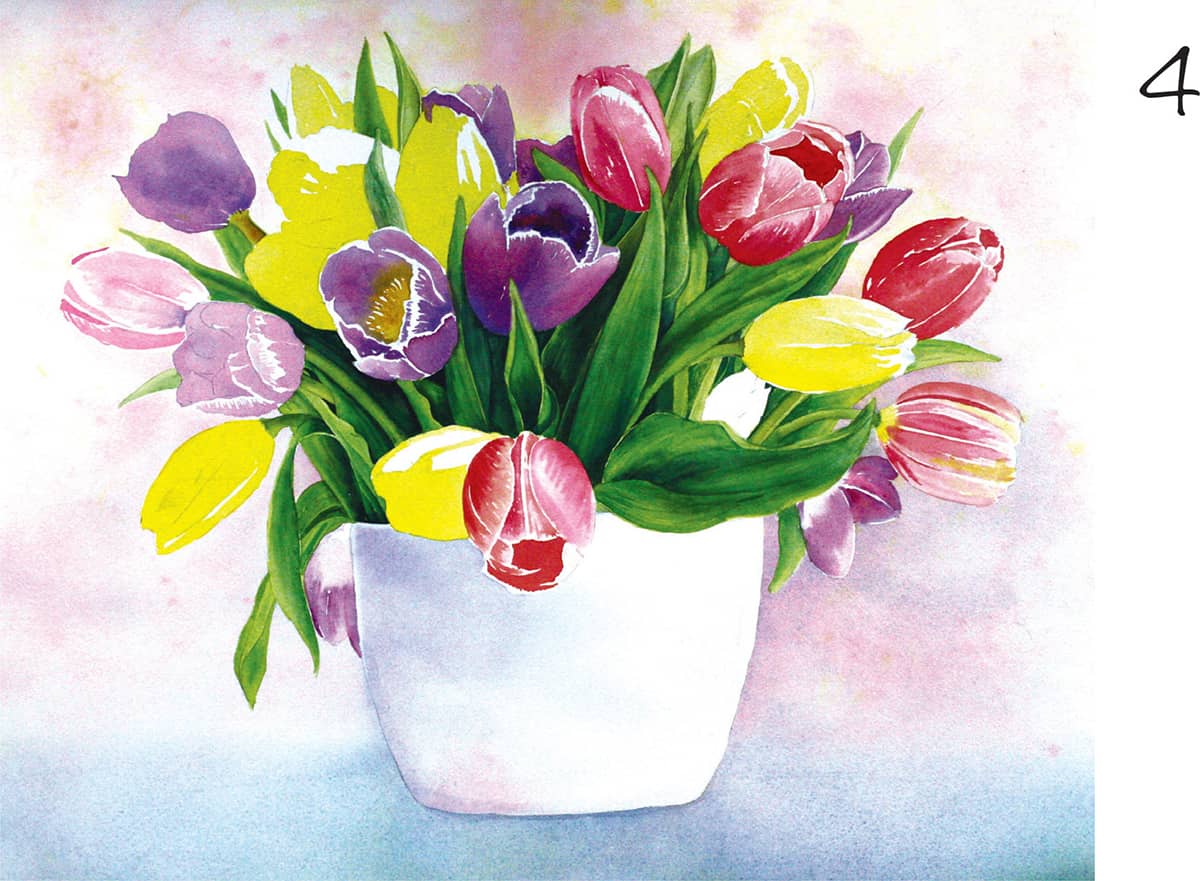
4 Wet the entire vase with clean water, drop in cerulean blue and a purple mixture on the left side, and tilt the painting to blend. After the vase area is dry, use a light green wash made from both the blues and yellow to cover the leaves. Mixing phthalo blue, yellow, and a bit of rose in varying proportions will create every shade of green needed for the leaves. Beginning with the shadowed areas, paint one leaf at a time. Work on dry paper, and paint the shadows with graded washes to achieve soft dark-to-light transitions.
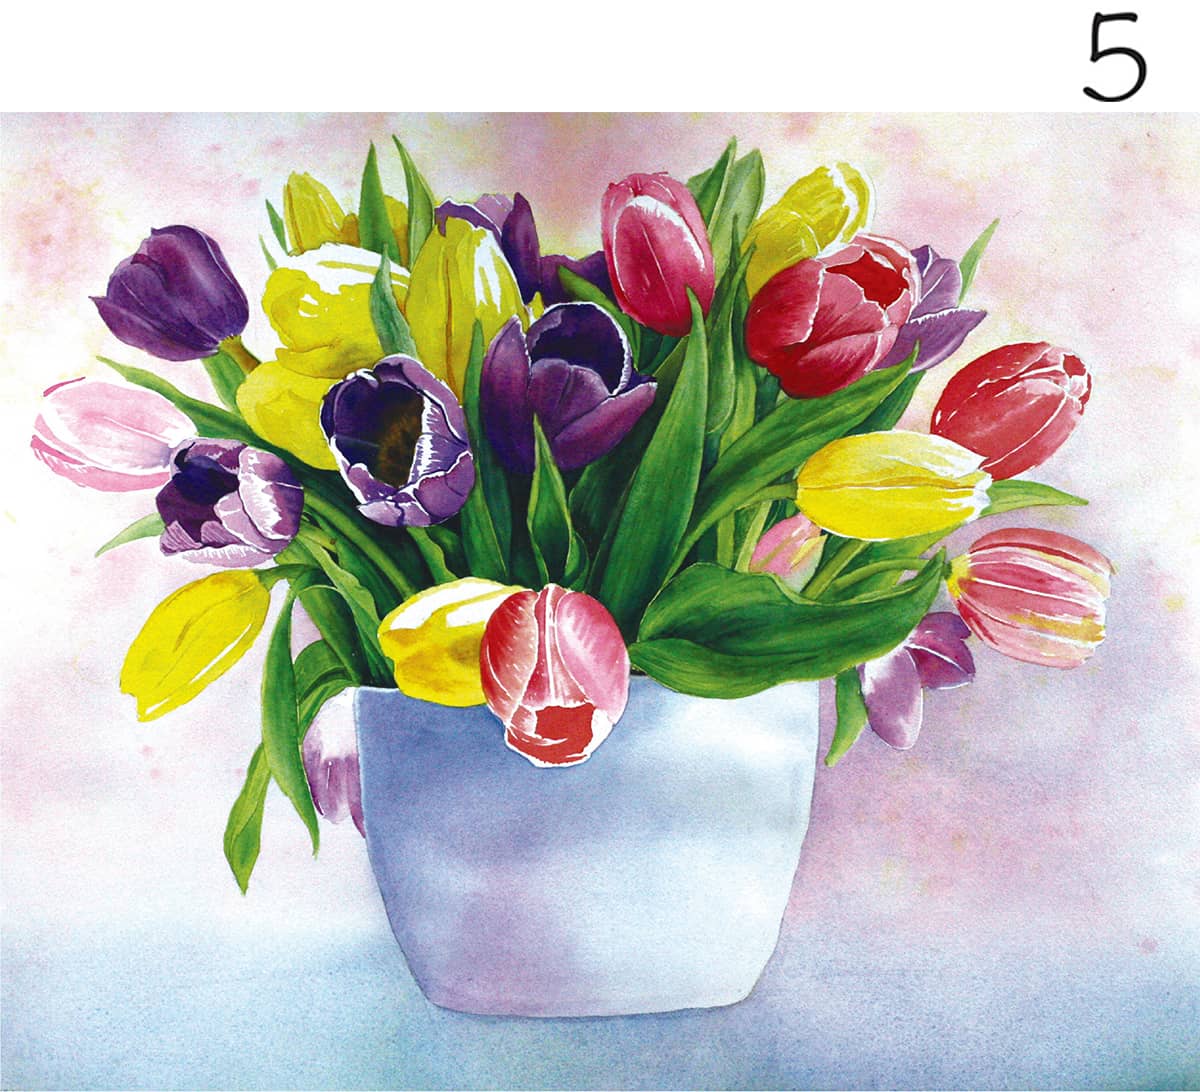
5 Give the vase another wash of cerulean blue and purple, again working wet-into-wet. Now finish the flowers. Work the values so that light flower edges are against dark leaves and dark flower edges are against light colors to create maximum visual impact. Keep your colors bright and pure by layering shadow colors and never mixing more than two primary colors at a time. For example, layer yellow tulip shadows with light washes of rose and yellow (orange), rose and cerulean (purple), or yellow and cerulean (green).
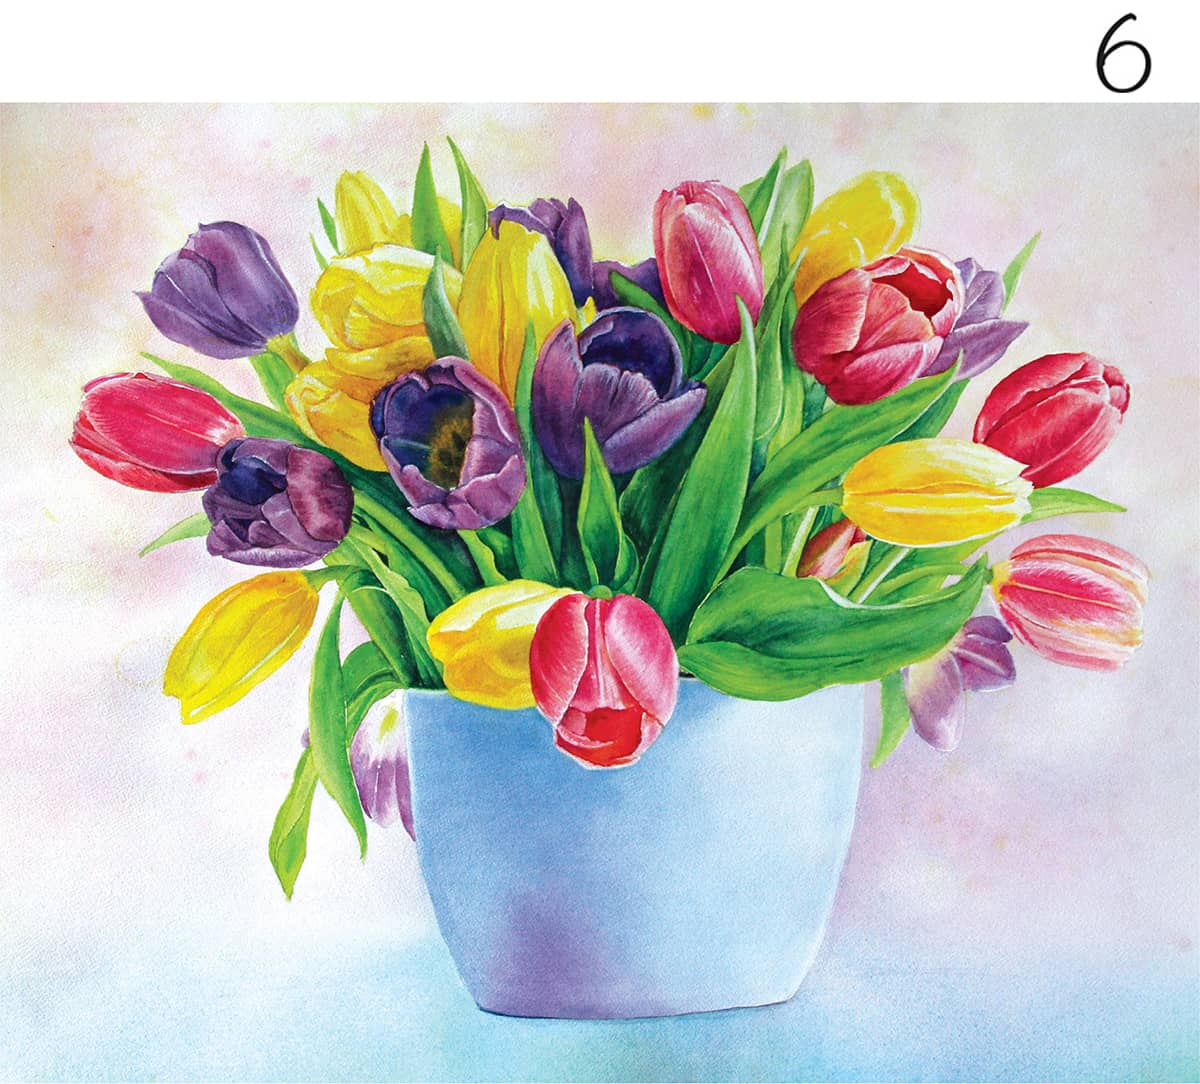
6 Wet the vase again before dropping in a final layer of blue and purple. Once dry, paint a small shadow under the edge (darker on the left side) so the vase doesn’t appear to be floating. Use white ink to clean up ragged edges and add tiny highlights to a few leaf and flower edges.

GRADATED WASH A gradated (or graduated) wash moves slowly from dark to light. Apply a strong wash of color and stroke in horizontal bands as you move away, adding water to successive strokes.
Flower Field
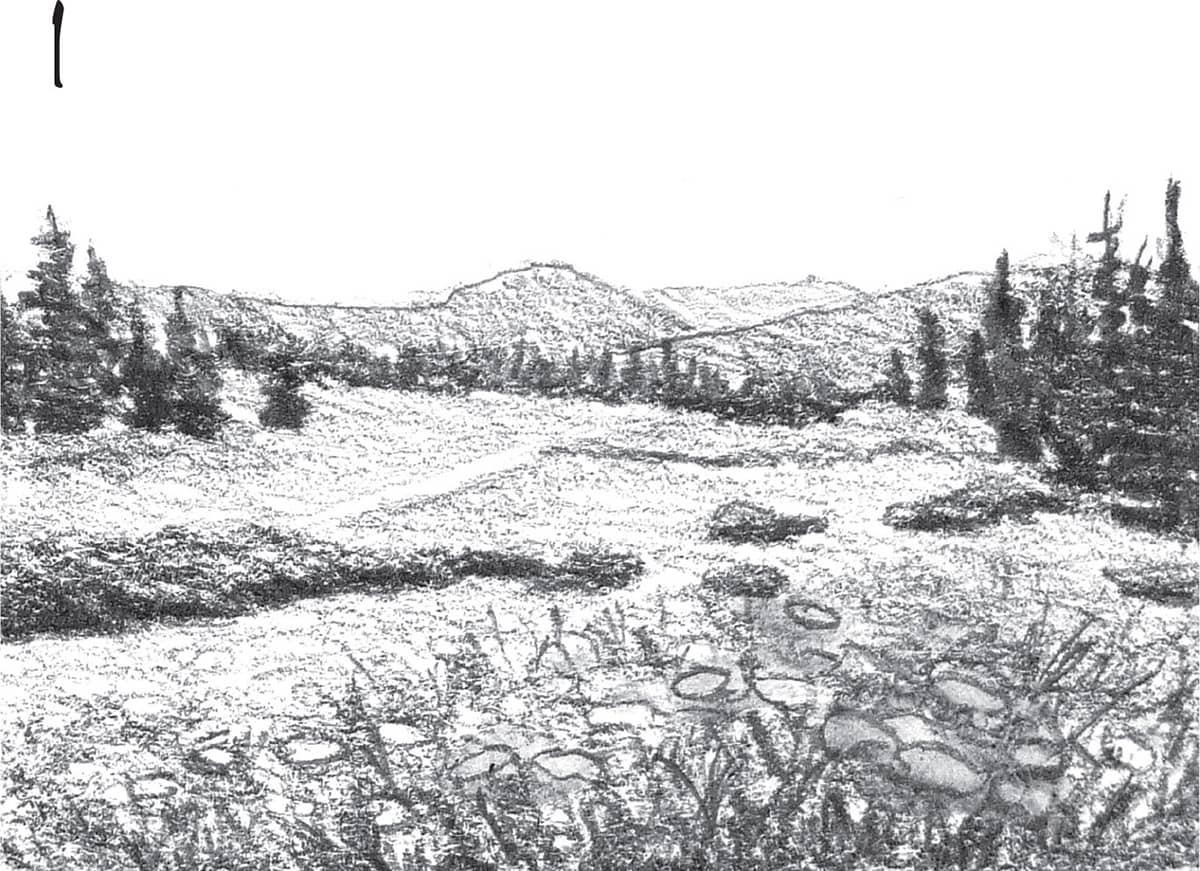
1 Make a thumbnail sketch, if desired, to determine the values and composition.
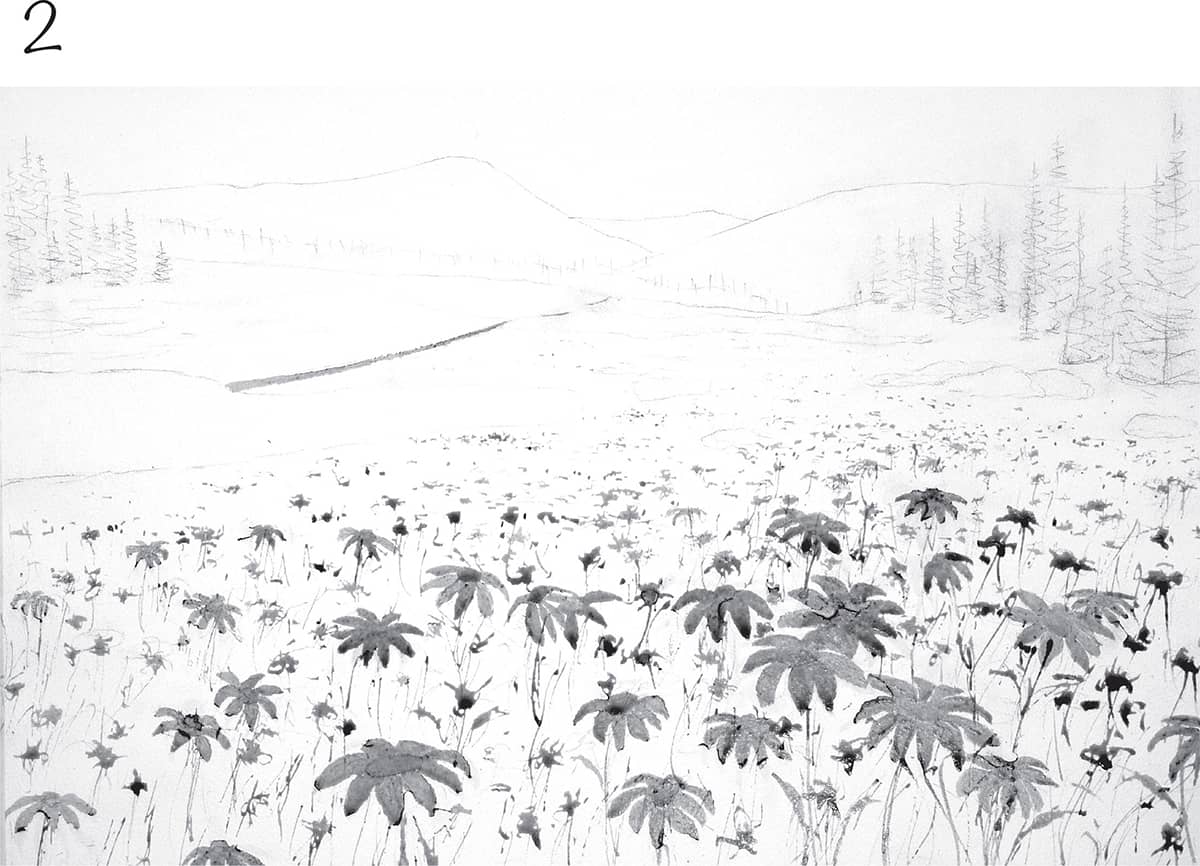
2 Make a line drawing on paper; then mask in the flowers, adding a few extras where it seems natural. Add a little bit of masking to the road in the distance.

3 Wet the sky area with clear water first. Then use a mixture of ultramarine blue, a tiny bit of thalo blue, and a touch of burnt sienna to make a flat wash for the sky, keeping it slightly lighter near the horizon and darker near the top. Next work on the hills from light to dark, using varying mixtures of ultramarine blue, burnt sienna, sap green, and a touch of phthalo blue. On the foreground hill, use a little more sap green and a touch of raw sienna.
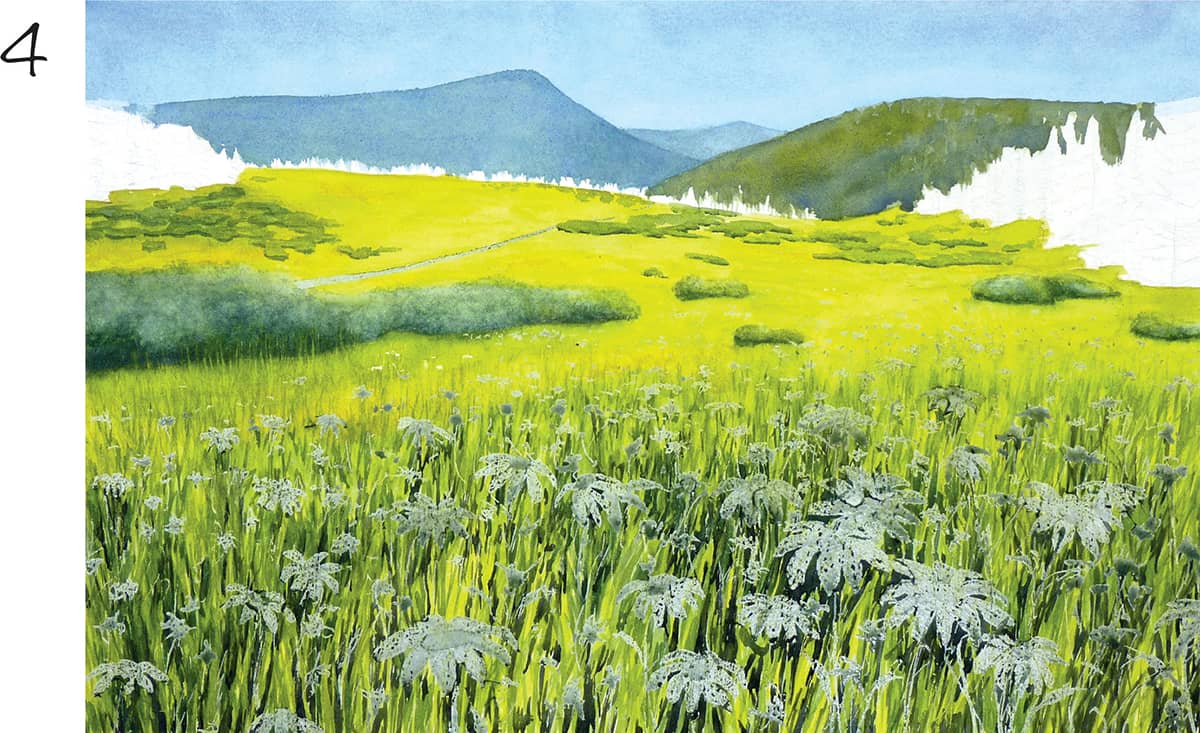
4 Mix several puddles of colors before starting to paint. Paint the lightest value with a mix of lemon yellow and ultramarine blue, adding in bits of yellow ochre while it is still wet. Slowly change colors, mixing in darker greens towards the foreground grasses and flower stems, and using different mixtures of ultramarine blue, burnt sienna, phthalo green, sap green, and some hansa yellow. Paint the bushes and flat green areas in the distance; then work in the foreground around the masked flowers, using random back-and-forth motions to create the grasses and stems. Once dry, go back over the grass strokes with a light yellow green. Use a damp brush and soften the edges between the flowers and the transition to the distant meadow.

5 Remove the masking with rubber remover. All the rough edges will be cleaned up when you paint the flowers and stems.

6 Paint the foreground flowers in the colors you wish. Paint the other flowers as abstract suggestions of red, pink, and purple wildflowers. Then paint the trees in the distance. Put a piece of masking tape along the hill edge to keep the dark tree paint from running. Paint the trees, varying the color of green between light and dark. After painting the pines, add drybrush texture to the bushes in front. Then add some glazes of color to the meadow grasses in the distance.
Fall Foliage

1 Create a light line drawing of the composition. Use liquid mask to cover the swans until the end of the painting.
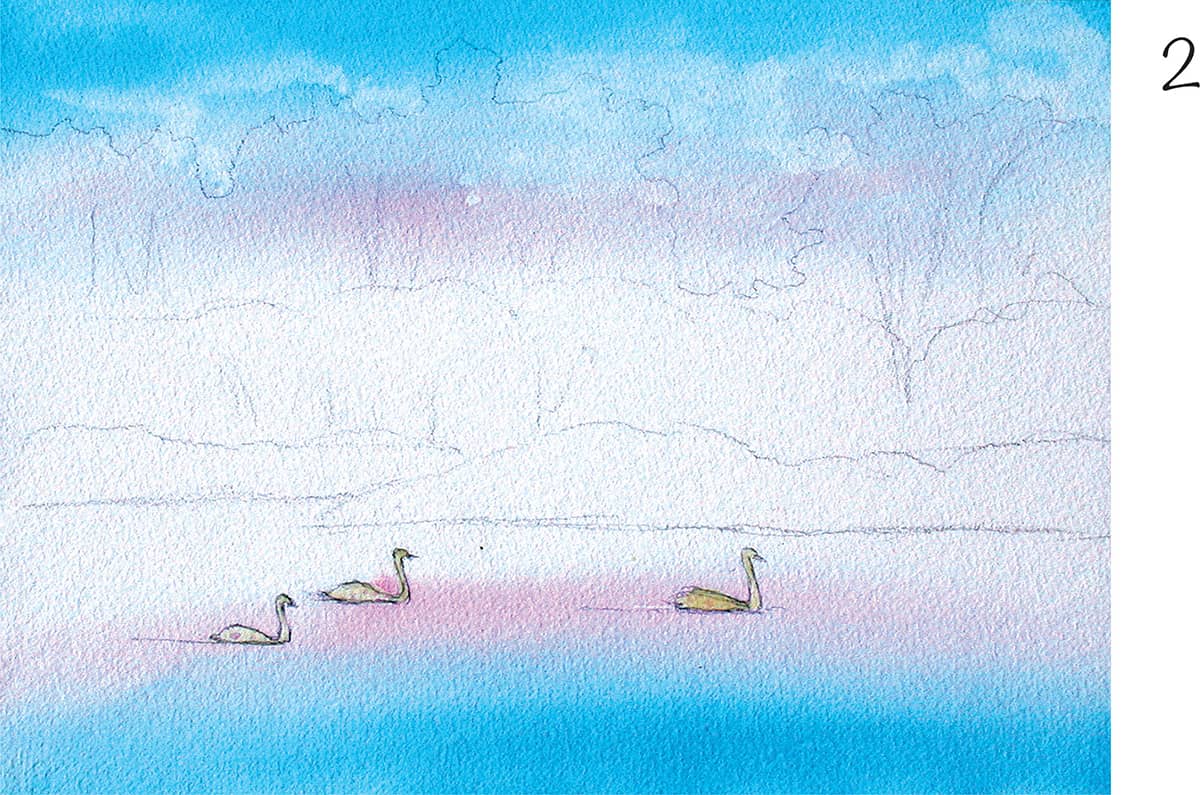
2 Mix a light puddle of phthalo blue and a small puddle of opera. After wetting the paper completely, paint a graded wash starting at the top. Pull down a bit of the phthalo blue, keeping it darker at the top and getting lighter as you move down. Mix in a little opera as it approaches the tree line. With a crumpled tissue, blot out a few clouds. On the bottom of the paper, make a mirror image wash of the sky on the water area. The wash should start light and grow stronger as it nears the bottom of the paper.

3 Use all the colors in your palette to create the colorful fall foliage. Work on dry paper so you can define the edges of your foliage. Use a 1/2″ flat brush to form a foundation at the lake edge and a natural sea sponge to create leafy texture at the tops of the trees. As you chase the wet edge across the page, analyze the pattern of trees being created for interest, balance, color, and randomness. Don’t go back over any area that is starting to dry as this will muddy the colors.

4 Once the colorful wash is completely dry, separate the low plants and reeds at the bottom of the foliage. Using a medium round brush, drop in stronger and darker colors at the top of this section, using negative painting around the reeds to shape them. Stipple and vary the edge up and down to form an interesting edge. With the 1/2” flat brush and a small amount of water, feather the wet, stippled paint up into the first colorful wash. When stippling, be careful to place analogous colors on top of existing colors to avoid muddiness. Create additional detail and shadows at the bottom edge where the reeds meet the water for interest and definition.

5 Next add definition to the trees. Pick areas suggested by the colorful wash and create bits and pieces of tree edges. Add stronger color around the tree edges, leaving the existing color in place, to create dimension. Remember that this is a cluster of trees and you are only painting parts of trees rather than perfect rows. Once you have an interesting cluster of trees, add a few trunks and branches using a rigger brush.
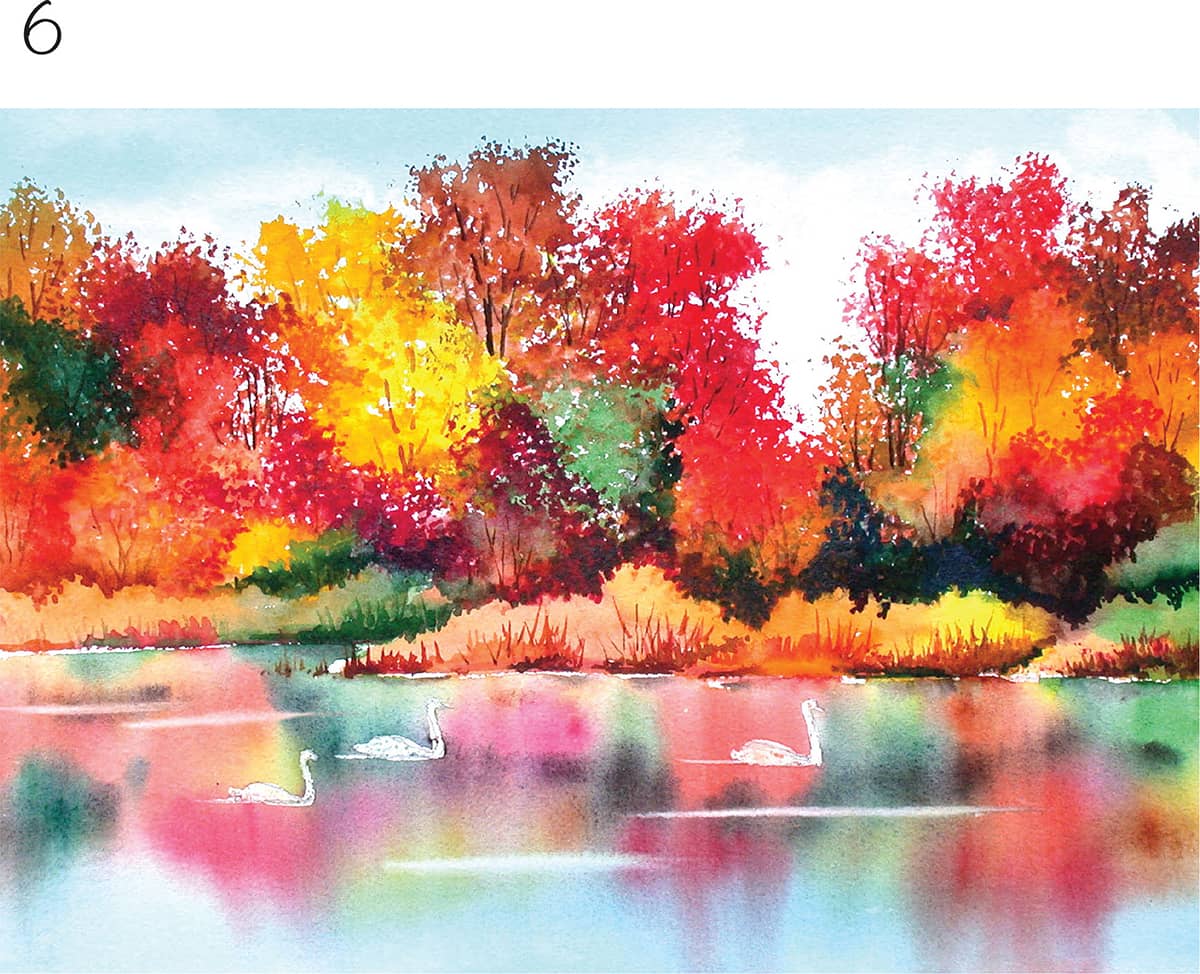
6 Make sure all the tree color paints are wet on the palette so you can work quickly in this step. With a flat brush, wet the entire water area of the painting. Then, with the 1/2-inch flat brush, pick up colors and add them in the water area below those same colors in the trees. Keep these colors close to the shore. The colors do not need to exactly match to the trees above, but should be close. Once the color is applied, take a damp 1″ flat synthetic bristle brush with no paint in it and pull a vertical stroke from the shoreline down to the bottom of the page. Clean the brush, squeeze the moisture out with a tissue, and repeat several times until you have a soft, slightly blurred reflection across the entire lake. While the water is wet, lift a few horizontal strokes out with a clean, damp synthetic bristle brush to create soft ripples in the water.
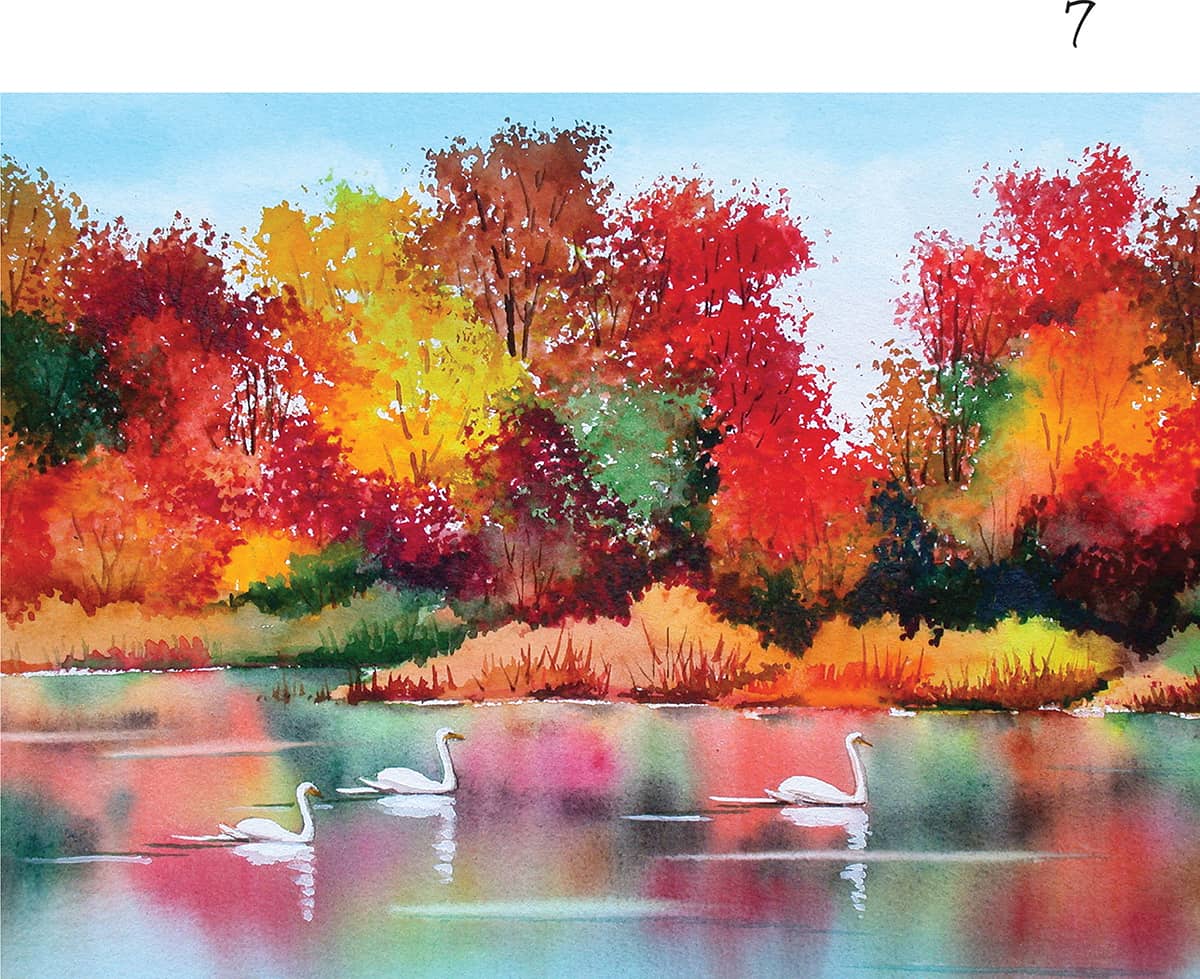
7 Once the lake is dry, remove the mask from the swans and paint them. With a small detail brush, paint a little shadowing on their necks and lower bodies. Paint the beaks and eyes, as well as stronger shading where the swans meet the water to make them appear to be swimming. The swans are white and should remain a light value so they stand out from the color in the water. If you did a good masking job initially, very little detail is needed. Add swan reflections with white gouache.
Summer Garden

1 Roughly sketch out the composition; then mask the white flowers with liquid frisket.
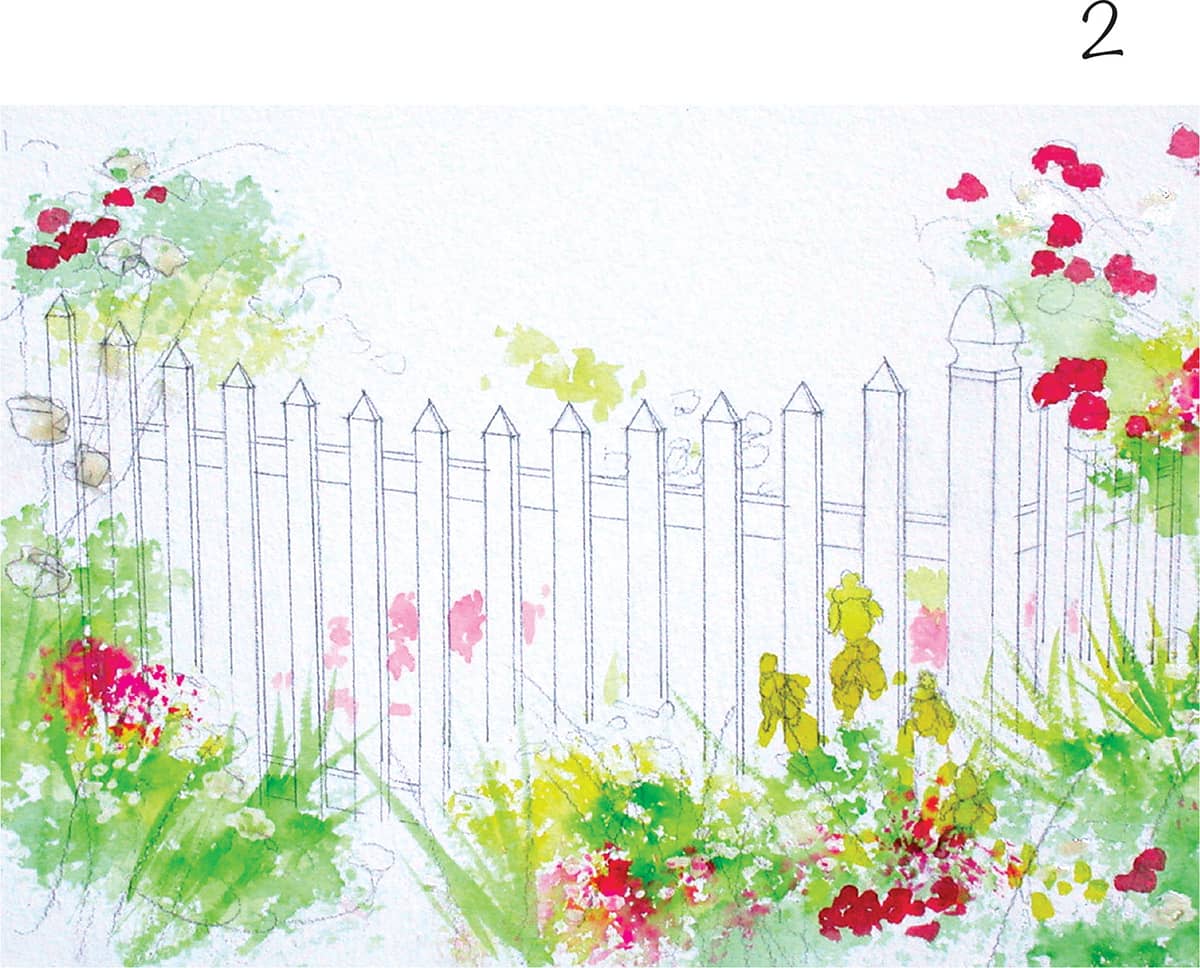
2 Block in the flower color using permanent red, permanent lemon yellow, permanent yellow deep, lilac, and opera. Block in a hint of green foliage for the plants with permanent green #1.

3 Mask some of the flowers you just painted. The mask dries transparent, which lets you see both the color and the value of that color under the mask as the painting develops. Mask out some of the plant shapes and edges, particularly at the bottom and side areas of the fence, using a small brush and a sea sponge.
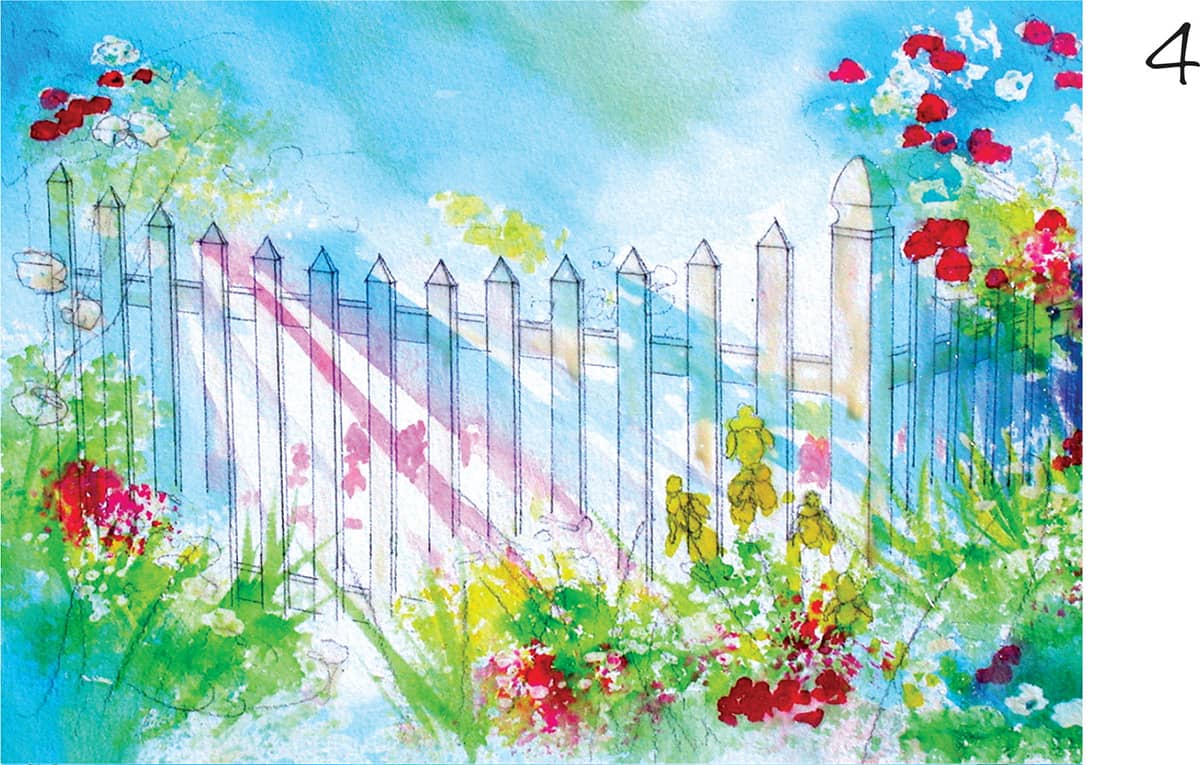
4 Next wet the entire watercolor paper and flood in some of the cool colors in the background, around the edges, and a few shadows cast across the fence. Use phthalo blue, opera, magenta, and permanent green #2. Try to keep these colors away from the center areas or sections where you want bright, lively colors. Once the colorful wash is dry, carefully mask out the picket fence, including the slats, cross rails, and corner post.

5 When the mask is completely dry, rewet the paper and flood in Hooker’s green, ultramarine blue, phthalo blue, permanent green #2, and magenta for the darker value colors. Use both a 1″ flat brush and a sea sponge to create plant leaf texture. Stamping in with the sea sponge while the paper is wet creates softer-edged texture for more variety.

6 Dry the painting completely with a hair dryer, and then remove all the masks with a masking fluid pickup. Before removing the mask make sure both the masking fluid and the wash are completely dry. If the mask is still damp underneath, it can tear the paper. If the paints are still slightly damp, they will bleed into the areas you protected with the mask. With the mask removed, you can see your painting coming alive. The picket fence stands out against the darker background and the colorful splash of flowers is apparent.
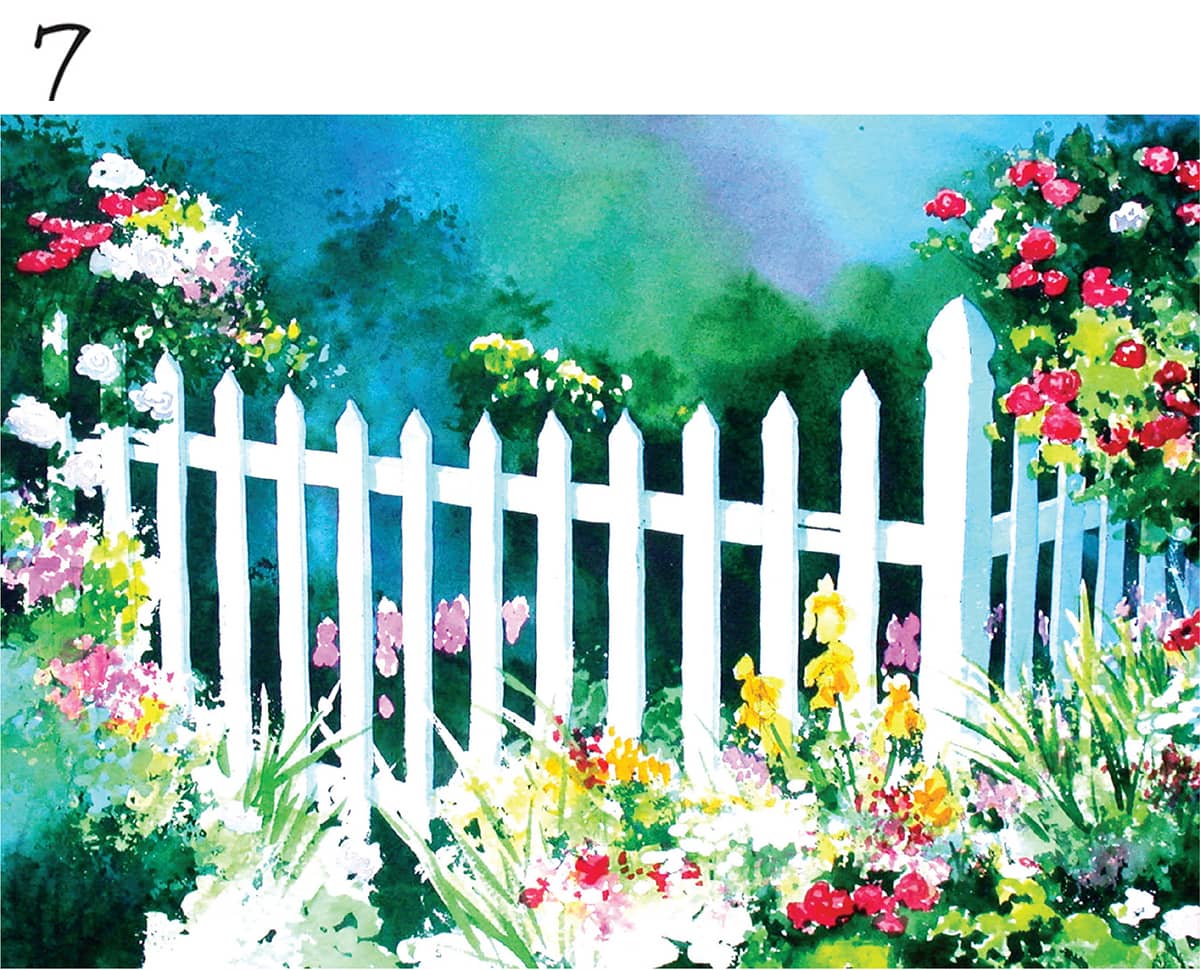
7 Add more color to the flowers, including detail to the roses and irises. Enhance the garden scene using a medium round detail brush, as well as a rigger brush and a sea sponge for leafy texture. Plant foliage, shadowing, and additional random areas of colors help to fill out the garden.
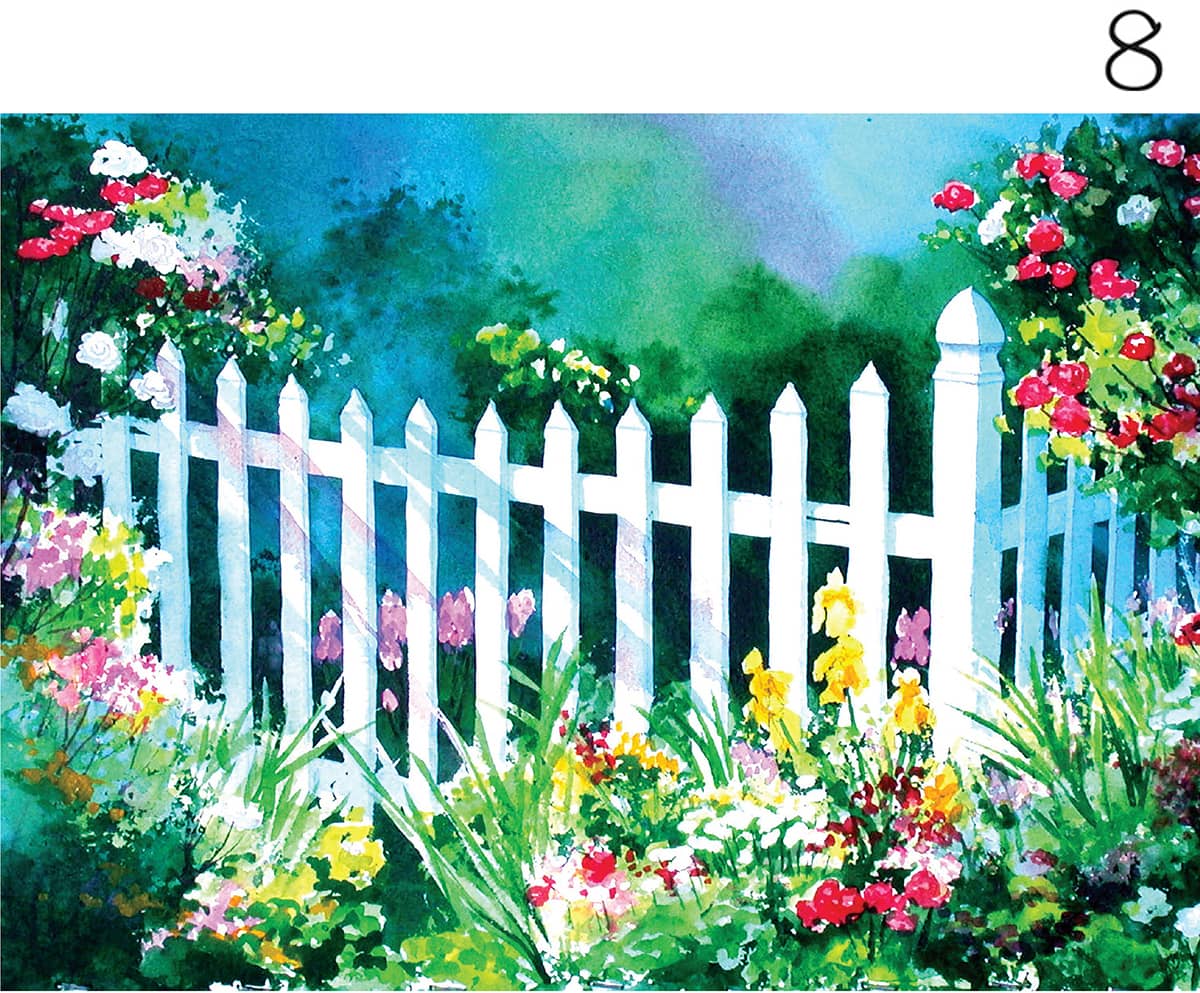
8 Adjust plant shapes and flower colors for a sense of realism and balance in the painting, adding color as needed with a small brush. To give the painting more depth and variety, knock back some of the flowers into shadows, particularly at the corners and some of the bottom of the garden. Use a 1″ flat brush and phthalo blue mixed with opera to create shadows. For a final touch, enhance the shadows cast across the picket fence, creating a more dramatic sense of light and shadow.