
 CHAPTER 4
ACRYLIC
Daisy in Cobalt Vase

1 Use a large flat brush to evenly tone the canvas with a thin wash of ultramarine blue. Draw the composition, using a straightedge to create horizontal, sloping lines to suggest the baseboard and floor shadows. Block in the shadow of the glass bottle and apply lettering so that you’ll have a guideline for your paint applications.

2 Once you are satisfied with the sketch, use a medium flat brush to block in the foreground with a mixture of titanium buff and titanium white. For the upper half of the background, mix burnt umber and ultramarine blue, adding titanium white to the mixture for the bottom half. Then create the shadows using a mix of cobalt blue, burnt umber, and titanium white, adding retarder to smooth out the transition between colors.

3 Next, build up the cast shadow near the bottle with cobalt blue, mixing in titanium white where you want to suggest that light is shining through the bottle. Begin work on the bottle itself, using a small brush to apply bold applications of ultramarine blue for the dark values and cobalt blue for the lighter ones. Paint around the lettering on the bottle, around the highlight shapes, and around the stems in the bottle.
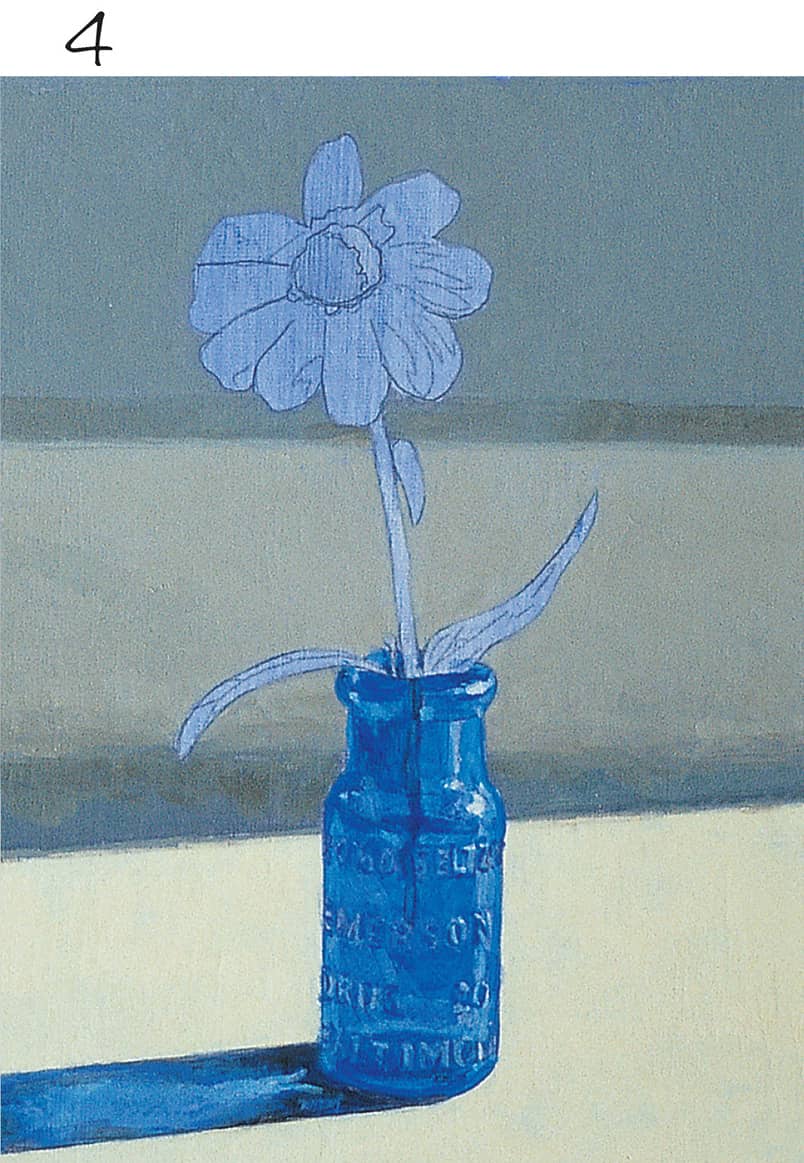
4 Using a small round brush, create the illusion of glass by adding highlights of titanium white to the blue of the bottle. Smoothly blending these white highlights with ultramarine blue and cobalt blue gives the bottle its translucent quality. Still using the small round brush, outline areas of the lettering with cobalt blue and ultramarine blue to give them dimension and depth.

5 Now paint the stem of the flower using a mixture of brilliant yellow-green and cadmium yellow light. Add hints of ultramarine blue to the shadows on the leaves, and then paint the daisy’s petals using cadmium yellow light mixed with titanium white. With a mix of burnt sienna, quinacridone crimson, burnt umber, and cadmium orange, create the shadow of the daisy’s center. Switch to cadmium yellow medium mixed with cadmium orange and titanium white for the pollen’s lightest values.

6 Finally, enhance the color of the petals, and the highlights in the daisy’s center and on the bottle surface using various light mixes of the following colors: titanium white, cadmium yellow light, and ultramarine blue. Apply pink to the daisy’s petals using cadmium red medium mixed with titanium white, and add the final details to the bottle using a small round brush and cobalt blue. Boost the highlights in the bottle’s shadow by applying hints of titanium white to the previous layers.

PAINTING THE LETTERING As an artist, it is important to be able to give your paintings dimension and depth, as you are trying to re-create a three-dimensional object on a flat surface. After blocking in the embossed letters with white, give them depth by painting dark to light. Start with a detail brush, applying darker values of cobalt blue to outline the letters. Then, once the paint has dried, lightly dab a mixture of cobalt blue and titanium white over the letters, being careful to maintain their general shapes.
Red Zinnias
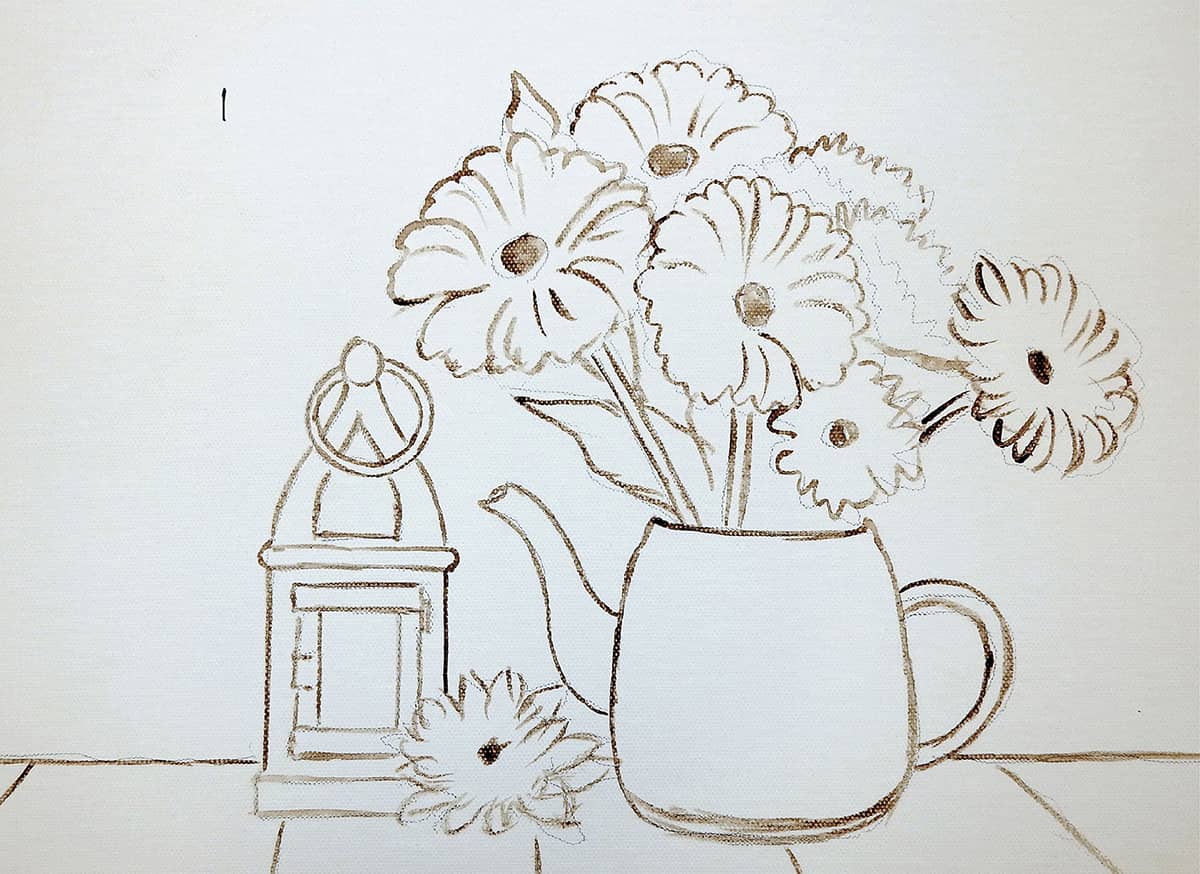
1 Draw the composition, which is the most important step for this piece. You can use a pencil or very fine lines of paint.

2 To paint the wall on the left side, use a mix of permanent blue and white. While working toward the right, reduce the amount of white and add a bit of Payne’s gray to darken the wall’s value.
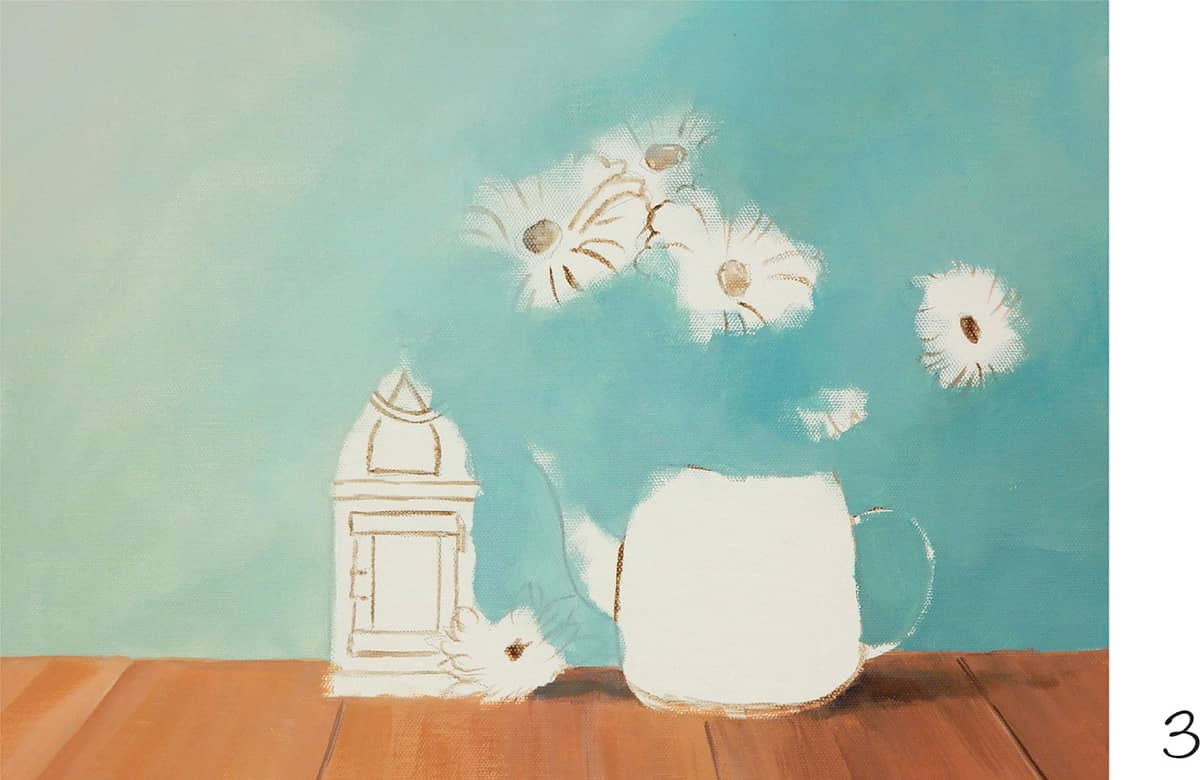
3 To paint the table’s surface, mix burnt umber, burnt sienna, and a small amount of white. Lastly, paint thin lines with pure burnt umber to indicate the spaces between the boards.
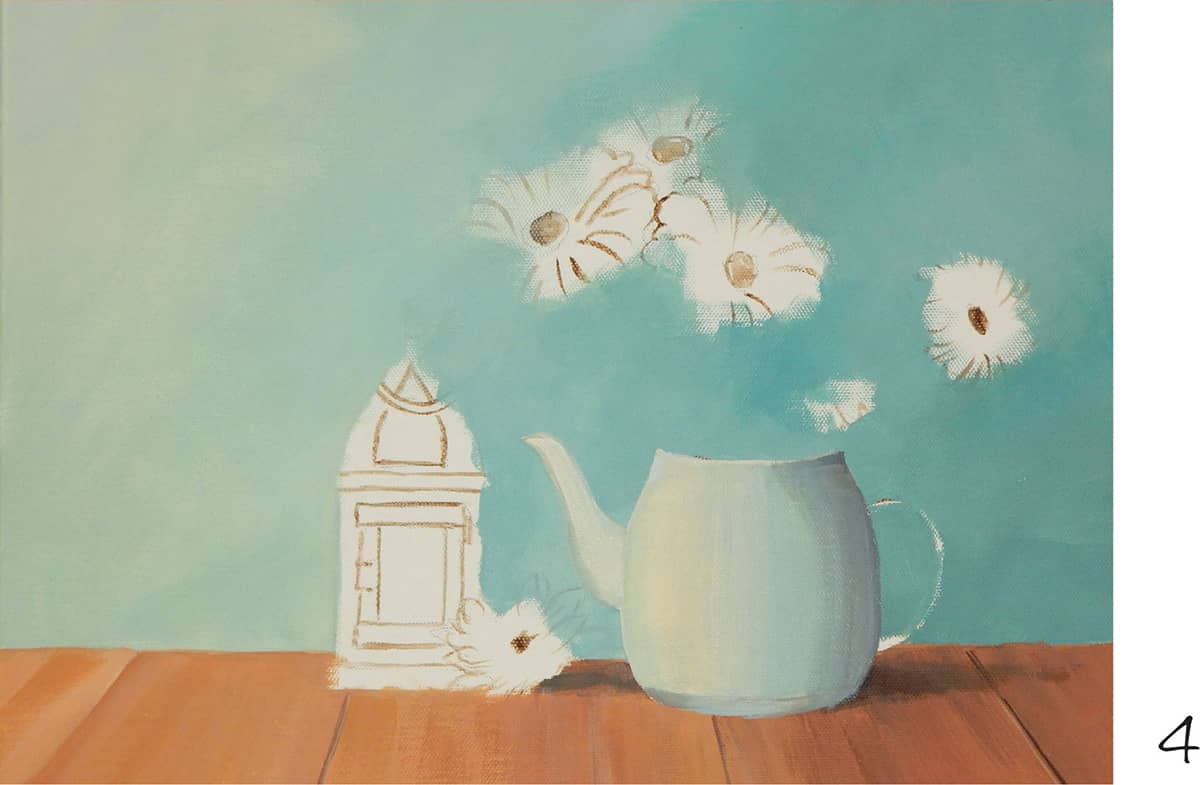
4 For this step, underpaint the teapot using white, ultramarine blue, and a bit of Payne’s gray, establishing the overall values for a 3-D effect.

5 Start the flowers by painting the leaves with Hooker’s green, which acts as the primary color. Then add raw umber and ultramarine blue for the shaded areas, followed by cadmium yellow for the lighter parts of the leaves and sides of the stems.
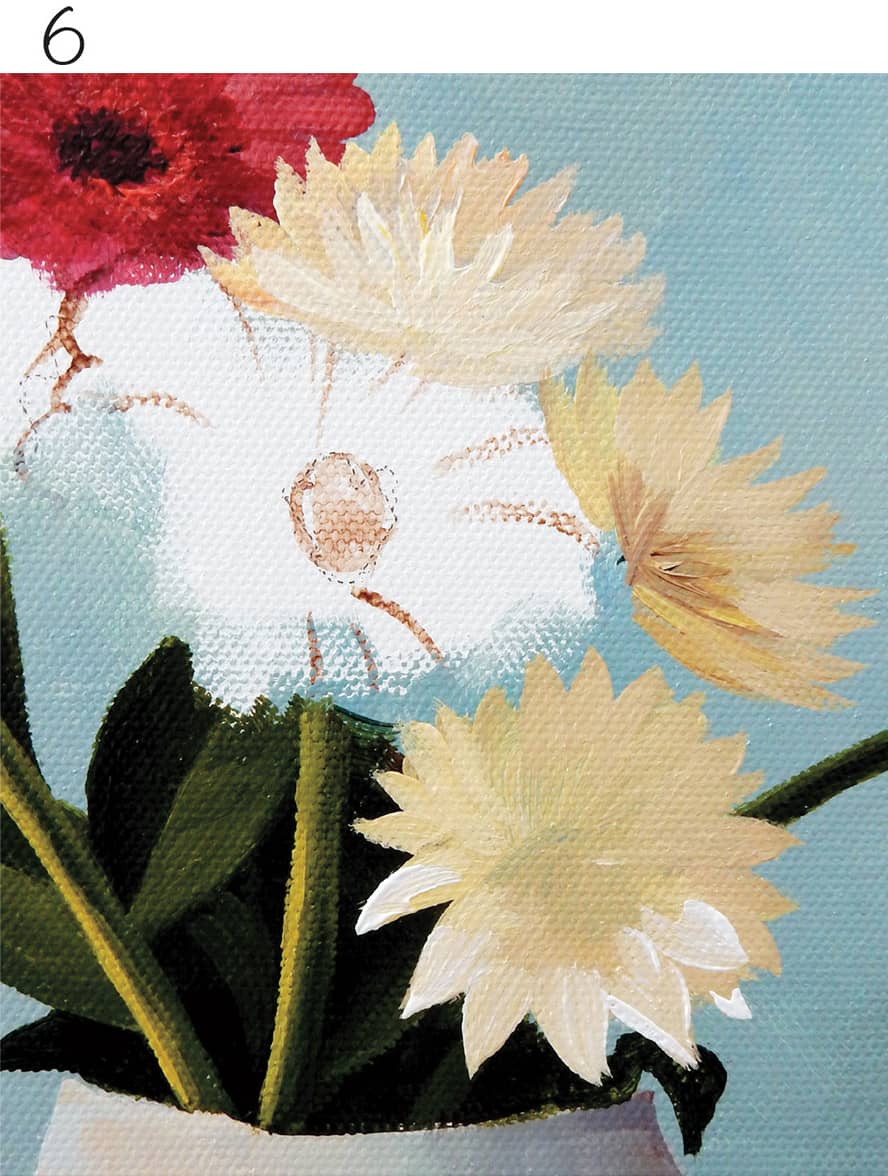
6 Start painting the white zinnias using white mixed with cadmium yellow and Payne’s gray. Add more yellow and gray to the mix for the darker parts of the flowers.

7 To complete the white zinnias, paint the center of each flower with burnt umber, and touch up the petals in the light with a mixture of white and cadmium yellow.

8 To finish the teapot, add light reflections on the left side with white mixed with a small addition of cadmium yellow. Also emphasize the shadows in the vertical groves and other areas with ultramarine blue and Payne’s gray.
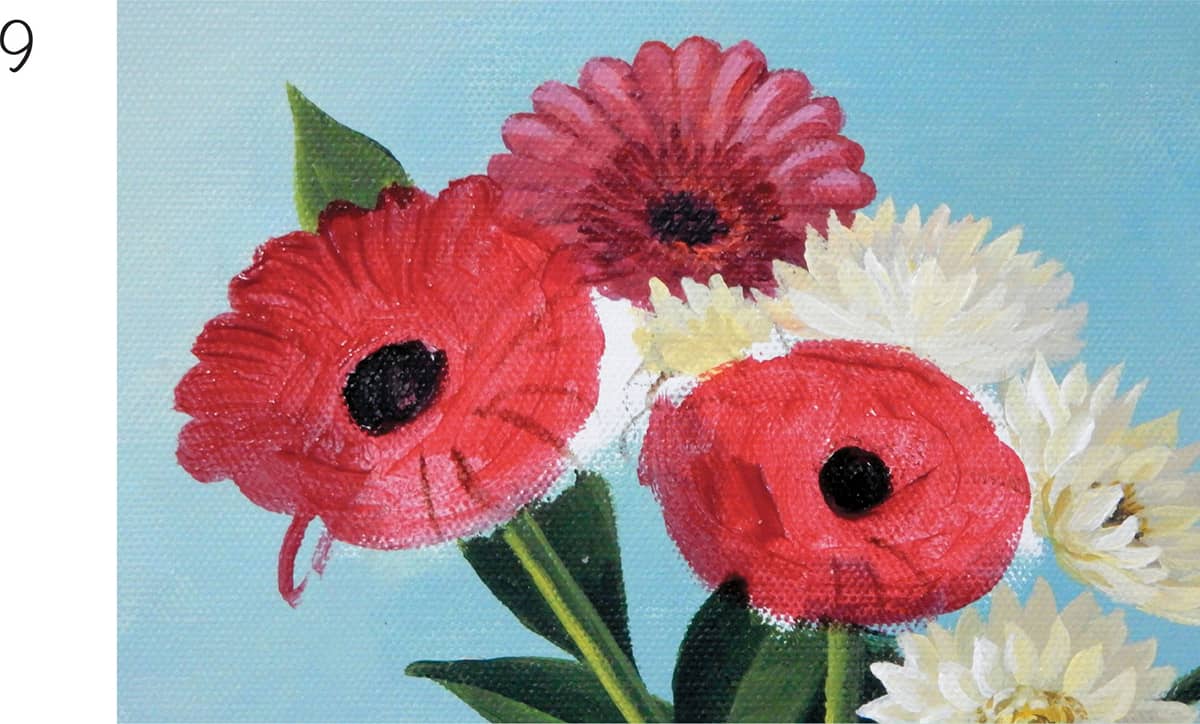
9 Using alizarin crimson, paint the circles to represent red zinnia petals. Use Payne’s gray for the centers of the flowers.
10 Finish the outline of the flowers and place the petals with a 1/4-inch round brush.
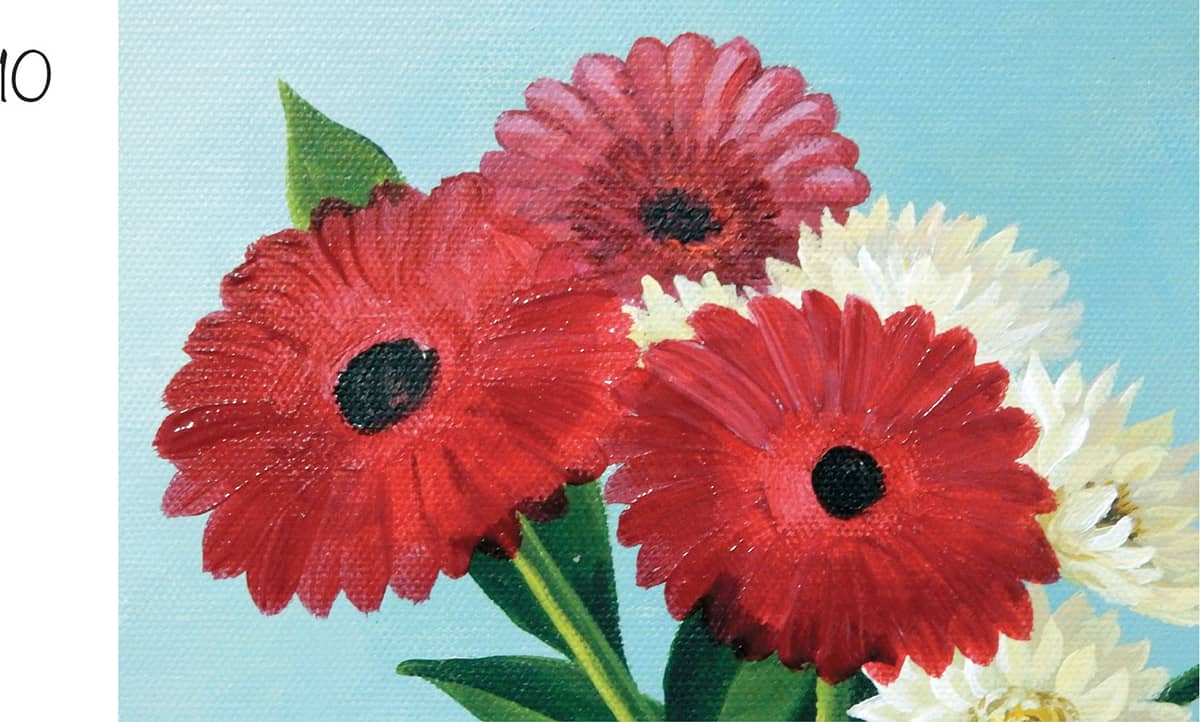
11 Next add white to the alizarin crimson and paint over the petals to show reflections of light.

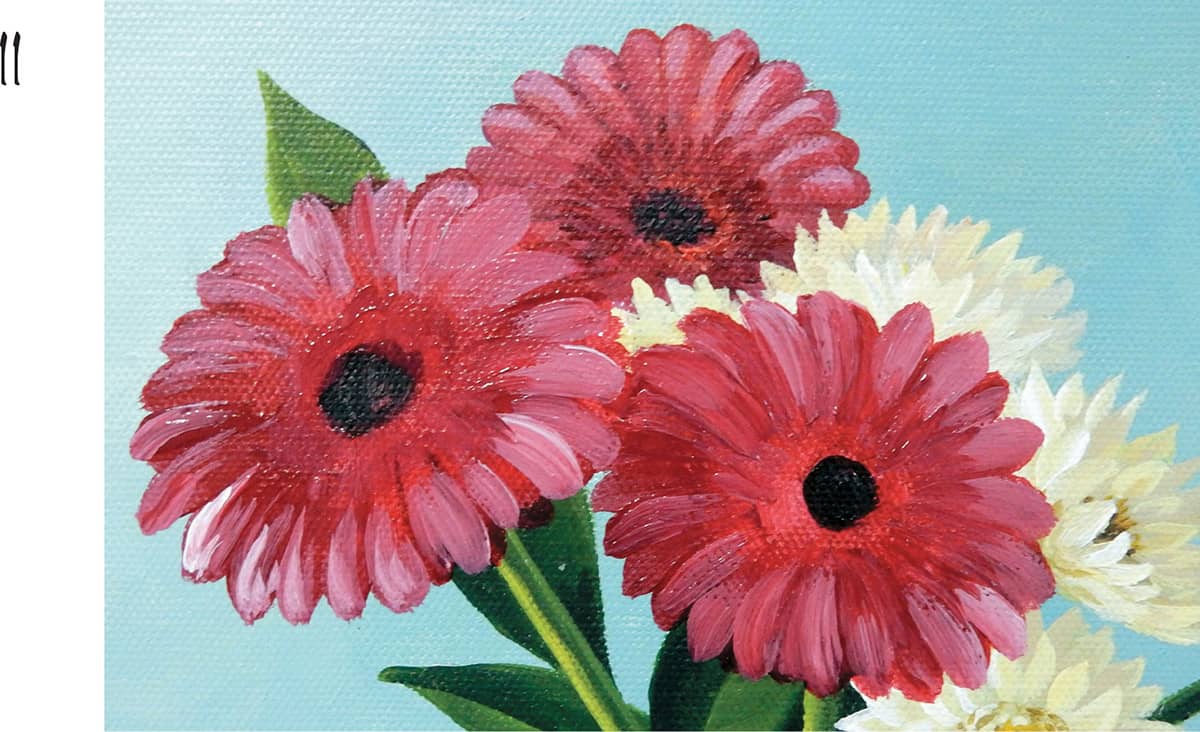
12 To complete the flowers, paint small petals in each center using a small round brush. Use a mixture of alizarin crimson and Payne’s gray for the petals in shadow, followed by a mixture of alizarin crimson and white for petals in light. Leave the dark center of each flower untouched.
Rose in Clear Vase
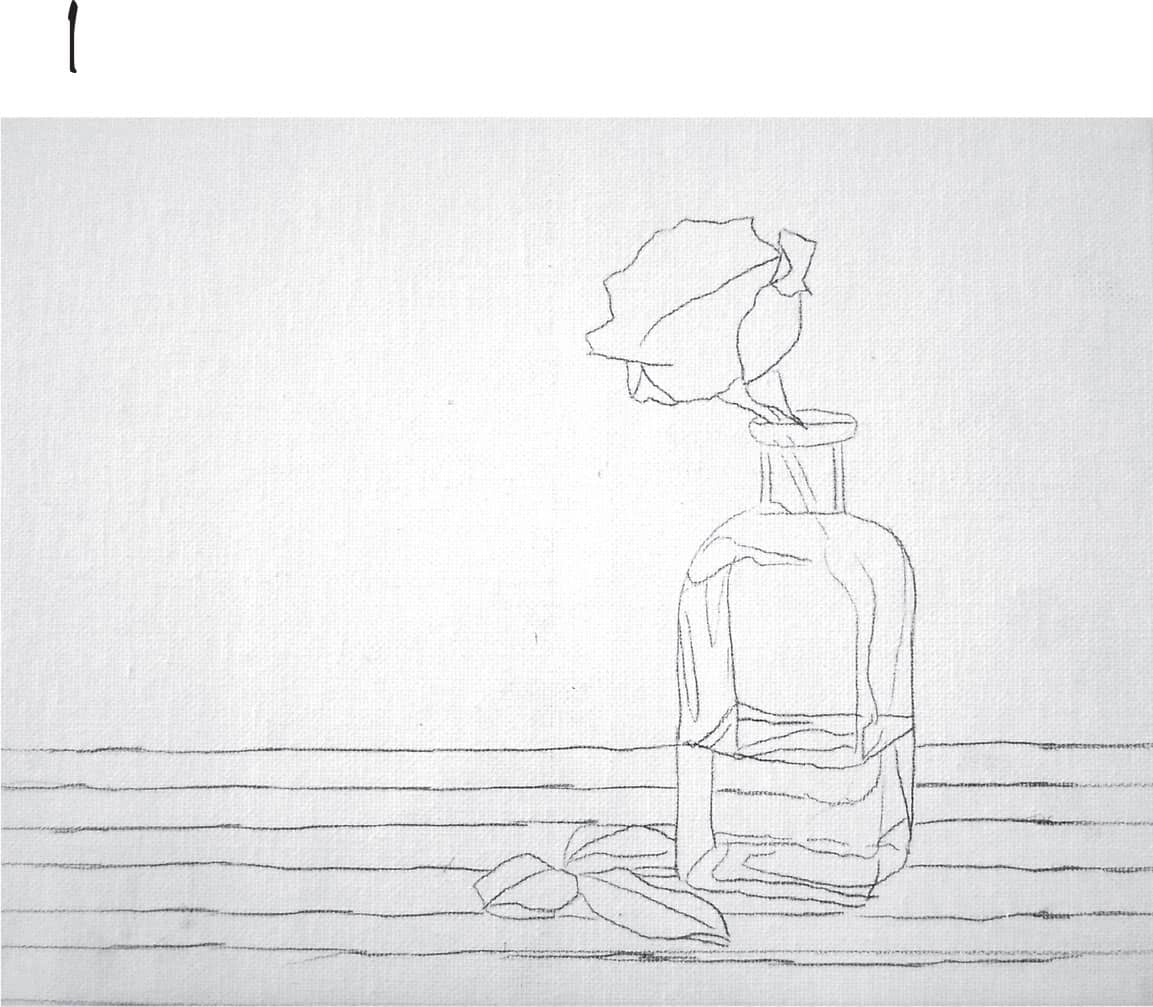
1 Sketch the composition directly onto an 8” × 10” canvas with a soft lead pencil or watercolor pencil.
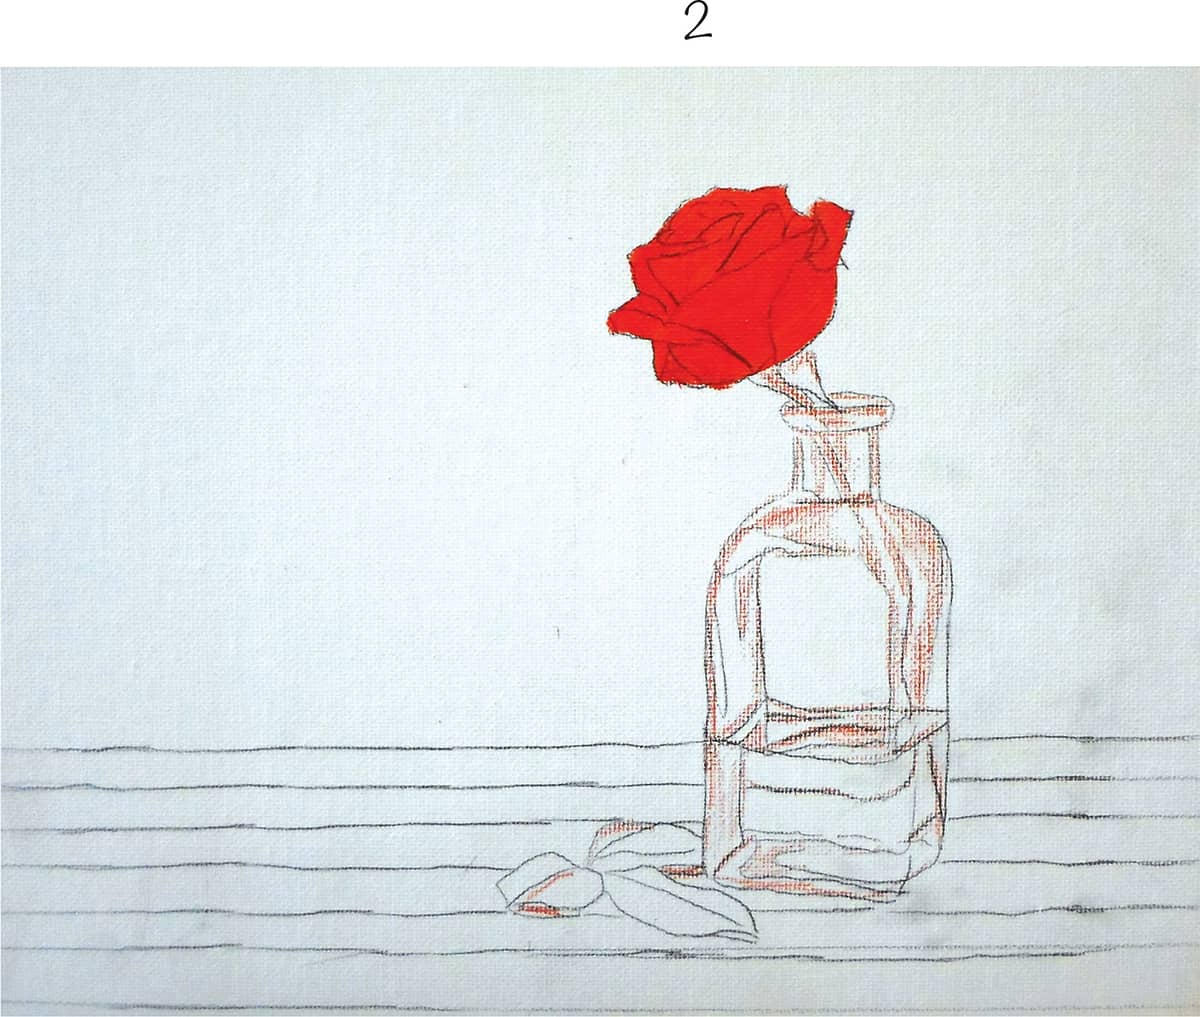
2 Use a watercolor pencil to lightly shade the darkest values. Then make a thin mix of cadmium red and naphthol crimson to block in the rose; this color serves as the rose’s middle value. These pigments are transparent, so you can still see the pencil lines underneath.
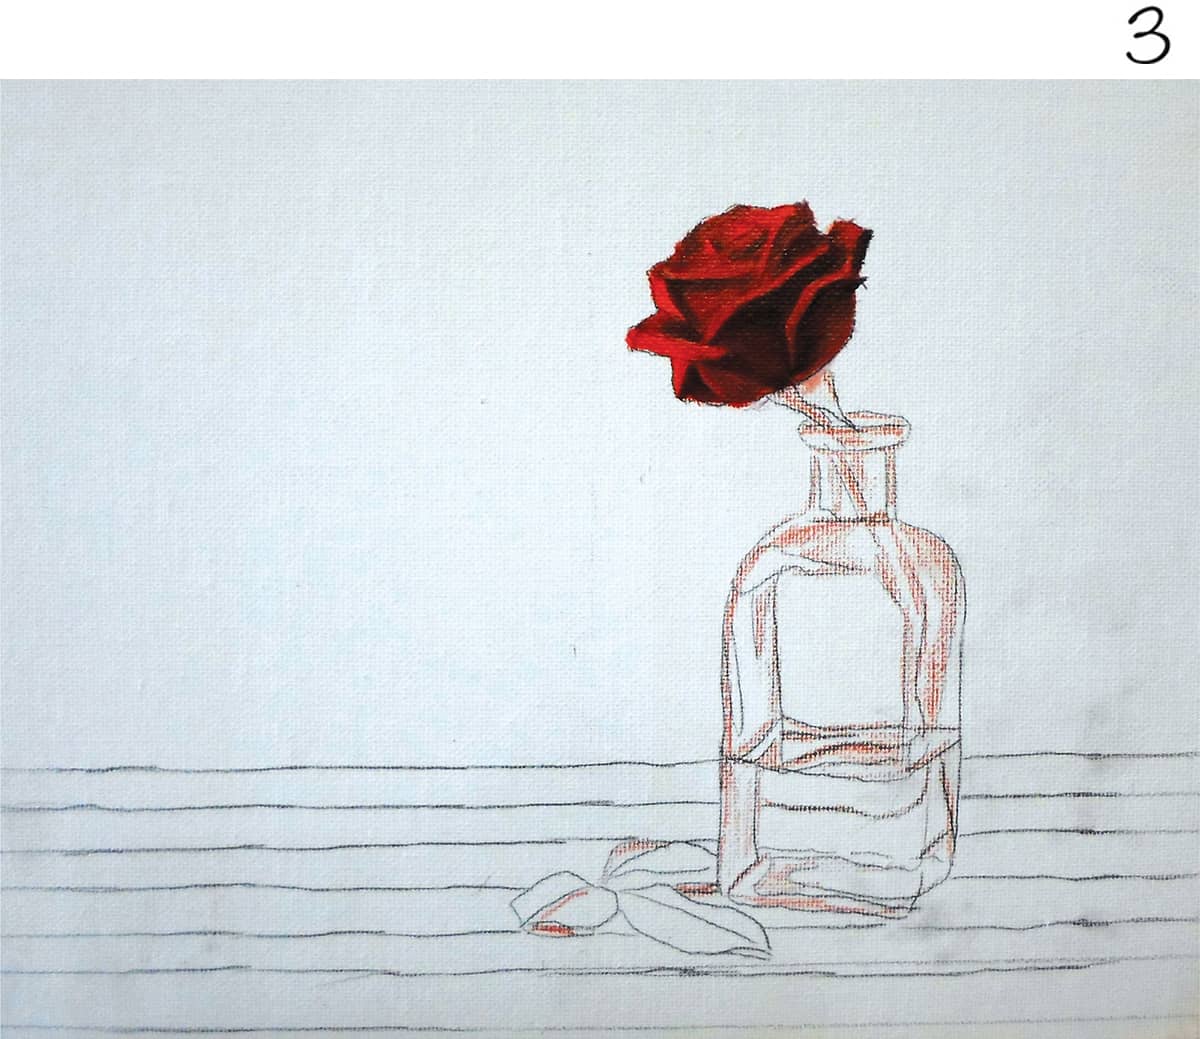
3 Mix a dark-value rose color with ultramarine blue and a bit of burnt umber, and apply the darkest parts to the rose. Blend harsh lines gently with a soft brush before the paint dries. Since the tops of the rolled edges on the rose appear lighter, paint these with a mix of naphthol crimson and a little cadmium yellow medium.
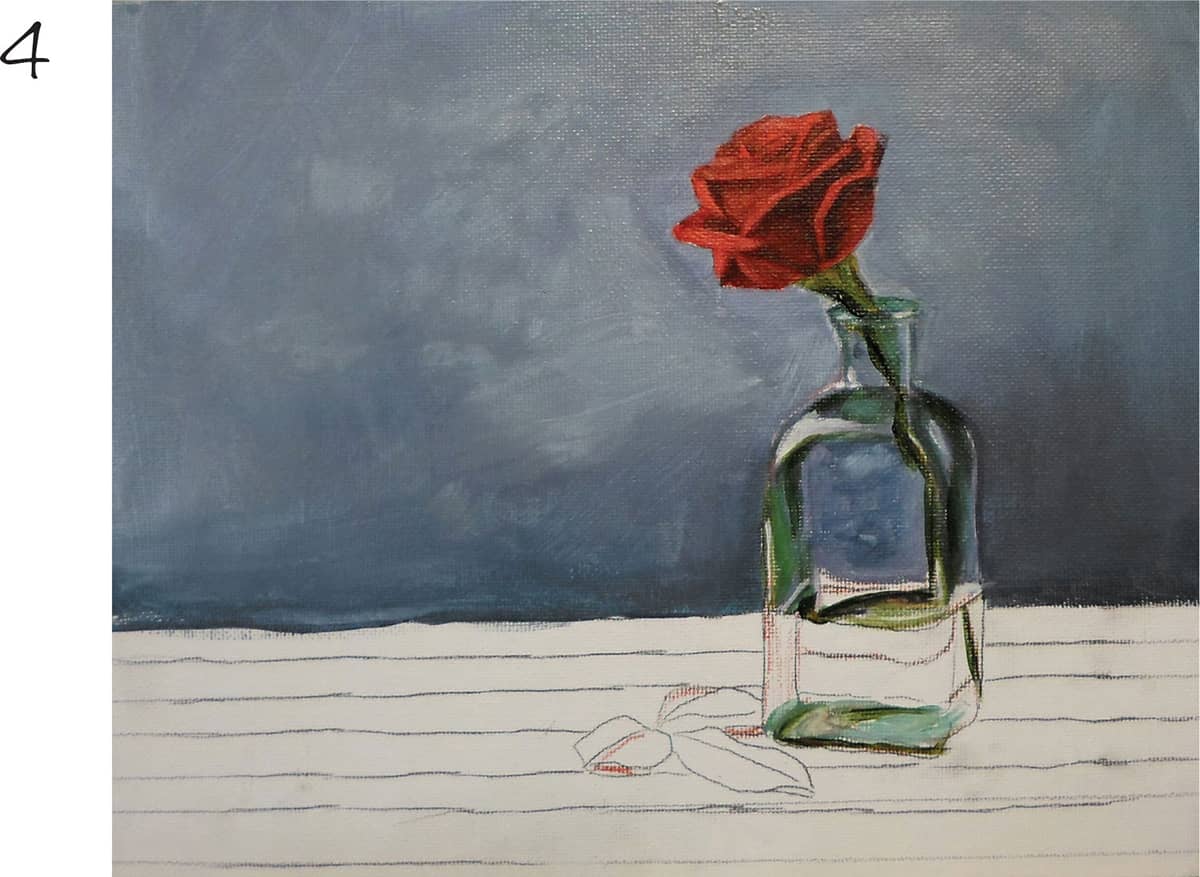
4 Paint the darkest values of the stem first with sap green. Then model the rest of the stem by mixing sap green with cadmium yellow medium to lighten areas as needed. Gently smooth the brush marks and transition areas with a soft, damp brush. Paint the background with a mixture of ultramarine blue, cadmium red light hue, burnt umber, and titanium white. Use a soft brush with a bit of water to lay in the color behind the bottle and the background. Remember that the bottle is transparent but it will still block some of the light, making the background behind it appear darker.
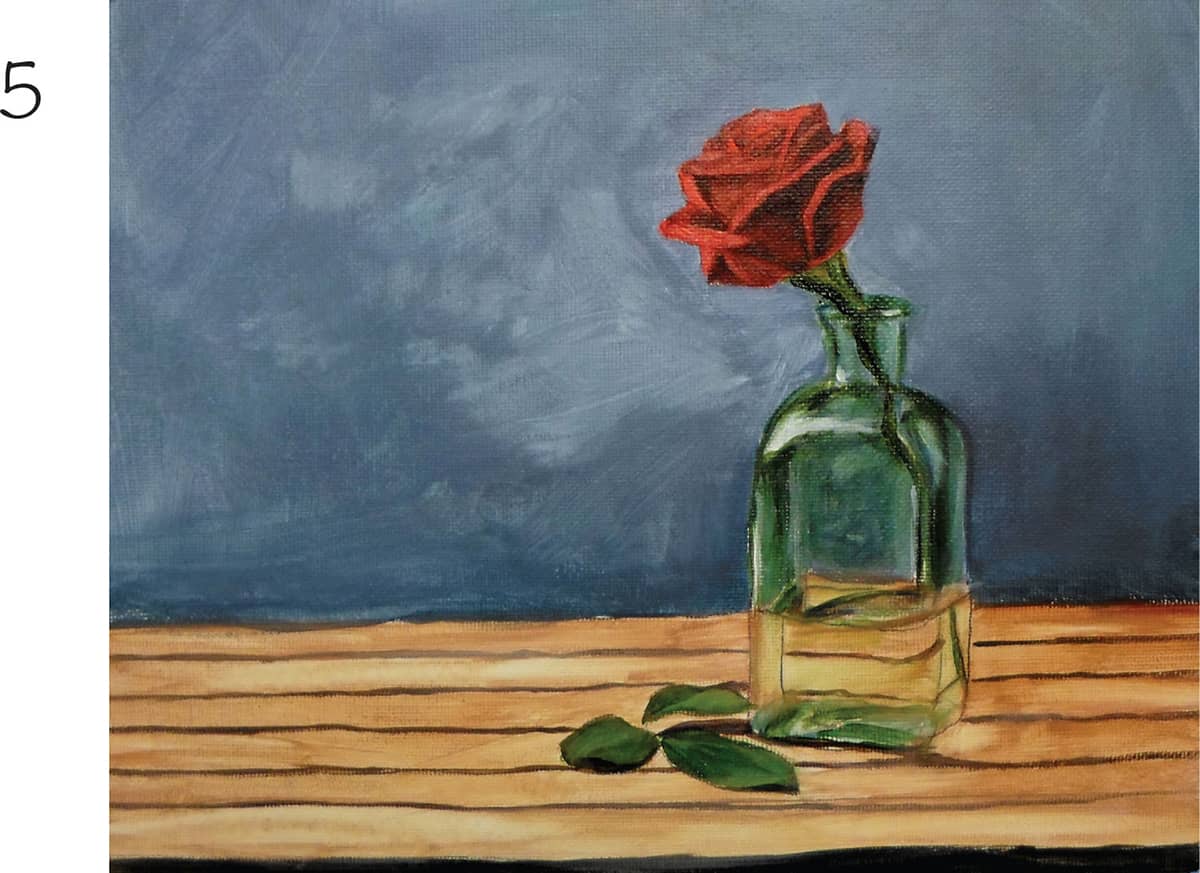
5 Add ultramarine blue and titanium white to the green mix from step 4 to create lighter green values for the bottom of the bottle. Paint the leaves on the table with sap green and add cadmium yellow medium to lighten the color where needed. Use burnt umber to paint the small shadows under the leaves, and the lines on the table. When the lines are dry, paint the tabletop with a very thin mixture of burnt sienna and titanium white, using a soft flat brush.

6 Examine the canvas to see where colors or values need to be adjusted. You may have lost some of the green in the bottle when you painted the background, so glaze a very thin layer of sap green mixed with ultramarine blue and titanium white over the body of the bottle. Paint a thin glaze of burnt umber on the table for the bottle’s shadow and darken the shadow along the front of the table. When the painting is dry, cover it in a thin layer of polymer gloss medium thinned with water.
Poppies

1 Lightly sketch the flowers and tabletop on a white canvas. You can draw the value changes in the flowers, which will be helpful when you start to apply paint. Don’t draw the stems and buds, as they will be covered by the first layer of paint.

2 Mix burnt umber and ultramarine blue with a bit of yellow oxide for a rich, dark olive green. Paint the darkest side of the background with this mix, using a #6 flat brush to carefully paint around the flowers. For the lighter side of the background, mix yellow oxide with a tiny bit of the dark mixture. Use a soft angle brush to smooth the transitions between the two colors and to eliminate brush marks. Allow this layer to dry before painting a few more layers to develop an opaque, smooth, and cohesive background.

3 Next, mix a thin puddle of paint for the tabletop, using equal parts yellow oxide and burnt sienna. Use a flat wash brush to paint a very thin layer over the entire table. Before the paint dries completely, gently scrub out some of the paint on the top edge of the table where the light makes it appear lighter in value. Allow the area to dry; then paint the shadows under the tabletop edge and under the flower on the table with thinned burnt umber.

4 Use a mixture of cadmium red light and naphthol crimson to block in each flower. This first mixture is the middle value. For the darkest values on the flowers, mix cadmium red light with dioxazine purple and follow the underlying sketch as a reference. Use a soft brush to blend transitions between colors. For the lightest values, add a little titanium white to cadmium red light. Mix burnt umber and ultramarine blue for the centers.
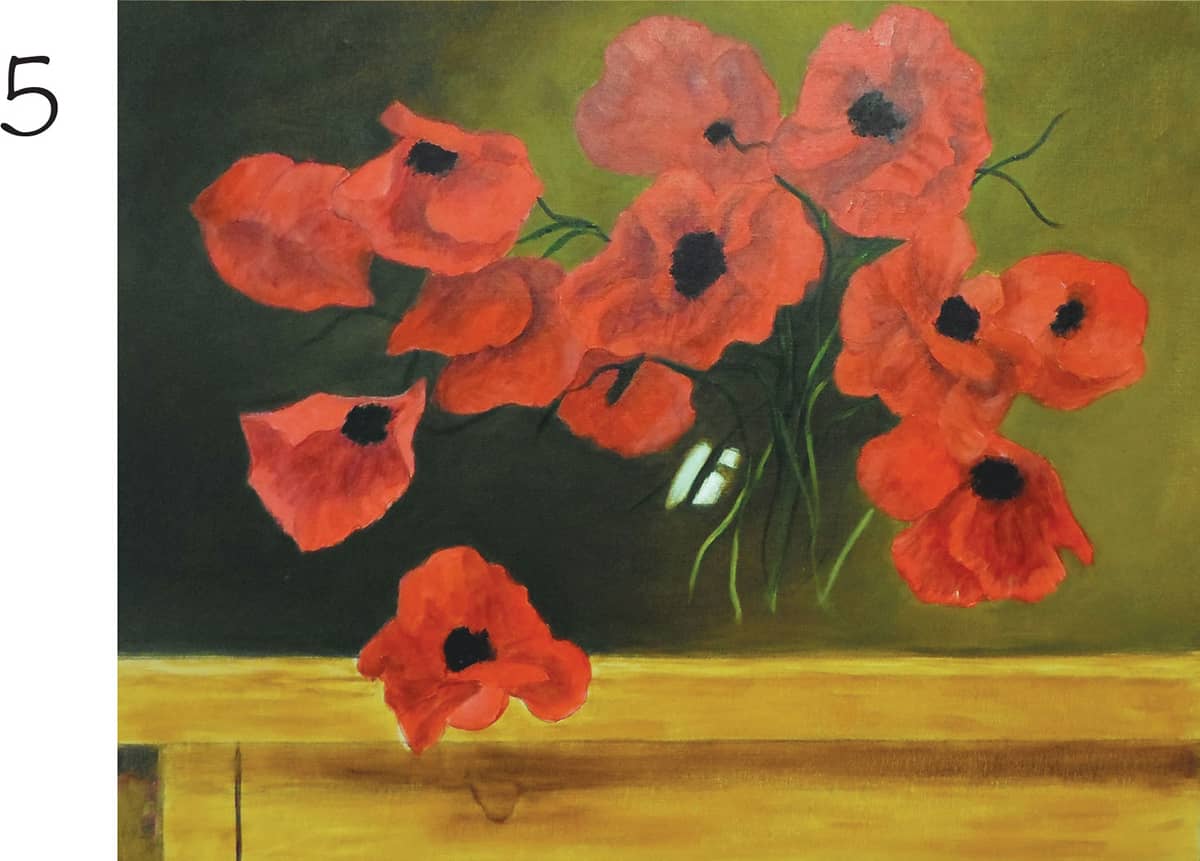
5 Using Hooker’s green and cadmium yellow medium, begin to paint the stems. In the area within the glass bowl, mix a little burnt umber into Hooker’s green for a darker value. Use cadmium yellow medium on the highlighted sides of the stems.

6 Paint a few buds with cadmium red light mixed with burnt umber in the darker areas. Re-establish the glass bowl by using a watercolor pencil to lightly draw it on the canvas. Continue glazing layers over the canvas until you have rich, deep color throughout the painting. Finish by cleaning up the edges. When the painting is completely dry, mix polymer gloss medium with a little water and apply a thin layer to give nice shine and brilliance to the colors.
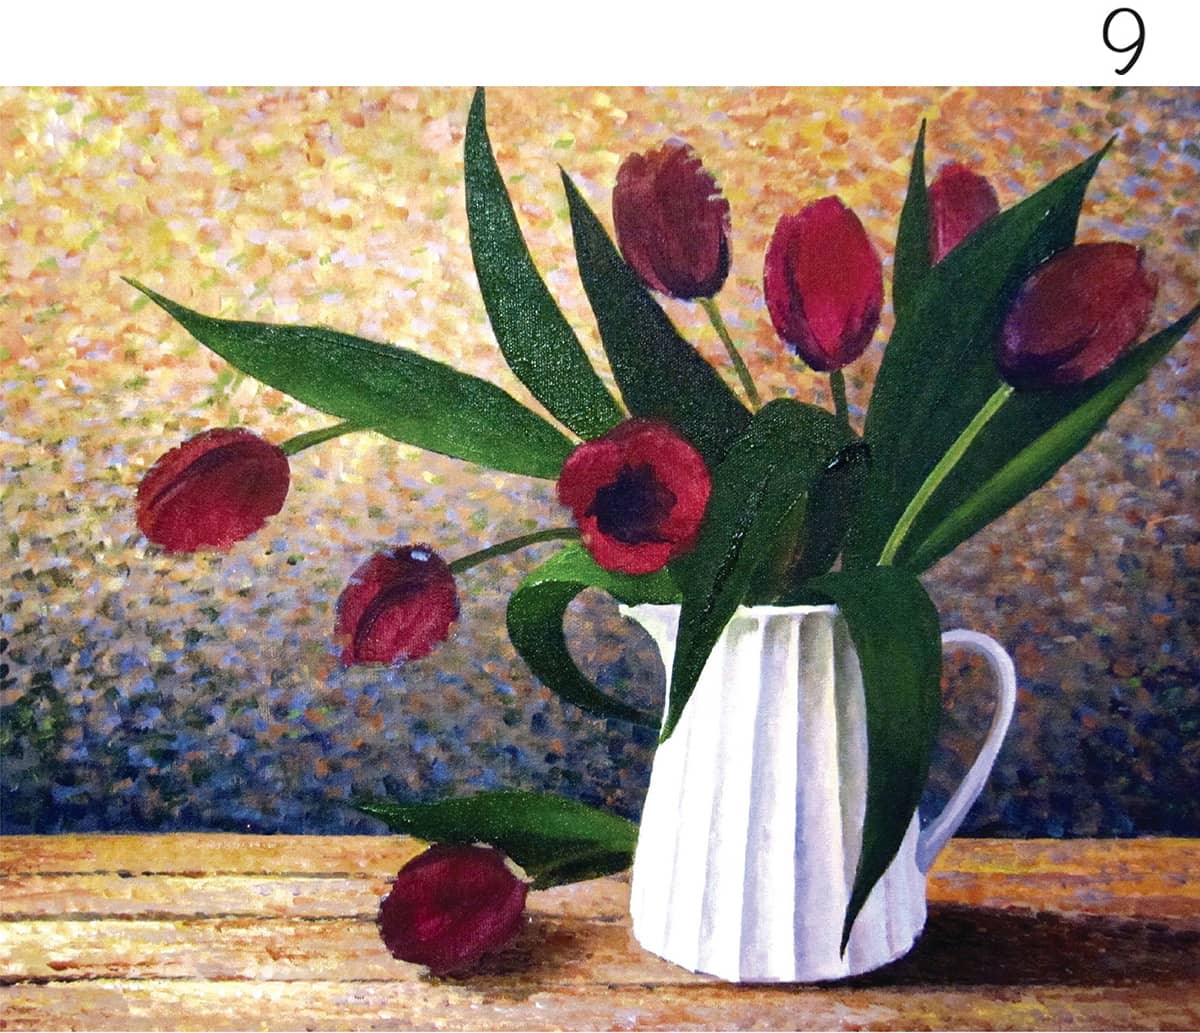
Tulips
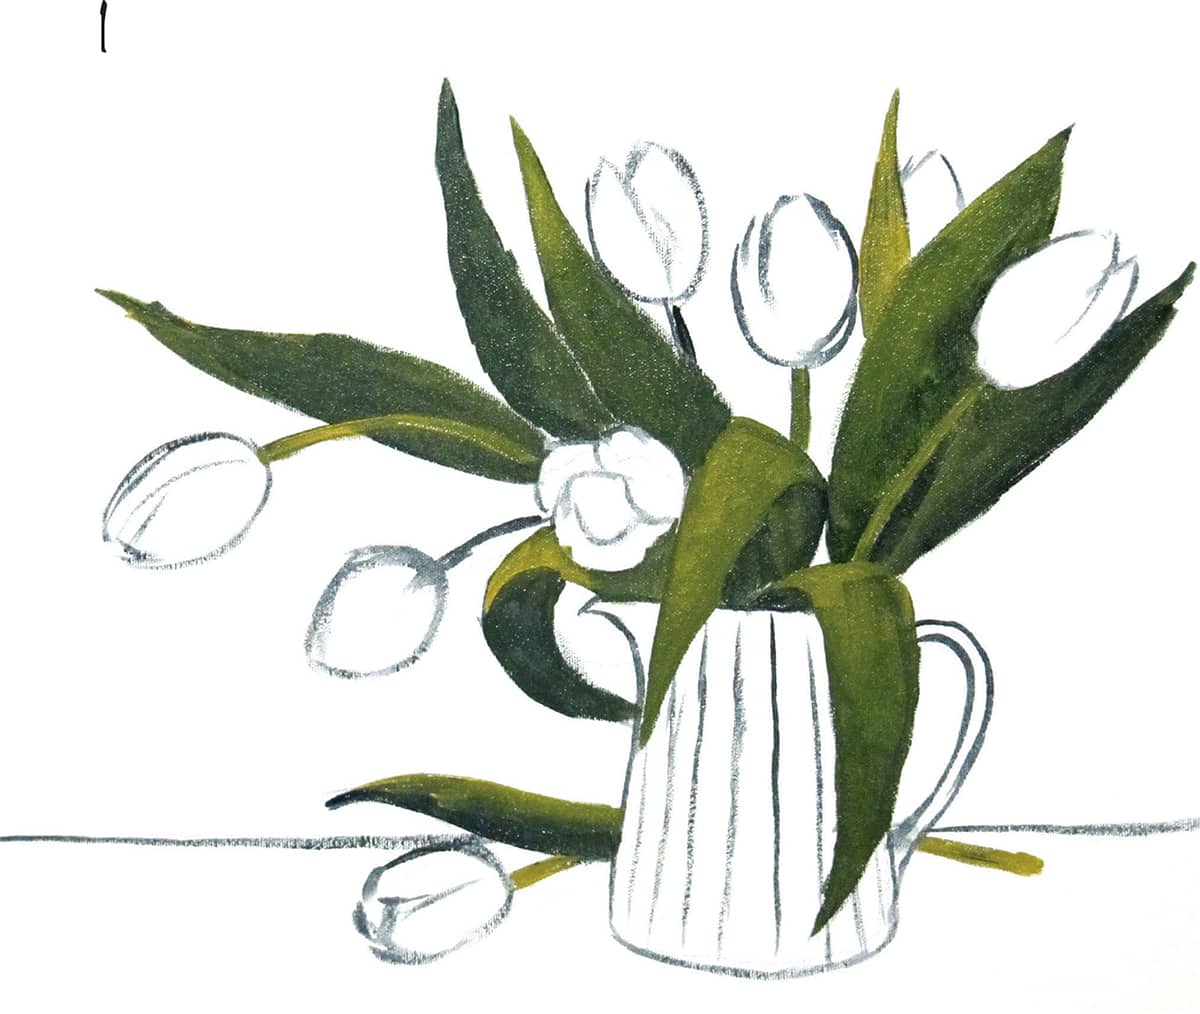
1 Make a quick sketch with pine gray on a canvas. Approach your underpainting in parts, beginning with the darkest values. With a 1/4-inch flat brush, paint the leaves using sap green. In the lighter areas, Add a little cadmium yellow medium to the green. In more shaded portions, mix in ultramarine blue instead.
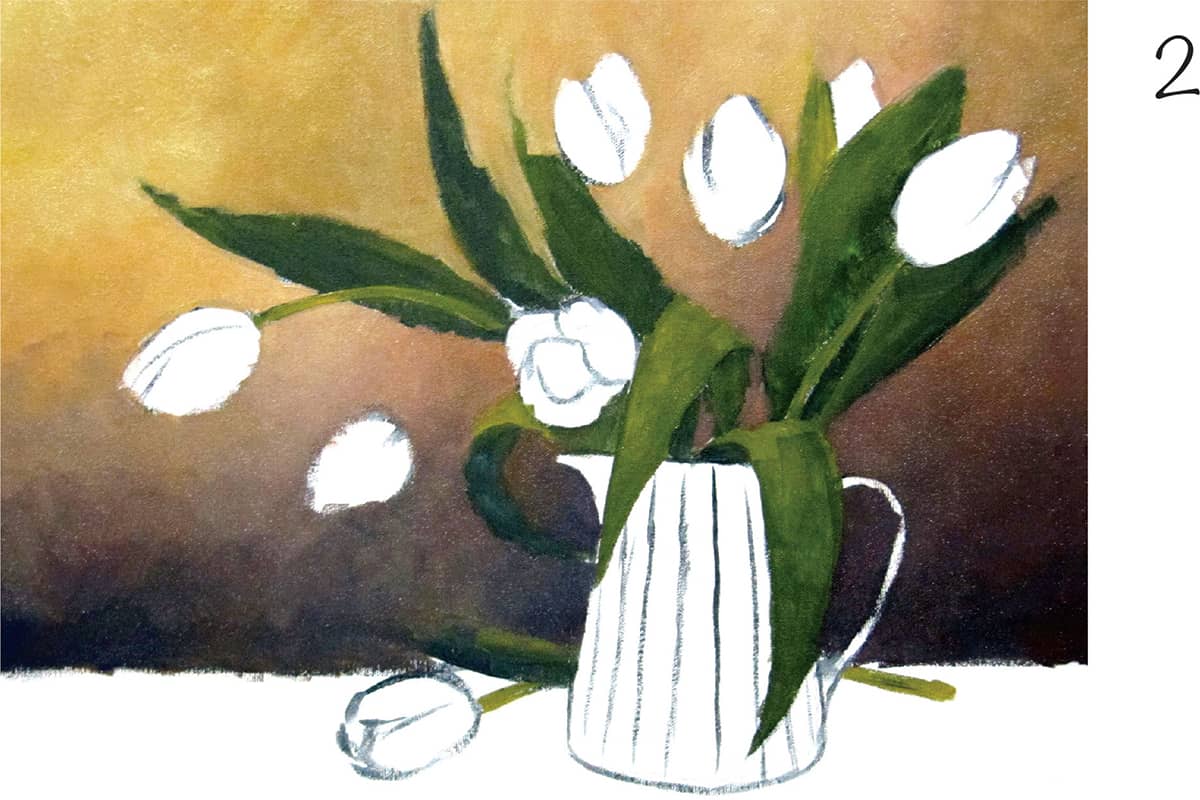
2 Starting at the top of the canvas with the background, begin with a warmer tone, mixing yellow ochre and burnt sienna. Eliminate the yellow ochre and gradually add ultramarine blue to the mix as you move down toward the table.
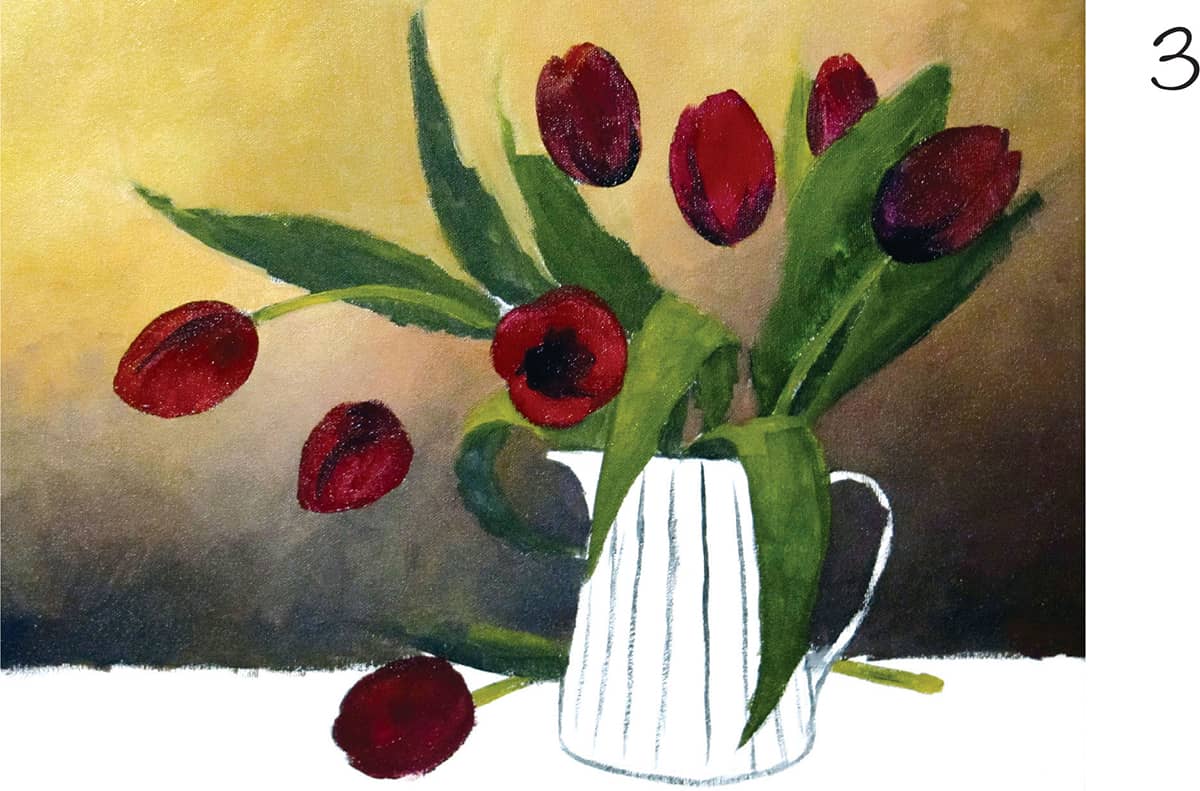
3 For the first layer of tulip color, apply alizarin crimson mixed with cadmium red medium for the lighter areas. As you move toward the shadowed areas, add ultramarine blue for the darker tones.

4 Paint the table with a coat of yellow ochre and burnt sienna, with ultramarine blue mixed in for the shadow. The vase is mostly white, but mix cadmium yellow medium with titanium white for the light side, and alizarin crimson and ultramarine blue for the shadowed side.
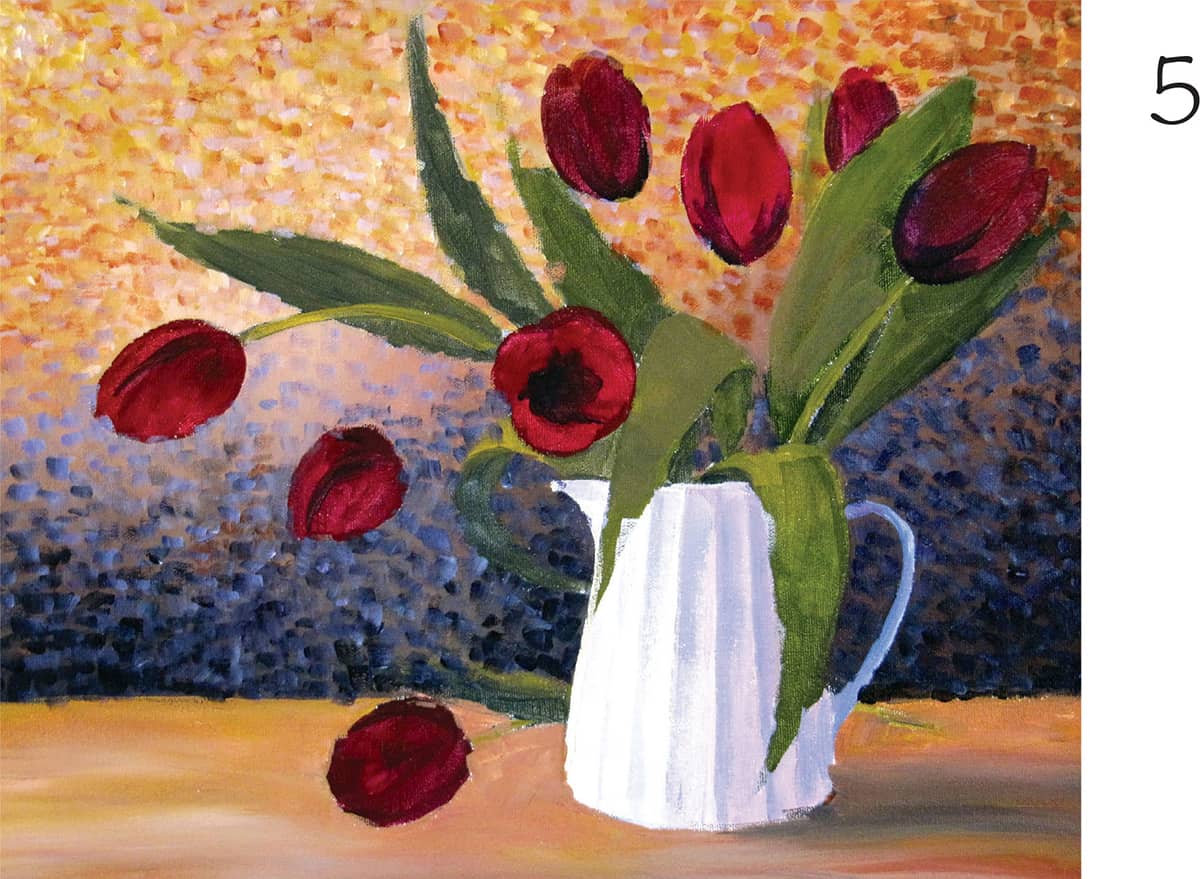
5 At this stage, add more strokes of any color or colors that you think might benefit the overall painting; adding a few strokes of sap green and other colors help reflect the tulips.
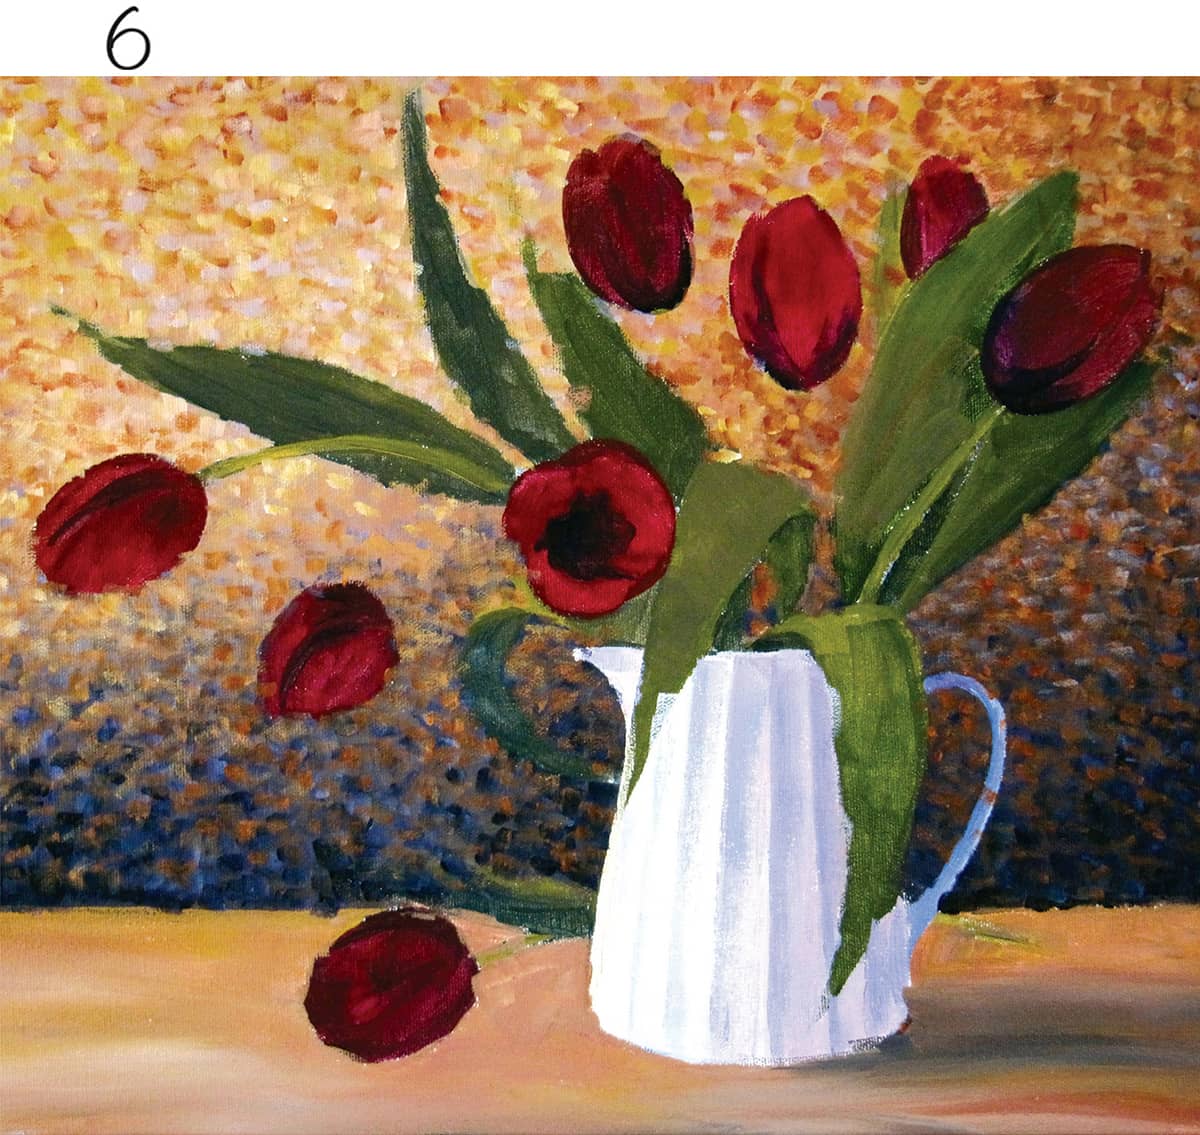
6 Stroke in more of the warm colors along the entire bottom of the wall and add more dark color into the transition zone. Refine any details as needed.
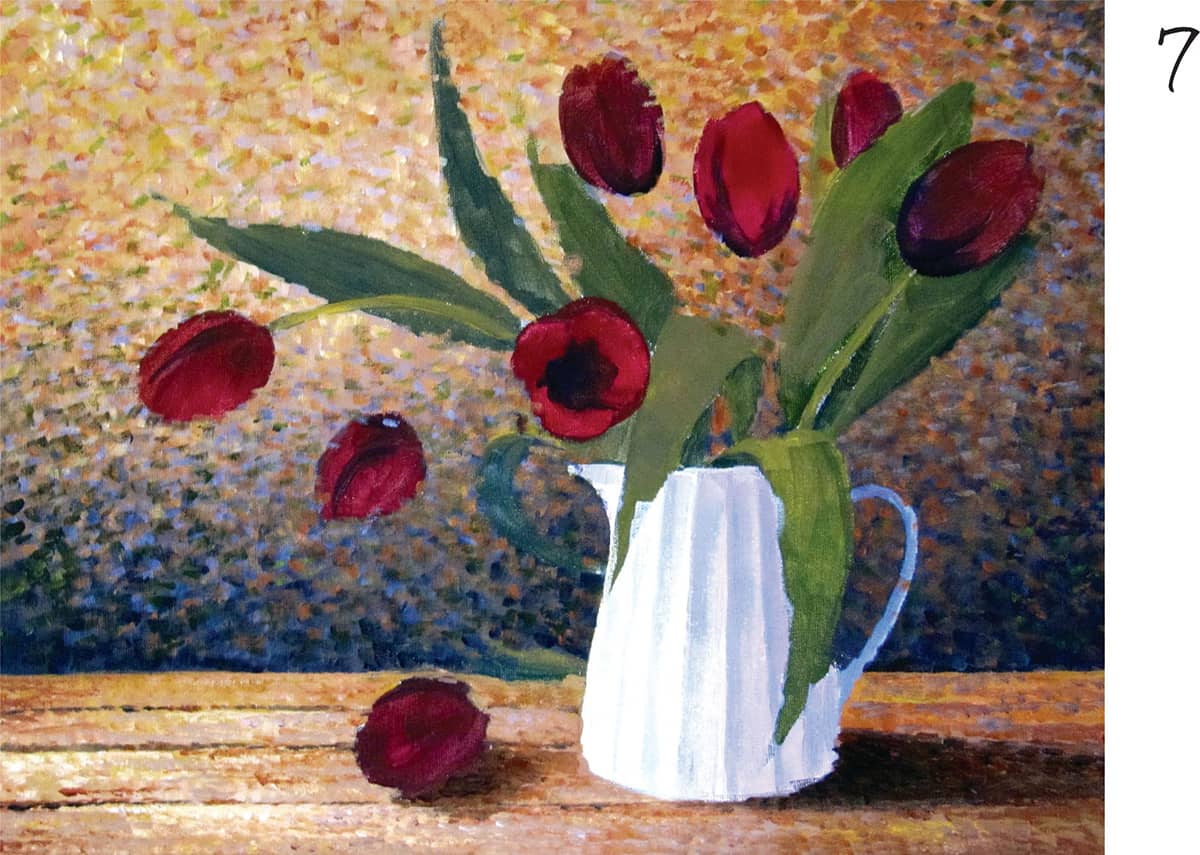
7 Paint the tabletop with the same cool colors from the wall: alizarin crimson, ultramarine blue, and titanium white. Use the darker, cooler colors as well, but apply the pine gray, ultramarine blue, and white only in the shadows cast by the tulip and vase.

8 Redefine the edges of the leaves with more sap green. Shift focus to develop the vase (see detail).
9 Mix sap green and ultramarine blue and paint the shaded parts of the leaves and stems with a 1/4-inch flat brush.

DETAIL Paint the grooves of the vase using cadmium yellow medium mixed with titanium white on the light side of each groove, and alizarin crimson, ultramarine blue, and burnt sienna on the shadow side. The lighter parts also reflect a little blue from a secondary light source.

10 Now bring out more detail in the stems and leaves by adding lighter portions with a mix of cadmium yellow medium, titanium white, and sap green.
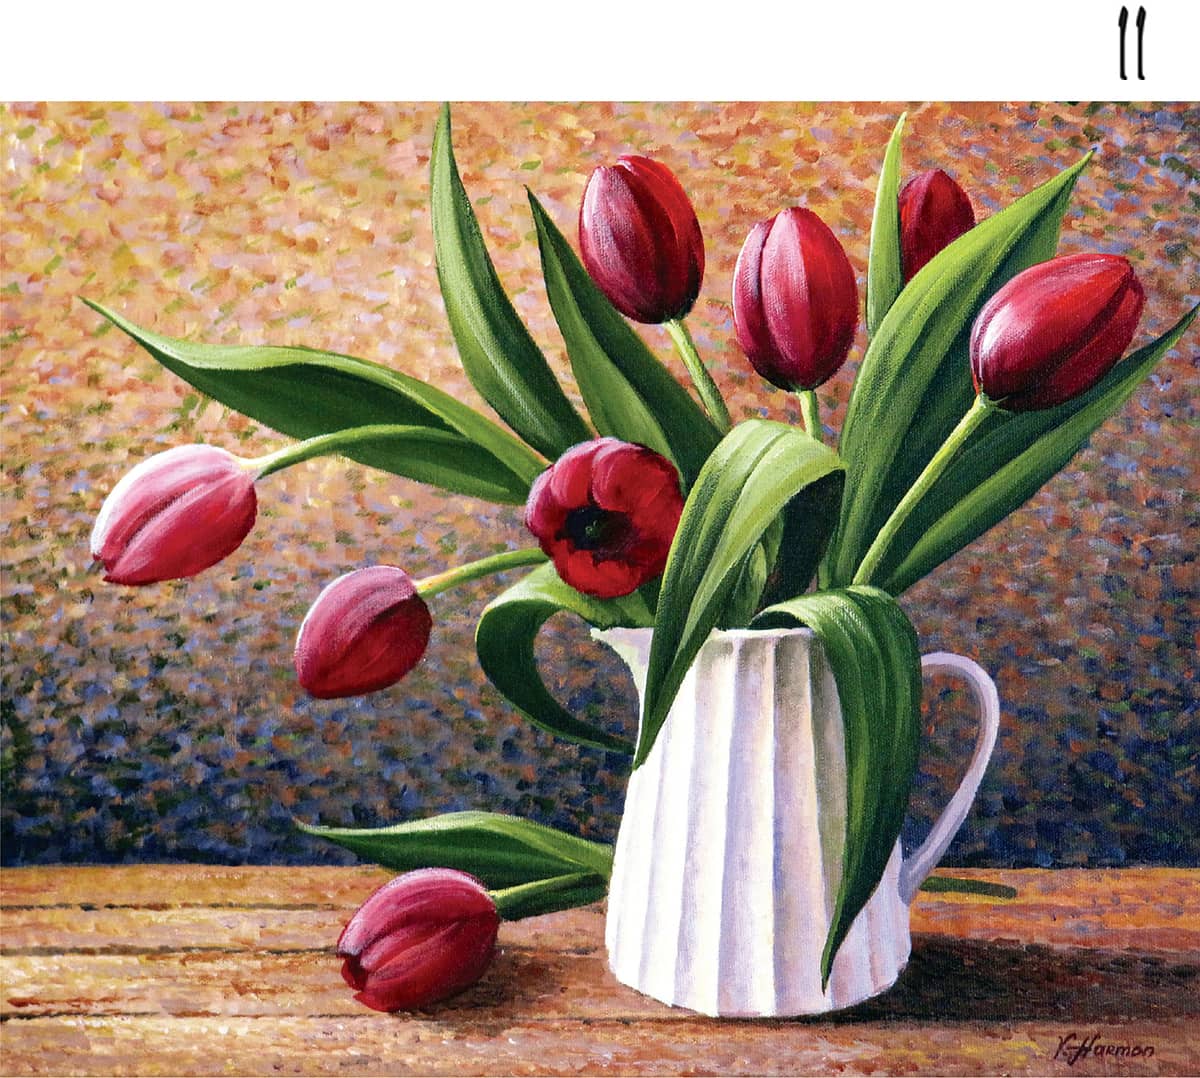
11 Everything is complete now except for the flowers. Cover the underpainting with a dark layer of alizarin crimson mixed with ultramarine blue to establish the shadows. Then apply cadmium red medium on the petals to create a transparent effect. Finish with the highlights, using a mixture of cadmium yellow medium and titanium white.
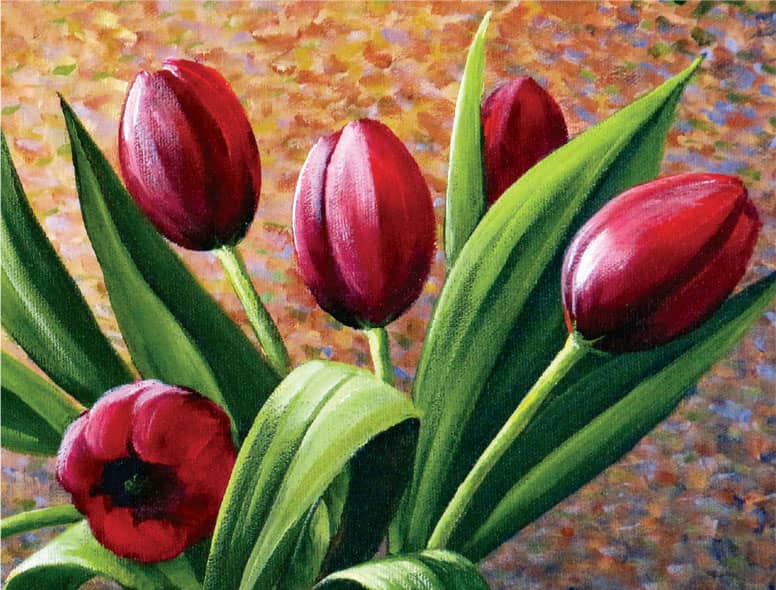
DETAIL The tulips are the focal point of this painting, so attention to detail is important. Be especially mindful of the direction of the light source when applying the highlights.
Magnolia

1 Using a 1-inch-wide flat brush, paint the background with a thin layer of burnt sienna mixed with ultramarine blue. Then draw the magnolia and vase with a white pencil. White shows the lines more clearly, but any color appropriate for the painting will work.

2 Continue the underpainting by filling in your drawing of the magnolia flower with titanium white and adding a bit of ultramarine blue for the shaded area of the petals. For the leaves, use sap green and add cadmium yellow to paint the lighter areas. The vase color is a mixture of titanium white, ultramarine blue, and a touch of burnt sienna.
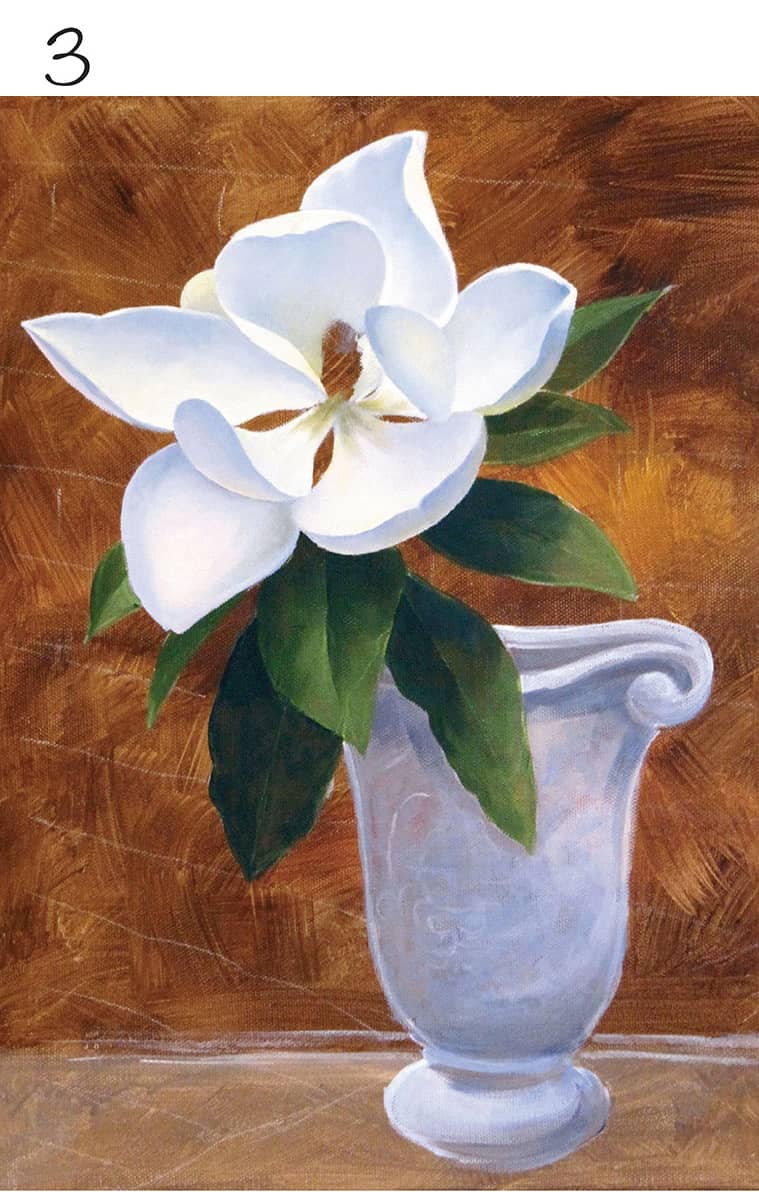
3 Next focus on the details of the magnolia flower using primarily titanium white with the addition of a little Winsor lemon in the lighter areas. To suggest the shaded area of the petals, add ultramarine blue mixed with a hint of alizarin crimson. There is a slight reflection of yellow-green on the side of some petals facing the leaves. Re-create these reflections by adding a small amount of sap green and cadmium yellow to titanium white.


4 Paint the shaded areas of the leaves with a mixture of sap green, ultramarine blue, and a small amount of burnt sienna. As you work toward the lighter area, add more cadmium yellow. For the lightest areas of the leaves, add Winsor lemon mixed with titanium white. Apply your final touches after you finish the background wall.

5 Paint the stamen—the center part of the flower—in three short steps.
A First paint the base shape of the stamen with a mixture of burnt sienna, sap green, and cadmium yellow.
B Then use Winsor lemon to paint the carpals on the center of the stamen.
C As a finishing touch, add darker strokes along the outline of the stamen using sap green and burnt sienna.

6 Moving to the background, paint the brick wall using ultramarine blue, burnt sienna, and alizarin crimson, along with a tiny bit of titanium white. Do not mix these paints evenly in order to produce the interesting “patchy” effect on the wall. Next add some detail to the bricks, including the mortar lines along the tops and sides, by mixing more white into the blend. Paint a darker line along the bottom of the bricks to make them appear three-dimensional.

7 Mix ultramarine blue, titanium white, and some burnt sienna to paint the weathered surface of the wood railing. To create the textured part of the wood, including the knots and cracks, use less white paint in your mixture and apply it with the side edge of a flat brush. Also place some additional touches on the leaves to show more reflections.

8 Create the porcelain effect of the vase using a mixture of white, ultramarine blue, cadmium yellow, alizarin crimson, and a little bit of burnt sienna. Add a touch of sap green on the sides of the vase’s rim and near the top, to show the reflections from the leaves.

9 For the final touch, paint design details on the vase. Use a combination of white and cadmium yellow for the light sections of the design detail. For the midtone areas, add alizarin crimson to the mixture. Lastly, use a cool combination of ultramarine blue and white in the shaded areas.