
 CHAPTER 2
GRAPHITE PENCIL
Calla Lily
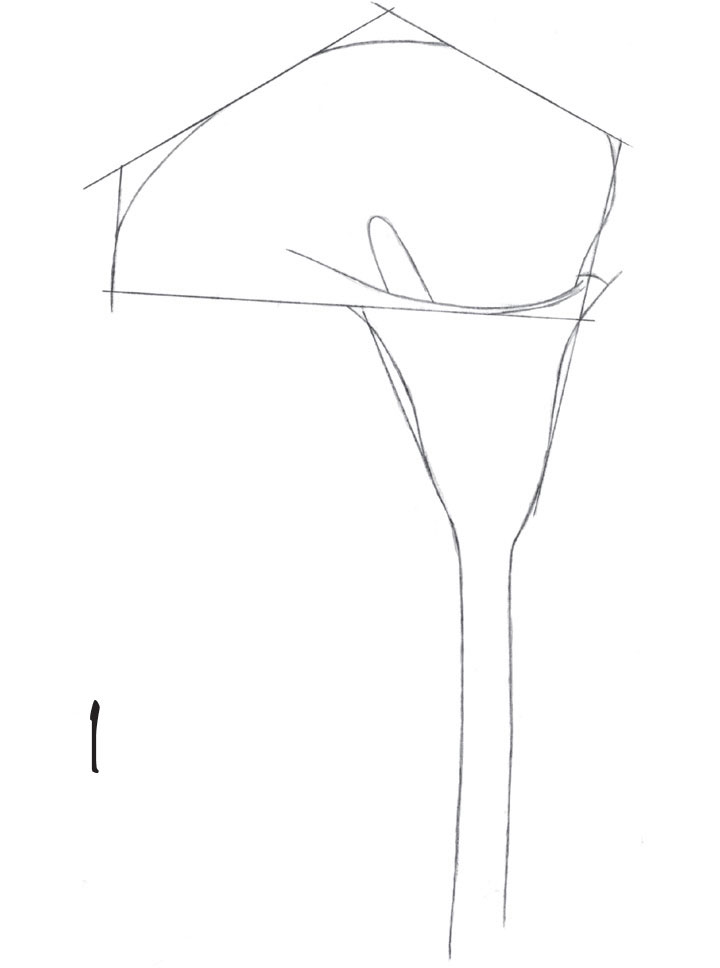
1 Start this drawing on heavy tracing vellum, using an HB pencil and straight lines to block in the basic shapes. Then refine the outline of the flower, rounding off the bottom of the blossom and transitioning into the straight, thick stem.

2 Take a second piece of tracing vellum and trace over the outline, adding more variation to the overall shape to create a better sense of natural realism. Transfer the outline to a sheet of smooth-finish Bristol paper.
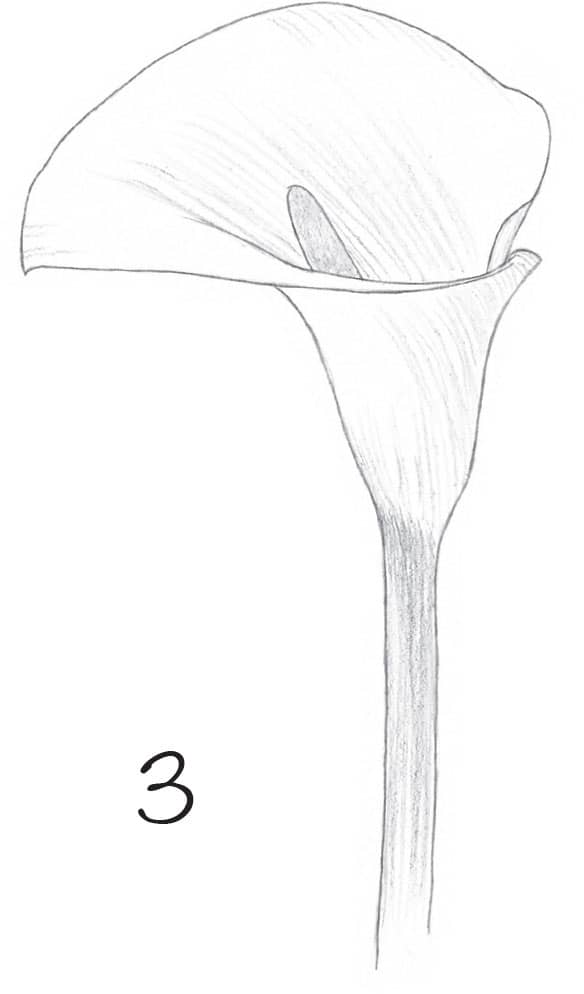
3 Using the side of an HB pencil, lightly stroke in some initial tone. Use long, parallel strokes that gently curve and follow the direction of the delicate striations. Add tone to the stamen using small, circular strokes and darken the stem.

4 Continue to build up the tone using the HB pencil. Then switch to a 2B pencil and darken the stem using long, vertical strokes. With heavier pressure and small circular strokes, deepen the tone of the stamen.
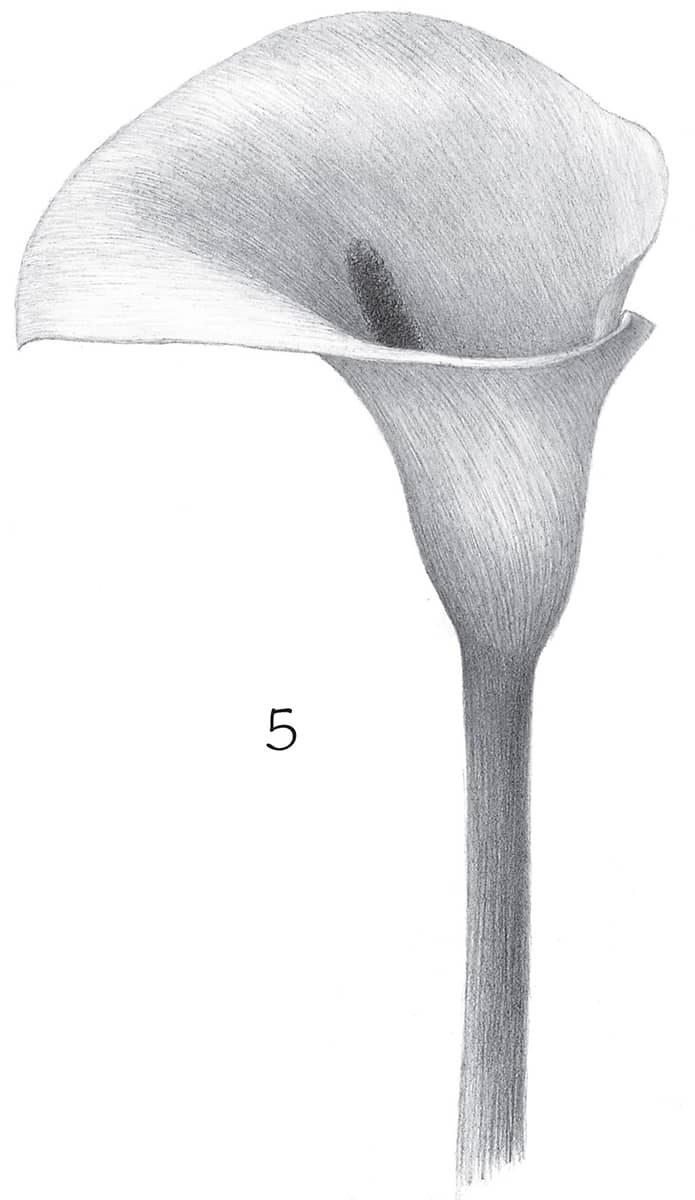
5 Continue to build up the tone of the flower head using the HB pencil. Then use an eraser to pull out some highlights along the outer edges of the petal. Further darken the stem and stamen. Finally, use the point of the pencil to reinforce the edges of the flower, creating a subtle contrast between the white flower and the white background.
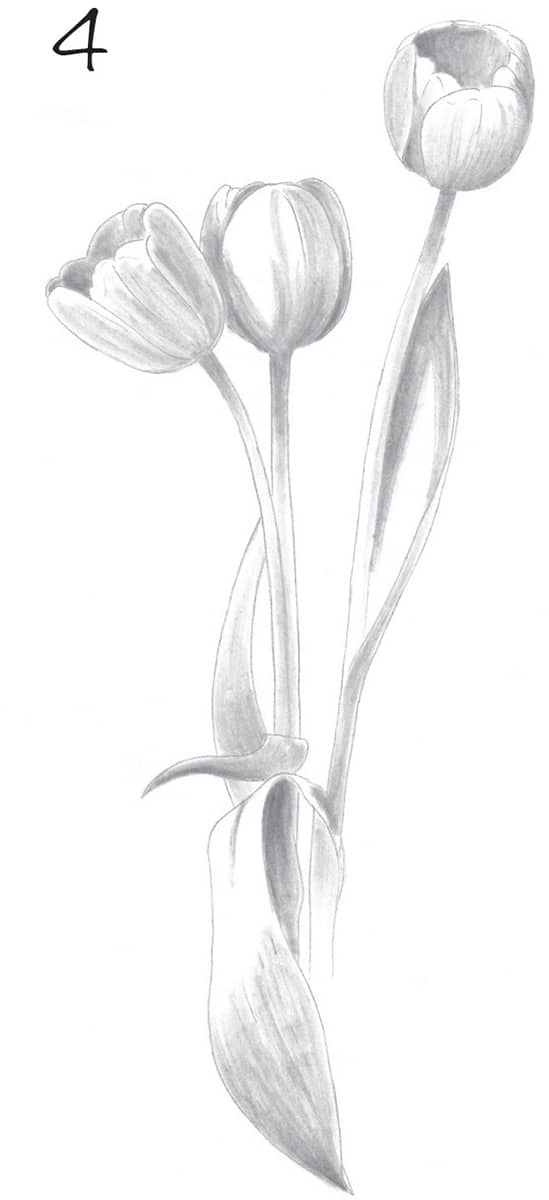
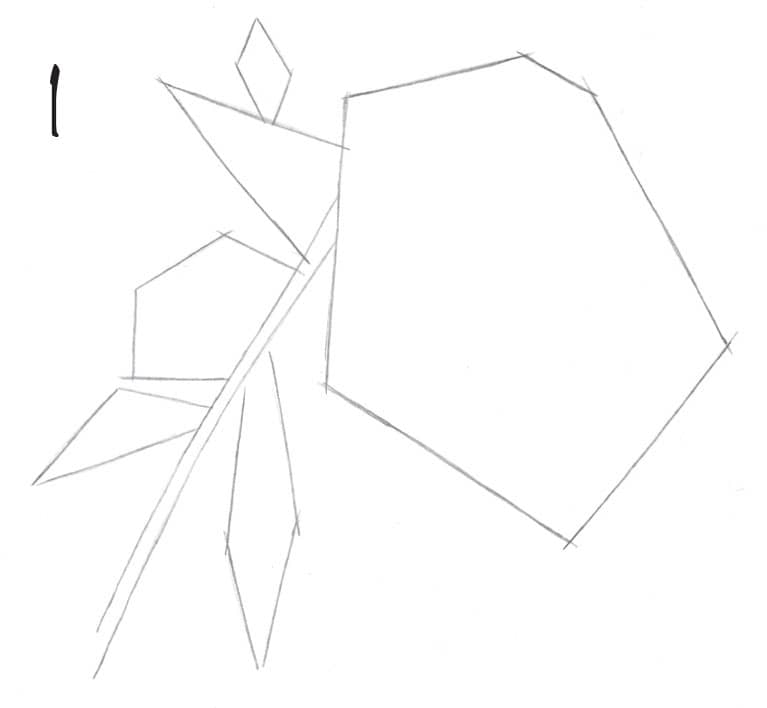
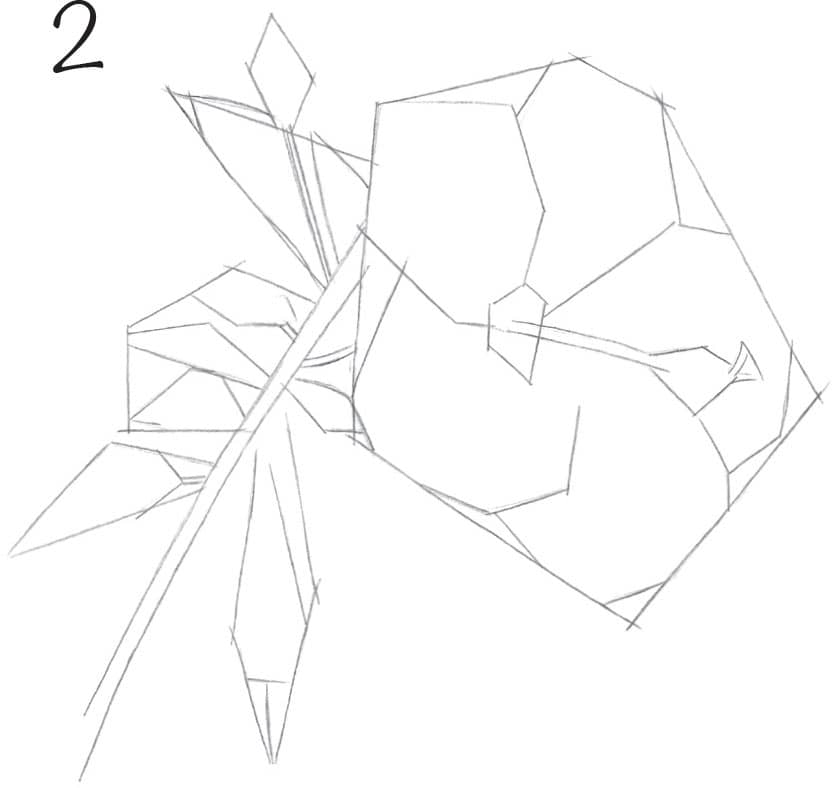
TULIP

1 Using an HB pencil and tracing vellum, draw the curves of the stems using long, graceful lines. Block in ovals to represent the flower heads and irregular ellipses where the insides of the cups are visible. Sketch the leaves.

2 Now draw the petals, using the ovals and ellipses as guides. Use curved lines and oval shapes to draw the petals. Refine the leaves as needed.
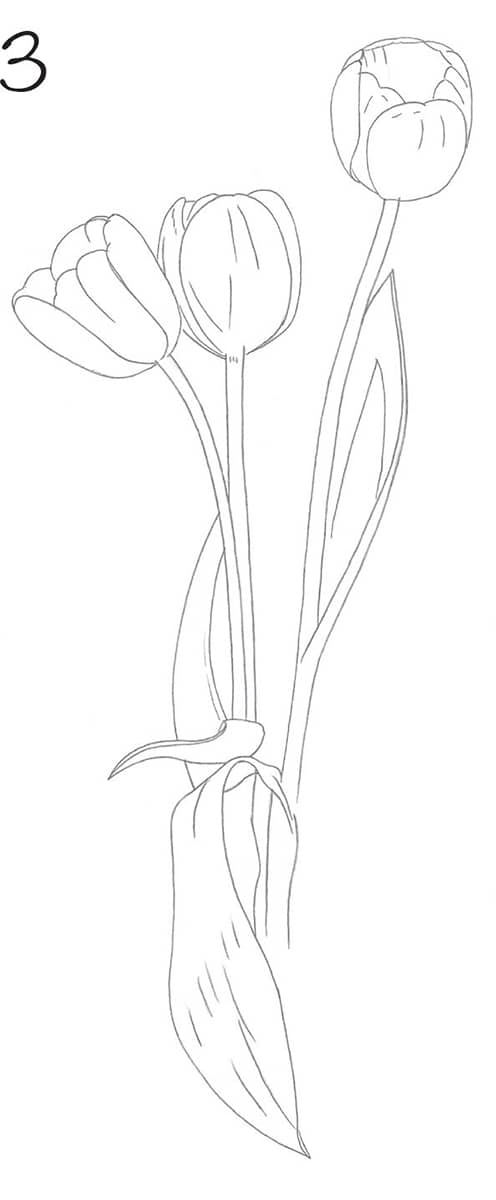
3 Place a new piece of tracing vellum on top of the drawing; then retrace and refine the flowers, leaves, and stems. Erase the ellipses, and add some lines to represent a few striations. Transfer the drawing to smooth-finish Bristol paper, keeping the lines as light as possible.
4 Begin adding shadows and highlights using strokes that follow the form of the flower. Apply some graphite to the leaves; then add some tone to the stems near the base of the flower heads.

5 Continue developing the tone of the tulips. Darken the cast shadow on the middle tulip. Continue to shade the leaves.

6 Use a sharp HB to continue shading the petals and a 2B for the darkest shadows and the insides of the flowers. Switch to a 2H to further define the petal edges. Then lift out the highlights on the flower heads with a kneaded eraser. For the leaves, use a 2B pencil and allow the individual strokes to remain visible to create a leaf-like texture. Shade the stems like a cylinder, keeping the side facing the light much lighter.
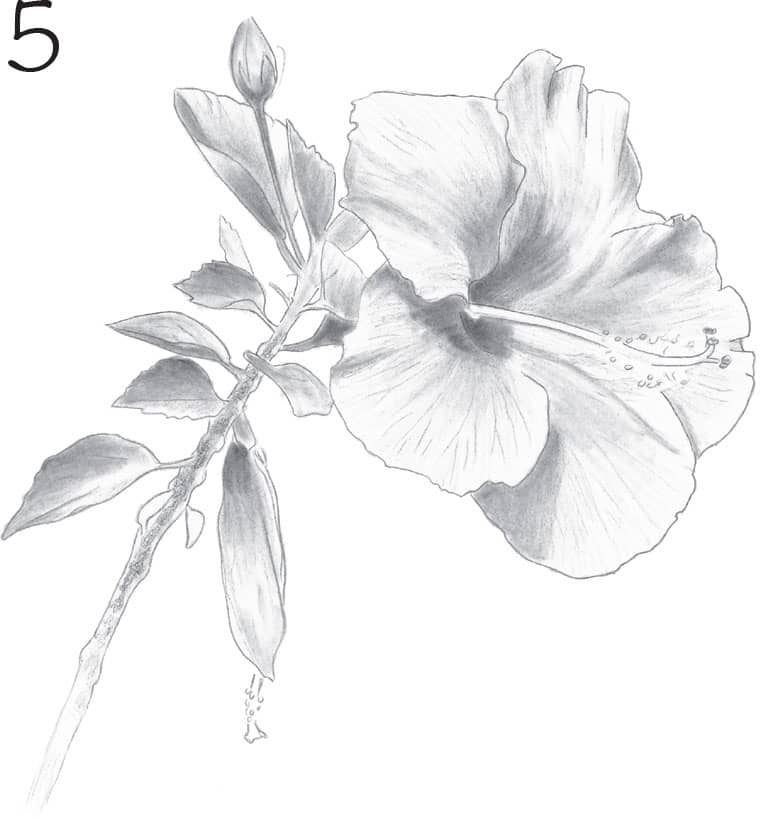
Hibiscus
1 Use an HB pencil to block in the outer shape of the flower using six straight lines. Block in the general shapes of the leaves and the closed bud.
2 Refine the petals, being mindful of their proportions and angles. Continue to use straight lines to suggest the shapes. Draw a polygon to define the center of the flower, parallel lines for the long filament and style, and polygons to block in the stigma and anther.

3 Indicate the major folds of the petals and the details of the pistil and stamen. Draw the details of the bud and sketch light lines to indicate venation on the leaves.

4 To begin working in tone, dip a large stump into graphite powder and stroke it into the areas that represent the deepest shadows on the petals and leaves. Apply the deepest tone in the center of the flower.
5 Continue adding lighter tone to the petals. Deepen the cast shadows on the petals and the center of the flower, and do the same on the leaves. For the thin stems and bud, use the point of the stump to blend the tone and soften the edges.

6 To shade, use a sharp HB and stroke over the flower, following the folds of the petals. Deepen the cast shadows with a 2B and darken the center of the flower with a 4B. Next draw the details of the pistil and stamens, adding some stippling. For the lighter leaf venation, lift out with a kneaded eraser. Shade the bud delicately, using light pressure. Use the side of a 4B pencil for the branch and make circular strokes to create the rough texture. Use a kneaded eraser to clean up any stray lines and finish your drawing.
Freesia

1 Using an HB pencil, draw balloonlike shapes to represent the flowers.
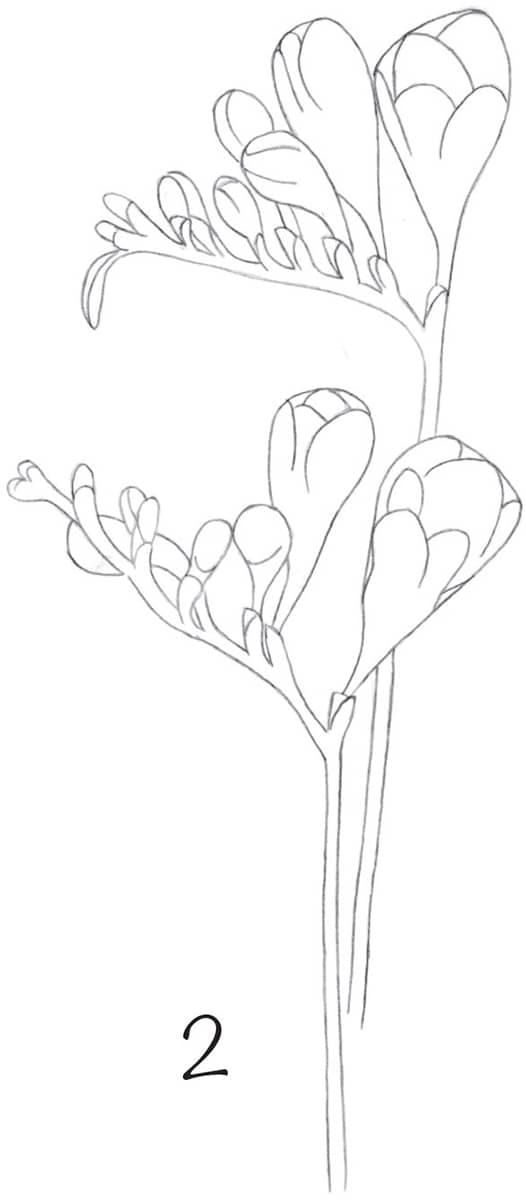
2 Use upside-down U shapes to block in the petals, paying attention to how the petals overlap one another.

3 Continue refining the shapes. Some of the petals are more angular and pointy, so make sure to depict that variation. Add more detail to the sepals at this stage.
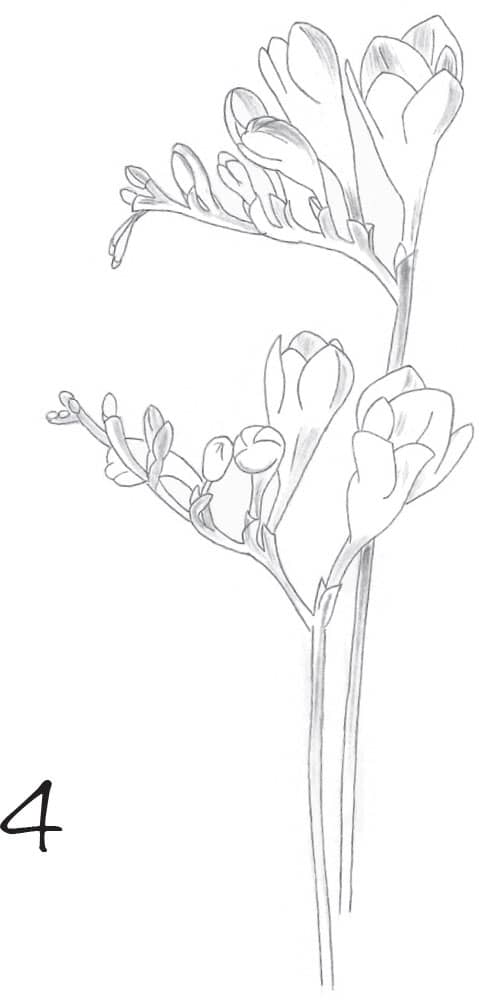
4 Apply dark tone on the stems, using long strokes. Then, very lightly add tone to the individual flowers to indicate the darkest shadow areas, using strokes that follow the direction of the petals.

5 Begin shading with the side of a sharpened HB. Go around each flower and petal using long, curved strokes. As the flowers get smaller and more bud shaped, use deeper shading.
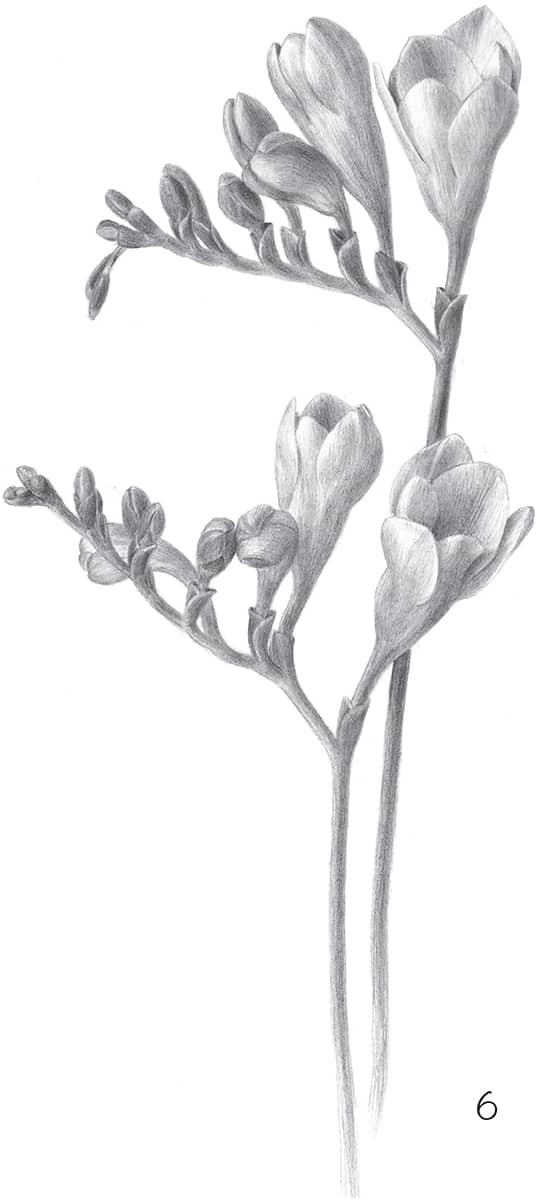
6 Delicately shade the individual flowers using a sharp HB, following their conical shapes. Toward the base of the flowers, use heavier pressure. Then use a 2B to shade the sepals. Add darker tone where the flowers create a cast shadow on the stem. Finally, with a sharp 2H pencil, refine the edges of the petals.
Heliconia

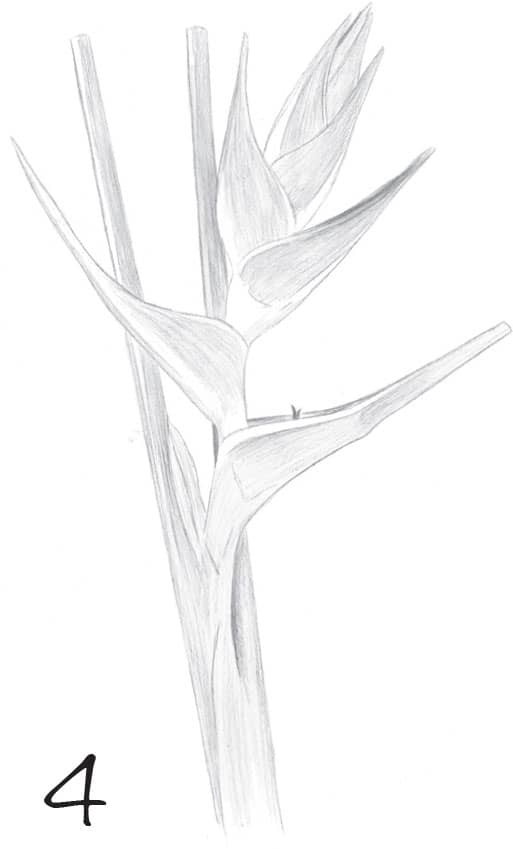
1 Use an HB pencil and draw the two stems that converge. Then block in the large shapes of the heliconia flowers, using triangular shapes for the two lower bracts. Next draw the curved shapes of the bracts within the guidelines.

2 Add more details to the stem, and indicate the border of color changes along the bracts. Add lines to indicate the darker values.
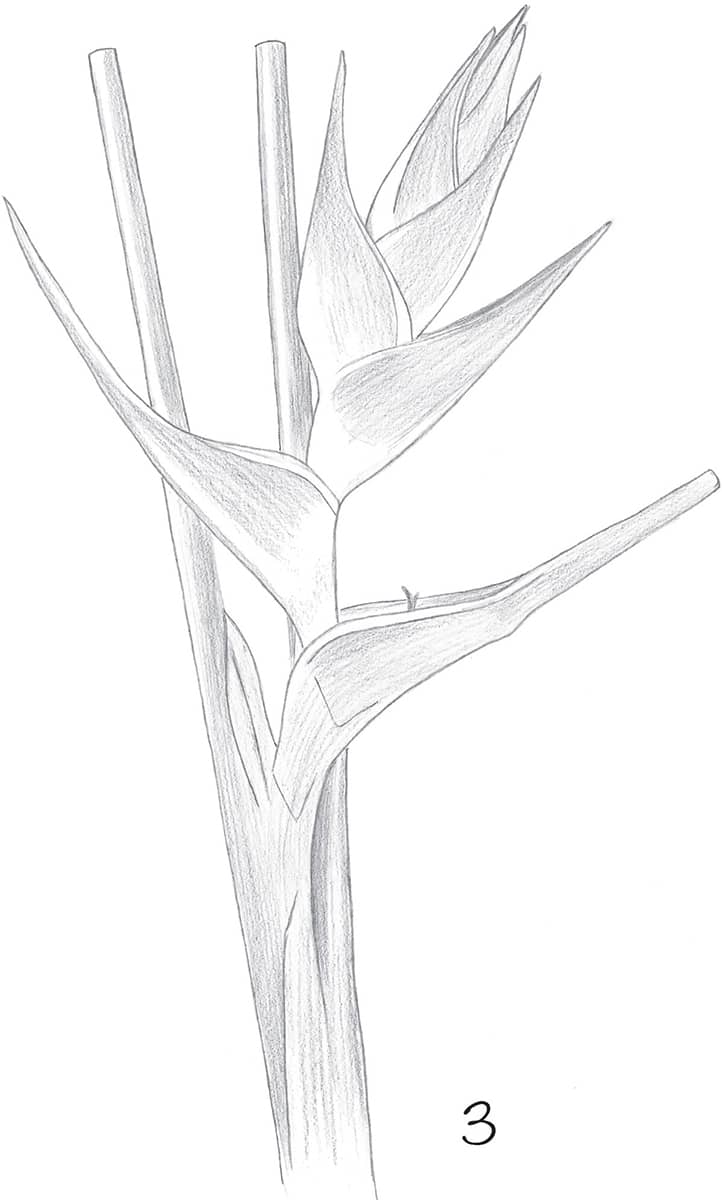
3 Now take a 4B water-soluble graphite pencil and add tone to the stems, stroking along the form. Use long, slightly curved strokes where the form of the bract curves and linear strokes where it straightens out.
4 Dip a watercolor brush in water and gently roll it on a paper towel to absorb excess water and form a point. To create a softer undertone, drag the brush to allow the water to dissolve the graphite wherever you want soft edges.

5 Use the water-soluble pencil to deepen the tones in the shadowed areas. Use medium pressure along the stems, continuing the long strokes. For the bracts, use the heaviest pressure for the deepest values. To convey the light-valued, yellow areas of the stem near the bracts, use a light touch to add a bit of tone. Where the highlight falls in these areas, leave the paper white. Go over the entire drawing with the watercolor brush, smoothing out the tones.

6 Now use a dark 8B water-soluble pencil to further develop the darker tones. Use this along the stem, deepening the shadows. Darken the deep shadow inside the flower bract. Be careful to capture the striped border along the edge of the flower, using heavy pressure where the bract comes to a point and maintaining the light value of the yellow areas with the watercolor brush. Smooth out the tones.
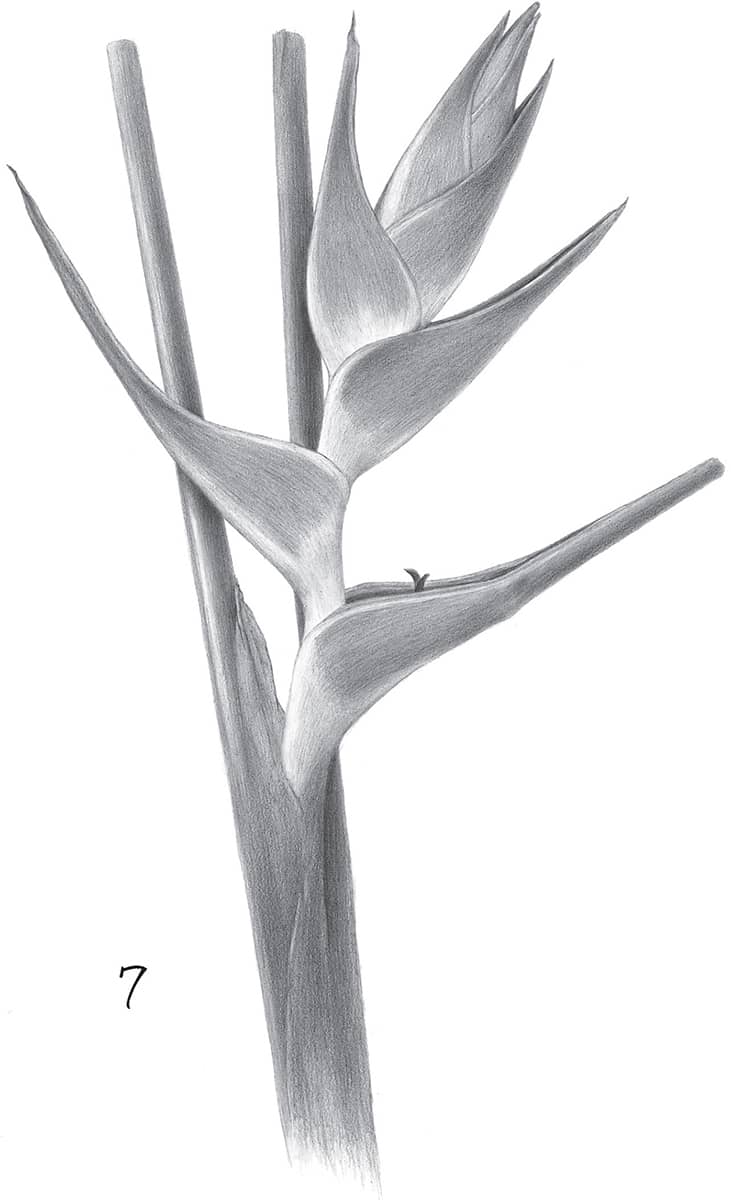
7 When the paper is dry, use an HB graphite pencil and darken the entire drawing, smoothing out the tones. Use the point of the HB to refine the edges of the flower. For darker tones, use a 4B pencil. For the darkest darks, use a sharp point and heavier pressure. Further smooth out the tones using both a 2B and an HB. Finally, use a kneaded eraser to lift out tone, further refining the edges of the bracts and the highlights along the lighter areas.
Ornithogalum

1 Use an HB pencil to draw the stem and leaves. Block in cup shapes to represent the flowers, flattening some and making others more pointed.

2 Now draw the individual petal shapes within the guidelines, using curved lines that come to a point.

3 Refine the petals, indicating subtle variations in their curves. Add a few curved lines to show the midline of some of the petals, which also helps give direction to the form.
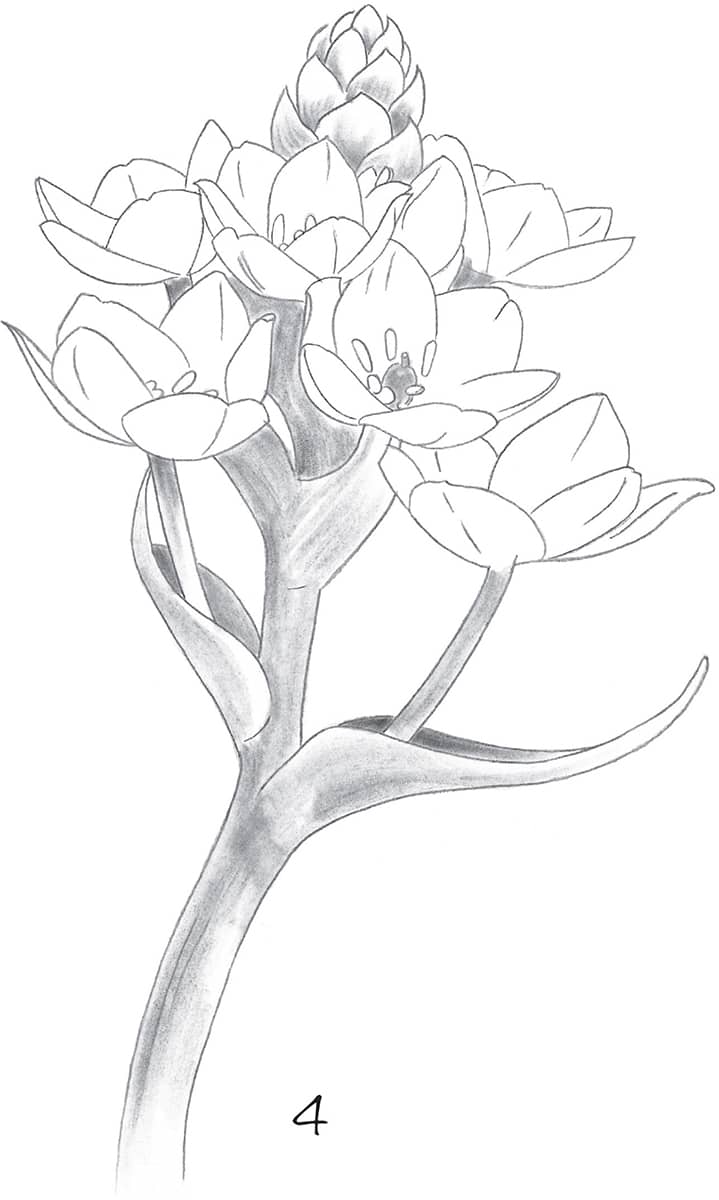
4 Use graphite powder to apply dark tones on the stem, leaves, and upper part of the stalk. Add some tone to the shadows on the upper cluster and the visible stigma, as well as to the insides of the leaves.

5 Add another layer of graphite powder for the deepest shadows. Then add very light tone to the flowers where the light hits.

6 Use a sharp HB to shade the flower petals. Lift out areas that are directly in the light. Then use a sharp 2B to darken areas that are turned away from the light and draw the small cast shadows created by the petals. Still using the 2B, draw the pistil and then use a 4B to add stippling texture. Switch back to the 2B pencil to shade the upper part of the stalk with curved strokes. Shade the stem and leaves using long parallel strokes; then switch to a 4B for the areas that turn away from the light. Use heavy pressure with the 4B to create the deep tones inside the leaves and for the cast shadows under the flowers.