
4. Introduction to Programming
In Chapter 1, “Project: Backscratcher Bot,” you learned how to use the NXT brick’s on-board programming tool to make the Backscratcher Bot’s motor turn. Now we’re going to learn how to program the robot properly, using NXT-G, the software that comes with the Mindstorms set. Figure 4.1 shows the NXT-G welcome screen.
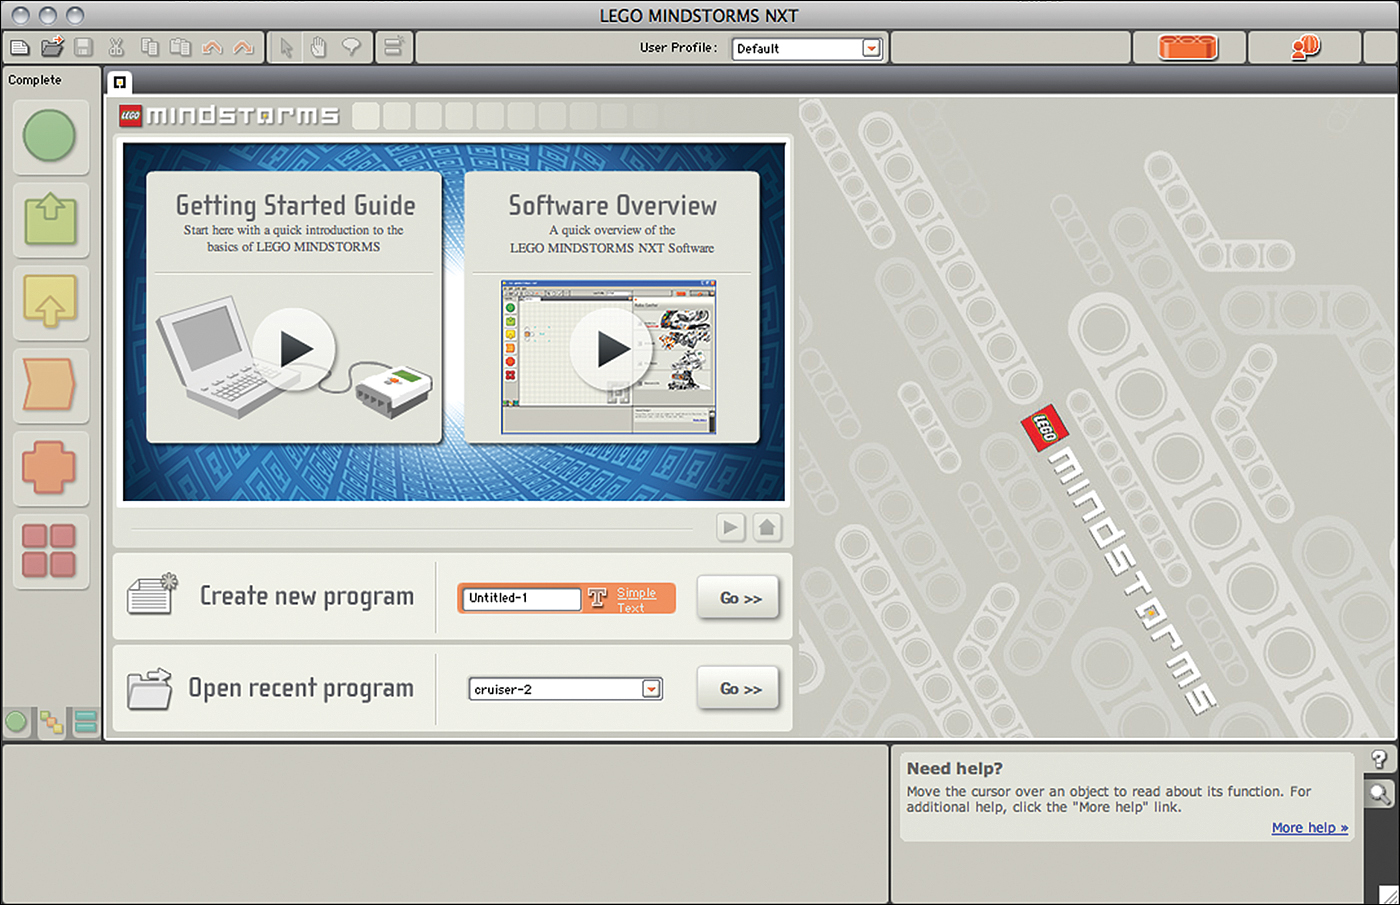
Figure 4.1. The welcome screen of the Mindstorms software.
Note: This Is a Primer
This chapter is a primer that introduces you to the basic Mindstorms programming environment. We don’t get into much in the way of hands-on programming here, although we do get into the specifics within each of the project chapters and in Chapter 8, “Advanced Programming.”
System Requirements
NXT-G isn’t a particularly robust program, meaning it can run on older computers that probably ought to have been recycled long ago. Nevertheless, it does have minimum requirements that must be met for successful installation.
• Linux—Let’s get this out of the way: NXT-G doesn’t run on Linux unless you have an emulator such as WINE (http://www.winehq.org/). If you don’t have this (or a similar) program or don’t want it, you have to use another machine to run NXT-G—one with either Mac OSX or Windows.
• Windows—NXT-G expects a minimum of Windows XP Professional or Home Edition with Service Pack 2, or a newer version of Windows such as Vista, Windows 7, or Windows 8.
For XP, you need a minimum of an 800MHz processor, although 1.5GHz is recommended. Vista and higher users should have Service Pack 1 installed and a 1GHz processor or better.
Additionally, you need a CD drive, a minimum of 512MB RAM, 700MB available hard disk space, a USB port, and a 1024×768 display.
• Macintosh—Your Mac should have OS 10.4 or newer, and run either a PowerPC processor (G3 and 600MHz or better) or an Intel processor (1.3GHz or better). You also need a DVD drive, 512MB RAM, 700MB of drive space, a USB port, and a 1024×768 display.
Installing the Software
Find the CD that came with the set (see Figure 4.2). Remove the disc from its sleeve and insert it into your computer’s drive. What happens next depends on what sort of operating system your computer runs.
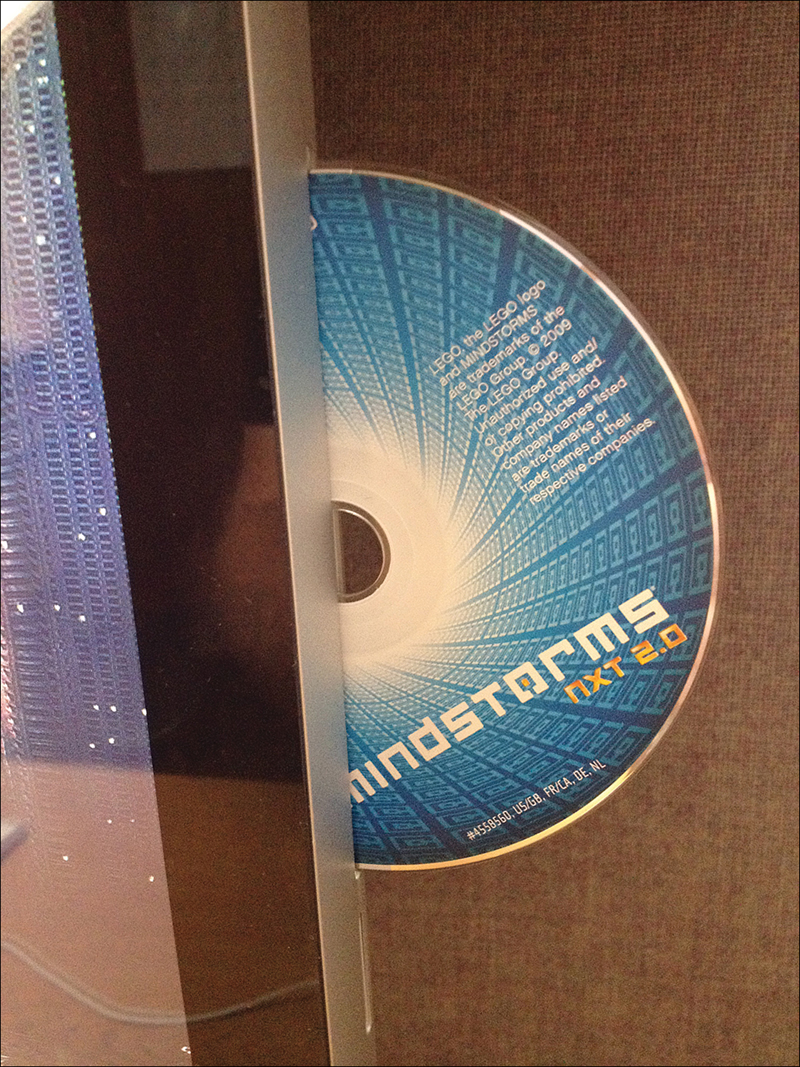
Figure 4.2. The first step to robotics adventure is to install the software!
Installing on a PC
The installation program should begin automatically. If it doesn’t run, go to My Computer. Right-click the drive holding the Mindstorms disc and select Autorun from the menu.
Depending on what version of Windows you are using and the permissions granted to you by the system administrator, Windows might ask you for permission to install the software. If you aren’t the administrator, you need to have that person enter his or her password for the installation to continue. If you are the administrator, Windows might still ask if you want to allow the program to make changes. Click Yes and the installation continues.
Installing on a Mac
If you’re on a Mac, you may have to follow one semi-tricky set of instructions to get your software to work.
1. Determine the version of your computer’s operating system by clicking the Apple menu at the upper left of the screen and choosing About My Mac. A window appears that identifies the version of the OS you are running.
• If you are running Version 10.5 or lower, you are able to install simply by inserting the Mindstorms disc and launching the install app.
• If you are running Version 10.6 or higher, you have to follow a slightly different set of directions to install the Mindstorms software.
2. Press Command+Shift+N to create a new folder on your desktop; then drag all the files from the Mindstorms disc into this folder. The files total about 374MB.
3. Locate the file called MindstormsUnivRet.pkg in the Parts directory. Hold down the Control button while clicking on the file (or right-click if you have a two-button mouse); then click Show Package Contents.
4. Open the Contents folder and then the Resources subfolder. Delete the file labeled preflight and then close the package.
5. Click Install.
Tip: Didn’t Delete Preflight File First?
If you accidentally installed NXT-G before deleting the preflight file, just delete the LEGO Mindstorms NXT folder from your Applications folder and reinstall using the preceding steps.
You might encounter additional difficulties depending on what version of the operating system you run on your Mac. If you run Leopard (10.5) or Snow Leopard (10.6), you might need to install one more patch to ensure that you’re operational. Visit http://mindstorms.lego.com/en-gb/support/files/Patches.aspx, download the appropriate patch, and follow the directions enclosed with the file. Whew!
NXT-G 101
Enough with the preliminaries; let’s get started. Are you ready to program? It might seem kind of intimidating at first, but we’ll get through it! Let’s jump in.
The Programming Block
The central tool of the NXT-G environment is the block (see Figure 4.3). A block is a series of programming commands simplified down to one visual cue. It can be tweaked through a series of check boxes to customize its functionality, and the icon changes to show how it has been customized. We get into customization more deeply later.

Figure 4.3. Blocks embody a string of programming commands.
Blocks have a data hub that pops down from the bottom when you click on the tab (see Figure 4.3). The data hub has a number of plugs that you can use to send and receive data and other information from other blocks.
You can even create your own blocks! Say you customize the heck out of a block and want to keep it for later use. You can totally do that.
Figure 4.4 shows the Mindstorms work area, and Table 4.1 explains each component in more detail.
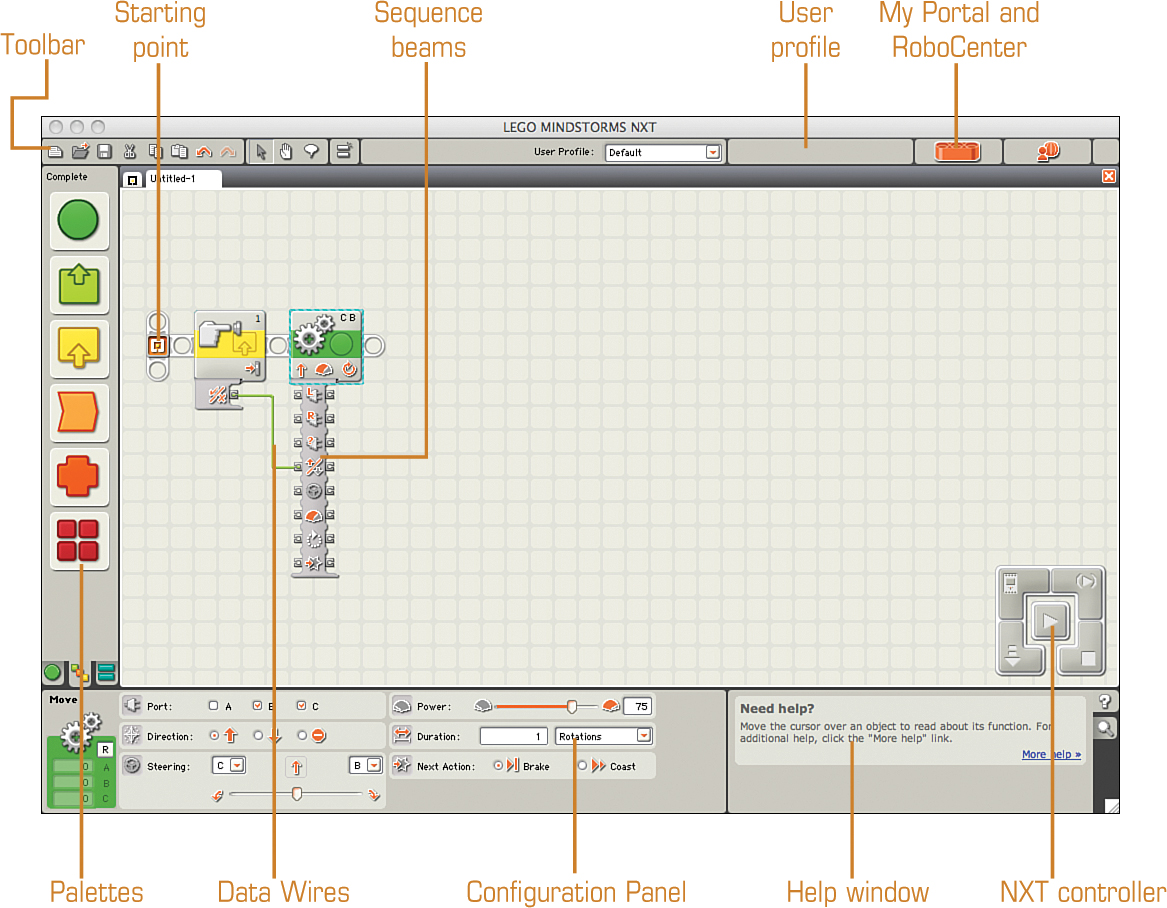
Figure 4.4. The Mindstorms work area. This is where the magic happens!
Table 4.1. The Mindstorms Work Area

Commonplace Blocks
Although there are numerous blocks, the following sections discuss a few you’re likely to encounter in a typical program.
Color Sensor Block
Mindstorms creations use the color sensor to detect the color of a scanned item and report the result to the NXT brick. This block (see Figure 4.5) controls it! This block is essential for any task that involves the sorting of bricks by color, or for following a colored line.
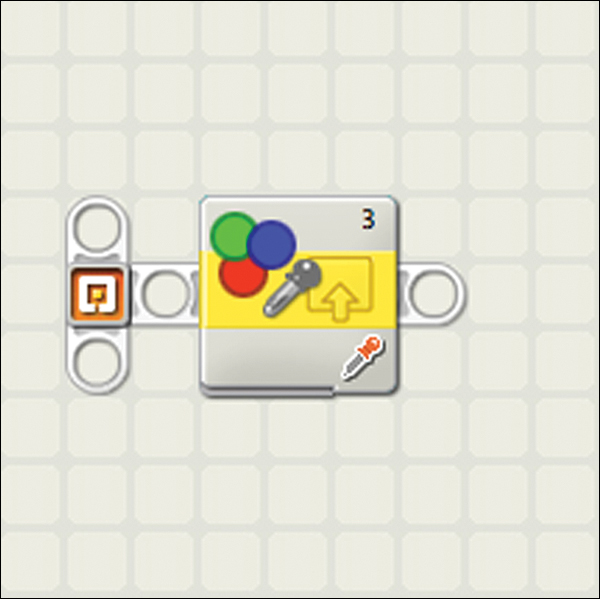
Figure 4.5. The Color Sensor block helps your robot to detect the colors around it.
Loop Block
The Loop block causes a sequence of blocks (placed inside it) to repeat until a certain event occurs or the program aborts (see Figure 4.6). This is a great way to keep the size of a program small, because the same blocks are accessed repeatedly.
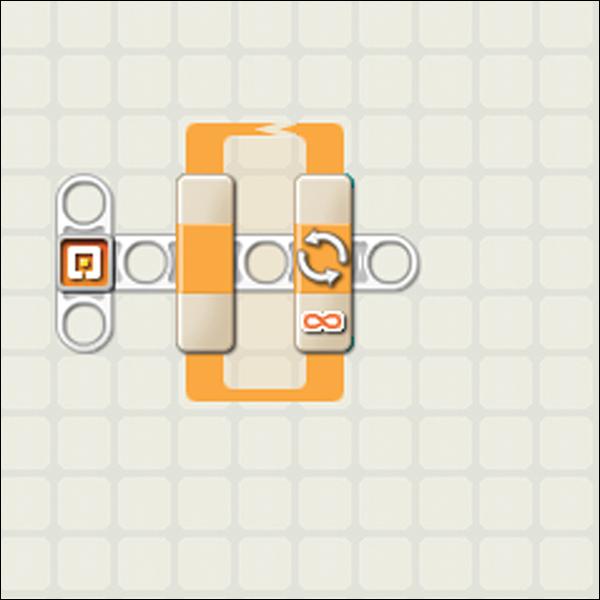
Figure 4.6. The loop is one of the classic programming tricks. Just loop it!
Move Block
The default Move block (see Figure 4.7) controls one or more motors. It is used as the basis for many robots because it simplifies certain maneuvers like reverses and turns. You can use the Configuration Panel to modify the block to fit the unique needs of your project.
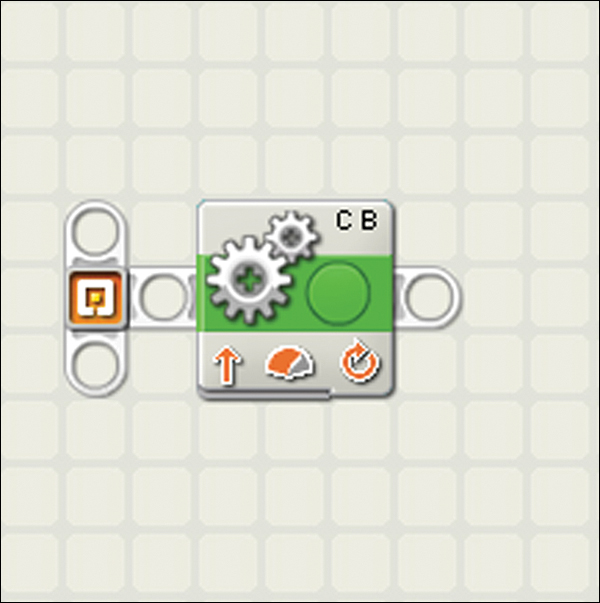
Figure 4.7. You use the Move block to control one or more motors.
NXT Buttons Block
The orange and gray buttons on the NXT brick are controlled by the NXT Buttons block, allowing you to interact with your robot’s NXT-G program directly from the brick (see Figure 4.8). This is kind of cool because it basically adds “free” buttons to any robot! Of course, you’ll need to position the NXT brick in a place where it’s easy to access the buttons.
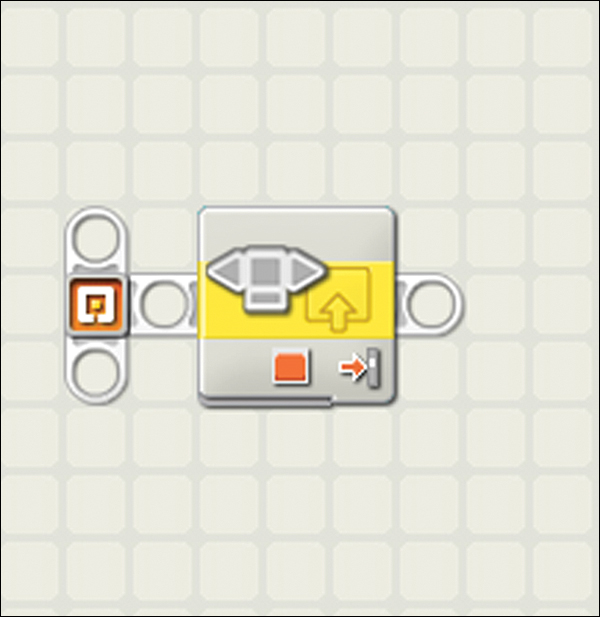
Figure 4.8. The NXT brick has buttons built into it. Use them!
Switch Block
What happens when you press that button? What happens when you don’t press it? The Switch block (see Figure 4.9) helps control the program’s flow as it interacts with a sensor. For example, you could make the robot move in reverse if the ultrasonic sensor detects an obstruction, or go forward if it the coast is clear.
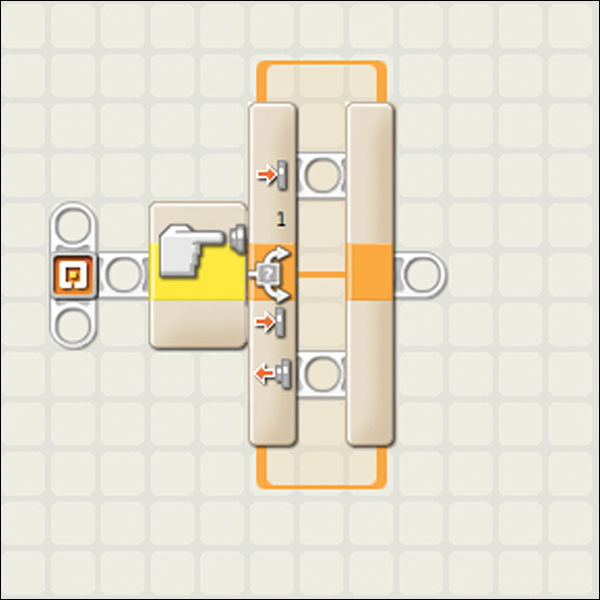
Figure 4.9. The Switch block allows you to perform two separate events depending on the input of a sensor.
Ultrasonic Sensor Block
The Ultrasonic Sensor block controls the various functions and options of Mindstorms’ ultrasonic sensor, including judging distance and detecting obstacles (see Figure 4.10). It works kind of like a bat’s sonar by sending out pulses of inaudible sound and listening for reverberations.
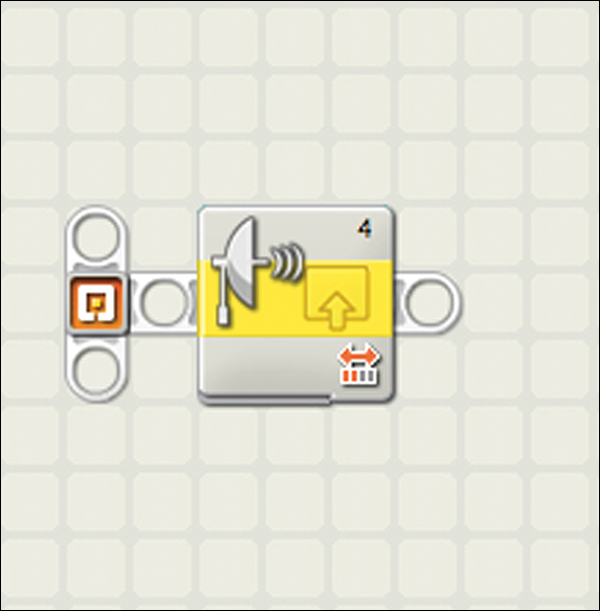
Figure 4.10. This block helps your robot see with the ultrasonic sensor.
Wait Block
The Wait block pauses a program for a predetermined length of time or until triggered by another block or a sensor’s input (see Figure 4.11). This is great for projects that rely on a lot of sensor input to manage the robot’s actions.
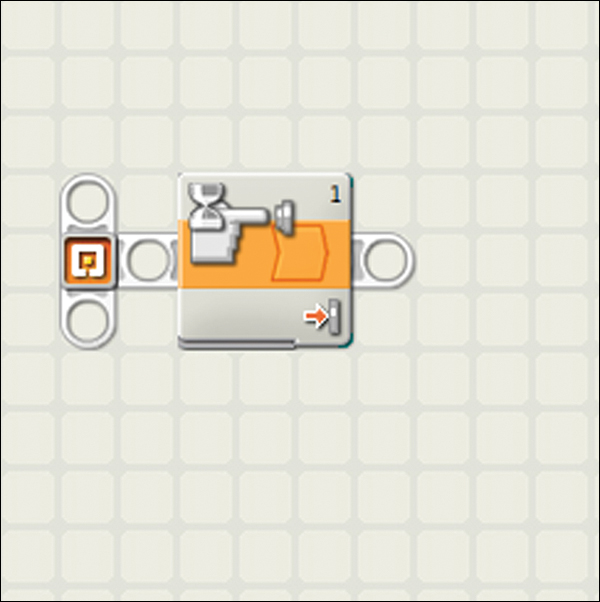
Figure 4.11. Wait for it...wait for it!
Programming the Backscratcher Bot
The Backscratcher Bot is fairly simple. No sensors and only one motor make for an elegantly simple program. All we’re going to do is program the motor to begin turning with the start of the program and to turn until the button on the NXT brick is pressed.
Create the Program
Let’s begin by launching NXT-G (see Figure 4.12). After it is loaded, follow these steps to program the Bot.
1. Drag a Loop block onto the work area.
2. Drag a Move block inside the loop; the Loop block grows as you drop more blocks inside it. Configure it with the correct motor port and change Duration to Unlimited.
3. Click on the right side of the loop to configure it. Change Control to Sensor and then select NXT Buttons from the drop-down menu of sensors. The remaining default settings should be fine.
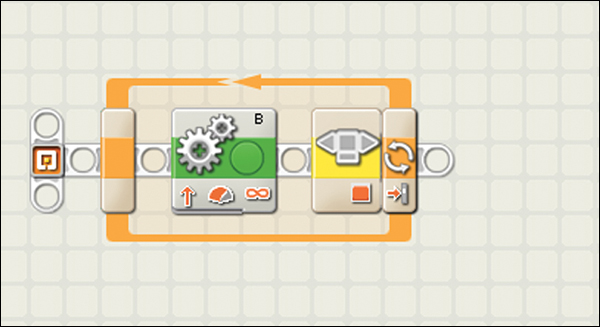
Figure 4.12. You’ve already created the Backscratcher Bot; now let’s program it!
When completed, the program should look like the one in Figure 4.12.
Connect to the NXT Brick
After your program is complete, it’s time to download the program to the NXT brick. But first, you’ll have to connect the two! This is how you do it:
1. Plug the NXT into your computer via a USB cable. One is included in the set, or you can use any typical “A-B” cable.
2. Turn on the NXT brick. If you forget, the computer isn’t able to see the NXT!
3. Click on the icon on the NXT Controller that looks like a NXT brick.
4. Click Scan in the NXT menu (see Figure 4.13). It takes a few moments for the software to see the brick.

Figure 4.13. Select a NXT and get to work.
5. When your NXT appears as one of the visible bricks, select it and click Connect. You’re in business!
Download the Program
From the NXT Controller, click the button that looks like an arrow in parentheses. This is Download and Run. Clicking it transfers the program file to the NXT brick and launches it automatically.
Tip: If You Can’t Get Your Program to Work
Be sure to read the help files. You can access them through the Help window at the lower-right corner of the screen. Also, don’t be hesitant to search the Web for Mindstorms blogs and forums. You’d be surprised how many people have already encountered the same problem!
The Next Chapter
Now that you’ve learned a little bit about how to program in NXT-G, let’s move on to the next model! In Chapter 5, “Project: Clothesline Cruiser,” you build and program a robot that can roll along a rope, using its sensors to tell when it has reached the end of the line. And if you’re hungering for even more NXT-G know-how, be sure to read Chapter 8, which offers advanced programming tips.