
You now have your sensor, but if you want to sense in more than just one direction, you could use several sensors, each mounted to a different side of the robot. However, there is a way to use servos to move your sensor, which allows you to use a single sensor to sense in several directions.
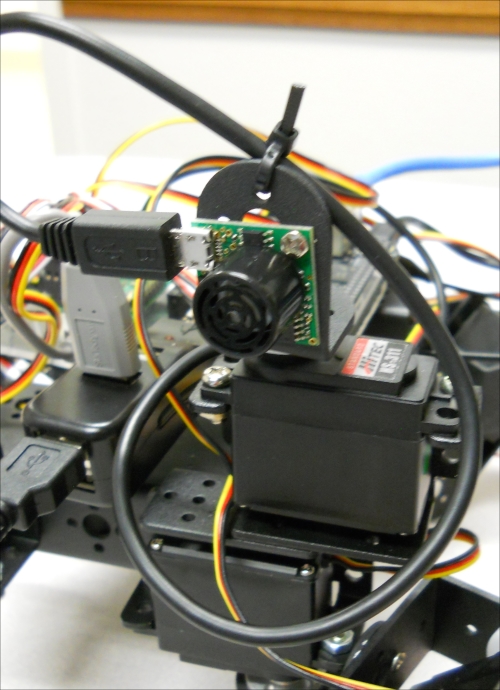
The simplest way to avoid having to purchase and configure several sensors is to mount the sensor on a single servo, then use a servo bracket to connect this assembly to the platform. Using the sonar sensor, the assembly will look something like this:
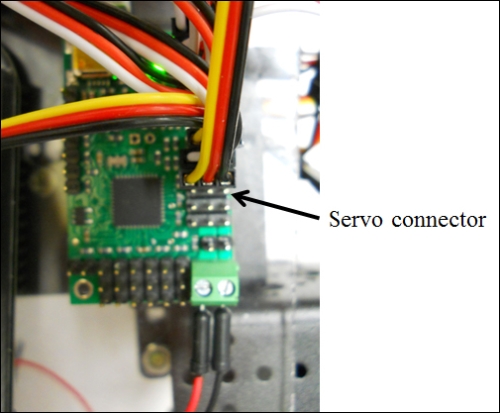
Make sure you connect your servo to the servo controller; it can fit into any open connection. I am connecting mine to my quadruped that has eight servos to control, so I have connected mine to the eighth connection on the servo controller board. Here is an image:
I'll assume you already have your sensor up and working and know how to read data. In this section, you will add the ability to move the sensor by communicating with the servo through the servo controller you configured in the last chapter.
For the program, you will begin with the robot.py program you created in Chapter 6, Making the Unit Very Mobile - Controlling Legged Movement, as you are going to need to access the servo controller. However, you may want to keep a copy of this program, just in case you want to use it later. First go to the directory that holds the robot.py program; in my case I placed it in the maestro_linux directory, so I would type cd ./maestro_linux from my log-in or home directory. Now let's create a copy of this program by typing cp robot.py sense.py.
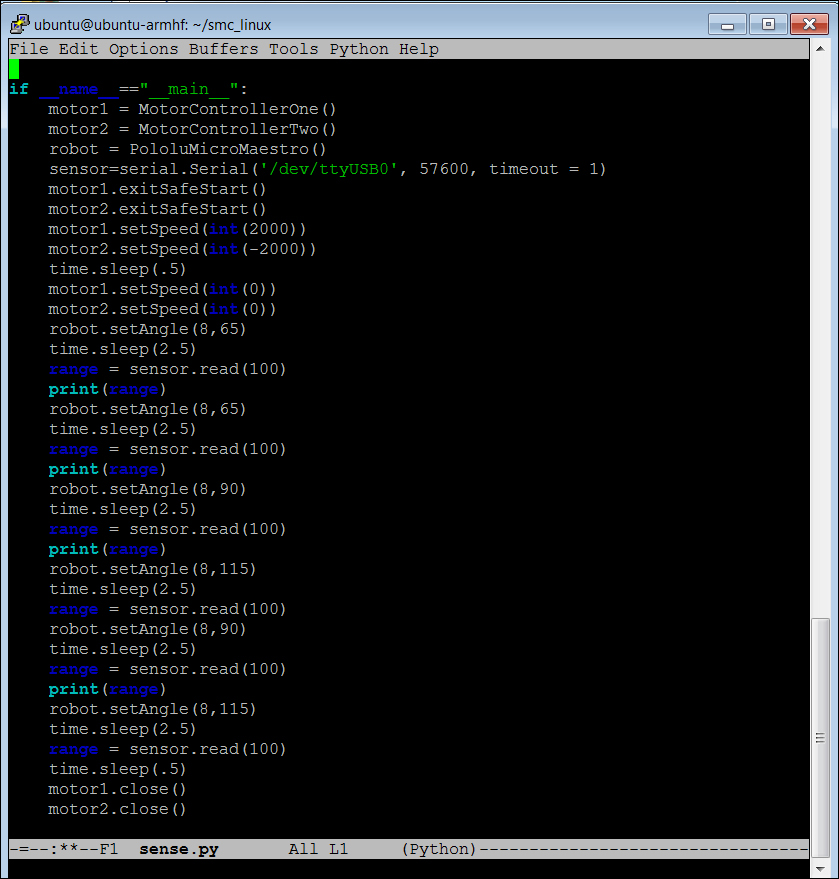
You'll want to edit this program, so if you are using the Emacs editor, type emacs sense.py. The program you want to create will look like this:
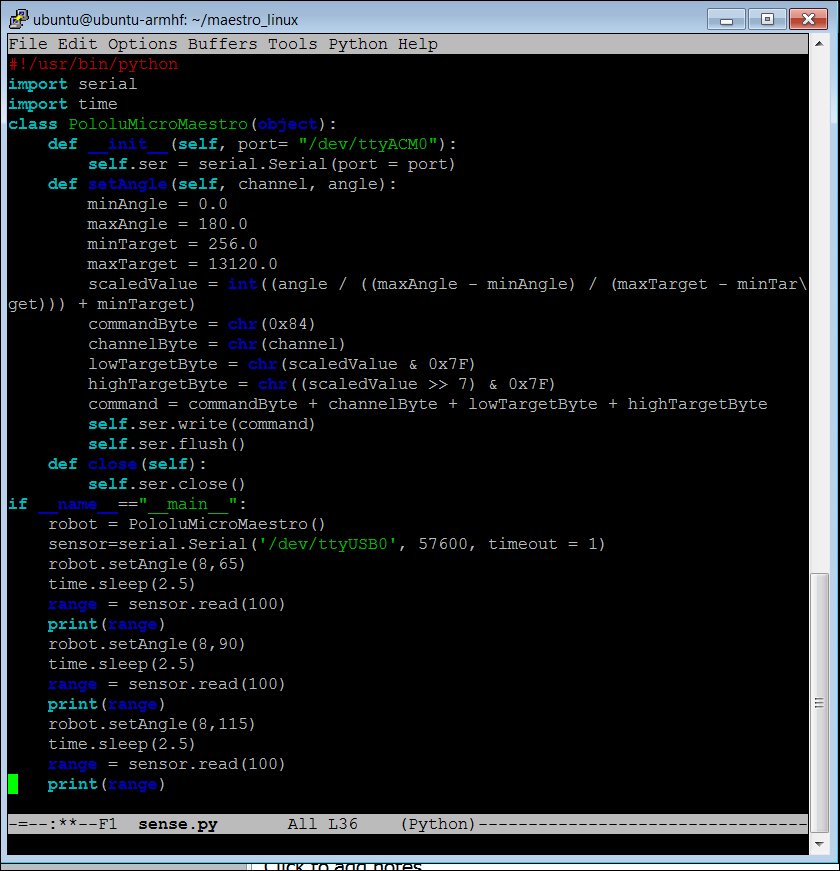
Let's walk through the code to see what it does. I will begin with the section that begins with if __name__="__main__":, as everything above this comes to us from the robot.py code and is covered in this previous chapter.
- The
robot=PololuMicroMaestro()line initializes the servo motor controller and connects it to the proper USB port. sensor=serial.Serial('/dev/ttyUSB0', 57600, timeout = 1)opens a serial port that connects you to the USB sonar sensor at the/dev/ttyUSB0port and sets its parameters.- You can now ask the servo to go to a specific position and then take a reading. In this case, I am doing this for the servo positions at 65 degrees, 90 degrees, and 115 degrees. At each of these locations, you ask for a range reading. Notice that you need to wait 2.5 seconds for the sensor to respond, based on the specifications of the manufacturer for the device to deliver a stable reading.
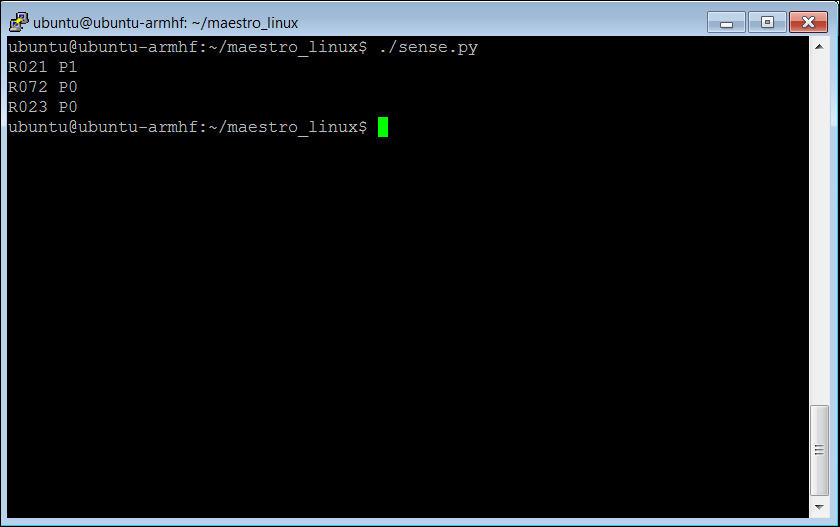
That's it! Now you can sense in front of you and to either side. Here is an example of what might be displayed as a result of running the program:
If you are adding the sensor/servo combination to your wheeled vehicle, you'll need to add the servo motor controller as well. The motor controllers, the servo controllers, and the USB sonar or IR sensor can all coexist on the same BeagleBone Black. You'll need to merge the dcmotor.py and the sense.py programs so that you can access each individual capability.
Here is a listing of a possible program that does this:
In order to make this fit here, I have not included the #include serial and time, the MotorControllerOne, and MotorControllerTwo classes from the dcmotor.py file, and the PololuMicroMaestro class from the robot.py file. These would all need to be included, and then this main program would move the robot and then sense the environment around it. This would be a great starting point for your mobile robot code.