
Besides fragments, another new feature introduced in Android 3.0 is the Action Bar. In place of the traditional title bar located at the top of the device’s screen, the Action Bar displays the application icon together with the activity title. Optionally, on the right side of the Action Bar are action items. Figure 2-14 shows the built-in Email application displaying the application icon, activity title, and some action items in the Action Bar. The next section discusses action items in more details.
The following Try It Out shows how you can programmatically hide or display the Action Bar.
TRY IT OUT: Showing and Hiding the Action Bar
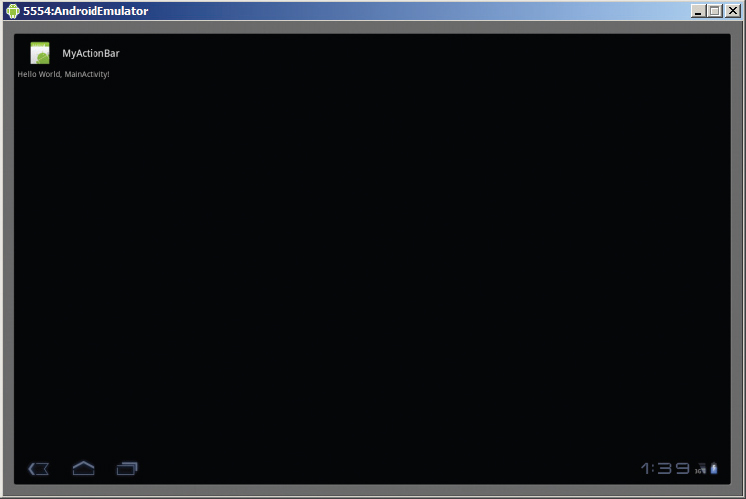
1. Using Eclipse, create a new Android project and name it MyActionBar.
2. Press F11 to debug the application on the Android emulator. You should see the application and its Action Bar located at the top of the screen (containing the application icon and the application name “MyActionBar”; see Figure 2-15).
3. To hide the Action Bar, add the following line in bold to the AndroidManifest.xml file:
<?xml version="1.0" encoding="utf-8"?>
<manifest xmlns:android="http://schemas.android.com/apk/res/android"
      package="net.learn2develop.MyActionBar"
      android:versionCode="1"
      android:versionName="1.0">
    <uses-sdk android:minSdkVersion="11" />

<application android:icon="@drawable/icon"
        android:label="@string/app_name">
        <activity android:name=".MainActivity"
                  android:label="@string/app_name"
                  android:theme=
                     "@android:style/Theme.Holo.NoActionBar">
             <intent-filter>
                  <action android:name="android.intent.action.MAIN" />
                  <category
                     android:name="android.intent.category.LAUNCHER" />
             </intent-filter>
        </activity>
</application>
</manifest>
4. Press F11 to debug the application on the Android emulator again. This time, the Action Bar is not displayed (see Figure 2-16).

5. You can also programmatically remove the Action Bar using the ActionBar class. To do so, you first need to remove the android:theme attribute you added in the previous step (note the strikethrough):
        <activity android:name=".MainActivity"
                  android:label="@string/app_name"
                android:theme=
                "@android:style/Theme.Holo.NoActionBar">
            <intent-filter>
                 <action android:name="android.intent.action.MAIN" />
                 <category
                    android:name="android.intent.category.LAUNCHER" />
            </intent-filter>
        </activity>
6. Modify the MainActivity.java file as follows:
package net.learn2develop.MyActionBar;

import android.app.Activity;
import android.os.Bundle;
import android.app.ActionBar;

public class MainActivity extends Activity {
    /** Called when the activity is first created. */
    @Override
    public void onCreate(Bundle savedInstanceState) {
        super.onCreate(savedInstanceState);
        setContentView(R.layout.main);

        ActionBar actionBar = getActionBar();
        actionBar.hide();
        //actionBar.show(); //---show it again---
    }
}
7. Press F11 to debug the application on the emulator again. The Action Bar remains hidden.
How It Works
The android:theme attribute lets you turn off the display of the Action Bar for your activity. Setting this attribute to “@android:style/Theme.Holo.NoActionBar” hides the Action Bar. Alternatively, you can programmatically get a reference to the Action Bar during runtime by using the getActionBar() method. Calling the hide() method hides the Action Bar, and calling the show() method displays it.
Note that if you use the android:theme attribute to turn off the Action Bar, calling the getActionBar() method returns a null during runtime. Hence, it is always better to turn the Action Bar on/off programmatically using the ActionBar class.
Adding Action Items to the Action Bar
Besides displaying the application icon and the activity title on the left of the Action Bar, you can also display additional items on the Action Bar. These additional items are called action items. Action items are shortcuts to some of the commonly performed operations in your application. For example, you might be building an RSS reader application and hence some of the action items might be “Refresh feed,” “Delete feed” and “Add new feed.”
The following Try It Out shows how you can add action items to the Action Bar.
TRY IT OUT: Adding Action Items
1. Using the same project created in the previous section, add the following code in bold to the MainActivity.java file:
package net.learn2develop.MyActionBar;

import android.app.Activity;
import android.os.Bundle;
import android.app.ActionBar;

import android.view.Menu;
import android.view.MenuItem;
import android.widget.Toast;

public class MainActivity extends Activity {
    /** Called when the activity is first created. */
    @Override
    public void onCreate(Bundle savedInstanceState) {
        super.onCreate(savedInstanceState);
        setContentView(R.layout.main);

        ActionBar actionBar = getActionBar();
        //actionBar.hide();
        //actionBar.show(); //---show it again---
    }

    @Override
    public boolean onCreateOptionsMenu(Menu menu) {
        super.onCreateOptionsMenu(menu);
        CreateMenu(menu);
        return true;
    }

    @Override
    public boolean onOptionsItemSelected(MenuItem item)
    {
         return MenuChoice(item);
    }

    private void CreateMenu(Menu menu)
    {
        MenuItem mnu1 = menu.add(0, 0, 0, "Item 1");
        {
            mnu1.setAlphabeticShortcut('a');
            mnu1.setIcon(R.drawable.icon);
        }
        MenuItem mnu2 = menu.add(0, 1, 1, "Item 2");
        {
            mnu2.setAlphabeticShortcut('b');
            mnu2.setIcon(R.drawable.icon);
        }
        MenuItem mnu3 = menu.add(0, 2, 2, "Item 3");
        {
            mnu3.setAlphabeticShortcut('c';);
            mnu3.setIcon(R.drawable.icon);
        }
        MenuItem mnu4 = menu.add(0, 3, 3, "Item 4");
        {
            mnu4.setAlphabeticShortcut('d');
        }
        menu.add(0, 3, 3, "Item 5");
        menu.add(0, 3, 3, "Item 6");
        menu.add(0, 3, 3, "Item 7");
    }

    private boolean MenuChoice(MenuItem item)
    {
        switch (item.getItemId()) {
        case 0:
            Toast.makeText(this, "You clicked on Item 1",
                Toast.LENGTH_LONG).show();
            return true;
        case 1:
            Toast.makeText(this, "You clicked on Item 2",
                Toast.LENGTH_LONG).show();
            return true;
        case 2:
            Toast.makeText(this, "You clicked on Item 3",
                Toast.LENGTH_LONG).show();
            return true;
        case 3:
            Toast.makeText(this, "You clicked on Item 4",
                Toast.LENGTH_LONG).show();
            return true;
        case 4:
            Toast.makeText(this, "You clicked on Item 5",
                Toast.LENGTH_LONG).show();
            return true;
        case 5:
            Toast.makeText(this, "You clicked on Item 6",
                Toast.LENGTH_LONG).show();
            return true;
        case 6:
            Toast.makeText(this, "You clicked on Item 7",
                Toast.LENGTH_LONG).show();
            return true;
        }
        return false;
    }

}
2. Press F11 to debug the application on the Android emulator. Observe the icon on the right side of the Action Bar (see Figure 2-17). This is known as the overflow action item.

3. Clicking the overflow action item reveals a list of menus items (see Figure 2-18). Clicking each menu item will cause the Toast class to display the name of the menu item selected.

How It Works
The Action Bar populates its action items by calling the onCreateOptionsMenu() method of an activity:
    @Override
    public boolean onCreateOptionsMenu(Menu menu) {
        super.onCreateOptionsMenu(menu);
        CreateMenu(menu);
        return true;
    }
In the preceding example, you call the CreateMenu() method to display a list of menu items:
    private void CreateMenu(Menu menu)
    {
        MenuItem mnu1 = menu.add(0, 0, 0, "Item 1");
        {
            mnu1.setAlphabeticShortcut('a');
            mnu1.setIcon(R.drawable.icon);
        }
        MenuItem mnu2 = menu.add(0, 1, 1, "Item 2");
        {
            mnu2.setAlphabeticShortcut('b');
            mnu2.setIcon(R.drawable.icon);
        }
        MenuItem mnu3 = menu.add(0, 2, 2, "Item 3");
        {
            mnu3.setAlphabeticShortcut('c');
            mnu3.setIcon(R.drawable.icon);
        }
        MenuItem mnu4 = menu.add(0, 3, 3, "Item 4");
        {
            mnu4.setAlphabeticShortcut('d');
        }
        menu.add(0, 3, 3, "Item 5");
        menu.add(0, 3, 3, "Item 6");
        menu.add(0, 3, 3, "Item 7");
    }
When a menu item is selected by the user, the onOptionsItemSelected() method is called:
    @Override
    public boolean onOptionsItemSelected(MenuItem item)
    {
        return MenuChoice(item);
    }
Here, you call the self-defined MenuChoice() method to check which menu item was clicked and then print out a message:
    private boolean MenuChoice(MenuItem item)
    {
        switch (item.getItemId()) {
        case 0:
            Toast.makeText(this, "You clicked on Item 1",
                Toast.LENGTH_LONG).show();
            return true;
        case 1:
            Toast.makeText(this, "You clicked on Item 2",
                Toast.LENGTH_LONG).show();
            return true;
        case 2:
            Toast.makeText(this, "You clicked on Item 3",
                Toast.LENGTH_LONG).show();
            return true;
        case 3:
            Toast.makeText(this, "You clicked on Item 4",
                Toast.LENGTH_LONG).show();
            return true;
        case 4:
            Toast.makeText(this, "You clicked on Item 5",
                Toast.LENGTH_LONG).show();
            return true;
        case 5:
            Toast.makeText(this, "You clicked on Item 6",
                Toast.LENGTH_LONG).show();
            return true;
        case 6:
            Toast.makeText(this, "You clicked on Item 7",
                Toast.LENGTH_LONG).show();
            return true;
        }
        return false;
    }
By default, all the menu items are grouped and displayed under the overflow action button, which is on the far right side of the Action Bar.
Customizing the Action Items and Application Icon
From the previous Try It Out, note that even though the first three menu items have their icons set, they are not displayed in the overflow action item. To make the icon for each menu item appear, you have to make the menu item appear as an action item, not within the overflow action item.
Suppose you have an image named save.png located in each of the drawable folders in the res folder. You can modify the previous Try It Out as follows:
        MenuItem mnu1 = menu.add(0, 0, 0, "Item 1");
        {
            mnu1.setAlphabeticShortcut('a');
            mnu1.setIcon(R.drawable.save);
            mnu1.setShowAsAction(MenuItem.SHOW_AS_ACTION_IF_ROOM);
        }
Doing so causes the menu item to appear as an action item (see Figure 2-19). The SHOW_AS_ACTION_IF_ROOM constant tells the device to display the menu item as an action item if there is room for it. This is because you may run out of room to display the action item if too many menu items are vying for space in the Action Bar. In general, you should restrict the number of action items in the Action Bar to prevent overcrowding — three should be the maximum.

If you want to display the text for the action item together with the icon, you could use the “|” operator together with the MenuItem.SHOW_AS_ACTION_WITH_TEXT constant:
        MenuItem mnu1 = menu.add(0, 0, 0, "Item 1");
        {
            mnu1.setAlphabeticShortcut('a');
            mnu1.setIcon(R.drawable.save);
            mnu1.setShowAsAction(MenuItem.SHOW_AS_ACTION_IF_ROOM |
                                  MenuItem.SHOW_AS_ACTION_WITH_TEXT);
        }
This causes the icon to be displayed together with the text of the menu item (see Figure 2-20).

Besides clicking the action items, users can also click the application icon on the Action Bar. When the application icon is clicked, the onOptionsItemSelected() method is called. To identify the application icon being called, you check the item id against the android.R.id.home constant:
    private boolean MenuChoice(MenuItem item)
    {
        switch (item.getItemId()) {
        case  android.R.id.home:
              Toast.makeText(this,
                  "You clicked on the Application icon",
                  Toast.LENGTH_LONG).show();
              return true;
        case 0:
            Toast.makeText(this, "You clicked on Item 1",
                Toast.LENGTH_LONG).show();
            return true;
        //...
        //...
        return false;
    }
The application icon is often used by applications to enable them to return to the main activity of the application. For example, your application may have several activities, and you can use the application icon as a shortcut for users to return directly to the main activity of your application. To do this, it is always good practice to create an Intent object and set it using the Intent.FLAG_ACTIVITY_CLEAR_TOP flag:
        case android.R.id.home:
            Toast.makeText(this,
            "You clicked on the Application icon",
            Toast.LENGTH_LONG).show();
            Intent i = new Intent(this, MainActivity.class);
            i.addFlags(Intent.FLAG_ACTIVITY_CLEAR_TOP);
            startActivity(i);
            return true;
The Intent.FLAG_ACTIVITY_CLEAR_TOP flag ensures that the series of activities in the back stack is cleared when the user clicks the application icon on the Action Bar. This way, if the user clicks the Back button, the other activities in the application do not appear again.