
Arduino Nano 33 IoT is an internet of things (IoT) solution to perform sensing and actuating on physical environment. The Arduino Nano 33 IoT board comes with WiFi and BLE modules that enable communication with other entities for exchanging data. This chapter will explore how to set up the Arduino Nano 33 IoT board for development.
Reviewing Arduino Nano 33 IoT board
Setting up development environment
Building LED blinking program
Applying Arduino web editor
Introduction
Arduino Nano 33 IoT is one of IoT platforms from Arduino. This board uses WiFi and Bluetooth modules to connect to a network. WiFi is a common network that people use to access Internet. Bluetooth is a part of wireless personal network (WPAN) that enables communication with other devices within a short distance.

Arduino Nano 33 IoT board
Review Arduino Nano 33 IoT Board
A Specification of Arduino Nano 33 IoT
Features | Notes |
|---|---|
Microcontroller | SAMD21 Cortex-M0+ 32-bit |
Radio module | u-blox NINA-W102 |
Secure module | ATECC608A |
Operating voltage | 3.3V |
Input voltage | 21V |
DC current per I/O pin (limit) | 7 mA |
Clock speed | 48 Mhz |
CPU flash memory | 256 KB |
SRAM | 32 KB |
EEPROM | None |
Digital I/O | 14 |
PWM pins | 11 (2, 3, 5, 6, 9, 10, 11, 12, 16 / A2, 17 / A3, 19 / A5) |
UART | 1 |
SPI | 1 |
I2C | 1 |
Analog Input | 8 (ADC 8/10/12 bit) |
Analog Output | 1 (DAC 10 bit) |
LED_BUILTIN | 13 |
USB | Native in the SAMD21 processor |
IMU | LSM6DS3 |
Size (Length x Width) | 45 mm x 18 mm |
Since Arduino Nano 33 IoT has some digital and analog I/O, we extend the board capabilities by wiring with other sensors or actuators. We also use universal asynchronous receiver/transmitter (UART), serial peripheral interfact (SPI), and interintergrated circuit (I2C) protocols to communicate with other devices.
Key: CPU, central processing unit; SRAM, static random-access memory; EEPROM, electrically erasable programmable read-only memory; PWM, pulse width modulation; UART, universal asynchronous receiver/transmitter; SPI, serial peripheral interfact; I2C, interintergrated circuit; USB, universal serial bus; IMU, inertial measurement unit.
Next, we will set up Arduino Nano 33 IoT on your computer so you can build programs for Arduino board.
Set Up Development Environment
Arduino provides software to build programs for all Arduino board models. We can use Arduino software. You can download Arduino software on the following link: https://www.arduino.cc/en/Main/Software. This software is available for Windows, Linux, and macOS.
The installation process steps are easy. Just follow the installation guideline from Arduino setup. After finished installation, you will see the Arduino application menu on main menu from your OS platform.

Arduino software for Windows
To work with the Arduino Nano 33 IoT board, we need to configure Arduino software. First, we add Arduino SAMD Boards so the Arduino software will recognize our Arduino Nano 33 IoT board. You can open a menu on Arduino software by clicking the menu Tools ➤ Board ... ➤ Boards Manager…

Adding supported boards for Arduino Nano 33 IoT
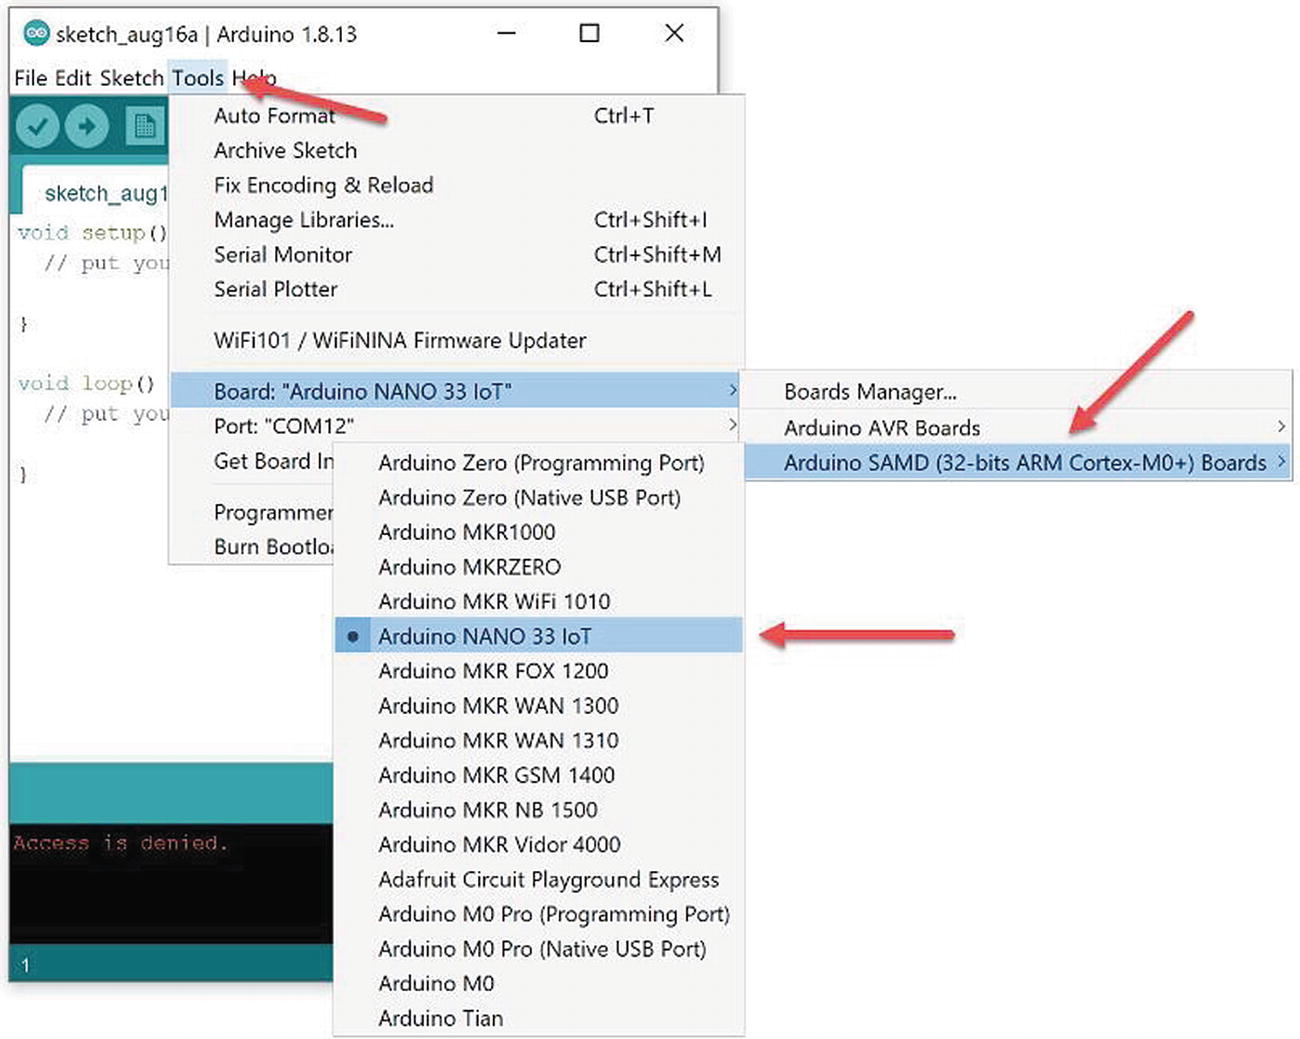
A list of targeted boards for Arduino
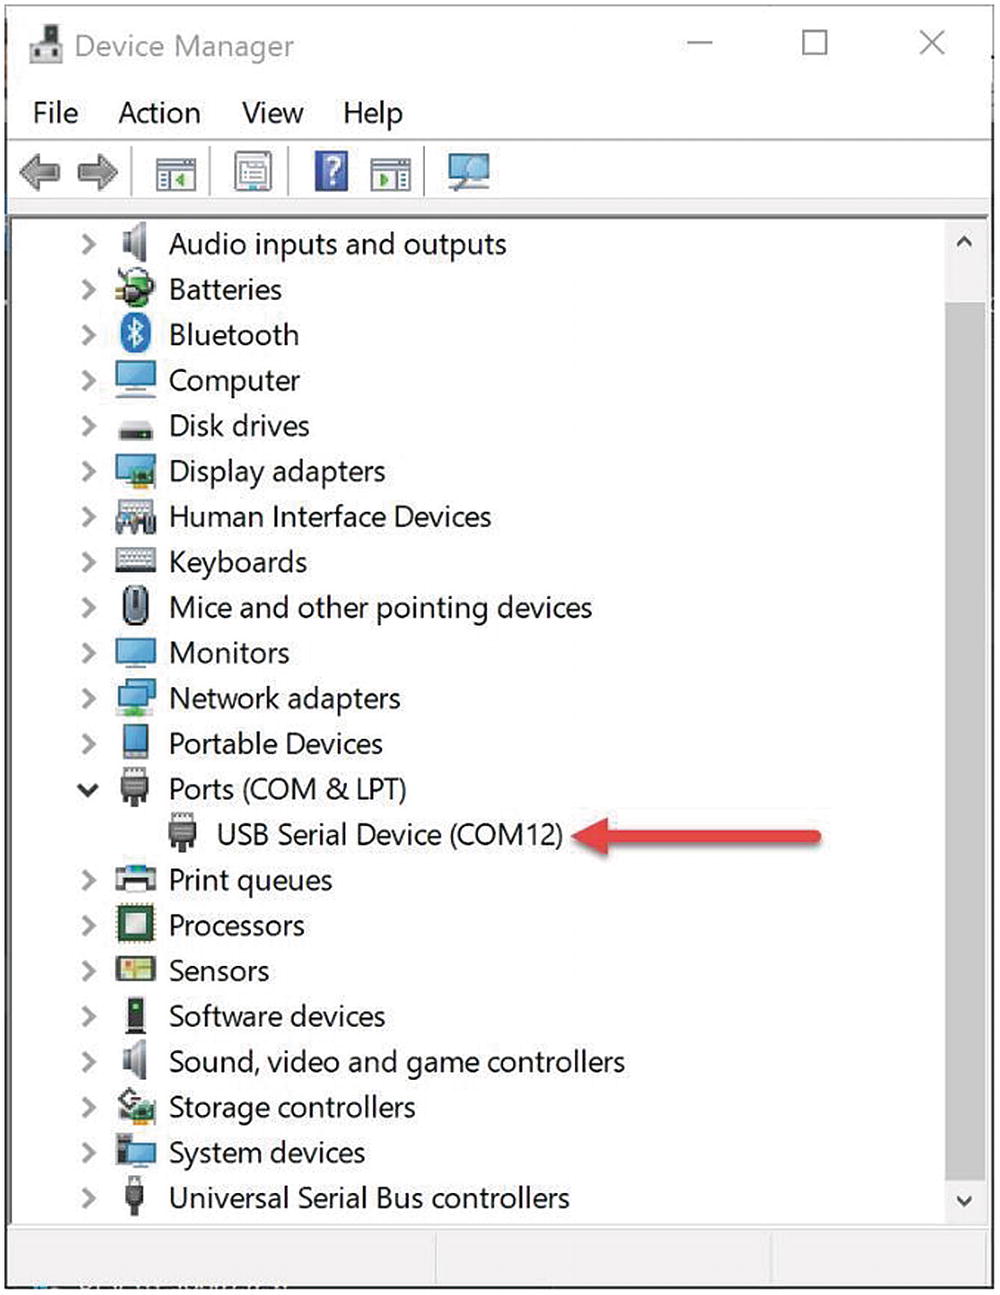
Detected Arduino Nano 33 IoT on Device Manager—Windows 10
You should see the USB device on your terminal.
Hello Arduino: Blinking LED
We first build a Arduino program. The Arduino Nano 33 IoT board has a built-in LED that is attached on digital pin 13. In this section, we build a simple blinking LED. Now you can connect Arduino Nano 33 IoT into a computer. Then, we can start to write the Arduino program.

Blink application on Arduino software
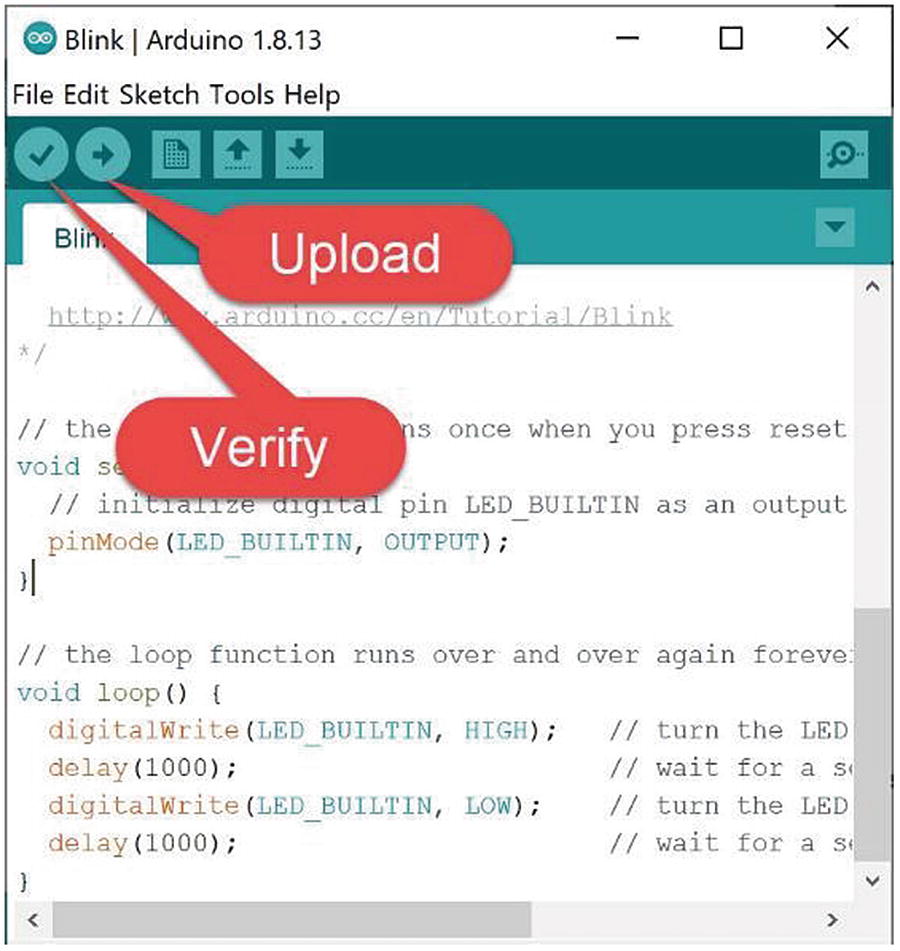
Compiling and flashing a program

Blinking LED on Arduino Nano 33 IoT
How does it work?
The Arduino program defines LED_BUILTIN for a general of built-in LED pin. We can set the pin as output mode by giving a value, OUTPUT.
You can practice the blinking LED program.
Next, we can use the Arduino web editor for alternative tools for Arduino development. We just need a browser and Internet access.
Arduino Web Editor
Arduino provides an online editor to build Arduino programs. The advantage of online editor is that we don’t prepare too many runtimes and tools. We only need a browser and Internet connection.
Arduino web editor
Register your Arduino portal account
Install Arduino plug-in
Build blink application for Arduino Nano 33 IoT
Registering an Arduino Account
To use and build the Arduino program with Arduino web editor, we must register an Arduino account. This account is a similar account to that used to buy the Arduino board in the Arduino store.
You can register a new Arduino account on the right-top menu icon. You can fill personal information through this portal. After completed account registration, we can build the Arduino program with Arduino web editor.
Installing Arduino Plug-in
To enable our Arduino Nano 33 IoT to connect to Arduino web editor, we need to install the Arduino plug-in. This is a required task for Windows. The Arduino plug-in will act as a bridge between local Arduino Nano 33 IoT and the Arduino web editor.

Arduino plug-in installation

Download the Arduino plug-in for Windows
Detecting the Arduino plug-in

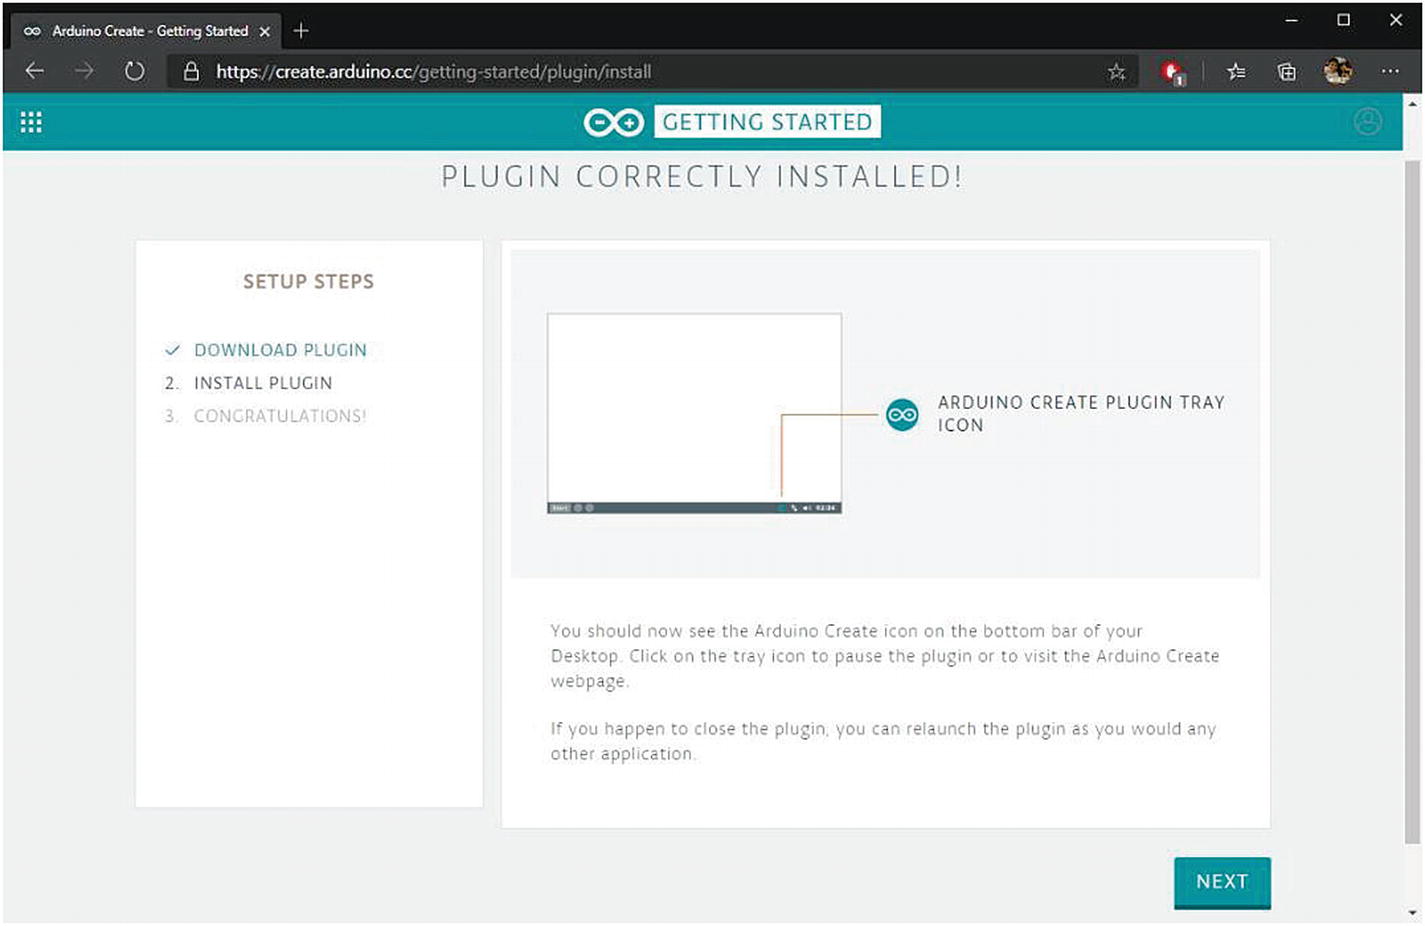
Completed Arduino plug-in installation
You can click the GO TO WEB EDITORS button to continue. You will be directed to the Arduino web editor, as shown in Figure 1-9.
Now we are ready for Arduino development using the Arduino web editor. Next, we will build a blink Arduino application.
Building an Arduino Program
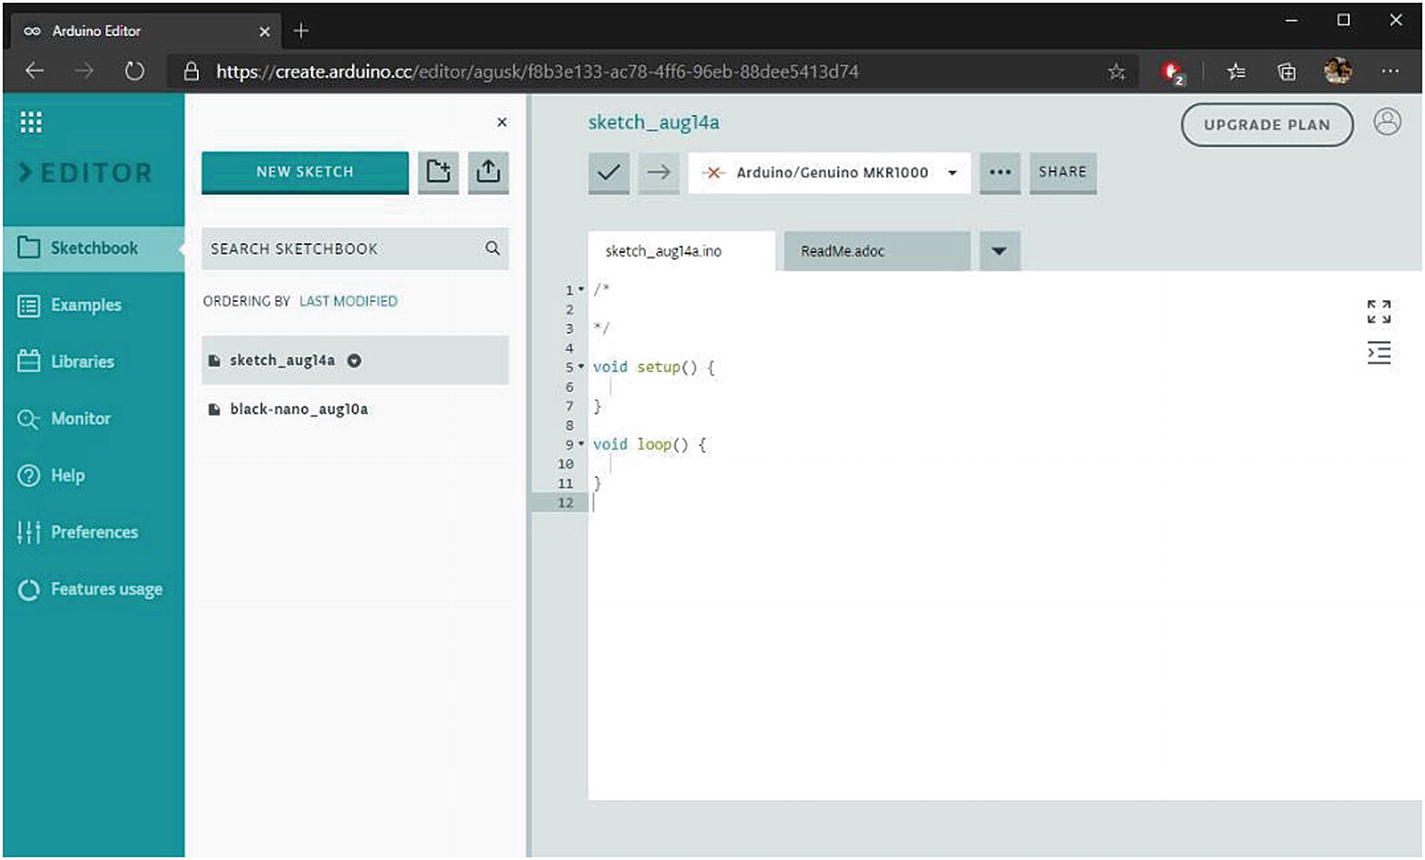
The Arduino web editor has the same functionalities as the desktop version ofArduino software. The Arduino web editor has project samples. We also can add Arduino libraries into the project.
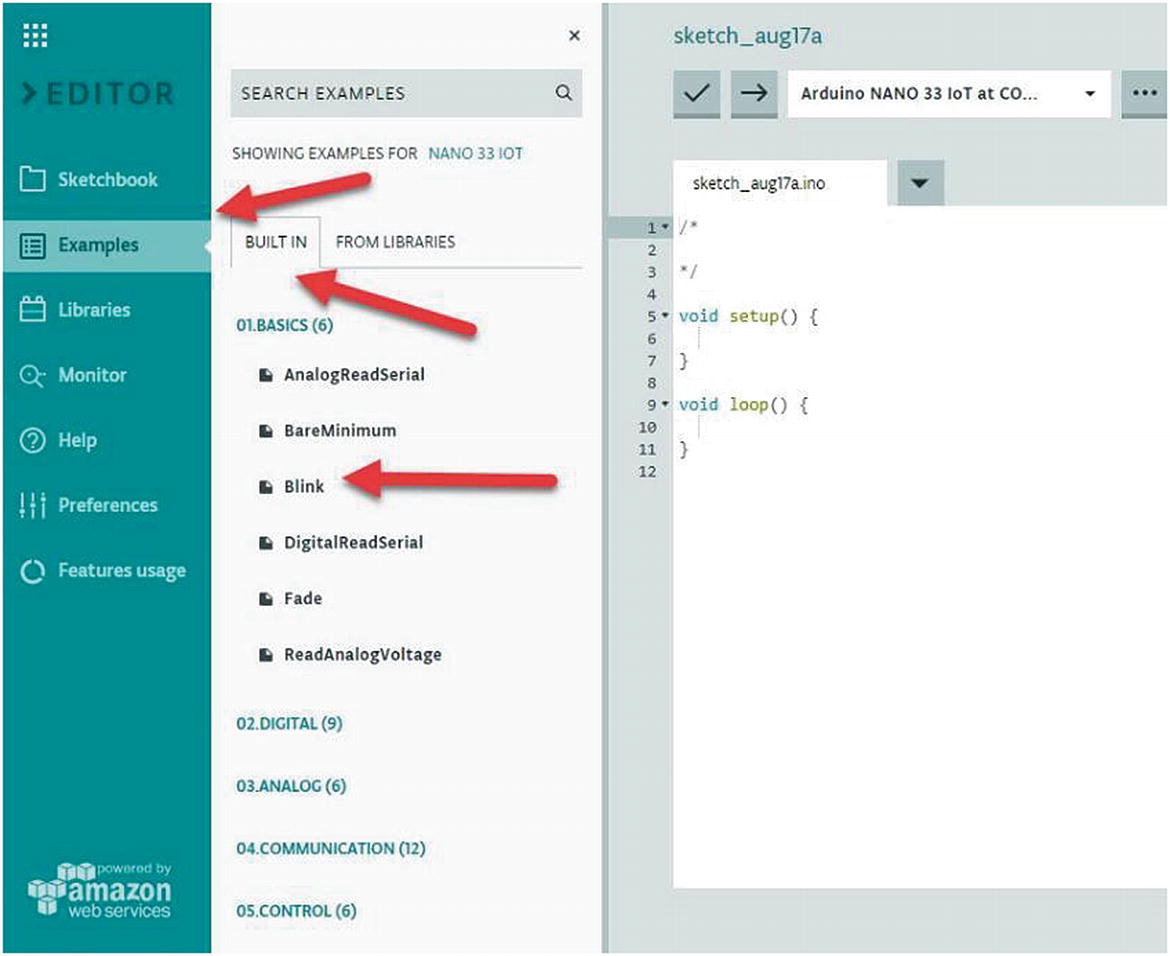
Create a new project
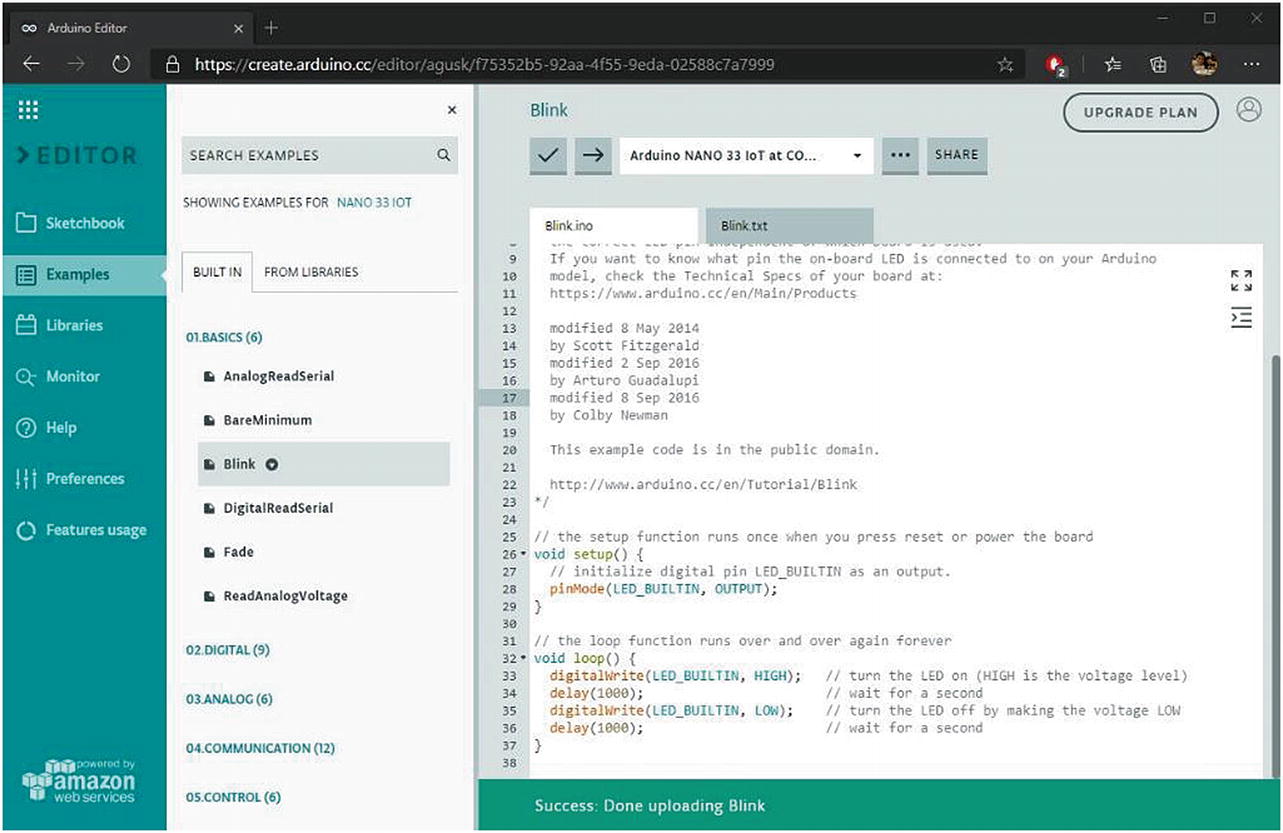
Uploading a program into Arduino Nano 33 IoT
Select your Arduino Nano 33 IoT board from the dropdown of the device list. Click the Verify and Upload icon on the left of dropdown. This tool will compile and upload the Arduino program into the targeted board.
We can try to build another Arduino project using the Arduino web editor. We can use project samples from this tool.
This is the end of the chapter for setting up an Arduino development environment.
Summary
We have learned to set up an Arduino development environment. We also installed Arduino software on a desktop environment. We built a simple Arduino program, blink. In addition, we tried to use the Arduino web editor to build Arduino programs.
Next, we will learn how to access Arduino Nano 33 IoT input/output. We use other communication protocols too.