
Arduino IoT Cloud is one of Arduino services to provide a cloud service for an IoT platform. We can send and receive data from IoT devices to Arduino IoT Cloud. This chapter explores how Arduino Nano 33 IoT interacts with Arduino IoT Cloud.
Setting up Arduino IoT Cloud
Building programs on Arduino Nano 33 IoT for the Arduino IoT Cloud
Building sensor monitoring program with the Arduino IoT Cloud
Introduction
A cloud technology enables us to enhance our IT and business productivity. A cloud technology also can be used to address IoT solutions. Arduino IoT Cloud is one of cloud servers from Arduino. We can send and receive data from Arduino IoT Cloud to our Arduino devices.
In this chapter, we build programs on Arduino Nano 33 IoT to access the Arduino IoT Cloud. Arduino Nano 33 IoT has a WiFi module so we can connect to the Arduino IoT cloud over the WiFi network. Make sure you have Internet access on WiFi network.
Setting up Arduino IoT Cloud
To access and build programs for the Arduino IoT Cloud, we need to set up our Arduino devices. We should register a new account to this platform. You can register your account on Arduino IoT Cloud to this link, https://create.arduino.cc/iot/. After we sign up, we register our Arduino Nano 33 IoT to the Arduino IoT Cloud.

A dashboard of the Arduino IoT Cloud website
If you have an account in the Arduino store, you can use the same account to sign up for Arduino IoT Cloud. Then, we can register our Arduino Nano 33 IoT.
Register Arduino Nano 33 IoT
installing Arduino Create Agent
adding a new Arduino device
Next, we can install the Arduino Create Agent.
Install the Arduino Create Agent
Arduino Create Agent is a background program to listen to our local Arduino devices. This agent program acts as a bridge between local Arduino devices and Arduino IoT Cloud.
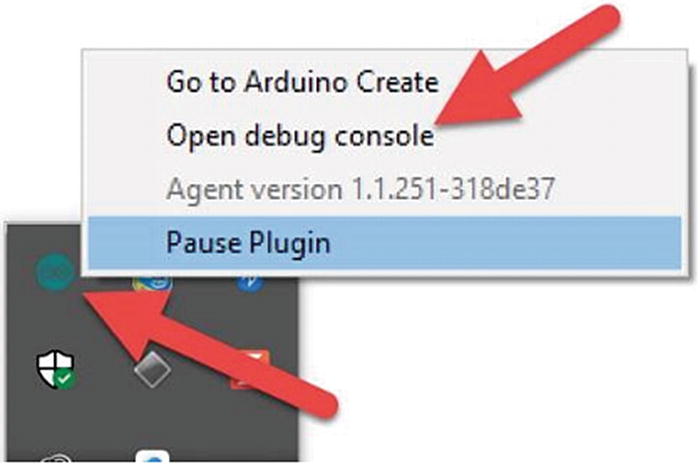
A tray icon of the Arduino Create Agent on Windows OS

A form of the Arduino Create Agent Debug Console
If you don’t see your Arduino device, make sure your Arduino is attached to your computer properly. After completed, you can register your Arduino Nano 33 IoT.
Add New Arduino Device
Once we have set up the Arduino Create Agent program on a local computer, we can add a new Arduino device. You can open the Arduino IoT Cloud website. Then, click the DEVICES menu. You can see a list of Arduino devices.
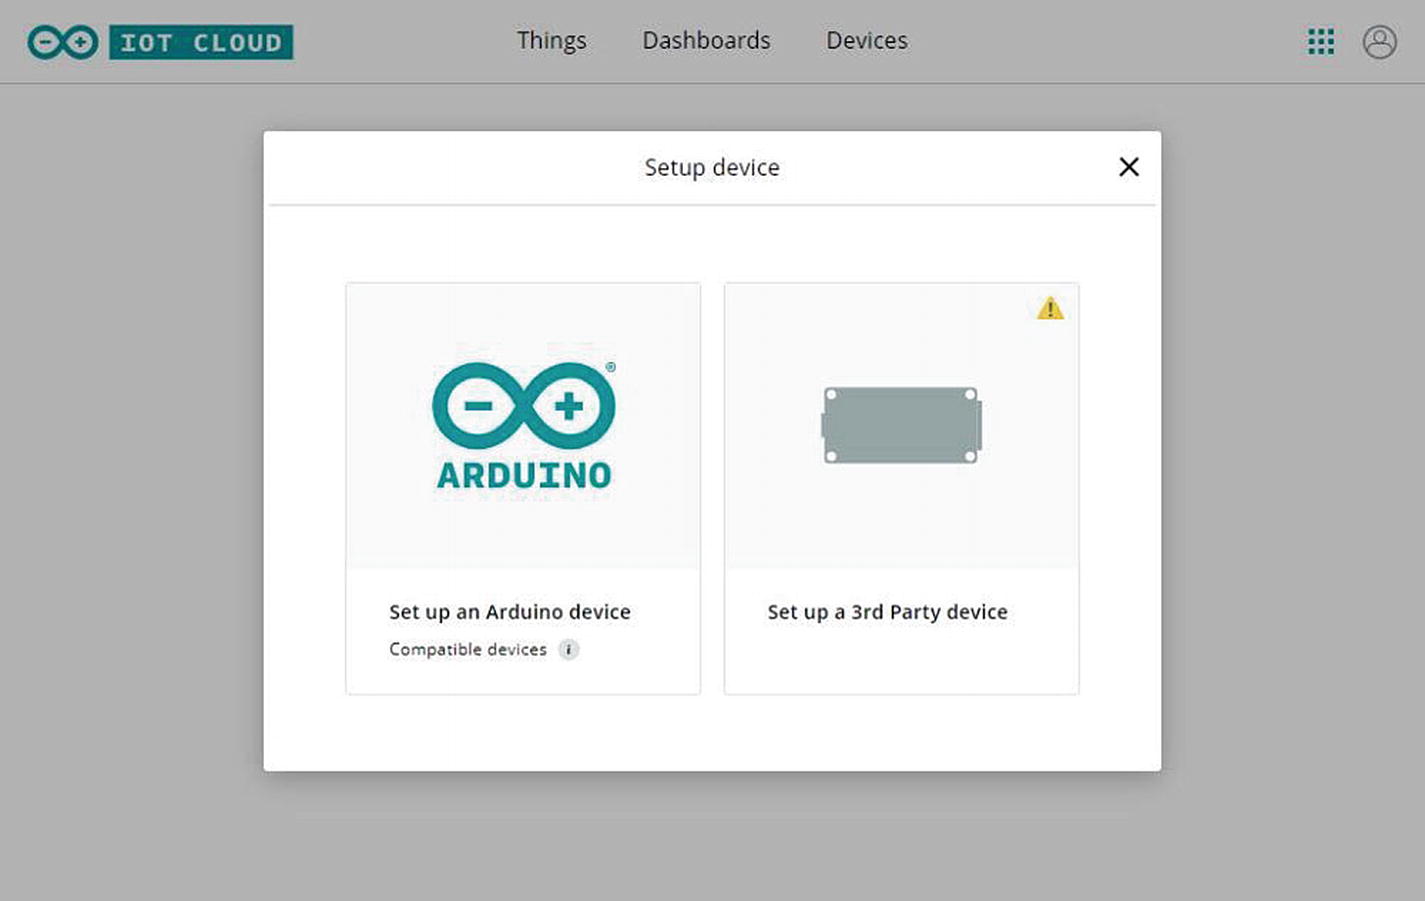
Adding a new Arduino device

Arduino IoT Cloud detected Arduino Nano 33 IoT
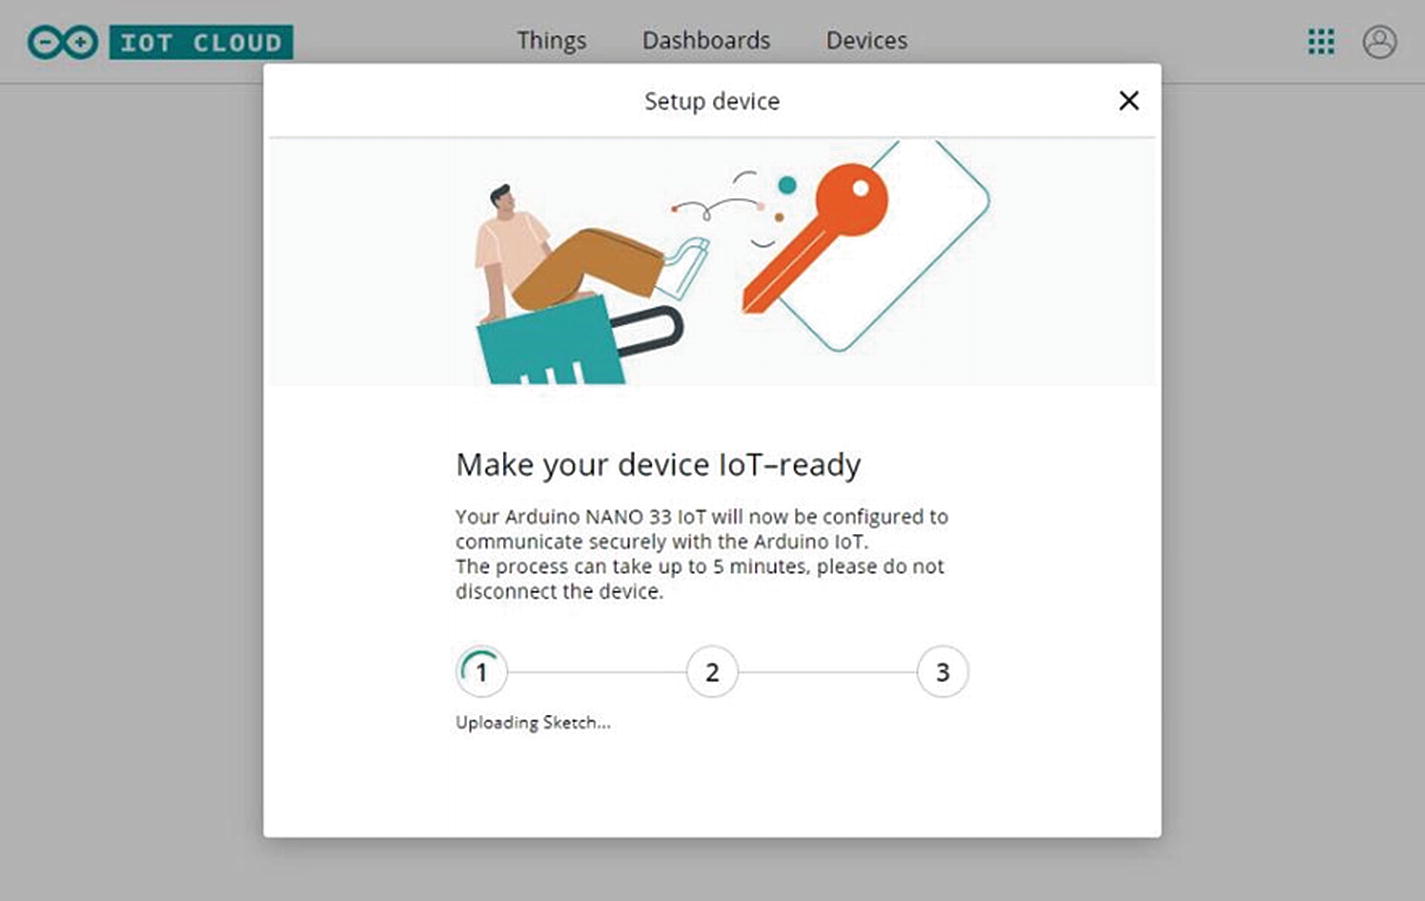
Configuring Arduino Nano 33 IoT

Arduino Nano 33 IoT device was added
Develop a Remote LED Button
In this section, we build a program to remote LED from the Arduino IoT Cloud dashboard. We can turn on/off the LED on Arduino Nano 33 IoT from the Arduino IoT Cloud dashboard website.
adding a new thing
adding properties
editing Sketch program
building a dashboard
testing
We implement these steps in the next section.
Adding a New Thing
A feature of the Arduino IoT Cloud is a program to interact with Arduino devices. With a free membership, we can only create one thing. In this demo, we build a remote for the LED from the Arduino IoT Cloud dashboard.
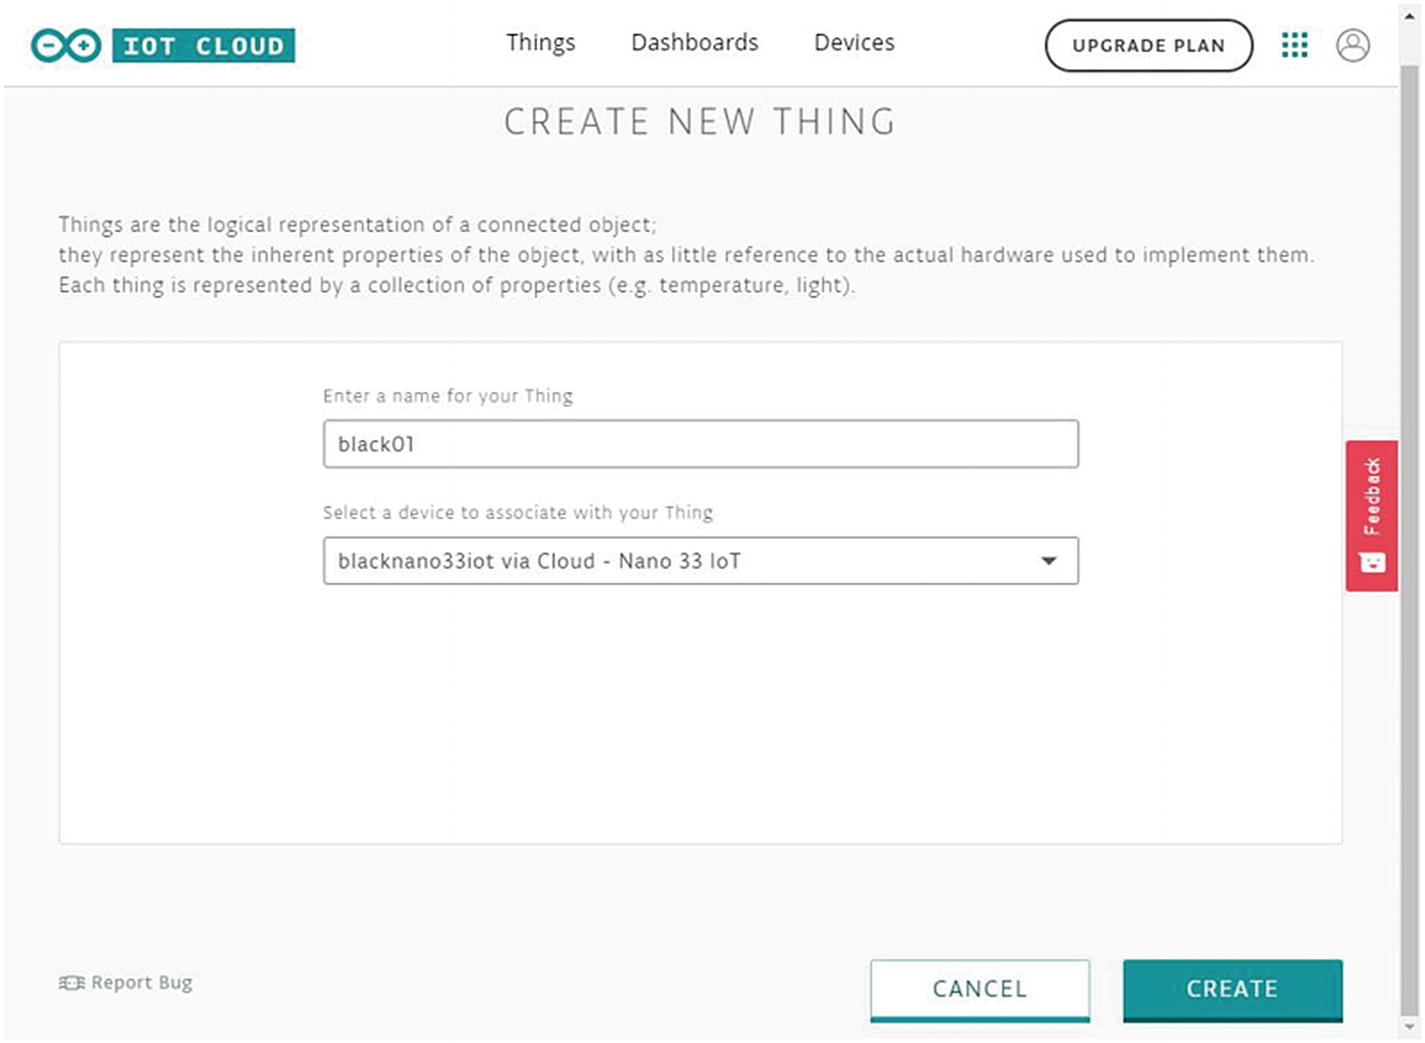
Adding a new Thing

A dashboard of an Arduino Thing
Adding a Property
We can expose I/O from Arduino Nano 33 IoT through the Thing property. For instance, we want to expose sensor data to the Arduino IoT Cloud. In this scenario, we want to expose our built-in LED in Arduino Nano 33 IoT. We can set I/O on LED so we can turn on/off the LED over the web.

Adding a new property
Name: LED1
VARIABLE NAME: lED1
TYPE: ON/OFF (Boolean)
Permission: Read & Write
Update: when the value changes
History: checked

A Thing with one property
You have created a Thing. Next, we can modify the Sketch program in order to connect to this LED1 property.
Editing the Sketch Program
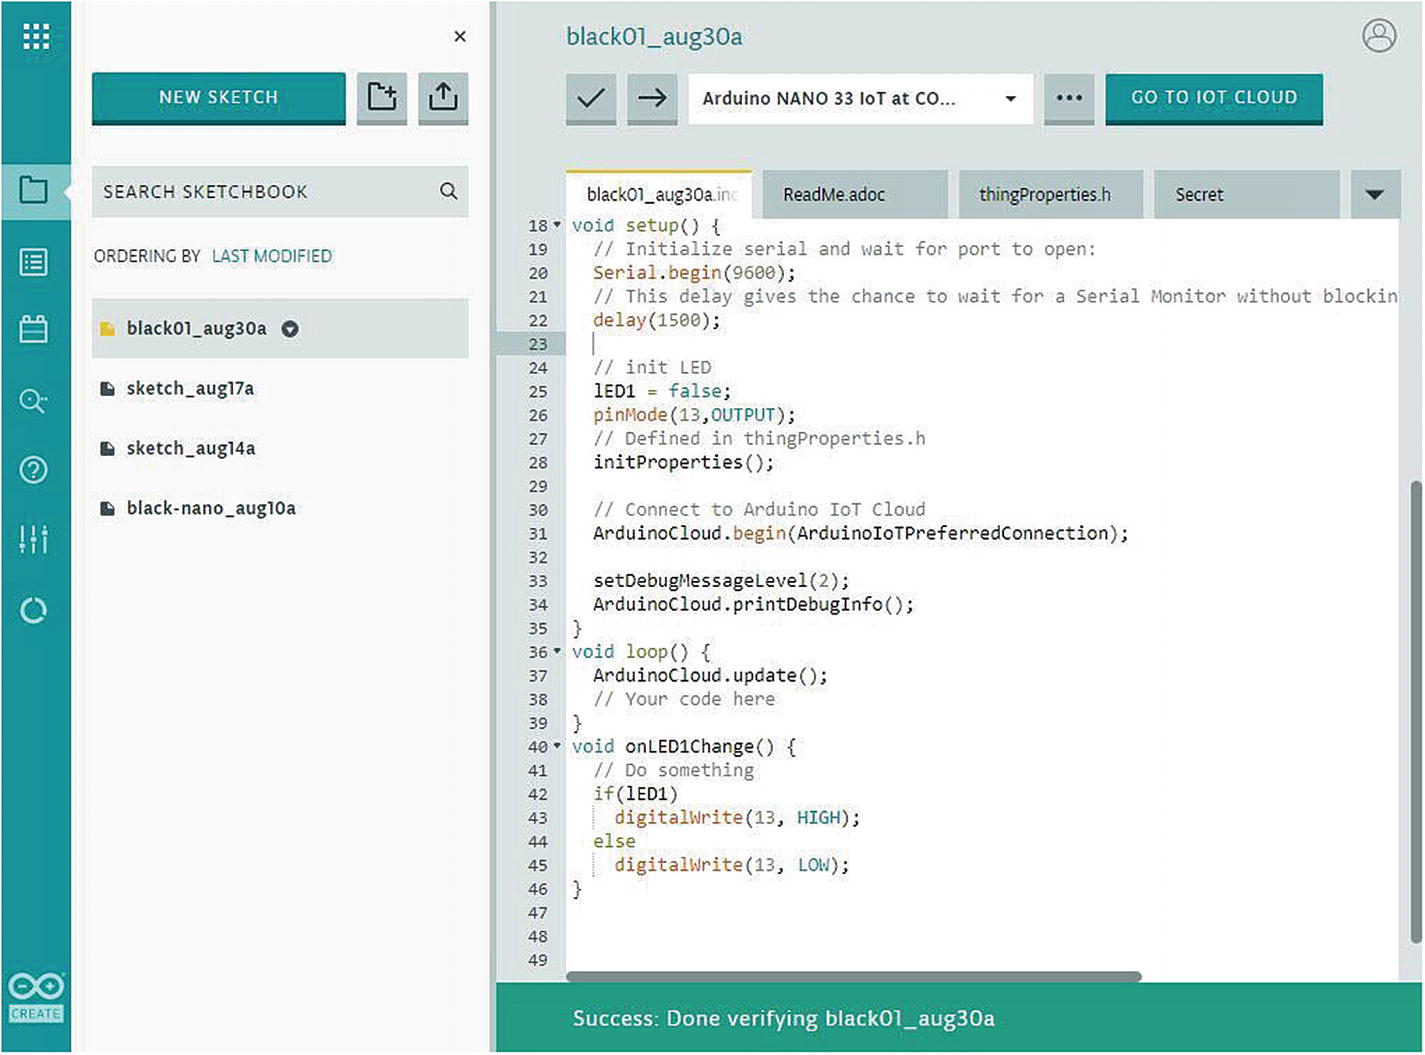
Editing the Sketch program
First, we modify the Secret program to configure the WiFi network on Arduino Nano 33 IoT. Fill in SSID ID and SSID key on the Secret tab. Now we modify codes on our main Sketch.
Save this program. You can compile and upload this program to Arduino Nano 33 IoT. Click Verify and Upload icons for compiling and uploading program.
Build a Dashboard
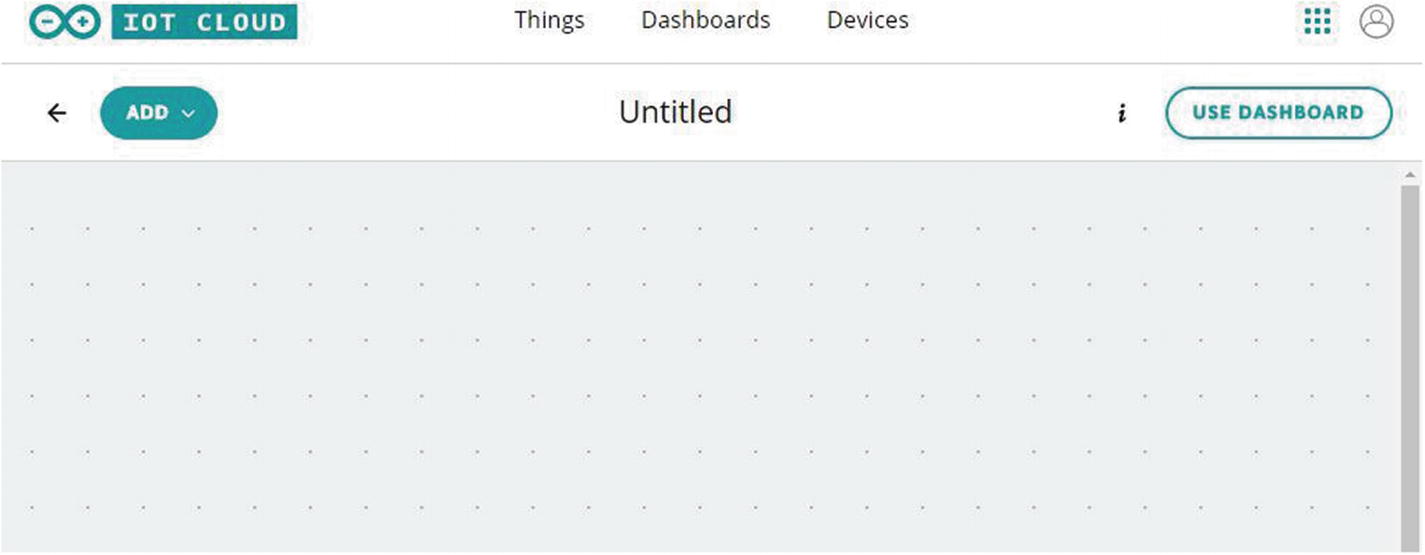
A dashboard of Arduino IoT Cloud
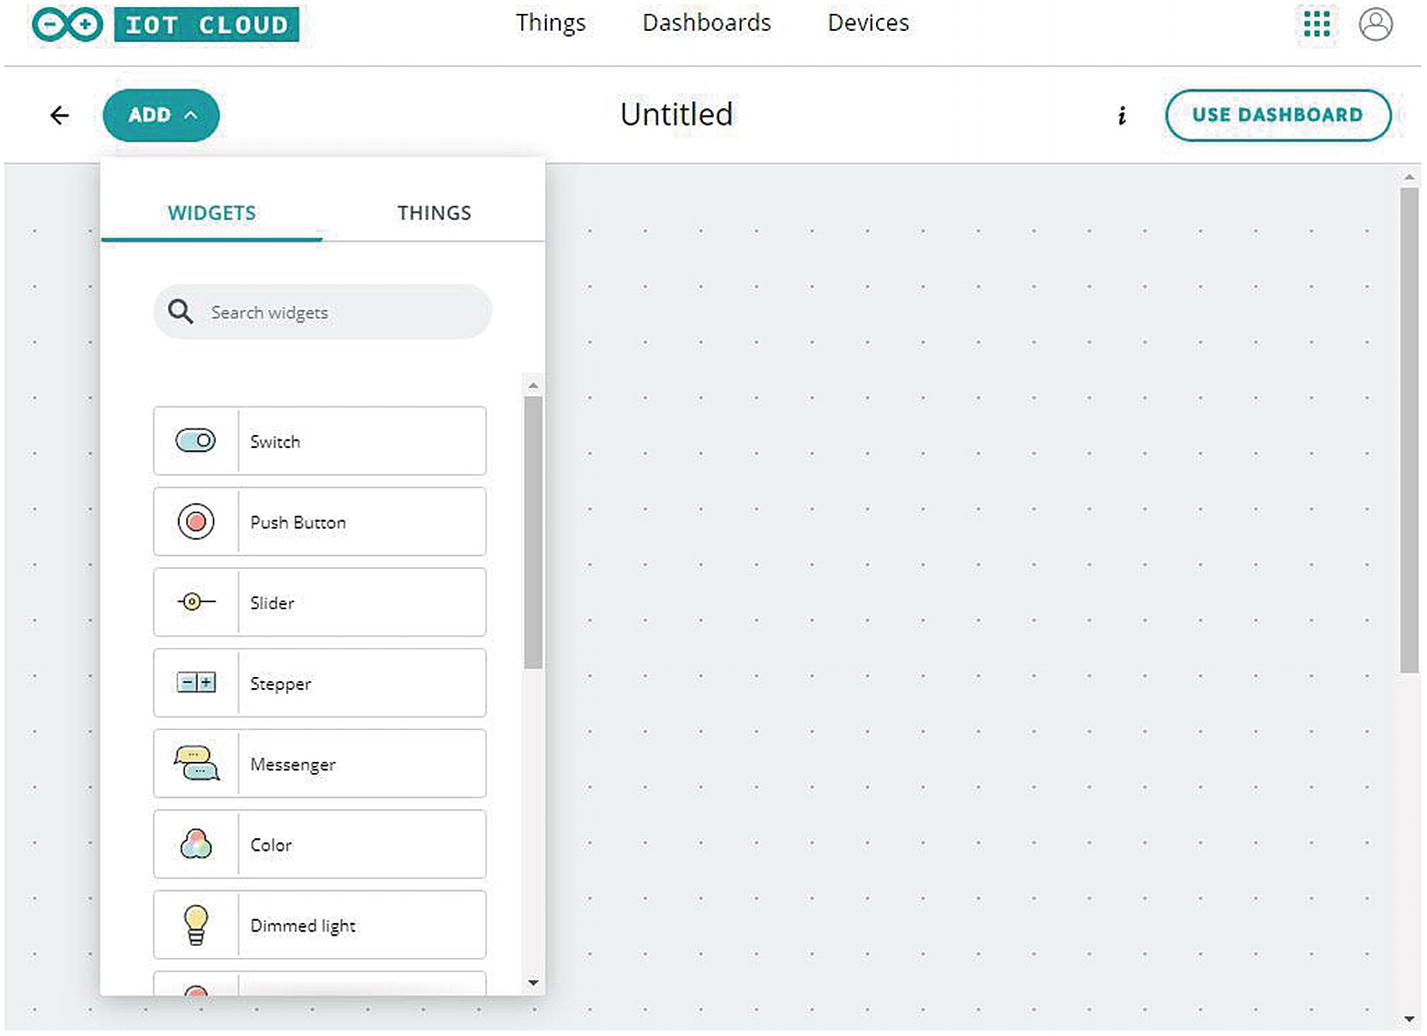
Adding a widget on the dashboard

Adding a switch

Setting a Switch widget
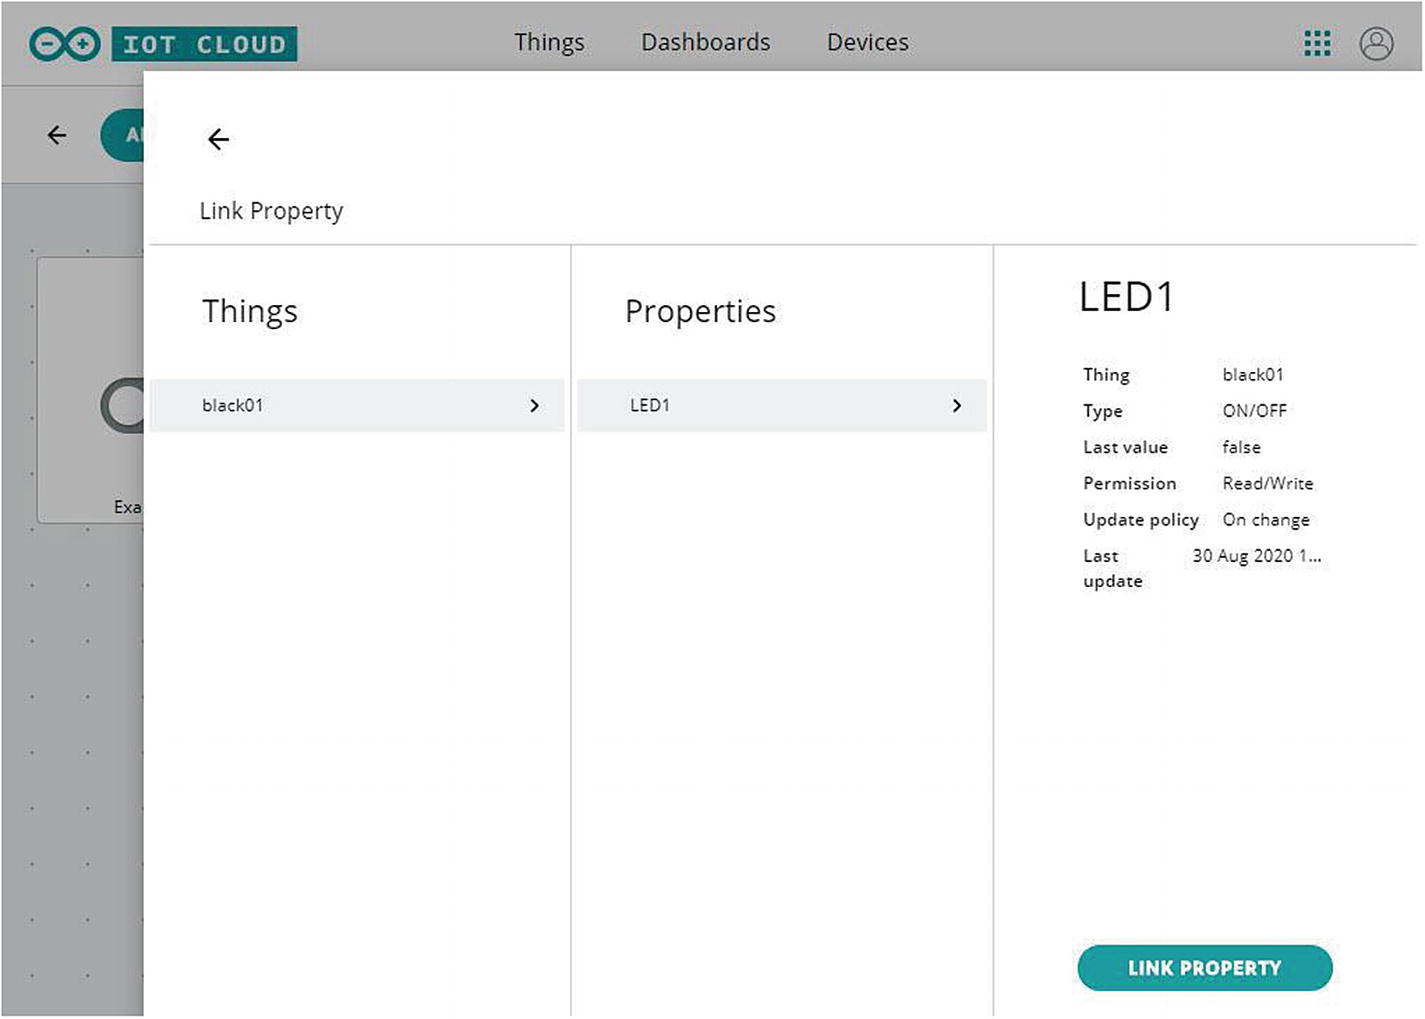
Linking a switch to thing properties
You also can rename our dashboard program—for instance, LED Demo. Now we can test our dashboard program.
Testing
To test our program, we need to activate our dashboard program on running mode. You can click the USE DASHBORD button to activate the dashboard program.

LED demo program on the dashboard editor

Toggling the Switch to turn on the LED
You can customize this program by adding some LEDs. Then, you can add some properties on the Things program.
Develop Sensor Monitoring
We have created Arduino IoT Cloud to turn on/off LED on Arduino Nano 33 IoT. Now we can continue to build the Arduino IoT Cloud program for monitoring sensors. In this demo, we use built-in sensors on Arduino Nano 33 IoT. For testing, we use the Gyroscope sensor.
adding a new thing
adding properties
editing the Sketch program
building a dashboard
testing
We implement these steps in the next section.
Add a New Thing
You can create a new Thing on Arduino IoT Cloud. If you have a free membership, you should delete the existing Thing on Arduino IoT Cloud because you can only create one Thing.
Now you can create a new Thing. For instance, we set the Thing name as GyroscropeThing. Then, we can add some properties to GyroscopeThing.
Add Property

Adding a property on a Thing
Input Paramters for Three Thing Properties
Parameters | Property 1 | Property 2 | Property 3 |
|---|---|---|---|
Name | xDegree | yDegree | zDegree |
Variable | xDegree | yDegree | zDegree |
Type | Float | Float | Float |
Minimum/Maximum | -4/-4 | -4/-4 | -4/-4 |
Permission | Read-only | Read-only | Read-only |
Update | |||
Delta | 0.05 | 0.05 | 0.05 |
Show history visualization | Checked | Checked | Checked |
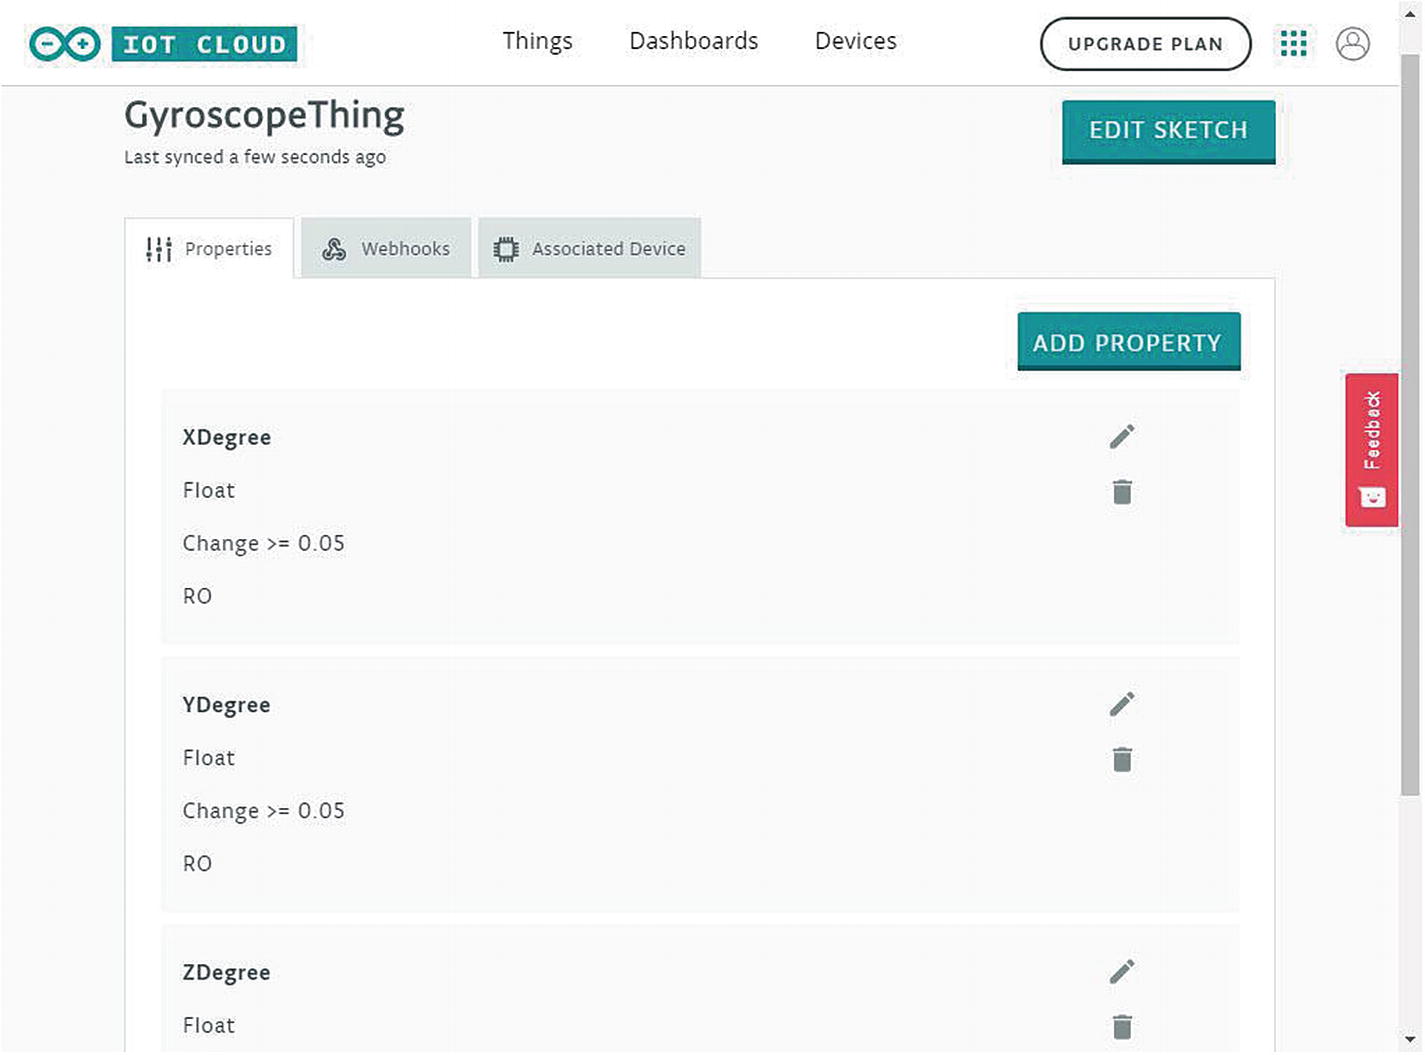
Three properties on GyroscopeThing
Editing the Sketch Program
After we add three properties on GyroscopeThing, we can edit the Sketch program. We will read the gyroscope sensor and then update sensor data to property variables.
Click the EDIT SKETCH button to edit our program on Arduino IoT Cloud. Then, we have the Sketch web editor. We modify this Sketch program to enable us to read the Gyroscope sensor and update three Thing properties.
Save this program. Now you can compile this Sketch program and upload to Arduino Nano 33 IoT device.
Build a Dashboard
Create a new dashboard.
Add three value widgets into the dashboard editor.
Each value widget is to be linked to each Thing Property, as shown in Figure 5-22.
Do the same action for XDegree, YDegree, and ZDegree value widgets.
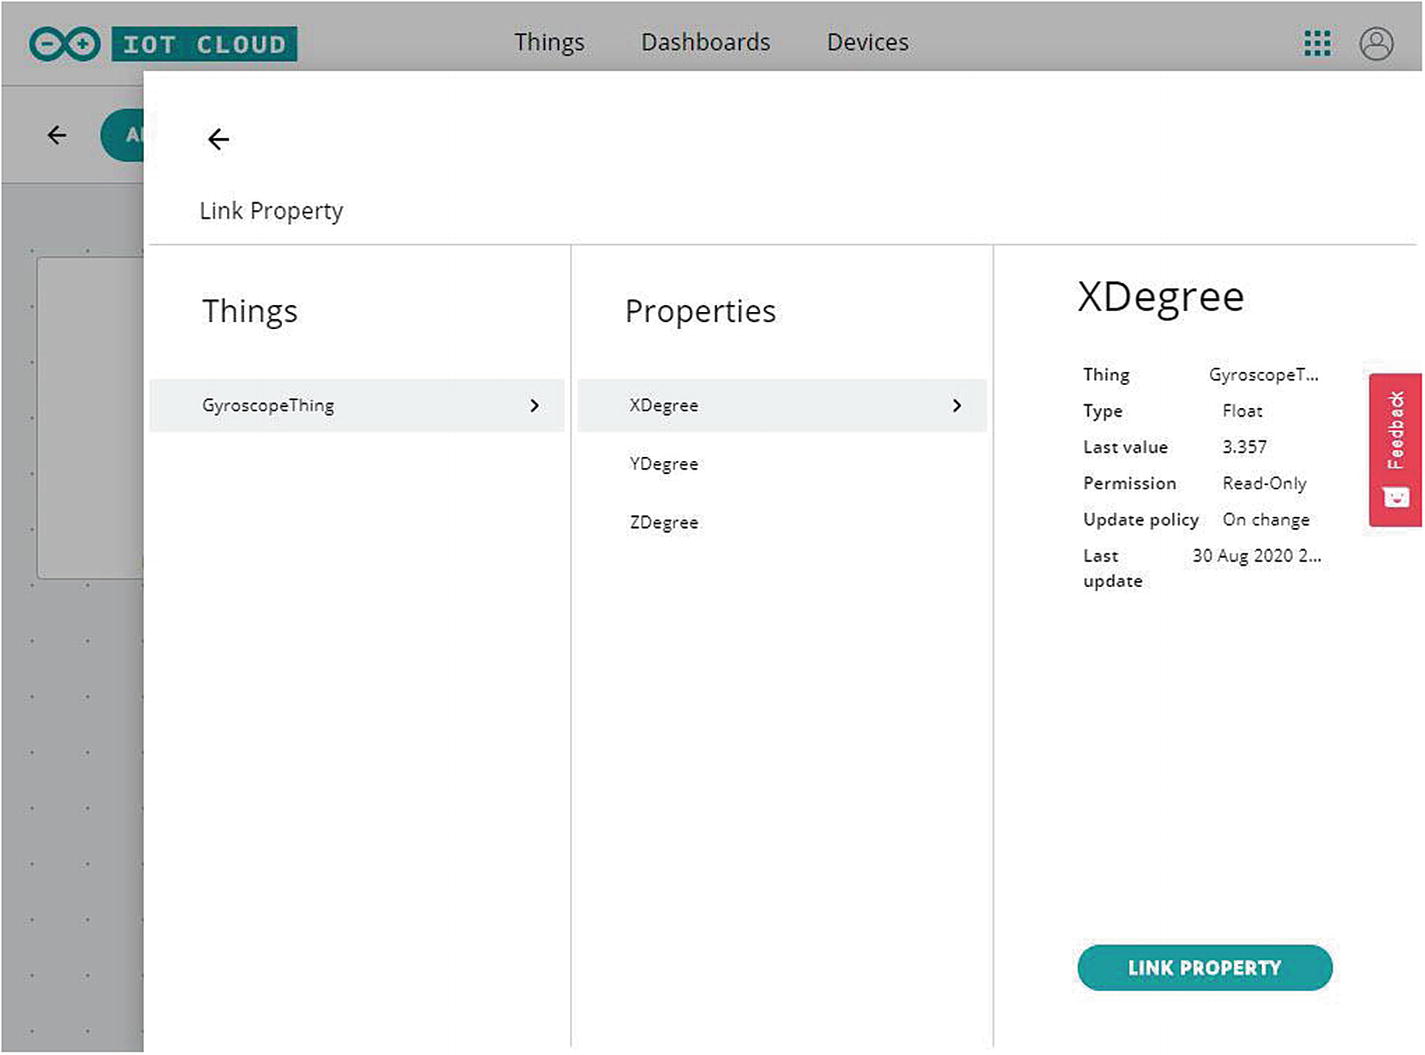
Linking a property to a widget
Testing

Showing sensor values on the Arduino IoT Cloud dashboard
You can see the widget output in Figure 5-23. Shake your Arduino Nano 33 IoT board to see sensor data changes on dashboard widgets.
You have created a dashboard on Arduino IoT Cloud to monitor sensors from Arduino Nano 33 IoT. You can practice by applying some sensors or actuators to integrate with Arduino IoT Cloud.
Summary
We have learned how to get started with Arduino IoT Cloud. We have set up and registered our Arduino Nano 33 IoT to Arduino IoT Cloud. We also have built two programs for Arduino IoT Cloud: remoting an LED and sensor monitoring.
Next, we will learn how to work and make interaction with Bluetooth Low Energy.