This chapter describes the installation and upgrade procedures for Fedora Linux 28. Fedora uses the Anaconda installation program. Designed to be simple and fast, it installs a core set of applications. A Fedora Linux 28 installation guide is available online. First check the new Fedora installation guide at https://docs.fedoraproject.org/f28/install-guide/ .
You can also link to this guide from the Fedora download page (right-side links) at https://getfedora.org/ . Scroll to the bottom of the page and under the Support list click the “Installation Guide” link.
If you are upgrading your system from Fedora 27, check the section for upgrading at the end of this chapter. There are several methods you can use, including a direct upgrade from the online repositories. A clean install, if possible, is always recommended over an upgrade, as conflicts can occur with some software if configuration file formats and supporting software libraries change too much. You can only upgrade to Fedora 28 from a Fedora 27 install. If you want to upgrade from Fedora 26, you first have to upgrade to Fedora 27, before you can upgrade to Fedora 28.
Obtaining the DVDs
To obtain the current version of Fedora Linux, go to the Fedora Project download website at https://getfedora.org . There are large icons for Workstation, Server, and Atomic (cloud images). Click on the Workstation icon. You can also scroll to the bottom of the page and, under the Download list, click the Get Fedora Workstation link. On this same list is the Fedora Spins link, which lets you download alternate spins, such as the KDE and Mate versions. Also, under the Download list, the Alternative Downloads link opens the https://alt.fedoraproject.org/ site with other methods for downloading, such as BitTorrent and Network installers, as well as other architectures such as ARM.
Fedora Linux 28 is also available on mirror sites. You can directly access a Fedora mirror site by entering the following URL: https://download.fedoraproject.org . You then need to navigate to the releases and the version directory (in this case 28) to find the Workstation directory, and then the architecture (x86_64) and media (iso) directories to where the Fedora Workstation iso image is kept (releases/28/x86_46/iso).
You can also access a specific mirror at the following URL: https://mirrors.fedoraproject.org/publiclist/ . The current Fedora mirror and their addresses are listed there. The addresses include web and FTP addresses . You can use an FTP client such as gFTP or Filezilla to perform a direct download.
Basic Install of the Fedora Workstation
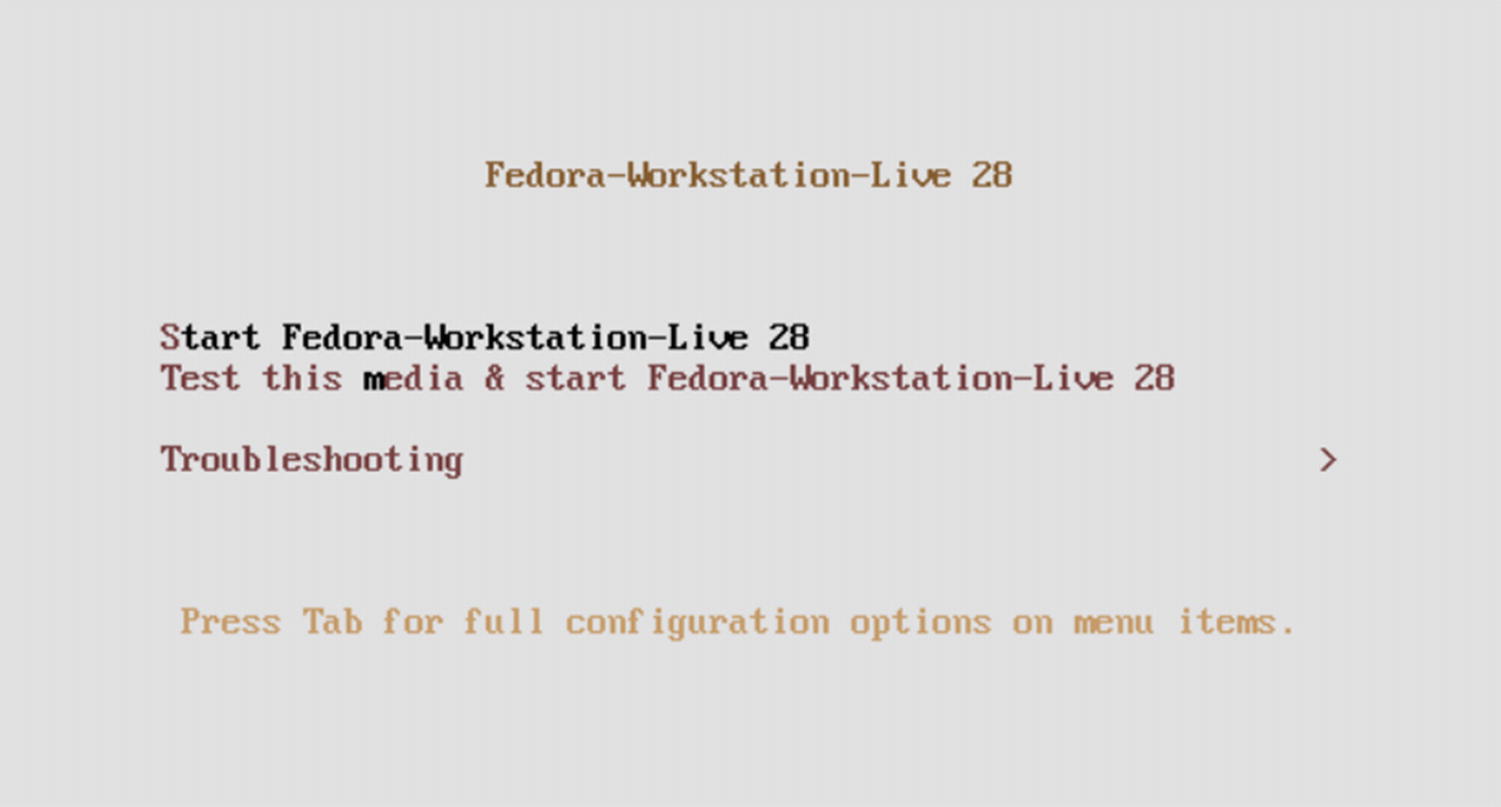
Install menu
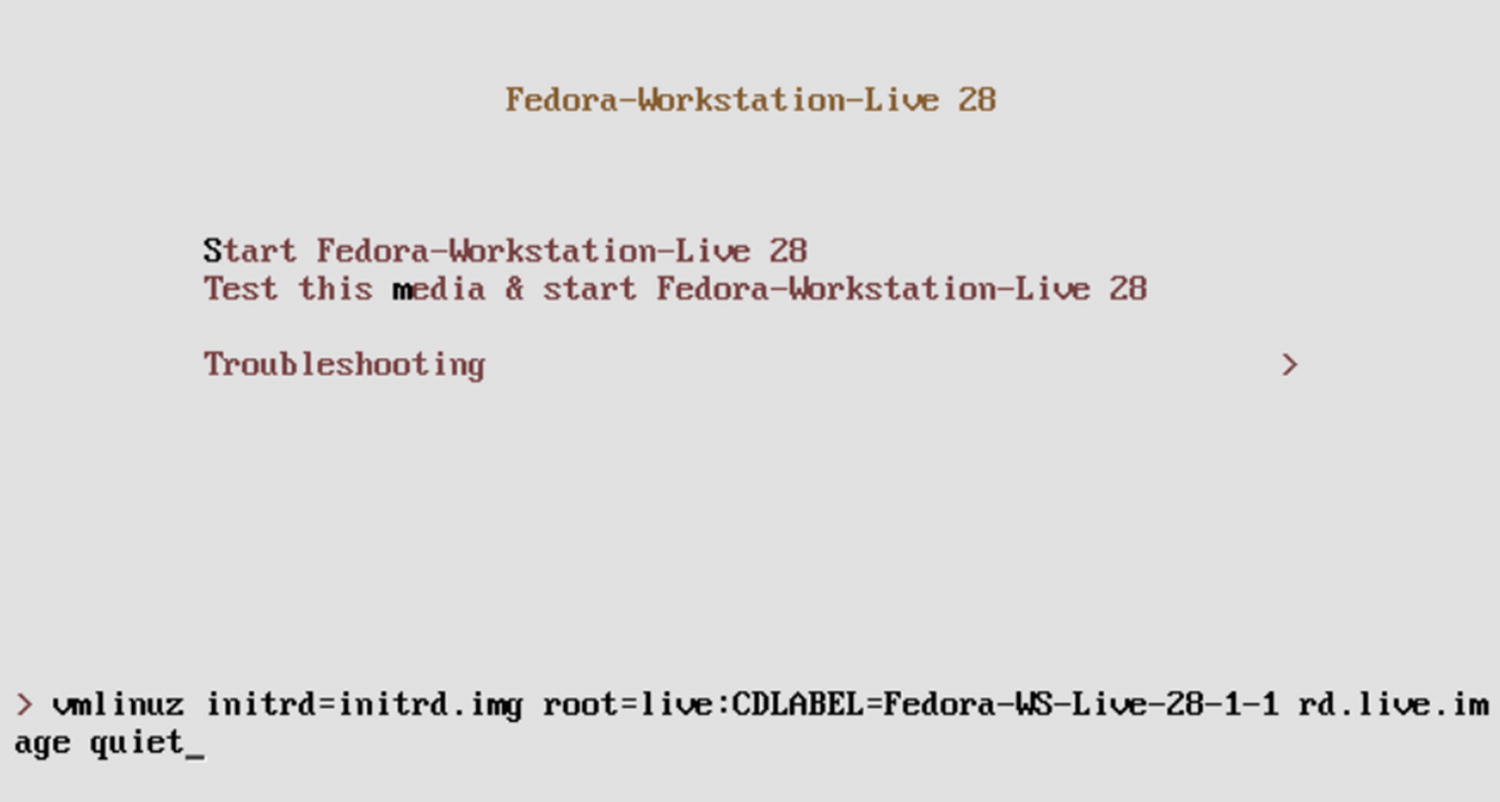
Install menu with boot options
For more startup options and testing, use the arrow key to move to the Troubleshooting entry. The Troubleshooting menu enables you to use the basic graphics mode, test the media, test the memory, and boot from a hard drive (see Figure 2-3). Use the arrow keys to move from one menu entry to the next, then press Enter to select the entry.
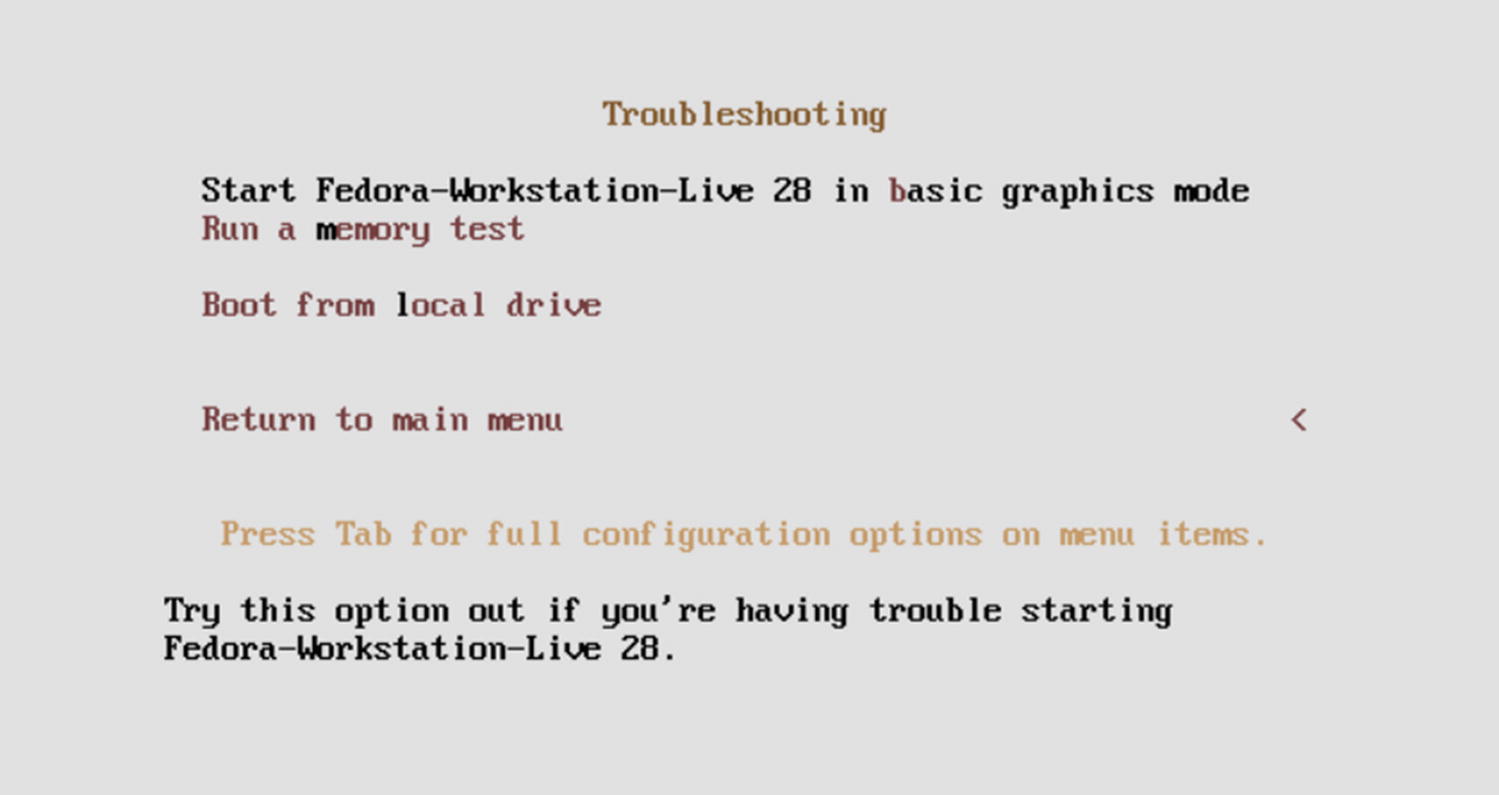
Install menu’s Troubleshooting options
When you first start the Live disk, you can choose whether to try Fedora or to install it (see Figure 2-4). If you want to install Fedora directly on your system, click the Install to Hard Drive icon to start the standard install procedure (Anaconda).
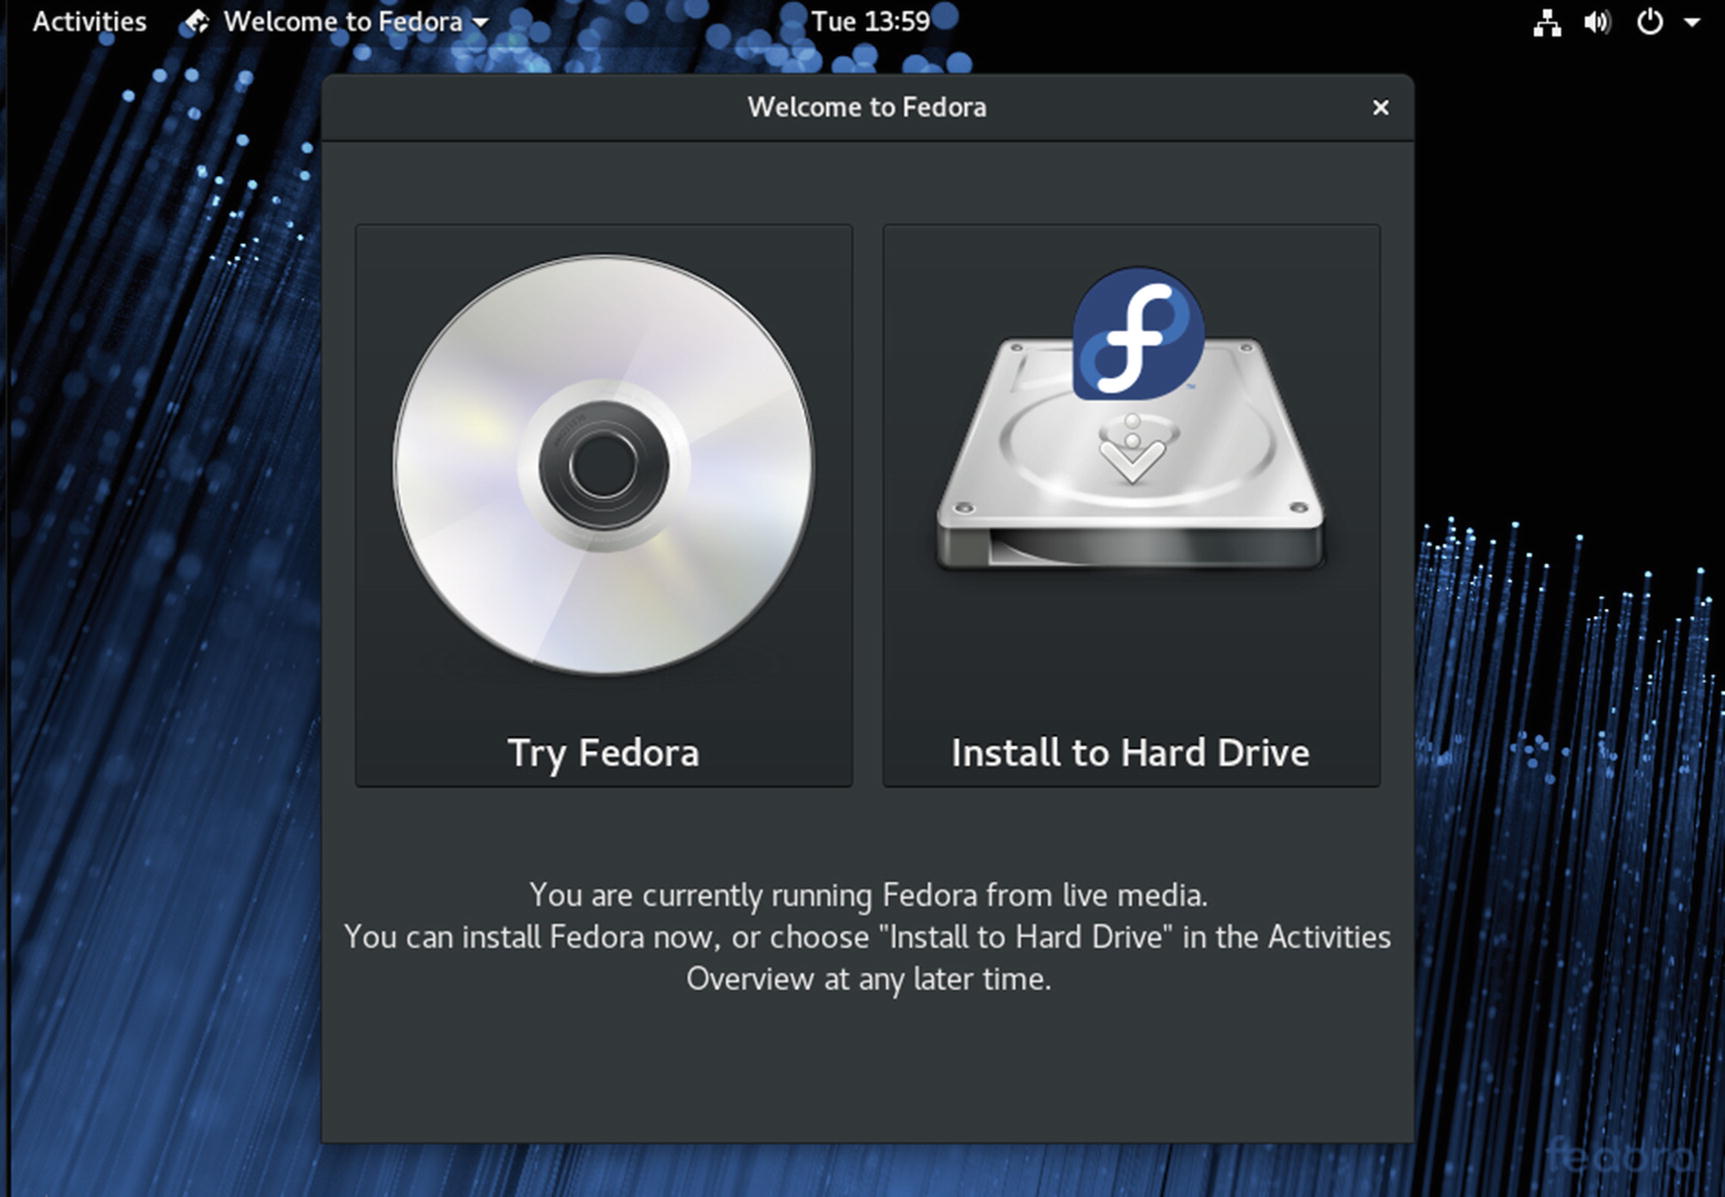
Fedora Install window
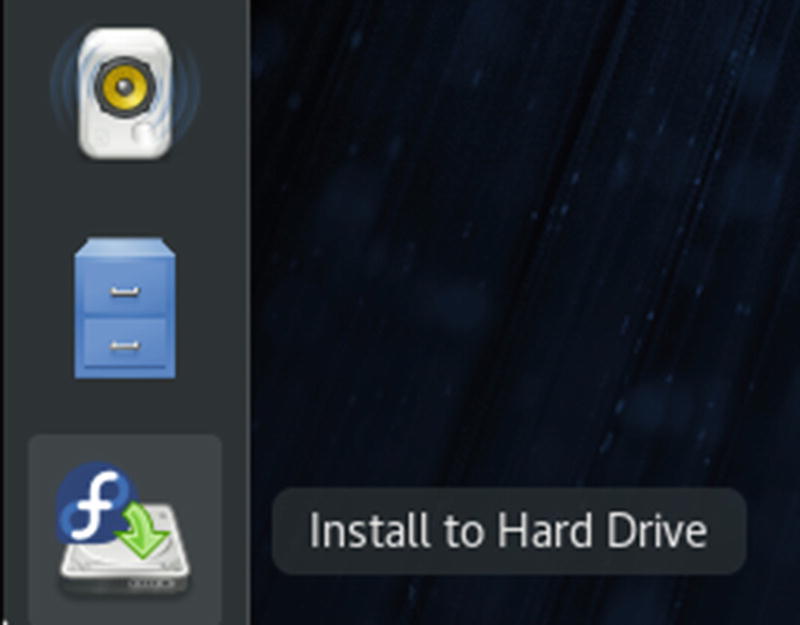
Fedora Install icon on Fedora Workstation Live dash
Language: Select your language.
Installation Summary: Configure your installation. The Fedora Live install has three options: Date & Time, Keyboard, and Installation Destination. A warning emblem is displayed on those options that require configuration. Ordinarily, only the Installation Destination option has a warning emblem. You cannot continue until all options with warnings are configured. Network configuration is performed automatically.
Date & Time: Select your city from the map or the pop-up menu or click the time zone on the map. This option may not have a warning on it but could still be incorrect. Be sure to check it.
Keyboard: Select and configure your keyboard, if you need to.
Installation Destination: Choose the hard drive to install on and set up your partitions. You have the option to manage your own. Once you finish configuring your installation summary items, the installation begins, showing a progress bar.
When the installation finishes, a simple Quit button will be displayed with a message to restart, to complete the installation. You can close at this point, to return to the Fedora Live Desktop, and then restart, to reboot to your installed system .
On reboot, you enter the Fedora Setup Agent procedure, where you can set the date and time and create a standard user, which you can use to log in as a normal user (not as root). More users can be created later. After setup, your login screen appears, and you can log in to your Fedora system.
You may have to update many of the applications installed from the DVD. Open GNOME Software to the Updates tab to start the update process. Applications and updates are downloaded from the Fedora repository and installed.
The installation process used on Fedora is a screen-based program that takes you through all installation steps as one continuous procedure. You can use the mouse or the keyboard to make selections. When you finish with a screen, click the Continue button at the bottom to move to the next screen. If you have to move back to the previous screen, click Back. You can also use Tab, the arrow keys, the spacebar, and Enter to make selections. You have little to do other than make selections and choose options. Some screens provide a list of options from which you make a selection. The installation process will first install Linux on your system. It will then reboot and start a Setup process to let you set the time and date and create a user to log in as. The steps for each part of the procedure are delineated in the following sections.
As each screen appears in the installation, default entries will be selected, usually by the auto-probing capability of the installation program. Selected entries will appear highlighted. If these entries are correct, you can simply click Next to accept them and go on to the next screen.
The install program (Anaconda) will automatically detect and configure your video card so that it can run a graphical interface for the install procedure. If it has difficulty configuring the video card, you can choose to use a basic video driver instead, which means you can still use the graphical install. Choose Install Fedora in Basic Graphics Mode from the Troubleshooting menu .
Initial Setup
If your basic device and hardware configuration were appropriately detected, a Welcome screen is displayed, with a Continue button in the lower-right corner. Once you’ve completed a step, you click Continue to move on. In some cases, you can click a Back button to return to a previous step.
Tip
Your mouse will be automatically detected. If you have a USB mouse that is not being detected, try reinserting the USB connector several times. If you cannot use your mouse for some reason, you can use the Tab key to move to different components and buttons. Use the arrow keys to select and enter a list. Press the Enter key to click a selected button or entry. The Tab key will cycle through entries on a screen sequentially. To return to a button or component, just continue to press the Tab key.
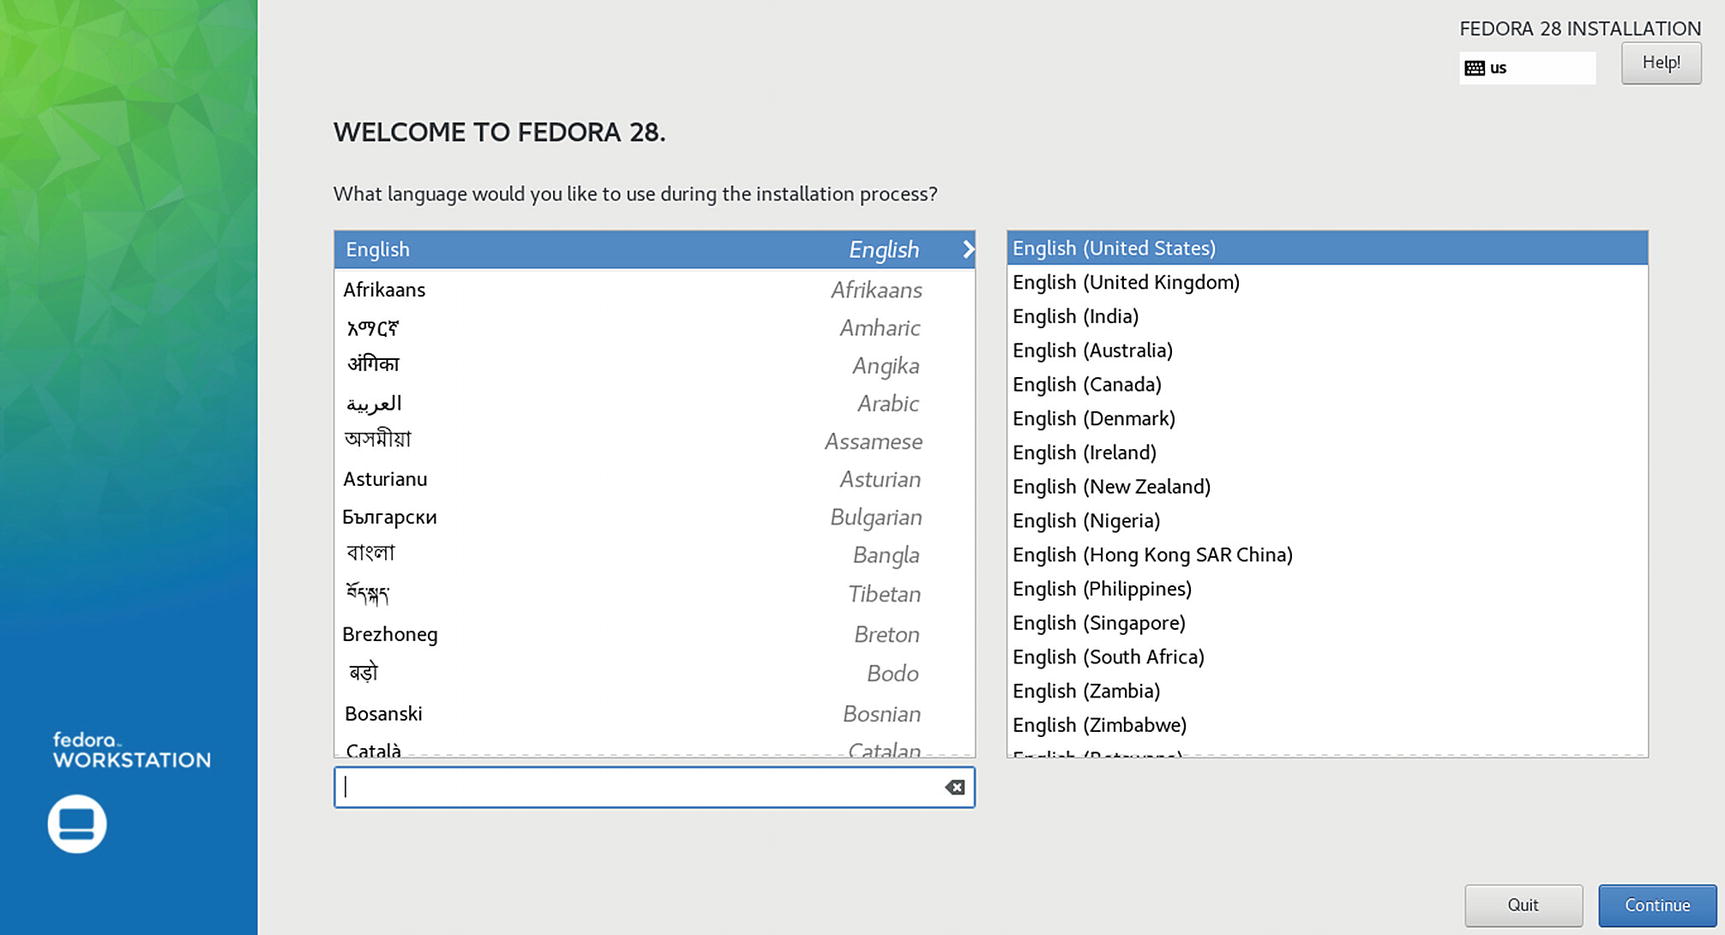
Welcome and language selection
You are then presented with an Installation summary screen with categories for Localization and System (see Figure 2-7). For Localization , you can configure the Date & Time and the Keyboard. For System, you can configure the Installation. A warning emblem appears on options that have to be configured, usually only the Installation Destination, although you should also check that the date and time are correct. A Quit button at the bottom-left of the screen lets you quit the installation. A Begin Installation button at the bottom-right remains grayed out as long as there are warnings. When all options are configured and the warning emblems disappear, this button becomes active, and you can click it to continue the installation.
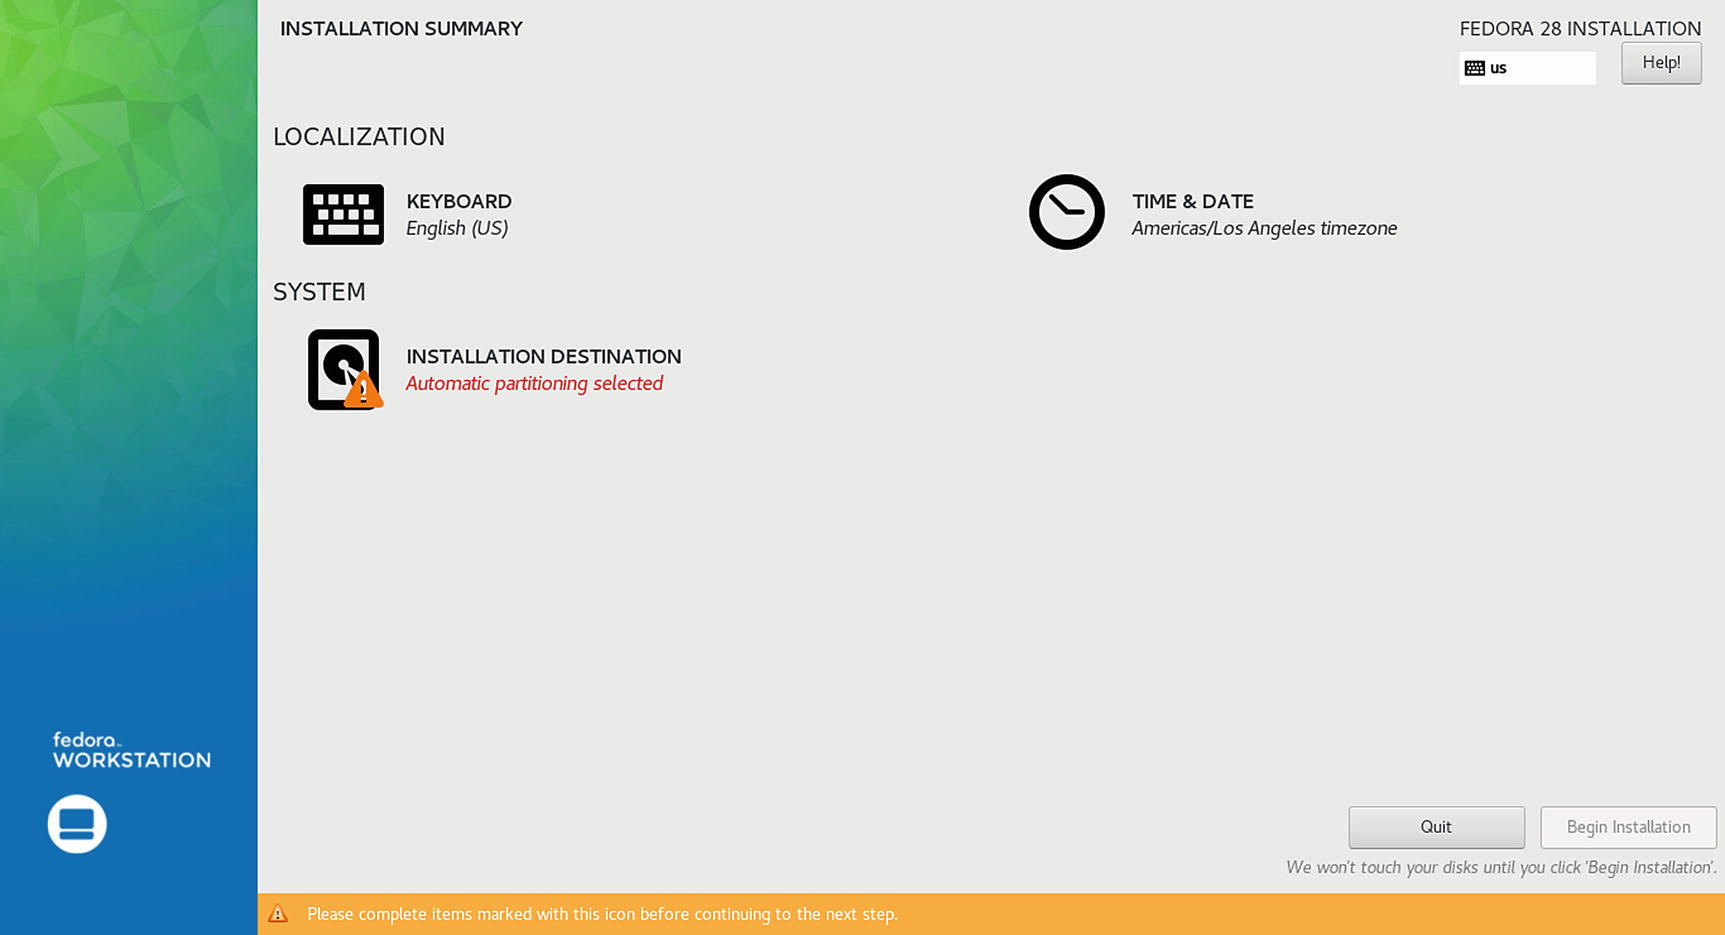
Installation Summary screen
With warning emblems present, a warning appears at the bottom of the screen.
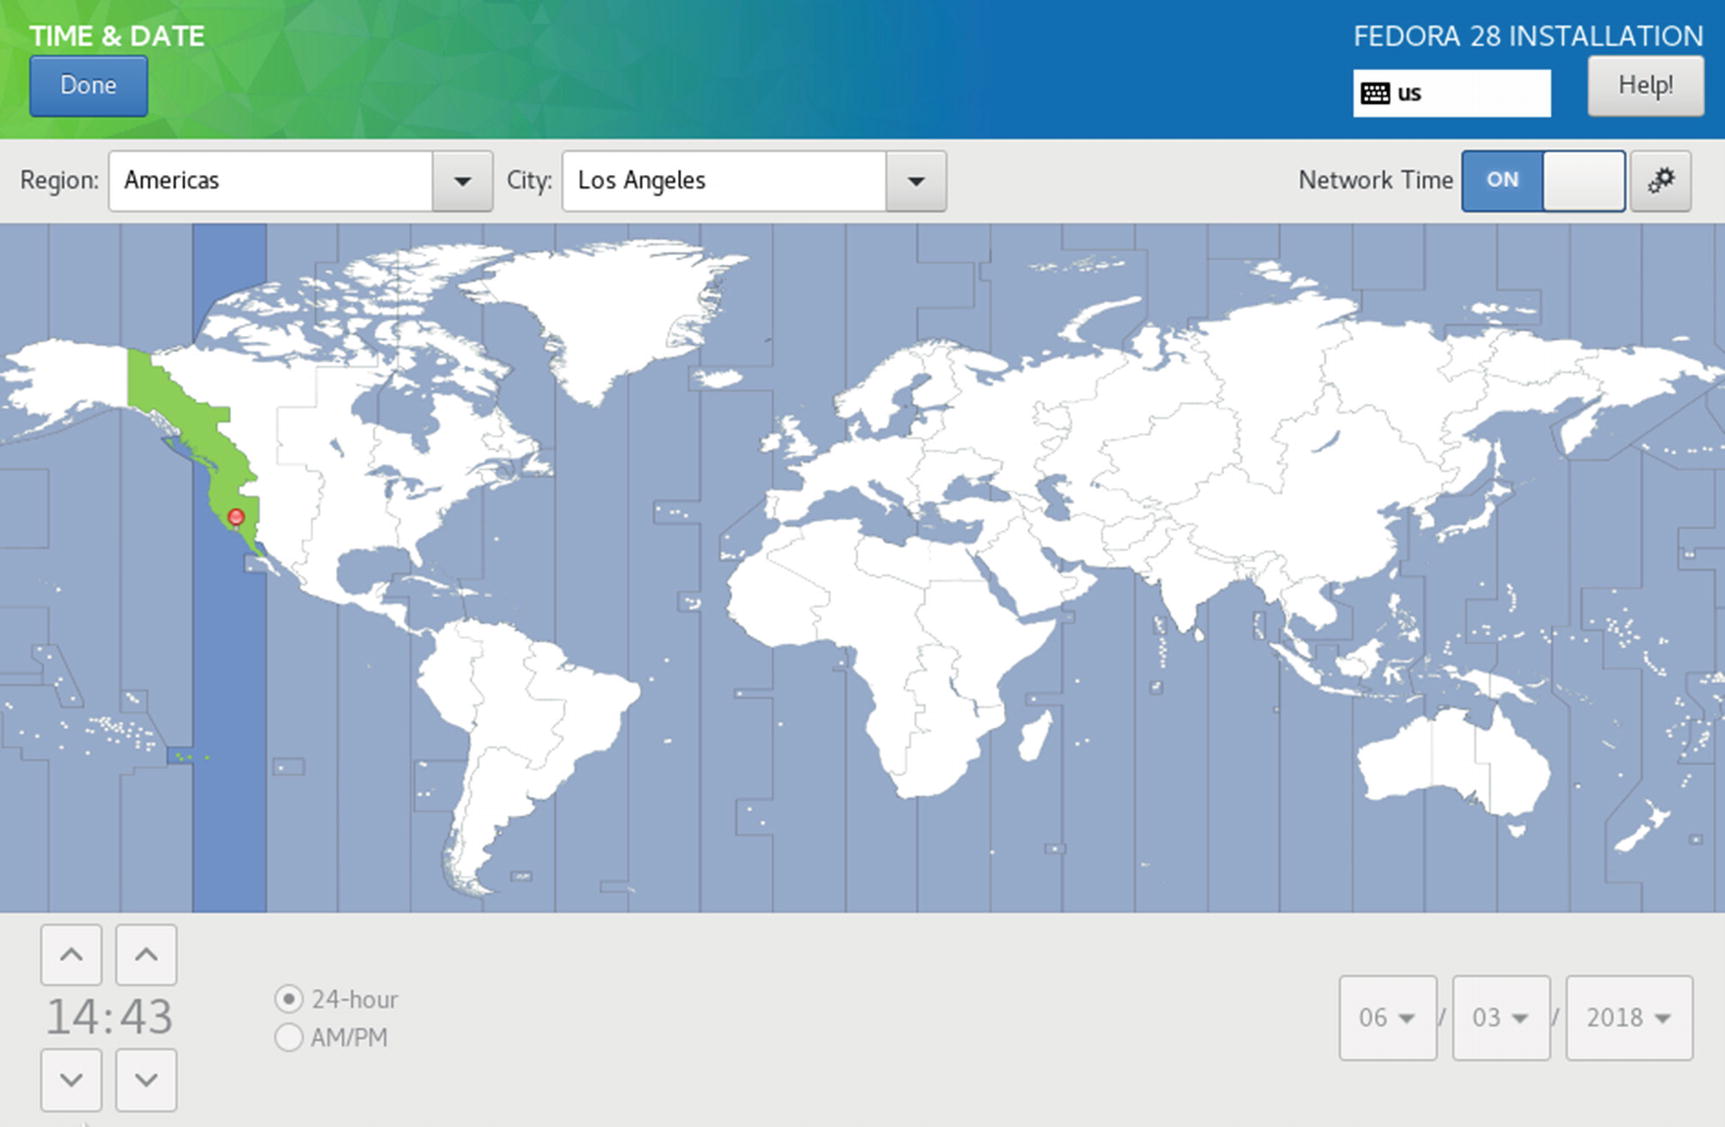
Time zone selection
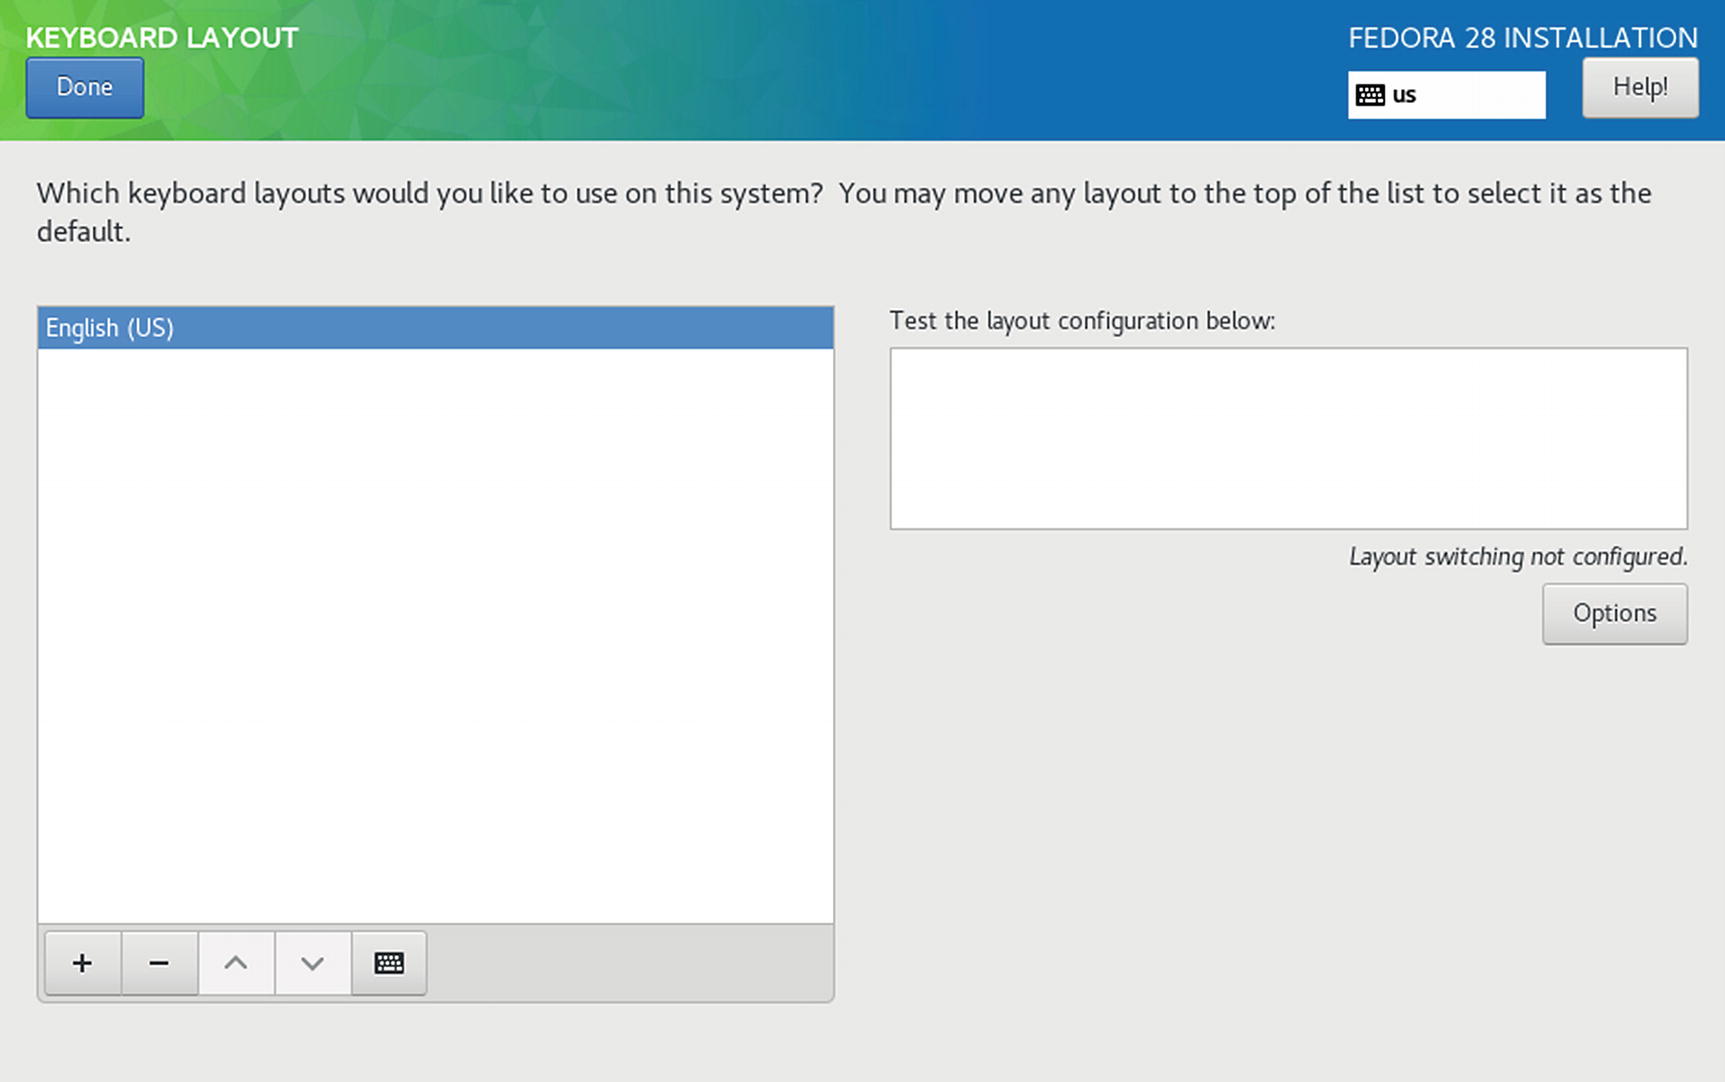
Keyboard selection

Installation Destination
The top icon bar shows your installation devices. The local drives are shown under the Local Standard Disks heading. If you have only a single local hard drive, that drive is automatically selected for you.
The Storage section lets you specify partitions on your hard drive and whether you want to encrypt it or not. Encryption sets a passphrase that you will be prompted for when you start up your system. Storage Configuration can be Automatic, Custom, or Advanced Custom. For a standard fresh install that overwrites your hard drive, using a standard set of partitions, simply choose the Automatic option. This is the default. The Custom and Advanced Custom options starts up the partitioner, which will let you create, edit, and delete partitions, as described in the next section. You can set your own size and type for your partitions. Use this option should you want to create added partitions or separate partition for certain system folders, such as the /var folder. You can also us the partitioner to preserve or reuse any existing partitions. You also have the option to free up additional space, should your hard drive have an operating system that you want to preserve, and has a large amount of unused space that can be freed up.
At the bottom of the screen, information is displayed about the selected disk. The Full Disk Summary and Options link opens with information about the device, as well as buttons to remove the device and install the bootloader. You can use this dialog to choose not to install the bootloader. If you have several hard disks, you can choose which one to install the bootloader on (should this be an issue). Usually, you install the bootloader on the same device as Fedora.
A check box at the bottom lets you encrypt the device.
When you have selected the device you want, click the Done button on the upper-left side of the screen.
Upon pressing Begin Installation from the Installation Summary screen, your installation begins with a progress bar at the bottom of the screen.

Installation complete
Manual Partitioning: Partitions, BTRFS, RAID, and Logical Volumes
On the Installation Destinations screen in the Storage Configuration section, you are given the option of customizing the disk partitioning. Click the Custom check box, and then click the Done button. This opens the Manual Partitioning screen (see Figure 2-12). The left-side scroll box lists the partitions as you create them. If your hard drive is blank, it will be empty. The button bar at the bottom of the scroll box has buttons for adding partitions, deleting them, and displaying information.
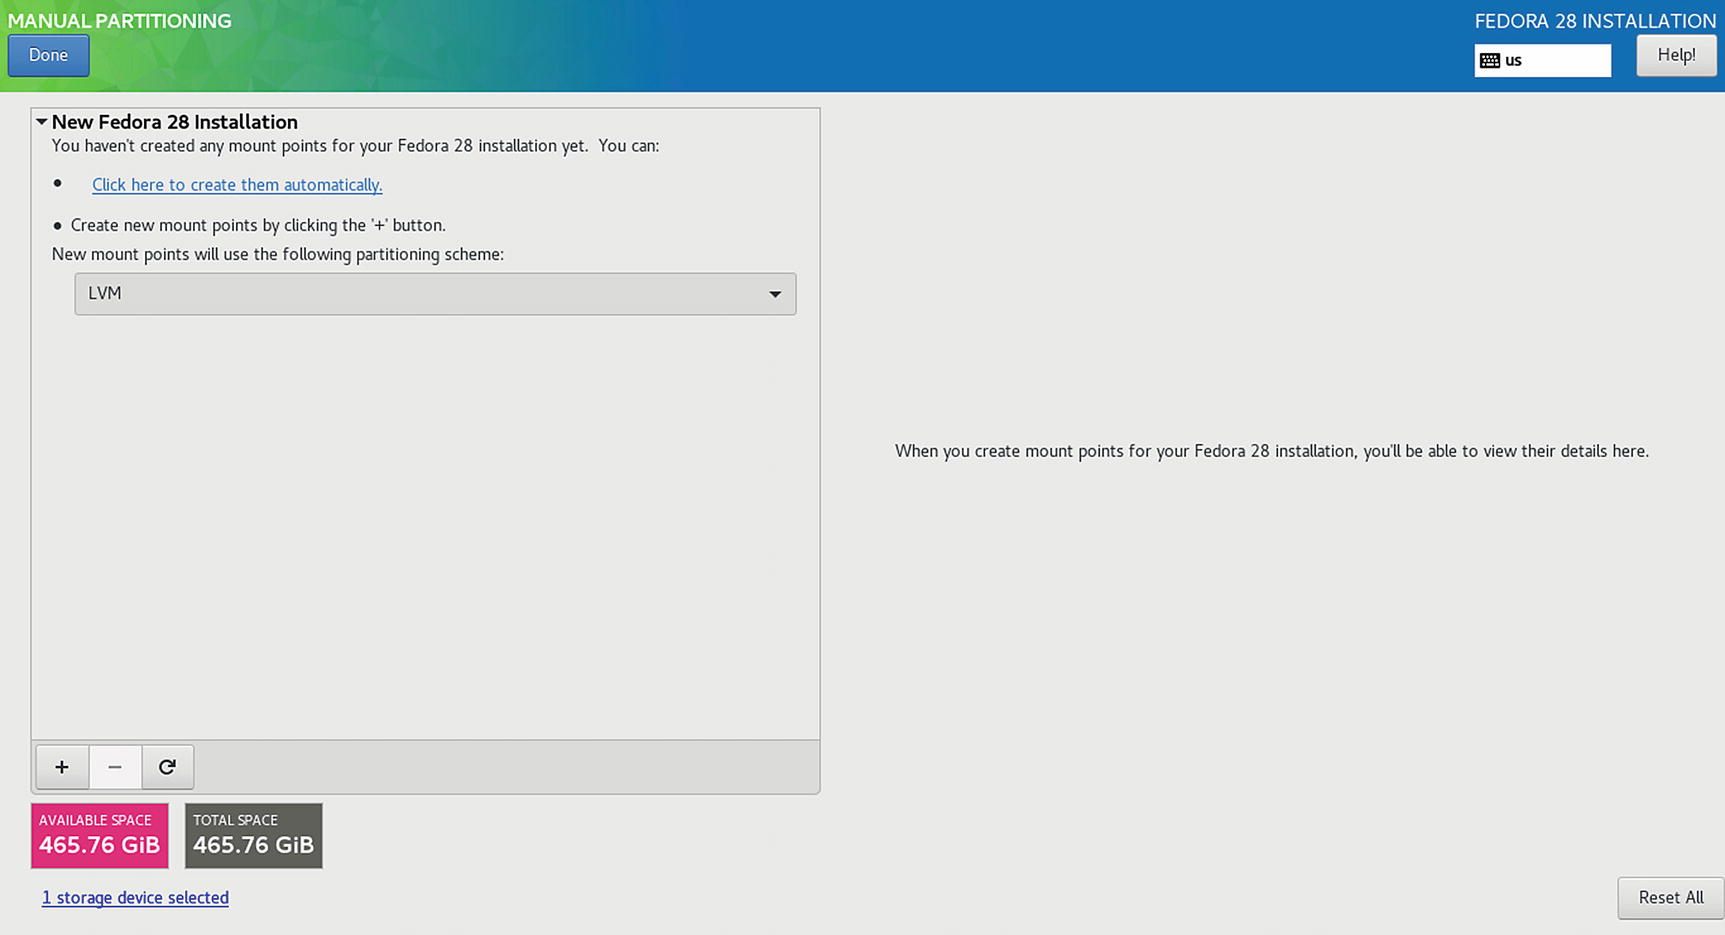
Manual Partitioning dialog
You are asked to designate the Linux partitions and hard disk configurations you want to use on your hard drives. Fedora provides automatic partitioning options if you just want to use available drives and free space for your Linux system. You can create specific partitions, configure RAID devices, or set up logical volumes (LVM).
No partitions will be changed or formatted until you leave the Manual Partitioning screen and, from the Installation Summary screen , you click the Done button. You can opt out of the installation any time until that point, and your original partitions will remain untouched. A default layout sets up a home partition, swap partition, a boot partition of type ext4 (Linux native) for the kernel, and an LVM partition that will hold all your applications and files, as well as a boot EFI partition if needed.
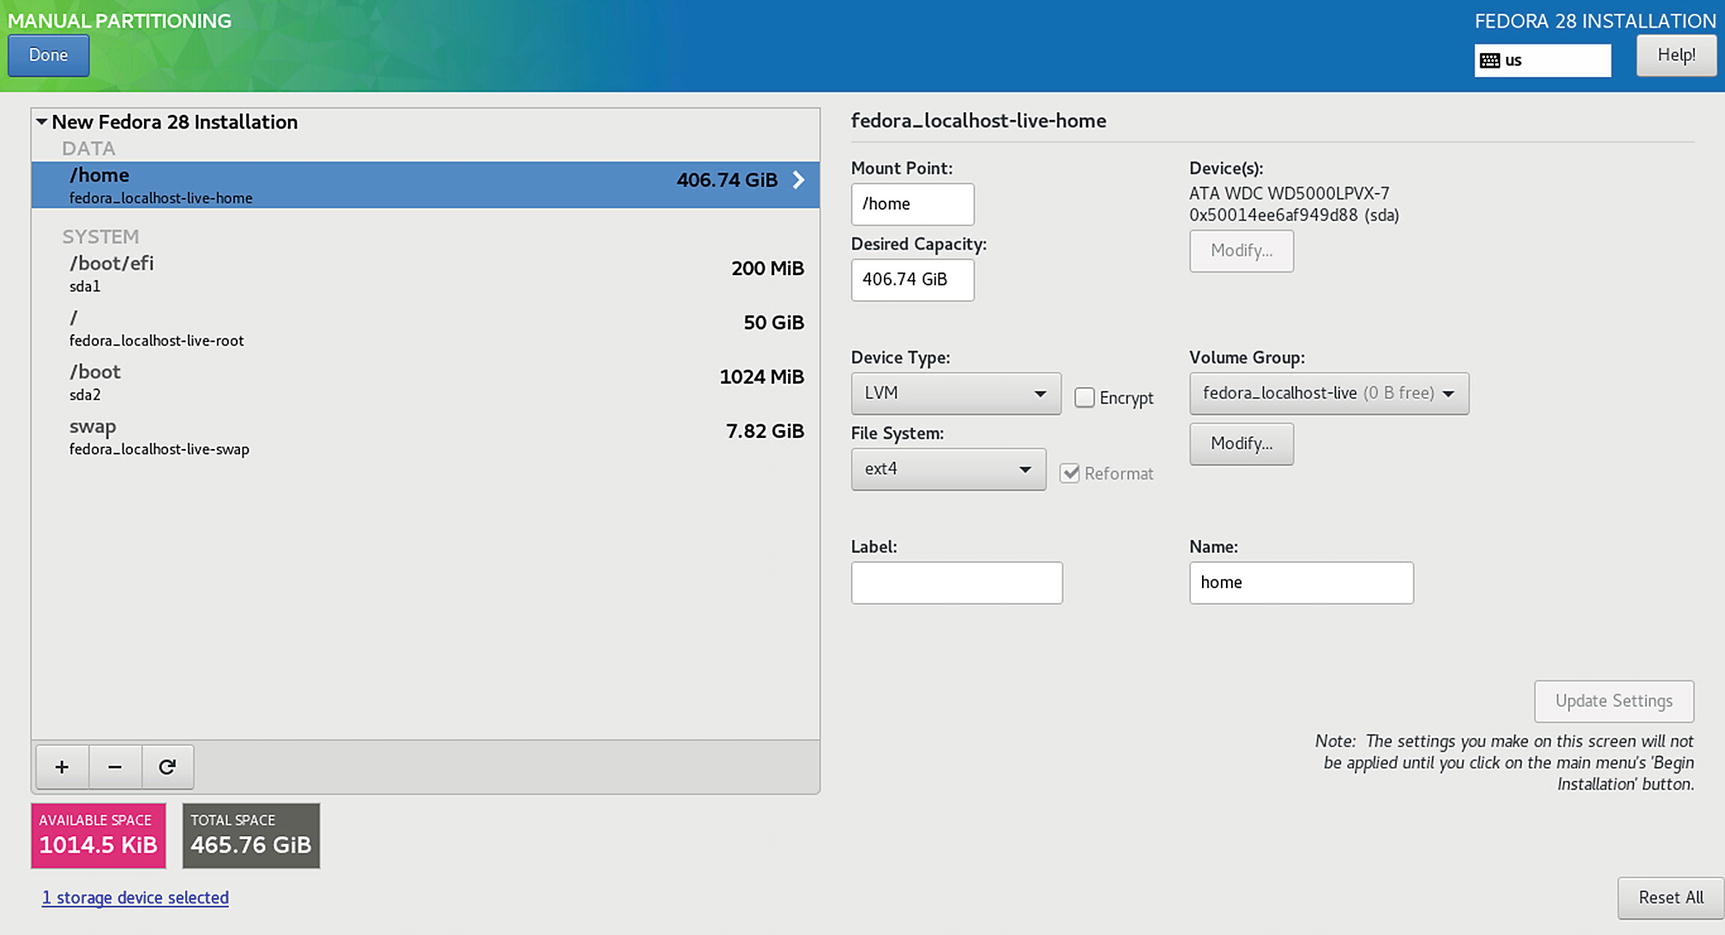
Default partitions
The side pane lists the partitions, showing the device name and size. The right pane shows the configuration for a selected partition . It displays the name, mount point, label, size, device type, file system, and encryption option. You can make changes to any of the entries. (No changes are actually made to the hard disk until you begin the software installation.)
Creating Partitions

New partition
The new partition appears on the Manual Partitioning screen. Select it to configure the partition. You can set the size (in megabytes), the device type, and the file system type. For the device type, you have the choice of a Standard Partition, BTRFS, Software RAID, and LVM. For Software RAID, you can create RAID partitions and RAID devices, to which you can assign RAID partitions. For LVM, you can create Logical Volumes (logical partitions to which physical partitions are assigned) and a Volume Group (the group to which logical volumes are assigned). Physical volumes are set up for you.
There are several kinds of file systems supported during installation: ext2, ext3, ext4, swap, btrfs, xfs, and vfat. The ext2 and ext3 partitions are older forms of the Linux standard partition type, ext4.
To make configuration changes to any partition, select it and make the changes to its entries.
Logical Volumes
Fedora supports Logical Volume Management (LVM), which enables you to create logical volumes that you can use instead of hard disk partitions directly. LVM provides a more flexible and powerful way of dealing with disk storage, organizing physical partitions into logical volumes in which memory can be managed easily. Disk storage for a logical volume is treated as one pool of memory, though the volume may in fact contain several hard disk partitions on different hard disks. There is one restriction. The boot partition cannot be a logical volume. You still have to create a separate hard disk partition as your boot partition with the /boot mount point in which your kernel will be installed.
If you selected default partitioning, the /boot partition will have already been set up for you, along with an LVM volume partition for the rest of the system. A logical group will be set up with volumes for both the swap and root partitions. The logical group will be labeled with a name such as fedora. You can change these names by editing the logical group and volumes during installation. Click the Modify button to the right of the volume group entry.
Creating logical volumes is now a simple process of specifying the LVM device type and the volume group. The physical LVM partitions that logical volumes are based on are generated automatically by Fedora. For a particular LVM partition (logical volume), you will have a Volume Group entry in which you can specify the volume group it belongs to.
RAID and BTRFS
You also have the option of creating RAID devices . Such devices are for use with the Linux software RAID service, and shouldn’t be used for your motherboard RAID devices, as these are automatically detected. If you have already decided to use the motherboard RAID support, you do not require Software RAID. Linux supports both motherboard/computer RAID devices (DMRAID), as well as its own Linux Software RAID. The RAID option is visible only if you have selected two or more hard disks.
BTRFS is the new file system format, still under development. If operates much like RAID devices, providing RAID0 (stripe), RAID (mirrors), and RAID10 (optimization) levels of support. You create the BTRFS sub-volumes, and the installer creates the BTRFS volume for you.
Advanced Custom (Blivet-GUI)
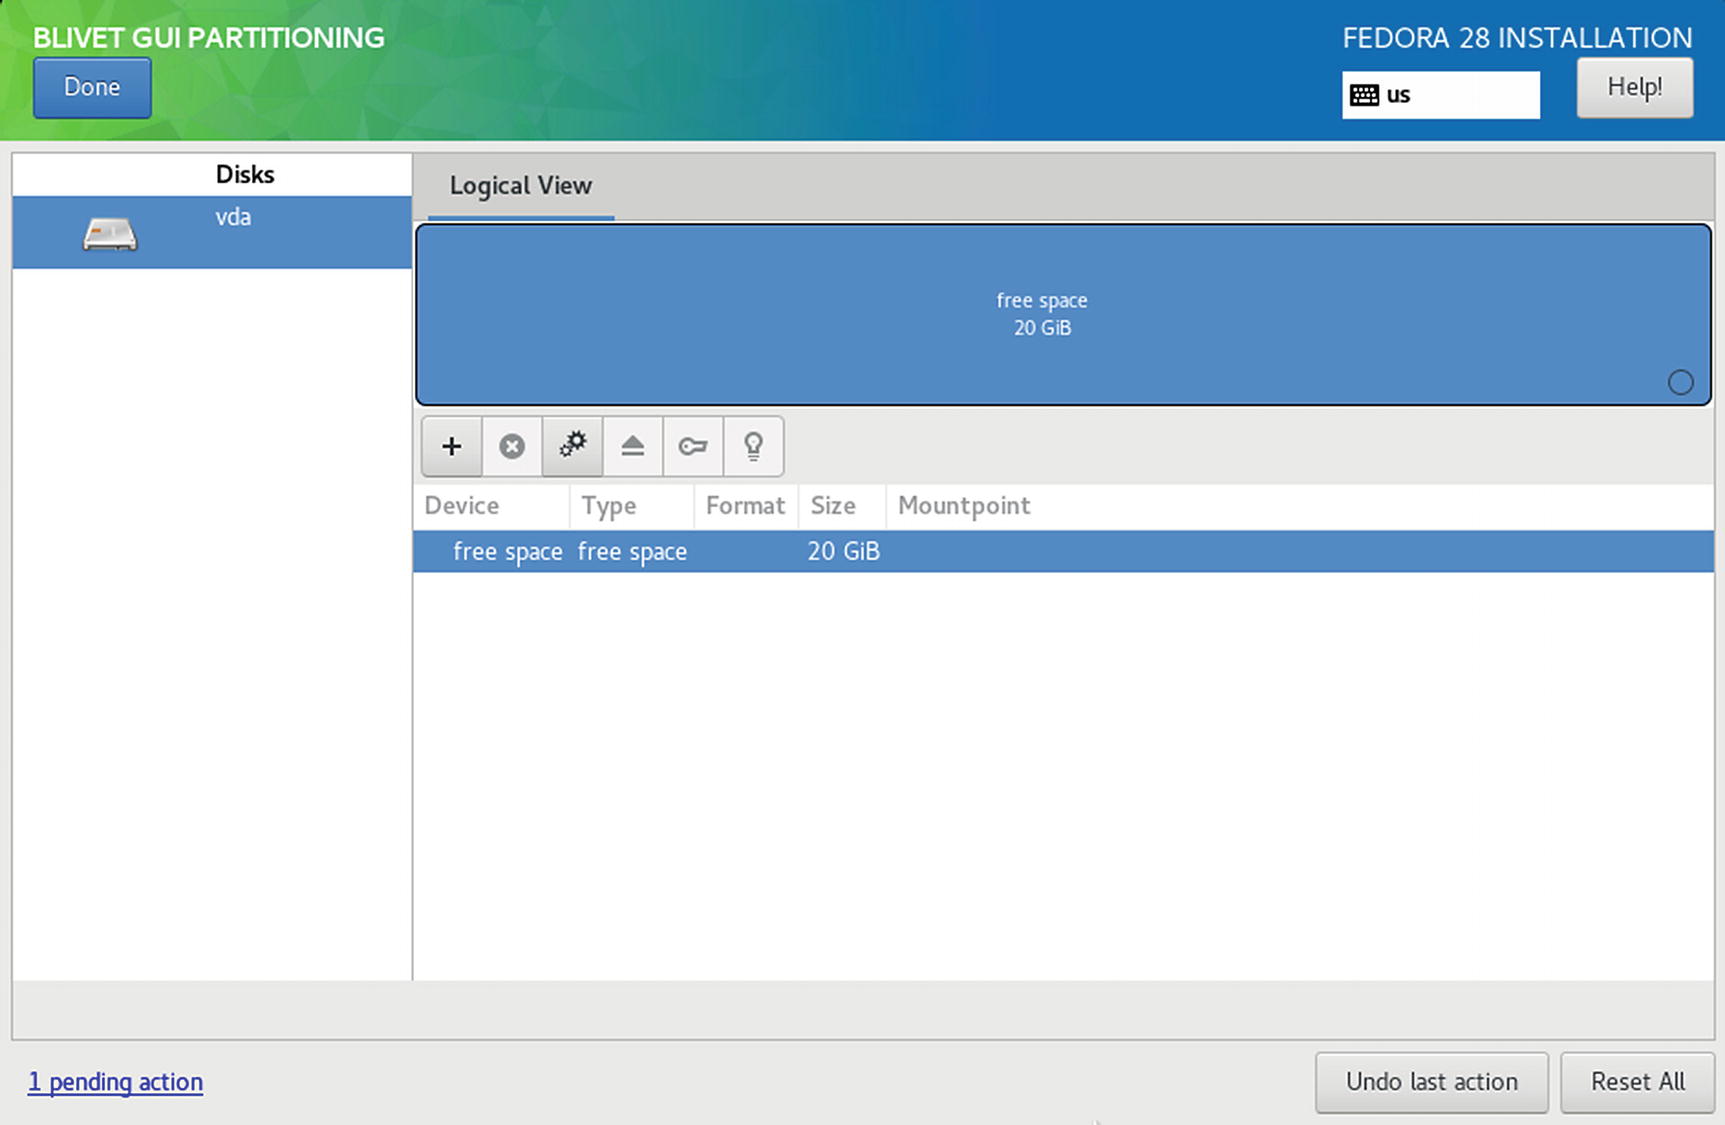
Blivet-GUI
GRUB on Restart
When you reboot, a GRUB bootloader briefly displays a startup message indicating which operating system on your disk will be started. The default is usually your Linux system. If Fedora is the only operating system on your system, GRUB will skip the startup message and the GRUB menu access and start Fedora immediately. Fedora 28 uses GRUB2. You can find out more about GRUB2 at https://fedoraproject.org/wiki/GRUB_2 .
If you have encrypted your hard disk partitions, you are then prompted to enter the LUKS passphrase for them. A standard installation will prompt for the same passphrase for your swap and root partitions on your LVM file system. The prompt will use the physical partition name used for the LVM group, in this example, /dev/sda2. There are two prompts: one for the LVM volume for the root file system, and one for the LVM volume swap file system.
The startup screen then shows the progress of your boot procedures. If your graphics card supports kernel mode settings, the Plymouth bootup screen will be displayed; otherwise, a simple progress bar is shown. You can press the ESC key to see startup messages.
GNOME Initial Setup and GNOME Help
GNOME initial setup
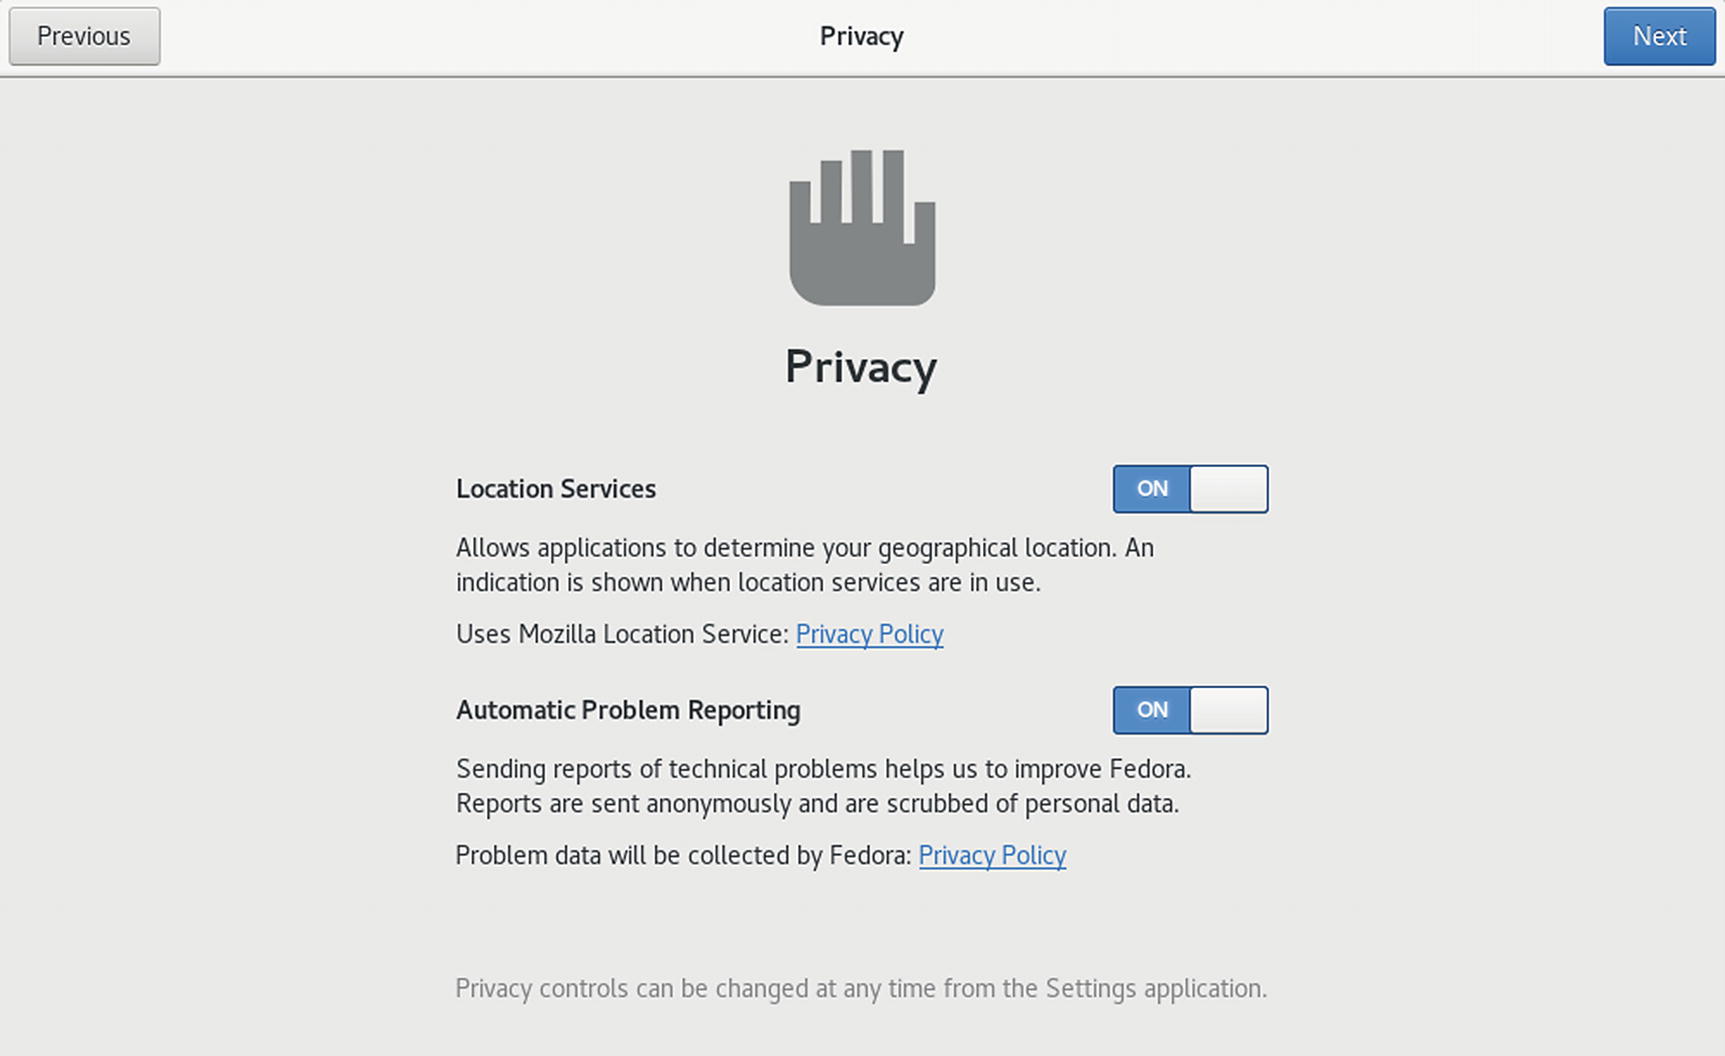
GNOME initial setup: Privacy

GNOME initial setup: Online Accounts
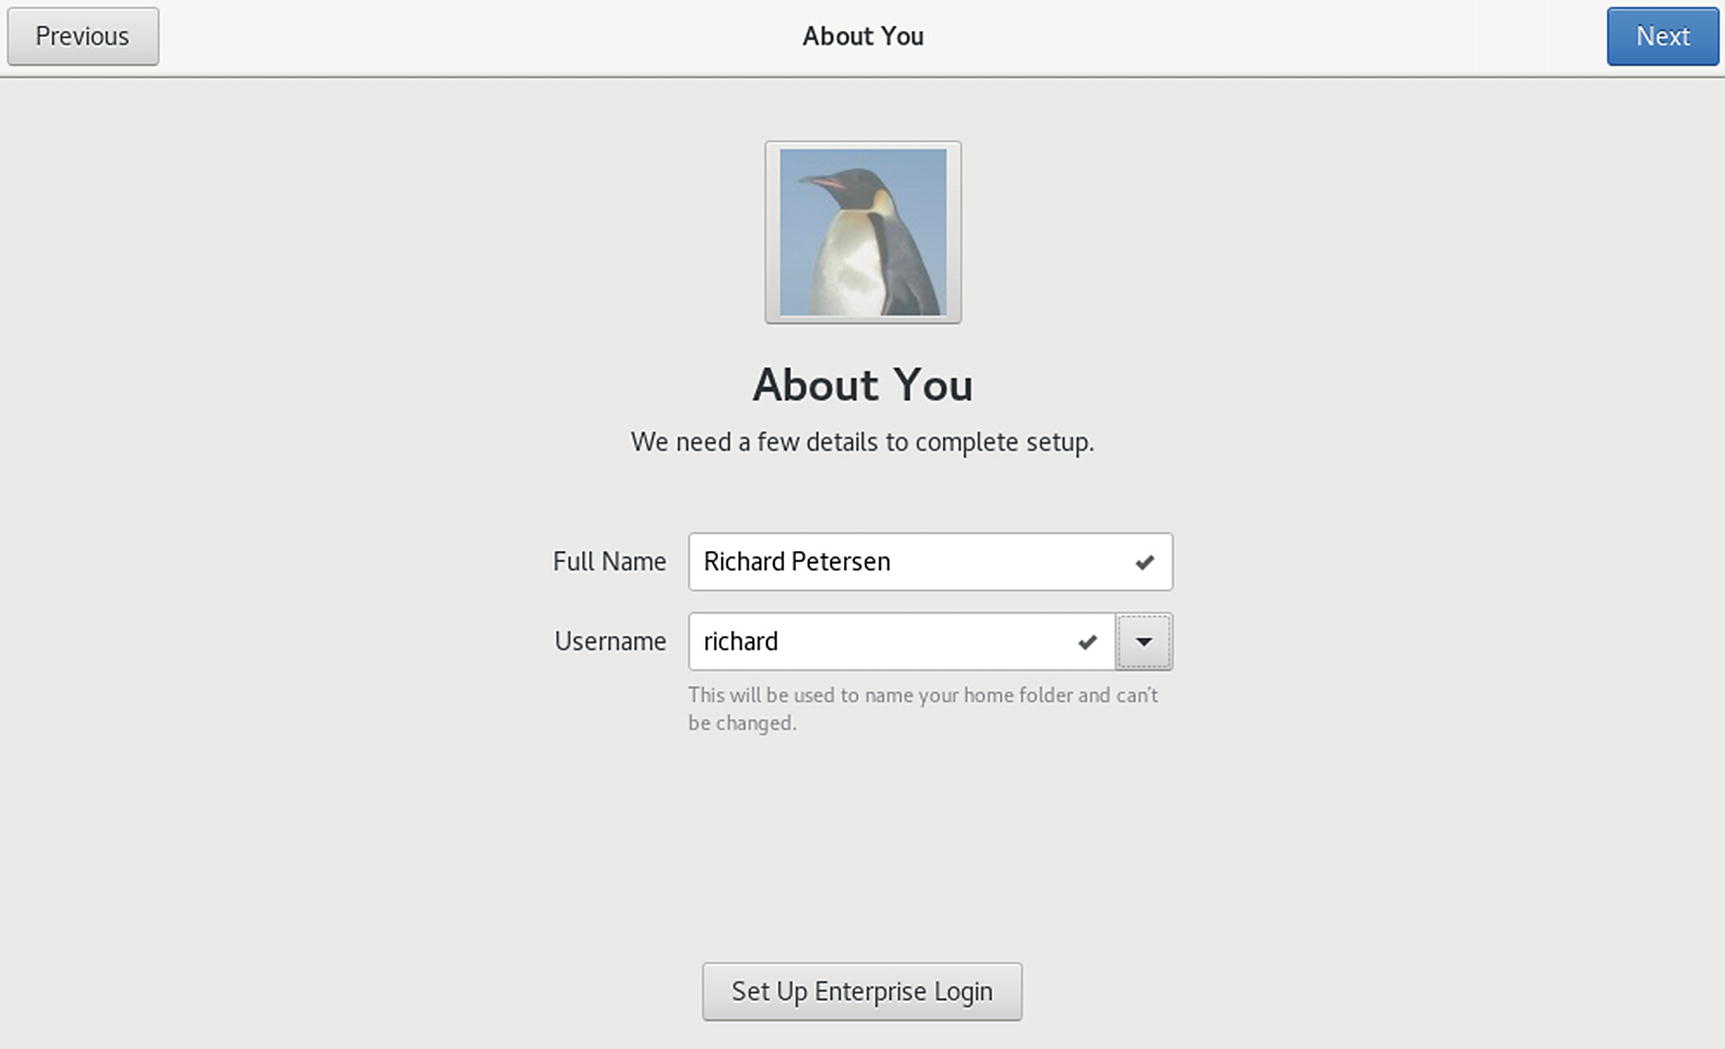
GNOME initial setup : About You
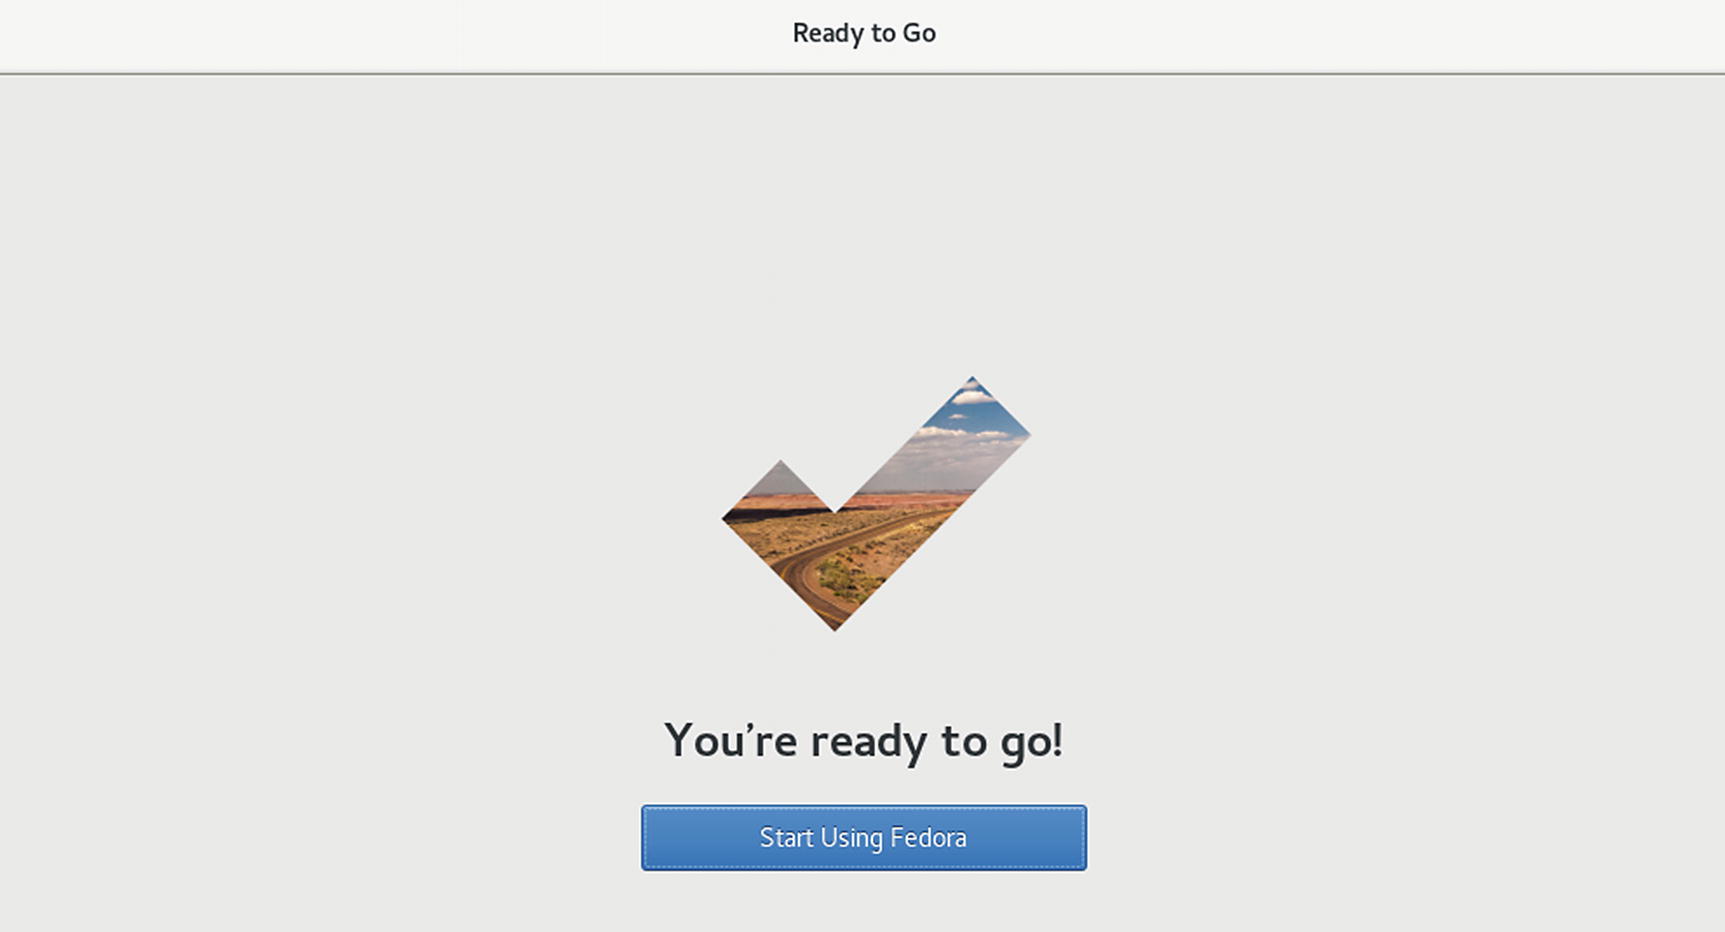
GNOME initial setup: Ready to Go
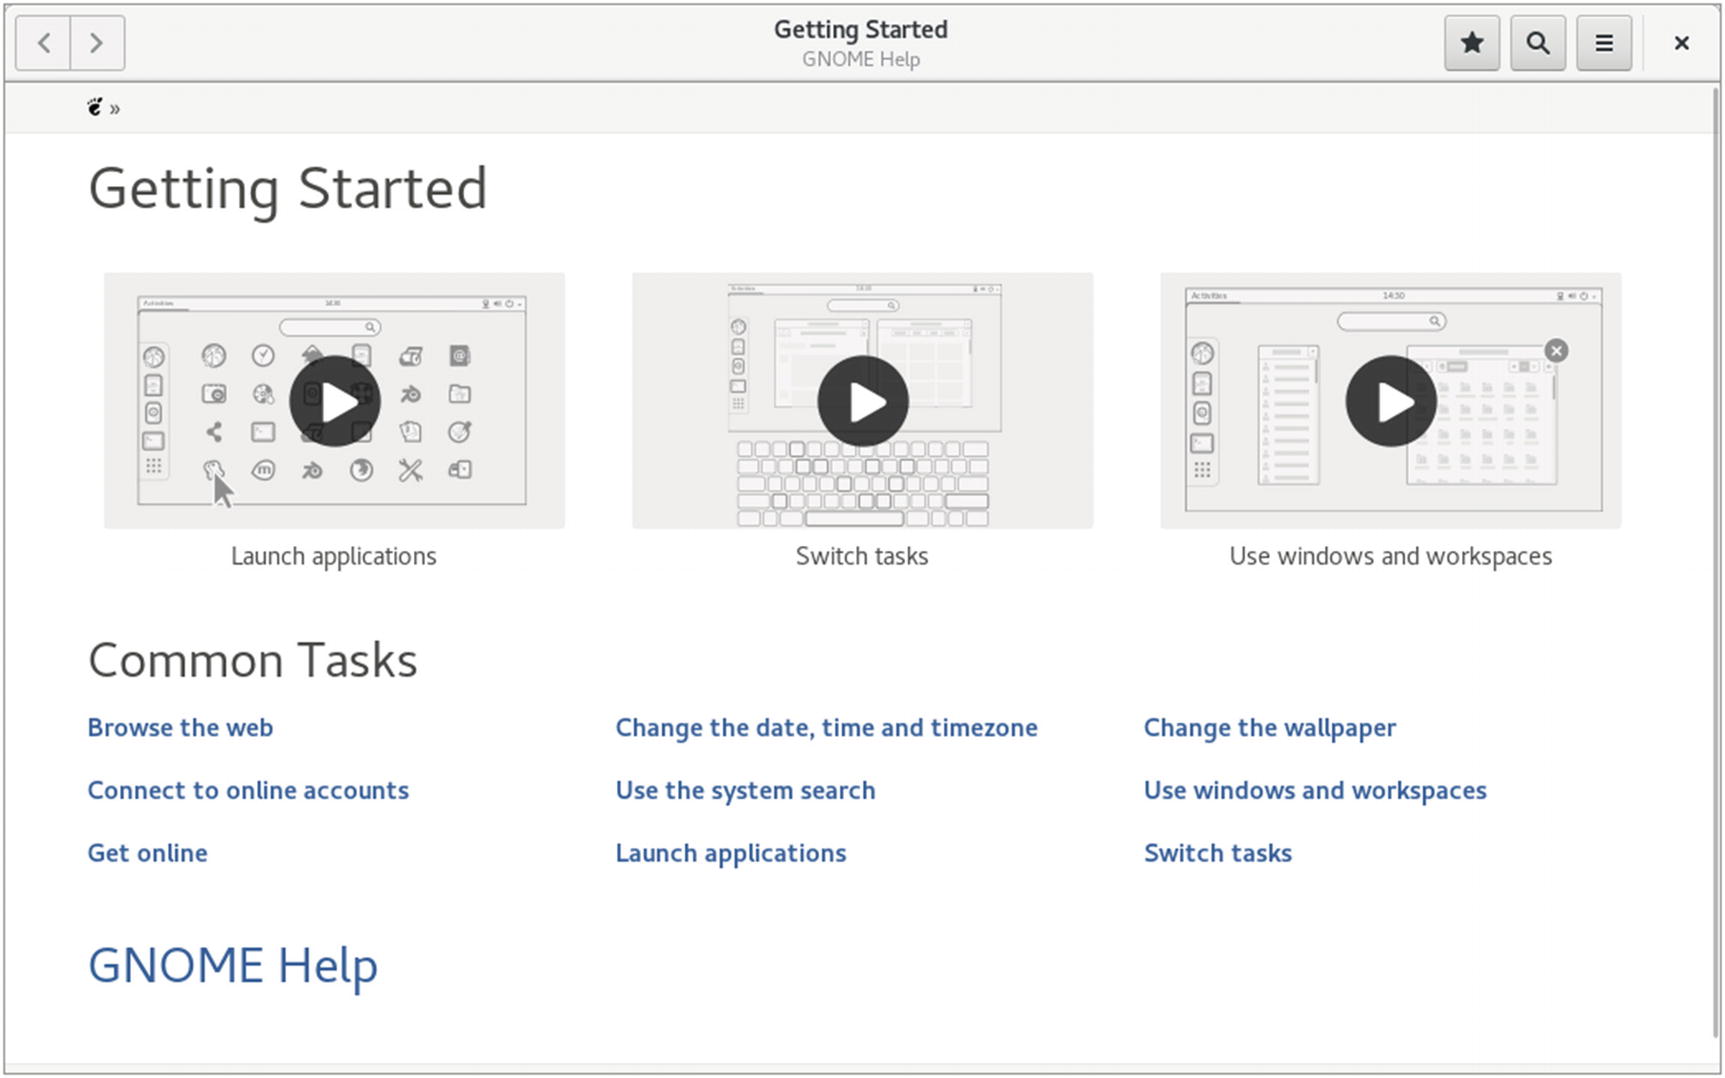
GNOME Help : Getting Started animations
Upgrading Fedora Linux
Creating Boot Disks
Booting in Rescue Mode
If you are not able to boot or access your system, it may be due to conflicting configurations, libraries, or applications. In this case, you can boot your Linux system in a rescue mode and then edit configuration files with a text editor, remove the suspect libraries, or reinstall damaged software with dnf. To enter the rescue mode, run the Fedora Workstation Live DVD and then select Rescue a Fedora System from the Troubleshooting menu.
Use the cd command to move between directories. Check /etc and /etc/sysconfig for your configuration files. You can use vi to edit your files and the less command to view them. To reinstall files, use the dnf install command. When you are finished, use the exit command.
Reinstalling the Bootloader
If you have a dual-boot system, where you are running Windows and Linux on the same machine, you may run into a situation where you have to reinstall your GRUB bootloader. This problem occurs if you have installed a new version of Windows after installing Linux. Windows will automatically overwrite your bootloader (alternatively, you could install your bootloader on your Linux partition instead of the MBR). You will no longer be able to access your Linux system.
All you have to do is reinstall your bootloader. First, in rescue mode as described in the previous section.
This will reinstall your current GRUB bootloader, assuming that Windows is included in the GRUB configuration. You can then reboot, and the GRUB bootloader will start up.
If your Linux rescue disks are unable to access your system, you can use a Fedora Workstation Live DVD to start up Fedora and then manually mount your Fedora partitions. You will have to know your partition device names (use GParted). Once they are mounted, you can access the system files on the mounted partition and make any required changes .