The GNU Network Object Model Environment, also known as GNOME, is a powerful and easy-to-use environment consisting primarily of a panel, a desktop, and a set of desktop tools with which program interfaces can be constructed. GNOME is designed to provide a flexible platform for the development of powerful applications. Currently, GNOME is supported by several distributions and is the primary interface for Fedora Linux. GNOME is free and released under the GNU Public License. GTK+ is the widget set used for GNOME applications. The GTK+ widget set is entirely free under the Lesser General Public License (LGPL). The LGPL enables developers to use the widget set with proprietary software, as well as free software (the GPL is restricted to free software).
GNOME Resources
Websites | Description |
|---|---|
Official GNOME website | |
GNOME documentation website for users, administrators, and developers | |
Desktop themes and background art | |
GNOME software applications | |
GNOME developers site; see http://help.gnome.org for developer documentation |
GNOME releases new versions on a frequent schedule. Fedora Linux uses GNOME 3.28.2. Key changes with GNOME 3.28 are described in detail at the following:
https://help.gnome.org/misc/release-notes/3.28/
The GNOME Desktop
GNOME Desktop
System Status Area menu
You can enhance the GNOME desktop by adding third-party extensions, as noted in Chapter 4 (see Figures 4-13, 4-14, and 4-15). These extensions are not guaranteed to work, though some are already installed and activated. Open the GNOME Software Add-ons category and click the Shell Extensions tab. First, enable the extensions. You will see icons with names and descriptions of different extensions, such as Dash to Dock which places a dash on the desktop instead of the Activities overview. Some extensions work as added items on the top bar, like system monitor. To manage installed extensions, click the Extension Settings button at the top of the Shell Extensions tab to pen a Shell Extension dialog where you can both turn extensions on or off and configure them if possible.
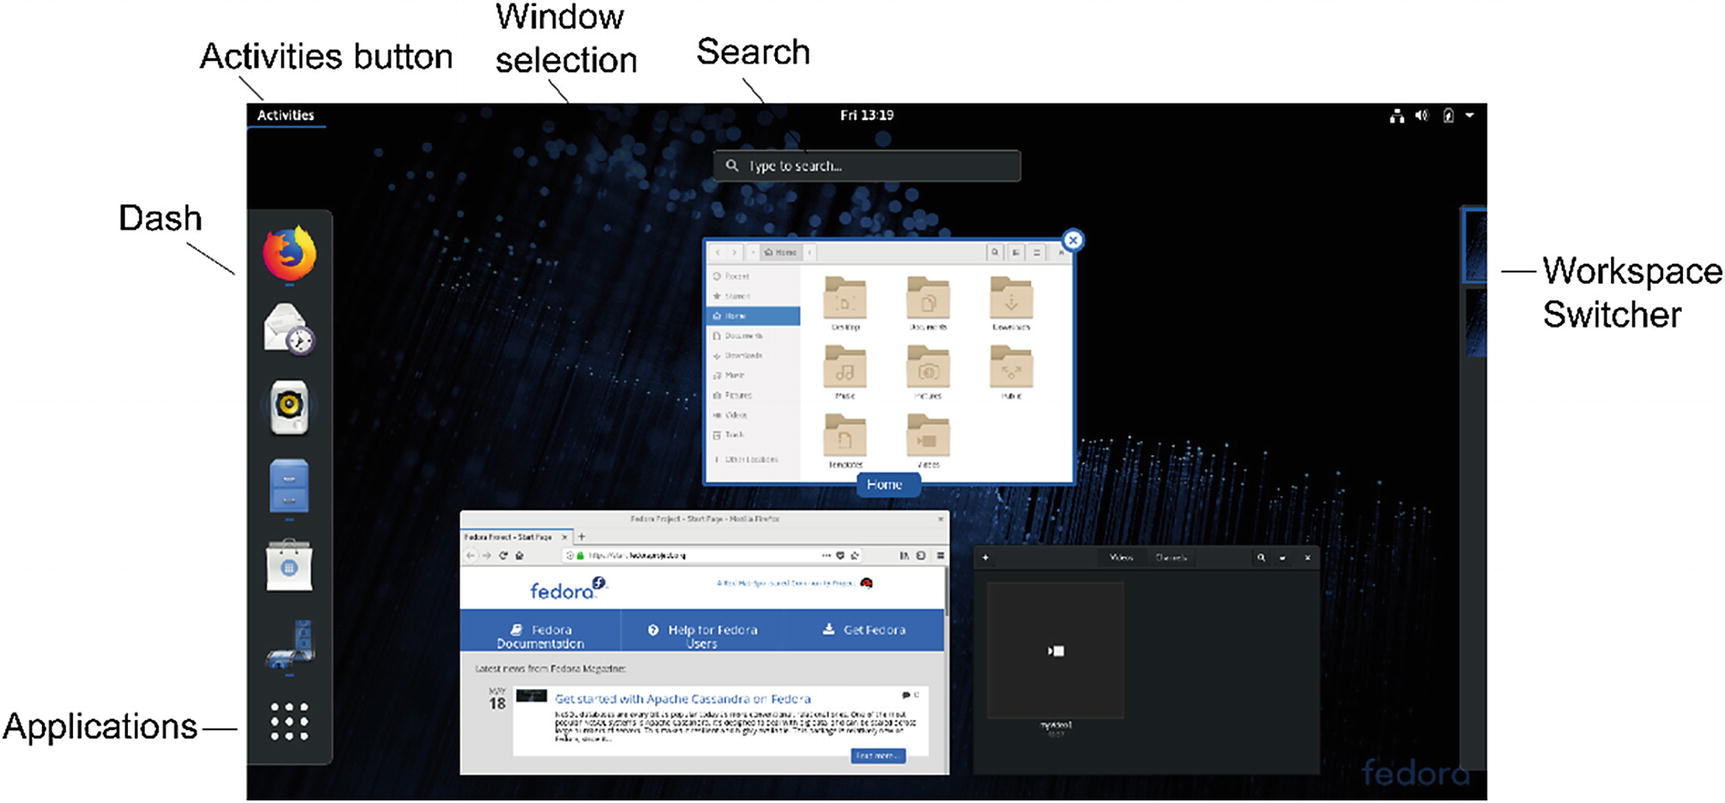
Top Bar
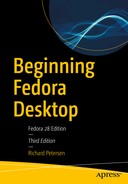
The screen displays a top bar, through which you access your applications, windows, and such system properties as sound and networking. Clicking the sound and power icons at the right of the top bar displays the system status area menu with options to set the sound level, screen brightness (laptop), wired and wireless connections, Bluetooth, and to shut down or lock the screen (see Figure 8-1). The center of the top bar has a button to display your clock and calendar. To the left is the Activities button, which displays an icon bar for favorite and open applications.
The System Status Area
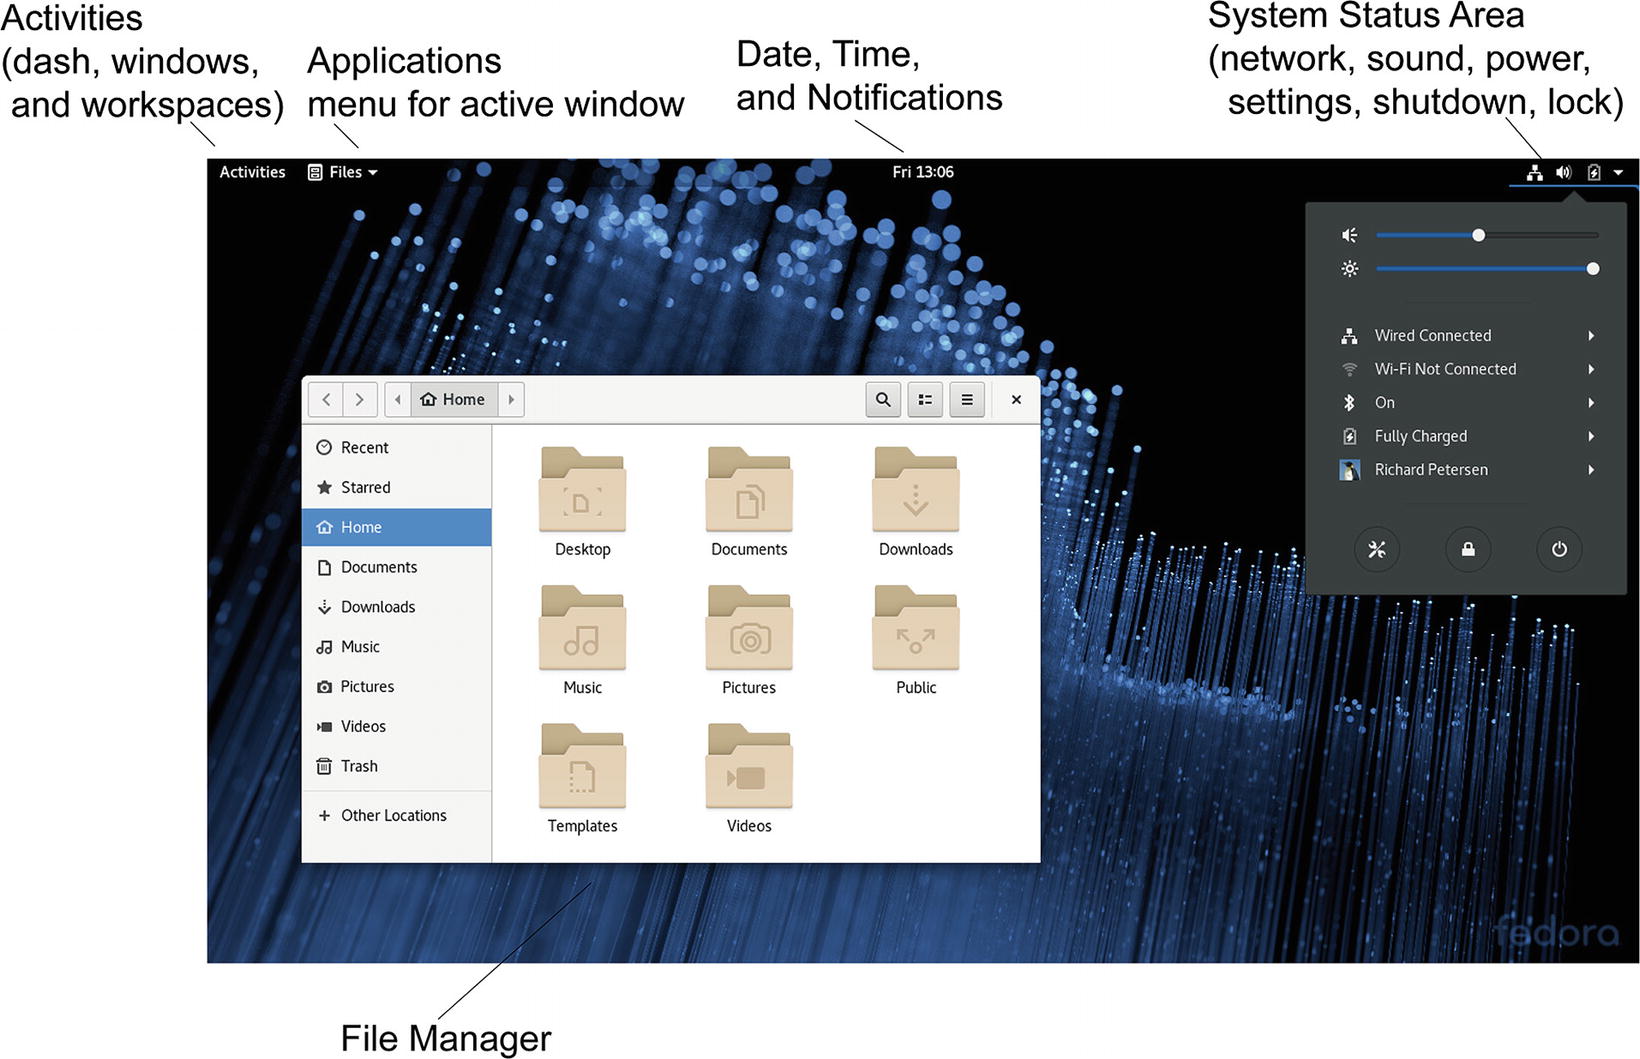
Once logged in, the System Status Area is displayed on the right side of the top bar (see Figure 8-2). The area will include status icons for features such as sound and power. Clicking the button showing the sound, power, and down arrow icons displays the System Status Area menu, with items for sound, brightness, wired and wireless connections, the battery, the current user, in addition to buttons at the bottom for opening GNOME Settings, activating the lock screen, and shutting down or rebooting the system. The sound and brightness items feature sliding bars with which you can adjust the volume and brightness. The Wi-Fi, Battery, and current user entries expand to submenus with added entries. The buttons at the bottom open separate dialogs.
On systems that are not laptops, there will be no brightness slider or battery entry on the System Status Area menu. If the system also has no wireless device, the WiFi entry will also be missing. A system of this kind will only have a sound slider and a user entry.
To log out, you click the current user entry to expand the menu to show Switch User, Log Out, and Account Settings entries. The Log Out returns you to the login screen, where you can log in as another user. To switch to another user, click the Switch User entry to display the login screen. You can then log in as another user. When you log out or choose Switch User, you can then select the original user. When you log back in, your session is restored.
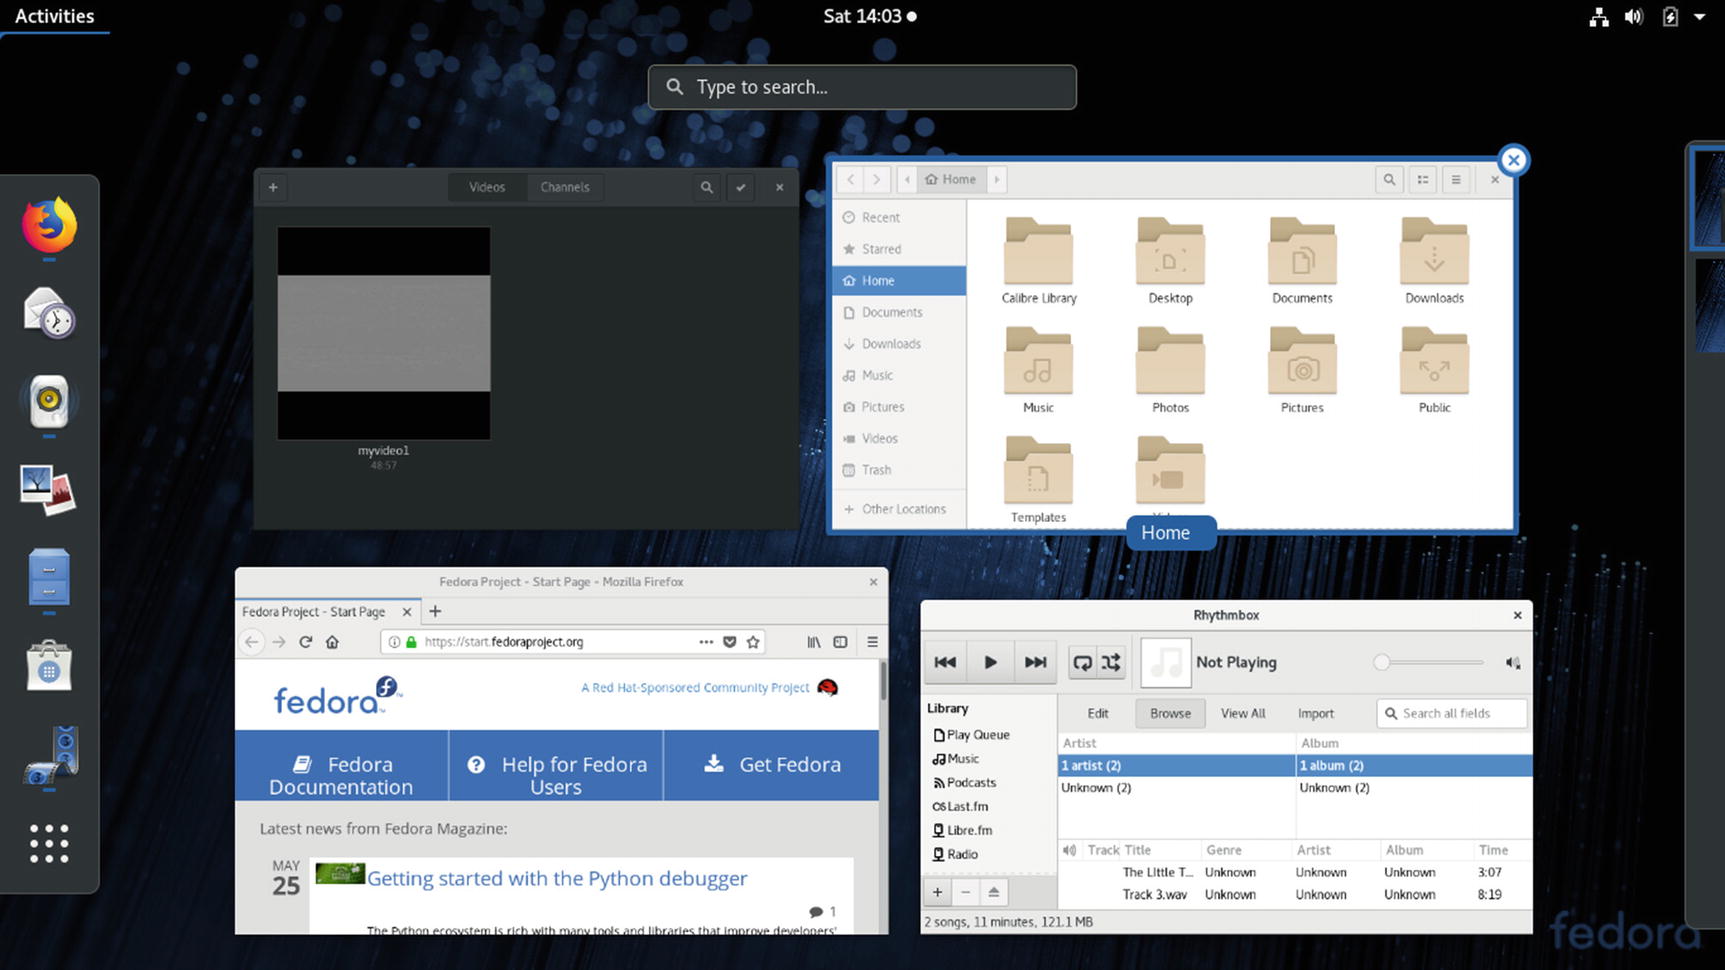
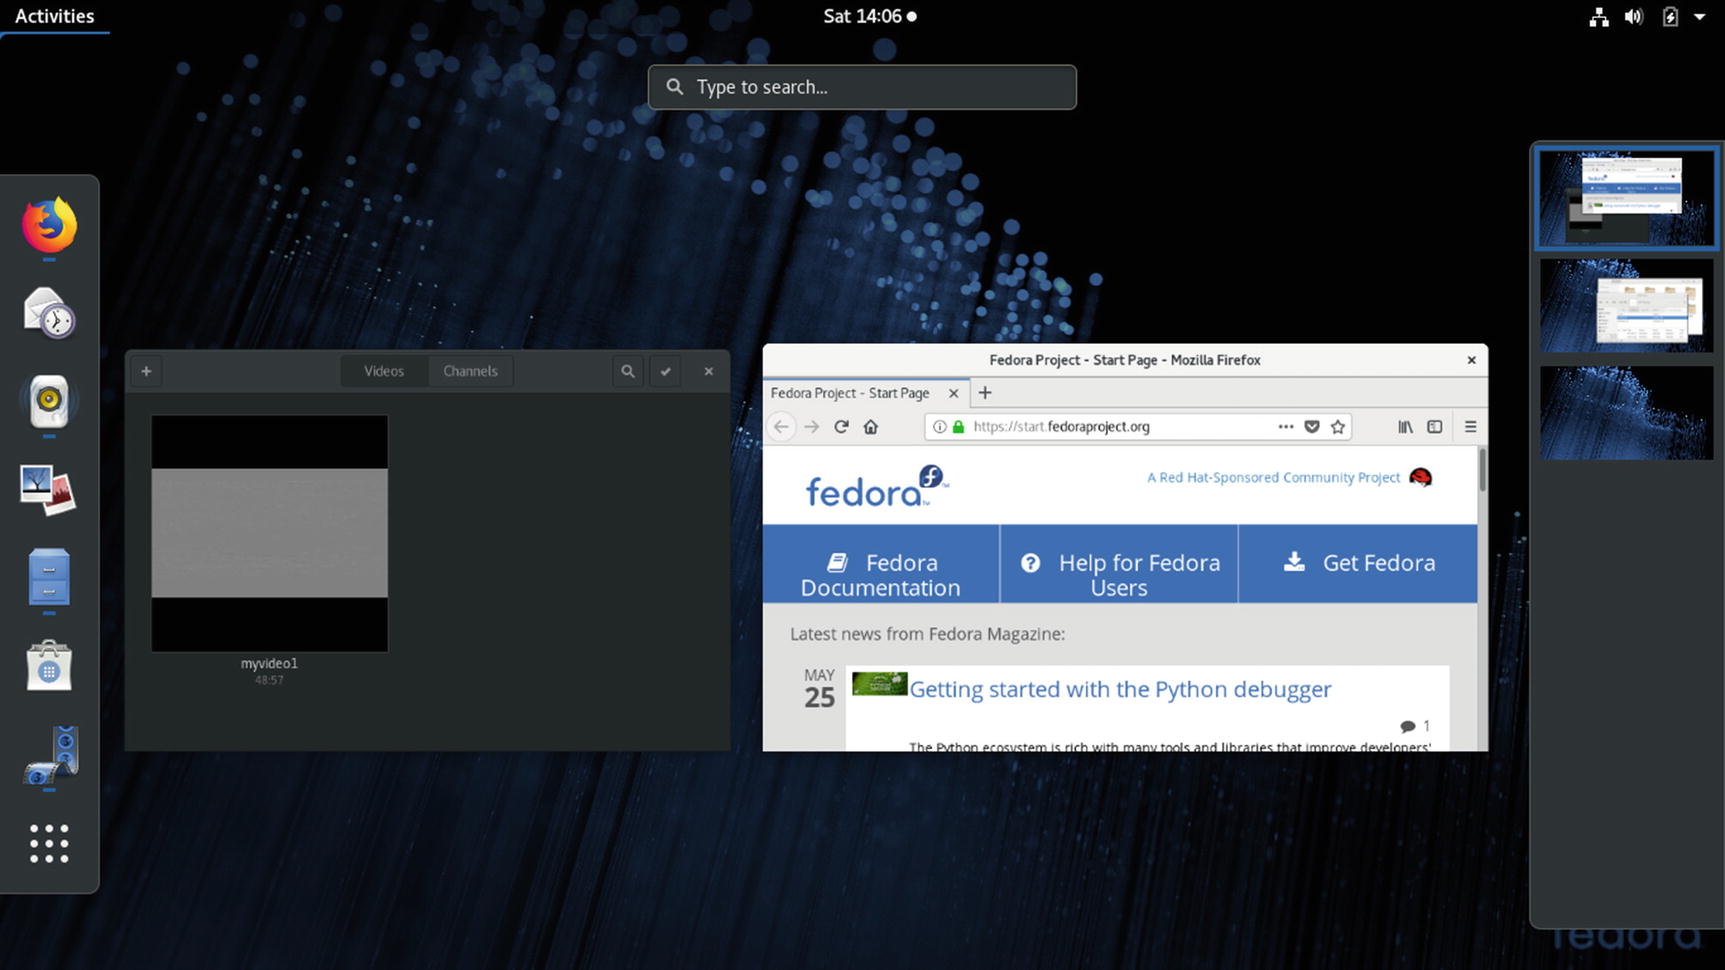
Activities Overview
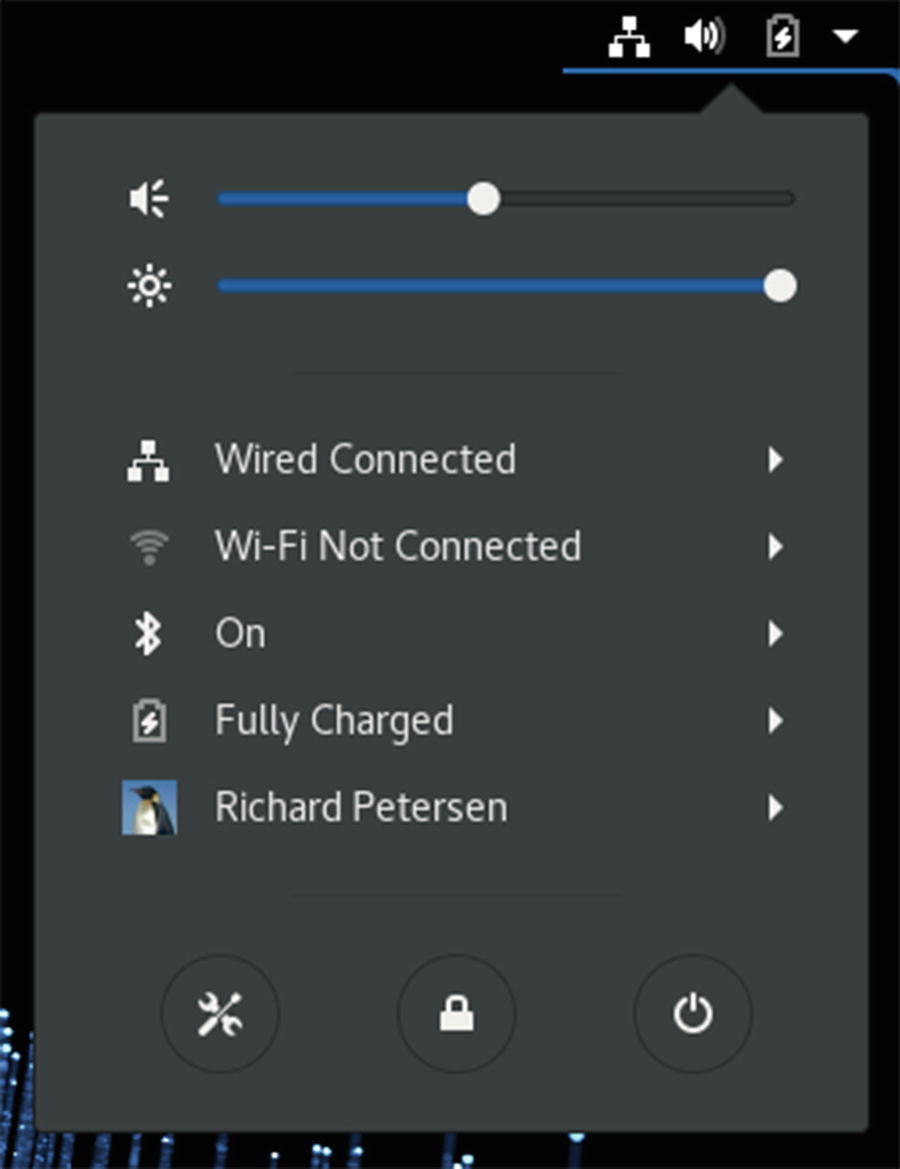
GNOME 3 activities overview
You can manually leave the Activities Overview mode at any time by pressing the Esc key.
Dash
The dash is a bar on the left side with icons for your favorite applications (see Figure 8-4). Initially, on the Fedora Workstation version, there is the Firefox Web browser, the Evolution mail application, the Rhythmbox music player, the Shotwell photo manager, the file manager, and software. To open an application from the dash, click its icon, or right-click and choose New Window from the pop-up menu. You can also click-and-drag the icon to the windows thumbnail area or to a workspace thumbnail on the right side.
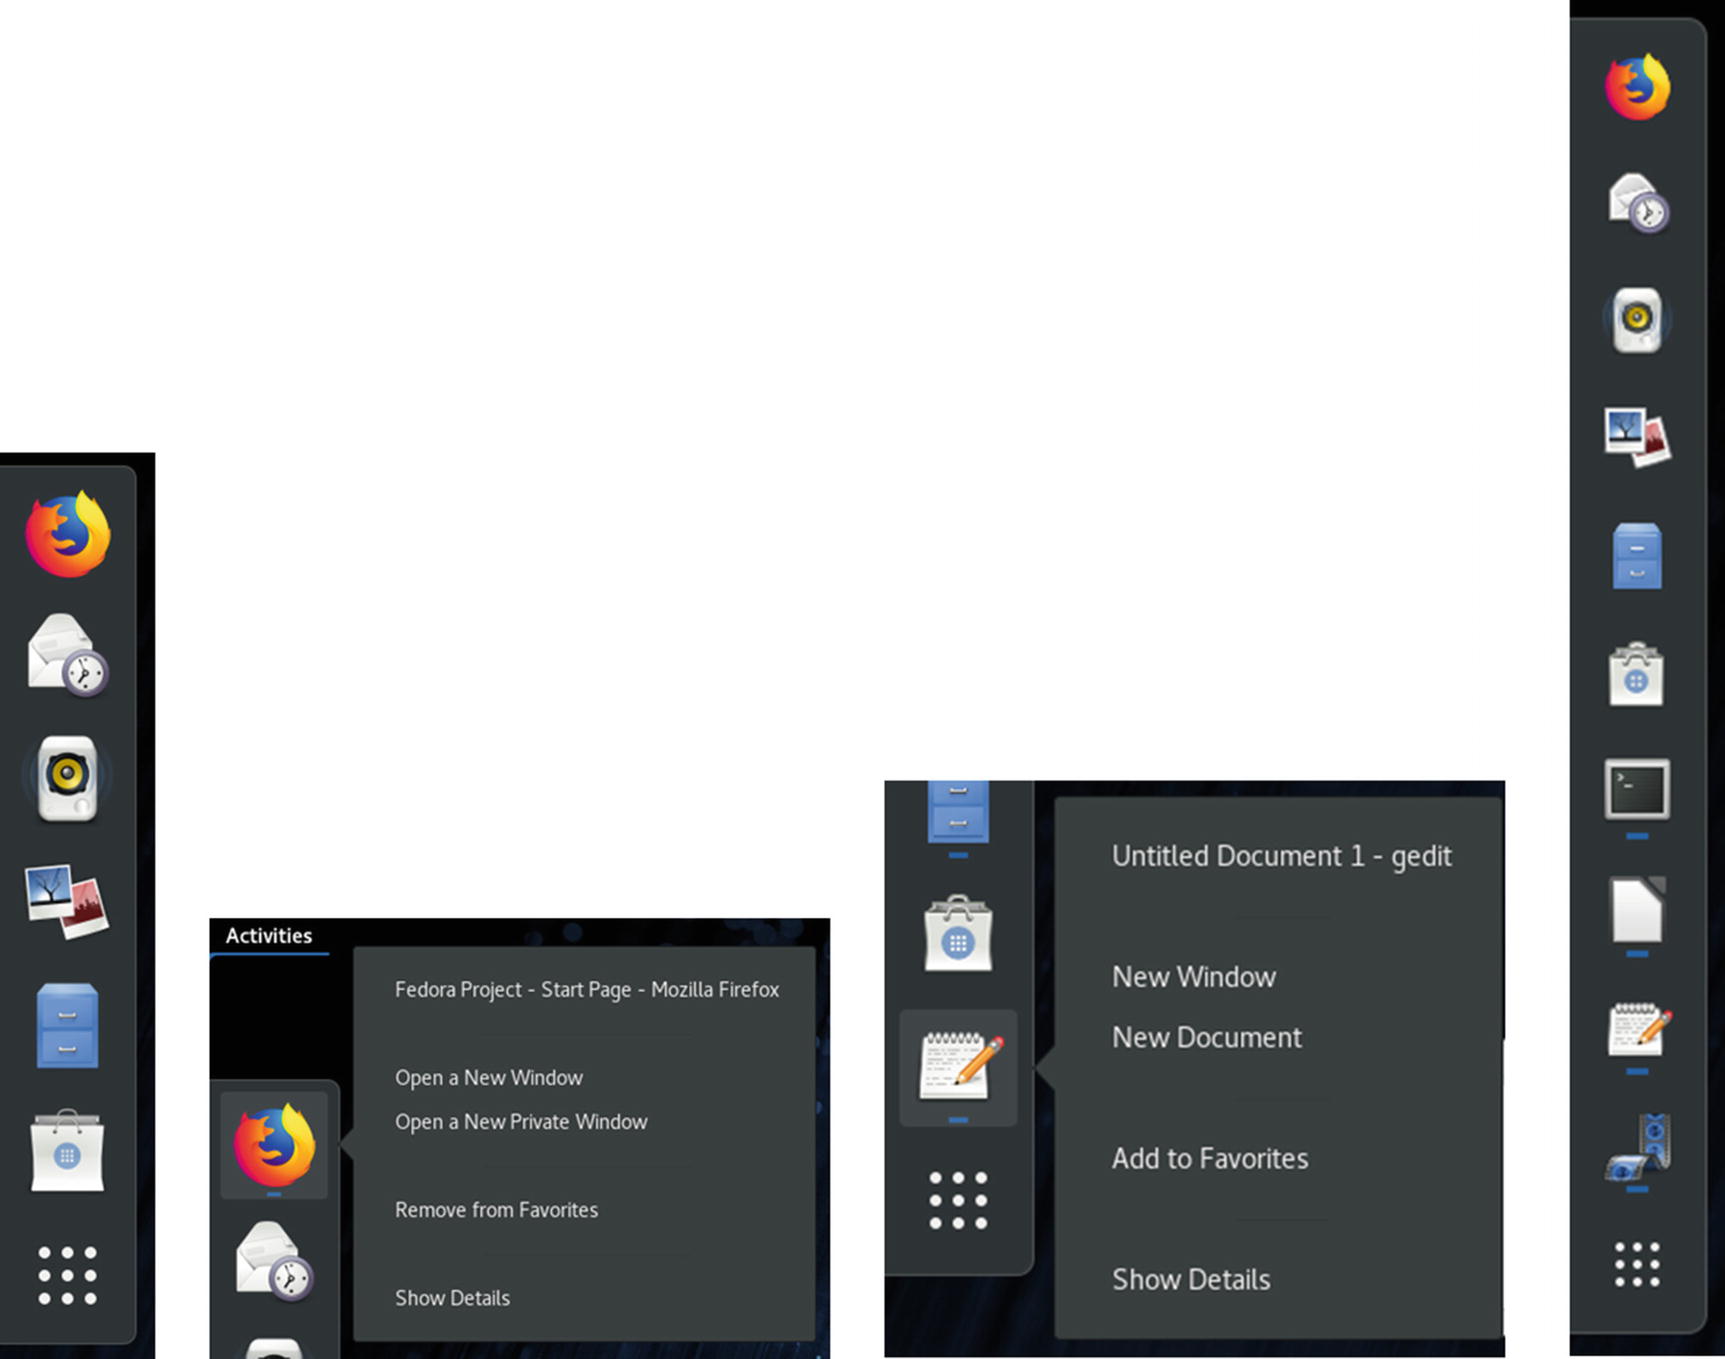
Overview dash with favorites and running applications
Window Thumbnails
Window thumbnails
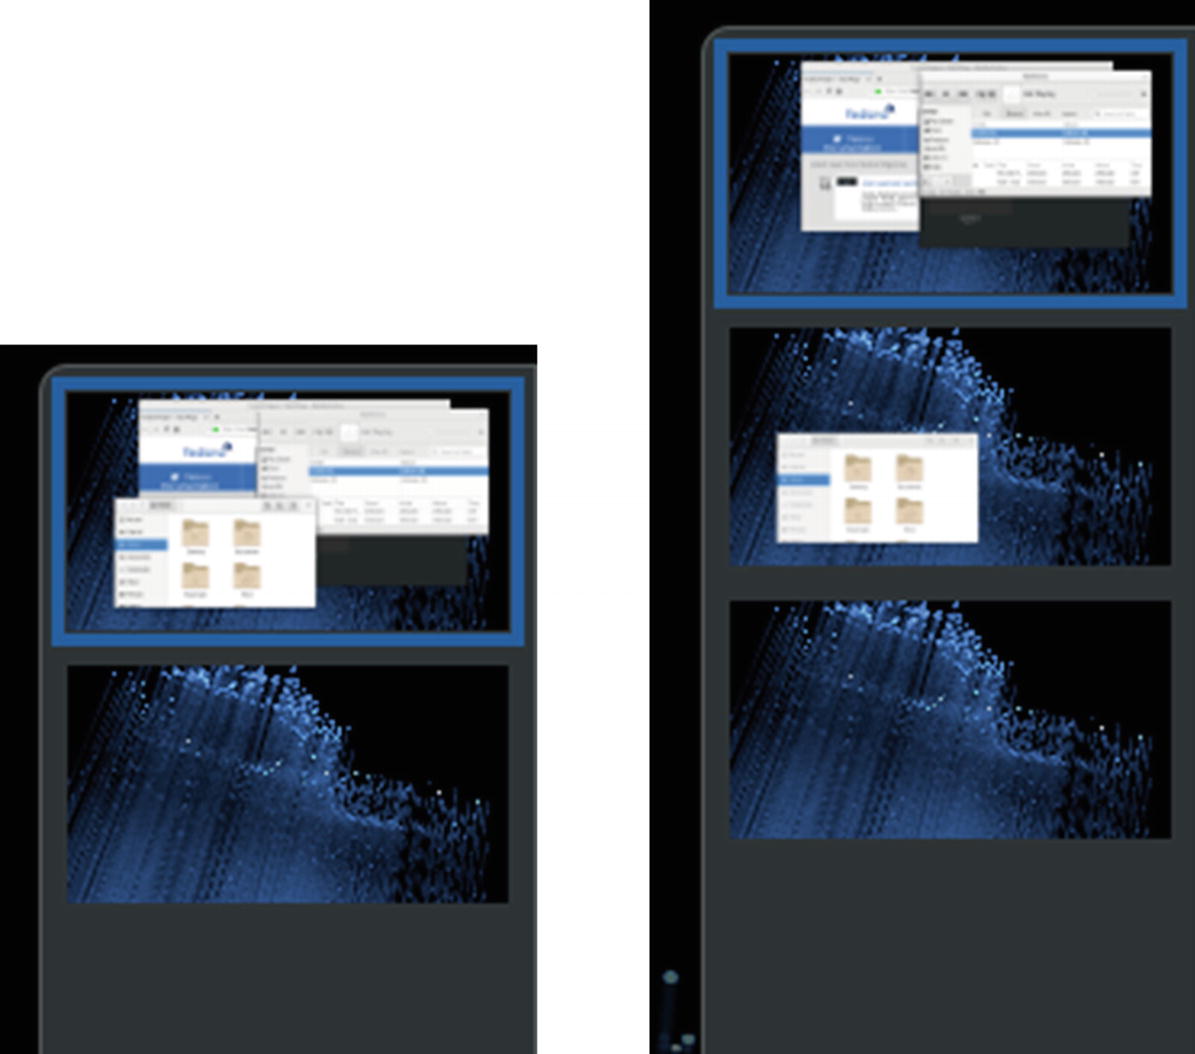
Workspace thumbnails
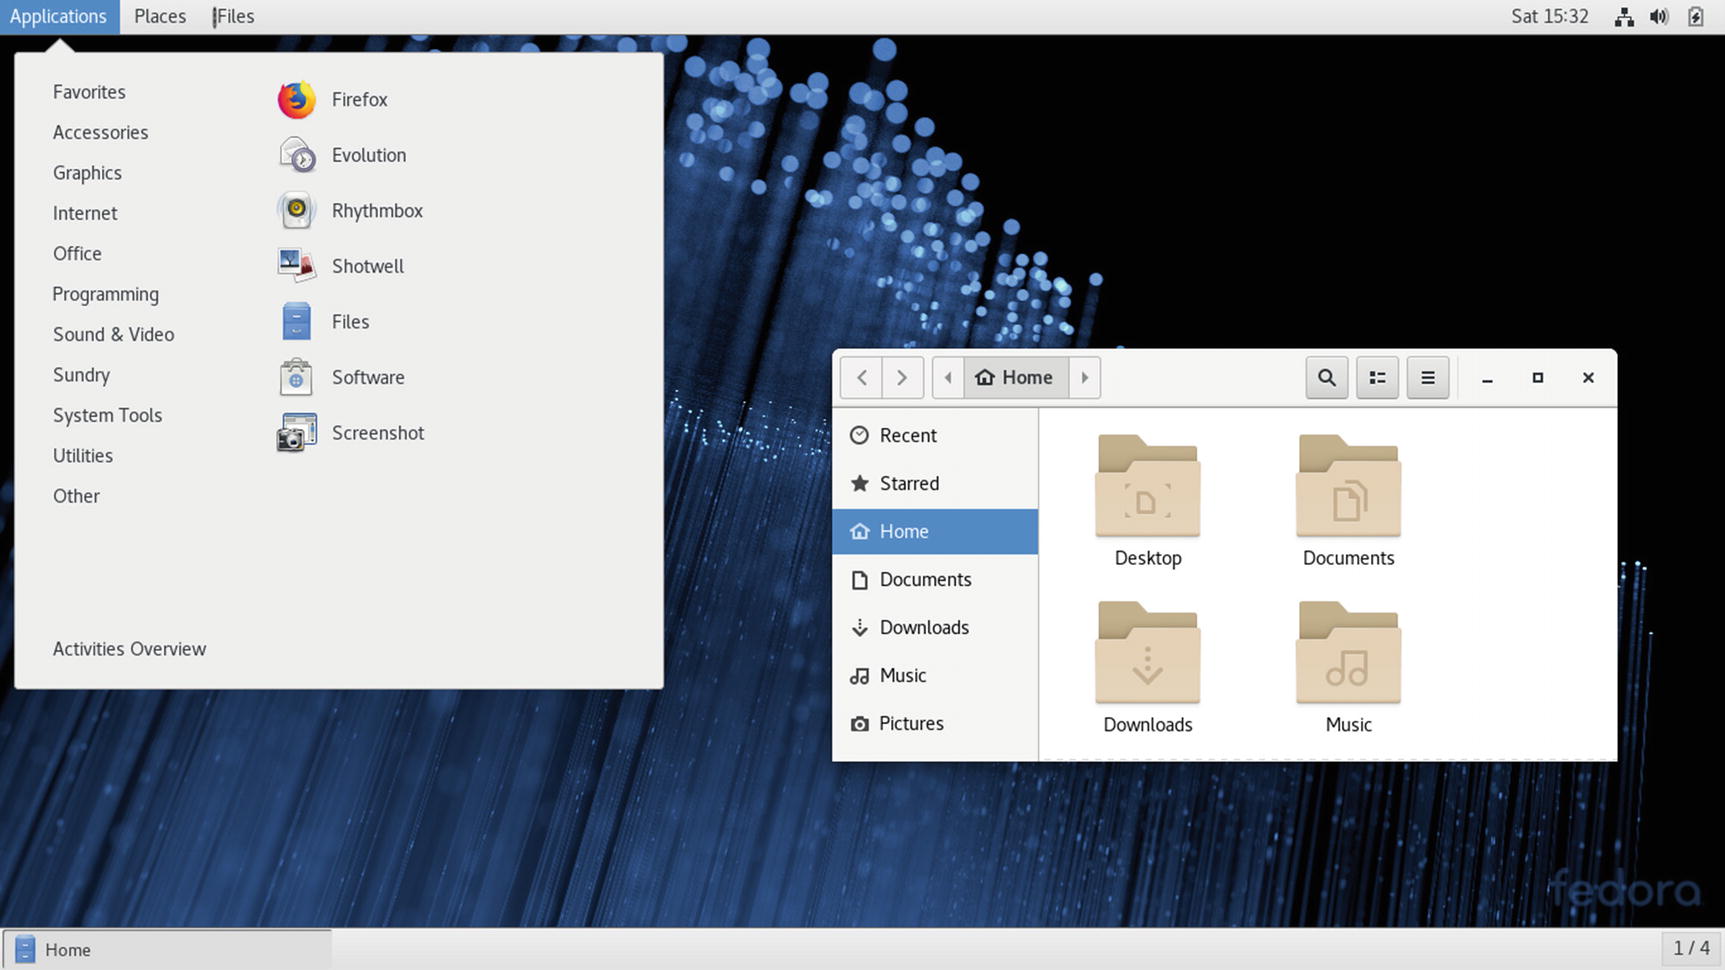
Applications Overview
Applications Overview
You can also open an application by dragging its icon to a workspace thumbnail on the right side, starting it in that workspace.
Also, as previously noted, to add an application as a favorite on the dash, you can simply drag its icon from the Applications Overview to the dash directly.
Activities Search
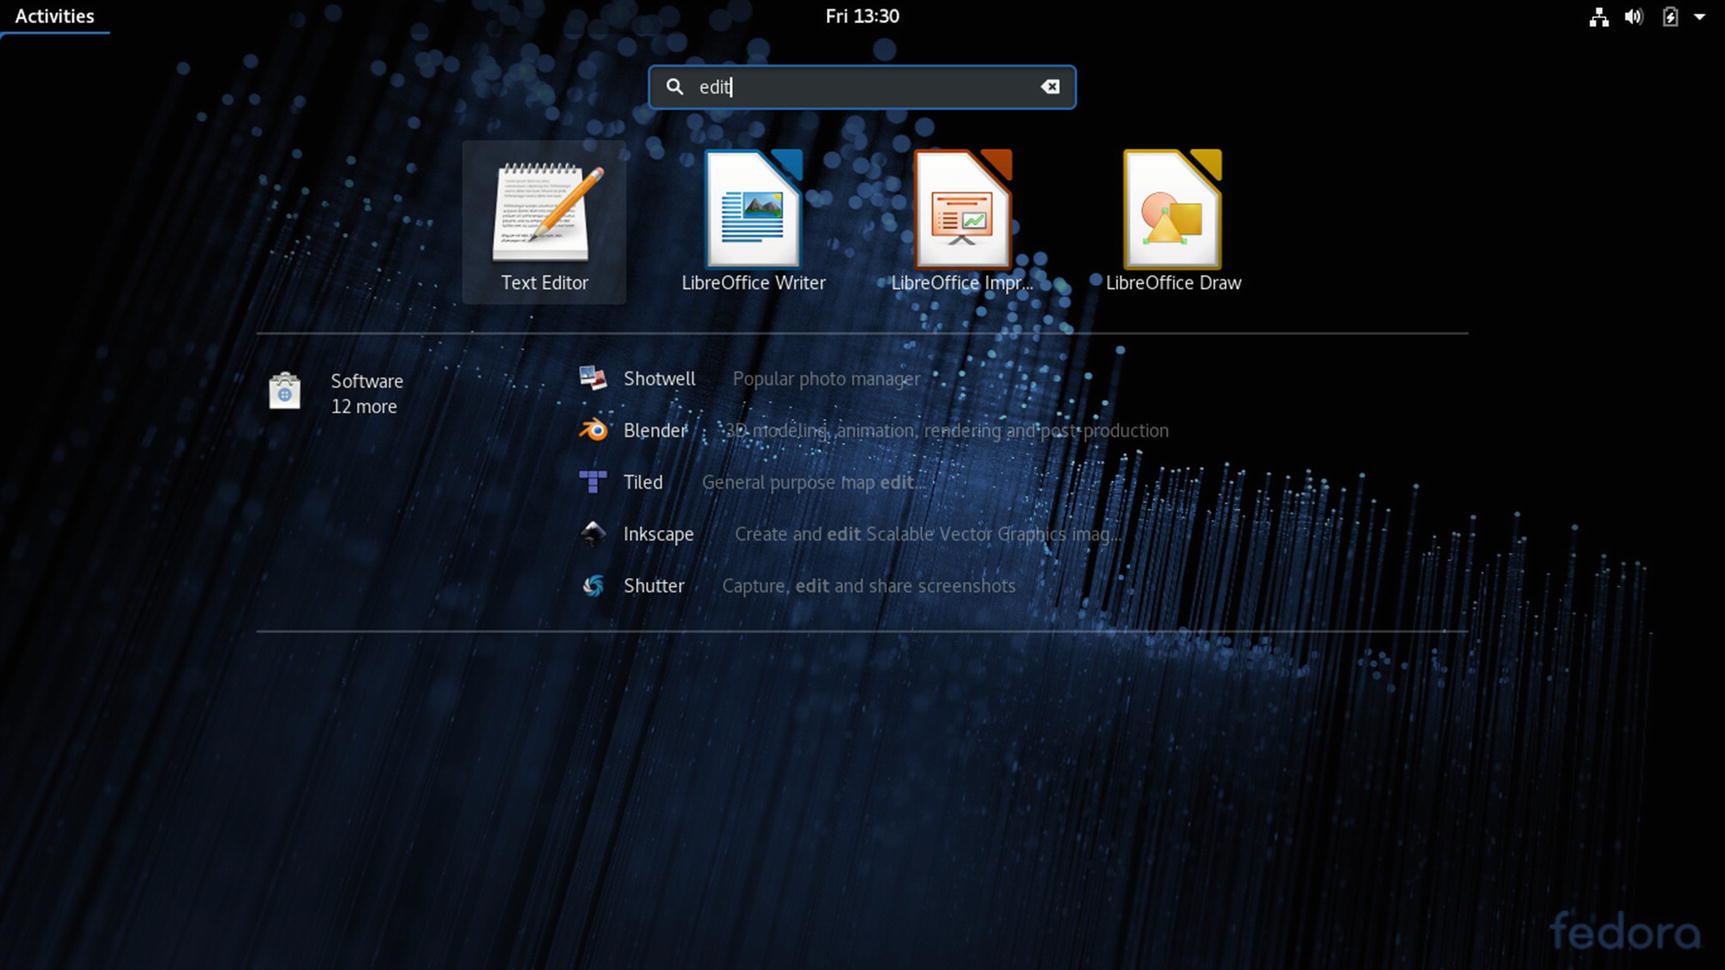
Activities search box

Activities: Search configuration
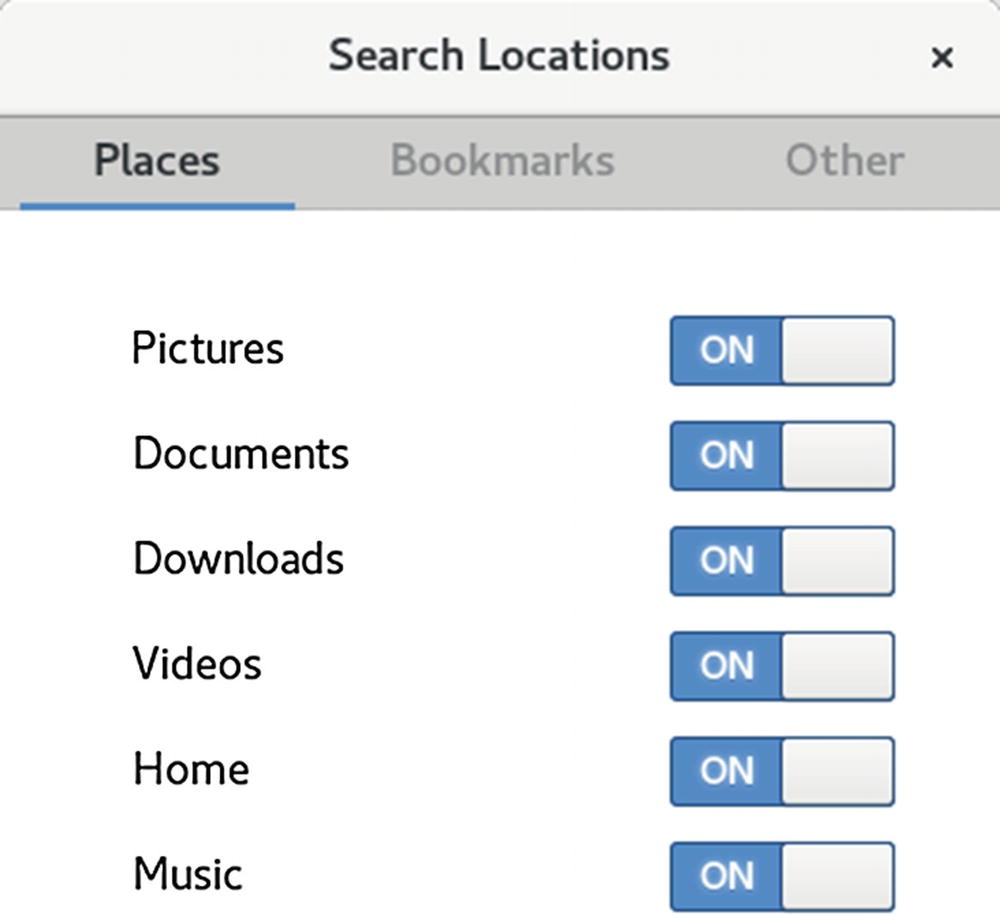
Activities: Search Locations
Managing Windows
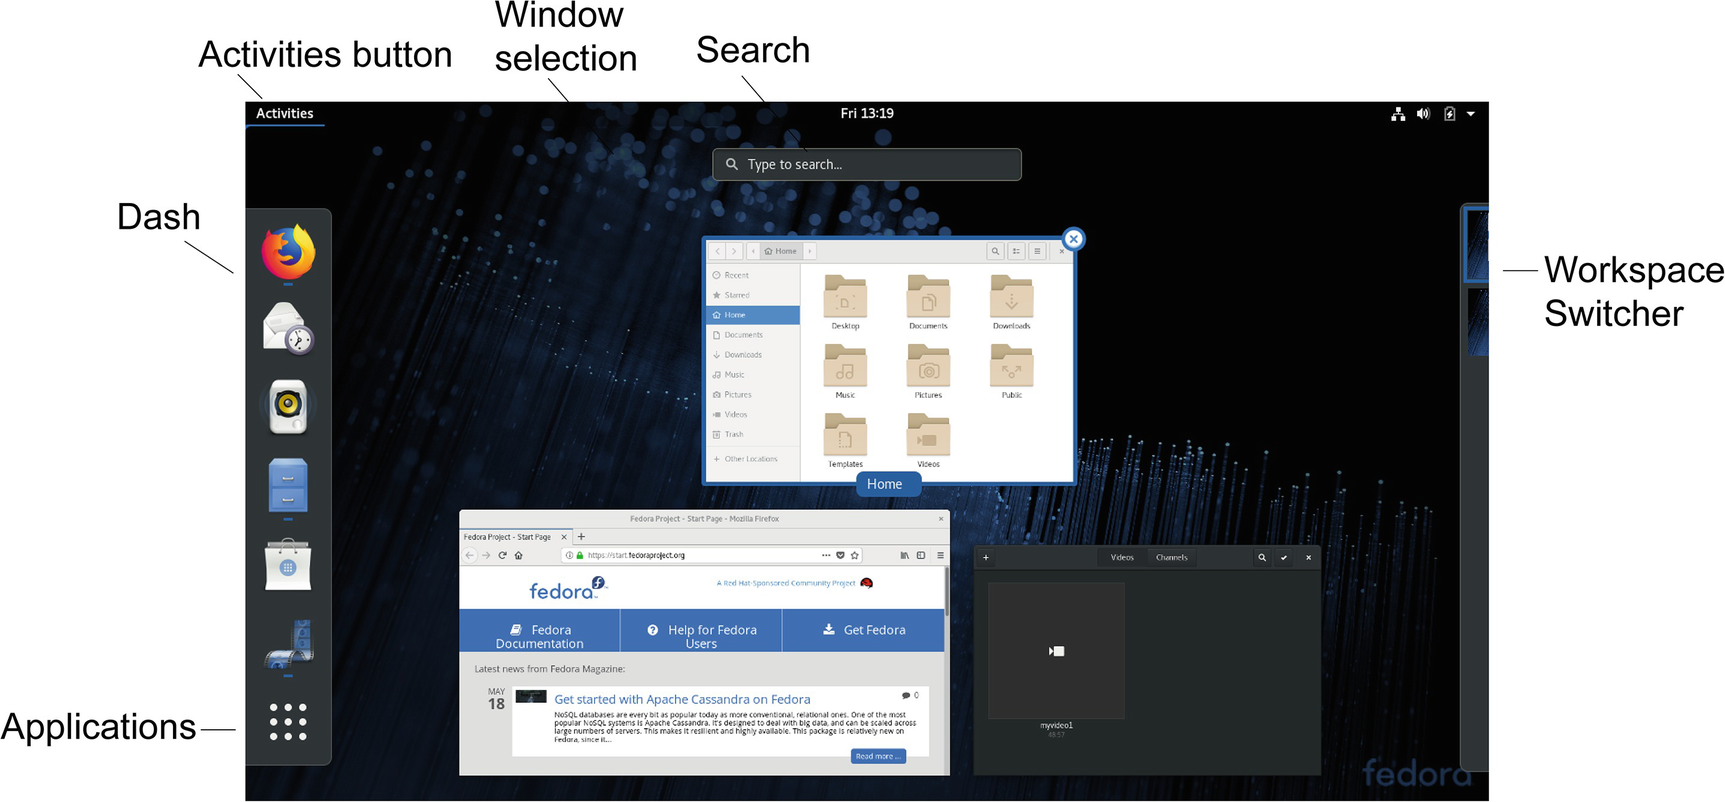
The title bar and the toolbar for GNOME windows have been combined into a single header bar, as shown in the following image of the file manager.

The minimize and maximize buttons have been dropped, and a single close button is always present. You can use Tweak Tool to add the minimize and maximize buttons if you wish. Some applications change the header bar if the function changes, presenting a different set of tools, as shown here for the GNOME Videos application.

Windows no longer have maximize and minimize buttons. These tasks can be carried out by a dragging operation or by double-clicking the header bar. To maximize a window, double-click its header bar or drag the header bar to the top edge of the screen. To minimize, drag the title away from the top edge of the screen. You can also use a window’s menu entries to maximize or minimize it. Right-click the header bar or press Alt+spacebar to display the window menu.
Window with Applications menu
To minimize an open window so that it no longer displays on the desktop, right-click the header bar and choose minimize. This will hide the window. You can then maximize the window later, using the window’s thumbnails on the activities overview (Activities button).
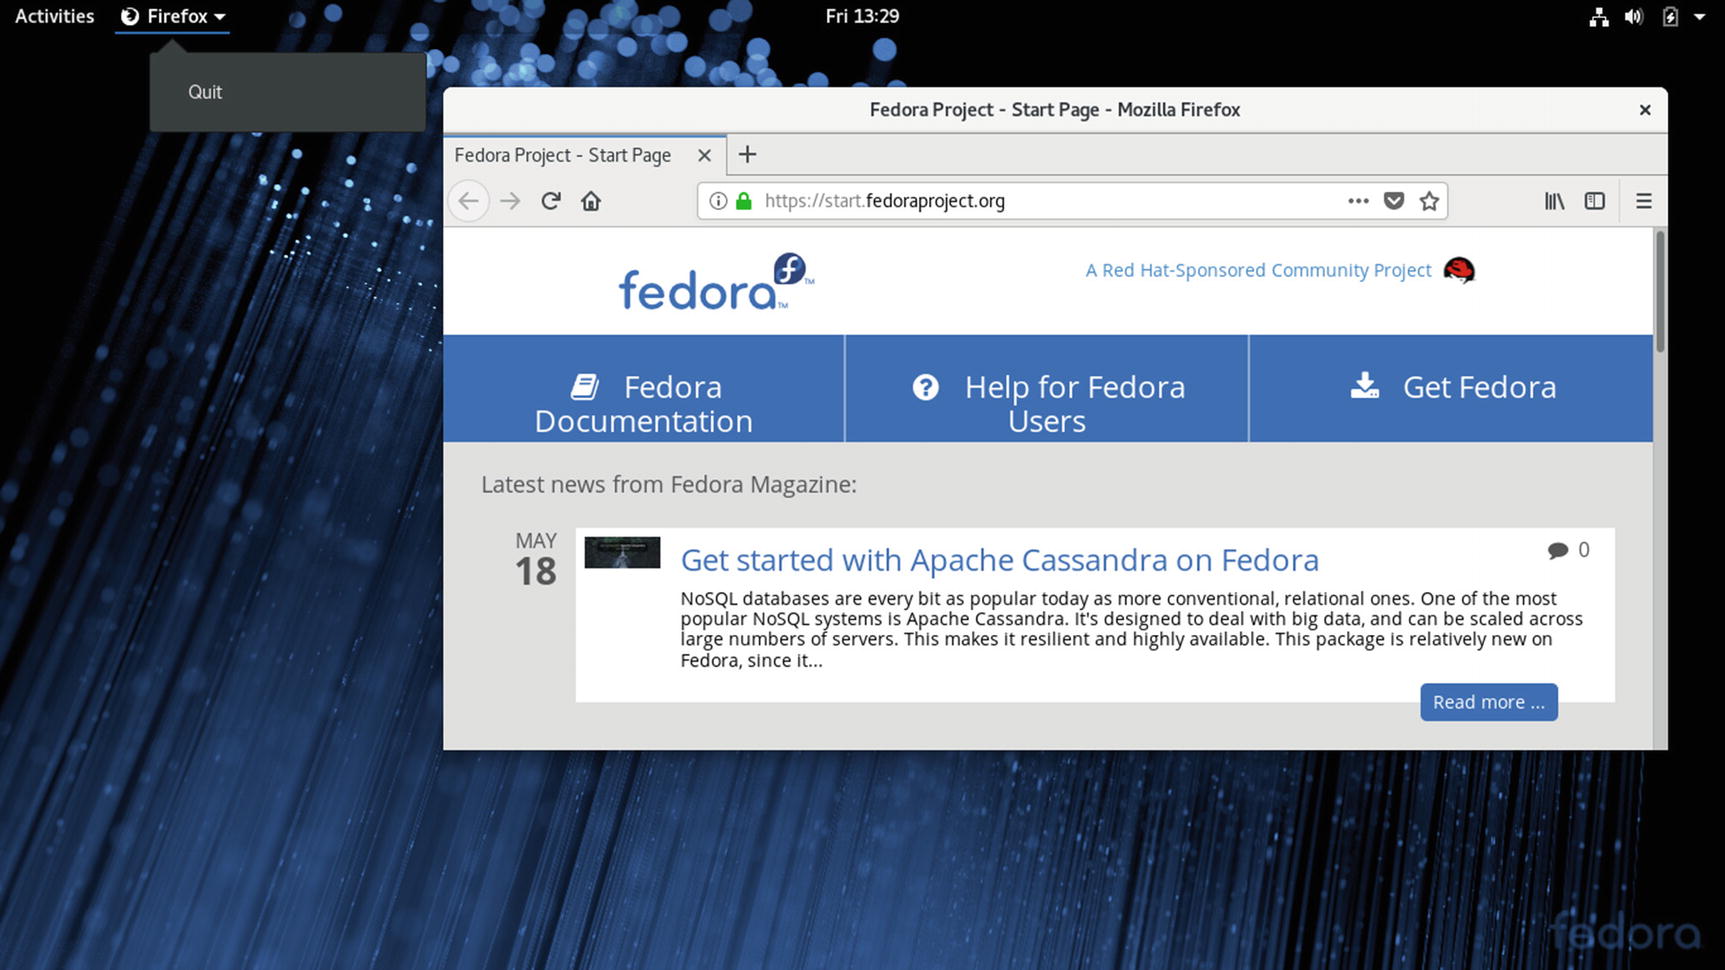
To close a window, click its close box or choose Close from the Window menu (right-click on title bar). Many currently selected windows have an Applications menu in the top bar to the left. Should an application not have a close button, you can click the Applications menu button on the top bar and choose the Quit entry (see Figure 8-11).
To tile a window, click-and-drag its header bar to the left or right edge of the screen. When your mouse reaches the edge of the screen, the window is tiled to take up that half of the screen. You can do the same with another window for the other edge, showing two windows side by side.
To resize a window, move the mouse to the edge or corner until it changes to an edge or corner mouse, then click-and-drag.
The scroll bar to the right also features fine scrolling. When scrolling through a large number of items, you can fine scroll to slow the scrolling when you reach a point to search. To activate fine scrolling, click and hold the scroll bar handle, or press the Shift key while scrolling.
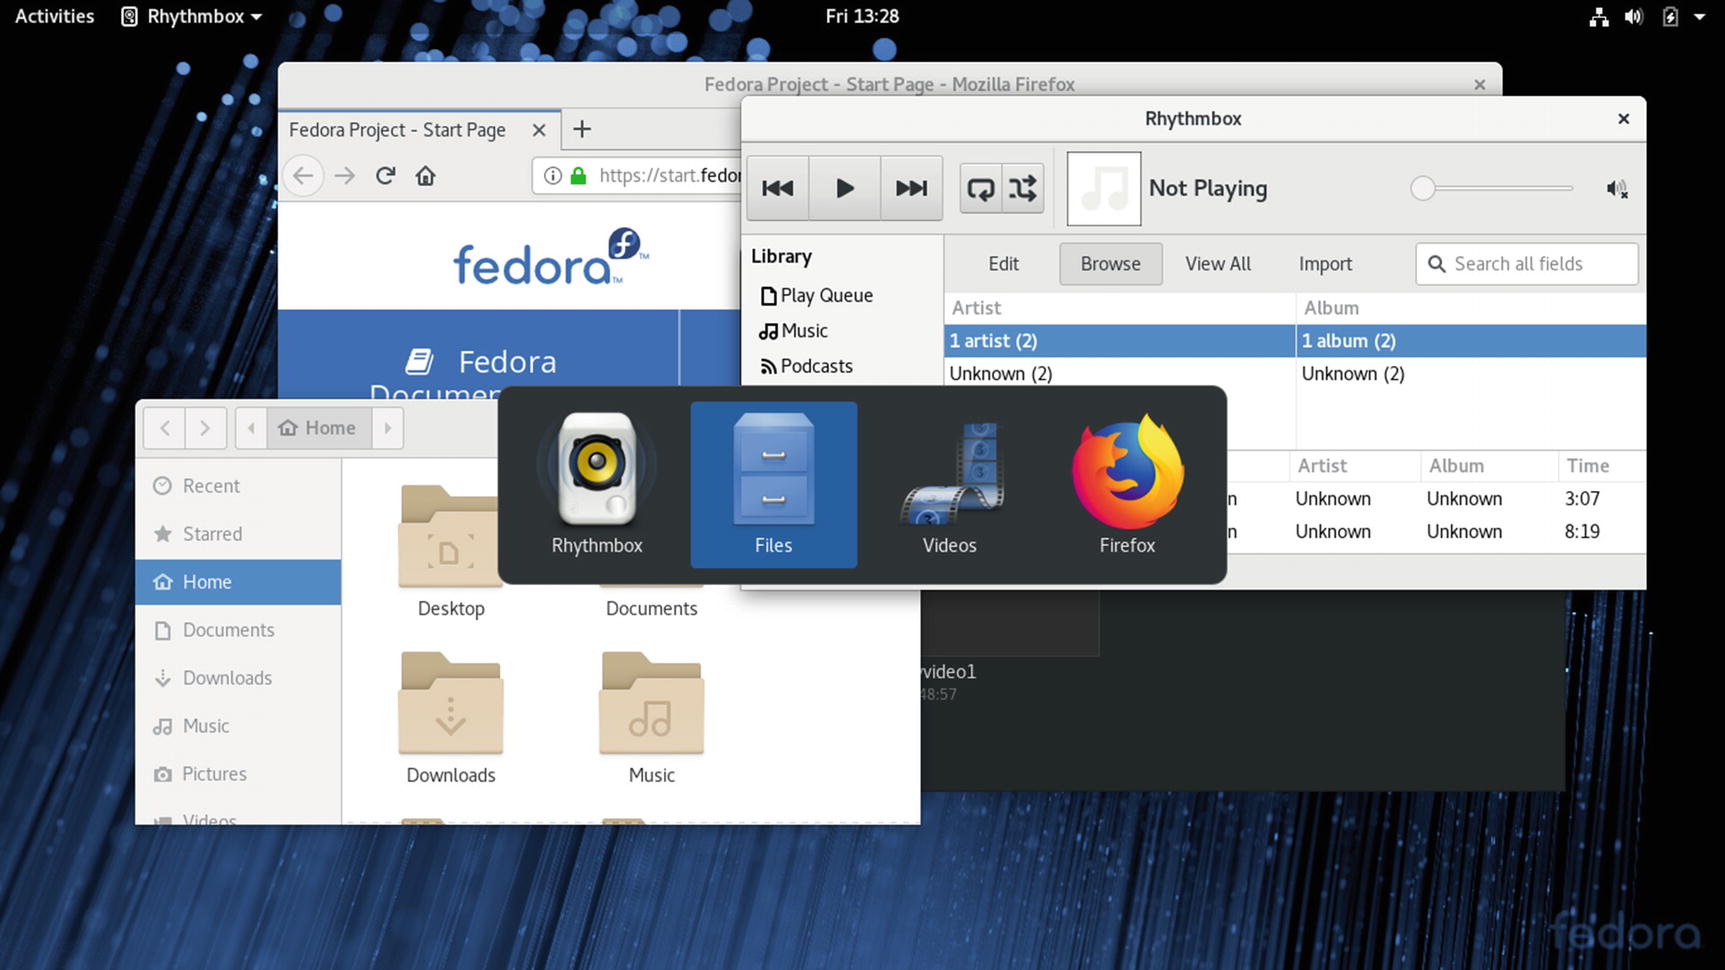
Window Switcher (Alt+Tab)
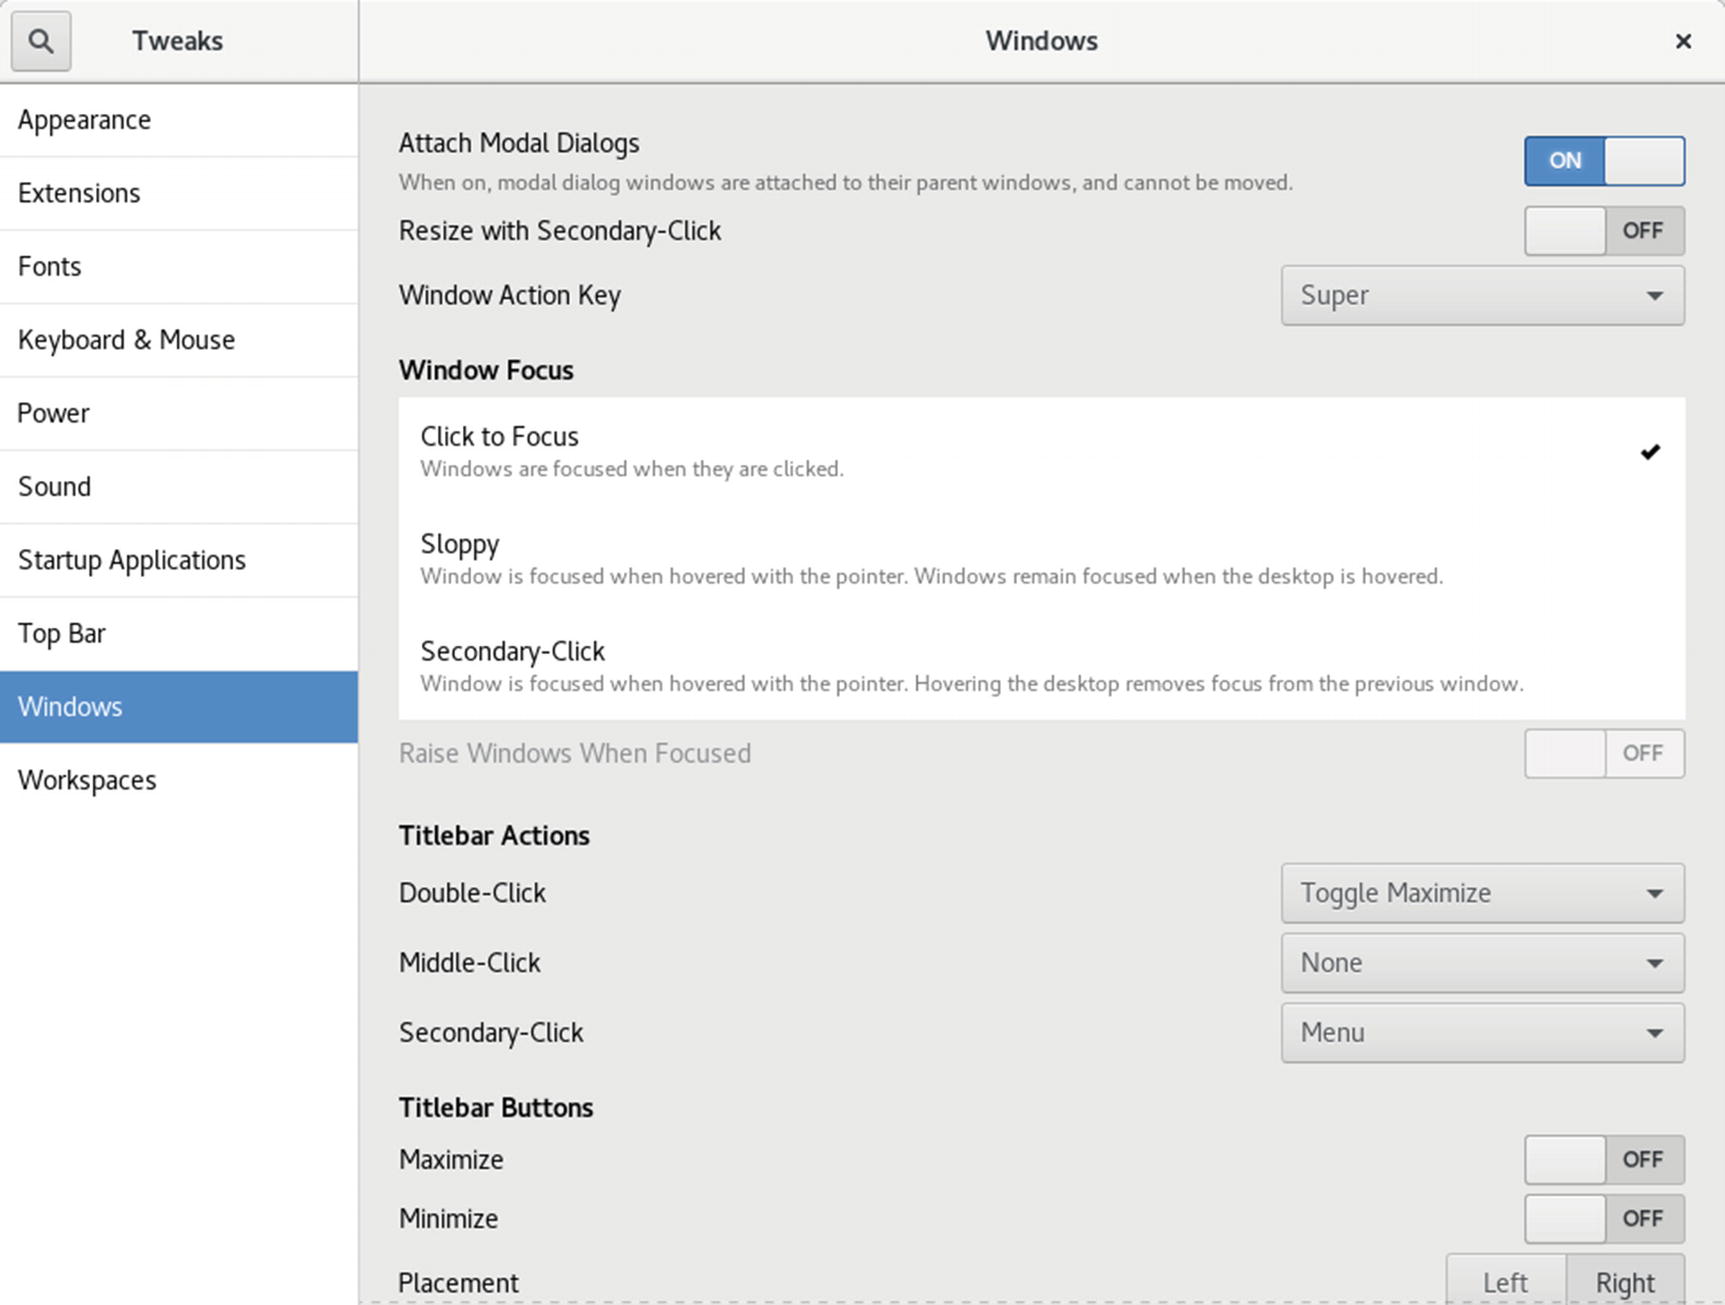
GNOME Tweak Tool: Windows (dialogs and title bar)
Workspaces
Workspace selector
Adding workspaces
To remove a workspace, close all its open windows or move the windows to other workspaces.
To move to another workspace, in the overview mode, move to the right edge to display the workspace selector, then click on the workspace you want. You can also use Ctrl+Alt with the up and down arrow keys to move to the next or previous workspaces.
To move a window to a workspace, on the Windows overview, click-and-drag the window to the workspace selector (right edge) and then to the workspace you want. You can also use the Window menu and choose Move to Workspace Down or Move to Workspace Up. You can also use Ctrl+Alt+Shift and the up or down arrow keys to move the window to the next workspace. Continue pressing the arrow to move it further should you have several workspaces.
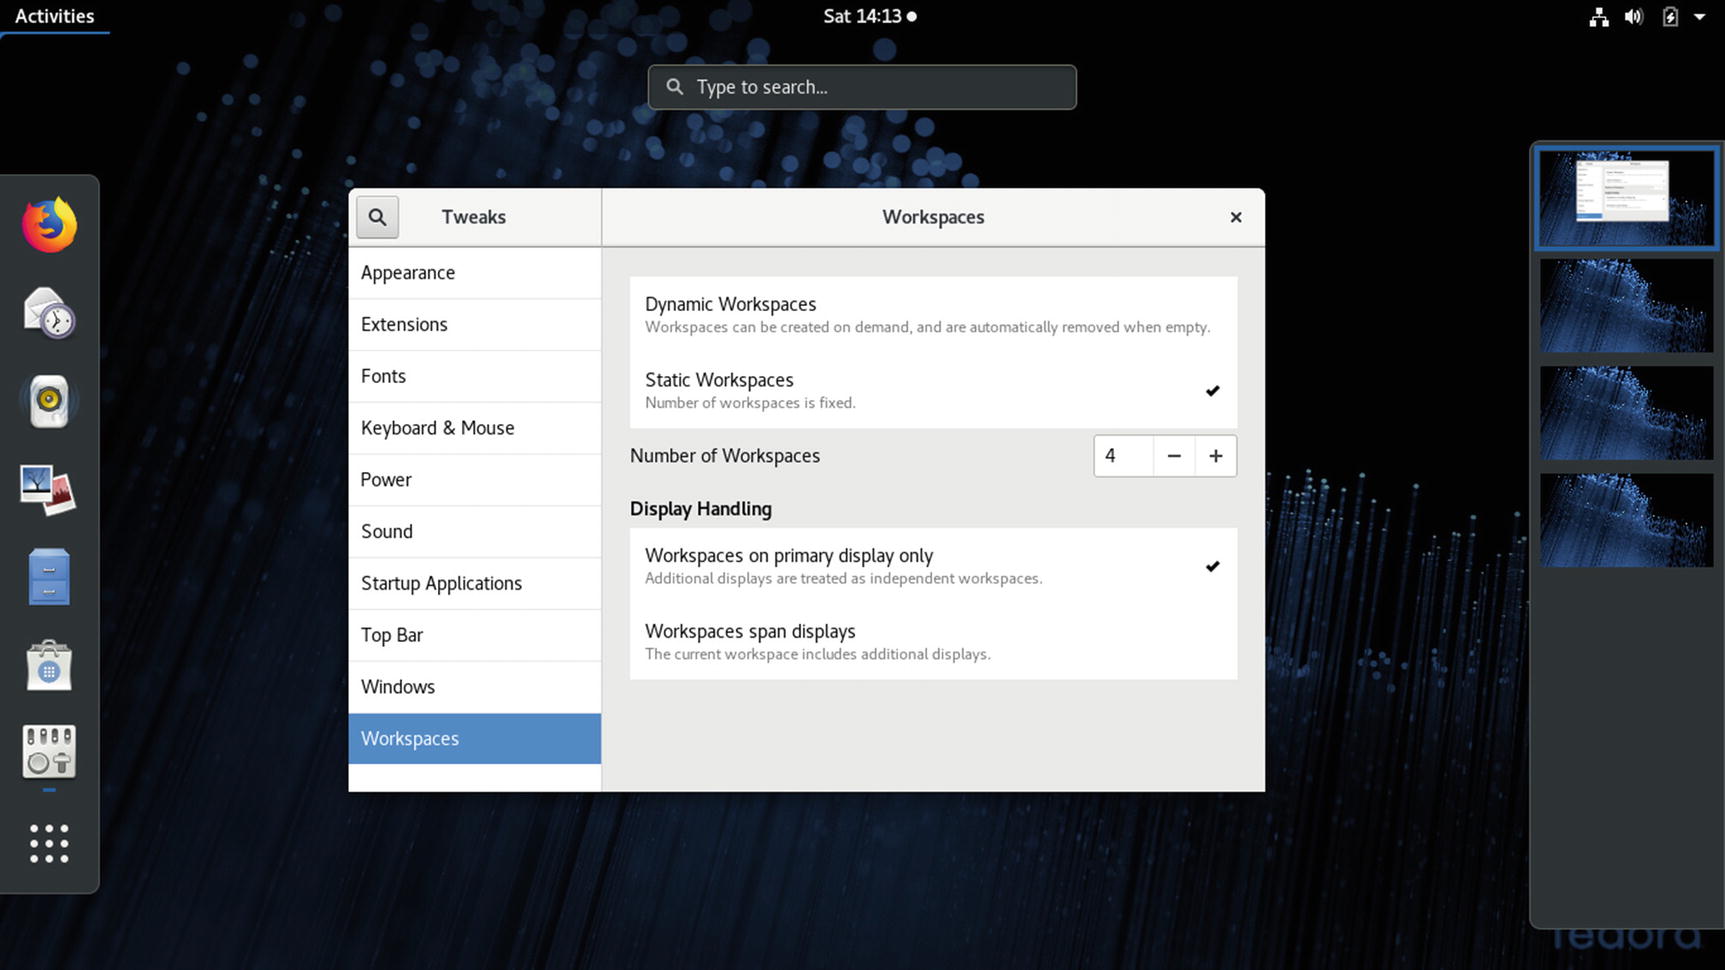
Static Workspaces: GNOME Tweak Tool Workspaces tab
Notifications and Message Dialog

Notifications
GNOME Customization with Tweak Tool: Themes, Icons, Fonts, Startup Applications, and Extensions
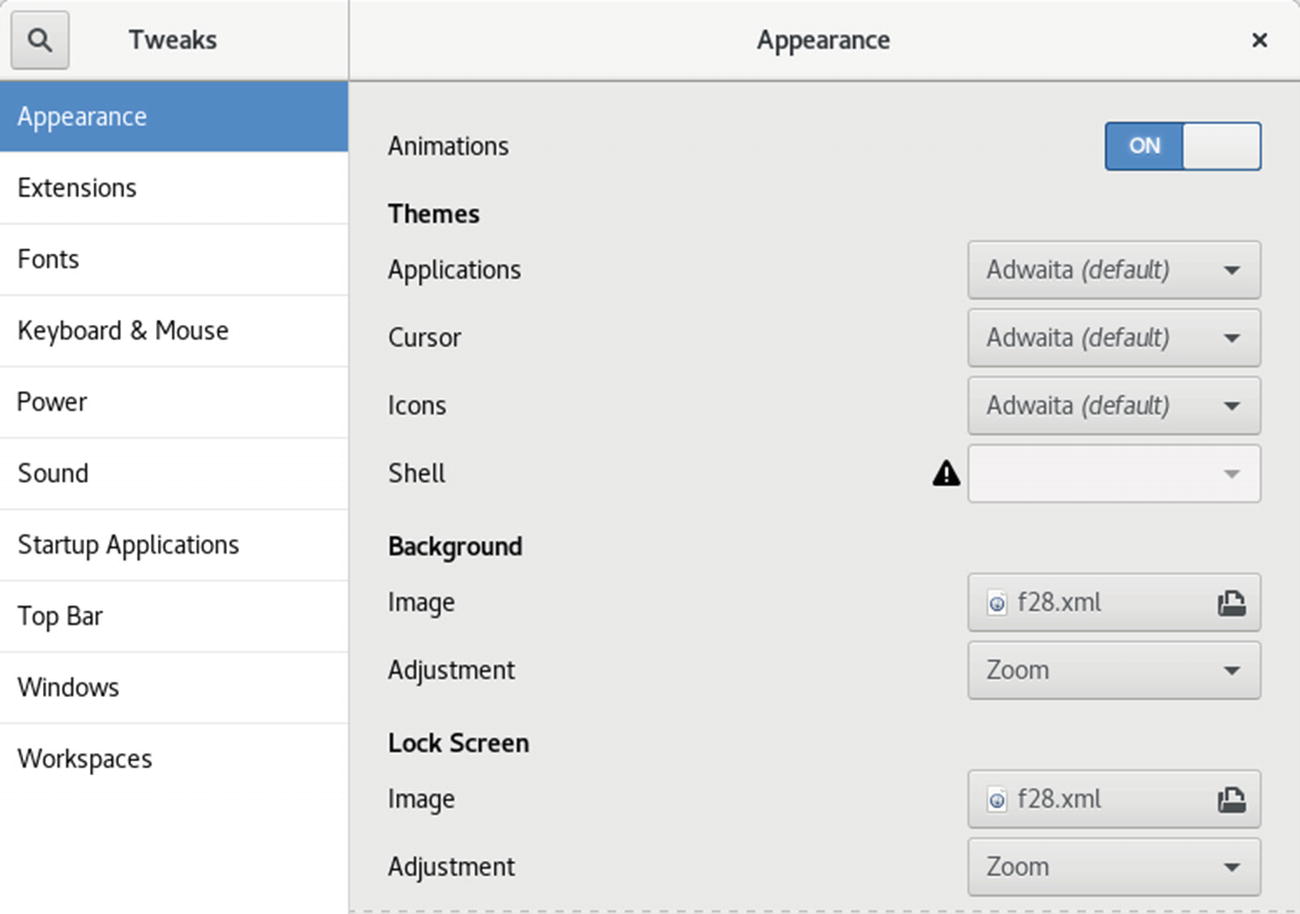
GNOME Tweak Tool: Appearance tab (themes)
The Appearance tab lets you set the theme for your windows, icons, and cursor. GNOME 3 uses the Adwaita Theme. This theme has a light and dark variant. The Global Light Theme is the default, but you can use the switch on the Appearance tab to enable the Global Dark Theme. The Global Dark Theme shades the background of windows to a dark gray, while text and button images appear in white.
Desktop fonts for window titles, interface (application or dialog text), documents, and monospace (terminal windows or code) can be changed in the Fonts tab. You can adjust the size of the font or change the font style. Clicking the font name opens a Pick a Font dialog from which you can choose a different font. The quality of text display can be further adjusted with Hinting and Antialiasing options. To simply increase or decrease the size of all fonts on your desktop interface, you can adjust the scaling factor.
At times, there may be certain applications that you want started up when you log in, such as the Gedit text editor, the Firefox web browser, or the Videos movie player. On the Startup Applications tab, you can choose the applications to start up. Click the plus (+) button to open an applications dialog from which you can choose an application to start up. Once added, you can later remove the application by clicking its Remove button.
Extensions function much as applets did in GNOME 2. They are third-party programs that enhance or modify the GNOME desktop, such as a window list, workspace indicator, a removable drive menu, and an applications menu. Extensions appear on the top bar or, in the case of the window list, in an added bottom bar. Installed extensions are listed on the Extensions tab of Tweak Tool, where you can turn them on or off.
GNOME Desktop Help
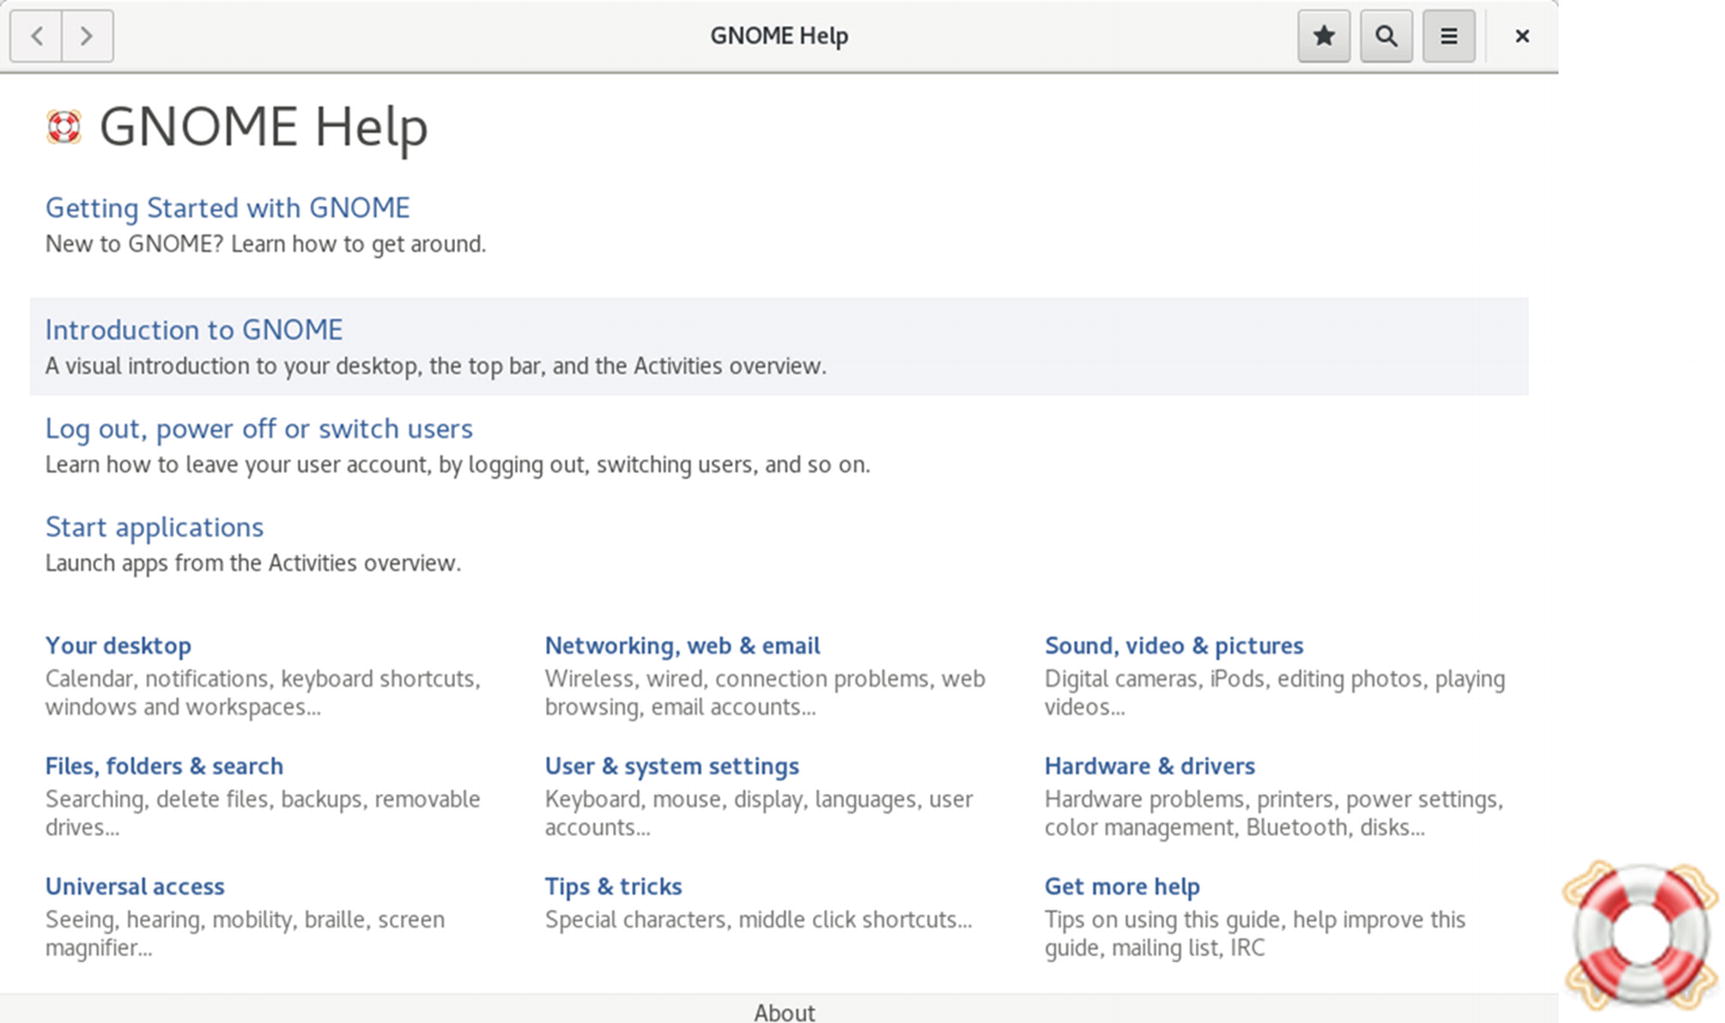
GNOME Help browser
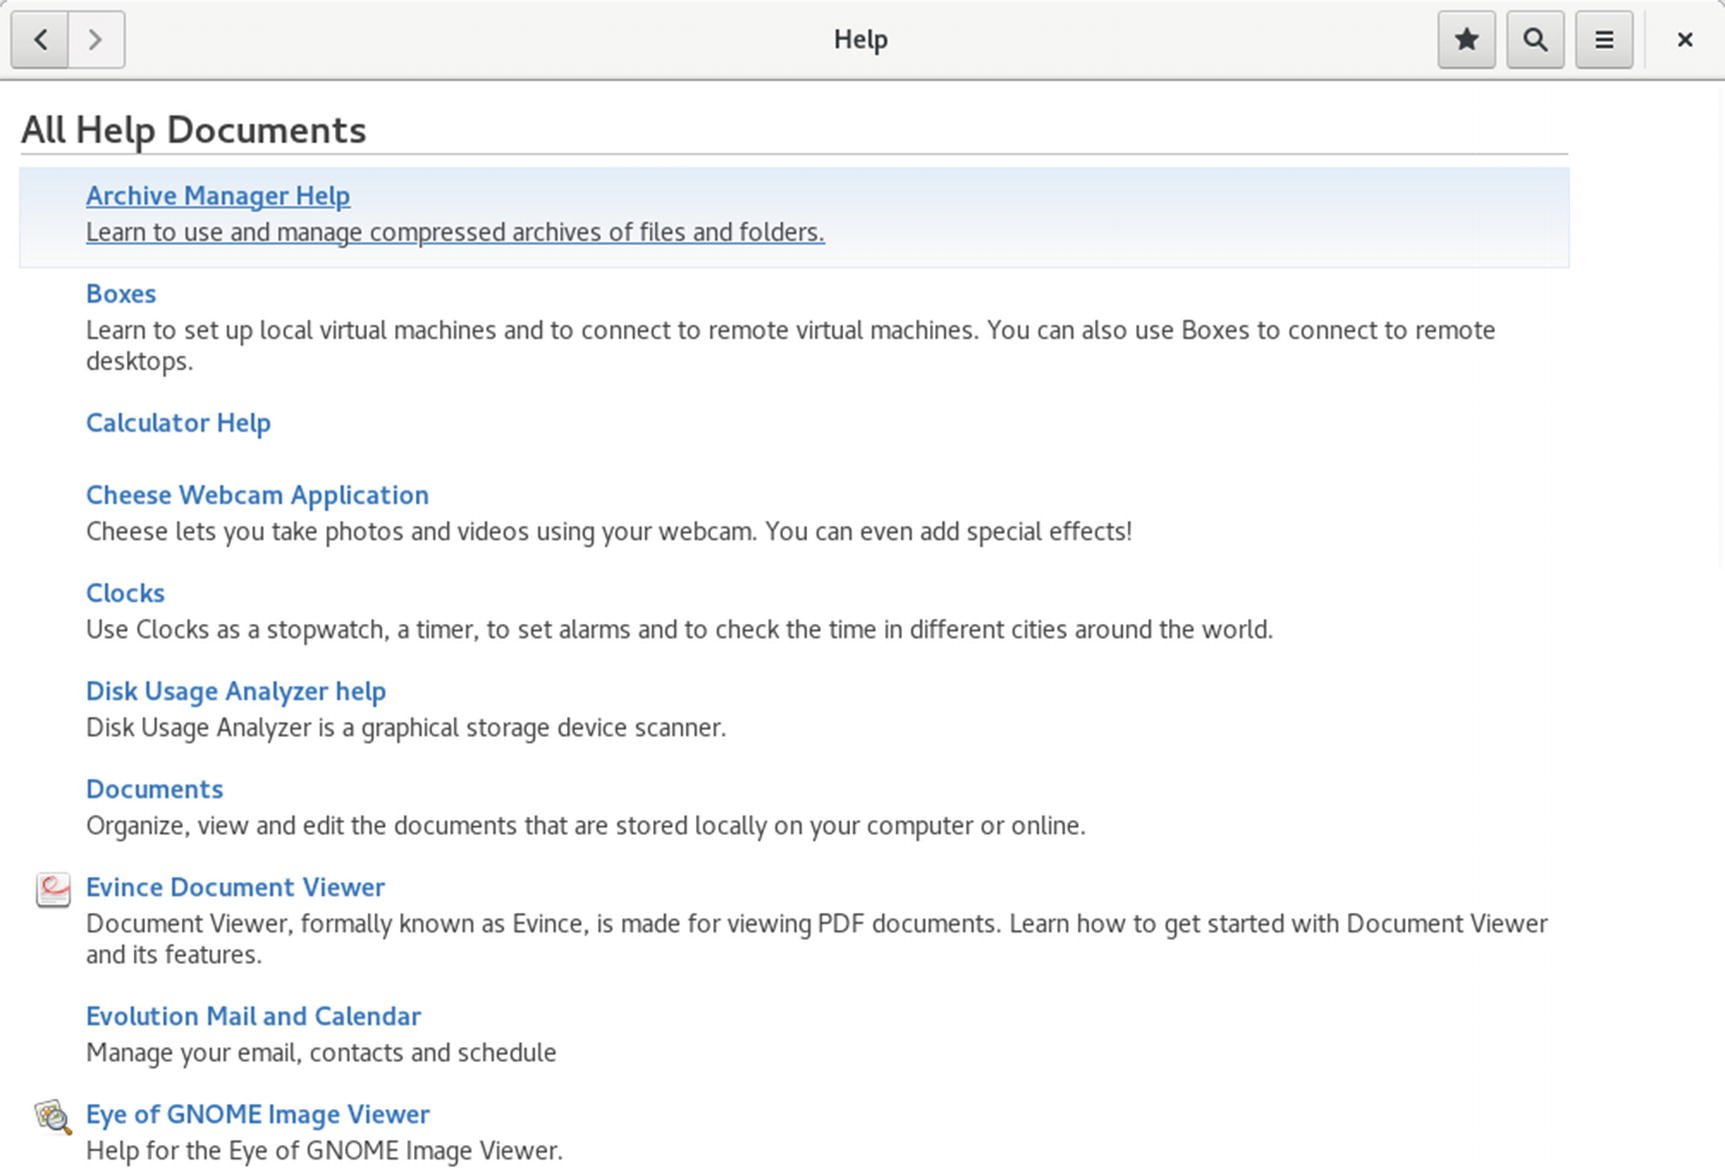
GNOME Help: All Documents
The GNOME Files File Manager
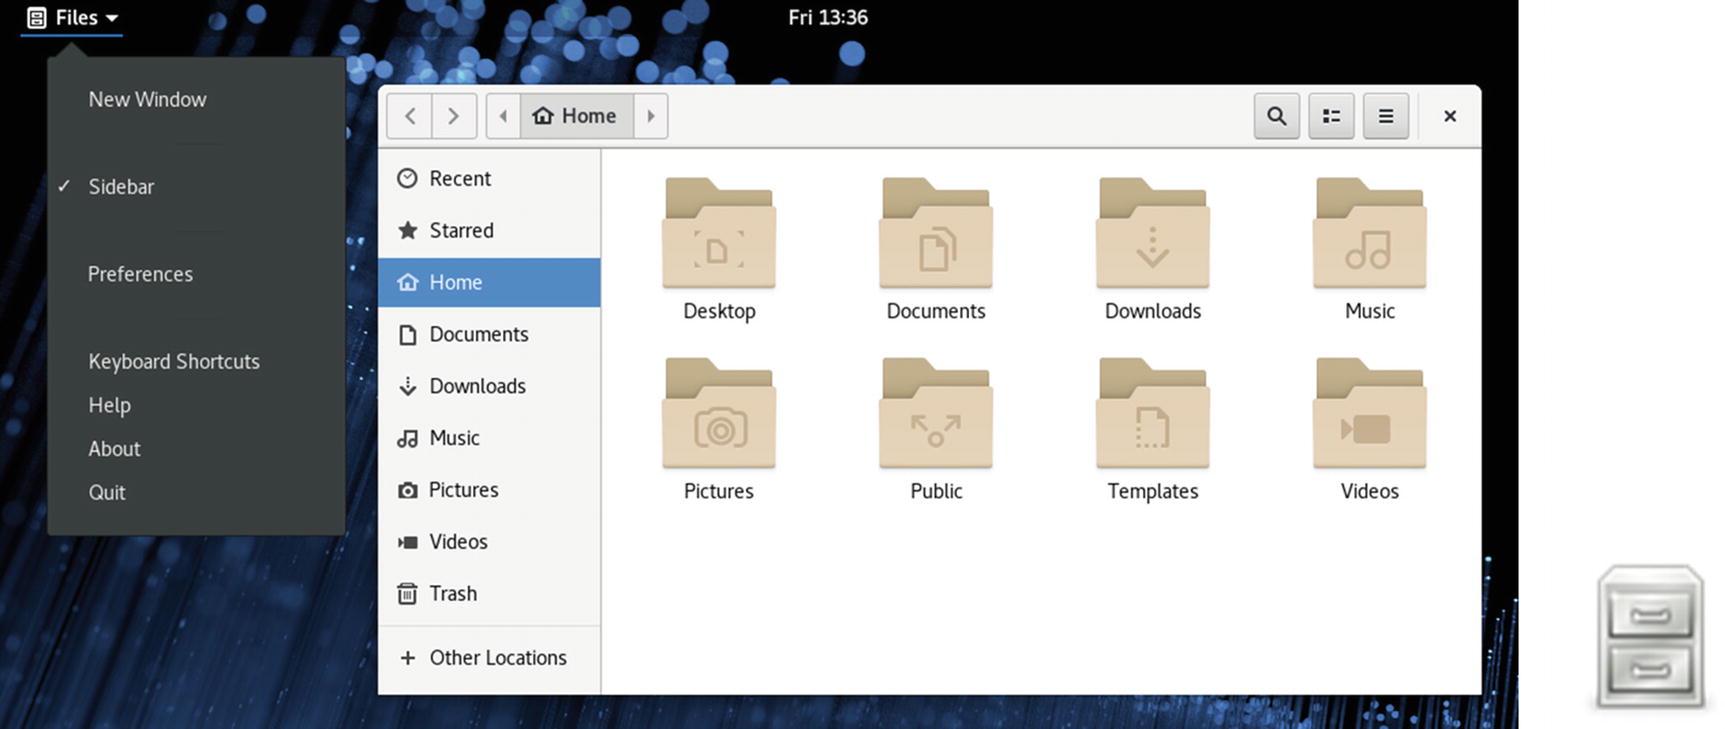
File manager with Files applications menu
File Manager GNOME Menu
Menu Item | Description |
|---|---|
New Window | Open a new file manager window |
Sidebar | Toggle display of the file manager sidebar |
Preferences | Open the file manager Preferences dialog |
Keyboard Shortcuts | Display a dialog listing keyboard shortcuts |
Help | Open GNOME desktop help |
About | Current GNOME release |
Quit | Close the file manager |
Home Folder Subfolders
GNOME uses the Common User Directory Structure (xdg-user-dirs at http://freedesktop.org ) to set up subfolders in the user home directory. Folders include Documents, Music, Pictures, Downloads, and Videos. These localized user folders are used as defaults by many desktop applications. Users can change their folder names or place them within each other using the GNOME file browser. For example, Music can be moved into Videos or Documents into Pictures. Local configuration is held in the .config/user-dirs.dirs file (.config is a hidden directory). System-wide defaults are set up in the /etc/xdg/user-dirs.defaults file. You can edit the local configuration using a text editor and change the directories for the current ones.
File Manager Windows
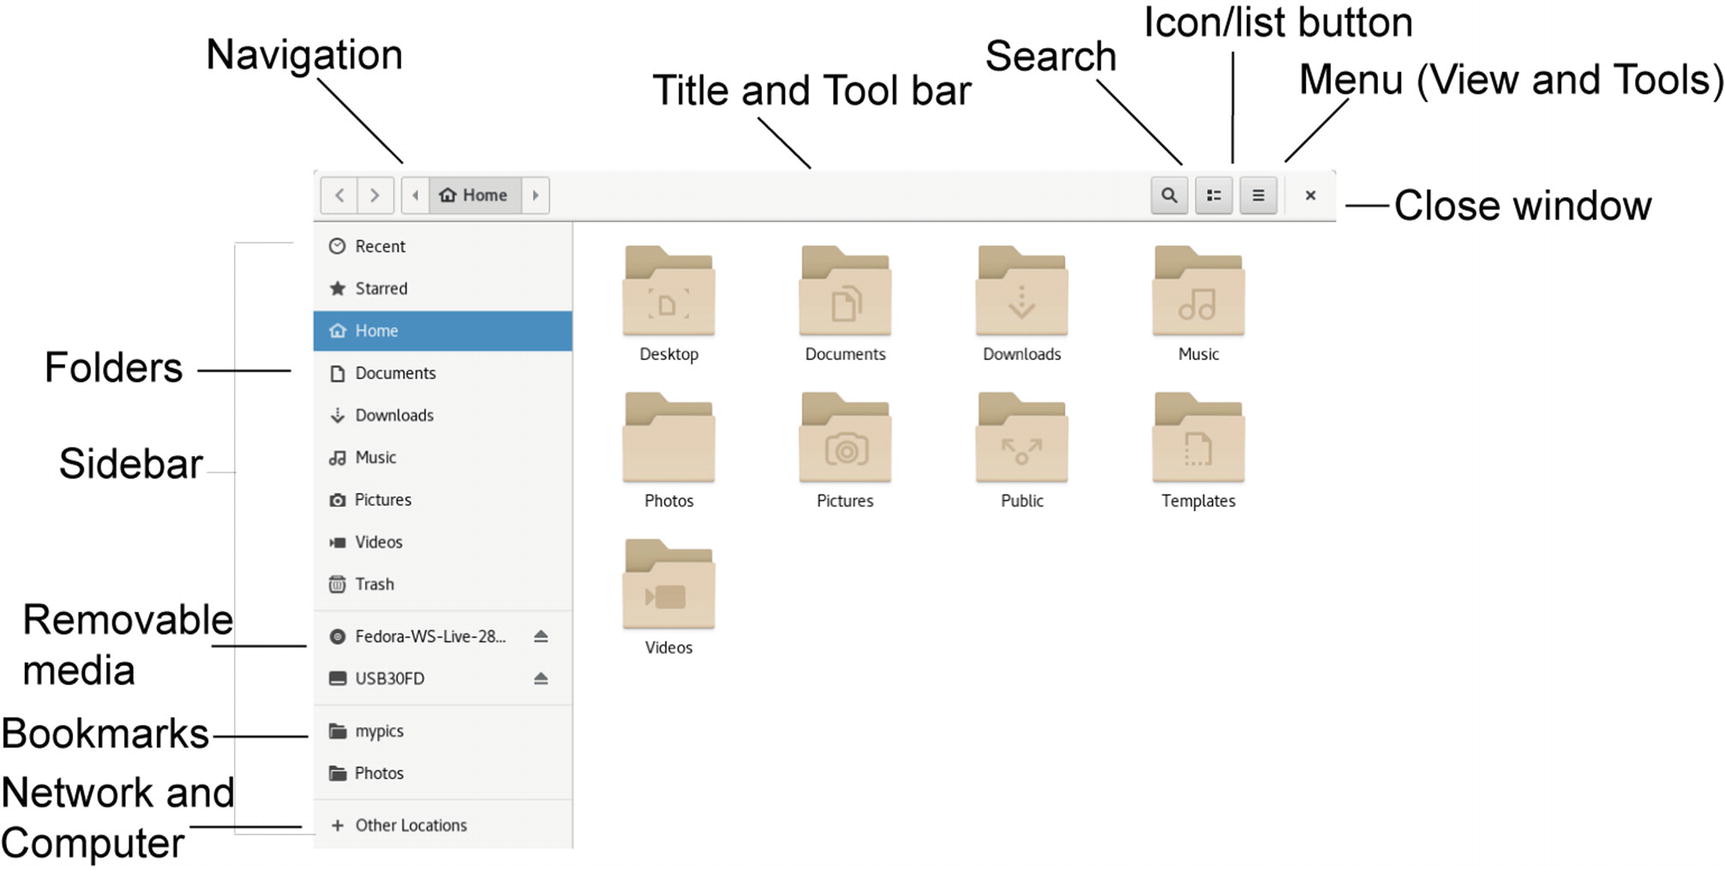
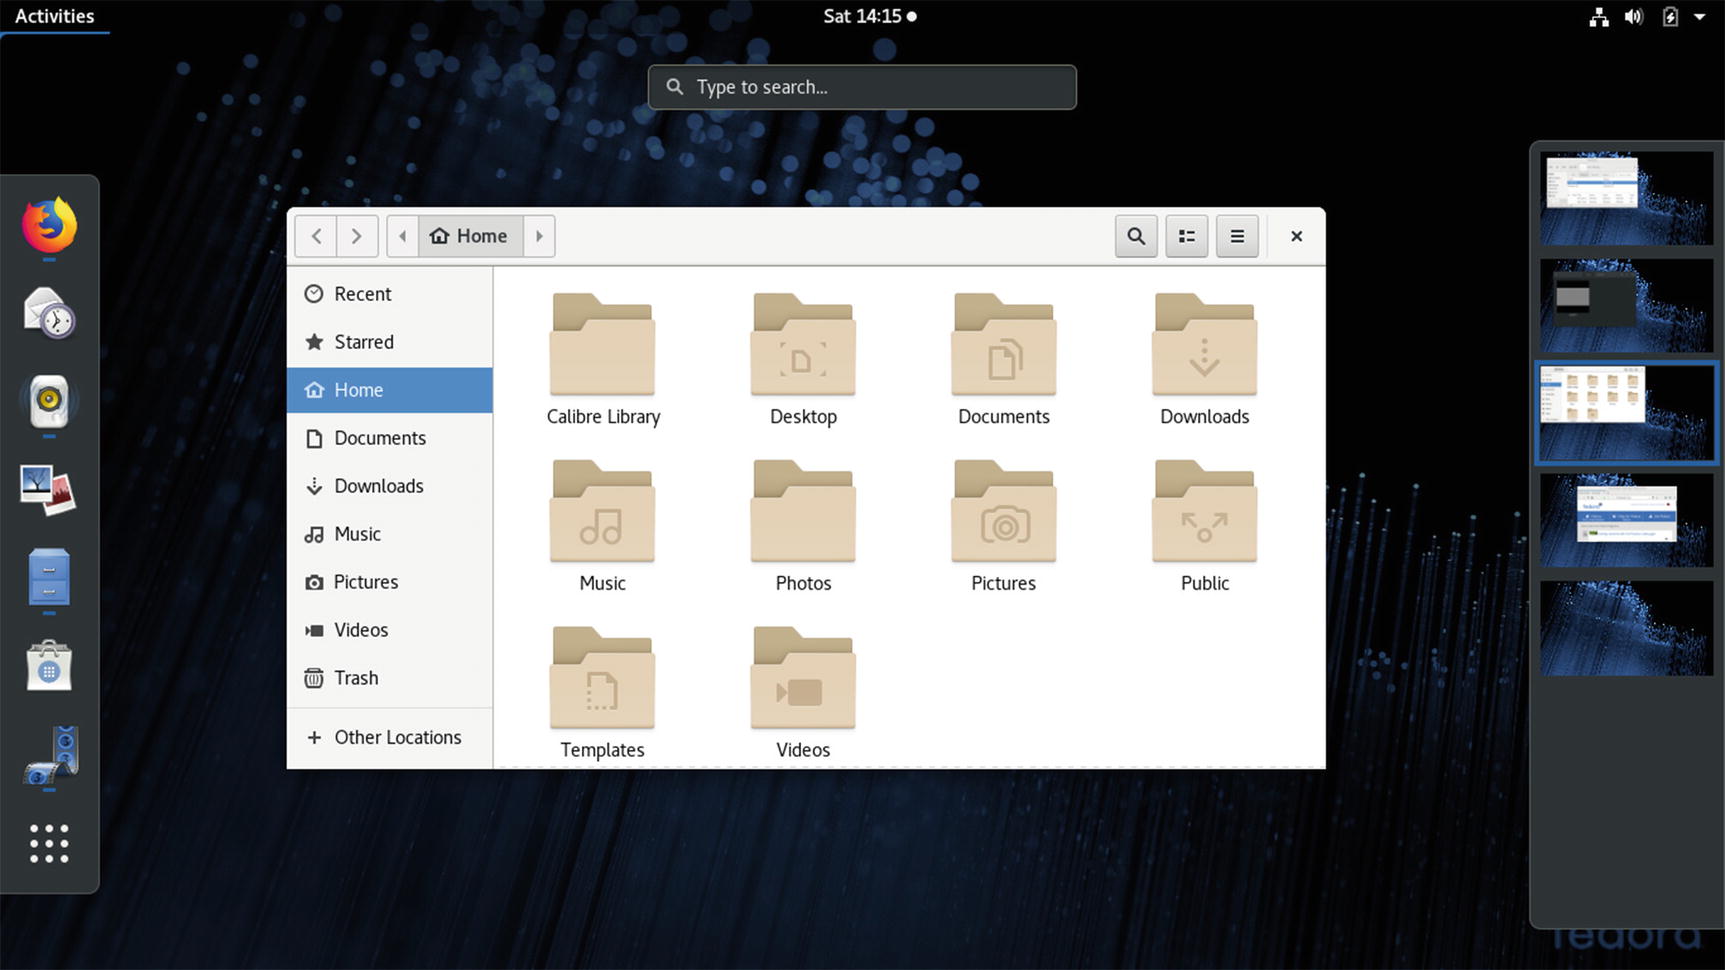
File manager with sidebar
When you open a new folder, the same window is used to display it, and you can use the forward and back arrows to move through previously opened folders (top left). As you open subfolders, the main toolbar displays buttons for your current folder and its parent folders, as shown here:

You can click a folder button to move to it directly. It also can display a location URL text box instead of buttons, from which you can enter the location of a folder, either on your system or on a remote one. Press Ctrl+l to display the text box. Press the Esc key to revert back to the folder location buttons.
File Manager Pop-Up Menu
Menu Item | Description |
|---|---|
New Folder | Creates a new subfolder in the current folder. |
Paste | Pastes files that you have copied or cut, letting you move or copy files between folders or make duplicates. |
Select All | Selects all files and folders in the current folder. |
Properties | Opens the Properties dialog for the directory. |
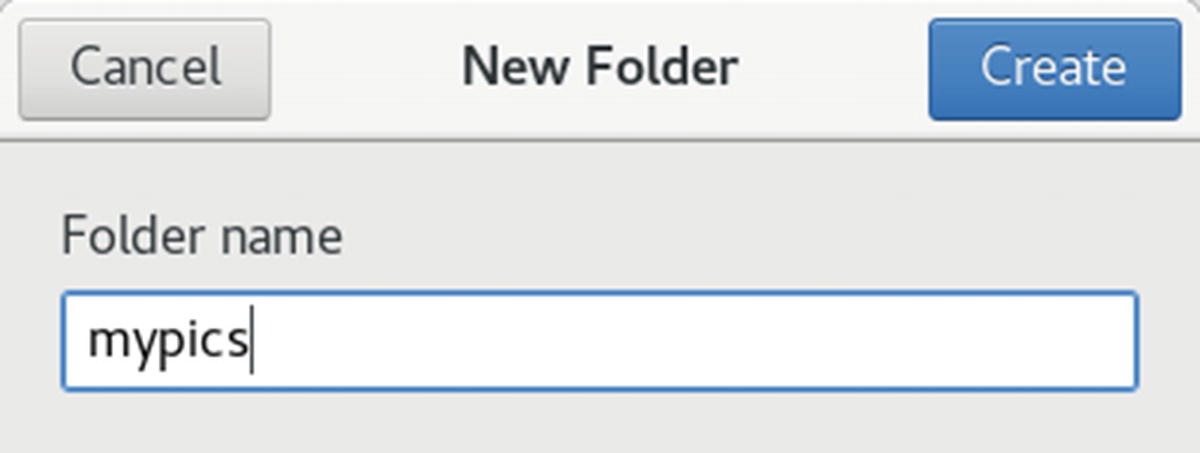
File manager New Folder dialog
File Manager Sidebar
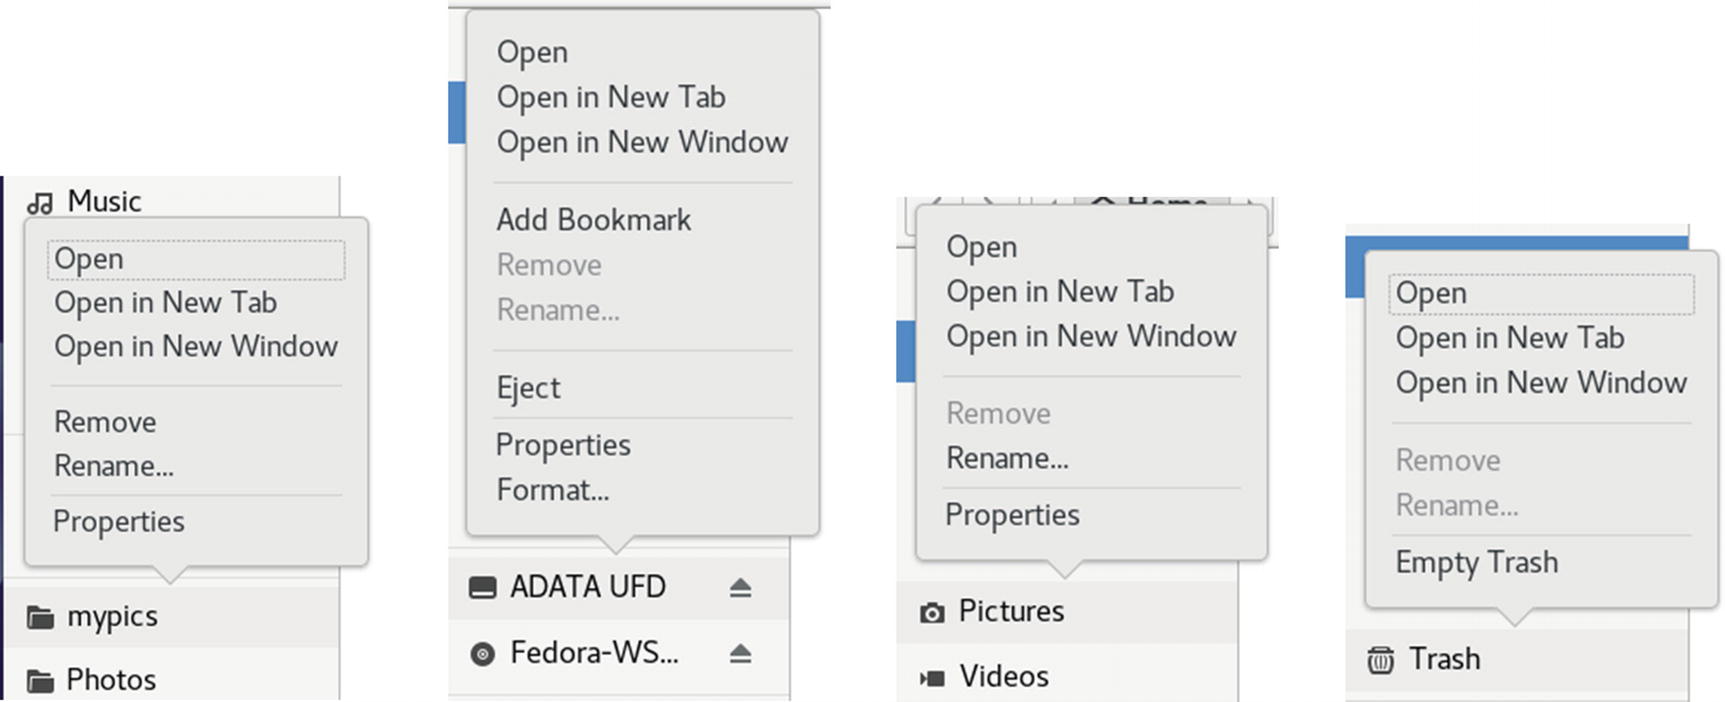
File manager sidebar with menus for bookmarks, devices, folders, and trash
Selecting the Other Locations entry on the sidebar displays entries for Computer and your networks. The Computer entry places you at the top of the file system, letting you move to any accessible part of it. In the Network section, you can access systems and shared folders on your network.
Tabs
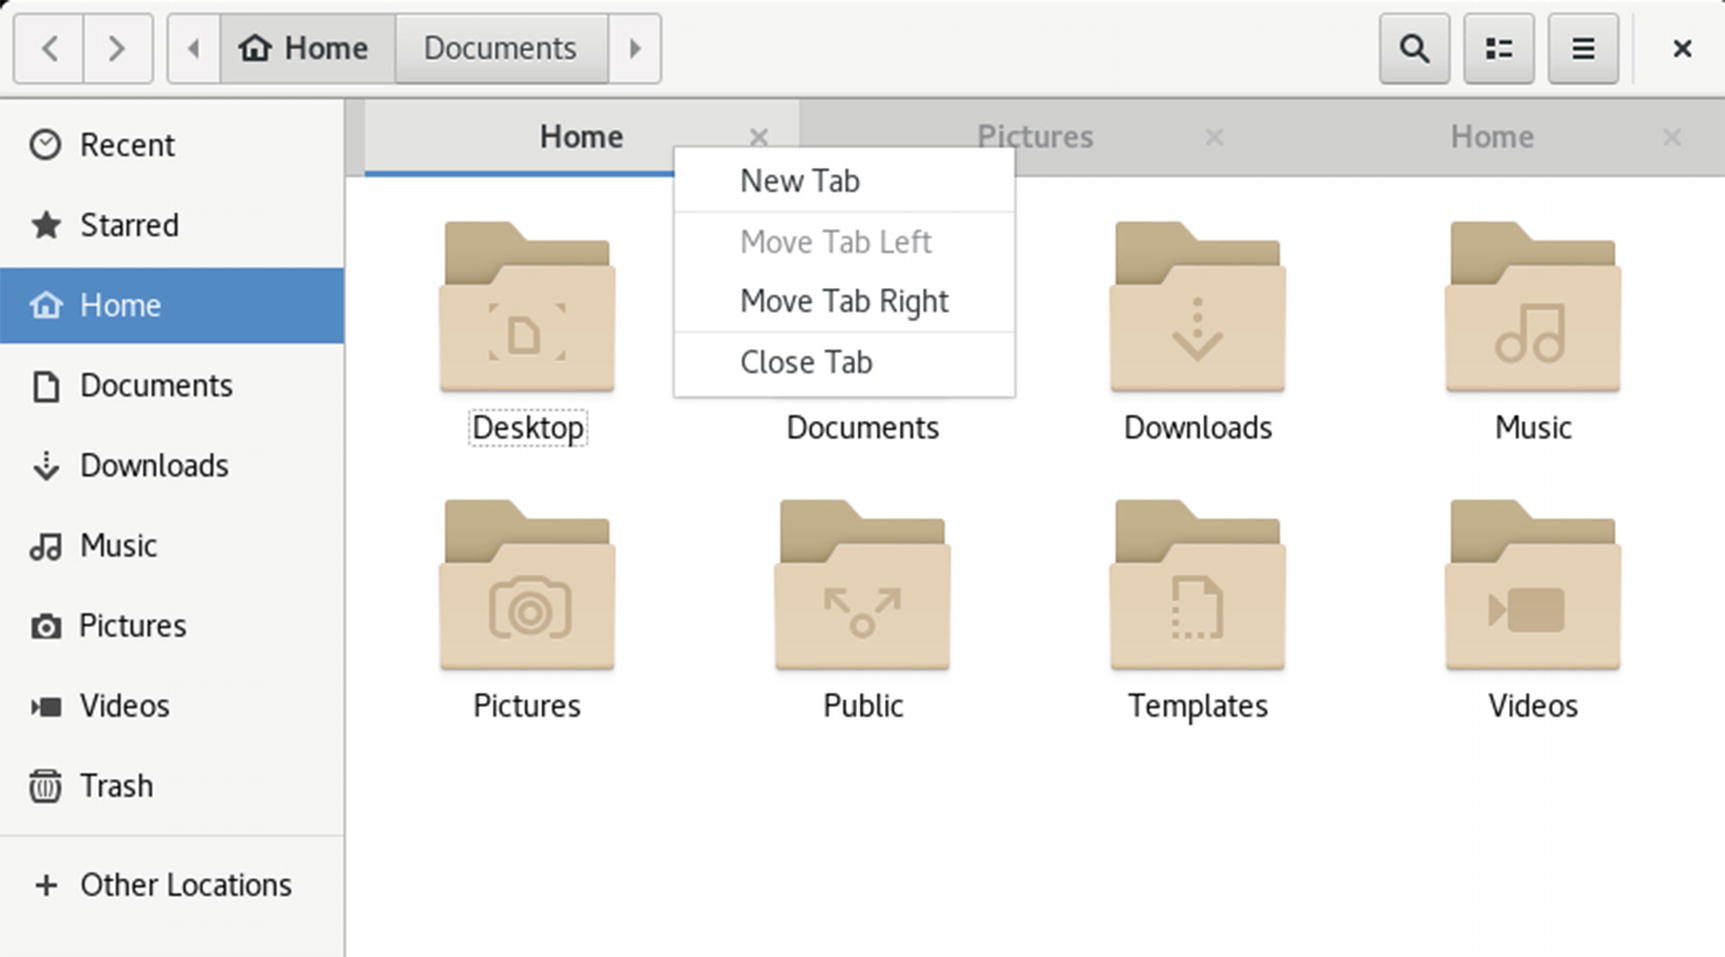
File manager window with tabs
Displaying and Managing Files and Folders
You can view a folder's contents as icons or as a detailed list, which you can choose by clicking the icon/list button between the search and menu buttons on the right side of the toolbar as shown here. This button toggles between icon and list views.

Use the Ctrl key to change views quickly: Ctrl+1 for icons and Ctrl+2 for list (there is no longer a Compact view). The List view provides the name, permissions, size, date, owner, and group. Buttons are displayed for each field across the top of the main pane. You can use these buttons to sort the list according to that field. For example, to sort the files by date, click the Date button; to sort by size, click Size. Click again to alternate between ascending and descending order.
Certain types of file icons display previews of their contents. For example, the icons for image files display a thumbnail of the image. A text file displays in its icon the first few words of its text.
File Manager Menu
Menu Item | Description |
|---|---|
New Folder button | Creates a new subfolder in the current folder |
Bookmark button | Creates a bookmark for current folder |
Tab button | Creates a new tab |
Zoom In button | Enlarges icon size |
Zoom Out button | Reduces icon size |
Undo | Undoes the previous operation |
Redo | Redoes an undo operation |
A-Z | Sorts in alphabetic order |
Z-A | Sorts in reverse alphabetic order |
Last Modified | Sorts by last modified date |
First Modified | Sorts by recent modified date |
Size | Sorts by file size |
Type | Sorts by file type |
Show Hidden Files | Shows administrative dot files |
Reload | Refreshes file and directory list |
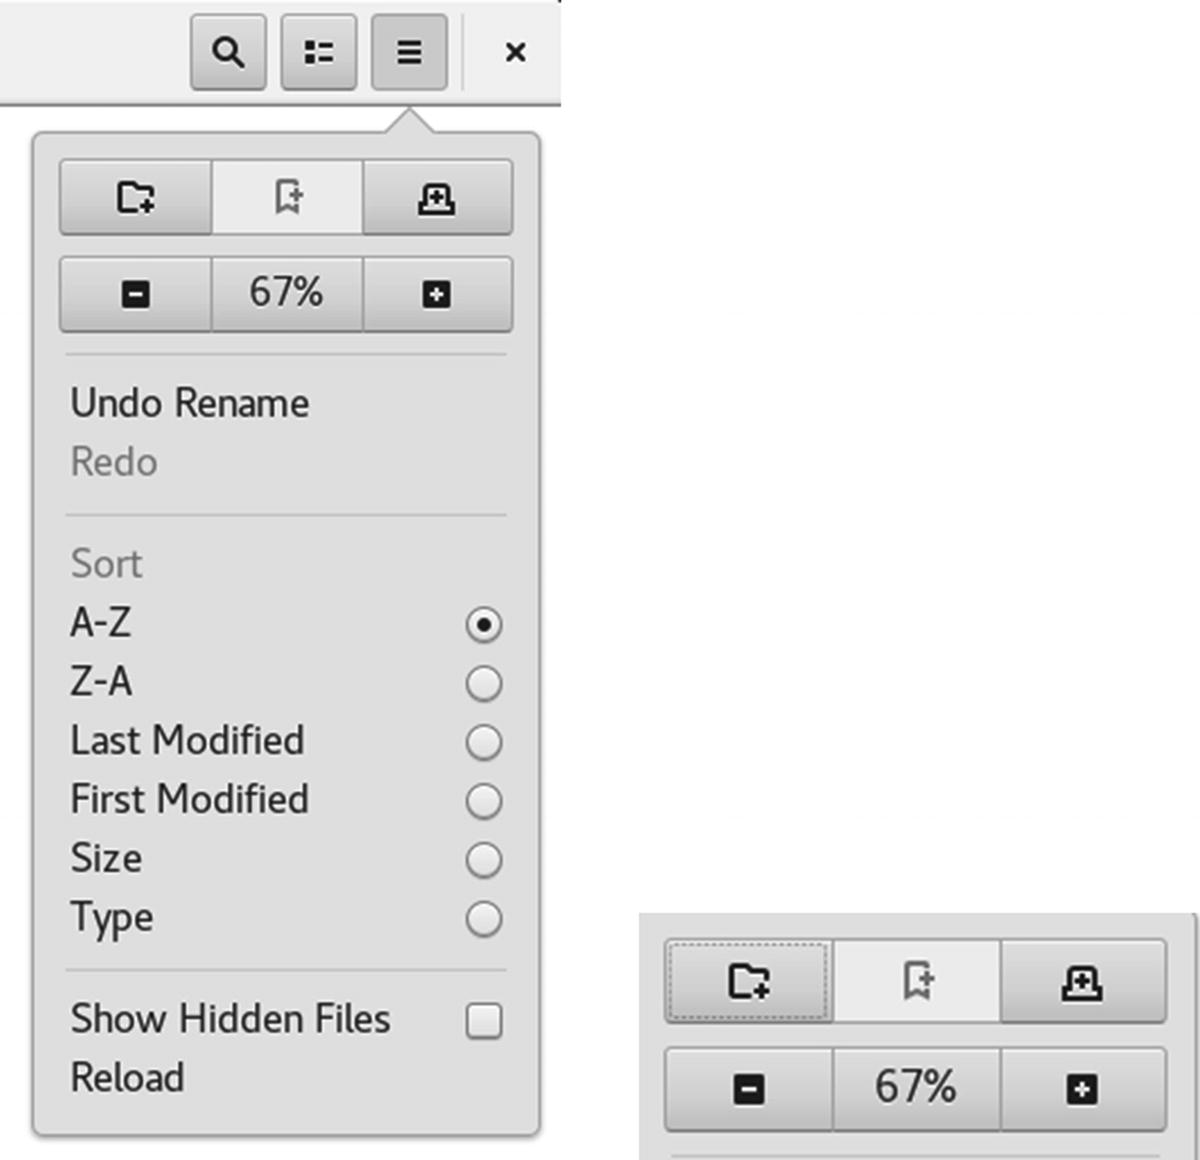
File manager menu
You can also bookmark the folder, create a new folder, and create a new tab . The top bar of the menu has buttons to create a new folder, create a bookmark for the current folder, and create a new file manager tab. Below that bar is a zoom bar, with zoom in and zoom out buttons, showing the zoom percentage between them. The zoom in button (+ button) enlarges your view of the window, making icons bigger. The zoom out button ( - button) reduces your view, making them smaller. You can also use the Ctrl++ and Ctrl+- keys to zoom in and out.
Previews
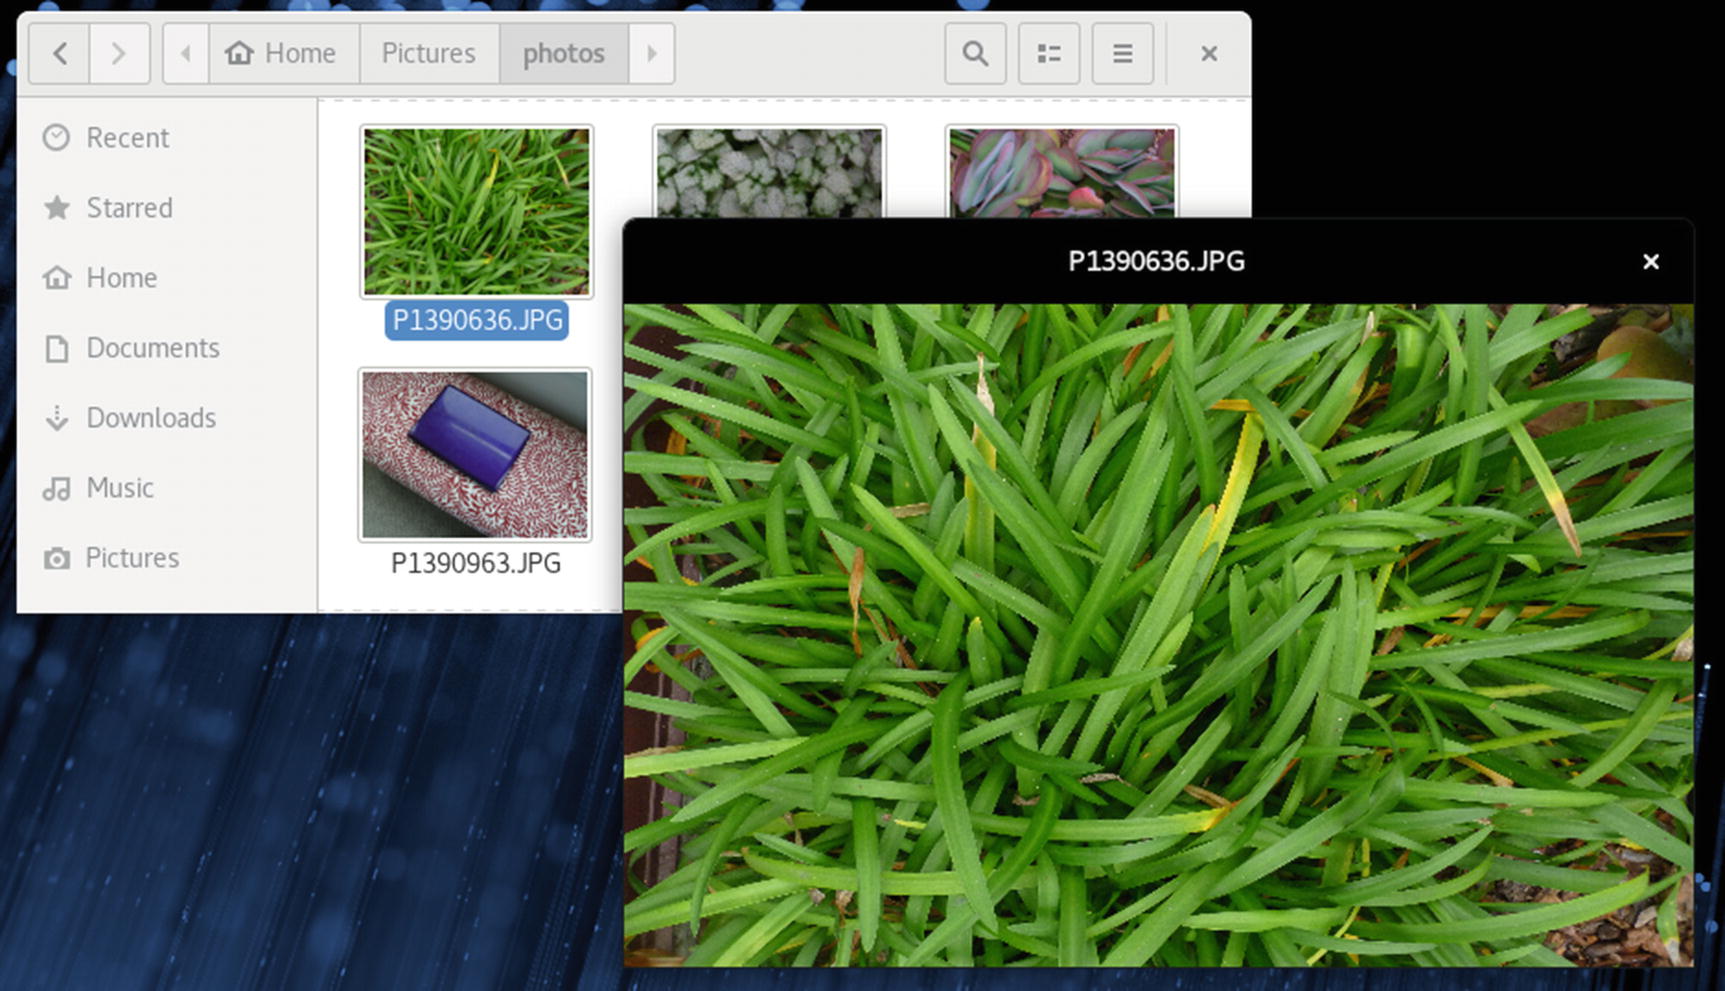
File previews (spacebar)
Navigating in the File Manager
The file manager operates similarly to a web browser, using the same window to display opened folders . It maintains a list of previously viewed folders, and you can move back and forth through that list using the toolbar buttons. The left arrow button moves you to the previously displayed directory, and the right arrow button moves you to the next displayed directory. Use the sidebar to access your storage devices (USB, DVD/CD, and attached hard drives). You can also access your home folders, trash, and recent files. From the sidebar Other Locations entry, you can also access mounted network folders. As noted, the Computer entry on the Other Locations section opens your root (top) system directory.
The File and Folder Pop-Up Menu
Menu Item | Description |
|---|---|
Open With Application | Opens the file with its associated application. Directories are opened in the file manager. Associated applications are listed. |
Open in New Tab | Opens a folder in a new tab in the same window. |
Open in New Window | Opens a folder in a new file manager window. |
Open With Other Application | Selects an application with which to open this file. An Open With dialog lists the possible applications. |
Cut Copy | Cuts or copies the selected file. |
Move To | Moves a file to the Home folder, desktop, or to a folder displayed in another pane in the File Manager window. |
Copy To | Copies a file to the Home folder, desktop, or to a folder displayed in another pane in the File Manager window. |
Rename (F2) | Renames the file. |
Move To Trash | Moves a file to the Trash directory, where you can later delete it. |
Compress | Archives the file using File Roller. |
Send to | Emails the file. |
Star | Marks file or folder as a favorite to be displayed by the starred entry in the sidebar. |
Properties | Displays the Properties dialog. |
To mark a file or folder as a favorite, right-click on it and choose Star from the pop-up menu. It can then be also accessed by clicking the starred entry on the sidebar.
The File Manager Sidebar Pop-Up Menu
Menu Item | Description |
|---|---|
Open | Opens the file with its associated application. Folders are opened in the file manager. Associated applications are listed. |
Open in a New Tab | Opens a folder in a new tab in the same window. |
Open in a New Window | Opens a folder in a separate window, accessible from the toolbar with a right-click. |
Remove | Removes the bookmark from the sidebar. |
Rename | Renames the bookmark. |
Entries for removable devices in the sidebar, such as USB drives, also have menu items for Eject and Safely Remove Drive. Internal hard drives have an Unmount option instead.
Managing Files and Folders
As a GNOME-compliant file manager , Files supports desktop drag-and-drop operations for copying and moving files. To move a file or directory, drag-and-drop from one directory to another. The move operation is the default drag-and-drop operation in GNOME.
To copy a file to a new location, press the Ctrl key as you drag-and-drop. When copying a large file or many files, an icon is displayed on the title bar to the right showing a circle chart and the progress of the copy operation. Clicking on the icon displays a menu showing the progress of the copy operation, with an x to the right you can click to cancel the copy, as shown here. When the copy process for a file is completed, the x becomes a checkmark. When the entire copy process is completed for all files, the icon shows a fully dark circle.

Renaming, Removing, and Compressing Files and Folders
You can also perform remove, rename, and compress operations on a file by right-clicking its icon and selecting the action you want from the pop-up menu that appears (see Table 8-5). For example, to remove an item, right-click it and select the Move To Trash entry from the pop-up menu. This places it in the Trash directory, where you can later delete it.
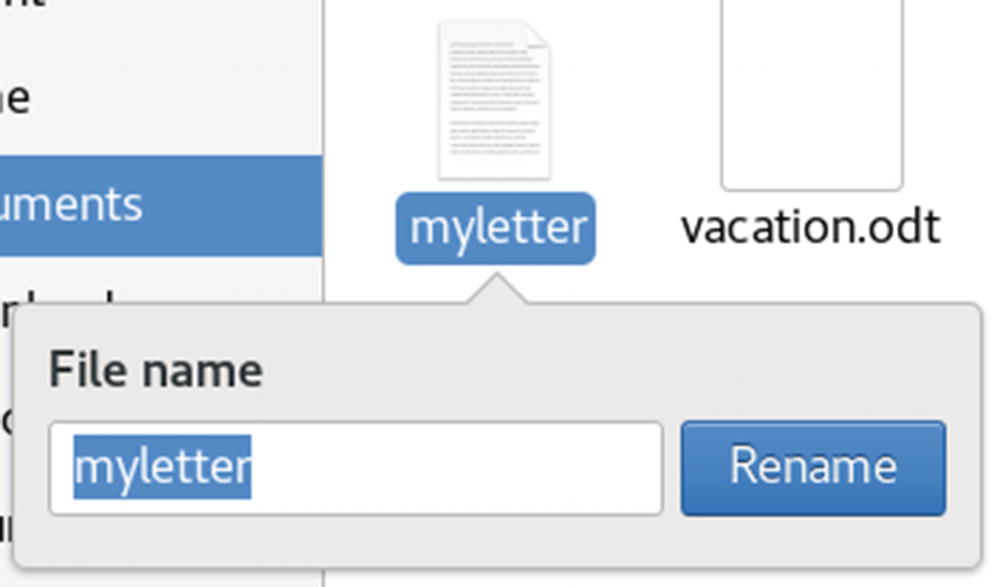
File manager Rename dialog
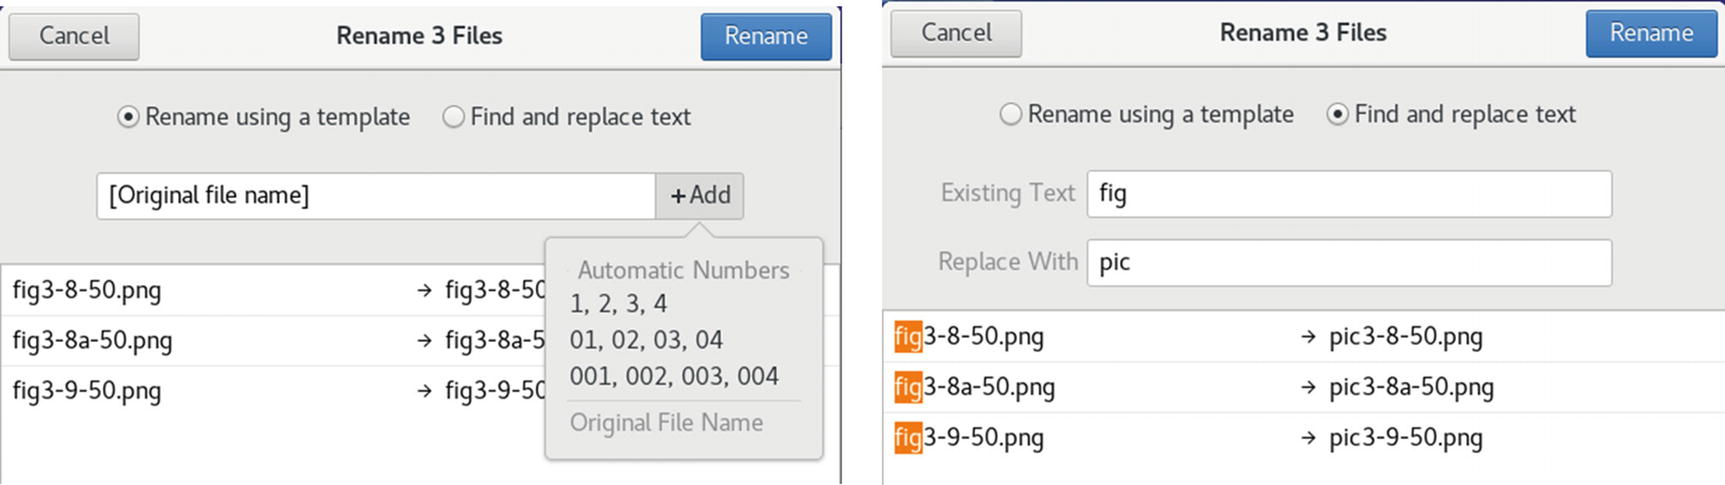
Renaming several files at once with the file manager
You can also rename a file by entering a new name in its Properties dialog box (Basic tab).
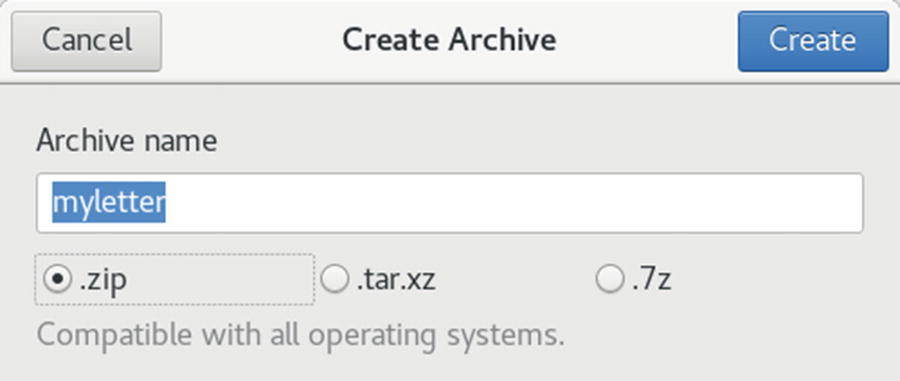
File manager: Compress and Archive dialogs
Grouping Files
You can select a group of files and folders by clicking the first item and then holding down the Shift key while clicking the last item, or by clicking and dragging the mouse across items you want to select. To select separated items, hold the Ctrl key down as you click the individual icons. If you want to select all the items in the directory, choose the Select All entry from the current folder's pop-up menu (see Table 8-3) or choose Ctrl+a. You can then copy, move, or delete several files at once.
Opening Applications and Files MIME Types
You can start any application in the file manager by double-clicking either the application or a data file used for that application. If you want to open the file with a specific application, you can right-click the file and select one of the Open With entries. One or more Open With entries will be displayed for default and possible application, such as Open With gedit for a text file. If the application you want is not listed, you can select Open With Other Application to access a list of available applications.
To change or set the default application to use for a certain type of file, you open a file’s Properties dialog and select the Open With tab. Here, you can choose the default application to use for that kind of file. Possible applications will be listed, organized as the default, recommended, related, and other categories. Click the one you want and click the Set As Default button. Once you choose the default, it will appear in the Open With list for this file.
If you want to add an application to the Open With menu, click the Other Applications entry to list possible applications. Select the one you want and click the Add button. If there is an application on the Open With tab that you do not want listed in the Open With menu items, right-click it and choose Forget Association.
File and Directory Properties
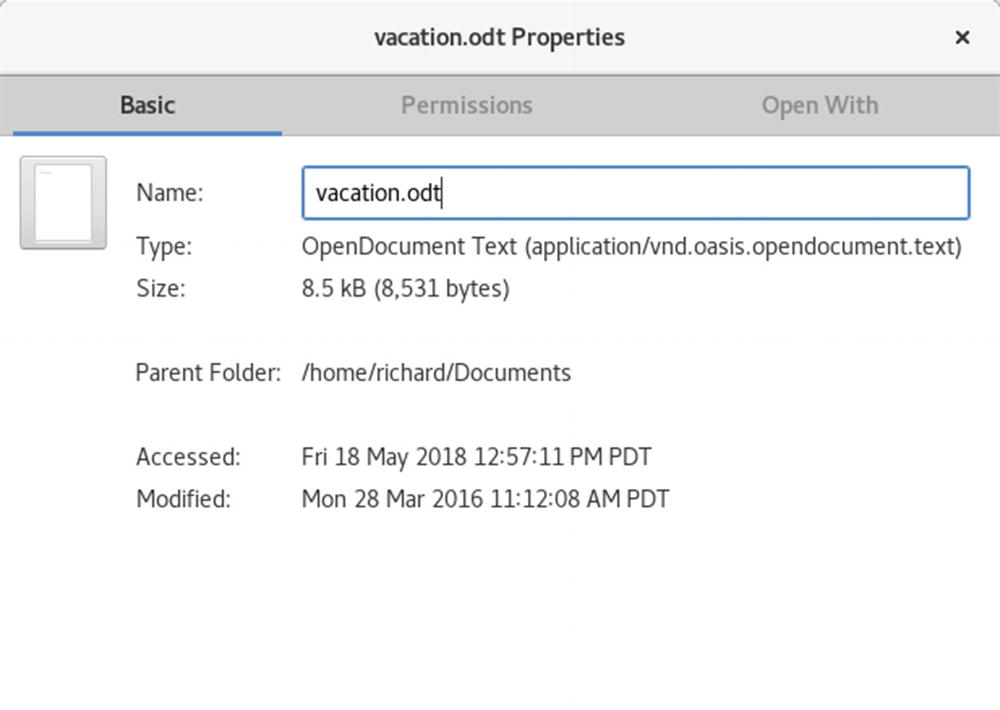
File properties
The Permissions tab for files shows the read, write, and execute permissions for owner, group, and others, as set for this file. You can change any of the permissions here, provided the file belongs to you. You configure access for the owner, the group, and others, using drop-down menus. You can set owner permissions as Read Only or Read and Write. For group and others, you can also set the None option, denying access. Clicking the group name displays a menu listing different groups, allowing you to select one to change the file’s group. If you want to execute this as an application, you check the Allow Executing File as Program entry. This has the effect of setting the execute permission.
The Open With tab for files lists all the applications associated with this kind of file. You can select the one you want to use as the default. This can be particularly useful for media files, for which you may prefer a specific player for a certain file or a particular image viewer for pictures.
Certain kinds of files will have additional tabs, providing information about the file. For example, an audio file will have an Audio tab listing the type of audio file and any other information, such as a song title or the compression method used. An image file will have an Image tab listing the resolution and type of image. A video file will contain an Audio/Video tab showing the type of video file, along with compression and resolution information.
The Permissions tab for folders operates much the same way, with Access menus for Owner, Group, and Others. The Access menu controls access to the folder with options for None, List Files Only, Access Files, and Create and Delete Files. These correspond to the read and execute permissions given to directories. To set the permissions for all the files in the folder accordingly (not just the folder), click the Change Permissions for Enclosed Files button to open a dialog where you can specify the owner, group, and others permissions for files and folders in the folder.
File Manager Preferences
You can set preferences for your file manager in the Preferences dialog, accessible by selecting the Preferences item in any file manager window’s application menu (Files ➤ Preferences).
The Views tab allows you to select how files are displayed by default, such as a list or icon view. You also can set default zoom levels for icon and list views.
Behavior lets you choose how to select files, manage the trash, handle scripts, and choose what information you want displayed in an icon caption, such as the size or date.
The List Columns tab lets you choose both the features to display in the detailed list and the order in which to display them. In addition to the already-selected name, size, date, and type, you can add permissions, group, MIME type, location, accessed, and owner.
The Preview tab lets you choose whether you to show thumbnail content displayed in the icons, search subfolders, or display the file count.
File Manager Search
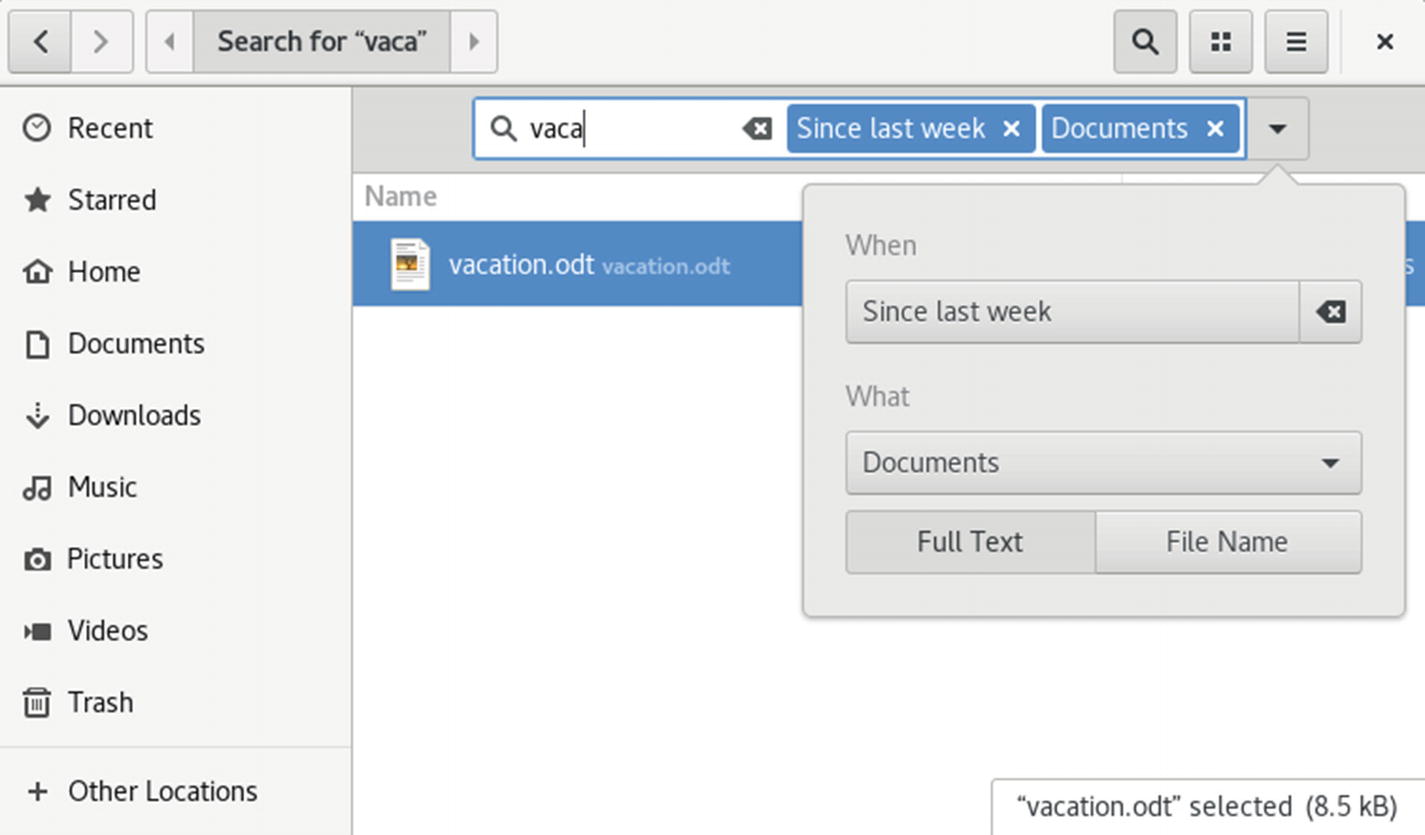
GNOME file manager search
GNOME Classic
GNOME Classic