Microsoft 365 services offers a seamless experience among its many products. Although they are different in look and feel and have different designs, the user experience remains the same. This chapter explores the seamless integration experience of SharePoint communication sites with Microsoft Forms, Power Apps, Power Automate, and Teams, to kick off your journey through this seamless experience.
Seamless Integration Between SharePoint Communication Sites and Microsoft Forms
This section explores the seamless integration with SharePoint communication sites and Microsoft built in the Microsoft 365 space. In this section, we demonstrate Microsoft Forms creation within and outside a communication site. For a case that’s outside a communication site, we also explain how do bring such forms back into SharePoint communication sites.
Creating a New Form in Communication Site
Microsoft Forms can be created in communication sites using the Forms webpart. Using this webpart, you can create multiple forms in a communication site and make them accessible through this communication site. Although the form is built in a communication site, you can share it with wider audience. Use the following steps to create a new form using the webpart available in the SharePoint communication sites.

A screenshot illustrates a webpage consisting of add new and page details tabs. A drop-down menu under add new lists different features of which the page is selected as list, document library, page, news post, news link, plan, and app.
Create new page
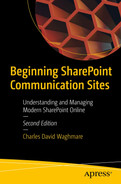
A screenshot illustrates a web page display template with a variety of images, and to the right, the images are shown.
Choose your visuals

An image illustrates a plus sign enclosed in a box with 2 rows.
Add a webpart

A screenshot illustrates a pop-up menu with the following features: a button, a call to action, a divider, a hero, an image, an image gallery, a link, quick links, a spacer, and a stream.
The pop-up window containing all the webparts in communication sites
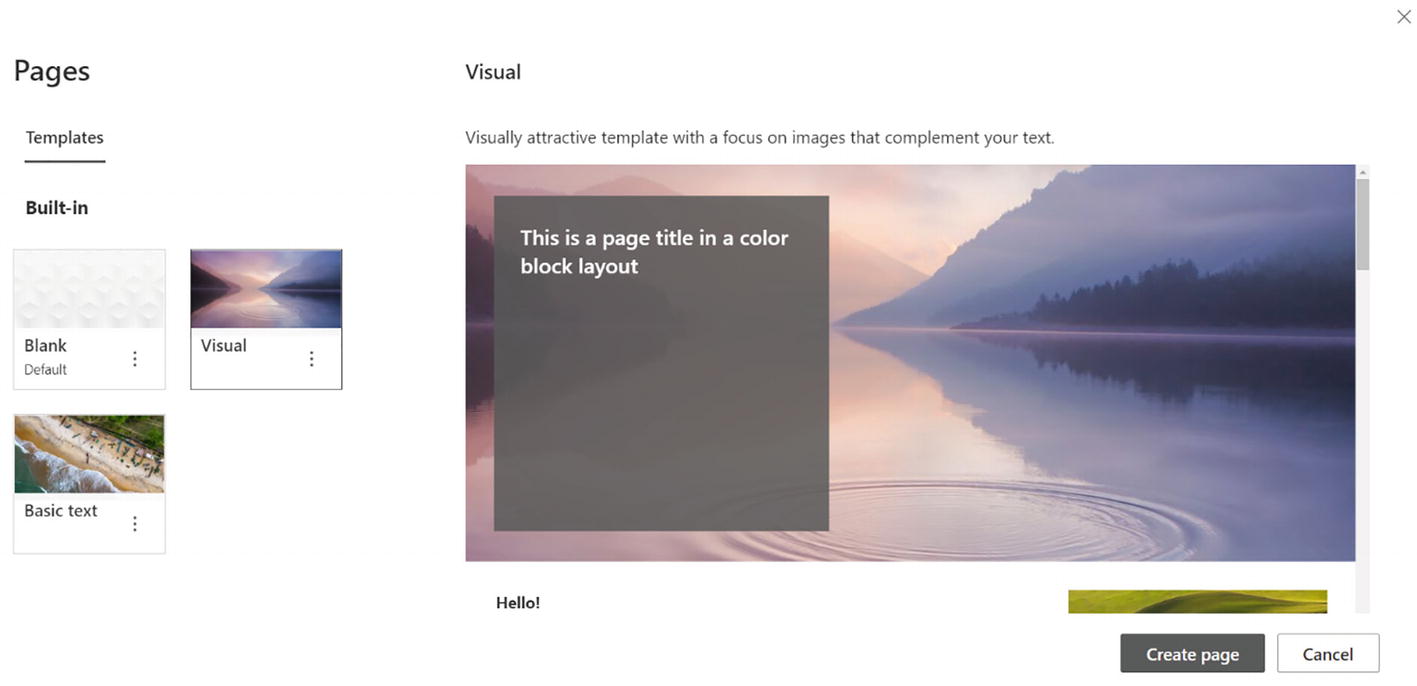
A screenshot illustrates a selection of Microsoft forms in a pop-up window.
Choose the Microsoft Forms webpart
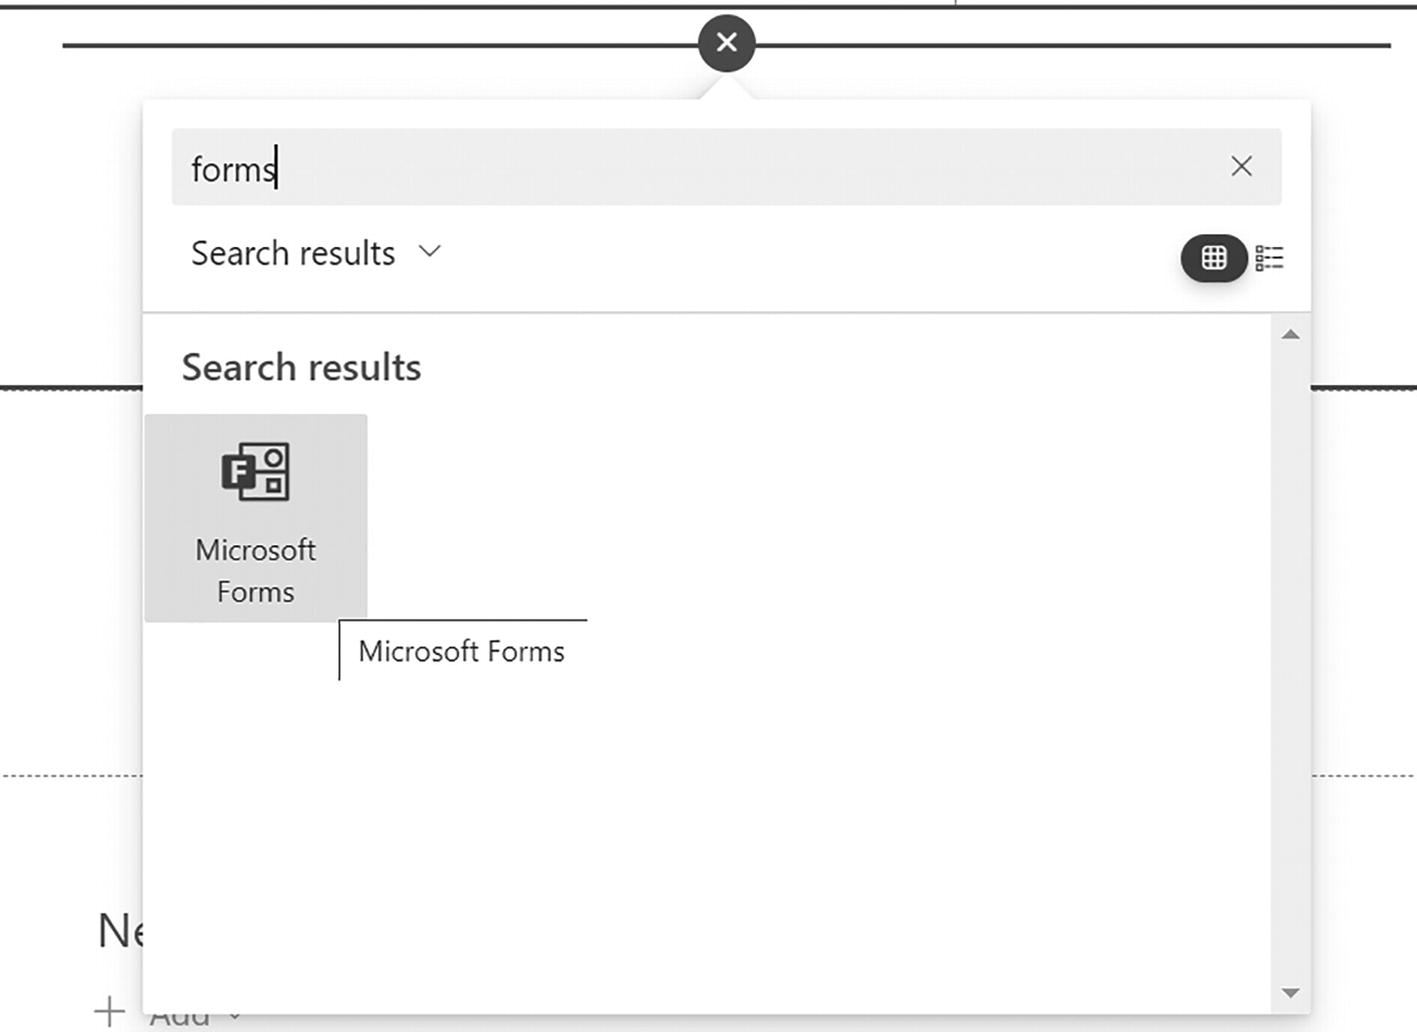
A screenshot illustrates a Microsoft Forms web page with the web address dialog box highlighted.
Choose or create a form
Also in Figure 7-6, the form’s web address is highlighted in red.

A screenshot illustrates a Microsoft Forms web page with the new form and create tabs highlighted.
Creating a form
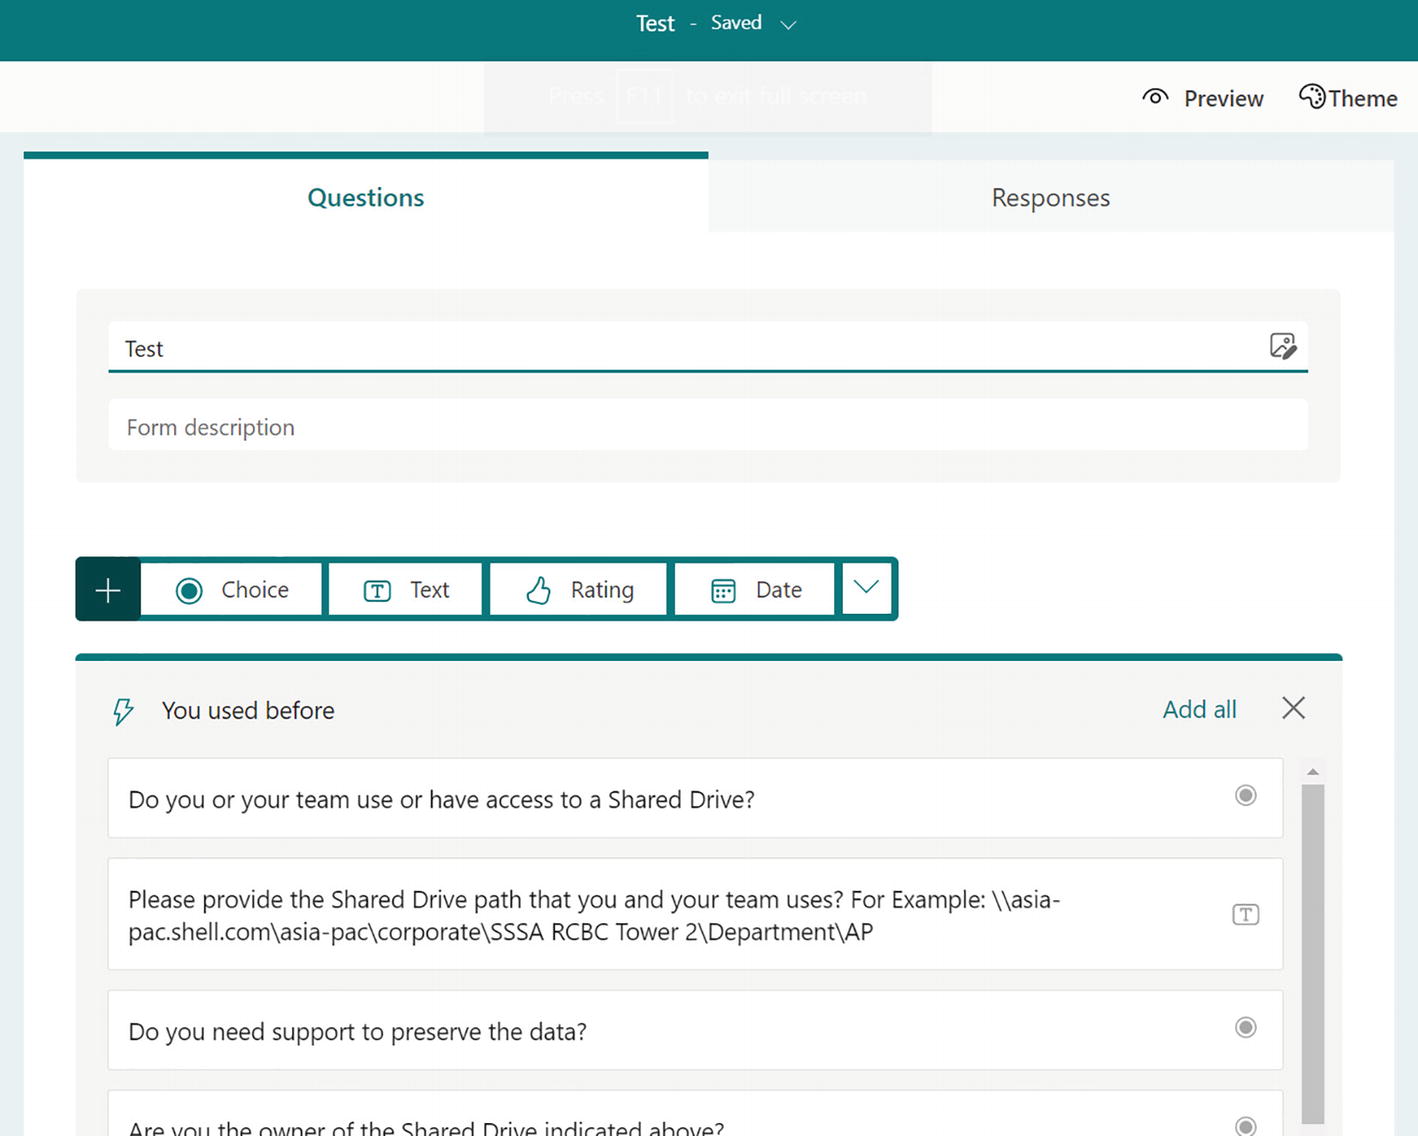
A screenshot a test website with two tabs for questions and answers. Entry fields for text and form descriptions are provided under the Questions tab. Below that, the following options are given: choice, text, rating, and date.
Forms creation page

A screenshot illustrates a pop-up window titled Forms, under which the following pages are displayed: my forms, shared with me, and group forms. The add new form feature under my forms is highlighted with an arrow pointing at form group forms.
Create a new form without use of a webpart

A screenshot illustrates an untitled form with two tabs for questions and answers. The entry fields for text and answer are provided under the Questions tab. Below that, an Add New tab is displayed.
Adding details to a new form
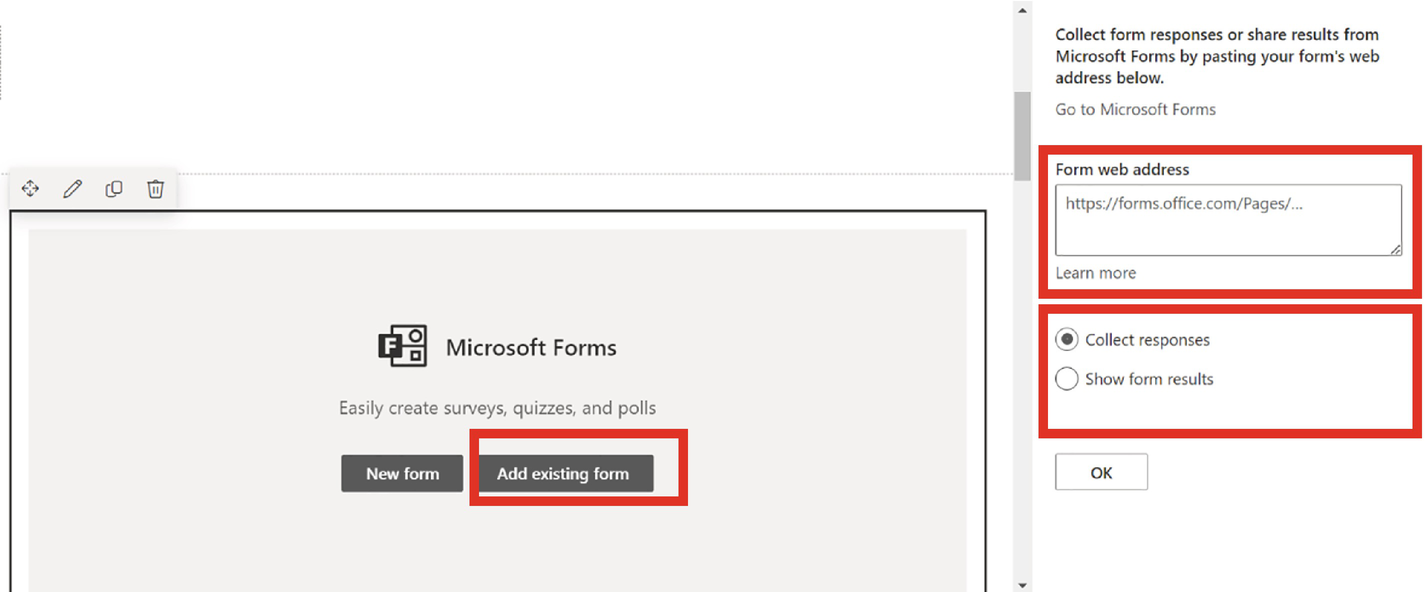
A screenshot illustrates a Microsoft Forms web page with the Add existing form tab, the form web address dialog box, and the collection responses and show form result options highlighted.
Clicking the Add Existing Form button
You should now be able to create forms in the communication sites and you’ve witnessed the seamless integration experience between SharePoint communication sites and Microsoft Forms.
Seamless Integration Between SharePoint Communication Sites and Power Apps
This section shows you how to create a Canvas app using Power Apps and Microsoft Lists. You can do this from within either Power Apps or Microsoft Online.
The app will have three screens—the Browse, Details, and Edit screens. The Browse screen allows you to view all the details about a single item in the list, while the Details screen shows all the information about that item. The Edit screen allows you to update or create an existing item.
Even if you create a list that’s very complex, the principles of creating an app will not change. The app will still have the same features regardless of the complexity of the list. In this section, we create an app from Power Apps and SharePoint Online (i.e., from a list part of the SharePoint communication). This will demonstrate the seamless nature of Power Apps and communication sites.
To create an app within Power Apps based on information coming out of the list part of the communication site, follow these steps:
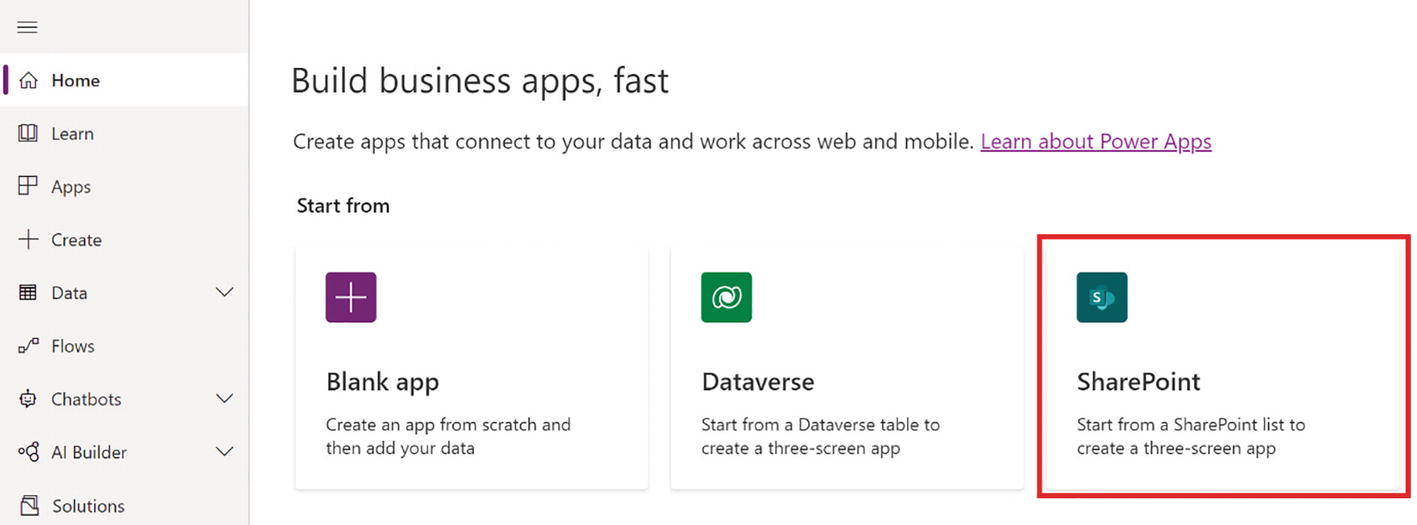
A screenshot illustrates a home page titled, Build Business Apps, below which apps are displayed, of which the Share Point app is highlighted.
Selecting the Sharepoint option from the Power Apps Console
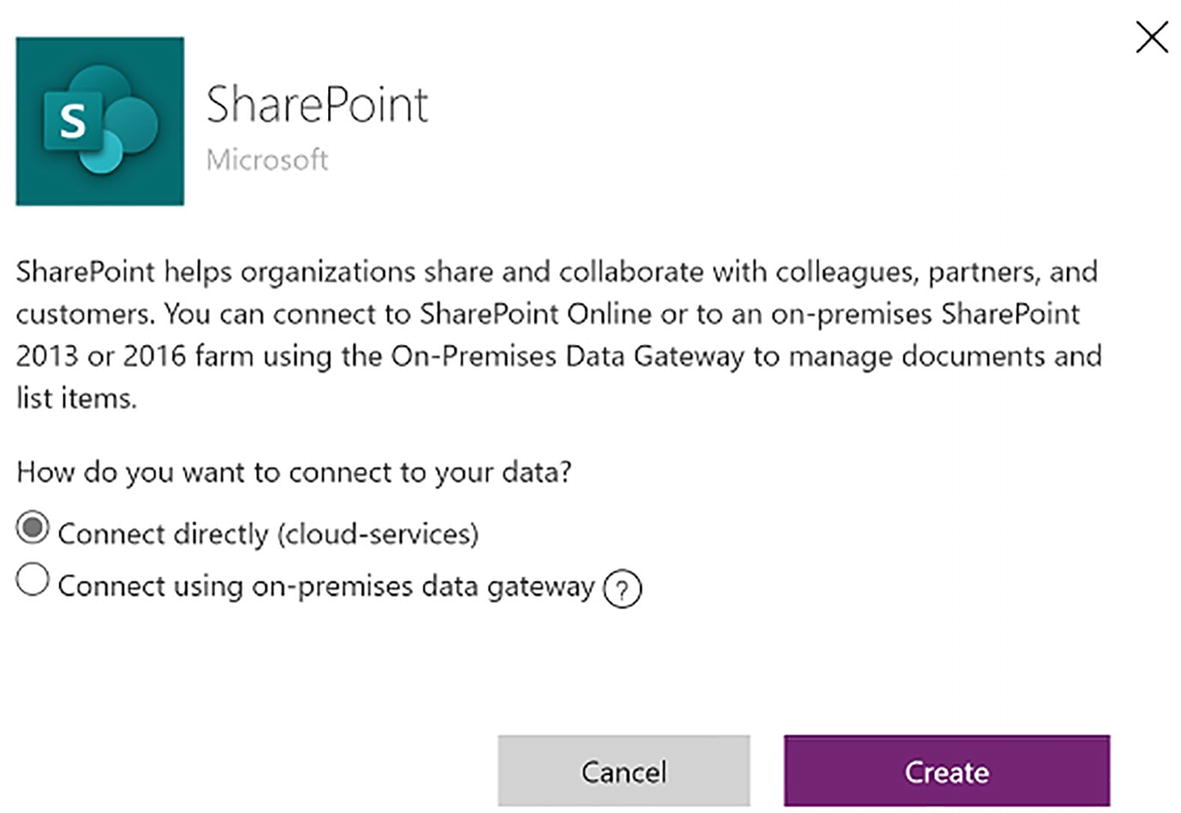
A screenshot illustrates the share point app's logo and the features listed below. For connecting to the app, two options are displayed below. Tabs for canceling and creating are visible at the window's bottom corner.
Creating the app

A screenshot illustrates the share point webpage with entire fields for the app name, share point site, and lists. Tabs for canceling and creating are visible at the window's bottom corner.
Enter the app details
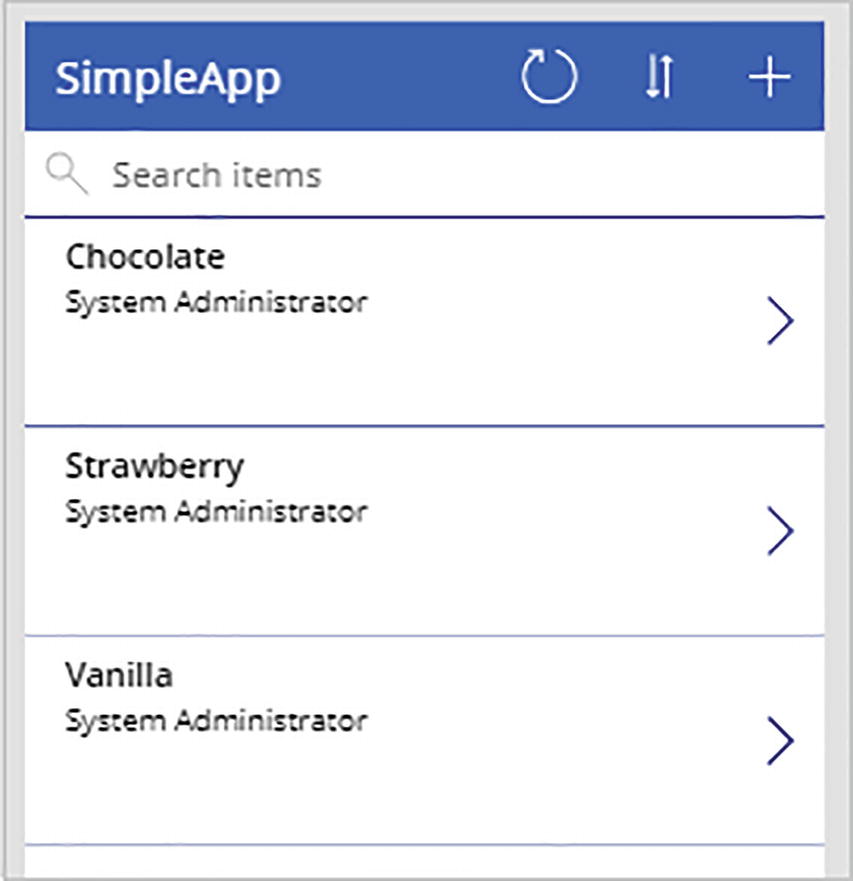
An image illustrates a simple app running on a smartphone, along with a list of the system administrators.
App created based on the SharePoint list
The app will automatically show the data in more columns if your list has multiple entries. On the top of the screen, there are icons that will allow you to sort the list, create an item, and refresh the list. A search box will also allow you to filter the list based on text.
Next, you will create Power Apps using SharePoint Online.
The app will automatically appear as a view when you open it in SharePoint Online. You can also run it in a web browser, on an Android device, or on an iOS device.
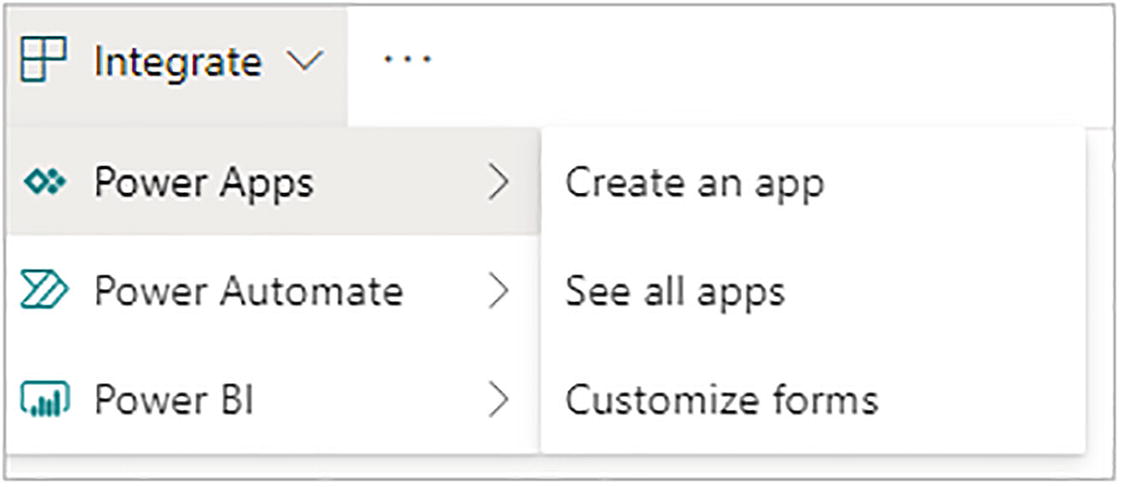
A screenshot illustrates a drop-down menu from the integrate tab, from which the Power Apps option is selected, which displays the following features: create an app, see all apps, and customize forms.
Creating an app

A screenshot illustrates the website page for creating an app. A field entry is provided for the name, with the Create tab selected.
Enter the app’s name

A screenshot illustrates a web page that consists of three segments as follows: the tree view, simple app, and browse screen 1, with their features listed below.
App creation in Power Apps from SharePoint
In this section, you experienced the seamless nature between communication sites and Power Apps.
Seamless Integration Between SharePoint Communication Sites and Power Automate
Chapter 8 includes a detailed example of seamless integration between SharePoint Online and Power Automate. In this section, you’ll see how to enable data flows from Power Automate and data flows from SharePoint communication sites to demonstrate the seamless experience between them.
First, let’s kickstart flow creation in SharePoint Communication sites by following these steps:

A screenshot illustrates a web page with the page option selected, in which the select automate option leads to power automate, which leads to the create a flow option.
Choose the Create a Flow option
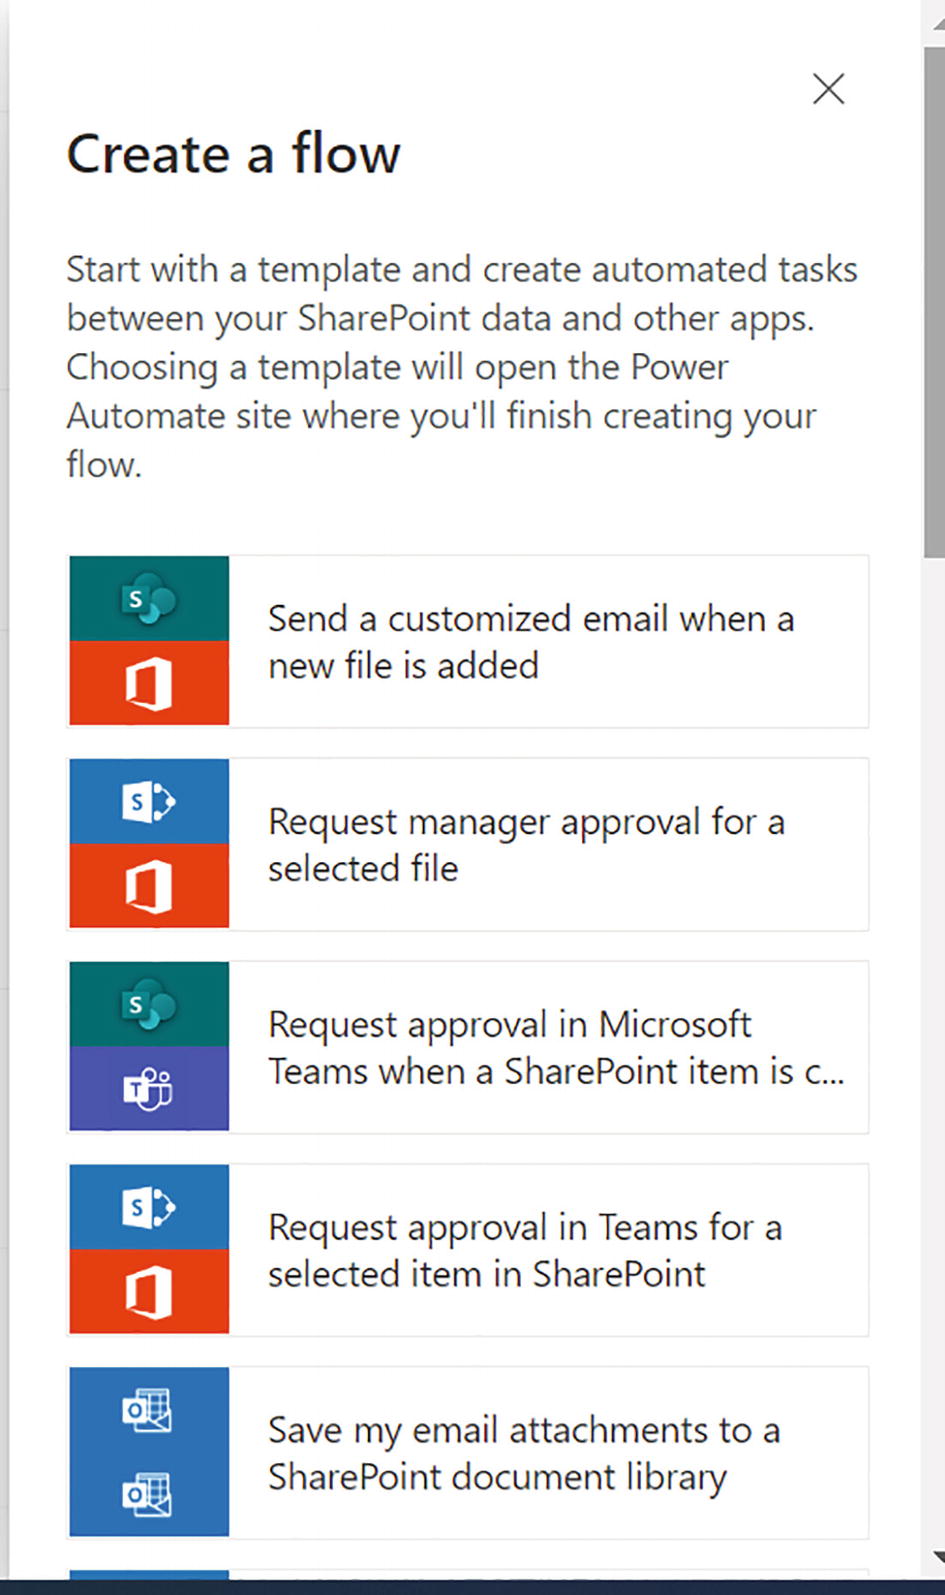
A pop-up window illustrates the instruction to create a flow. The automated tasks between the SharePoint app and other apps are listed below.
List of flows

A screenshot illustrates the workflow as follows: file is created, which leads to getting my profile, which leads to sending an email with the dialog box shown below.
Flow configuration
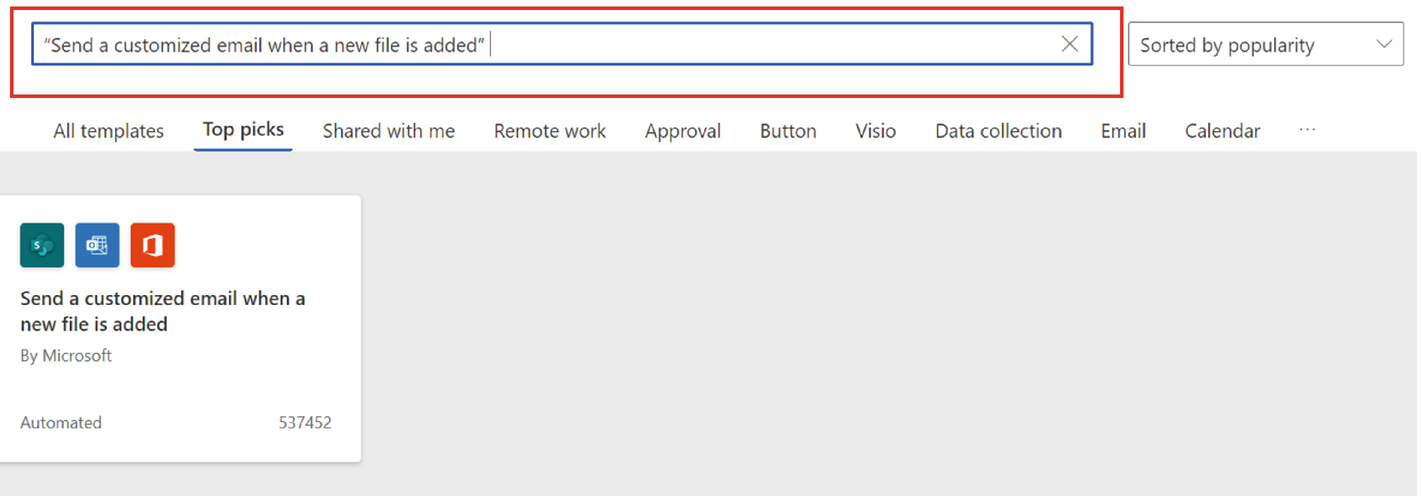
A screenshot illustrates a web page with a dialog box for sending a customized email when a new file is added, which is highlighted. Under the option, top picks, the apps that are automated are displayed.
Flow creation from Power Automate
Along with this flow, there are many other flows, including Send an Email When New Item Is Created or Modified in SharePoint List, Copy Files from One Document Library to Another, and Move Files from Document Library to OneDrive. This concludes this section of seamless learning with Power Automate and communication sites.
Seamless Integration Between SharePoint Communication Sites and Microsoft Teams
OneDrive is very similar to the My Folder concept on standard laptops. You store attachments that you diligently share with colleagues when there is a need and you do not share them with all colleagues. For example, Salary Slips, Project Manuals, ID Card Soft Copies, and others.

A screenshot illustrates a webpage showing the share point app, one drive, and teams apps, along with their respective logos, for intelligent file experiences that lead to intelligent content services.
File experience in Microsoft 365
Therefore, OneDrive is used to share documents for very specific purposes and with people whom you choose. On the other hand, SharePoint Online is used to share documents with a wider audience.
An important point to remember is that whenever a file is uploaded in Microsoft 365, it is stored in SharePoint Online. Files shared through Teams Chat are hosted in OneDrive along with other files uploaded by the users.
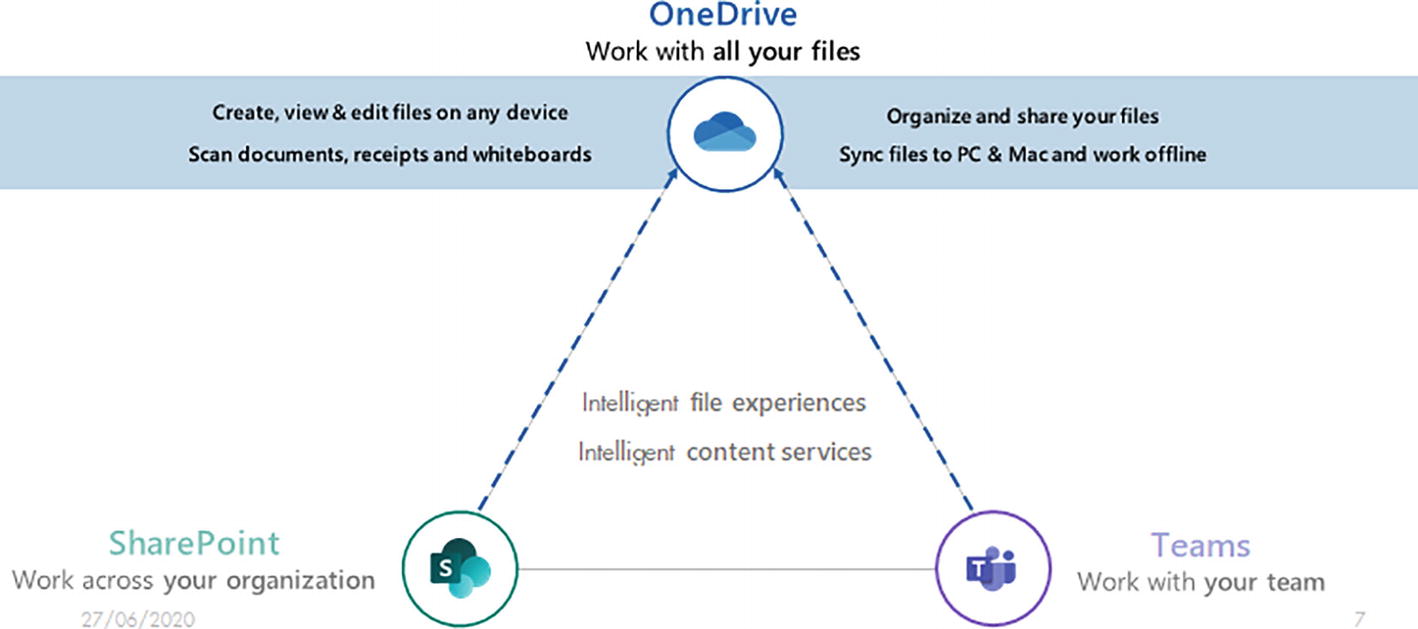
A screenshot illustrates the Share Point app, One Drive app, and Teams app interacting with one another, with each app's logo represented on a triangle. The triangle's center displays the text's intelligent file experiences and intelligent content services.
Files hosted either in SharePoint Online and OneDrive are shared in the Teams conversation

A screenshot illustrates the Share Point app, One Drive app, and Teams app interacting with one another, with each app's logo represented on a triangle. The triangle's center displays the text's intelligent file experiences and intelligent content services.
Files uploaded to Teams are stored either in SharePoint Online or on OneDrive into Teams
When a team is created, a corresponding SharePoint communication site is also created. The contents inside this SharePoint communication site can be managed via Teams and the SharePoint communication sites, thus offering a seamless experience.
Summary
Now that you’ve seen how seamless integration experiences between communication sites and Microsoft Forms, Power Apps, Power Automate, and Teams works, you end your journey of seamless experiences. In the next chapter, you will explore the usefulness of communication sites to perform project management activities.