C H A P T E R 11
A World of Applications
Ubuntu is a thoroughly modern operating system and, as such, includes a comprehensive selection of software for just about every day-to-day task. Regardless of whether you want to write letters, edit images, or listen to music, Ubuntu offers something for you.
This chapter introduces the software under Ubuntu that performs the tasks you might be used to under Windows. It’s not a detailed guide to each piece of software. Instead, this chapter aims to get you up and running with the Ubuntu replacement as quickly as possible. The chapter gives the name of each piece of software, where you can find it on Ubuntu’s menus, and a few basic facts about how to use it. In many cases, these applications are covered in far more depth later in the book.
Available Software
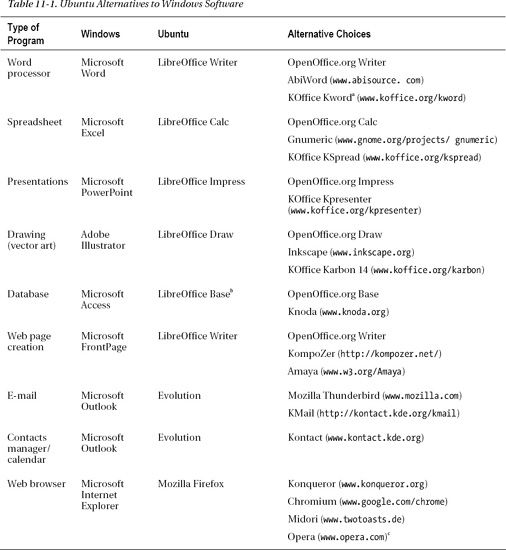
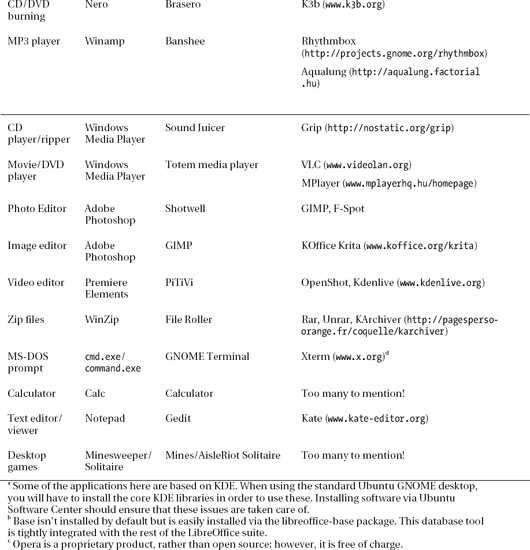
Table 11-1 lists various popular Windows programs alongside their Ubuntu counterparts. You'll find most of the programs listed on the Applications menu. Table 11-1 also includes a number of other mainstream alternatives, most of which aren't installed by default under Ubuntu but are available from the Ubuntu online software repositories. You might want to try these later on. As you might expect, they're all free of charge, so you have nothing to lose.
![]() Note Table 11-1 lists only a fraction of the programs available under Linux. There are quite literally thousands of others, including some that have similar facilities as those mentioned. The programs listed here are those that work like their Windows equivalents and therefore provide an easy transition.
Note Table 11-1 lists only a fraction of the programs available under Linux. There are quite literally thousands of others, including some that have similar facilities as those mentioned. The programs listed here are those that work like their Windows equivalents and therefore provide an easy transition.
![]()
LINUX HAS IT ALL
A Quick Start with Common Ubuntu Programs
The remainder of this chapter outlines a handful of the programs listed in Table 11-1. Our goal is to give you a head start in using each program and point out where most of the main functions can be found. You'll find more details about some of them later in this book.
Keep in mind that Ubuntu doesn't aim to be an exact clone of other operating systems. Some of the programs will work in a similar way to what you're used to, but that's not true of all of them. Because of this, it's easy to get frustrated early on when programs don't seem to work quite how you want or respond in strange ways. Some programs might hide functions in what seem like illogical places compared with their counterparts on another OS. Some patience is required, but it will eventually pay off as you get used to Ubuntu.
Word Processing: LibreOffice Writer
LibreOffice Writer is the word processor application included in LibreOffice.
But what is LibreOffice? Previous versions of Ubuntu came with OpenOffice.org as its full office suite. But following Oracle Corporation acquisition of Sun Microsystems (which was the suite creator and the major contributor), several members feared for the future of the project, and in September 2010 they formed a new group, “The Document Foundation,” to ensure the continuation of the free and open development. They made available a rebranded fork of OpenOffice.org, named LibreOffice. Oracle rejected to participate in the new project, so LibreOffice and OpenOffice.org parted ways. Given the free nature of LibreOffice, many Linux distributions (Ubuntu among them) decided to support it by including it as the default office suite instead of OpenOffice.org.
LibreOffice, as a fork of OpenOffice.org, is an entire office suite for Linux that was built from the ground up to compete with Microsoft Office. Because of this, you'll find that much of the functionality of Microsoft Office is replicated in LibreOffice, and the look and feel are also similar to pre-2007 releases of Office. The major difference is that LibreOffice is open source and free of charge.
LibreOffice Writer, shown in Figure 11-1, is the word processor component. As with Microsoft Word, it's fully WYSIWYG (What You See Is What You Get), so you can quickly format text and paragraphs. This means the program can be used for quite sophisticated desktop publishing, and pictures can be easily inserted (via the Insert menu).
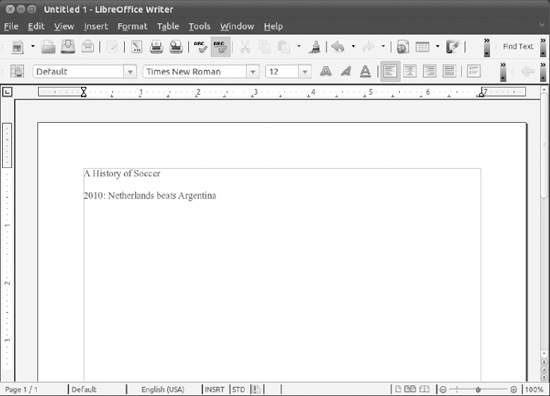
Figure 11-1. LibreOffice Writer
Writer's toolbars provide quick access to the formatting tools, as well as to other common functions. The vast majority of menu options match those found in Word. Right-clicking the text itself also offers quick access to text-formatting tools.
A number of higher-level functions are provided, such as mail merge and spell-checking, (found on the Tools menu). You can perform spell-checking on the fly, with incorrect words appearing underlined in red as you type.
As with all LibreOffice packages, Writer is mostly compatible with Microsoft Office files, so you can save and open.doc and .docx files. Just click File ![]() Save As, and click the arrow alongside File Type to choose a document format. Even some password-protected file formats are supported. You can also export documents as PDF files (by choosing File
Save As, and click the arrow alongside File Type to choose a document format. Even some password-protected file formats are supported. You can also export documents as PDF files (by choosing File ![]() Export As PDF), so they can be read on any computer that has Adobe Acrobat Reader installed.
Export As PDF), so they can be read on any computer that has Adobe Acrobat Reader installed.
![]() Note LibreOffice is covered in more detail in Chapter 13.
Note LibreOffice is covered in more detail in Chapter 13.
Spreadsheet: LibreOffice Calc
As with most of the packages that form the LibreOffice suite, Calc does a good impersonation of its proprietary counterpart, Microsoft Excel, both in terms of powerful features and the look and feel, as you can see in Figure 11-2. However, it has only limited support for Excel's Visual Basic for Applications (VBA) macros at present. Instead, Calc and other LibreOffice programs use their own macro language, called LibreOffice Basic (for more information, see http://help.libreoffice.org/Common/Macro).
Calc has a vast number of mathematical functions. To see a list, choose Insert ![]() Function. The list on the left side of the dialog box includes a brief explanation of each function to help you get started. Just as with Excel, you can access the functions via the toolbar (by clicking the Function Wizard button) or you can enter them directly into cells by typing an equal sign and then the formula code. Calc is intelligent enough to realize when formula cells have been moved and recalculate accordingly. It will even attempt to calculate formulas automatically and can work out what you mean if you type something like sales + expenses as a formula.
Function. The list on the left side of the dialog box includes a brief explanation of each function to help you get started. Just as with Excel, you can access the functions via the toolbar (by clicking the Function Wizard button) or you can enter them directly into cells by typing an equal sign and then the formula code. Calc is intelligent enough to realize when formula cells have been moved and recalculate accordingly. It will even attempt to calculate formulas automatically and can work out what you mean if you type something like sales + expenses as a formula.
As you would expect, Calc also provides automated charting and graphing tools (under Insert ![]() Chart). In Figure 11-2, you can see an example of a simple chart created automatically by the charting tool.
Chart). In Figure 11-2, you can see an example of a simple chart created automatically by the charting tool.
You can format cells by using the main toolbar buttons, or automatically apply user-defined styles (choose Format ![]() Styles and Formatting).
Styles and Formatting).
![]() Tip In all the LibreOffice applications, you can hover the mouse cursor over each button for one second to see a tooltip showing what it does.
Tip In all the LibreOffice applications, you can hover the mouse cursor over each button for one second to see a tooltip showing what it does.
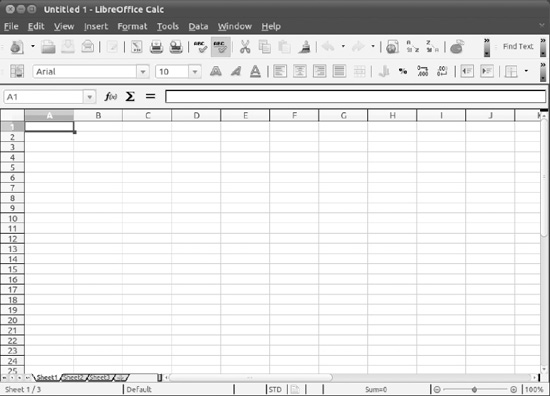
Figure 11-2. OpenOffice.org Calc
If you're a business user, you'll be pleased to hear that you can import databases to perform serious number crunching. Use Insert ![]() Link to External Data to get the data, and then employ the tools on the Data and Tools menu to manipulate it.
Link to External Data to get the data, and then employ the tools on the Data and Tools menu to manipulate it.
As with all LibreOffice programs, compatibility with its Microsoft counterpart—Excel files in this case—is pretty good. You can also open other common data file formats, such as comma-separated values (CSV) and Lotus 1-2-3 files.
LibreOffice Calc is covered in more detail in Chapter 13.
Presentations: LibreOffice Impress
Anyone who has used PowerPoint will immediately feel at home with Impress, LibreOffice's presentation package, shown in Figure 11-3. Impress duplicates most of the common features found in PowerPoint, with a helping of LibreOffice-specific extras.
The program works via templates into which you enter your data. Starting the program causes the Presentation Wizard to appear. This wizard guides you through selecting a style of presentation fitting the job you have in mind. At this point, you can even select the type of transition effects you want between the various slides.
After the wizard has finished, you can choose from the usual Normal and Outline view modes (available from the View menu, or by clicking the tabs in the main work area). Outline mode lets you enter your thoughts quickly, and Normal mode lets you type straight onto presentation slides.
You can format text by highlighting it and right-clicking it, by using the Text Formatting toolbar that appears whenever you click inside a text box, or by selecting an entry on the Format menu. Impress also features a healthy selection of drawing tools, so you can create quite complex diagrams. These are available on the Drawing toolbar along the bottom of the screen. You can also easily insert pictures, other graphics, and sound effects.
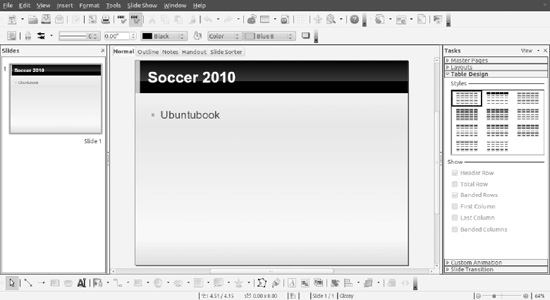
Figure 11-3. LibreOffice Impress
You can open and edit existing PowerPoint (.ppt) files and, as with all LibreOffice packages, save your presentation as a PDF file. Impress also lets you export your presentation as a Macromedia Flash file (.swf). This means that anyone with a browser and Macromedia's Flash plug-in can view the file, either online or via e-mail. Simply click File ![]() Export, and then choose Macromedia Flash (SWF) from the File Format list.
Export, and then choose Macromedia Flash (SWF) from the File Format list.
Along with slide presentations, Impress also lets you produce handouts to support your work. LibreOffice Impress is covered in more detail in Chapter 13.
Database: LibreOffice Base
Base, shown in Figure 11-4, allows you to create relational databases by using a built-in database engine, as well as interface with external databases. Base is not installed by default, so you will need to install the libreoffice-base package by using the Ubuntu Software Center.
Base is very similar to Microsoft Access in look and feel, although it lacks some of Access's high-end functions. For most database uses, it should prove perfectly adequate. If you know the fundamentals of database technology, you shouldn't have any trouble getting started with Base immediately. This is made even easier than you might expect, because when the program starts, a wizard guides you through the creation of a simple database.
As with Access, Base is designed on the principles of tables of data, forms by which the data is input or accessed, and queries and reports by which the data can be examined and output. Once again, wizards are available to walk you through the creation of each of these, or you can dive straight in and edit each by hand by selecting the relevant option.
Each field in the table can be of various types, including several different integer and text types, as well as binary and Boolean values. Forms can contain a variety of controls, ranging from simple text boxes to radio buttons and scrolling lists, all of which can make data entry easier. Reports can feature a variety of text formatting and can also rely on queries to manipulate the data. The queries themselves can feature many functions and filters in order to sort data down to the finest detail.
You learn more about Base in Chapter 13.
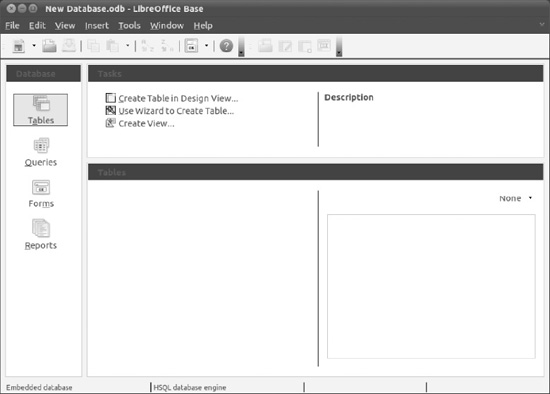
Figure 11-4. LibreOffice Base
E-Mail/Personal Information Manager: Evolution
Evolution is a little like Microsoft Outlook in that, in addition to being an e-mail client, it can also keep track of your appointments and contacts. You can start Evolution by clicking the mail envelope in the top panel and selecting the Mail option.
Before using the program, you need to set it up with your mail server settings, as detailed in Chapter 14. Evolution is compatible with POP/SMTP, IMAP, Novell GroupWise, Hula, Microsoft Exchange, and a handful of UNIX mail formats rarely used nowadays.
After the program is up and running, as shown in Figure 11-5, you can create a new message by clicking the New button on the toolbar. To reply to any e-mail, simply select it in the list and then click the Reply or Group Reply button, depending on whether you want to reply to the sender or to all the recipients of the message.
To switch to Contacts view, click the relevant button on the bottom left. If you reply to anyone via e-mail, they're automatically added to this Contacts list. You can also add entries manually by either right-clicking someone's address in an open e-mail or right-clicking in a blank space in the Contacts view. Clicking the Calendars view shows a day-and-month diary. To add an appointment, simply select the day and then double-click the time you want the appointment to start. You can opt to set an alarm when creating the appointment, so that you're reminded of it when it's scheduled.
Finally, by clicking the Tasks and Memos buttons, you can create a to-do list and jot down quick notes, respectively. To add a task, click the bar at the top of the list. After an entry has been created, you can put a check in its box to mark it as completed. Completed tasks are marked with a strikethrough, so you can see at a glance what you still need to do. To add a memo, click the bar at the top of the memo list and simply type what you want to remember.
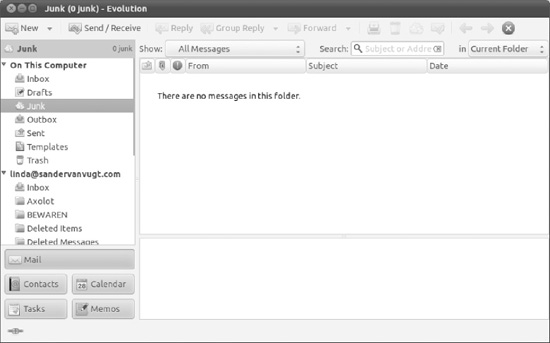
Figure 11-5. Evolution
Web Browser: Firefox
You might already know of Mozilla Firefox under Windows, where it has firmly established itself as the alternative browser of choice. The good news is that the Linux version of Firefox is nearly identical to its Windows counterpart. You can conveniently start it from the Unity Launcher Natty includes its latest version, Firefox 4.0, which is up to six times faster than previous versions and has many improved features.
When the program starts, as shown in Figure 11-6, you can type an address into the URL bar to visit a web site. If you want to add a site to your bookmarks list, click Bookmarks ![]() Bookmark This Page. Alternatively, you can press Ctrl+D.
Bookmark This Page. Alternatively, you can press Ctrl+D.
Searching is easy within Firefox. You use the search bar at the top right of the window. By default, Firefox uses Google for searches. To choose from other search engines, click the small down arrow on the left side of the search box. You can even enter your own choice of site if your favorite isn't already in the list—click Manage Search Engines and then click the Get More Search Engines link in the dialog box that appears.
Firefox popularized the principle of tabbed browsing, which means you can have more than one site open at once. To open a new tab, press Ctrl+T. You can move between the tabs by clicking them.
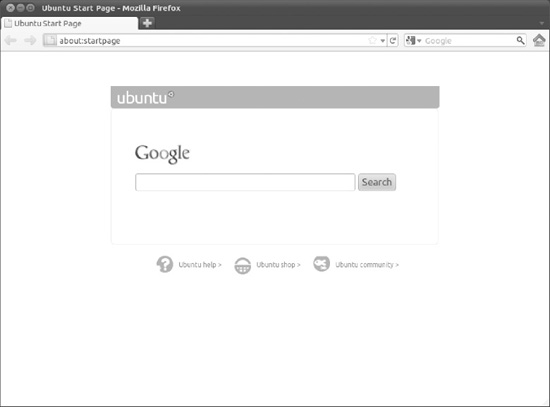
Figure 11-6. Mozilla Firefox
Firefox is compatible with most of the same add-ons (extensions) that you might have used under the Windows version of the browser. You can download new add-ons from https://addons.mozilla.org, or click Tools ![]() Add Ons and select the Get Add-ons icon. In addition, Firefox under Ubuntu can work with Flash animations and multimedia content; the relevant software (including the Flash Player) is installed on demand the first time it's needed. See the instructions in Chapter 17 to learn more.
Add Ons and select the Get Add-ons icon. In addition, Firefox under Ubuntu can work with Flash animations and multimedia content; the relevant software (including the Flash Player) is installed on demand the first time it's needed. See the instructions in Chapter 17 to learn more.
Media Player: Banshee
The default media player has changed in this last release of Ubuntu: Rythmbox has been replaced with Banshee.
Banshee is a media player application, which means that it will allow you to play audio, such as music or podcasts, as well as watch videos. You can import media stored in your computer, sync it with such portable devices iPods or Android phones, and play online media.
The user interface is uncomplicated and effective. The music and video sources are shown on the left in the Sources pane. When you select a source, the content will be displayed in the right pane, or Library Browser. The Library view will change depending on the source you have chosen.
Banshee can play back the majority of audio files, as long as it's properly configured, which is to say after additional software has been installed. We describe how to set up this software in Chapter 16.
Figure 11-7 shows a typical Banshee screen.
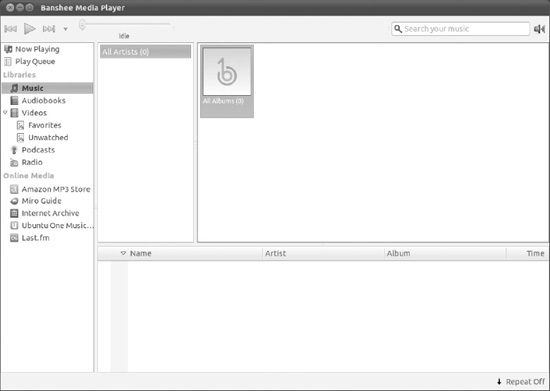
Figure 11-7. Banshee
When you open Banshee for the first time, it's a good idea to configure it to find your music and video collections. You can do that by clicking Media > Import Media. It can import folders and files from storage or from other sources such as iTunes and Rhythmbox. Imported media will appear in its corresponding source (under Music or Videos, for example).
To play music, select the Music source. Choose the album or song, or navigate to the album or artist browsers to refine your search. Videos are listed alphabetically under the Video source. Just right-click on the desired video in the Library pane and select Play. If you click the Now Playing source, you can watch the video in the right pane. You can click the Simplify button to hide the left pane, and the Fullscreen button to go to fullscreen mode. If you want to know what's going to play next, just select the Play Queue source.
You can also use Banshee to listen to Internet radio stations. Just right-click on the Radio source and select Add Station. You need to know the genre, the name, and the station's URL to properly configure it.
Podcasts are different because they are downloaded to the PC prior to being played. They are episodic in nature, so they form a series with periodic updates. The list of episodes is centrally maintained on a server and updates are published as web feeds. Banshee is a client application for podcasts, which means that you can use it to subscribe to a podcast and receive the new episodes automatically. Just right-click on Podcasts and select Add Podcast.
Other sources include the Amazon MP3 Store, where you can buy music and videos; the Miro Guide, where you can search for available podcasts; the Internet Archive, which is a digital library of online resources; and Last.fm, a popular online music service and social network.
Movie Playback: Totem Movie Player
Totem movie player is able to handle the majority of video files you might own, as long as some additional software is installed. Totem can also play back DVD movies, which, again, requires the installation of software. We cover setting up this software in Chapters 16 and 17 if you intend to play back video files and DVDs, these chapters should be your first port of call.
Like Banshee, Totem is an uncomplicated application. As shown in Figure 11-8, the video plays on the left side of the window. A playlist detailing movies you have queued appears on the right side. You can remove this, to give the video more room, by clicking the Sidebar button.
You can control video playback by using the play/pause, fast-forward, and rewind buttons at the bottom left. In addition, provided a compatible video format is being played, you can use the Time bar to move backward and forward within the video file. You can switch to full-screen playback by clicking View ![]() Fullscreen. To switch back, simply press the Esc key.
Fullscreen. To switch back, simply press the Esc key.
Provided the software described in Chapter 17 is installed, DVD playback will start automatically as soon as a disc is inserted, and you should be able to use the mouse with any onscreen menus. In addition, you can skip between chapters on the disc by using the Go menu, and also return to the DVD's main or submenu systems. To switch between the various languages on a DVD (if applicable), click Sound ![]() Languages and choose from the list.
Languages and choose from the list.
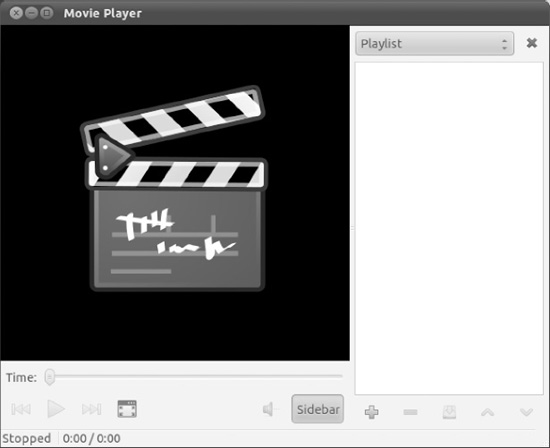
Figure 11-8. Totem movie player
CD/DVD Burning: Brasero/Nautilus CD/DVD Creator
As soon as you insert a blank writeable disc, whether it's a CD or DVD, Ubuntu detects it and offers a handful of choices: Do Nothing, Open Folder, and Open CD/DVD Creator.
The first option should be obvious, whereas the second option starts Nautilus's CD/DVD burning mode. This is a simple disc-burning interface where files can be dragged into the window and subsequently burned to data CD/DVD.
However, the third option—Open Disc Burner—is most useful. This activates Ubuntu's dedicated CD/DVD-burning software, Brasero, which is able to create data CD/DVDs, as well as audio and video CDs. Brasero, shown in Figure 11-9, can also copy some kinds of discs.
If you want to start Brasero manually, you'll find it on the Applications menu. When the Brasero interface appears, select from the list whichever kind of project you want to create. For example, to create an audio CD, click the Audio Project button. Then drag and drop your music files onto the program window and click the Burn button. Keep an eye on the meter at the bottom right. This is like a progress bar; when the green portion is full, the disc is full. Note that you can't write certain audio files, like MP3s, to CDs unless you have the relevant codecs installed. See Chapter 16 to learn more.
Using the Nautilus CD/DVD Creator is similar to using Brasero. Just drag and drop files onto the window to create shortcuts to the files. When it comes time to burn, Nautilus copies the files from their original locations. When you've finished choosing files, click the Write to Disc button. Unfortunately, you won't see a warning if the disc's capacity has been exceeded until you try to write to the disc. However, by right-clicking an empty space in the Nautilus window and selecting Properties, you can discover the total size of the files. Remember that most CDs hold 700MB, and most DVD+/-R discs hold around 4.7GB (some dual-layer discs hold twice this amount; see the DVD disc packaging for details).
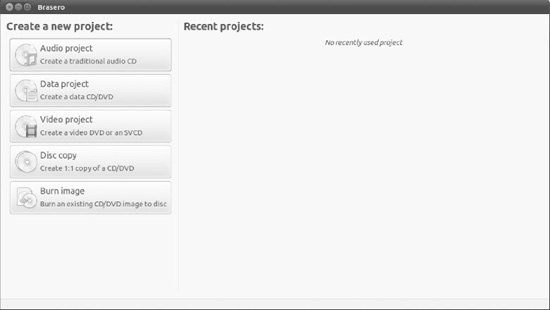
Figure 11-9. Nautilus CD/DVD Creator and Brasero
Photo Editing: F-Spot and GIMP
Ubuntu offers photo-editing tools on par with professional products like Adobe Photoshop. It's certainly more than powerful enough for tweaking digital camera snapshots.
F-Spot is covered in depth in Chapter 18. In this section we give you a brief introduction to GIMP, which has to be installed with Ubuntu Software Center because it's no longer a default application.
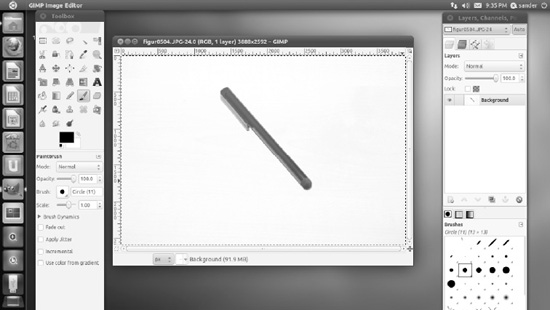
To start GIMP, choose Applications ![]() GIMP Image Editor. After the program is running, you'll notice that its main program component is a large toolbar on the left side of the screen. On the right are certain floating palettes, while in the middle is the main image-editing program window. This can be maximized to fill the Desktop, and this is a good idea if you want to make serious use of GIMP.
GIMP Image Editor. After the program is running, you'll notice that its main program component is a large toolbar on the left side of the screen. On the right are certain floating palettes, while in the middle is the main image-editing program window. This can be maximized to fill the Desktop, and this is a good idea if you want to make serious use of GIMP.
To open a picture, choose File ![]() Open and select your image from the hard disk. After an image file is opened, you can manipulate it by using the tools on the toolbar (which are similar to those found in other image editors). On the bottom half of the main program window are the settings for each tool, which can be altered, usually via click-and-drag sliders.
Open and select your image from the hard disk. After an image file is opened, you can manipulate it by using the tools on the toolbar (which are similar to those found in other image editors). On the bottom half of the main program window are the settings for each tool, which can be altered, usually via click-and-drag sliders.
To apply filters or other corrective changes, right-click anywhere on the image to bring up a context menu with a variety of options. For example, simple tools to improve brightness and contrast can be found on the Colors submenu, as shown in Figure 11-10.
Other Handy Applications
Many additional applications might prove useful on a day-to-day basis. Here we review some of the more common ones.
Calculator
The GNOME Calculator (also known as Gcalctool) can be found on the Applications menu. In its default mode, shown in Figure 11-11, it shouldn't present any challenges to anyone who has ever used a real-life calculator.
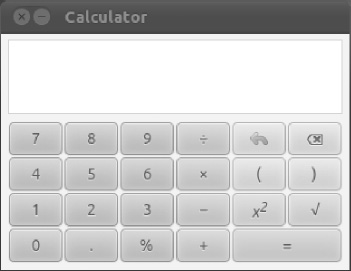
Figure 11-11. GNOME Calculator
Calculator also has other modes that you can switch into by using the View menu. Perhaps the three most useful modes for general use are Advanced, Financial, and Scientific. All offer calculator functions relevant to their settings. The Advanced mode is simply a more complicated version of the basic Calculator. It can store numbers in several memory locations, for example, and can also carry out less-common calculations, such as square roots and reciprocals.
Archive Manager
Archive Manager (also known as File Roller), shown in Figure 11-12, is Ubuntu's archive tool. It's the default program that opens whenever you double-click .zip files (or .tar, .gz, or .bzip2 files, which are the native archive file formats under Linux).
To extract files from an archive, select them (hold down the Ctrl key to select more than one file) and then click the Extract button on the toolbar.
To create an archive on the fly, select files or folders in a Nautilus file browser window, right-click the selection, and select Compress. Give the archive a name, and the archive will be created. To add new files to an existing archive, double-click an archive file and then drag and drop files into the Archive Manager window. When you've finished, simply close the Archive Manager window.
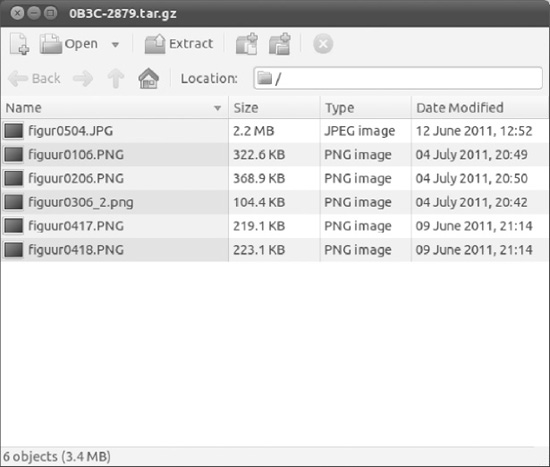
Figure 11-12. Archive Manager
Dictionary
You can use the Dictionary tool to look up the definitions of words in the Collaborative International Dictionary of English1. This dictionary is based on a 1913 edition of Webster's Revised Unabridged Dictionary, but with some additional modern definitions. The Dictionary tool is useful for quick lookups, although if you want a precise and modern definition of a word, you might consider using a more contemporary source.
After installing the gnome-dictionary package using Ubuntu Software Center, you can easily start it from the Applications menu in the Unity Launcher. Type the word in the Look Up text box at the top of the window, and its definition will appear in the area below, as shown in Figure 11-13. As soon as you start typing, the program will begin to look up the word in the dictionary, and this can cause a momentary delay before the letters appear on your screen.
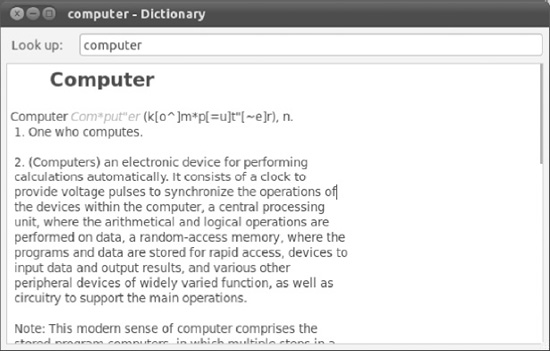
Figure 11-13. Dictionary
Empathy Instant Messaging Client
Empathy is the instant messaging software provided with Ubuntu. Unlike most other messaging programs, Empathy isn't exclusive to one chat protocol. You can use it to connect to GTalk, Jabber, MSN, AOL/ICQ, Yahoo!, Facebook Chat, and many other services.
Details for setting up Empathy are in Chapter 14. After the program is up and running, you can chat with any of your buddies by double-clicking their icon, as shown in Figure 11-14.
The rest of the program can be administered by right-clicking the notification area icon that appears when the program starts. For example, you can change your status or sign off from there. You can also use the Me menu, explained more thoroughly in Chapter 15, to change the status of all your Chat accounts at once.
_____________
1 To use the Dictionary, you first need to install the GNOME Desktop Utilities application using the Ubuntu Software Center.

Ekiga
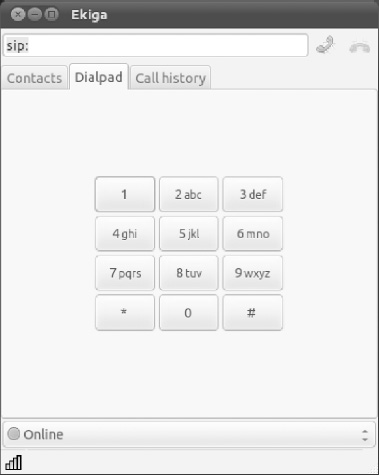
Ekiga provides Internet telephony (known as Voice over IP, or VoIP) via the SIP and H.323 protocols2. It also provides video conferencing, and is compatible with all major features specified within SIP and H.323, such as holding, forwarding, and transferring calls. Ekiga can be found on the Applications ![]() Internet menu.
Internet menu.
To activate the camera mode for a video conference, click the webcam icon on the left side of the window. To text chat, click the top icon on the left side of the window. When the program starts, it walks you through setup via a wizard. Simply answer the questions with your details. After the program is up and running, as shown in Figure 11-15, type the URL of the person you would like to call into the address bar and click Call.
Note that Ekiga is not compatible with proprietary VoIP software, such as Skype. To learn how to install Skype under Ubuntu, see Chapter 14.
___________
2To use Ekiga, you first need to install it with Ubuntu Software Center.
Games
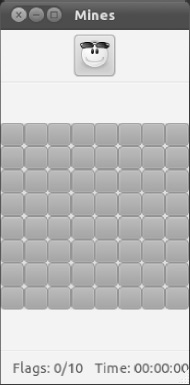
Ubuntu comes with a great selection of simple games, including Mines, shown in Figure 11-16. The equivalent of the Windows Minesweeper game, Mines can be found on the Applications menu. The rules are identical, too: on each grid are several hidden mines, and it's your job to locate them. After you've clicked one square at random, you'll see a series of empty squares and several with numbers in them. Those with numbers indicate that a bomb is near. Your job is to deduce where the bombs are and then mark them by right-clicking them. You have to do this as quickly as possible because you're being timed.
To change the grid size, click Settings ![]() Preferences. Your choices are Small, Medium, Large, and Custom.
Preferences. Your choices are Small, Medium, Large, and Custom.
There are of course a lot of games to play within Ubuntu. We cover the subject in more depth in Chapter 19.
Windows Applications
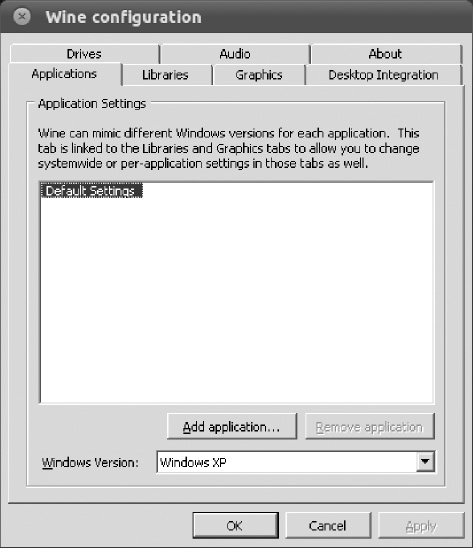
Although Ubuntu doesn't officially support Windows applications, the Wine project is attempting to add a degree of compatibility and is currently good enough to run many of the most common Windows applications. Wine can be installed by using Ubuntu Software Center, and then applications can be installed by using the standard Windows installer.
Although not every application will work, Wine supports quite a lot of software, including Microsoft Office XP, Spotify (shown in Figure 11-17), Photoshop 7, and even some games. See www.winehq.org for more information.
We discuss how to install Windows applications with Wine in Chapter 20.
Summary
In this chapter, you've taken a look at some Ubuntu programs that provide vital functions that you might have used daily under Windows. The aim was to get you started with this software as quickly as possible by pointing out key features. You've seen how some programs mirror the look and feel of their Windows counterparts almost to the letter, whereas others resolutely strike out on their own path. It takes just a little time to become familiar with Ubuntu software, and then using these programs will become second nature.
In the next chapter, we move on to more fundamental Ubuntu tasks: manipulating files. However, once again, this is not too dissimilar from the Windows experience, which makes getting used to the system very easy.
