C H A P T E R 17
Movies and Multimedia
Watching movies and TV shows on computers is becoming increasingly popular. Most PCs now ship with hardware capable of playing back DVDs. Web sites such as YouTube and Vimeo provide thousands of clips for viewing via your web browser, and Netflix On Demand and Hulu deliver high-quality films and TV shows directly to your PC.
Ubuntu provides support for visual entertainment. As with audio playback (discussed in the previous chapter), you’ll need to install some additional codecs to access certain types of files. And just as with audio playback codecs, multimedia applications suggest which movie playback codecs to download and install when you attempt to play unsupported multimedia files. This chapter explains how easy it is to set up Ubuntu for watching videos, DVDs, and TV on your computer, as well as playing web site Flash animations and videos.
Installing Playback Software
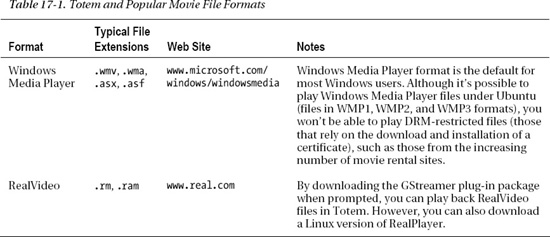
Like the other multimedia software provided with Ubuntu, its video playback application, the Totem movie player, is basic but effective and does the job well. However, because of patenting issues, Totem doesn’t support all video formats out of the box, although for some of them it’s not hard to add support by installing the right codecs. In Table 17-1 you find an overview of some of the most common video formats and their current status in Totem.
Video and audio playback within the Firefox web browser are handled via the Totem browser plug-in (In Firefox, see Tools ![]() Add Ons
Add Ons ![]() Plugins for a list of currently installed plug-ins. These plug-ins work in exactly the same way as the Windows Media Player and QuickTime browser plug-ins work under Windows. This is set up automatically during initial installation of Ubuntu and is also compatible with the GStreamer codec plug-ins after they are installed. However, when you try to retrieve streaming content, many web sites attempt to probe your setup to ensure that you have the required media player software, and they may balk when they can’t find Windows Media Player or QuickTime. This makes playback difficult, although more and more sites are switching to video playback via Flash Player. Additionally, some web sites use Java applets to present content. You can install support for both Flash and Java through Firefox.
Plugins for a list of currently installed plug-ins. These plug-ins work in exactly the same way as the Windows Media Player and QuickTime browser plug-ins work under Windows. This is set up automatically during initial installation of Ubuntu and is also compatible with the GStreamer codec plug-ins after they are installed. However, when you try to retrieve streaming content, many web sites attempt to probe your setup to ensure that you have the required media player software, and they may balk when they can’t find Windows Media Player or QuickTime. This makes playback difficult, although more and more sites are switching to video playback via Flash Player. Additionally, some web sites use Java applets to present content. You can install support for both Flash and Java through Firefox.
Next we cover how to install codecs for movie file formats, as well as how to install the Linux version of RealPlayer and support for Flash and Java.
Installing Codecs
The codecs for video playback are created by the open source community and are therefore entirely free of copyright issues, but it is claimed that some utilize patented technology. As you might expect, this makes for another legally gray area. It’s unlikely that the patent holders sanction the distribution of the codecs in countries that allow software to be patented. As with audio playback codecs, you will need to decide whether the caveats shown by Ubuntu during the installation of the codecs apply to you.
![]() Note Most of the movie playback codecs used under Ubuntu are provided by the excellent FFmpeg Project (
Note Most of the movie playback codecs used under Ubuntu are provided by the excellent FFmpeg Project (http://ffmpeg.mplayerhq.hu). This endeavor is part of the MPlayer Project, which aims to create an open source media player and platform, separate from GStreamer or Xine (used under the GNOME and KDE desktops, respectively). However, as with all open source projects, it is both possible and encouraged to take and reuse just the FFmpeg codec software, which is what the Ubuntu developers have done to bring support for a wide range of movie and audio formats to Ubuntu.
As stated earlier, codec installation for new file formats is automated (so long as you’re online), just as with audio codecs. In fact, if you followed the instructions to install the MP3 codecs in the previous chapter, including the GStreamer ffmpeg video plug-in codec, then your system may already have support for the movie formats. In that case, the video file you’ve chosen to view will just start playing—you won’t be prompted to download anything extra.
Here is the procedure for adding codecs to play a multimedia file:
- From Nautilus, double-click a movie file.
- The Totem movie player application will start and prompt you to search for a suitable codec. (As noted, the movie will just start playing if you already have the necessary codec.) Click the Search button.
- Ubuntu will search for the applicable codec. After it has finished searching, the Install Multimedia Codecs dialog box will appear, prompting you to select from the list of codecs.
- You can read through the descriptions to know which codec to choose, if more than one is offered. As with audio playback codecs, it’s usually a good idea to select all the codecs offered, to get the broadest range of support. Ubuntu will handle any functionality overlap in the background, so don’t worry about installing two or more sets of codecs that seemingly do the same job. Check the options you want and click the Install button.
- Ubuntu will ask you to confirm the installation of restricted software. Read through the conditions and warnings. If you want to continue, click Confirm. Otherwise, click the Cancel button to choose not to install the codec (meaning that your system will not be able to play the files).
- Back in the Install Multimedia Codecs dialog box, click the Install button again.
- Supply your password in the authorization dialog box and click OK to proceed with the installation.
- Ubuntu will download and install the packages. After you have been notified that the packages have been installed successfully, click the Close button. At this point, your multimedia file will play in Totem.
Installing RealPlayer 11
RealPlayer 11 is a media playback application designed for Linux, Windows, and Macintosh OS X, written by Real Networks. It gives you access to a range of media. Although the software has been available for Linux and Ubuntu for some years, its installation still occasionally causes confusion. There are a couple of ways to install the software, but we’re going to use a native .deb package file that automates much of the process:
- Open a browser and go to
www.real.com/linux. From the main page click Download DEB installer and accept the default suggestion to open the file with the Ubuntu Software Center.- After the 8MB package has downloaded, it automatically launches the Ubuntu Software Center. Click Install to start the installation process and then read through and acknowledge the end-user license.
- The software will now begin to install. During the process it will download other pieces of software to sort out dependencies, which can take some time.
- After the software has finished installing, it will create icons under the Applications
Multimedia menu and will also set up the helpers for Firefox. The first time you run the software, it will start a Setup Assistant. After accepting the License Agreement, it will do a network speed test (see Figure 17-1). After the test, you’ll see its results. From the results window, click Update and then click Finish. At this point you will be ready to go.
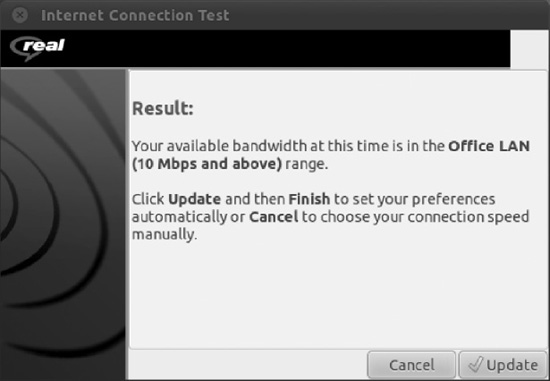
Figure 17-1. After RealPlayer has been installed by a self-installer executable, you must run the setup assistant, which starts an Internet connection speed test.
![]() Tip To see which plug-ins are installed under Firefox, type about:plugins in the address bar.
Tip To see which plug-ins are installed under Firefox, type about:plugins in the address bar.
Adding Flash Support
Flash is a multimedia plug-in used for animations, games, and video playback on web sites. It is a standard requirement on modern Internet-equipped computers, and finding commercial sites that don’t utilize it in some way is becoming difficult. For example, YouTube (www.youtube.com) uses Flash for the playback of video files, as shown in Figure 17-2.
Adobe is the originator of the Flash technology and makes a version of its proprietary Flash Player web browser plug-in especially for Linux, which can be easily installed under Ubuntu. You can also choose to install one of two open source Flash players: Swfdec or Gnash. Of the three, Adobe’s own Flash Player offers the best all-round compatibility with web sites of all kinds—general, video, games, and animations. Swfdec is perhaps the best open source choice, although it specializes primarily in video playback, such as that offered by YouTube or the BBC (www.bbc.co.uk). Gnash may be the weakest of the three (at the time of this writing), but may be worth investigating if you prefer to use open source software and find that Swfdec doesn’t work correctly with your favorite web sites. Be aware, though, that open source Flash solutions are running behind compared to the possibilities of commercial Flash players. For the best Flash experience, use Adobe Flash.
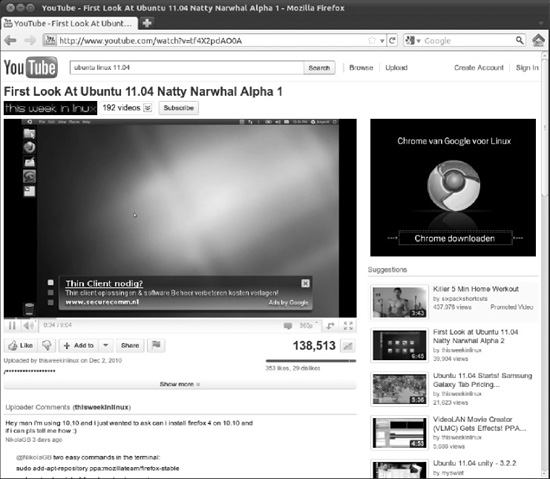
Figure 17-2. Flash is increasingly popular on video playback sites such as YouTube.
![]() Note Sadly, there isn’t a Linux version of the Shockwave Director browser plug-in. If you really need to have access to Shockwave sites under Linux, consider using CrossOver Professional (
Note Sadly, there isn’t a Linux version of the Shockwave Director browser plug-in. If you really need to have access to Shockwave sites under Linux, consider using CrossOver Professional (www.codeweavers.com) to install the Windows version. But be aware that CrossOver Professional is a commercial product, meaning you have to pay for it.
Installing a Flash Plug-in
As with multimedia codecs, Flash support is installed on demand and is entirely automated. However, this time, installation takes place from within the Firefox browser, as follows:
- The first time you visit a web site that uses Flash, a yellow bar will appear at the top of the browser window, informing you that you need to install a missing plug-in. Click the Install Missing Plugins button.
- In the Plugin Finder Service dialog box, click your choice of plug-in and then click the Next button. You’re asked whether you want to install additional software. Click the Yes button.
- The software is downloaded and installed in the background automatically. After installation has completed, click the Finish button to close the Plugin Finder Service dialog box. The browser will then display the Flash content.
- Some users may find that this method doesn’t work and that the plug-in is not available. In this case, go to
www.adobe.com, click the link for Get Adobe Flash Player, select the appropriate version to download (.debfor Ubuntu 8.04+), and then install as with the RealPlayer software earlier. Note that you’ll be prompted to close down all browsers during the installation procedure.
Removing a Flash Plug-in
If you want to remove a Flash plug-in—perhaps because it doesn’t work correctly and you want to try an alternative—open Ubuntu Software Manager and search for gnash to remove Gnash, swfdec to remove Swfdec, or flashplugin-nonfree to remove Adobe’s Flash Player. Click the check box alongside the entry in the list and select Mark for Removal from the menu that appears. (If you want to remove Gnash, you’ll need to mark both gnash and gnash-common for removal.) Then click Apply on the main toolbar. Close Ubuntu Software Manager when the removal is complete.
Following this, whenever you visit a site requiring Flash, you will again be prompted to install a Flash plug-in. You can then select a different option from the list.
Adding Java Support
Java is a software platform that some programs use. The intention is that Java is cross- platform, which means that software developed for, say, Microsoft Windows will also work on Linux and Macintosh. Because of this, some web sites use Java applets—small programs embedded into the web page—to present interaction, animation, and even movies.
To access web sites that employ Java applets, you’ll need to install the Java Runtime software along with a browser plug-in. Previously, Java would have been a separate installation, but since Sun Microsystems released the software under an open source license, it has been available to distribution developers and hence is now included in the Ubuntu software repositories. The simplest way to install is to open Ubuntu Software Center, do a search for Java, and then select Sun Java6 JRE for installation (see Figure 7-3). Other options will automatically be selected, including the binaries and plug-ins for Firefox, and you can just click Apply to install the software.
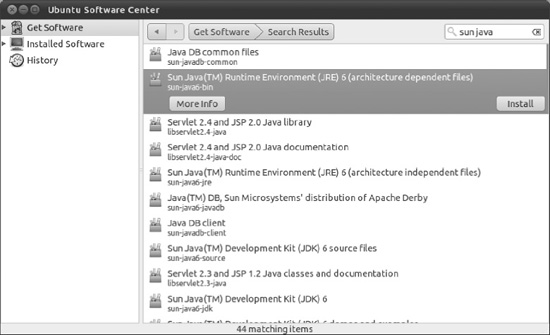
Figure 17-3. Install the Sun Java Runtime Environment for optimal Java support.
Watching Movies
The Totem movie player application (Applications ![]() Multimedia
Multimedia ![]() Movie Player) is used to play back video under Ubuntu, as shown in Figure 17-4.
Movie Player) is used to play back video under Ubuntu, as shown in Figure 17-4.
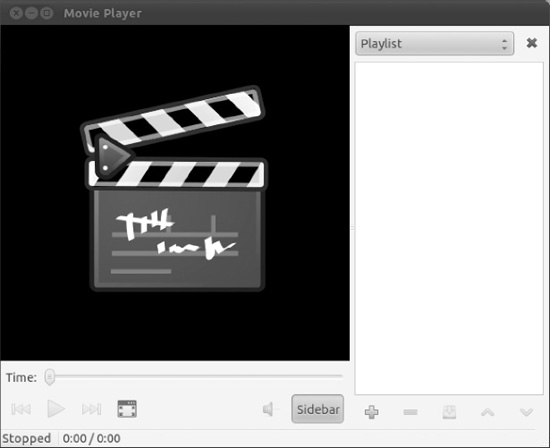
Figure 17-4. Totem handles movie file playback under Ubuntu and is simple but effective.
To play a movie file on your hard disk, simply double-click its icon. This will automatically start Totem and play the video, if Totem has the appropriate codecs, as shown in Figure 17-5. If not, Totem will suggest which codecs to download and install, as explained earlier in the chapter.
![]() Tip By default, all video files will play in Totem, including RealMedia. To change this so that RealPlayer handles its own file types, right-click any RealPlayer movie file, select Properties, click the Open With tab, and click Add. Locate RealPlayer in the list, click the Add button, and then make sure the radio button alongside RealPlayer is selected.
Tip By default, all video files will play in Totem, including RealMedia. To change this so that RealPlayer handles its own file types, right-click any RealPlayer movie file, select Properties, click the Open With tab, and click Add. Locate RealPlayer in the list, click the Add button, and then make sure the radio button alongside RealPlayer is selected.
Using Totem is easy, and the interface has only a handful of options. At the bottom left of the screen are the transport controls that enable you to pause, play, and move forward and backward in the video file. Alternatively, you can right-click the video window and select the controls from there.
Above the controls is the Time bar. You can usually drag the slider to move through the video, but not all files support this function. You might find that some dragging is allowed, but you’re not able to click a new place in the Time bar and have the counter jump to that position.
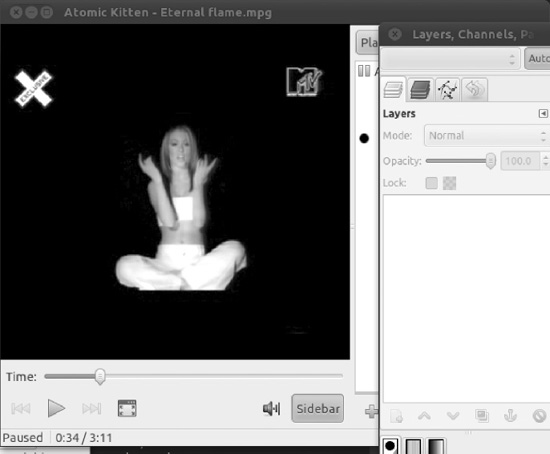
Figure 17-5. Totem can play just about every kind of movie file, such as QuickTime, Windows Media Player, DivX, and Ogg (or .ogv) files, as shown here.
At the right of the program window is a playlist. You can queue several video files to be played in sequence by simply dragging and dropping movies from a Nautilus file browser window. You can hide the playlist by clicking the Sidebar button. This gives nearly all of Totem’s program window to the playback window. To play the video full screen, thereby hiding the desktop and Totem controls, press the F key. To return to the program window, press Esc (or press F again). In full-screen mode, you can start and stop the video by pressing the spacebar.
To adjust the image quality, click Edit ![]() Preferences and then click the Display tab in the Preferences dialog box. You can make adjustments by clicking and dragging the Brightness, Contrast, Saturation, and Hue sliders. If a video is playing in the background, the changes are shown as you make them.
Preferences and then click the Display tab in the Preferences dialog box. You can make adjustments by clicking and dragging the Brightness, Contrast, Saturation, and Hue sliders. If a video is playing in the background, the changes are shown as you make them.
![]() Tip If you find you have problems with video playback, such as Totem showing an error message about another application using the video output, try the following: click System
Tip If you find you have problems with video playback, such as Totem showing an error message about another application using the video output, try the following: click System ![]() Preferences
Preferences ![]() Terminal, and at the prompt, type gstreamer-properties. Click the Video tab, and in the Plugin drop-down list under Default Output, select Xwindows (No XV).
Terminal, and at the prompt, type gstreamer-properties. Click the Video tab, and in the Plugin drop-down list under Default Output, select Xwindows (No XV).
OPEN SOURCE MOVIE FILE FORMATS
Watching DVDs
DVD movie discs are protected by a form of DRM called CSS. This forces anyone who would like to create DVD playback software or hardware to pay a fee to the DVD Copy Control Association, an industry organization set up to protect DVD movie technology.
Some open source advocates reverse-engineered DVD protection and came up with the DeCSS software. This bypasses the CSS system and allows the playback of DVD movies under practically any operating system. Sadly, DeCSS is caught in a legal quagmire. The Motion Picture Association of America (MPAA) has attempted to stop its distribution within the United States, but has so far failed. Some experts suggest that distributing DeCSS breaks copyright laws, but there has yet to be a case anywhere in the world that proves this. Nor has there been a case proving or even suggesting that using DeCSS is in any way illegal.
Ubuntu doesn’t come with DeCSS installed by default, but you can download and install the software by issuing a simple command if it hasn’t been installed on your computer yet, following the installation of a software package. Here is the procedure:
- Open Ubuntu Software Center.
- In the search bar, type libdvdread4. In the list of results, click the check box alongside the package and click Mark for Installation. Click Apply on the main toolbar. Close Ubuntu Software Center.
- Open a terminal window (Applications
Accessories
Terminal). Type the following in the terminal window to download and install the DeCSS component:
sudo /usr/share/doc/libdvdread4/install-css.sh- After the command has completed, you can close the terminal window.
![]() Note You must ensure that Ubuntu Software Center and Update Manager are closed before typing the command to install the DeCSS software. It will fail if either program is running.
Note You must ensure that Ubuntu Software Center and Update Manager are closed before typing the command to install the DeCSS software. It will fail if either program is running.
After you’ve installed DeCSS, just insert a DVD, and Totem will automatically start playing it, as shown in Figure 17-6.
![]() Note If the relevant codecs aren’t installed when you insert a DVD, you will be prompted to install them, as with all kinds of multimedia file playback.
Note If the relevant codecs aren’t installed when you insert a DVD, you will be prompted to install them, as with all kinds of multimedia file playback.
If the movie doesn’t start playing automatically, double-click the disc’s icon on the desktop. In the Nautilus file browser window, click the Open Movie Player button.
Unfortunately, there is a slight limitation to playing DVD movies within Totem: the chapter menus don’t work, so you can’t navigate from chapter to chapter in the disc. Additionally, in our tests, we noticed that DVD playback can be a little glitchy. To get around both these issues, you can install the totem-xine package. This installs a separate but otherwise identical version of the Totem movie player that utilizes the Xine multimedia framework. Then you can choose between using the standard version of Totem, which relies on the GStreamer multimedia framework, or the Xine version of Totem. Installing the totem-xine package also installs Xine versions of the codecs you need for virtually all multimedia file playback, meaning no extra configuration is necessary.
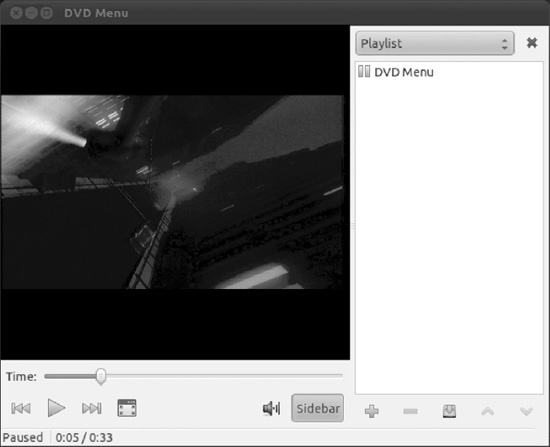
Figure 17-6. Just insert a DVD in your computer, and it will automatically play in Totem.
![]() Note You might be wondering why we didn’t just advise you to install
Note You might be wondering why we didn’t just advise you to install totem-xine back at the beginning of this chapter, if it installs all the codecs you need. The method we recommend installs codecs for the GStreamer multimedia framework, rather than just Totem. GStreamer is used by all the GNOME desktop multimedia software. This means that if you install a different GNOME movie player in the future, it will automatically have support for all the file formats you’ve already added to Ubuntu. In contrast, the totem-xine package is rather self-contained and installs codecs for only the Xine framework, which isn’t supported elsewhere under Ubuntu (but is the default framework under the KDE desktop environment).
Watching TV
If you have a TV card, you may be able to use it to watch TV under Ubuntu. Ubuntu doesn’t come with a TV tuner application by default, but you can download the tvtime program from the software repositories by using the Ubuntu Software Center.
Checking for Video Input
Ubuntu includes the Video for Linux project, an extension to the Linux kernel, to allow many popular TV and video-capture cards to work. You can find out whether yours is compatible by opening a terminal window (Applications ![]() Accessories
Accessories ![]() Terminal) and typing gstreamer-properties. In the dialog box that appears, click the Video tab and click the Test button in the Default Input part of the window. If you see a video window without an error message, your TV card is compatible. If you receive an error message, your card probably isn’t compatible.
Terminal) and typing gstreamer-properties. In the dialog box that appears, click the Video tab and click the Test button in the Default Input part of the window. If you see a video window without an error message, your TV card is compatible. If you receive an error message, your card probably isn’t compatible.
![]() Note Getting Video for Linux to work can be troublesome, but there are a lot of resources out there to help. You can start by visiting
Note Getting Video for Linux to work can be troublesome, but there are a lot of resources out there to help. You can start by visiting www.linuxtv.org and www.exploits.org/v4l/.
Installing tvtime
To download and install tvtime, open the Ubuntu Software Centerand enter tvtime as a search term. In the list of results, click the entry for the package, mark it for installation, and then click Apply.
When the download has completed, you’ll be asked a number of questions during the configuration process. First, you need to choose your TV picture format. Users in the United States should choose NTSC. Users in the United Kingdom, Australia, and certain parts of Europe should choose PAL. To find out which TV system your country uses, look up your country at www.videouniversity.com/standard.htm. You also need to choose your geographical area from the list so that tvtime can set the correct radio frequency range for your TV card.
After the program is installed, you’ll find it on the Applications ![]() Multimedia menu. Using the program is straightforward, but if you need guidance, visit the program’s web site at
Multimedia menu. Using the program is straightforward, but if you need guidance, visit the program’s web site at http://tvtime.sourceforge.net.
![]() Tip If you’re interested in setting up a low-cost personal video recorder (PVR) and entertainment system, you may want to install MythTV by using the Synaptic Package Manager. For more information, check out Practical MythTV: Building a PVR and Media Center PC by Stewart Smith and Michael Still (Apress, 2007).
Tip If you’re interested in setting up a low-cost personal video recorder (PVR) and entertainment system, you may want to install MythTV by using the Synaptic Package Manager. For more information, check out Practical MythTV: Building a PVR and Media Center PC by Stewart Smith and Michael Still (Apress, 2007).
Summary
In this chapter, you looked at how you can watch movies on your PC. You’ve seen how you can update Ubuntu to work with the most popular digital video technologies, such as Windows Media Player and QuickTime.
In addition, you looked at how you can view online multimedia such as Flash animations on your computer, and learned how you can watch TV on your PC.
In the next chapter, you’ll take a look at image editing under Ubuntu. You’ll learn about one of the crown jewels of the Linux software scene: GIMP.
