C H A P T E R 23
![]()
Backing Up Data
Every computer user knows that backing up data is vital. This is usually because every computer user has lost data at some point, perhaps because of a corrupted file or an accidental deletion.
Some of the people behind UNIX were highly aware of such occurrences, and built in several advanced and useful backup tools. These have been mirrored within Linux, with the result that creating and maintaining backups is easy.
In this chapter, you first look at what data should be backed up and then explore two ways to make backups: via the Simple Backup utility and the command line.
What Data Should You Back Up?
Data on your system can be classified into three broad types: program data, configuration data, and personal data. It's traditionally reasoned that backing up all types of data is inefficient, because it would mean backing up many gigabytes of information regularly. Because of this, you usually want to back up the latter two types of data: configuration and personal. The theory is that if your PC is hit by a hard-disk-wrecking disaster, you can easily reinstall the OS from the CD or DVD. Restoring your system from backup is then simply a matter of ensuring that the configuration files are back in place, so your applications work as you would like them to, and your personal data is once again made accessible.
Practically all the personal configuration data for programs you use every day, as well as your personal data, is stored in your /home directory (although the configuration files for software used systemwide are usually stored in the /etc directory).You might also want to consider locating your /home directory in a separate partition, for additional security.
If you take a look in your /home directory, you might think that the previous sentence is incorrect. On a freshly installed system, the directory appears largely empty, apart from a handful of directories for music, photos, and so on. However, most, if not all, of the configuration files are hidden; their directory and filenames are preceded with a period (.), which means that Linux doesn't display them in a standard directory listing.
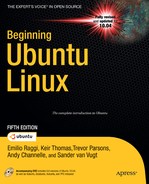
To view hidden files and folders in the Nautilus file manager, choose View ![]() Show Hidden Files. This can be quite an eye-opener when you see the masses of data you didn't even realize were there, as shown in the example in Figure 23-1.
Show Hidden Files. This can be quite an eye-opener when you see the masses of data you didn't even realize were there, as shown in the example in Figure 23-1.
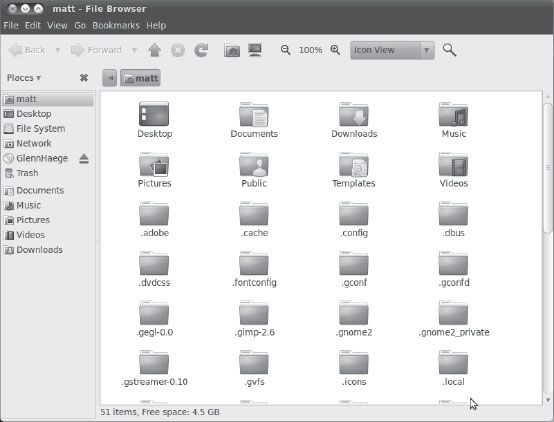
Figure 23-1. Most of the configuration files for programs are hidden—literally—in your /home directory.
The configuration files held in your /home directory relate solely to your user account. Any other users will have their own configuration files, entirely independent of yours. In this way, all users can have their own configuration settings for various applications, which can be backed up independently.
Under Ubuntu, you can back up both configuration data and personal files by using Simple Backup, which can be downloaded from the Ubuntu software repositories.
Keep in mind that there's little point in making backups if you leave the resultant archive files on your hard disk. For full backup protection, the archives should be stored elsewhere, such as on an external hard disk, network mount, or CD/DVD-ROM. Consider using GNOME's CD/DVD Creator (click Applications ![]() Accessories
Accessories ![]() CD/DVD Creator on the Main Menu).
CD/DVD Creator on the Main Menu).
Using Simple Backup
Simple Backup is a series of programs that enable quick and easy backup and restoration of personal data, as well as system configuration files. Its output, which takes the form of backup directories containing an archive of the files, plus configuration data, can be written to your hard disk (or a network mount attached to it), or to a remote Internet location, such as an FTP server.
Simple Backup was created courtesy of the Google Summer of Code sponsorship scheme and was designed with the help of Ubuntu developers. To install Simple Backup, open the Ubuntu Software Center (Applications ![]() Ubuntu Software Center) and then search for
Ubuntu Software Center) and then search for sbackup. Click the entry Simple Backup Config in the list of results and click Install. You'll then find entries for Simple Backup Config and Simple Backup Restore on the System ![]() Administration menu.
Administration menu.
Backing Up Data via Simple Backup
To configure a backup, choose System ![]() Administration
Administration ![]() Simple Backup Config. You'll see the Backup Properties dialog box, as shown in Figure 23-2. Using this dialog box, you can choose the files that Simple Backup backs up, as well as when it does so. After you've made your changes, click the Save button. Do this before making a backup. If scheduled backups are set, it's sufficient to save the changes and quit the program. The backup jobs will take place automatically, in the background, at the set times.
Simple Backup Config. You'll see the Backup Properties dialog box, as shown in Figure 23-2. Using this dialog box, you can choose the files that Simple Backup backs up, as well as when it does so. After you've made your changes, click the Save button. Do this before making a backup. If scheduled backups are set, it's sufficient to save the changes and quit the program. The backup jobs will take place automatically, in the background, at the set times.
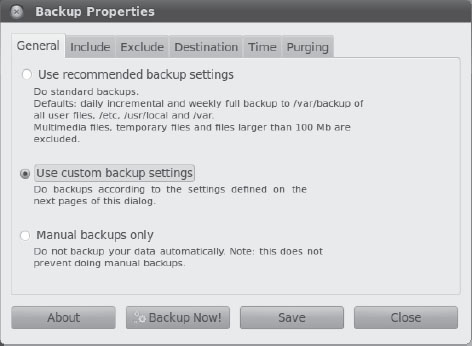
Figure 23-2. Simple Backup can work automatically or with custom settings you specify.
As listed on the General tab of the Backup Properties dialog box, Simple Backup can operate in three modes:
Use recommended backup settings: This is by far the best choice for fuss-free operation. Simple Backup will perform a daily backup of your
/homedirectory, as well as the vital system data held in/etc,/usr/local, and/var. However, it will deliberately exclude any multimedia files (because of their large size), along with any temporary files and files of any type that exceed 100MB (again for size reasons). By default, the backup directory created is placed in/var/backup.Use Custom Backup Settings: This is effectively the same as the recommended backup, and includes the same list of file inclusions and exceptions, but you can edit the settings manually. For example, you might choose to include MP3 files, rather than excluding them. The custom backup option lets you alter where the eventual backup directory is saved and the time when the backup is made.
Manual Backups Only: This effectively deactivates Simple Backup, so that it no longer periodically backs up files. However, you can still click the Backup Now! button to manually perform a backup according to the settings on the other tabs of the Backup Properties dialog box.
![]() Note Simple Backup doesn't create a new backup each time it runs, because that would take too long. The first time it runs, a full backup is taken, but those created afterward are incremental backups, and only files that are new or that have changed are backed up. The backup directory created during the first run is given the file extension
Note Simple Backup doesn't create a new backup each time it runs, because that would take too long. The first time it runs, a full backup is taken, but those created afterward are incremental backups, and only files that are new or that have changed are backed up. The backup directory created during the first run is given the file extension .ful, while the backup directories created after this have the extension .inc. As you might expect, if the original .ful backup directory can't be found, a new full backup will be created.
Including Files and Folders in the Backup Job
Assuming that you've chosen a custom backup, and therefore are able to alter the backup settings, clicking the Include tab in the Backup Properties dialog box enables you to specifically define directories and files that you want to include in the backup. Simply click the Add File or Add Directory button and then browse to the relevant location (to add a directory, you need to click to open it before clicking the Open button).
Bear in mind that adding a directory does so recursively, which means that any directories contained within that directory are also backed up. For this reason, you don't need to specifically add your /home/<username> directory, because the entire /home directory is included in the backup by default. This means the backup will also include all other users' directories within /home too.
Excluding Files and Folders from the Backup Job
You have a wide range of choices when it comes to excluding files and folders from the list. Directories can be excluded based on their location. Files can be excluded based on location, type, or size.
Clicking the Exclude tab in the Backup Properties dialog box reveals a set of side tabs on the left side of the program window which enable you to exclude items from the backup as follows:
Paths: To exclude a specific file or folder, click this side tab. As with including files, click the Add File or Add Directory button and then browse to the relevant location.
File Types: To exclude certain types of files, click this side tab, as shown in Figure 23-3. After clicking the Add button, you'll see that you can choose from a brief list of standard file types or filter by file extension (such as
.mp3for MP3 files or.zipfor compressed Zip files). If you want to back up your multimedia files, remove the corresponding file type entries from this list.Regex: If you're competent at using regular expressions, you can use them to specify extremely precise rules by clicking this side tab.
Max Size: Any files larger than the stated size on this tab aren't backed up. By removing the check next to the Do Not Backup line, you can deactivate this feature (although that could lead to massive backup files, which would take a long time to generate).
Figure 23-3. Excluding certain types of large files leads to far smaller backup files.
Changing the Backup Directory Destination
By default, the backup directory created by Simple Backup is stored in the /var/backup directory. By clicking the Destination tab in the Backup Properties dialog box, you can choose to save it in a different location on your hard disk. Of course, if you have a network mount, you can also opt to save it there. In most cases, we advise that you use /var/backup to store the newly created backup files, and copy the files to their permanent destinations later. You might even choose to do this periodically and automatically. By following the instructions in Chapter 24, which explain how to schedule tasks, you could set up a cron job to automatically copy the files to a network mount or removable storage device.
![]() Note Remember that Simple Backup creates incremental backups, so you should copy all the backup directories and files within
Note Remember that Simple Backup creates incremental backups, so you should copy all the backup directories and files within /var/backup to the external storage device, rather than just the latest one.
You can even transfer the backup directory across the Internet via SSH file transfer or the less secure FTP standard. To do so, simply enter the protocol, username, password, and URL in the following format:
sftp://username:[email protected]/remotedirectory
It's important to precede the address with the protocol you intend to use: sftp:// for SSH or ftp:// for FTP.
Changing the Time Period Between Backups
Clicking the Time tab in the Backup Properties dialog box lets you set the frequency of the backup. You can opt to back up hourly, daily, weekly, or monthly. You can also set the exact time of the backup if necessary. For example, you could set a backup to take place every week on a Tuesday at 12.30 p.m. Simply select the interval period from the Do Backups drop-down list and then select from the Day of Month, Day of Week, Hour, and Minute lists, as necessary. Simple Backup uses the system scheduler, cron (discussed in more detail in Chapter 24). The use of cron means that Simple Backup doesn't need to be running all the time for the backup to take place. Simple Backup is started and stopped automatically in the background as needed.
You can also elect to perform a full backup after a certain number of days have passed (up to 1,000). A full backup means that Simple Backup creates a new complete backup, rather than incremental ones.
Purging Old Backup Files
By clicking the Purging tab in the Backup Properties dialog box, you can opt to automatically delete old backup directories. This saves on storage space. Purging can be done either by specifying a cutoff date, so that any backup archive older than the specified number of days is deleted, or it can be done logarithmically. This means that the program keeps just one backup out of the many that might be created in a week, month, and so on. All others are deleted. For obvious reasons, you should use the purging option with care!
Restoring Data via Simple Backup
If the worst happens, and you need to restore any number of files from the backup, you can click System ![]() Administration
Administration ![]() Simple Backup Restore.
Simple Backup Restore.
The first step is to select the location of the backup directories. If the backups aren't contained in /var/backup, click “Use custom” and either type the path into the field or click the file browser button and locate the backup directories and click Apply. Then click the Available Backups drop-down list to choose a backup directory from which to restore. The directory names contain the dates and times the backups were made, and it makes sense to choose the latest (unless you want to revert to an older version).
After the backup has been selected, the files that the backup archive contains are displayed. Each directory has a small triangle to its left, which you can click to expand the directory and show its contents.
After you've found the file(s) or directories you want to restore, highlight them and click the Restore button. But beware, because this will rewrite the files and directories to their original locations—files or directories already there with matching filenames will be overwritten!
If you want to restore the files to a different location, click the Restore As button and then choose a folder. Simple Backup stores its information in a standard .tar.gz file within the selected directory when you back up. This means it's possible, if necessary, to manually access the information in the backup.
![]() Caution Restored files and directories are owned by
Caution Restored files and directories are owned by root. This is because Simple Backup runs with superuser powers. Therefore, one of the first things you have to do is to change the ownership and group of the file to what they were originally. See Chapter 21 for more details about file ownership and how to change it.
Creating and Compressing Archives
Although Simple Backup allows the uninitiated to make quick and regular backups, there are many other ways to package a folder and store it as a single file. Linux users often create archives in the form of .tar files. tar stands for Tape ARchive and refers to backing up data to a magnetic tape backup drive. Originally designed for backing up files with UNIX operating systems, it has also become a standard method of transferring files across the Internet, particularly with regard to source files or other installation programs.
![]() Note Linux comes with a couple more backup commands, which you might choose to use. They are
Note Linux comes with a couple more backup commands, which you might choose to use. They are cpio and pax. Both aim to improve on tar in various ways, but neither is broadly supported at the moment. cpio is installed by default under Ubuntu, and pax can be found via the Ubuntu Software Center. Examine their man pages for more details.
Creating Archives with Nautilus
An archive is a file that can act as a container for other files. The most common type of archive in Linux is the .tar file, but there are many others. Usually you'll use archive files to pack together the contents of a folder, for example, your /home directory. Although you can archive a single file, it's not very useful! Some of the archive types even compress the information so it consumes less space in your disk or is downloaded faster when posted to a web site.
To create an archive file, open Nautilus and browse to the parent of the folder you wish to archive. Right-click the folder and select the option Compress… The Compress dialog box will open.
You can set the name of the destination file and select the type. You have a few options to choose from, each with its specific functionality. Table 23-1 briefly describes each of those options. Some archive types allow you to password-protect its contents so you can add a layer of security to the information. Only users provided with the password will be able to access your files. Additionally, you can select the location in which the new archive file will be created. By default it is in the same path as the folder you are archiving.
Table 23-1. Types of Files to Create with the Compress Dialog Box
When you create an archive from a folder, the operation is automatically recursive, so it adds all subdirectories to the same archive.
Folders and files added to the archive have the initial forward slash removed from their paths. So, rather than store a file in the archive as this:
/home/keir/Mail/file1
the file will be stored as follows:
home/keir/Mail/file1
The difference between the two forms concerns us when the files are extracted from the archive. If the files had the initial slash, to the particular file would be restored to /home/keir/Mail/file1. If there were already a file of that name in that location, it would be overwritten. With the leading slash removed, a new directory is created wherever you choose to restore the archive. In this example, it creates a new directory called home, and then a directory called keir within that, and so on.
Managing Archive Files
Once you have created an archive file, you can manage its contents just using the File Roller, an archive manager for GNOME that is preinstalled with Ubuntu.
Viewing the Contents of an Archive File
To open an archive with the File Roller, browse to its location in the disk within Nautilus and right-click the archive. Select Open with Archive Manager from the context menu.
The File Roller opens, displaying the content of the archive file. You have several options to get more information about the file or change the way its content is displayed, for example as follows:
- Click File and select Test Integrity to check whether or not the archive is corrupted.
- Click File and select Properties to view information about the archive, such as location, the date in which it was modified, the size and compression ratio, and so on.
- Click View and select whether you want to see all files as if they were in the same folder (View All Files, Ctrl+1), or if you want to respect the folder structure in which the files are stored (View as a Folder, Ctrl+2).
- Click View and select Folders (or press F9) to split the navigation pane and display the folder hierarchy to the left for easier browsing of big and complex archives.
![]() Tip A popular compressed archive file type is
Tip A popular compressed archive file type is rar files. You usually manage them with WinRar in Windows. To add support for rar files to the File Roller, install the package unrar using the Ubuntu Software Center. Another package, rar, lets you archive and compress in additional formats using Nautilus (.bz2, .cbr, .lzma, .rar).
Extracting Folders and Files
You can extract one or more folders or files from an archive, or even its whole contents, to the folder you choose. Just select the folder/s and/or file/s you need and click the Extract button. The Extract dialog box is displayed. Here you can select the destination folder in which you will extract your files. You can also specify whether you will be extracting all the files contained in the archive, or only specific files within it. Under Actions, you have some options for changing the behavior of the extract operation:
Re-create folders: When selected, the whole folder structure will be recreated in the destination directory. Files within subfolders will be placed into the corresponding directory. If this option is left unchecked, all files will be extracted to the root of the folder you specify as a destination.
Overwrite existing files: When selected, files stored in the destination folder which have the same name as a file being extracted will be deleted. If it is unchecked, files with conflicting names will not be extracted.
Do not extract older files: This option is used in conjunction with “Overwrite existing files” and works only if that option is selected as well. When selected, if there is a conflict between an existing file and one being extracted, only the file with the most recent modification date will be saved.
Saving the File to a CD-R/RW or to a DVD-R
After the .tar file has been created, the problem of where to store it arises. As we mentioned earlier, storing backup data on the same hard disk as the data it was created to back up is useless, because any problem that might affect the hard disk might also affect the archive. You could end up losing both sets of data!
If the archive is less than 700MB, it should be possible to store it on a CD-R or CD-RW. If the backup file is larger than 700MB, you might want to burn the backup file to DVD, using a DVD-R/RW drive.
![]() Note Remember that Ubuntu has a very capable CD/DVD burning tool called Brasero. To access it, click Applications
Note Remember that Ubuntu has a very capable CD/DVD burning tool called Brasero. To access it, click Applications ![]() Sound & Video
Sound & Video ![]() Brasero. Note that although it's listed as a multimedia application, it is in fact capable of burning all types of data discs. To get started, just click the Data Project button. Then simply drag the backup file(s) onto the program window and click the Burn button at the bottom right.
Brasero. Note that although it's listed as a multimedia application, it is in fact capable of burning all types of data discs. To get started, just click the Data Project button. Then simply drag the backup file(s) onto the program window and click the Burn button at the bottom right.
You can access a special folder named CD/DVD Creator by using a launcher located in Applications ![]() Accessories in the Main Menu. This opens Nautilus. A banner is shown in which you are instructed to copy the files you want to burn to a CD. When you are finished doing so, you can click on the Write to Disk button to start the write operation.
Accessories in the Main Menu. This opens Nautilus. A banner is shown in which you are instructed to copy the files you want to burn to a CD. When you are finished doing so, you can click on the Write to Disk button to start the write operation.
Of course, you need to insert a valid CD or DVD into the optical drive of your computer and make sure it can write such disks. If Ubuntu detects that there is no valid and writable disc in the optical drive, it will give you the option to store your content in the form of a disc image with the extension .iso. That format is widely used and broadly recognized by most operating systems.
In any case, you should eject your disc and insert it again in order to be able to read it.
Summary
In this chapter, you looked at making backups. First, you saw where in the Linux file system your personal files and other vital data are stored. Then you looked at how the Simple Backup tool can be used to back up system configuration and personal data. You next learned how to create and manage archives to back up any kind of data. Finally, you learned how to burn CDs and DVDs of your backup files from within Nautilus.
In the next chapter, we look at how tasks can be scheduled to occur at various times under Ubuntu.