
As you already know, we will be using the Unity game engine in order to develop games. Unity has been written in the C++ programming language, but its scripting application programming interface (API; what we’ll use to actually code the games) is in C#. Unity can be used for much more than just making games. It can even be used to create visualizations for movies, architecture, or car manufacturing.
The benefit of using Unity rather than writing our games from scratch is that Unity already provides many ready-made tools to assist us in our game-making process, such as physics or lighting. Compared to other game engines, Unity is far more popular, which makes resolving bugs or learning how to do something easier, because it is very likely that something will already be present on the Internet. Any games we wish to work on in Unity is a project.
2.1 Creating a Unity Account

Creating a Unity account
2.2 Downloading Unity and Add-ons

Unity plans
2.2.1 Unity Hub
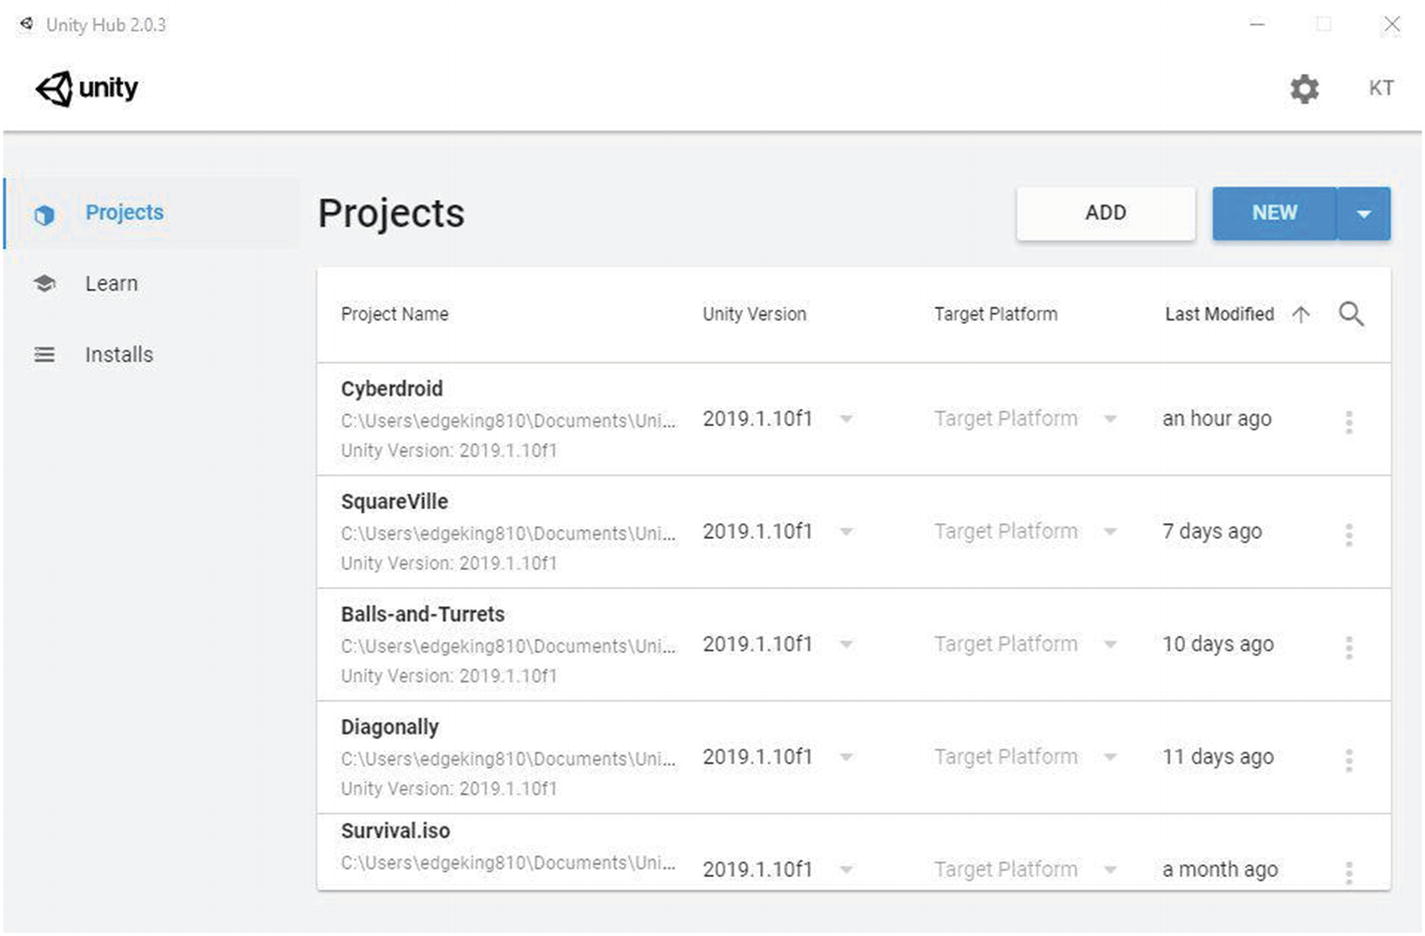
Unity Hub projects
For MacOS or Windows users, Unity Hub can be downloaded from https://unity3d.com/get-unity/download/, and for Linux users, an executable file can be obtained from the forum at https://forum.unity.com/threads/unity-hub-v2-0-0-release.677485/. Just install or run it after it finishes downloading.

Downloading the Unity Editor from the Hub
You will also require an integrated development environment (IDE) to write scripts. Visual Studio Code is a lightweight and excellent choice. You can download it from https://code.visualstudio.com/. We will be linking it to the Unity Editor later. For now, just install it.
2.2.2 Creating an Empty Project

Creating a new project
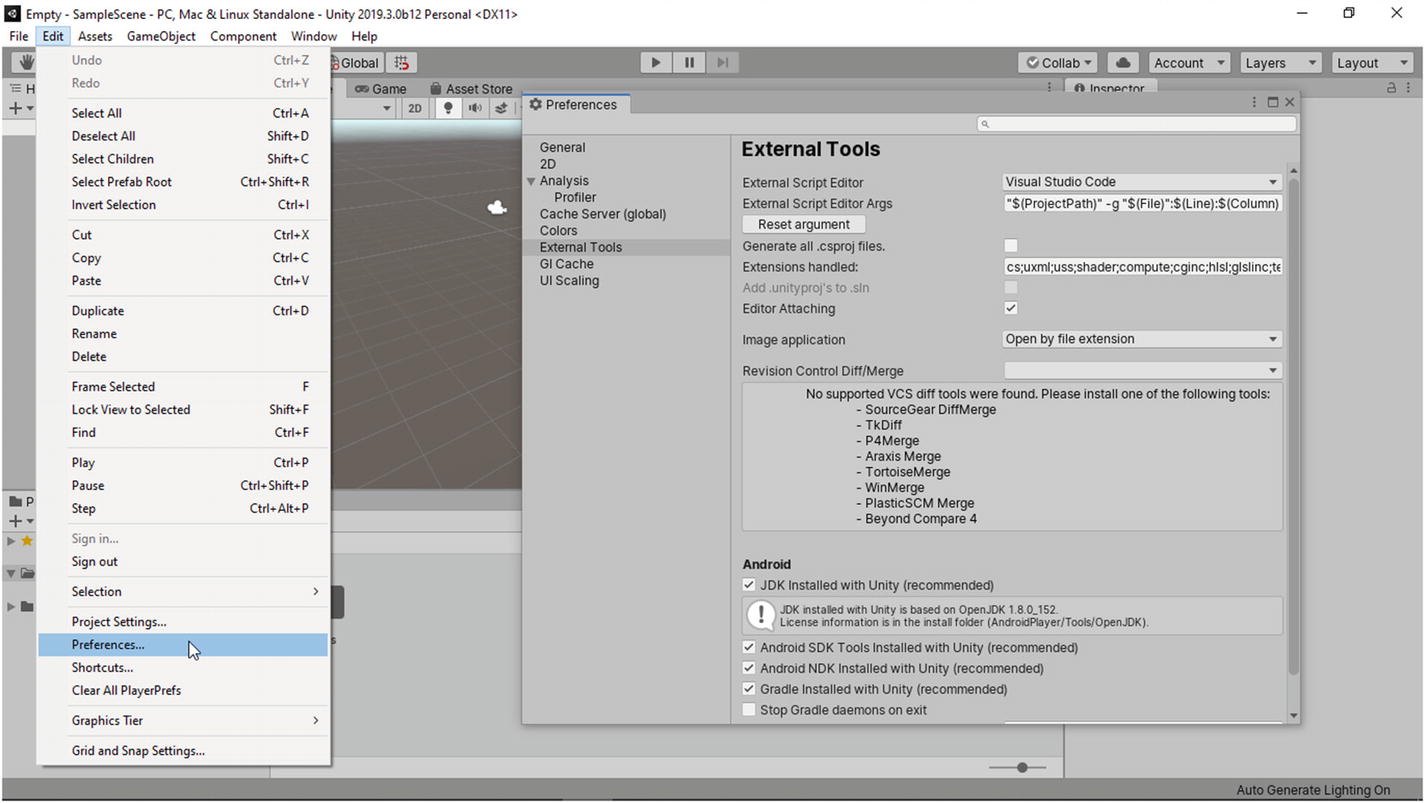
Checking preferences
2.3 Essential Windows
Unity provides several windows with very specific features to help developers in their game-developing process. You already know what a project means in Unity. Game projects contain scenes. Think of scenes as levels of a game, for example. It would be a bad idea to load everything when a lot of the things are currently unnecessary, for example. In scenes, you can design your levels and make them playable.
Now, everything that is present in a scene is called a GameObject (more on these in Chapter 3 of this book). When you make games, you will probably require images, sound, 3D models, etc. All of what you import in your project is an asset, whether you ever use it in a scene.
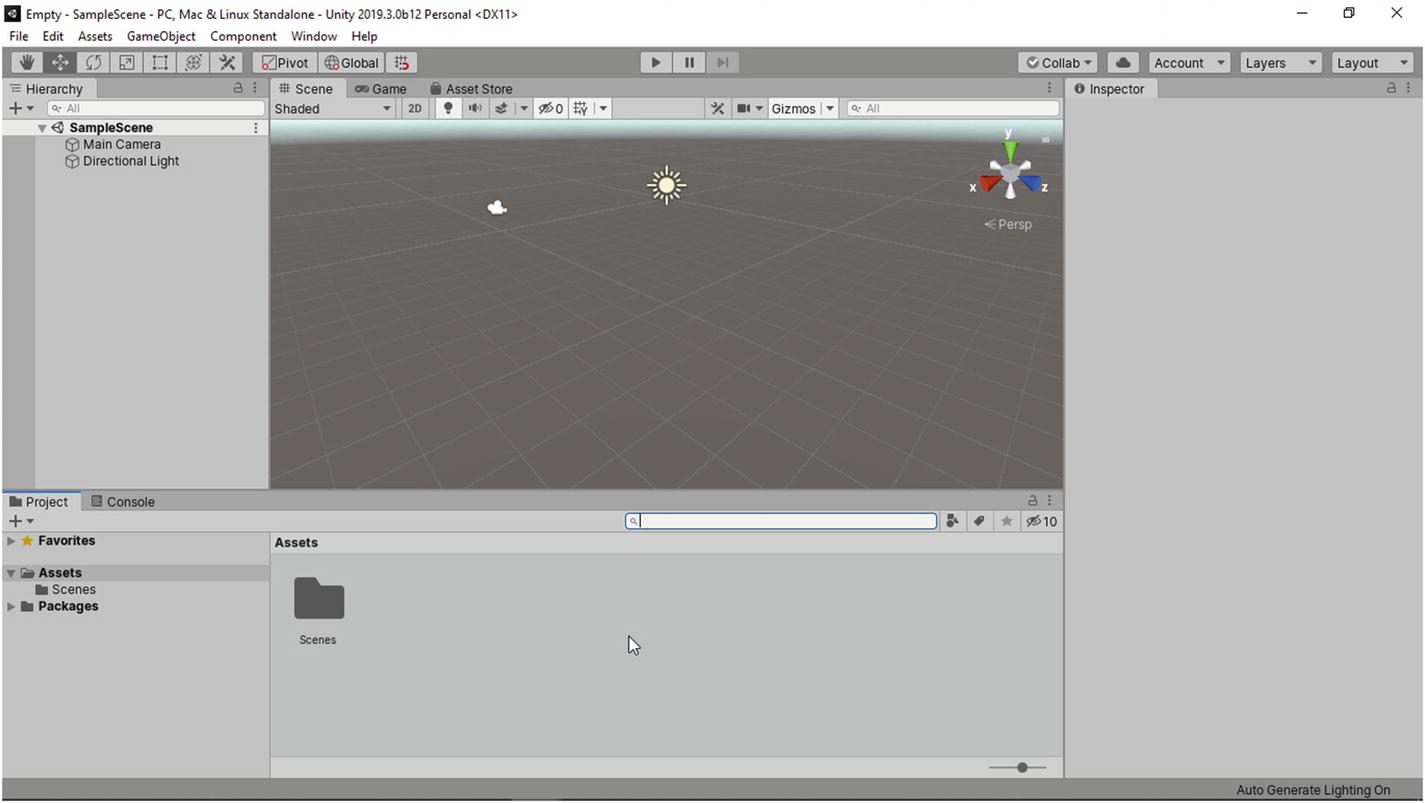
An empty scene

Layouts
2.3.1 The Project Window
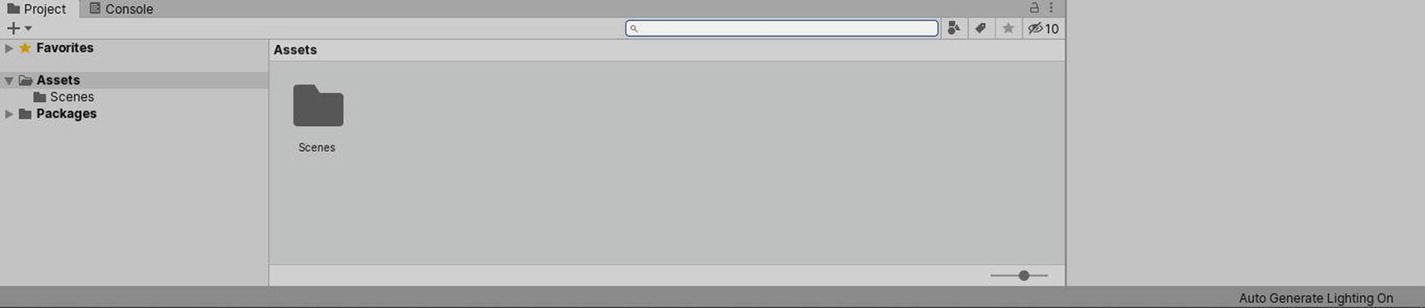
The Project window
2.3.2 The Hierarchy Window

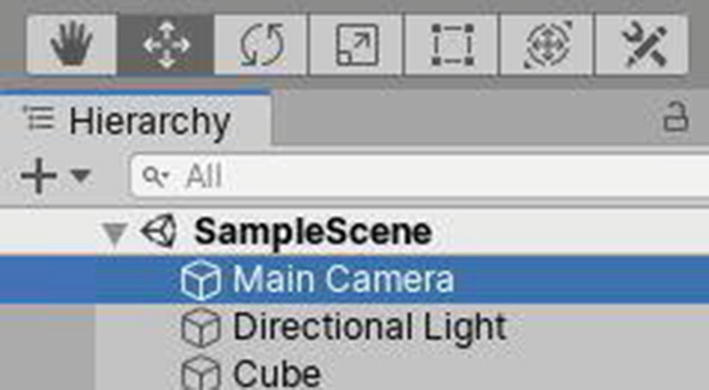
The Hierarchy window, as it is by default
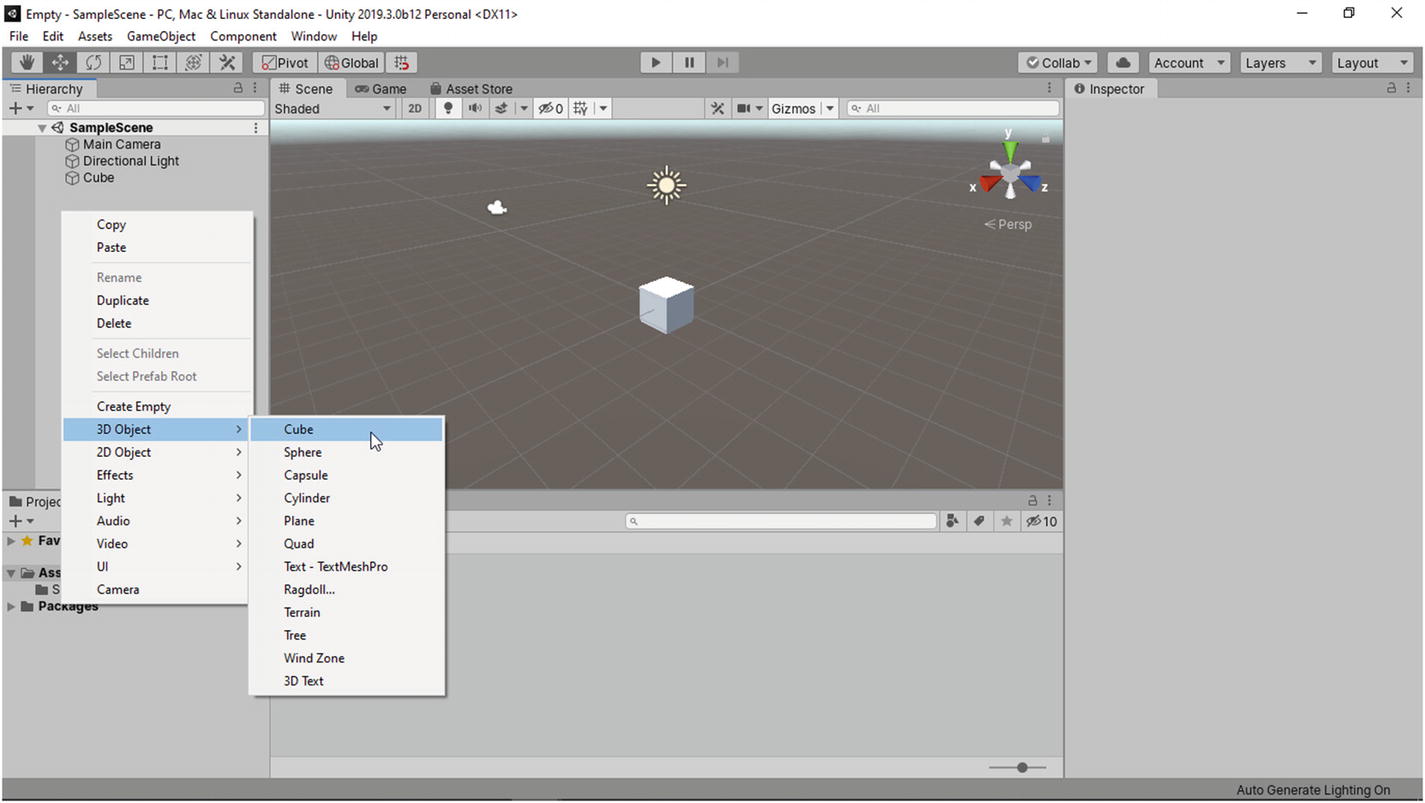
Creating a 3D GameObject
2.3.3 The Scene Window

The scene window with a cube
You can select objects by left-clicking them in the Scene window. Try also right-clicking and dragging to rotate around, or use the scroll wheel to zoom in and out. You can finally click and hold the scroll wheel and move your mouse to pan around. If you left-click and select objects in the Inspector window, they will appear selected in the Scene window also.
The seven scene tools
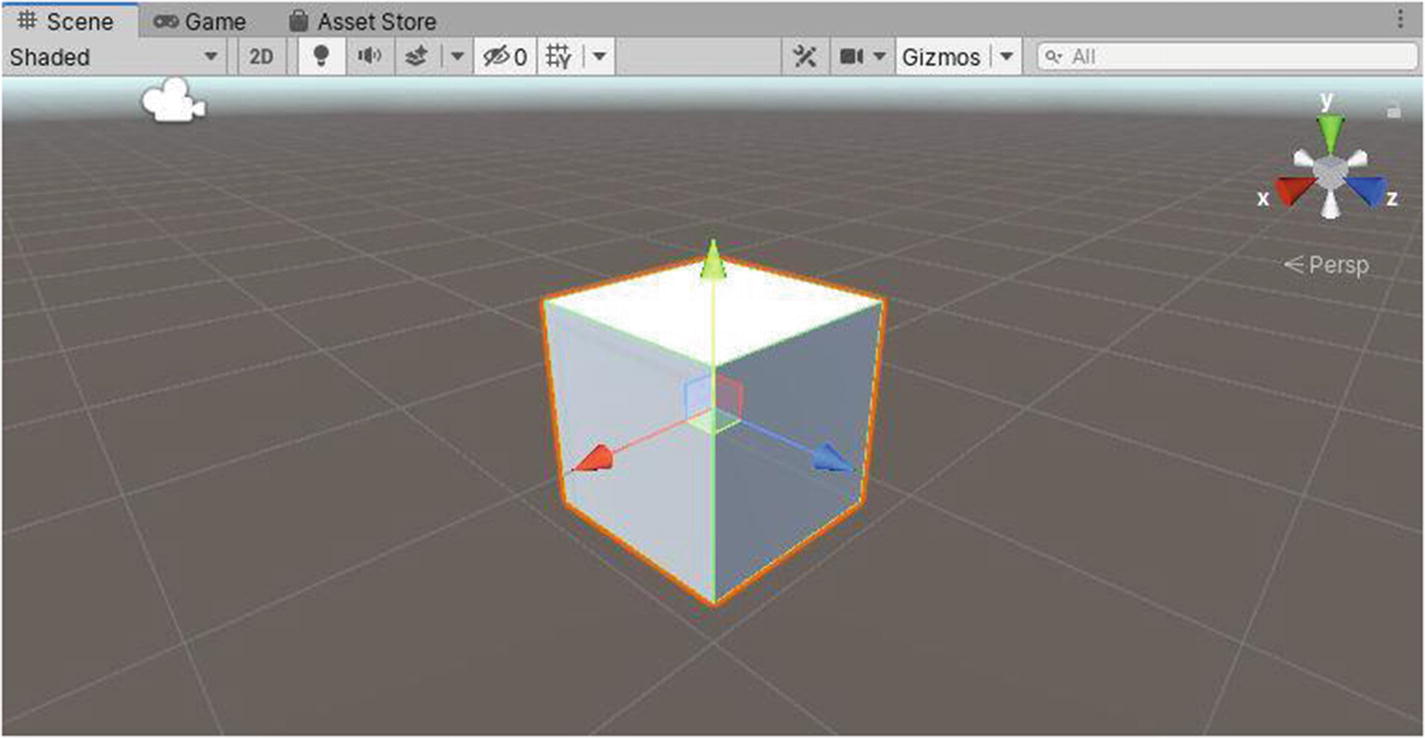
The Move tool
The Rotate tool

The Scale tool
The fifth scene tool is the Rect tool, which is useful for moving and scaling 2D objects. We’ll be using it afterward, when we’ll have to move or scale images, buttons, and 2D UI elements.

The Multi tool

Viewing in the x axis direction
You can also click the text under the little cones, to switch between a perspective or orthographic view, depending on the type of game you’re making.
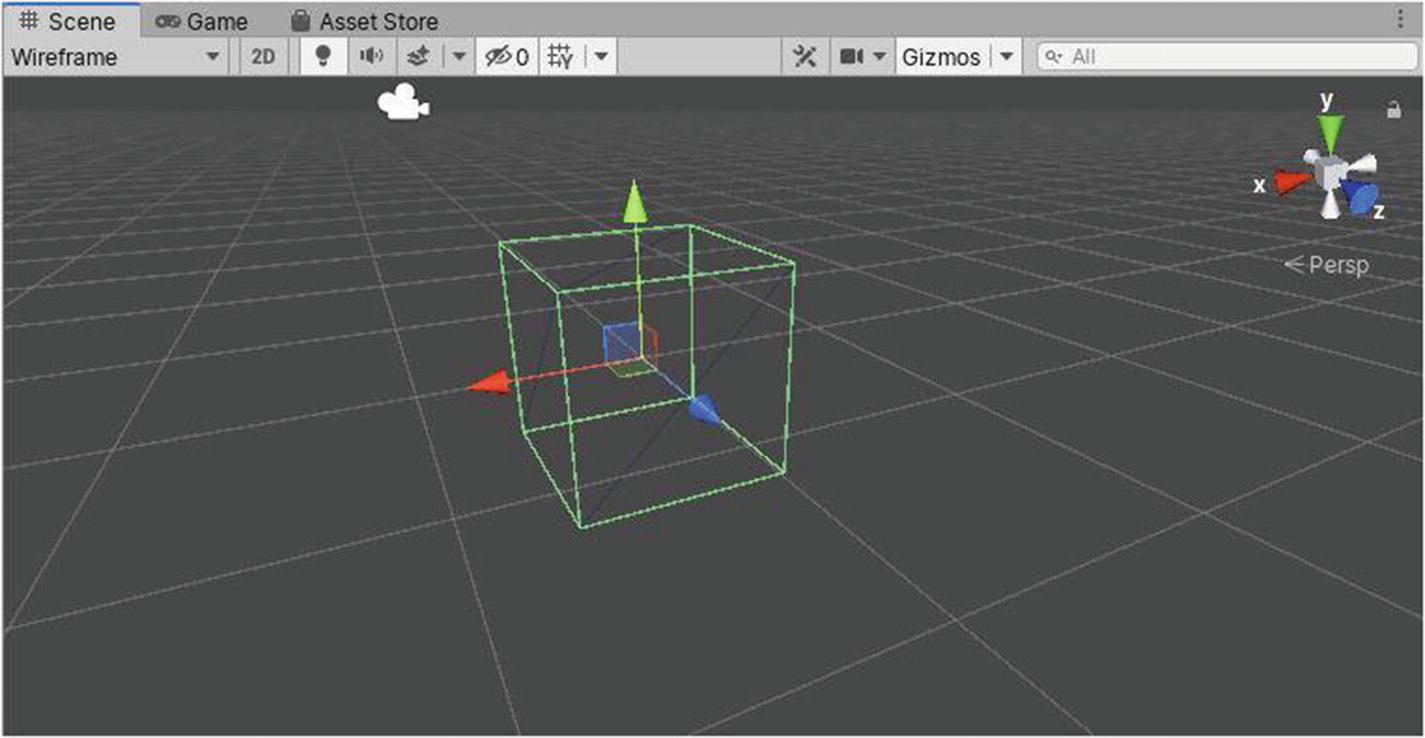
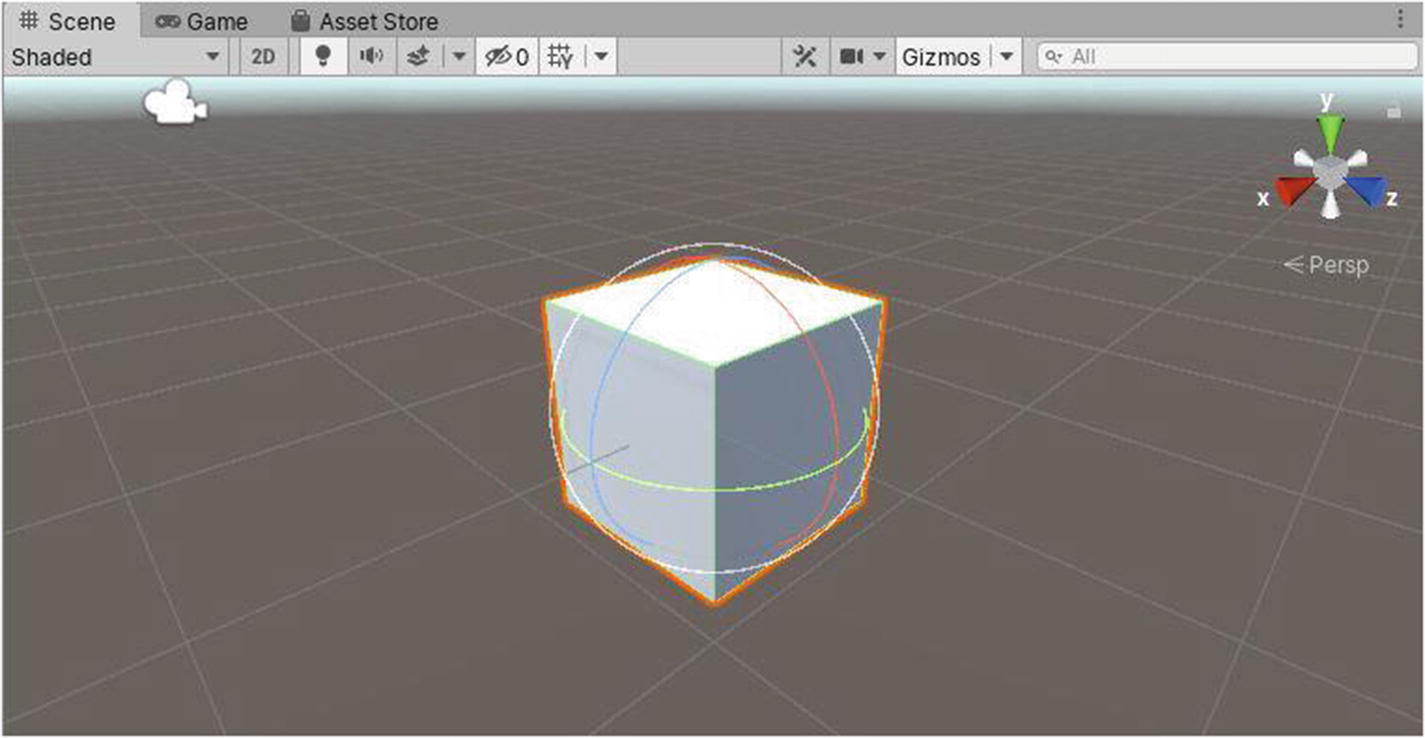
Wireframe shading in the Scene window
The little 2D button at the top of the window makes everything appear in 2D, which is useful for working with 2D UI elements or on 2D games. The other buttons mainly serve to toggle on or off such things as lighting, audio, or effects.
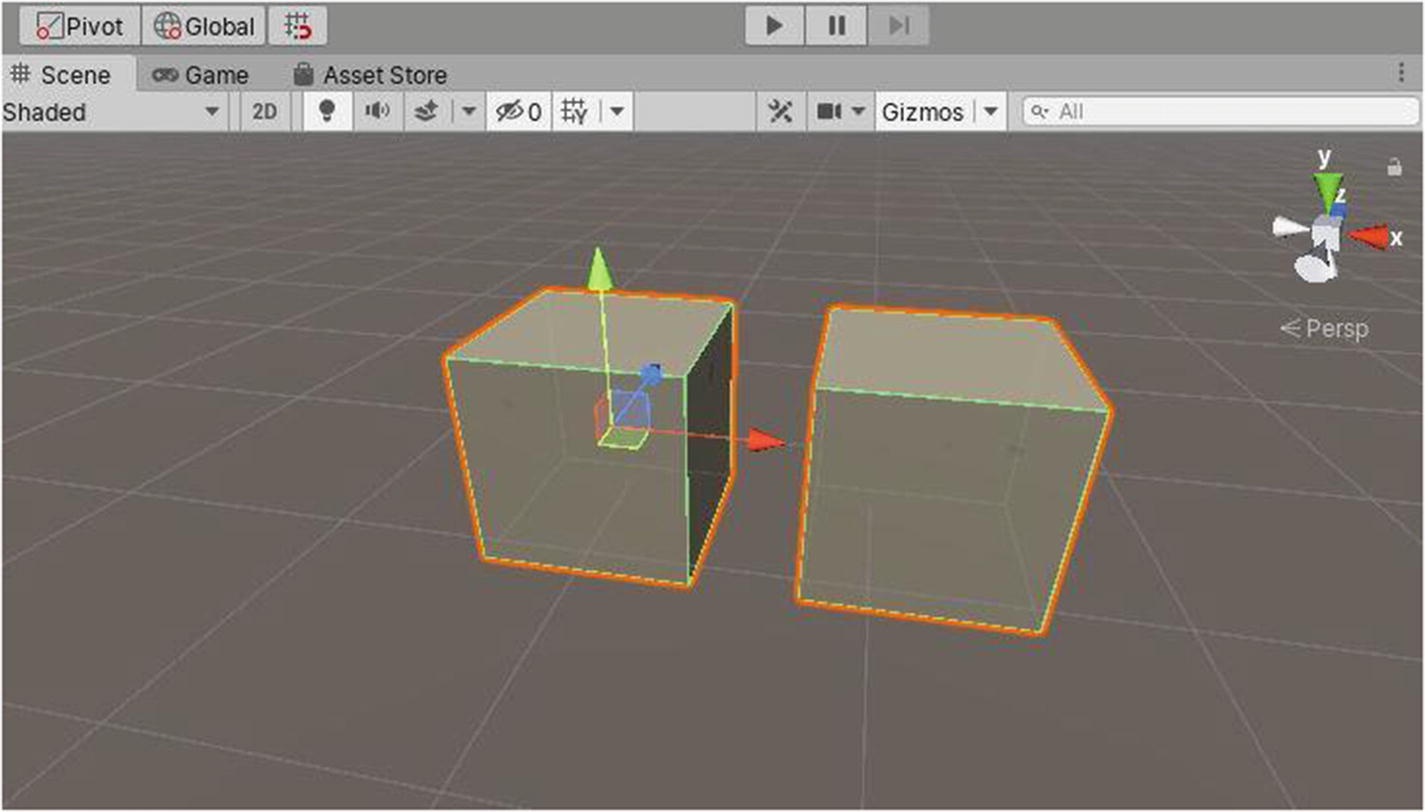
Finally, there are also two buttons by default, labeled Center and Global. When you click the former, either Center or Pivot will be displayed. When using transform tools such as Move or Rotate, the arrows will be placed either at the center or at the pivot point of the selected GameObject(s). Try this in the Editor now, to get more comfortable with working with these. Try moving, rotating, and scaling 3D objects, and practice everything you’ve learned until now.

Center point of two GameObjects
Pivot point of two GameObjects
Now on to Global and Local modes. Basically, when the mode of the first button is set to Global, all the tools will have the same positioning relative to the world. The red arrow will always point right (x axis); the green arrow will always point up (y axis); and the blue arrow will always point forward (z axis). These won’t depend on the position, rotation, or scale of the selected GameObject(s).
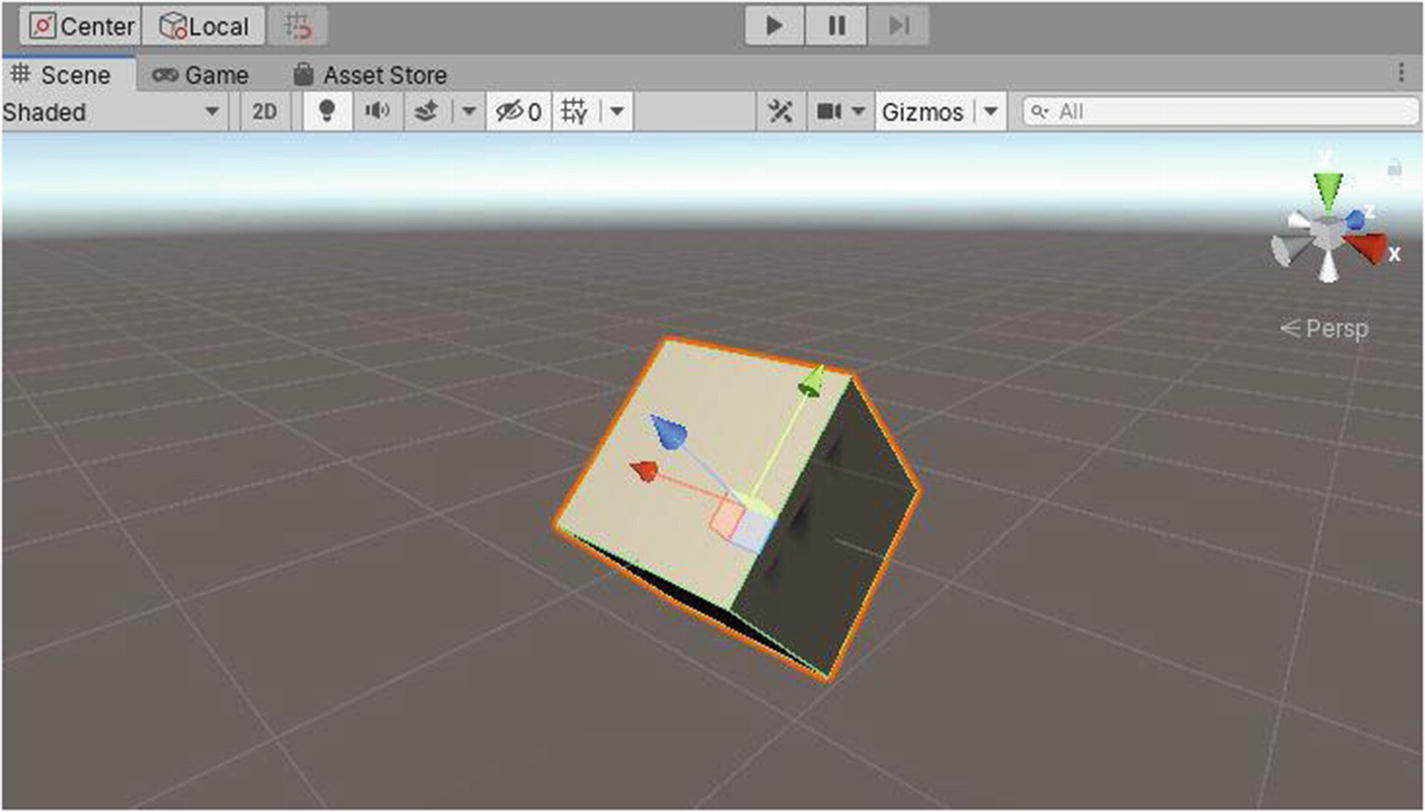
Local mode with a selected GameObject
There is also a little magnet icon next to the Global/Local button. This can be used to toggle on/off Grid Snapping. This can be used when tool positioning is set to Global. Grid Snapping allows you to move objects by units of 1 across all axes and will thus snap the position of GameObject(s) to the closest whole number position in the scene.
2.3.4 Game View

The game view
Figure 2-23 shows what your empty game would look like if someone tried to play it right now. Display 1 allows you to toggle between different displays, to see how specific places will look.

Setting a new resolution/ratio in the Game view
Using the slider for scale, you can zoom in or out of the Game window, although that is not available in the actual game if you don’t implement something similar. Maximize On Play can be set on or off. It will appear whiter if activated, and that allows you to test your game in full screen. Note that at this point, nothing will happen if you toggle it on or off.

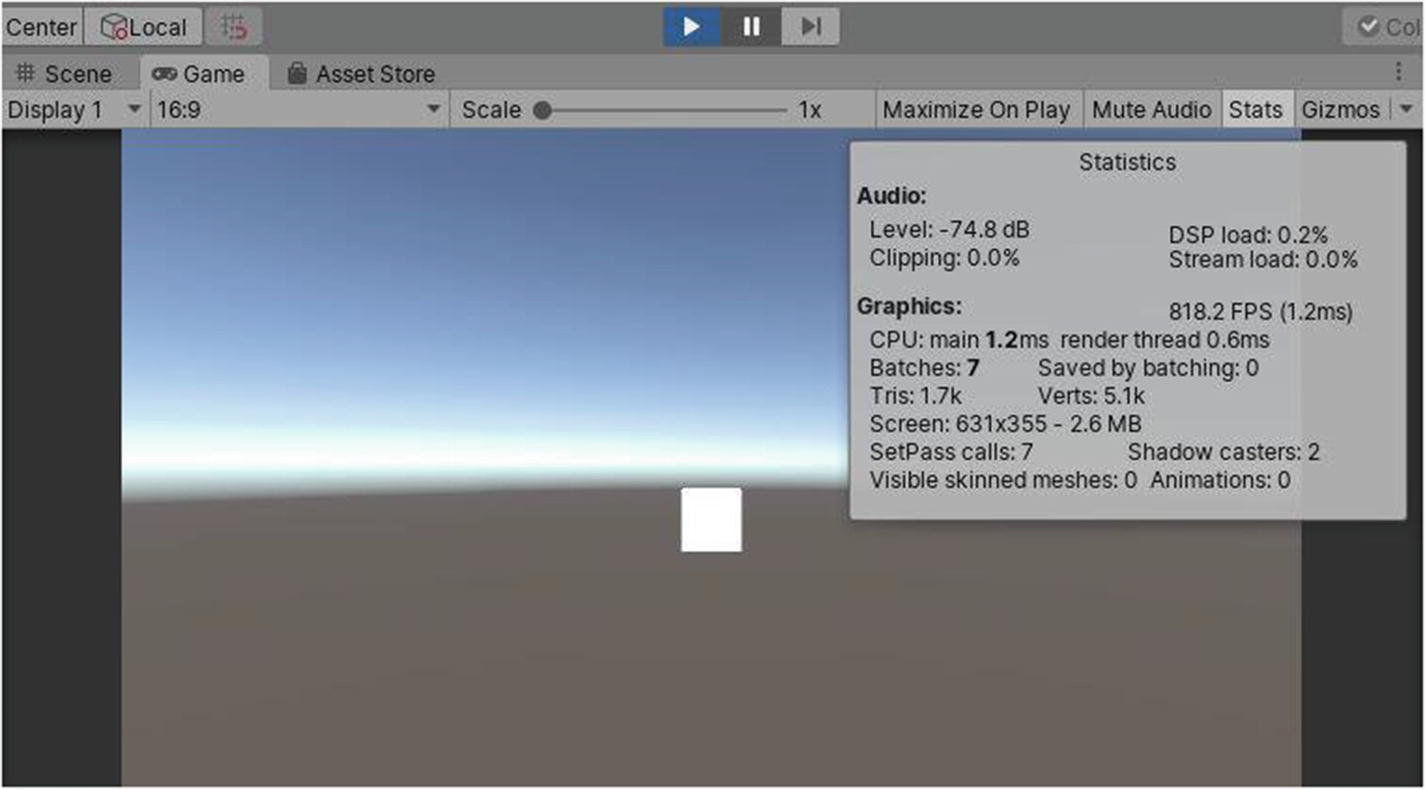
Showing stats in the Game view
Gizmos allows you to preview more things that are shown to the end user, such as components like colliders, which you’ll learn more about in the next chapters. Finally, on to Play mode.
When you want to test your game without exporting a build of it, you can do that within the editor. There are three icons at the top of the Game window. The first (leftmost) one is the Play button. When you click that button, the Editor goes darker, the button turns blue, and you’re in what is called Play mode. In Play mode, you’re playing the game as a normal user would if they had a build of that game. To exit Play mode, you simply click the Play button again.
Entering Play mode
Please be aware that any changes you make while in Play mode are temporary. That is, if, for example, you move an object in Play mode, when you go back to the normal editing mode, the changes will revert to how they were before you entered Play mode.
2.3.5 The Inspector Window
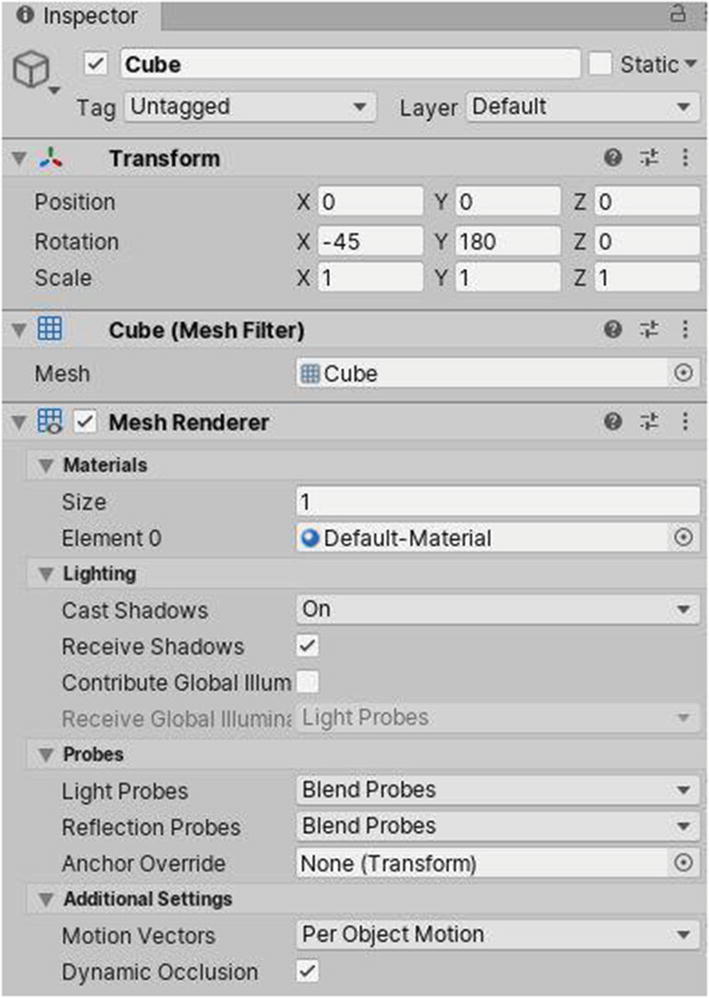
A typical default Inspector window for a cube: part 1
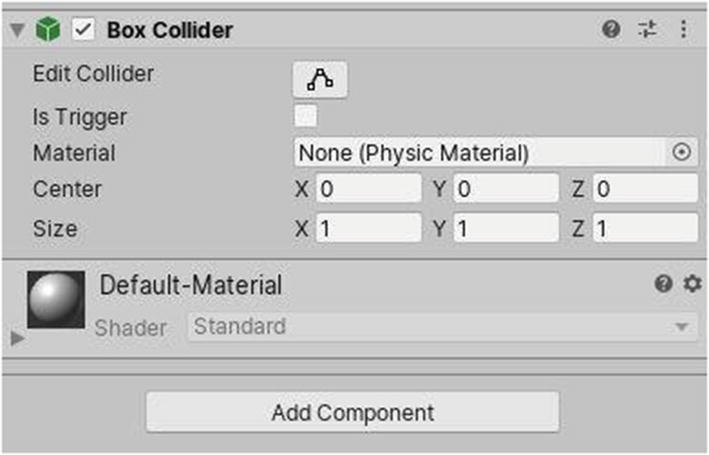
A typical default Inspector window for a cube: part 2
The cube we’ve been taking as an example, or a new cube that we create, should normally have these components by default. The purpose of tags and layers will be explained in the last chapters, and the use of the components you’re seeing will be documented in Chapter 3. When the check box next to Static is ticked, our GameObject(s) won’t move or physically change at runtime, no matter what we do. This has performance gains. You are advised to try changing the properties of some components, to see the difference this makes.
2.3.6 The Unity Asset Store
If you remember what was mentioned about the definition of assets in the section where you learned about the Project window, there are several ways to import assets into Unity. One of the most common is by opening .unitypackage files. A Unity package, or a file ending with a .unitypackage extension, is a compressed file that includes several assets.
For this section, we’ll focus mostly on downloading and importing assets from the Asset Store, rather than from third-party unofficial sources. The Asset Store is kind of marketplace where you can browse and download assets for your games. Think of it as Unity’s Google Play for Assets.

The Asset Store
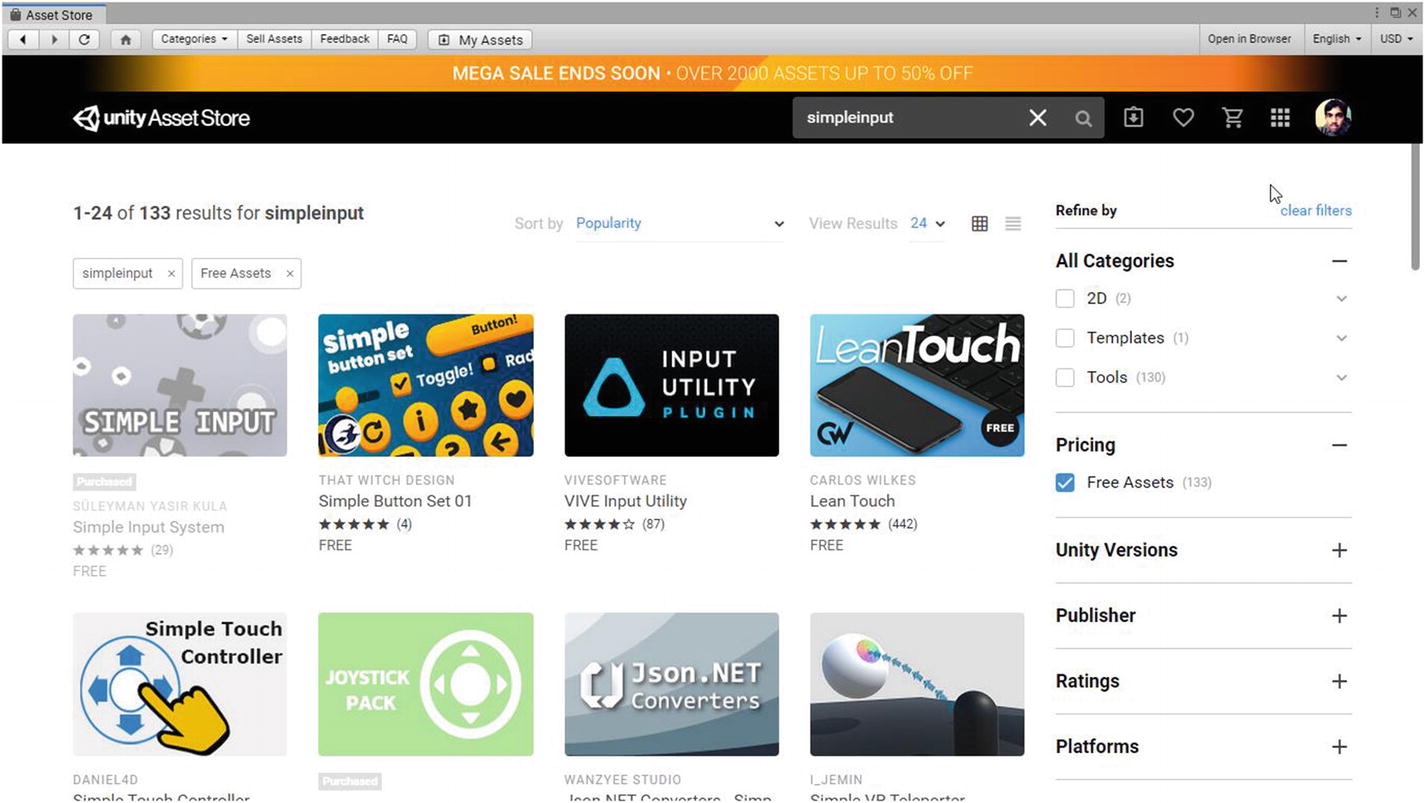
Searching for assets

The Simple Input system asset
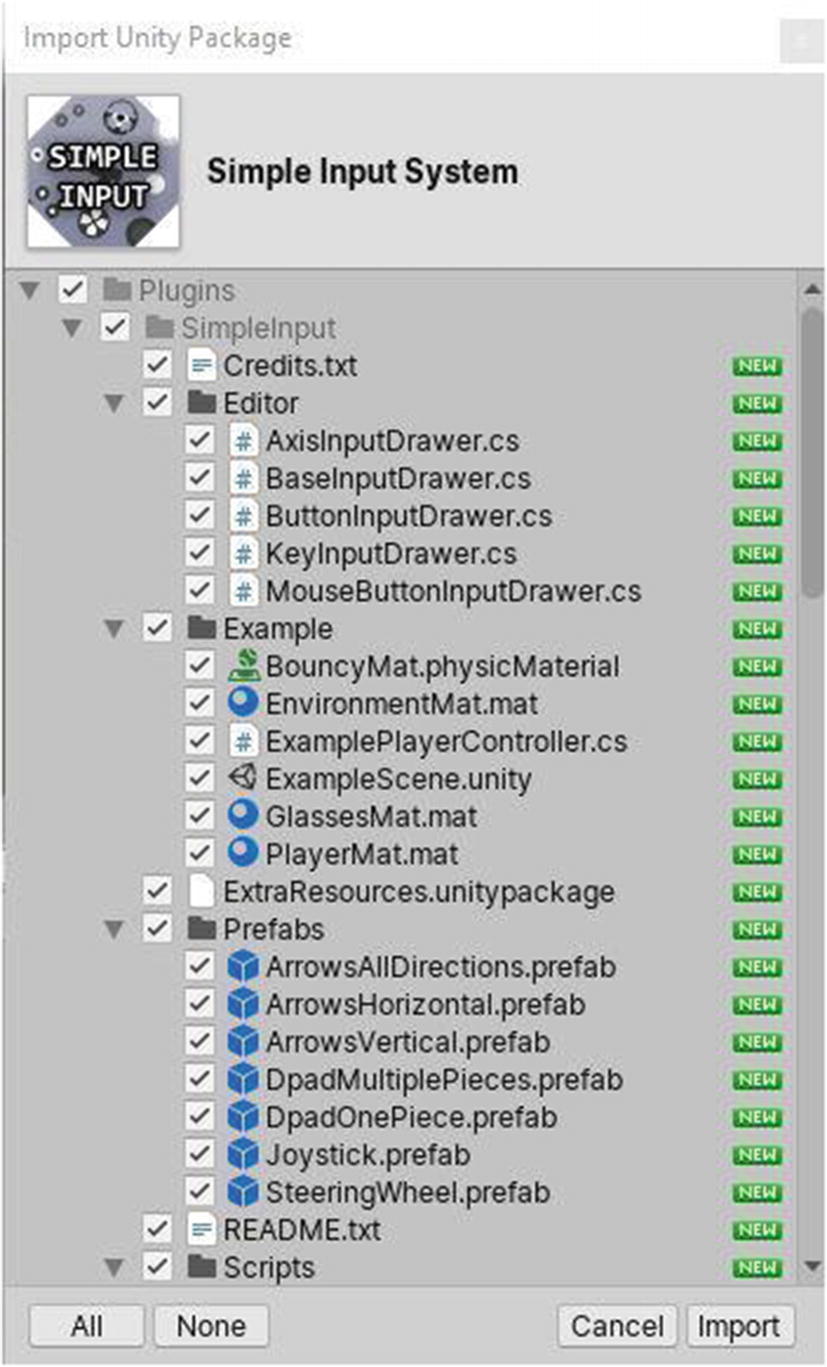
Importing an asset—Simple Input System in our project
2.3.7 The Console Window
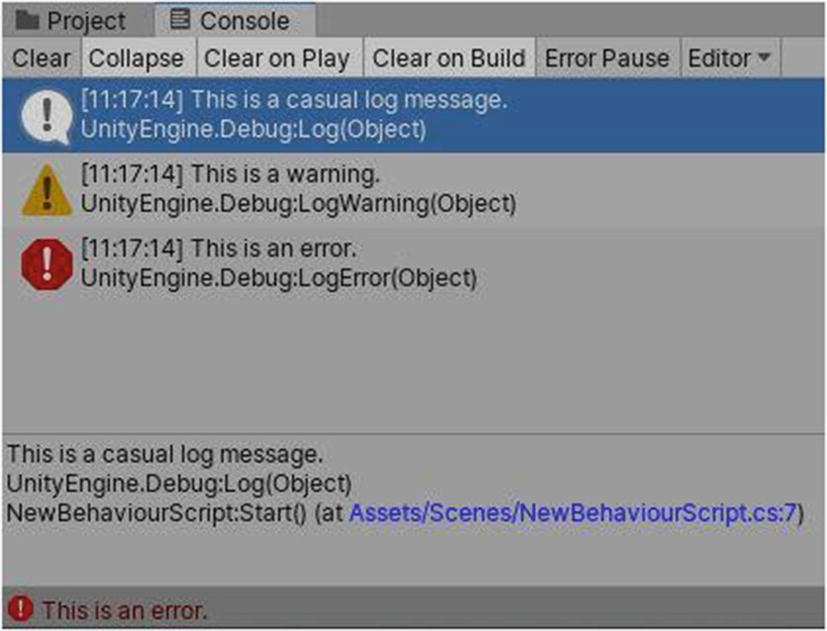
Example of logging, warning, and error messages in the Console
When you click a log/warning/error in the Console window, more details will appear at the bottom of the screen, indicating mainly the statement and line number that are responsible for the message in question. If you double-click a message in the Console, the responsible script will be opened in the default text/code editor Unity has been assigned to use.
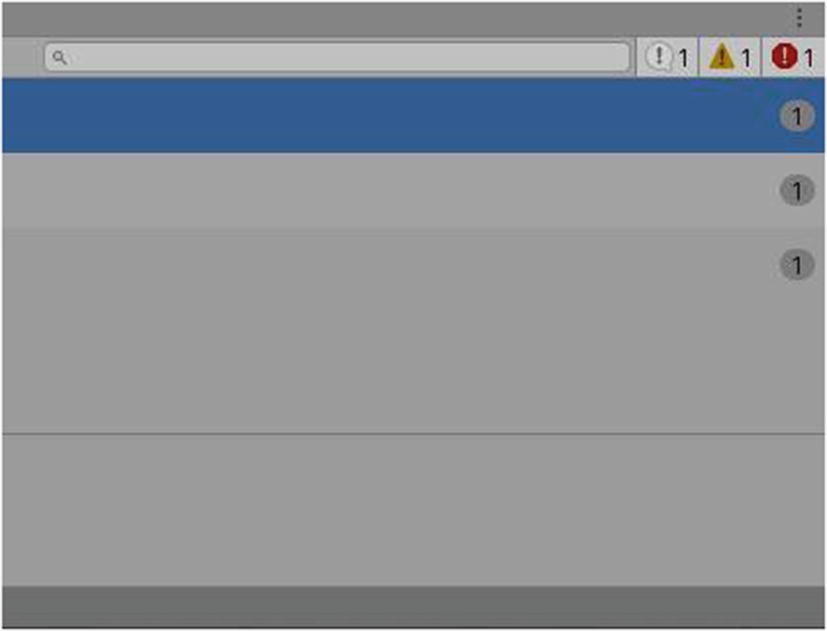
Amount of messages by type and genre in the Console window
The Collapse tab will compile the same console messages together in a single message. The number of instances will be represented in a small circle at the far right of the Console window. Error Pause will pause the game in Play mode when an error is received, and the last drop-down button Editor allows you to choose where you want to have debug messages from, perhaps from a device connected to your computer, for example.
The Search bar allows you to search for messages in particular, and the last three small colored buttons allow you to choose what kind of debug messages you desire. For example, clicking the yellow button will stop all warning messages from popping in the Console window. However, the number of every type of logging message received since the last time you hit Clear will still continue to be displayed beside their respective buttons.
2.3.8 Build Settings
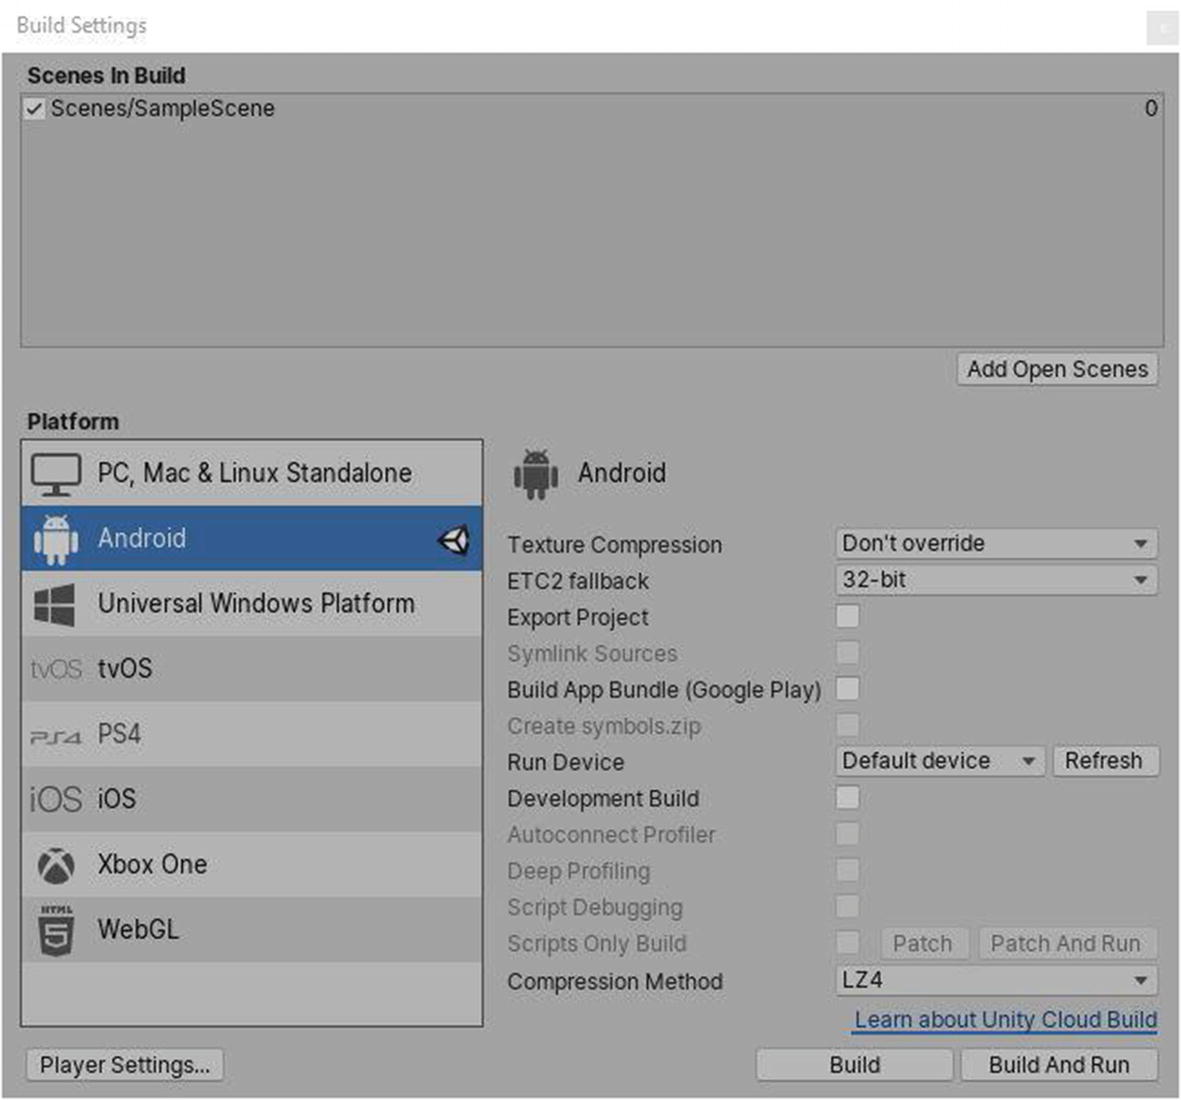
The Build Settings window