UE4 Blueprints is a visual gameplay scripting language based on a node graph in which you connect nodes from left to right. It can create full-fledged games or simple/complex game mechanics, such as those that open the door to level-wide puzzles. The biggest advantage of Blueprints is that you don’t need a programmer to create the logic. Artists can easily make anything they want inside Blueprints and share it with a programmer.
This system is extremely powerful because it offers the artist a full range of tools that are generally only available to programmers. On top of that, C++ programmers can create baseline systems that can be accessed or modified by Blueprint users.
Nodes
In Blueprints (or any other visual programming language), a node is a self-contained functionality that does something unique. In Unreal Engine, Blueprint nodes are objects that can be anything—events, flow control operations, functions, variables, and so on. The source code for the node can be big or small. In Unreal Engine 4, a developer can use C++ to make a Blueprint node, which is accessed in the Graph Editor panel.
An example of nodes
Blueprint Types
There are multiple types of Blueprints, which you need to understand to use them efficiently. All Blueprints types (except Level) are created in the Content Browser.
Blueprint Classes
The Blueprint class is the most common type used in your game because it self-contains gameplay mechanics, and it is easily reused across multiple levels. Blueprint classes are inherited from native C++ classes and can have their functionality.
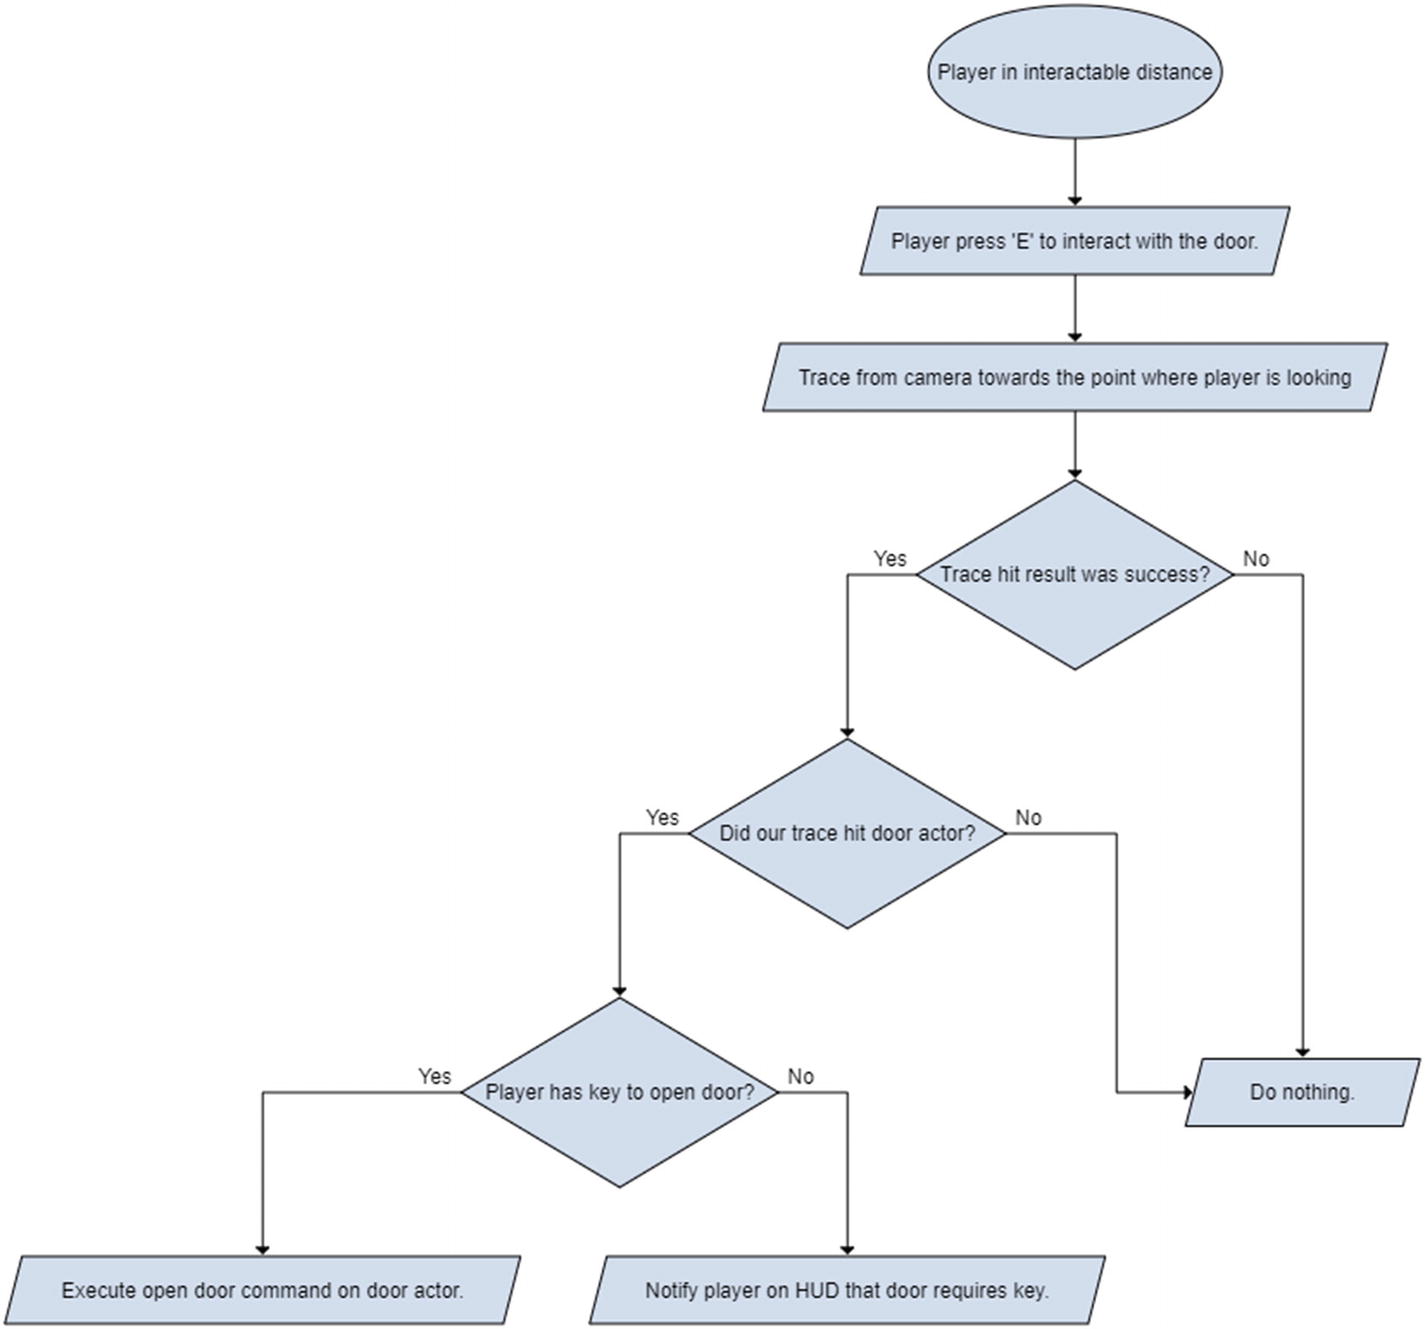
You can create your own C++ classes and mark them as Blueprintable to create Blueprint classes. They can interact with each other to create interesting gameplay mechanics; for example, a light Blueprint and a switch Blueprint that communicate to toggle on or off a light. You could also make the switch interact with multiple lights to toggle them on/off randomly or sequentially.

Select Blueprint class
Example Blueprint class with a custom event
Level Blueprint
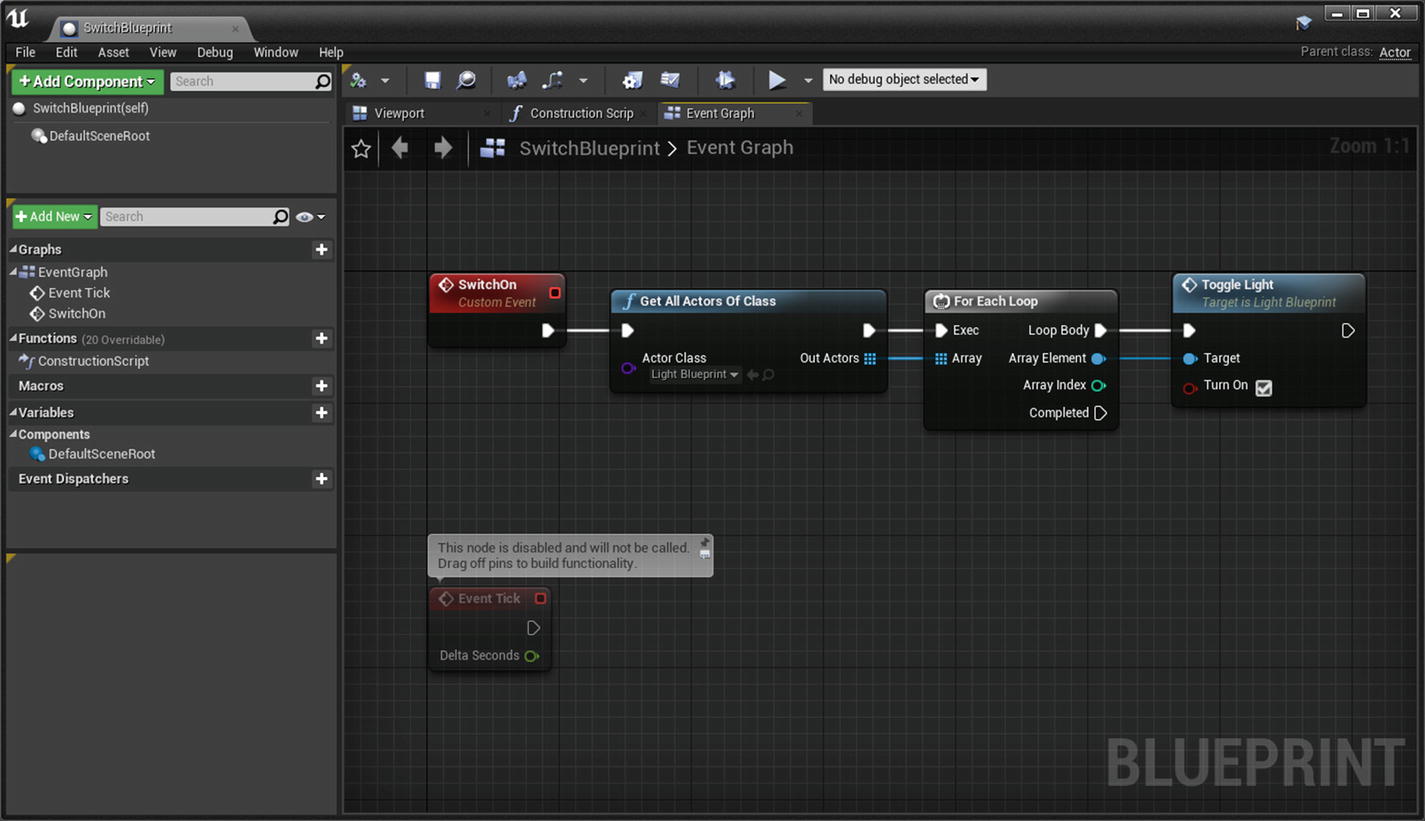
A Level Blueprint cannot be created manually but is included within the level itself. It is available when the level is loaded. You can reference any asset in the world and interact with it. If you reference a Blueprint class inside a Level Blueprint, you can access all the public variables and functions in that class.
A public variable or function is accessed from outside the class.
The advantage of using a Level Blueprint is that it is easier to access the actors on the level because you can directly reference them without casting. This is useful when creating events or functions that should be isolated to the level. An example is triggering a cinematic when a certain condition is met.

Access Level Blueprint from Editor toolbar
Referencing an asset
Blueprint Interface
Functions are graphs with a single entry pin and a single output pin. Inside it, you can connect any number of nodes that make up your logic so that when the function is called, it starts from the entry pin, activates all the connected nodes, and exits through the output pin. Interfaces cannot contain any function implementation, which means you can only create a function without any logic (graphs are read-only), and variables cannot be created.
Variables are nodes that hold a value or a reference to an object or actor in the world.
Interfaces can be added to multiple other Blueprints, and they are guaranteed to contain the functions created in the interface, which can then be implemented. This allows multiple Blueprints to share one common interface; for example, imagine you have two completely different Blueprints, like tree and ice. You can have an interface that contains a damage function and implement this interface in tree and ice. Inside the tree and ice Blueprints, you can implement the damage function that makes the tree burn and the ice melt. If there is no interface, then you must convert (a.k.a cast) the hit actor to each type of actor and call the damage function.
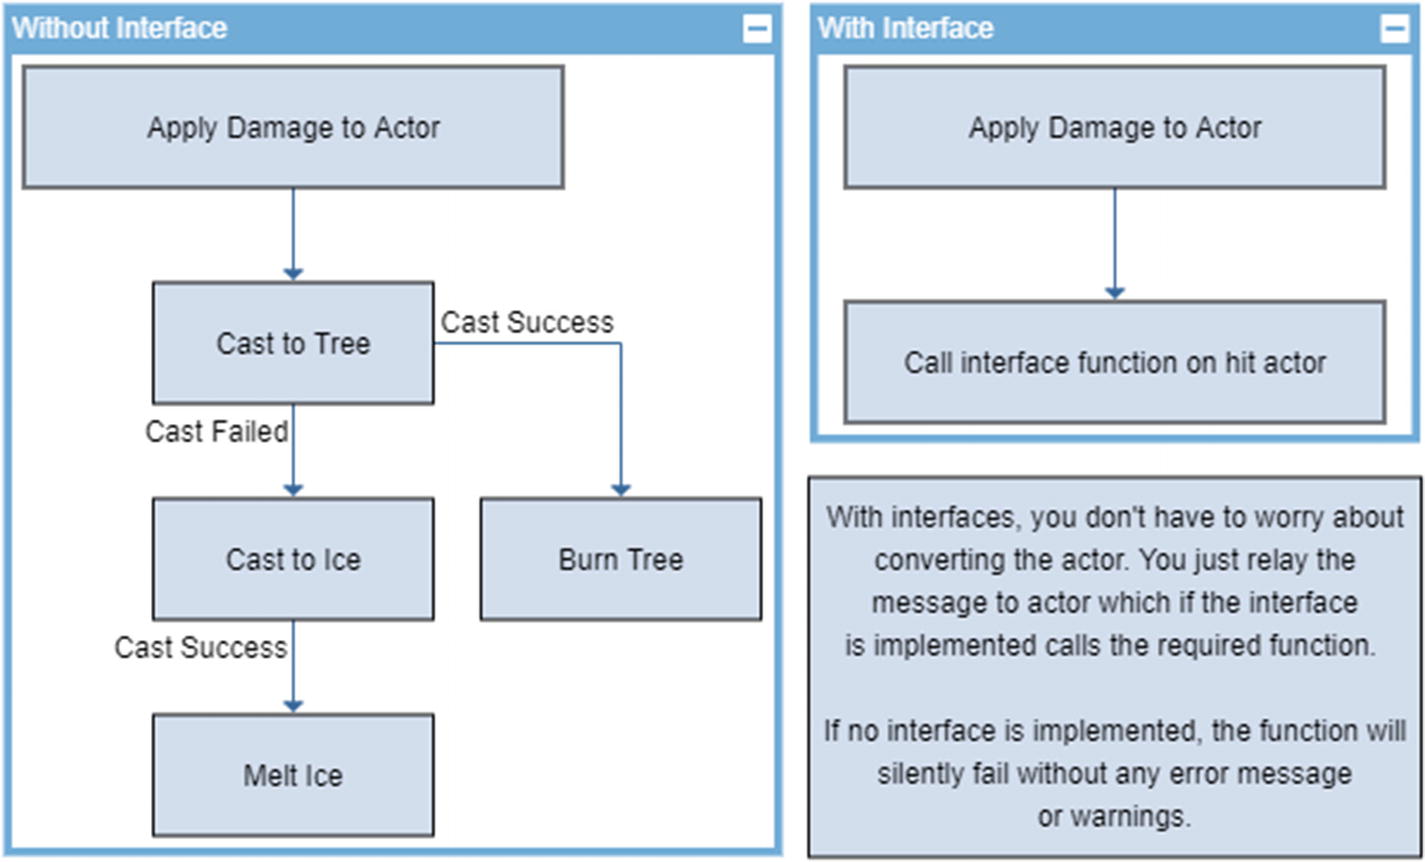
Comparing interface vs. no interface

Creating a Blueprint interface

Example Blueprint interface
Blueprint Macro Library

An example macro that gets a random item from an array, which is a list or collection of elements

An example of how to use the macro in a Blueprint
Chapter 3 explains how to combine C++ and Blueprints. You can create your own classes and Blueprint-based classes. In addition, you can declare variables and functions in C++ that you can access in Blueprint.