C++ is used in Unreal Engine 4 to create gameplay elements or modify the engine. In this chapter, you learn how to install Visual Studio for Unreal Engine. You also learn how to create C++ classes and see how they are structured.
Installing Visual Studio
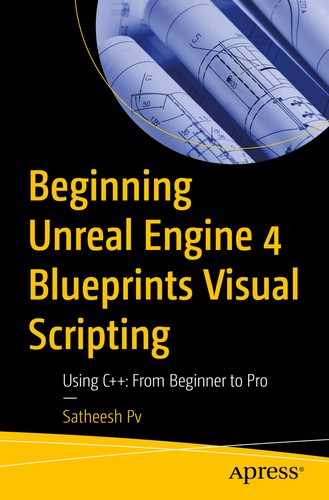
Install Visual Studio with Game Development with C++ enabled
After the installation, restart your PC. You can start writing C++ in Unreal Engine 4.
Adding C++ Code
You add new C++ classes from Unreal Editor. A C++ class is a user-defined data type that holds its own variables and functions, which are accessed by creating an instance of that class. These variables and functions define the behavior of the class. Class definitions do not take up any memory, but memory is allocated when an instance of the class is created. In UE4, Blueprints extend from one of the classes created in C++ and inherit all the class properties.
In this chapter you create an Actor-based class that can be placed on your level. In Unreal Engine, there are two main classes that you need to be aware of: the Actor class and the Object class. Even though usage depends on your goals, there are some things you must keep in mind when creating classes.
Any Actor-based class can be placed or spawned in the level. These classes have a visual representation and support networking. Object-based classes are generally for storing data, and their memory size is typically smaller than Actor-based classes.

Creating new C++ from File Menu
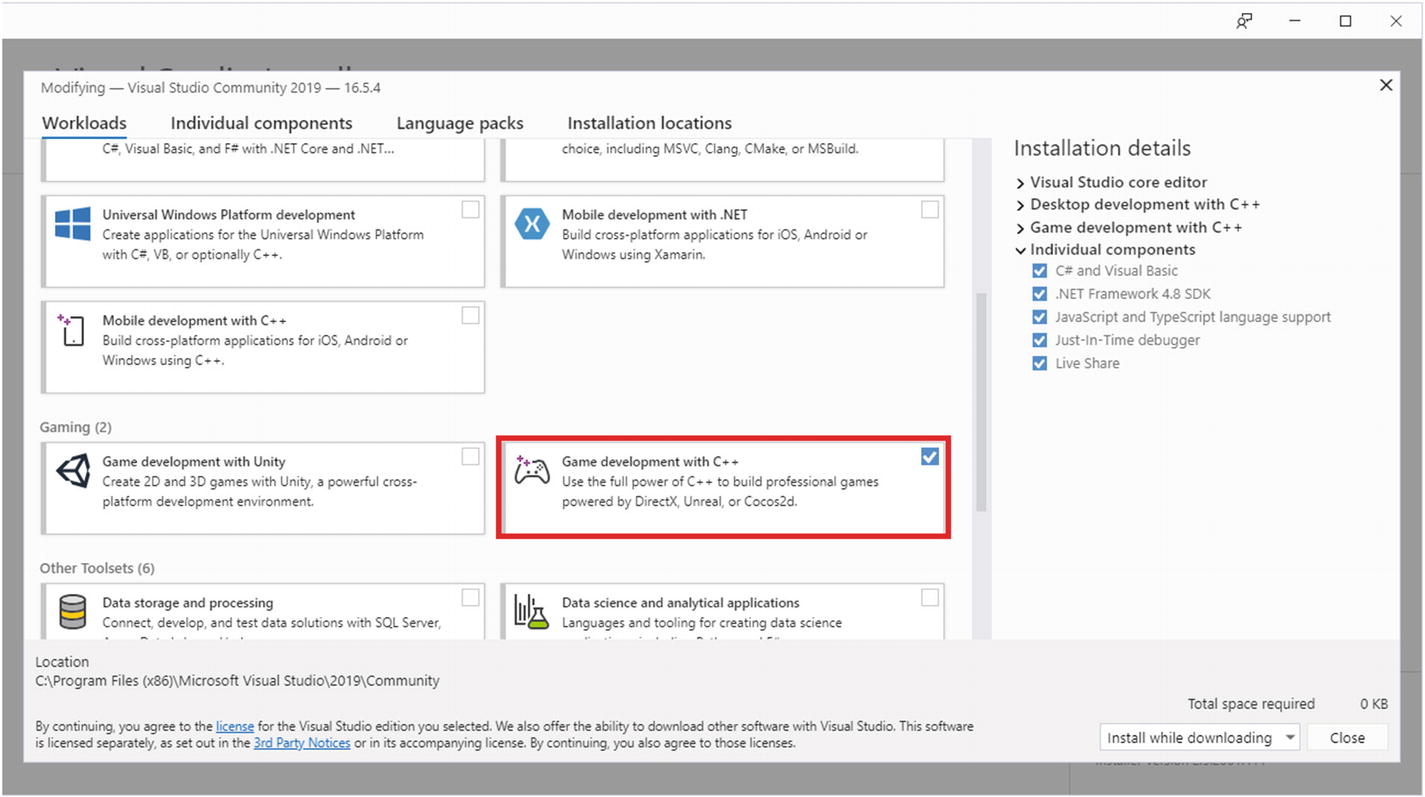
Select Actor class
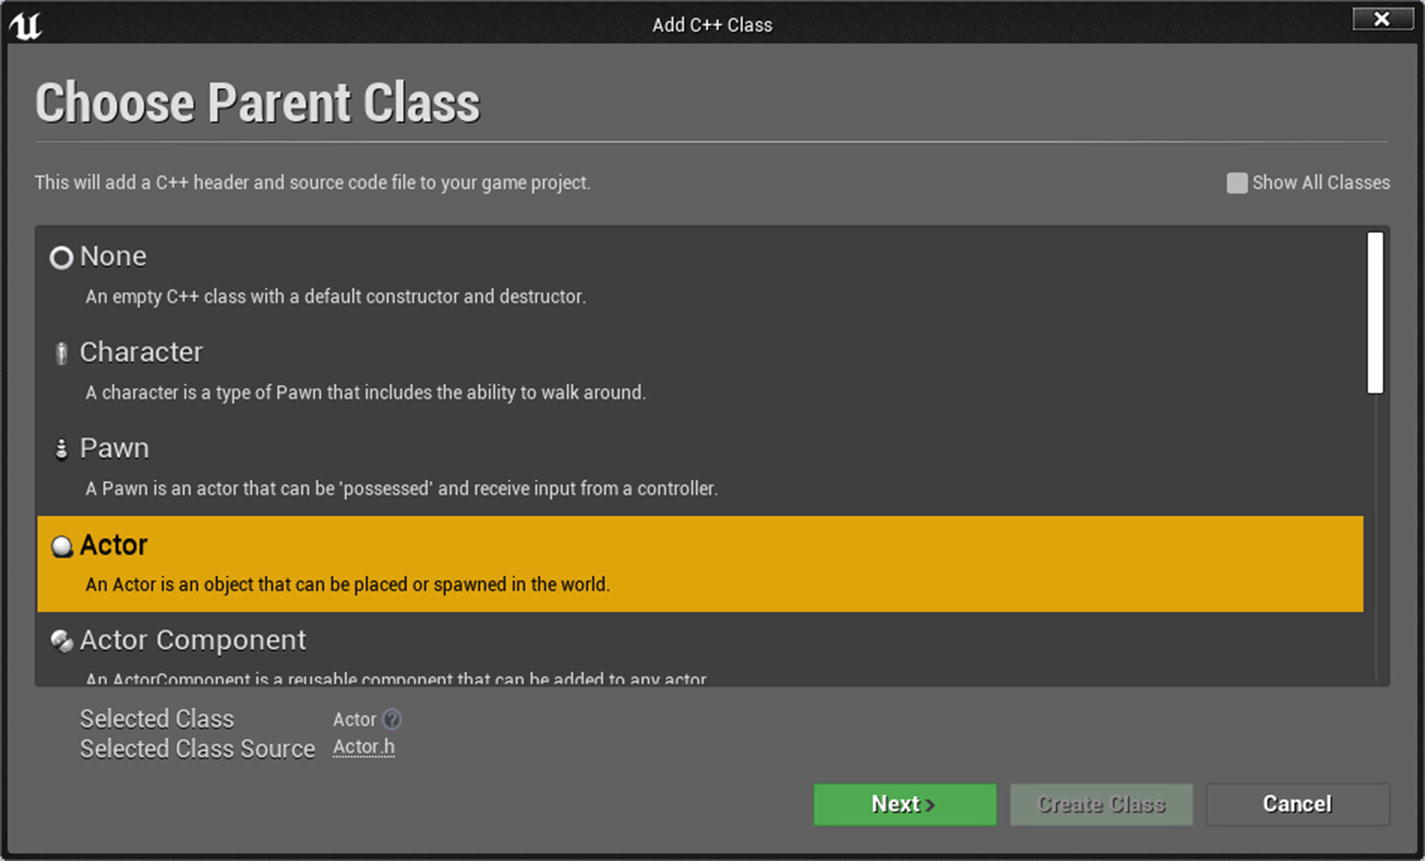
Choose name, location and scope
Generally, it’s a good and recommended practice to arrange your header in a public folder and your source files in a private folder, so select the public option, which puts the header file in the Public folder and the source file in the Private folder. For now, let’s stick with the default MyActor name and click Create Class.
Unreal Engine now adds the code to your project and starts compiling C++ code. This might take a few seconds to finish, so you can go to the project folder and see which new folders and files were created.
Binaries: This folder contains executable files or other files created during compiling. It can be deleted if the Editor is not running and is created next time you compile the project.
Intermediate: This folder contains temporary game object files and Visual Studio–generated project files. It can be deleted safely.
Source: This folder contains your game-specific code files. Obviously, don’t delete it.
If you go inside the Source folder, you see that some extra files were created, such as the YourProjectName.Target.cs and YourProjectName.Build.cs files (the actual name of your project replaces YourProjectName). The Target file determines the build settings (how your project is built) for a specific target (such as Game, Editor, etc.), whereas the build file determines which modules should be built. Modules are containers, including a collection of C++ classes accompanied by a C# build file (with the *.build.cs extension). When you build a module, a corresponding DLL file is generated in the Binaries folder. When you ship your project, all modules are linked together in a single EXE file.
Inside the Public folder, MyActor.h is the header file. Inside the Private folder, MyActor.cpp is the source file. The Header file is where you declare your variables and functions. You implement variables and functions in the Source file.
Examining the Header
#pragma once
#pragma once is called a preprocessor directive, which means that you only include this header file once. If you include MyActor.h multiple times in any other file, all subsequent inclusions are ignored.
UCLASS( ) macro
UCLASS() macro is a special macro required by Unreal Engine to make the Editor aware of the class and include it for serialization, optimization, and other Engine-related functionalities. This macro is paired with the GENERATED_BODY() macro, which includes additional functions and type definitions in the class body.
The UCLASS( ) macro can take parameters (a.k.a., Specifiers). You can read more about them at https://docs.unrealengine.com/en-US/Programming/UnrealArchitecture/Reference/Classes/Specifiers/index.html.
class BOOKTEMPLATE_API AMyActor : public AActor
class BOOKTEMPLATE_API AMyActor : public AActor is the beginning of your class. The _API macro is related to DLL linkage, which means it tags functions, classes, or data public to the DLL file; any other module that imports this API module can access these classes or functions directly. This is passed to the compiler from Unreal Build Tool. public AActor means that you inherited this class from Actor type. Inheriting is a feature in which you create a new class (also known as a derived class) from an existing class (also known as a base class). The inherited class derives all the features of its base class (also known as a parent class) and can have its own functionality.
A for Actor type (e.g., AActor, AController, AGameMode)
U for Unreal Object (e.g., UObject, UActorComponent, USceneComponent)
T for Template (e.g., TWeakPtr, TArray, TMap)
S for Slate (e.g., SWidget, SCompundWidget, SCurveEditor)
I for Interface (e.g., IAssetRegistry, ILevelViewport, IAsyncTask)
E for Enum (e.g., EAnchorWidget, EAcceptConnection)
G for Global (e.g., GEditor, GWorld)
F for Float (e.g., FVector, FGameplayTag)
public:, protected:, and private:
public: Any outside class can access members
protected: Any inheriting class can access members
private: No other class can access members
AMyActor( )
AMyActor() is the constructor, which is a special function that is automatically called when an object is created. It has the same name as the class and never returns any type. It is where you initialize all the default values for any type defined in the header files. For example, if you create a variable with type int32 (like int32 MyVariable;) inside the constructor, you can assign any default value, such as MyVariable = 1.
virtual void BeginPlay( ) override
The override keyword means this function was already declared and defined in the Actor class, and you are overriding it to have your own custom functionality. So, you declare the BeginPlay function that is from the Actor class. The same idea applies to the Tick method.
Examining the Source File
This source file contains only a very basic implementation. Something important to remember here are the Super calls (Super::BeginPlay(); and Super::Tick();), which mean that even when you override these functions, they still call the base implementation defined in the parent class. It is extremely important to include Super calls if you are overriding native engine implementations.
Exposing Variables and Functions to Blueprints
From the C++ class, you can expose the functions or variables that you need to Blueprints so designers can modify them accordingly. You modify the newly added actor to have variables and functions exposed to Blueprints.
Modifying the Header
UCLASS macros are for classes.
UPROPERTY macros are for variables.
UFUNCTION macros are for functions.
UPROPERTY is a special engine macro. Inside, you specify how to expose your variable.
EditAnywhere: This property can be edited in default Blueprint and the instances placed in the world.
EditDefaultsOnly: This property can be edited in default Blueprint only. When you place the instances of an actor in the world, you cannot edit this property individually by instance.
EditInstanceOnly: This property can only be changed for instances placed in the level. This property is not available in default Blueprint.
VisibleAnywhere: This property has the same visibility as EditAnywhere, but the property cannot be edited. It is read-only.
VisibleDefaultsOnly: This property has the same visibility as EditDefaultsOnly, but the property cannot be edited. It is read-only.
VisibleInstanceOnly: This property has the same visibility as EditInstanceOnly, but the property cannot be edited. It is read-only.
If necessary, property editing can be enabled or disabled based on boolean values. This is achieved using a metadata specifier called EditCondition. An example is provided in the preceding code.
Modifying the Source File
In the code, you see a special Engine function called CreateDefaultSubobject. This function allows you to create an object of the given type, which is visible in the Editor. This function can only be called inside constructors; calling it at runtime crashes the Editor.
Then create a definition for the CollectMe function inside the source file.
Function names can be anything, but generally, it is recommended that they are verbs that describe the function’s usage or are based on the return value.
The Final Code
Using the Class
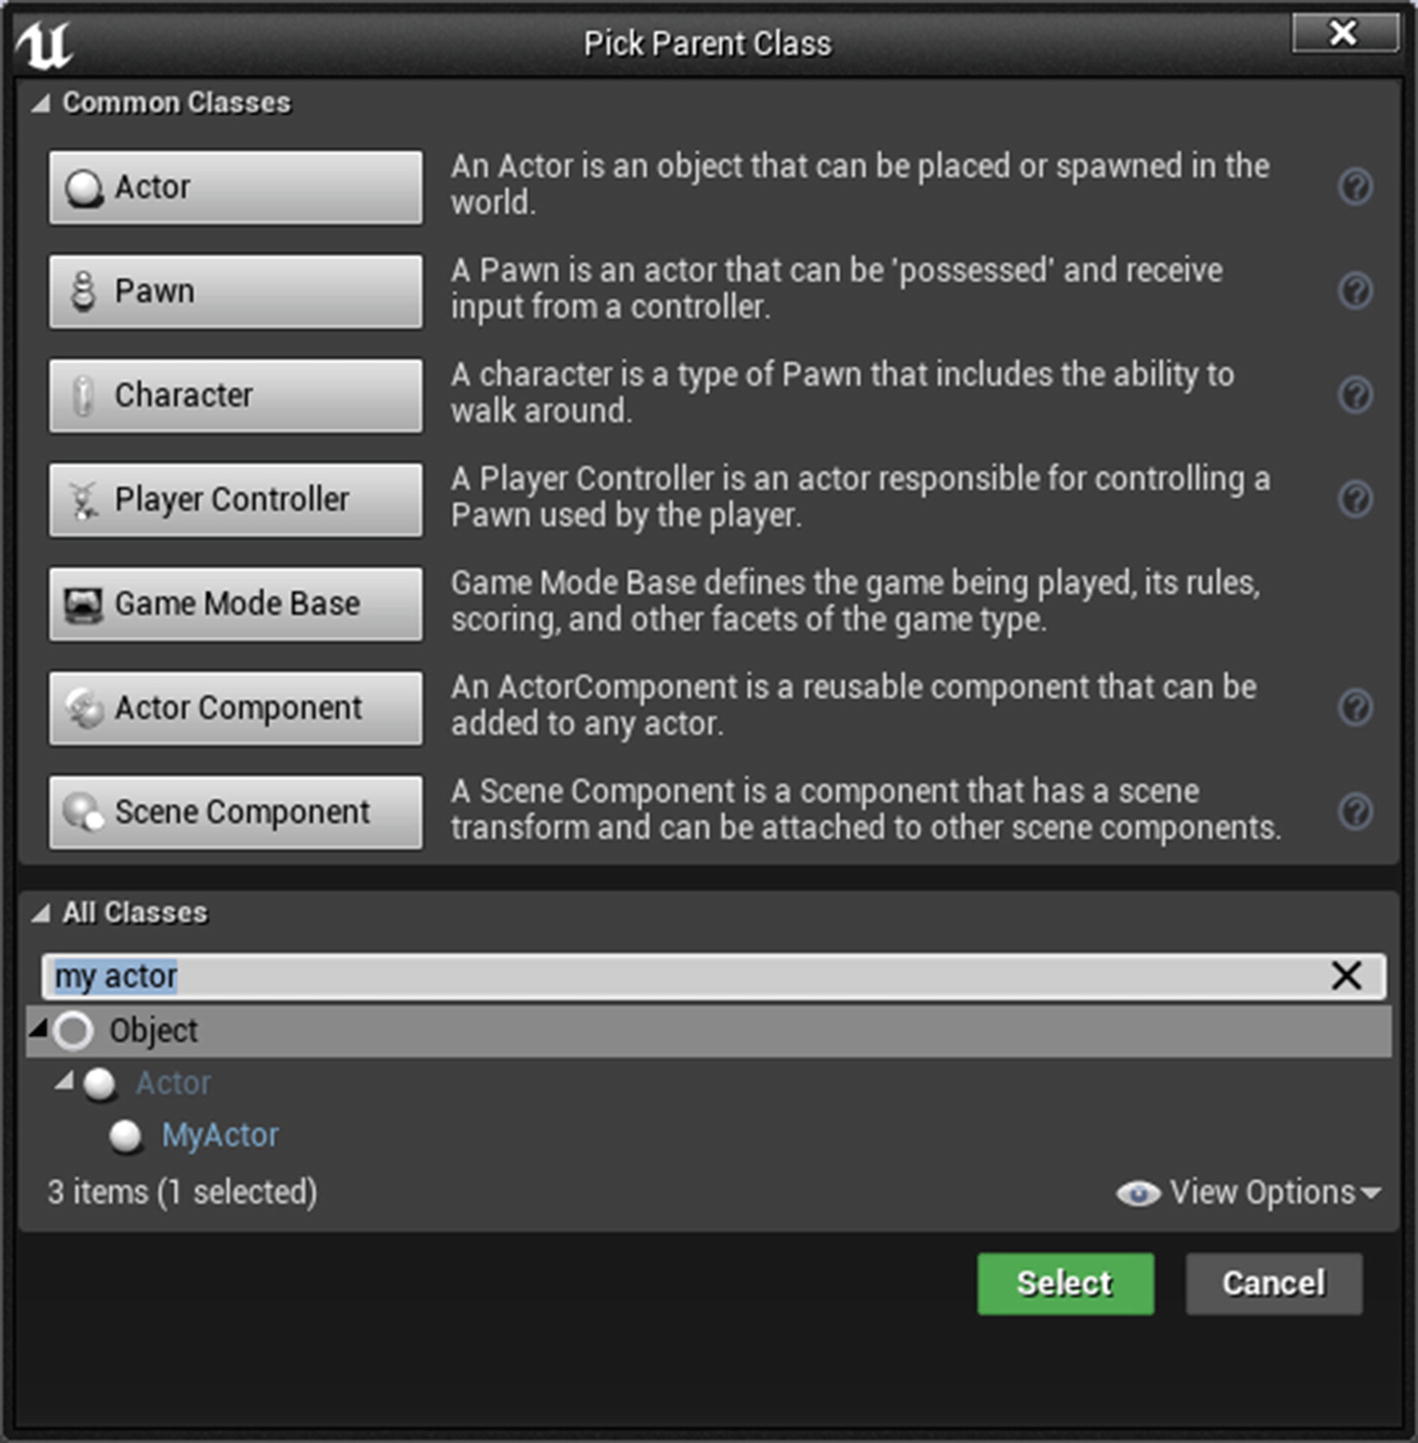
Select our previously created C++ class as parent
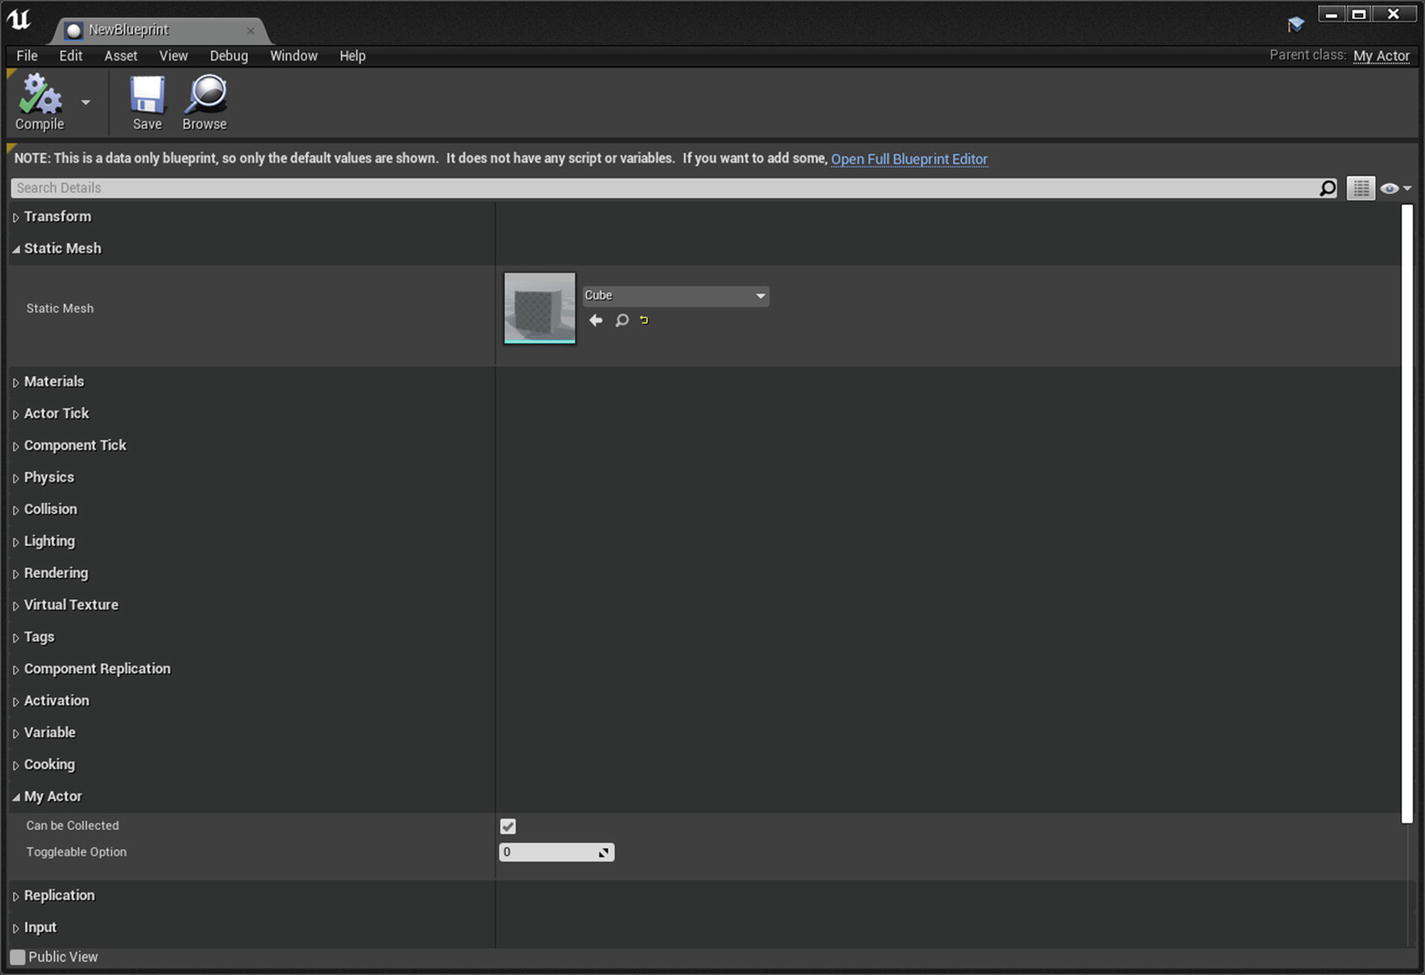
Adjust properties exposed from C++
Calling C++ Functions in Blueprints
My Actor Blueprint is ready in the Editor. You also made a Blueprint Callable function inside the actor called Collect Me. In this section, we use relatively simple logic to quickly call this function in the Level Blueprint.

Referencing My Actor Blueprint

Calling Collect Me function

Final Graph
Even though you only used a boolean as an input here, you can use other types, like floats, integers, units, and even UObjects or AActors. For example, if you want to use int32, change the boolean to int32 in both the header and source files. Void CollectMe(int32 MyIntVariable);. After that, you can use MyIntVariable in the CollectMe function defined in the source file.
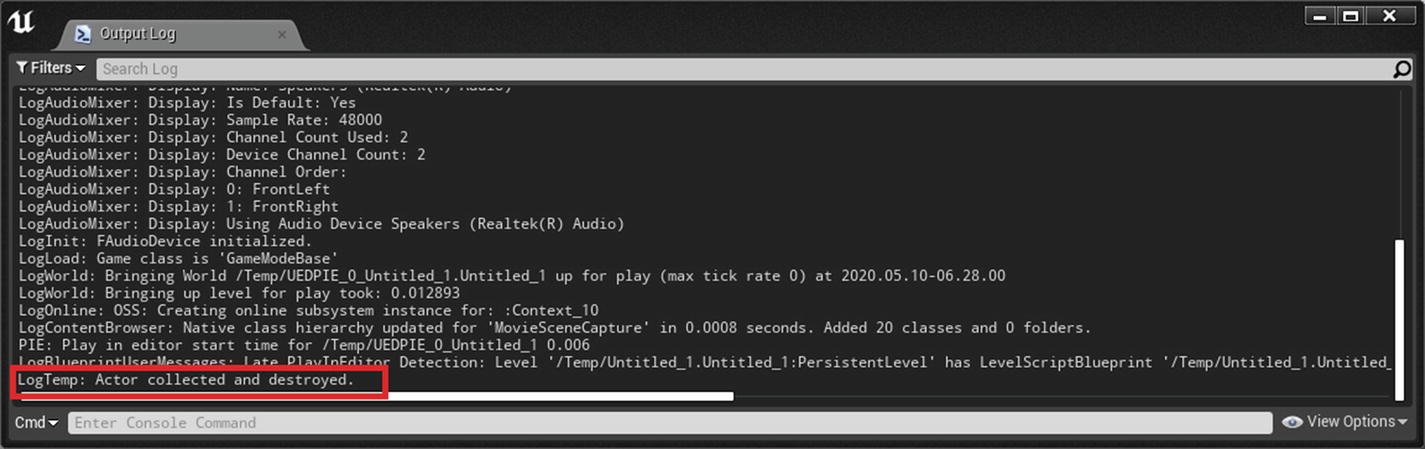
Logged information displayed