Now we are going to add the Generated Planes to our game, which will help the ARKit camera track the movement of the device.
Creating the Generated Planes GameObject
Just like we did in Chapter 3, create an empty GameObject. From the file menu, select GameObject ➤ Empty (Figure 7-1).
Figure 7-1
Creating an empty GameObject
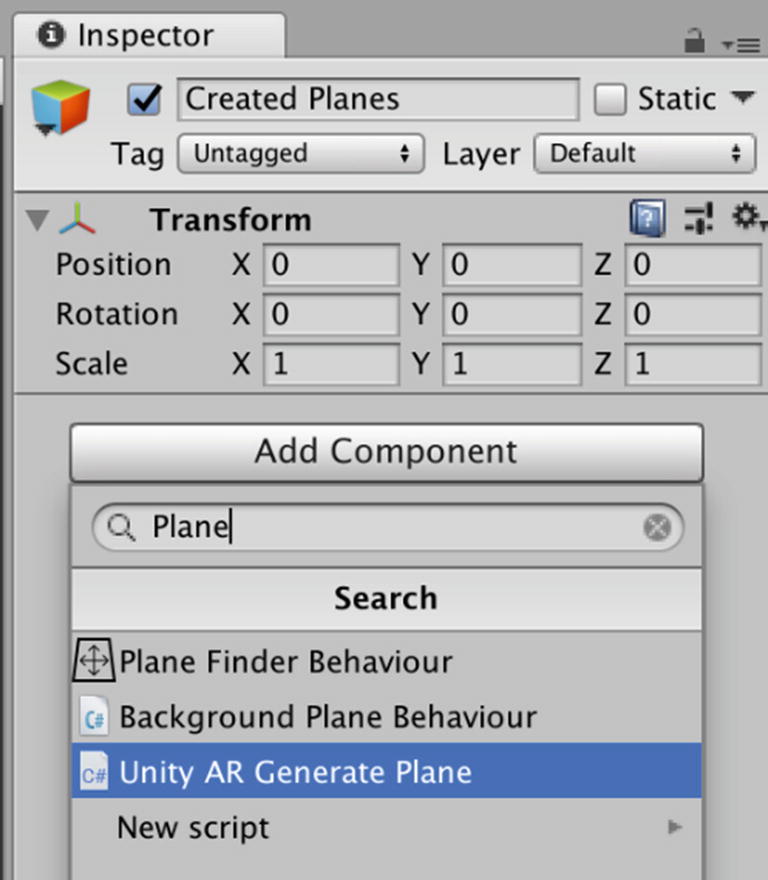
With the GameObject selected, in the Inspector, name this Created Planes (Figure 7-2).
Figure 7-2
Naming GameObject Created Planes
Now we need to add a component. Select the Add Component button in the Created Planes Inspector; and in the search bar, search for the Unity AR Generated Plane script (Figure 7-3).
Figure 7-3
Searching for the Unity AR Generated Plane script
With the Unity AR Generated Plane script included in the Created Planes GameObject, in the Plane Prefab setting of the Unity AR Generated Plane script, select the small gear to the right of the option box and search for and select the DebugPlanePrefab (Figure 7-4).
Figure 7-4
Searching for the debugPlanePrefab
Creating the Point Cloud GameObject
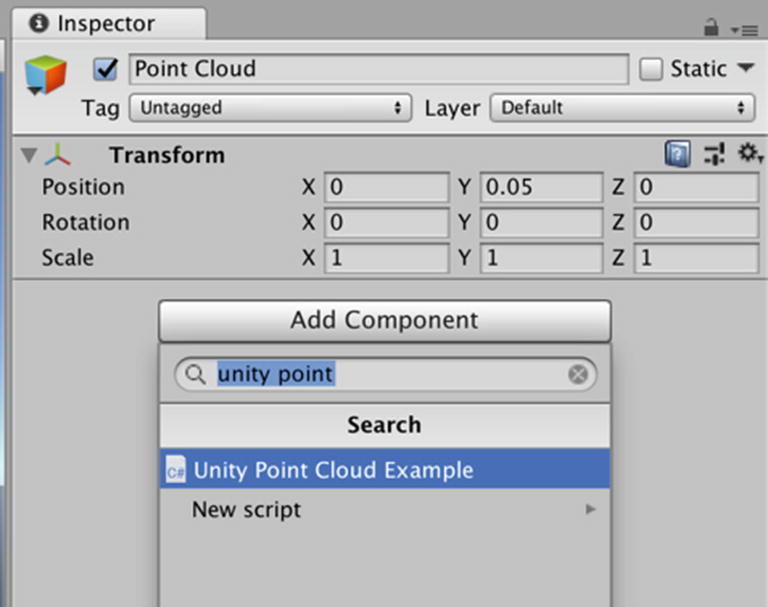
Creat an empty GameObject (Figure 7-5). With the Empty GameObject selected in the Inspector, rename it Point Cloud. Now add a component. In the search bar, search for the Unity Point Cloud Particle Example and add this to the Point Cloud GameObject (Figure 7-6).
Figure 7-5
Creating an empty GameObject
Figure 7-6
Searching for the Point Cloud Particle Example
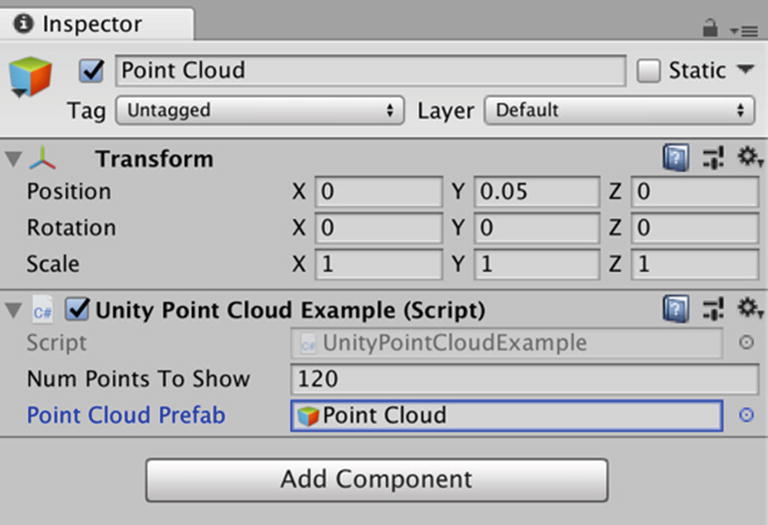
With the Unity Point Cloud Particle Example script added, now set the number of Max Points to Show at 120 (Figure 7-7). You can set as many Point Clouds as you like.
Figure 7-7
Setting the Max Points to Show
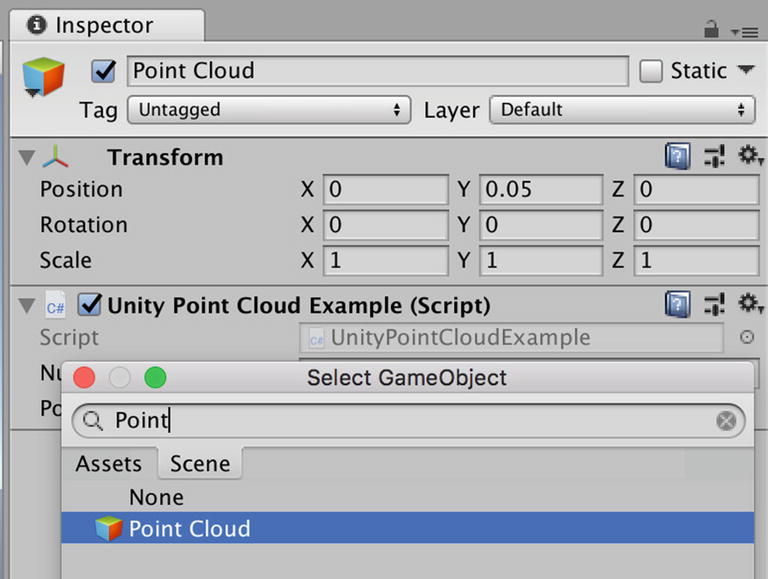
Now add a Point Cloud Particle Prefab to the Point Cloud Prefab properties box. Select the small gear to the right of the Point Cloud Prefab properties box and then search for the Point Cloud Prefab (Figure 7-8). Select and drag the PointCloudPrefab to the Point Cloud Particle Prefab box in the Point Cloud Particle Example script (Figure 7-9).
Figure 7-8
Searching for the PointCloud Prefab
Figure 7-9
The PointCloudPrefab set as the Point Cloud Prefab
Setting Up the Main Camera
You might recall that in Chapter 3, we needed to set up the game for AR. The first thing we need to do is change the settings of the Main Camera. If you remember how to do this, you can skip this section. However, I will provide a guide to setting this up for those readers who read Chapter 3 some time ago and might need a reminder on how we set this up,
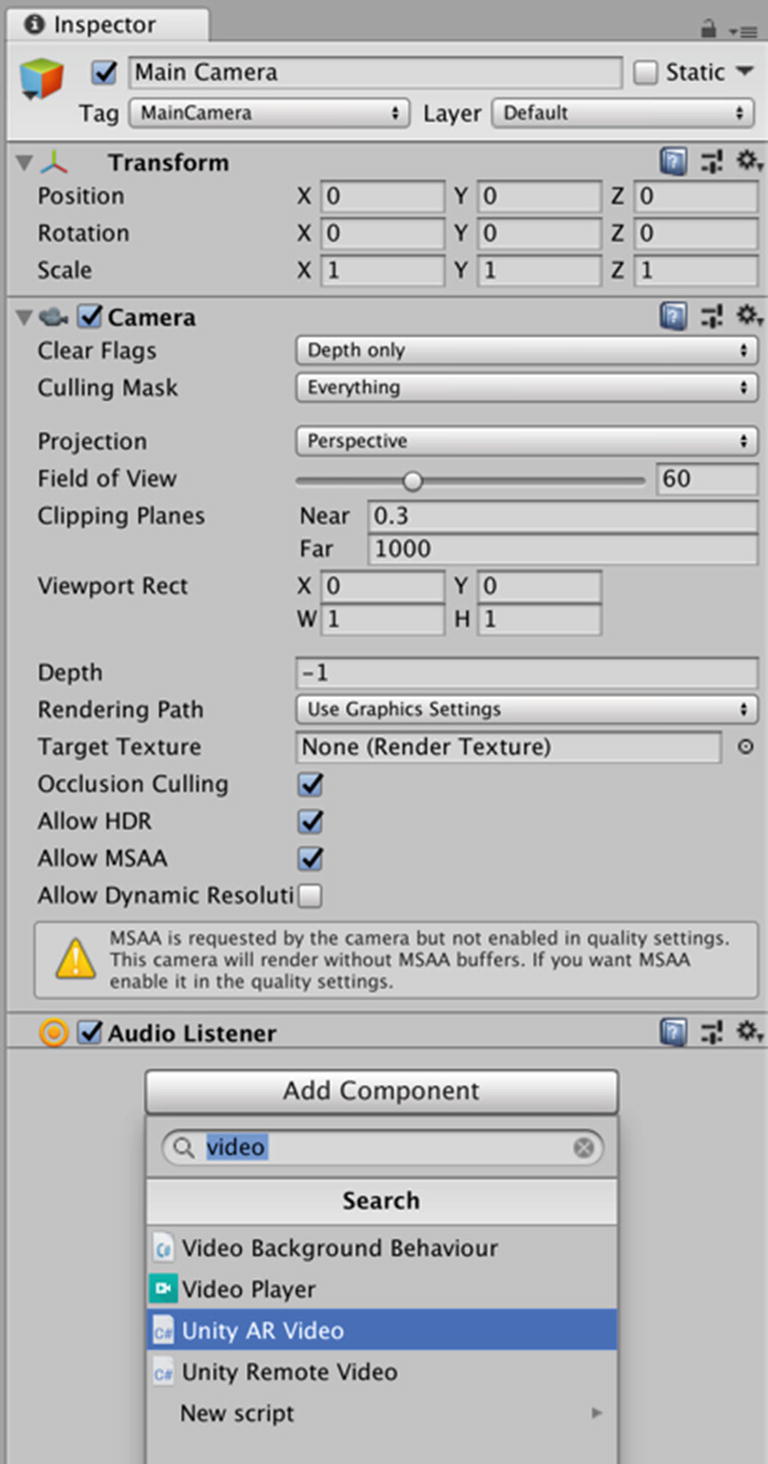
In the Hierarchy, select the Main Camera and in the Inspector, set the Clear Flags to Depth only (Figure 7-10).
Figure 7-10
Set the Clear Flags to Depth only
With the Main Camera selected, in the Inspector select Add Component. Now search for and add the Unity AR Video Script (Figure 7-11).
Figure 7-11
Searching for the Unity AR Video Script component
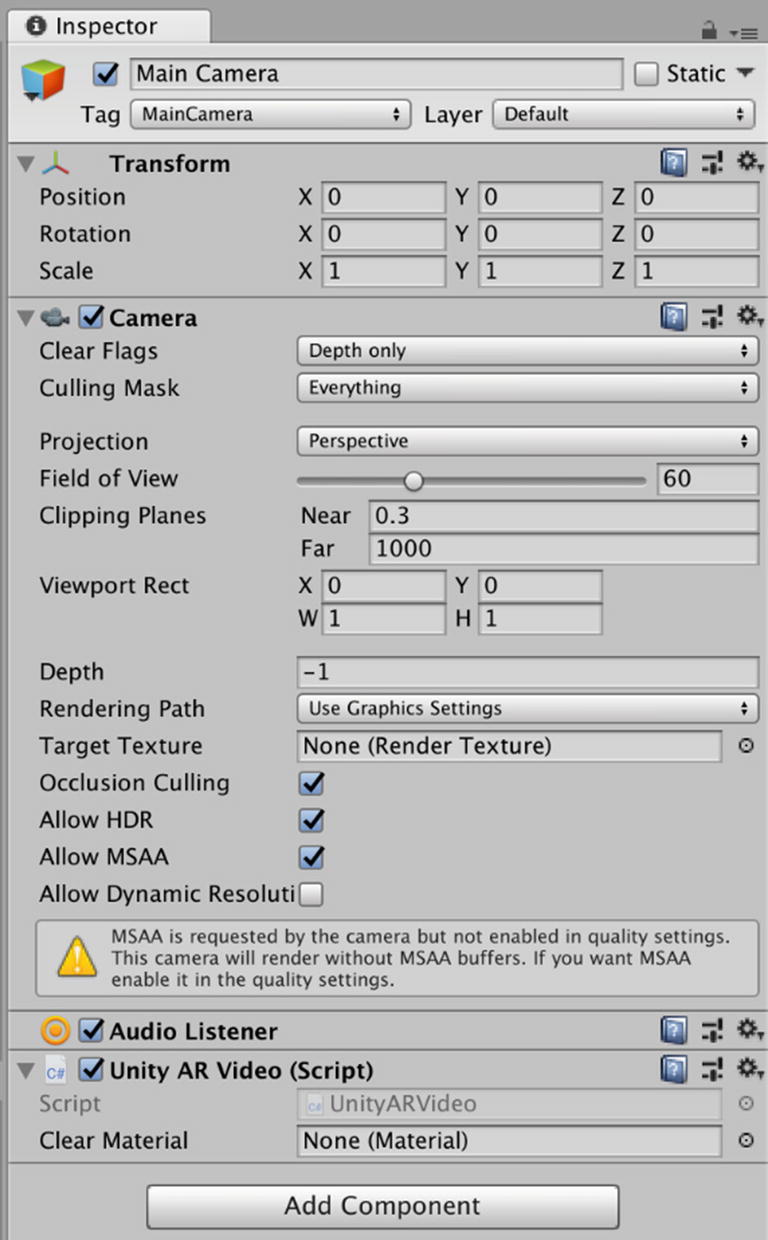
Now select the Unity AR Video Script (single, left mouse click) and this component should be added to the Main Camera (Figure 7-12).
Figure 7-12
The Unity AR Video Script component added to the main camera
Setting the Unity AR Video Script Clear Materials
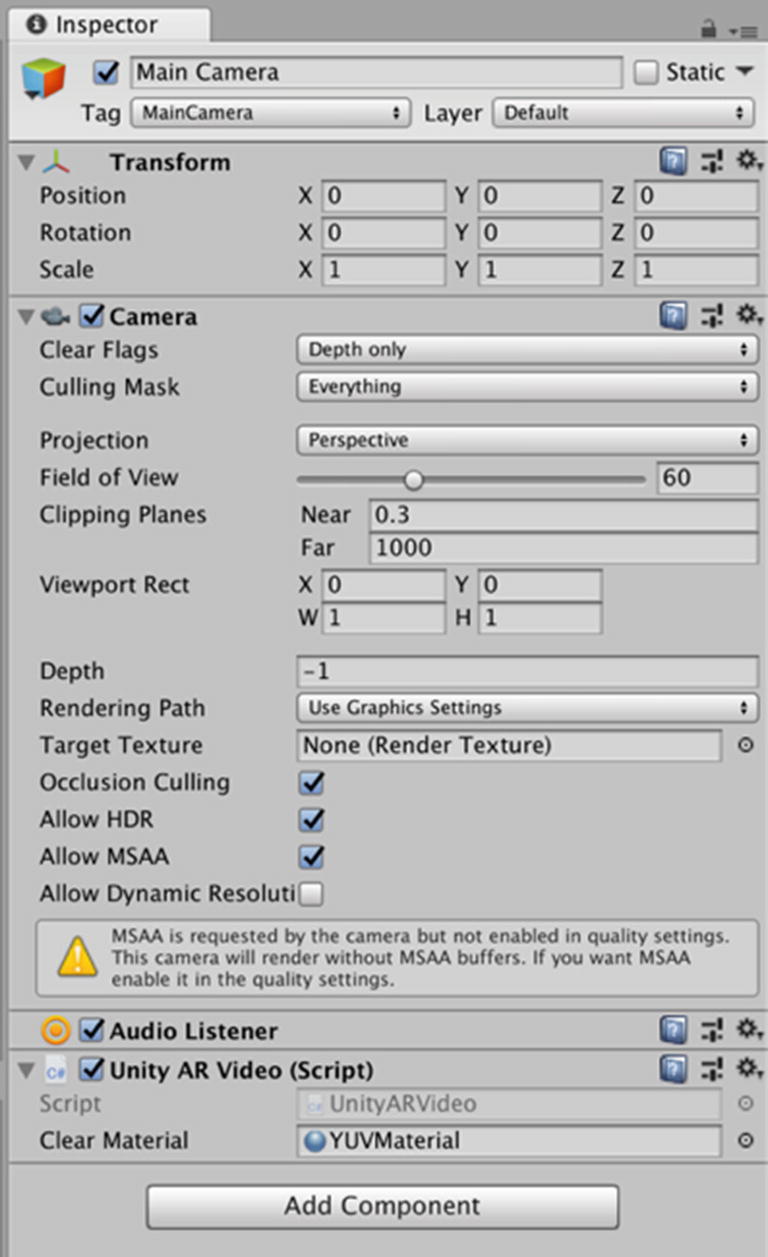
On the right of the properties box of the Unity AR Video Script component, there is a small gear (Figure 7-12); select this gear, and search for the YUV material (Figure 7-13).
Figure 7-13
Selecting the YUV material for the Clear Material
Adding the Unity AR Camera Manager
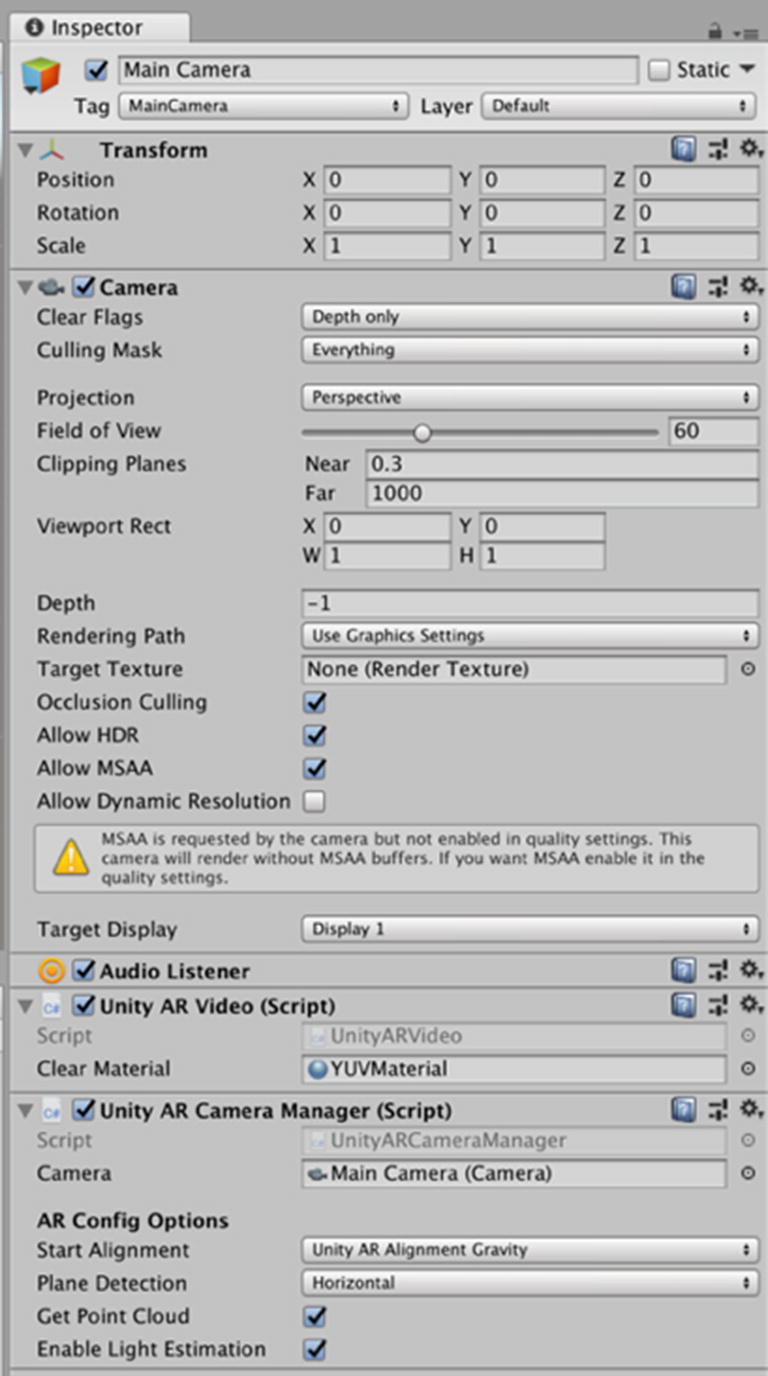
With the Main Camera still selected, in the Inspector, select Add Component (Figure 7-14); now search for AR Camera Manager (Figure 7-15), and now add it to the Main Camera.
Figure 7-14
Add Component
Figure 7-15
Searching for the Unity AR Camera Tracker
Now add the Main Camera as the Tracked Camera. To add the Main Camera to the Camera Properties of the Unity AR Camera Manager, select the Main Camera from the Hierarchy and drag this to the Tracked Camera properties of the Unity AR Camera Manager (Figure 7-16).
Figure 7-16
Setting the Main Camera as the Tracked Camera
Adding the Unity Remote Connection
To test our game in the Game tab, we also need to add the Unity Remote Connection to our Hierarchy. In the Project Tab, search for a Prefab called ARKitRemoteConnection (Figure 7-17).
Figure 7-17
Searching for the UnityARKitRemoteConnection Prefab
Select this Prefab and add it to the Scene (drag it to the Hierarchy) (Figure 7-18).
Figure 7-18
The UnityARKitRemoteConnection in the Scene
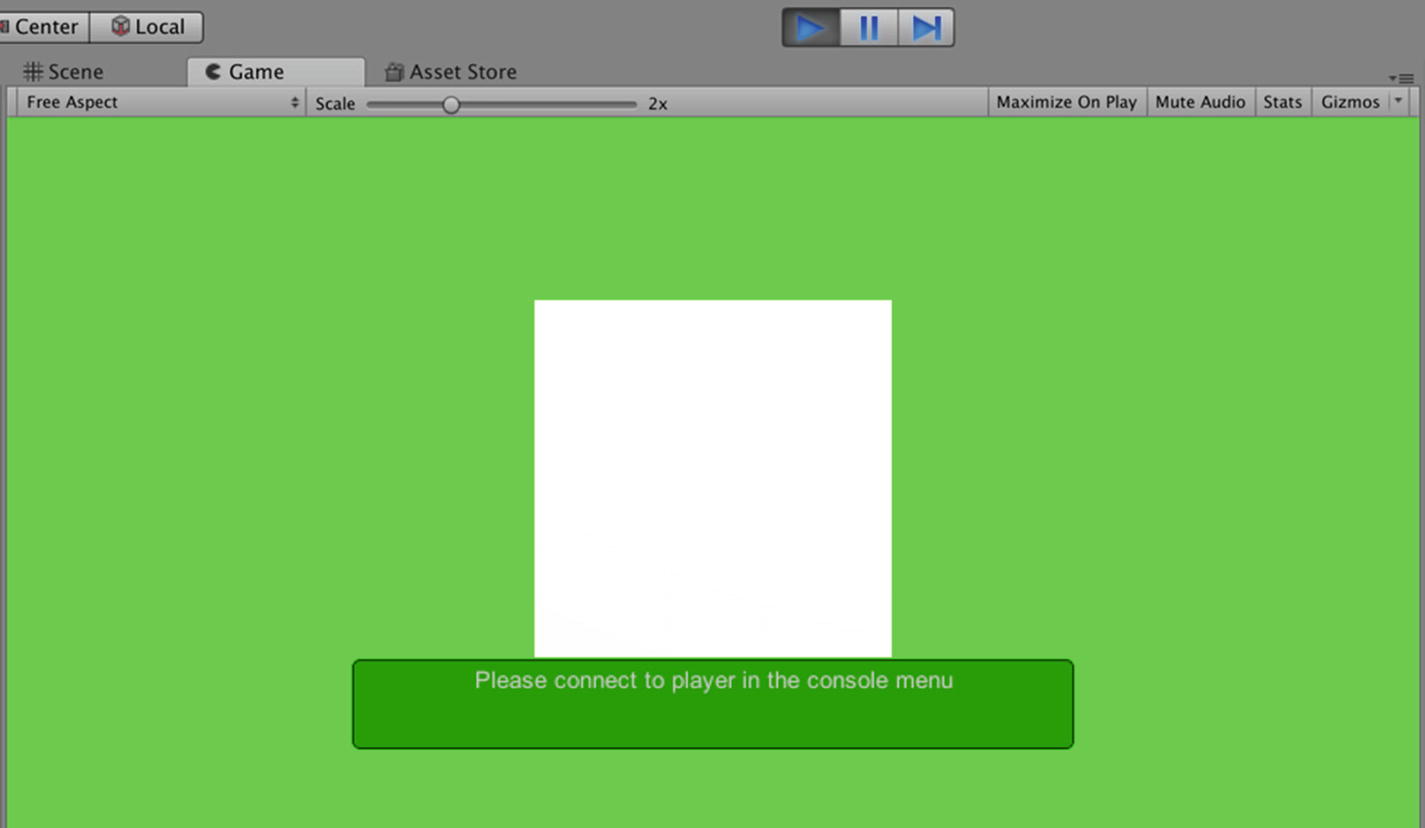
Now we need to open the ARKitRemote on our iOS device. First, connect your iOS device to your development computer. In Unity, select the Game tab and press the Play button. Unity will prompt you to connect to the player in the console menu (Figure 7-19).
Figure 7-19
Unity connect to player message
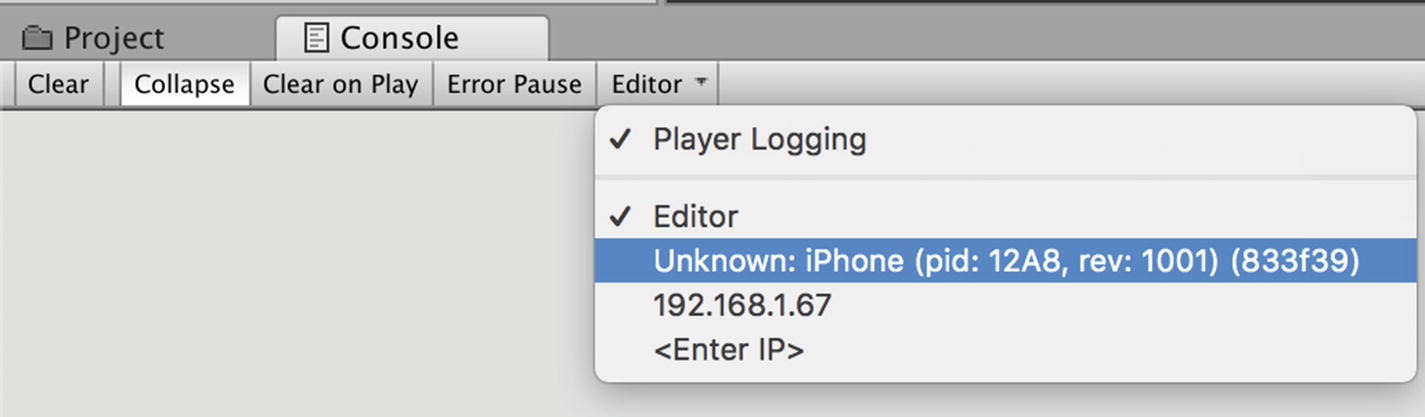
In the Console table, select Editor and select your iOS device (Figure 7-20).
Figure 7-20
Selecting the iOS device in the Console menu
Then Unity will prompt you to Start Remote ARKit Session (Figure 7-21). Click the icon on the Game screen in Unity and your application can now run on your iOS device.
Figure 7-21
Start Remote ARKit Session prompt
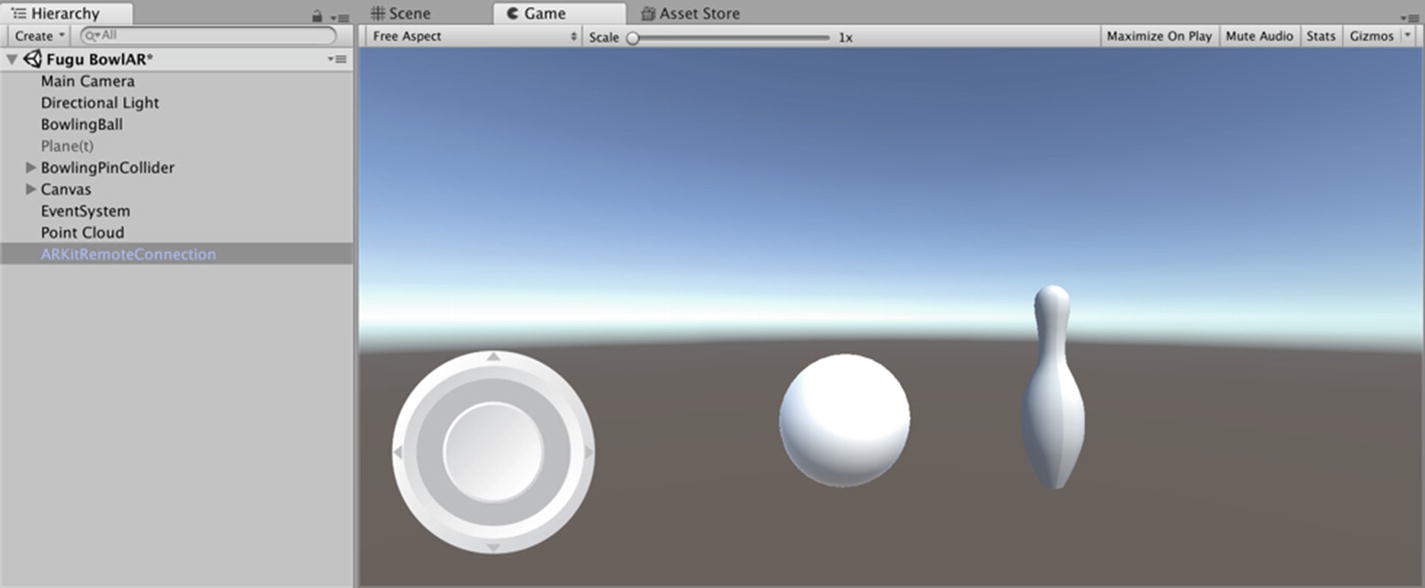
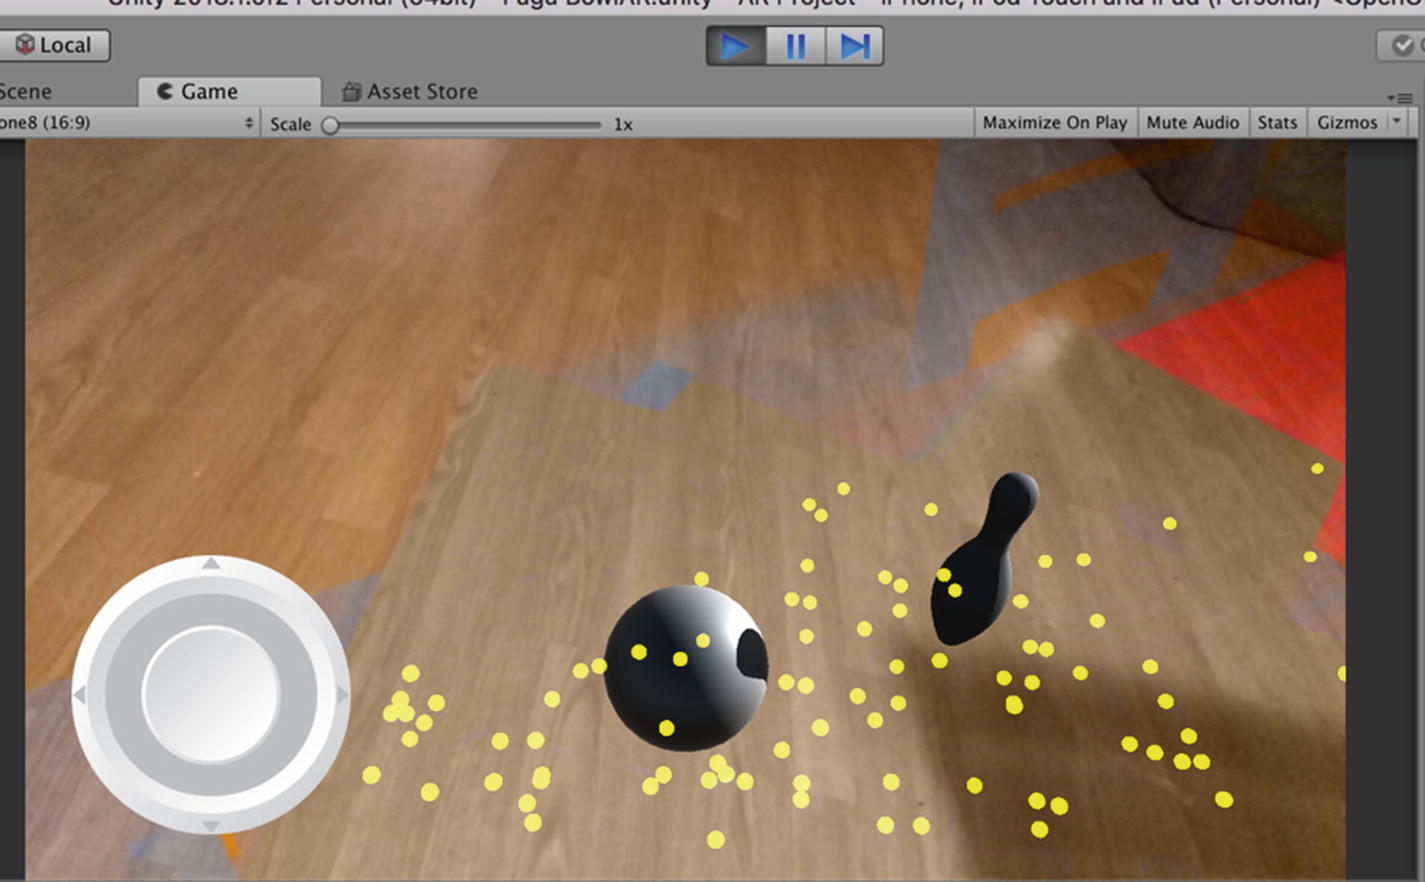
In Figure 7-22 you can see that I have successfully been able to view the Hello WorldAR App on my iPhone and see the Scene in Unity. If you move your device, you should see the Camera move in the Unity Scene tab and the picture change in the Game tab. I would like to point out that it’s going to be a bit slow (lag), but the ARKitRemote is currently the best way to test Unity AR development for iOS.
Figure 7-22
The Game View
Houston, We Have a Problem…
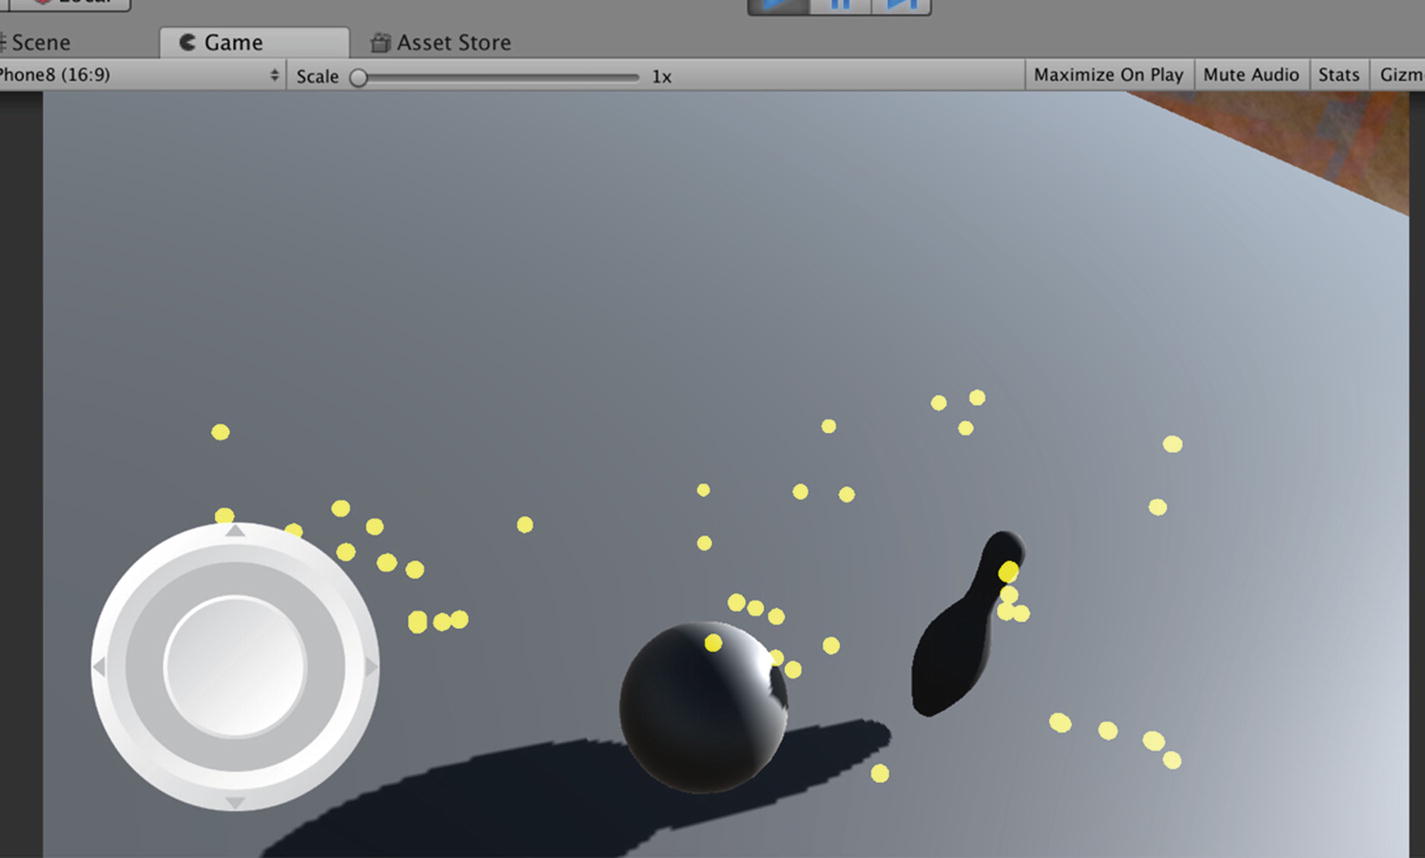
If you get a similar result as I have in Figure 7-23, don’t panic! The scene is rendering in real time. The BowlingBall and Bowling_Pin are being rendered and so is the Virtual Joystick. We can see the Point Clouds. But… the Pane(t) is still visible.
Figure 7-23
The Mesh Renderer de-selected
To fix this challenge, we are going to disable the Mesh Renderer Component of our Plane(t). To do this, in the Hierarchy, select the Plane(t) GameObject and in the Inspector, deselect the Mesh Renderer (Figure 7-24). To do this, left mouse click the check mark in the check box to the left of the Mesh Renderer Component.
Now retest your build and see the result. Your result should be similar to mine (Figure 7-24).
Figure 7-24
The Game View without the Plane(t)
Testing on an iOS device
As we have successfully been able to test the current build in the Game View, now would be a good time to see if this works on our device.
From the Main Menu, select from the Main Menu, File ➤ Build Settings (Figure 7-25). Make sure you have selected iOS as the Platform, and the Development Build check box is selected. Also, be sure to check that you are building the correct scene (Figure 7-26). In the Build Settings Menu, select Player Settings and in the Inspector make sure that the Other Settings options are set correctly. I have set my version to version 3.0. However, you might want to use a different version number (Figure 7-27).
Figure 7-25
Selecting the Build Settings
Figure 7-26
The Build Settings Menu
Figure 7-27
The Other Settings Menu options
From the Build Settings menu, select Build and Run. Unity will compile the code and then open Xcode. Make sure your iOS device is connected and that you have correctly set the Provisioning Profile in Xcode. If everything is set correctly, Xcode will deploy your game to your iOS device, and you can test the build.
Bringing Balance to the Force
When we tested our game in the Game view, we found that the BowlingBall GameObject was probably going a bit too fast. If you were able to test the game on your iOS device, you probably felt that we had a similar situation. The process of making a game fair or balanced is not easy; it requires a lot of planning and testing. In our game we have the BowlingBall GameObject set at 5 m/h. As you might imagine, the average bowler is unlikely to be able to bowl a bowling ball at 5 m/h. However, as this is a game, we have some latitude and creative license. But, we don’t want to make the game too hard or too easy. Finding this balance is challenging. Like all the great cooking shows, I am going to test the settings and report on the result. However, if you want to try testing different speeds for the bowling ball, this would be a great experience. I would, however, recommend testing the game in the Game view and not deploying the build to your iOS device.
Slowing Down the Bowling Ball
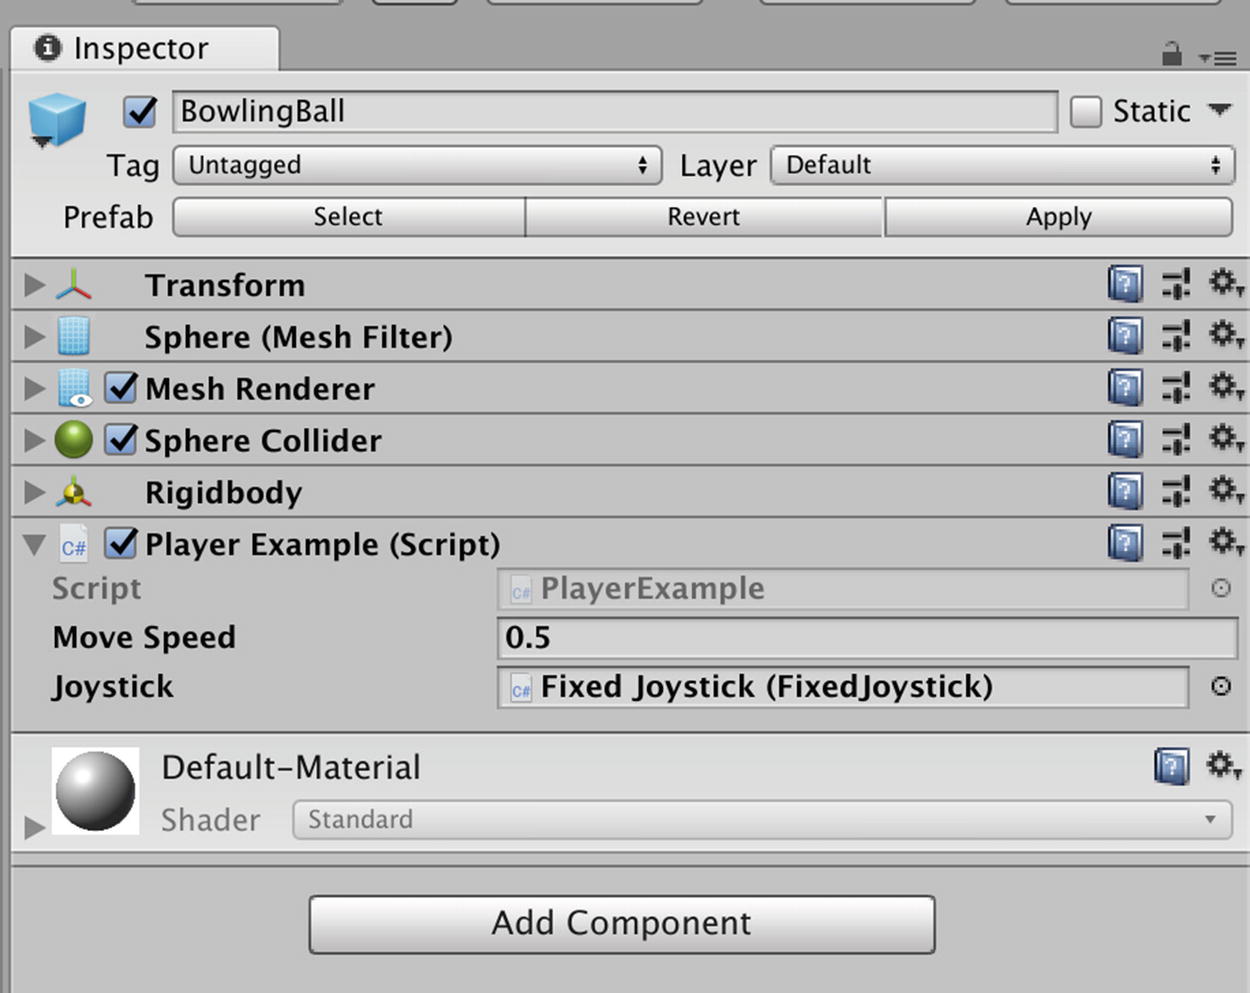
There are two ways we can slow down the bowling ball. We could increase its mass (make it heavier) or we can slow down its move speed. I prefer the second option. In the Hierarchy, select the BowlingBall GameObject and in the Inspector set the Move Speed in the Player Example component to 0.5 (Figure 7-28).
Figure 7-28
The adjusted Move Speed settings
I am reasonably happy with this setting, but some user testing is going to help us confirm if this speed is too slow.
Lighting
Just like we did in Chapter 4, we are going to adjust our lighting so that the lights in the game are a closer approximation to the lighting in the real world.
Turning Off the Lights
We are going to use a different light source for our App. However, for best results, let’s make sure we have turned off all the lights in the scene.
From the Main Menu, select Window ➤ Lighting ➤ Settings (Figure 7-29).
Figure 7-29
Selecting the Lighting Settings
In the Lighting Settings, in the Environment settings, change the Intensity Multiplier to zero. In the Mixed Lighting settings, uncheck the Baked Illumination settings (Figure 7-30).
Figure 7-30
Changing the Lighting Settings
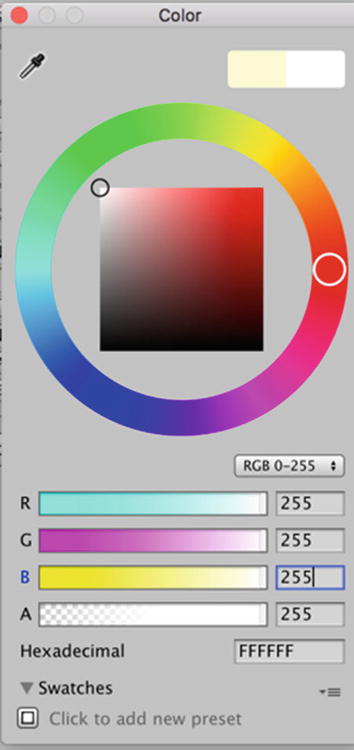
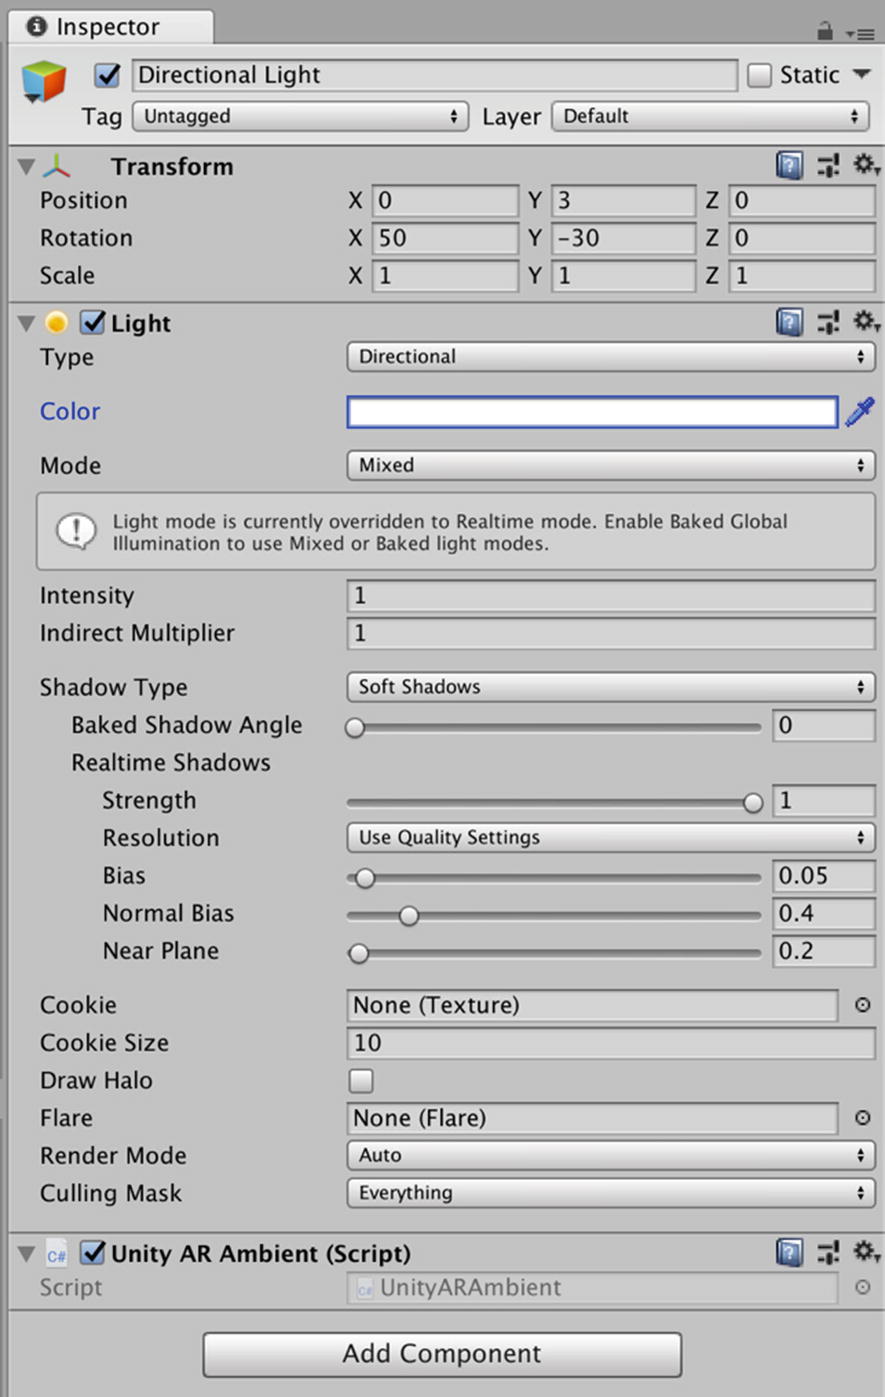
Now select the Directional Light and in the Inspector, change the color to white. And type in the RGB or HSV values of the color you want in the properties box (Figure 7-31).
Figure 7-31
Typing in the color properties
Setting the Ambient Light Source
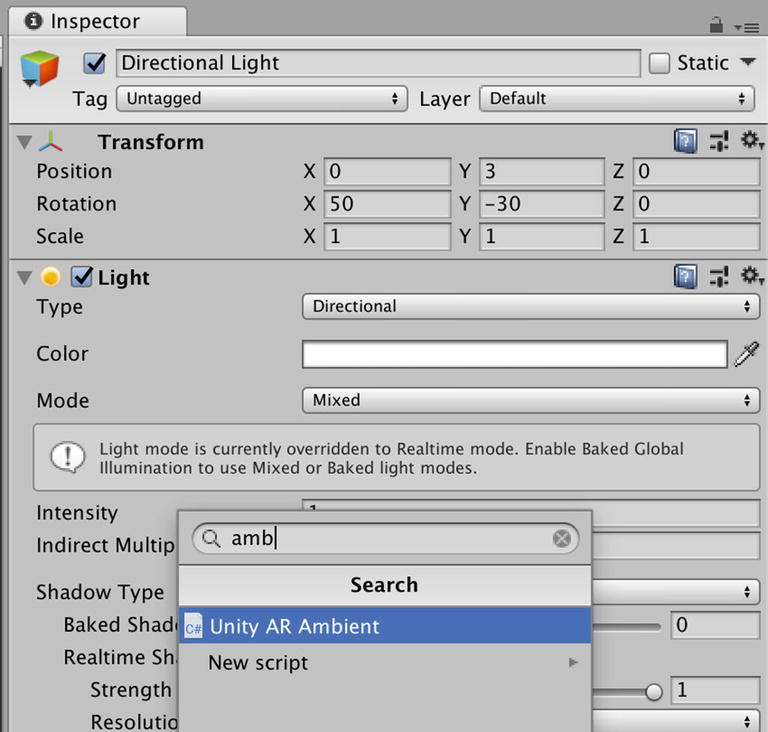
Now we can set the ambient light source. With the Directional Light selected, select the Add Component button and search for ambient (Figure 7-32).
Figure 7-32
Searching for the Unity AR Ambient
You will see that the Unity ARKit has also included a script called Unity AR Ambient. Select this script to add it to our Directional Light (Figure 7-33).
Figure 7-33
The Unity AR Ambient script added to the Directional Light
Summary
In this chapter, we added the Plane Detection and Point Clouds to our Game. We also improved the lighting to make the lighting in the game look closer to the lighting in the real world. In our next chapter, we will look at adding Sound to our game.
The more experienced developers that read this chapter will probably realize that we still have the Plane(t) GameObject in the Game. If we remove the Plane(t) GameObject completely, the BowlingBall and the Bowling_Pin will keep on falling. This is because these GameObjects are instantiating before the Created Plane is. In Chapter 8, we will cover how to instantiate these GameObjects in Unity after the Created Planes are created. For now, we have a reasonably solid test environment.