Chapter 19
Preparing for Native IOS Development
WHAT YOU WILL LEARN IN THIS CHAPTER:
- Joining the IOS Developer Program
- Getting necessary credentials
- Installing a provisioning profile
Although IOS web apps can perform and even look similar to native apps, many mobile web developers still want to package their web apps inside a native IOS app shell for one reason: real estate in terms of a place in the App Store and a place on the Home screen of the device.
In Chapter 20, I show you how you can transform your web app into a native app without learning a line of Objective-C. However, before doing so, you first need to get the preliminaries out of the way. In order to develop native IOS apps, you need to join the IOS Developer Program and get credentials that you use to install apps on an IOS device. In this chapter, I walk you through all of these initial details.
NOTE Although you can develop web apps on a Mac, Windows, or Linux machine, native IOS development is not so platform neutral. You must have a Mac computer in order to build IOS apps.
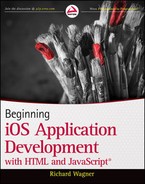
Xcode is the integrated development environment (IDE) for creating native IOS and Mac apps written in Objective-C. Now, before you get queasy thinking about being talked into the idea of programming in Objective-C, don’t sweat. Although you need to utilize Xcode to wrap your web apps inside a native wrapper, you don’t need to learn Objective-C. I promise!
Xcode is a free download from the Mac App Store. If you can’t find it, just search for Xcode and it will be the first app in your search result list.
Figure 19-1 shows Xcode after it has been downloaded and installed onto your machine.
JOINING THE IOS DEVELOPER PROGRAM
The gateway to native IOS development begins with a membership in the Apple Developer Program. There are two levels: the Standard Program ($99 annually) and the Enterprise Program for developers at companies with more than 500 employees ($299 annually).
The upside to the program is that it enables you to publish apps on the App Store. The downside is that many of the benefits of the Apple Developer Program are specifically for the Objective-C developer, so they are less relevant to you as a web developer.
To join the Apple Developer Program, go to http://developer.apple.com/programs/ios. This page is your starting point for registering for and purchasing the program. Click the Enroll Now button to begin.
Complete the steps of enrollment to purchase the Developer Program of your choice. Once you purchased a membership in the Developer Program, you have to be approved by Apple before your developer certificate is awarded. If you’re an individual developer, the response time may be only a few hours. If you’re a corporation, then it may take a few days before the process is completed.
GETTING AN IOS DEVELOPER CERTIFICATE
After you have been accepted into the IOS Developer Program, you can log in to the IOS Dev Center and download your developer certificate, which is required before you can install native apps onto an IOS device. This certificate links your identity to the validated contact address that you provided to Apple when you registered. You use the developer certificate during testing and debugging and a separate distribution certificate when you submit your app to the App Store.
TRY IT OUT: Obtaining a Developer Certificate
In order to obtain a developer certificate, you need to generate a Certificate Signing Request (CSR). To generate a CSR, do the following on your Mac.
1. Launch the Keychain Access utility.
2. Choose Keychain Access ⇒ Preferences.
3. In the Certificates pane, set the Online Certificate Status Protocol and Certificate Revocation List to Off.
4. Close out the Preferences dialog box.
5. Choose Keychain Access ⇒ Certificate Assistant ⇒ Request a Certificate from a Certificate Authority. The Certificate Assistant opens (see Figure 19-2).

6. In the User Email Address box, type in the email address you used to register for the IOS Developer Program.
7. In the Common Name field, type in your name. Your name will be used as your private key in the Keychain Access utility.
8. Select the Saved to Disk option.
9. Check the Let Me Specify Key Pair Information checkbox.
10. Click Continue.
11. Save your .certSigningRequest file on your desktop.
12. In the Key Pair Information panel, select 2048bits in the Key Size drop-down box.
13. Choose RSA for the Algorithm.
14. Click Continue to generate the certificate request.
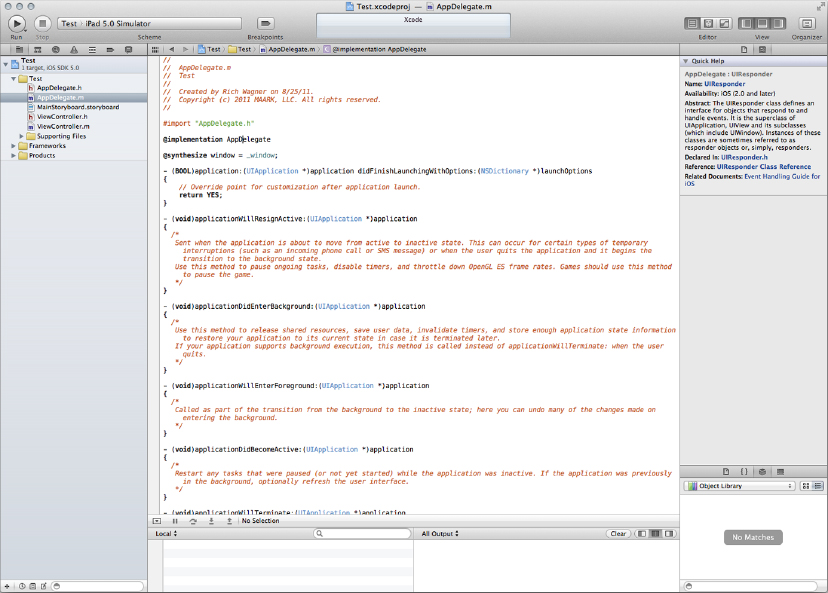
15. In your web browser, go to the IOS Provisioning Portal section of the IOS Dev Center: https://developer.apple.com/ios/manage/overview/index.action.
Figure 19-3 shows the main page of the IOS Provisioning Portal.
16. Click the Certificates link on the left.
17. Click the Request Certificate button.
18. Click the Choose File button on the Create IOS Development Certificate page and choose the .certSigningRequest file you just created on your desktop.
19. Click the Submit button.
How It Works
This process walks you through how to generate a certificate request and then submit it to Apple via the IOS Provisioning Portal online. The IOS Provisioning Portal location to which you will return to gets necessary credentials used to certify your app for IOS device installation. From here you can also manage members of your dev team, register devices used in testing, and create Provisioning Profiles used to code sign your app.
After your certificate request is submitted to Apple you receive an email notifying you that your request has been approved or denied. When your request is approved, you are able to download your developer certificate.
RETRIEVING THE DEVELOPER CERTIFICATE
When you receive an approval email you can go to the Program Portal to download the certificate. You download the developer certificate file (which is named developer_identity.cer) from Apple’s IOS Provisioning Portal at https://developer.apple.com/ios/manage/overview/index.action.
Click the Certificates link to display the Current Development Certificates list. A certificate is shown in the list (see Figure 19-4). Click the Download button to retrieve the developer_identity.cer file.

After you download the certificate, all you need to do is double-click the developer_identity.cer file to add it to the Keychain Access utility.
During the testing process, you should register your IOS device with the IOS Provisioning Portal to enable you to install apps you create onto the device for testing. Complete the following steps to register a device:
1. Connect your IOS device to your Mac using the USB cord.
2. Launch iTunes.
3. Display the Summary page for your IOS device.
4. Click the Serial Number displayed at the top to display the Unique Device Identifier (UDID).
5. Copy the UDID number to the Clipboard.
6. Go to the IOS Provisioning Portal at https://developer.apple.com/ios/manage/overview/index.action.
7. Click the Devices link and then click the Add Device button.
8. Type a descriptive name for the device in the space provided. From experience, I recommend making sure it is the name of the person and the type of device. That makes it much easier to manage than a name such as Amazing Phone of Wonder.
9. Paste the UDID of your device into the Device ID box.
10. Click Submit to add your device. The device is displayed in the list, as shown in Figure 19-5.

You can enter up to 100 devices annually for development and testing purposes.
An App ID is used to uniquely identify your app as part of the provisioning and authentication process. It has two parts:
- The Bundle Seed ID is a 10-character prefix generated by Apple.
- The Bundle Identifier is a reverse-domain style string that you determine. It can contain standard alphanumeric characters (A–A, 0–9), periods, and hyphens.
For example, a typical App ID might look something like the following:
2MDCRUBLFG.com.richwagner.myamazingwebapp
To create an App ID for your app:
1. Go to the IOS Provisioning Portal at https://developer.apple.com/ios/manage/overview/index.action.
2. Click the App IDs link.
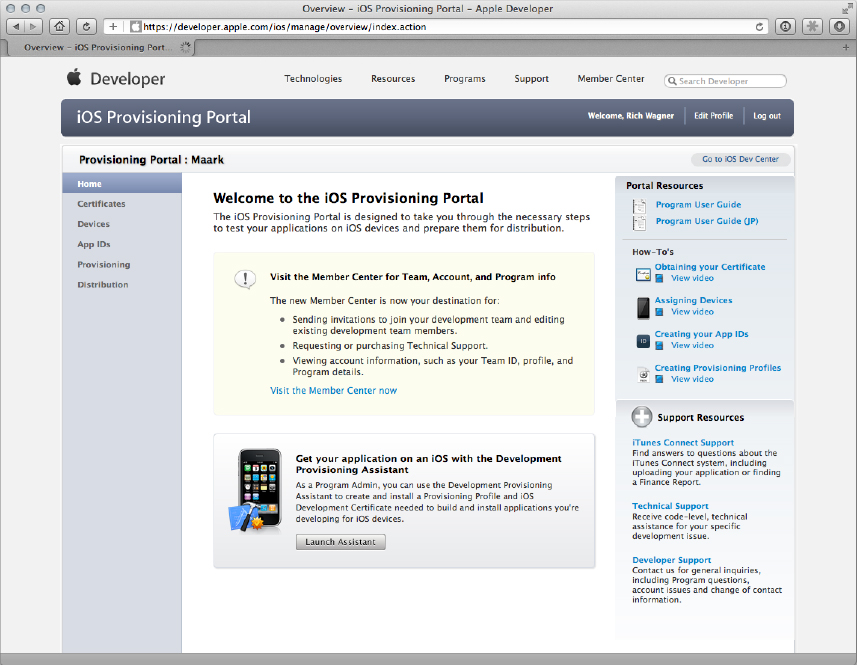
3. Click the New App ID button to display the Create App ID page (see Figure 19-6).
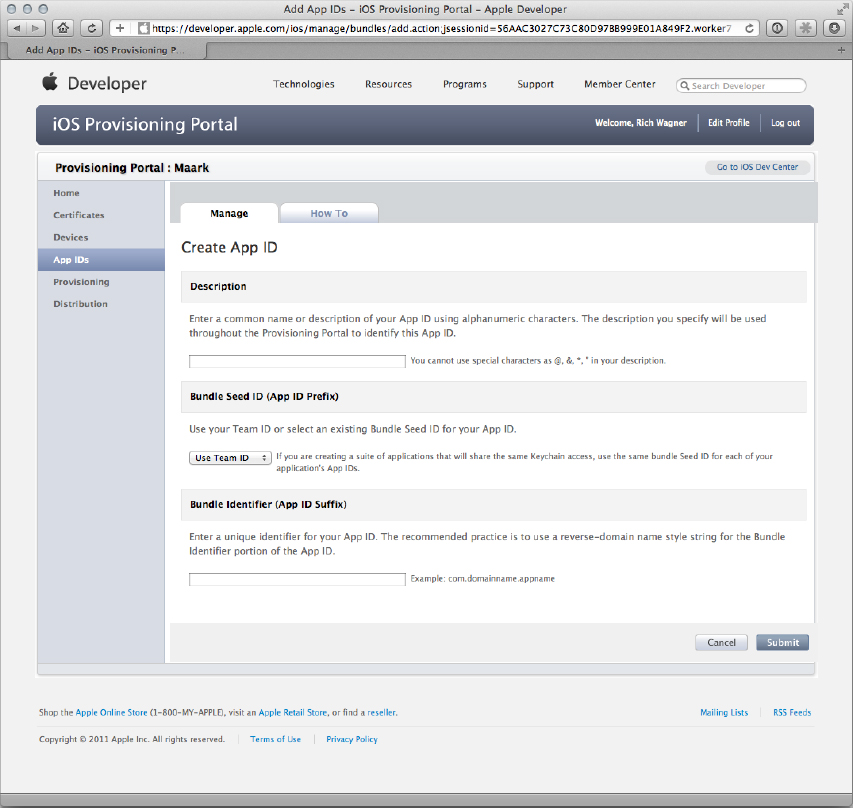
4. In the Description input box, enter a name or description of your app.
5. In the Bundle Seed ID drop-down box, select Use Team ID (the default item).
6. In the Bundle Identifier box, enter a reverse-domain name style string.
7. Click Submit to add the App ID.
CREATING A PROVISIONING PROFILE
If you have proceeded in order through the chapter, you have submitted and obtained a developer certificate, registered your IOS device for testing, and created an App ID. Now, you are ready to create the final and most important credential needed to install, run, and test your app on an IOS device — a Development Provisioning Profile.
TRY IT OUT: Obtaining a Development Provisioning Profile
To create a Development Provisioning Profile, follow these steps:
1. Go to the IOS Provisioning Portal at https://developer.apple.com/ios/manage/overview/index.action.
2. Click the Provisioning link.
3. Click the New Profile button to display the page shown in Figure 19-7.
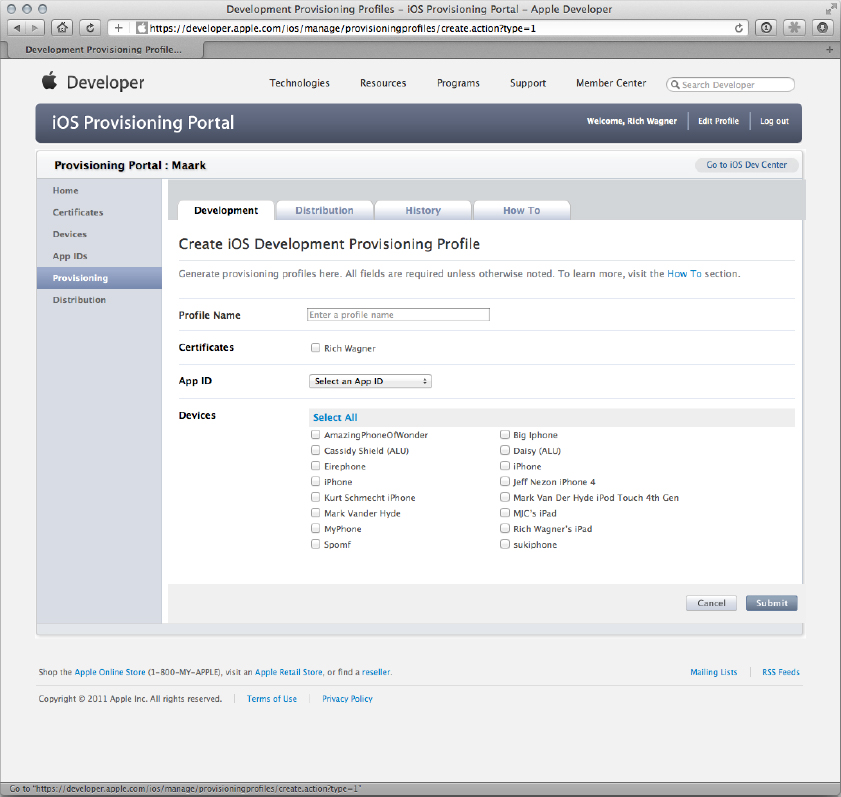
4. Type the name of the profile in the Profile Name box.
5. The name of your developer certificate (which you created earlier in the chapter) displays next to the Certificates label. Click the checkbox to assign your developer certificate to this profile.
6. Choose the App ID you created earlier in the App ID drop-down box.
7. Check all of the devices on which you want to be able to install your app for development and testing purposes.
8. Click the Submit button to create the Development Provisioning Profile.
9. Click the Download button next to the provisioning profile you just created to download the .mobileprovision file to your desktop. (You may have to wait a few seconds and refresh the page to see the Download button.)
How It Works
This exercise walks you through the process of creating a Development Provisioning Profile. A Development Provisioning Profile is used to tie together a developer certificate, a specific application, and a set of devices. You need to have a Development Provisioning Profile installed on each IOS device that runs your app. And you need to have a unique Development Provisioning Profile for every app you create.
INSTALLING THE DEVELOPMENT PROVISIONING PROFILE
As I stated earlier, a Development Provisioning Profile is a collection of digital credentials that ties an application and a testing device to a registered IOS developer. After you have the .mobileprovision file downloaded to your desktop, you need to install it in Xcode so it is ready to go when you need it.
Installing it is a quick, four-step process that doesn’t require you to learn what pointers are or to make sense of Objective-C’s strange programming syntax.
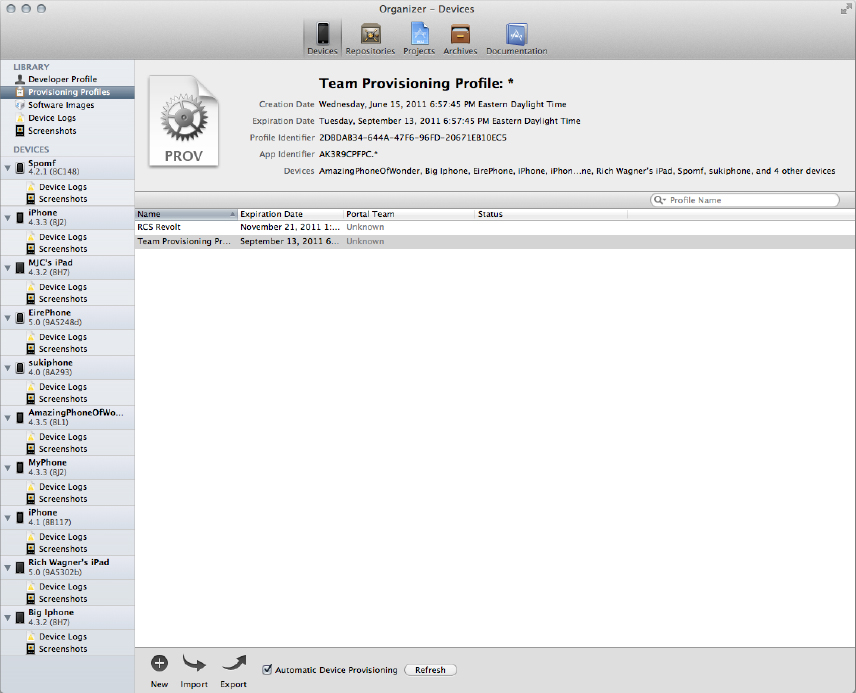
1. Launch Xcode. If this is the first time, you see a Welcome to Xcode window.
2. From the Window menu, choose Organizer.
3. Click the Devices button.
4. Drop the .mobileprovision file into the Library’s Provisioning Profiles at the top left of the window (see Figure 19-8).
That’s it! You have now gotten all of the busy work out of the way, so as you continue with Chapter 20, you can get back to wrapping your web app inside a native IOS shell.
EXERCISES
1. What software is needed to create native IOS apps?
2. Which is most important for installing your app onto your own IOS device for testing: a developer certificate, an App ID, device registration, or a Development Provisioning Profile?
3. Can you use a Windows computer to create a native IOS app?
Answers to the Exercises can be found in Appendix A.
• WHAT YOU LEARNED IN THIS CHAPTER
| TOPIC | KEY CONCEPTS |
| Joining the IOS Developer Program | Membership into the IOS Developer Program is required for installing, testing, and distributing native IOS apps. |
| Obtaining a Developer Certificate | A developer certificate ties your identity to a validated contact address that was provided to Apple when you registered. |
| Creating a Development Provisioning Profile | A Development Provisioning Profile is used to bind together a developer certificate, an app, and an IOS device (or devices). You need to have a Development Provisioning Profile installed on each IOS device that runs your app during testing. |