Chapter 21
Submitting Your App to the App Store
WHAT YOU WILL LEARN IN THIS CHAPTER:
- Getting a distribution certificate
- Obtaining a distribution provisioning profile
- Publishing your app to the App Store
If you have made it this far, you’ve designed, coded, and tested your web app, and you’ve wrapped it in PhoneGap or Titanium for native distribution. As a final step, you’re ready to distribute your app to others by publishing it to the App Store. In this chapter, I show you how to do that.
However, before you submit your app to the App Store, you need to check out the App Store Review Guidelines, which tells you what Apple considers when determining whether or not to approve an app. Sign in with your Apple ID, and then find the guidelines at https://developer.apple.com/appstore/resources/approval/guidelines.html. When you are satisfied that your app meets the guidelines you’re ready to begin the four-step submission process described in this chapter.
NOTE Be sure to read Chapters 19 and 20 before you work through this chapter.
STEP 1: GETTING A DISTRIBUTION CERTIFICATE
iOS apps must be signed by a valid certificate before they can be run on an iPhone, iPad, or iPod touch. Similar to what you did when you obtained a developer certificate to develop and install your apps on your own device for testing, you need to get a distribution certificate that is used when building the app for your published release.
TRY IT OUT: Obtaining a Distribution Certificate
The following steps outline how to get a distribution certificate from the IOS Dev Center.
1. Log in to the IOS Dev Center at http://developer.apple.com.
2. Click the IOS Provisioning Portal link. The IOS Provisioning Portal page is displayed, as shown in Figure 21-1.

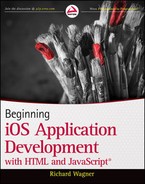
3. Click the Certificates link on the left sidebar.
4. Click the Distribution tab. A list of existing certificates is displayed (see Figure 21-2).
5. If you have a certificate ready, click the Download button. If you don’t, follow the instructions to create one. After it is created, then you can download the developer_identity.cer file and continue.
6. When you have downloaded it, double-click the developer_identity.cer file to add it to your Mac OS X keychain.
How It Works
You obtain the distribution certificate directly from the IOS Dev Center through its Provisioning Portal. After you download it, you need to make it available by adding it to your Mac OS X keychain. When you’ve done that, you can use the distribution certificate for code signing when you publish your app.
STEP 2: CREATING A DISTRIBUTION PROVISIONING PROFILE
After you have added the certificate to your keychain, you are ready to obtain a Distribution Provisioning Profile. A Distribution Provisioning Profile is a collection of digital entities that uniquely ties an application to a registered IOS developer. Although a Developer Provisioning Profile includes actual device GUIDs for testing, the Distribution Provisioning Profile does not include device info.
TRY IT OUT: Obtaining a Distribution Provisioning Profile
A Distribution Provisioning Profile is much like your app’s passport and is required for entry into the App Store. Here’s how to download your own Distribution Provisioning Profile from the IOS Dev Center.
1. Log in to the IOS Dev Center at http://developer.apple.com.
2. Click the IOS Provisioning Portal link. The IOS Provisioning Portal page is displayed (refer to Figure 21-1).
3. Click the Provisioning link on the left sidebar.
4. Click the Distribution tab to display the list of Distribution Provisioning Profiles. If this is the first time you’ve selected this tab, you’ll find this area blank.
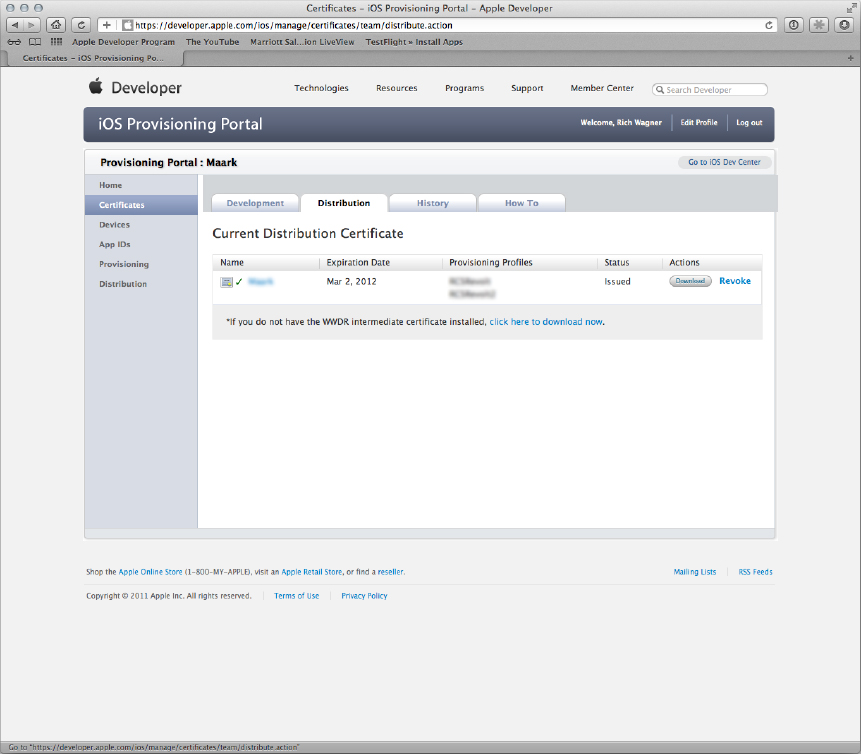
5. Click the New Profile button. The Create IOS Distribution Provisioning Profile page is displayed. (See Figure 21-3.)
6. Fill out the profile form for the app you want to submit and click the Submit button when you are done. The Provisioning Profile is added to your list with a Pending status.
7. Give Apple a few moments to process your request and then refresh the browser to see the profile status changed to Active.
8. Click the Download button to download the .mobileprovision file.
9. Save this file to your hard drive.
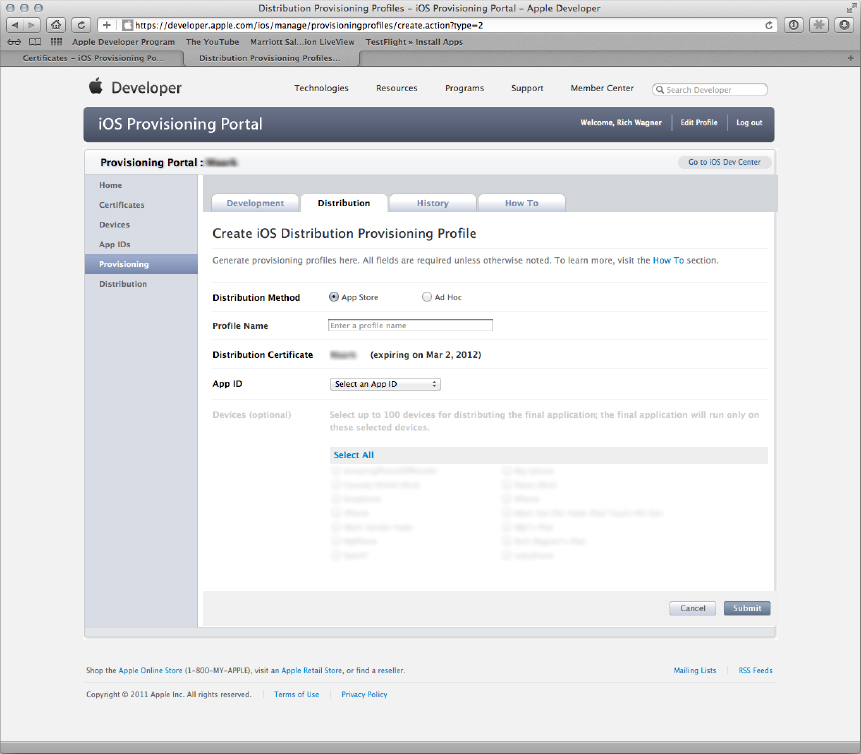
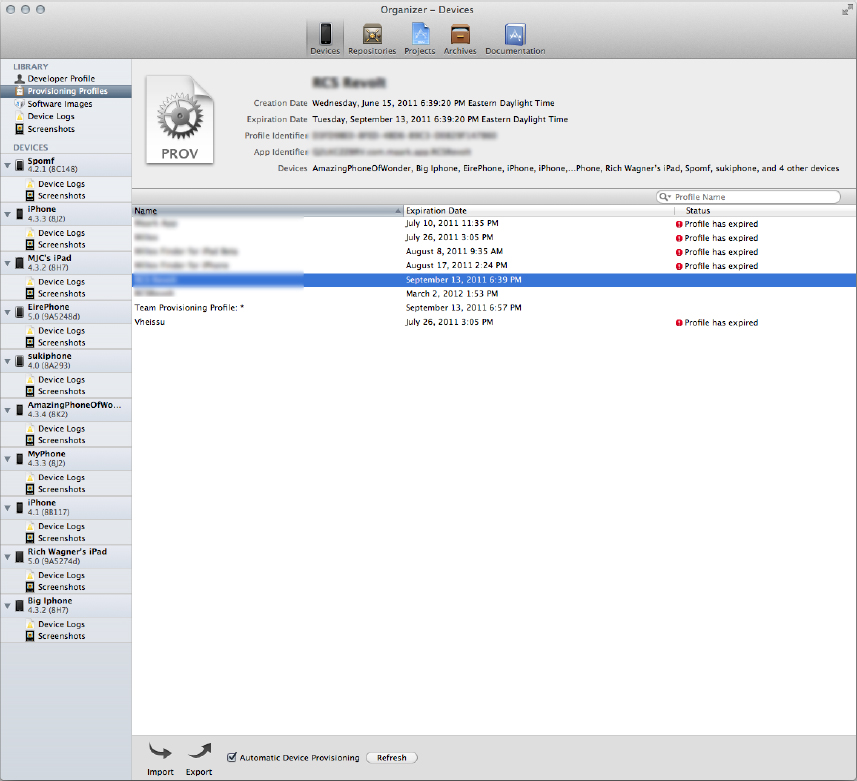
10. Launch Xcode and display the Organizer window.
11. Drop the .mobileprovision file into the Library’s Provisioning Profiles (see Figure 21-4).
How It Works
The Provisioning Profile is used by Xcode when you build your app for code signing. In order to publish to the App Store, the .ipa file you build needs have a Distribution Provisioning Profile, which is obtained from the IOS Dev Center. After you’ve downloaded and dropped the file into Xcode you can use it to code sign your app’s .ipa file.
STEP 3: BUILDING A DISTRIBUTION RELEASE OF YOUR APP
Now that you have all the preliminaries completed and your credentials in order, you are ready to publish the final distribution release of your native IOS app.
TRY IT OUT: Publishing a Distribution Release
Use the following steps to build an archive that will be submitted to the App Store.
1. Open your app’s project in Xcode. (You created this in Chapter 20.)
2. Click the project in the Project Navigator.
3. Click the Project item in the list to display the project settings (see Figure 21-5).
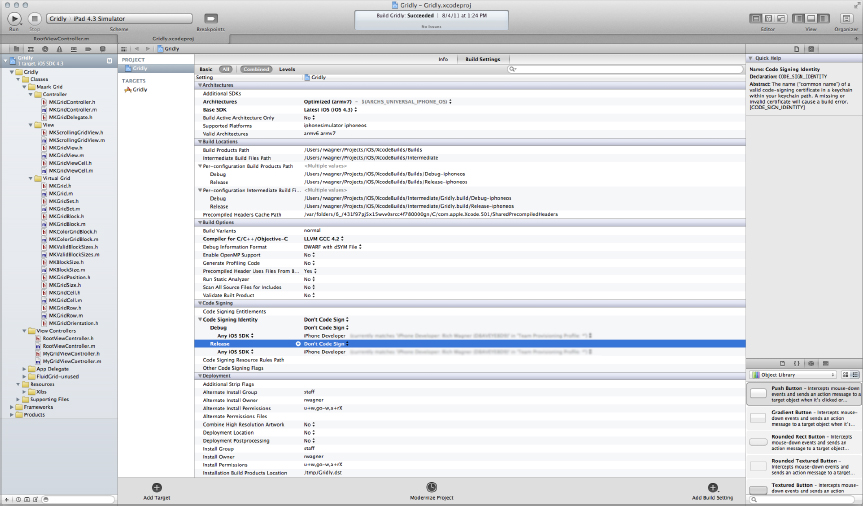
4. In the Code Signing section, click the Release drop-down box and then select your Distribution Provisioning Profile from the list.
5. From the Product menu, choose the Archive menu item. (If Archive is disabled, make sure that your configuration is set to IOS Device, not a simulator.)
6. The Organizer is displayed showing the Archives section. (See Figure 21-6.)

How It Works
When you perform these actions, you build an archive file. In the next section, you take this archive file and submit it to the App Store.
STEP 4: SUBMITTING YOUR APP TO THE APP STORE
After you have your app compiled and ready to go, it is time for the Big Finish: submitting your app to the App Store. Once reviewed and approved by Apple, anyone will be able to download your app through the App Store.
TRY IT OUT: Submitting to the App Store
Follow these steps to submit your app to the Apple App Store.
1. Log in to the IOS Dev Center at http://developer.apple.com.
2. Click the iTunes Connect link. You are taken to the iTunes Connect website, as shown in Figure 21-7. This is the website that you use for managing your store content.
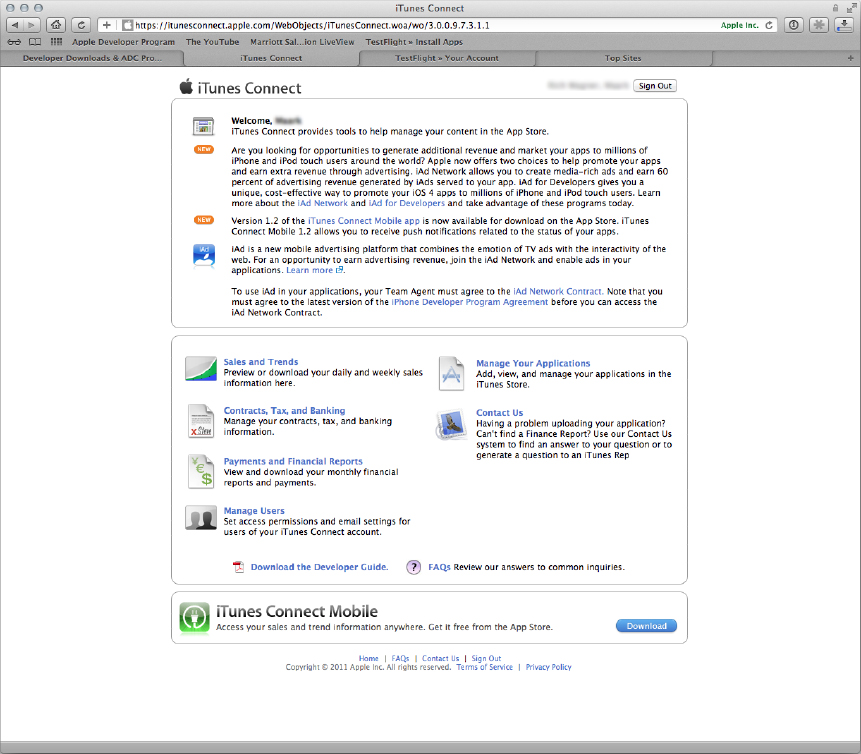
You can also go directly there at https://itunesconnect.apple.com.
3. Click the Manage Your Applications link.
4. Click the Add a New App link.
5. Add info about your app on the App Information page.

6. Enter the name of your app in the App Name box.
7. Enter a unique number to identify your app. This value isn’t a version number; it’s a way to differentiate between multiple apps you submit.
8. Select your provisioning profile from the list and then click Continue.
9. Enter additional details about the app, including availability date, price, and so on. Click Continue.
10. Enter meta data about the app in the next page. As part of this process, you will need to assign a content rating for your app.
11. In the Uploads section, provide a 512 × 512 icon and at least one screenshot.
12. Click Save.
13. Return to Xcode and go to the Organizer window.
14. Select your archive and click the Validate button. This feature is sort of a presubmission check for you to ensure that your app passes basic tests that Apple puts your app through.
15. Follow the steps in the dialog box to validate your app. If you are not successful then modify your app based on the test results. If you are successful then continue.
16. Click the Submit button to submit your app to the App Store.
17. Follow the instructions for uploading and submitting your app to the App Store.
How It Works
You just walked through the final, critical stage of submitting your app to the App Store. That’s it! You now just have to wait for Apple to review your app over the next week or weeks before it is officially available.
EXERCISES
1. Do you need a different certificate and Provisioning Profile for distribution when you already have one for testing?
2. What is a release build of your project called in Xcode?
3. When you submit your app to the App Store, is it available right away for the public?
Answers to the Exercises can be found in Appendix A.
• WHAT YOU LEARNED IN THIS CHAPTER
| TOPIC | KEY CONCEPTS |
| Distribution Certificate | iOS apps must be signed by a valid certificate before they can be run on an Apple device. |
| Distribution Provisioning Profile | A Provisioning Profile is a collection of digital entities that uniquely ties an application to a registered IOS developer. |