After you’ve mastered the advanced tricks with text and images alone, you can move on to manipulating them together. This chapter contains the following tutorials to help you dazzle your audience:
Placing Text Over Images
RevealTransFilterInternet Explorer Text and Image Filters
Internet Explorer Wave Filters
Toggling Images and Text in Internet Explorer
Toggling Netscape’s Layers
Now and again I wonder if people are reading all the stuff I write. When I put up the last FAQ page at HTML Goodies, I answered a question from a reader about putting text over an image. She wanted to be able to put the name of the person in the picture on top of the picture, like a caption. I said that it couldn’t be done without the use of a graphics editor. Well, KaBoom! The email poured in.
Note
You can find thistutorial, and all of its examples, online at http://www.htmlgoodies.com/beyond/textonimages.html.
Yes, people are reading. I will take the weasel road right now and say that when I answered the question, it was correct. Now the variables have changed right out from under me, and the version 4.0 browsers have offered a few different ways to do it. In this section, I’ll outline three.
Here you go. Figure 3.1 shows text over a stunning image of yours truly.

Like the haircut? Most of the top is gone, as well as most of the beard. I thought about getting a new character for the home page, but I still like the old one. Besides, as of the writing of this book, I’m back to a full head of hair and full beard. I go for the “mountain man” look once every couple of years.
Here is the code that created the caption:
<TABLE BORDER="0" cellpadding="0" CELLSPACING="0">
<TR>
<TD WIDTH="221" HEIGHT="300" BACKGROUND="newjoe01.jpg" VALIGN="bottom">
<FONT SIZE="+1" COLOR="yellow">Joe Burns at Work</FONT></TD>
</TR>
</TABLE>
I got the effect using a single table cell, adding a background, and then some text, like so:
<TABLE BORDER="0" cellpadding="0" CELLSPACING="0">—This is the format for the cell. You need to set everything to zero so that the cell borders lay right against the image. That way, you have better control over the text in relation to the image.<TR>—This starts the table row.<TD WIDTH="221" HEIGHT="300" BACKGROUND="newjoe01.jpg" VALIGN="bottom">—This is what does the trick. I set the image in Figure 3.1 as the background of the image cell. Note that I added the height and width of the image. You need to do that. If you don’t, the cell will only conform to the size of the text you put after the<TD>command. In other words, you won’t see the entire picture.<FONT SIZE="+1" COLOR="yellow">Joe Burns at Work</FONT></TD>—This is the text that appears on the image. I used aFONTsize and color command to get the text to show up a little better.</TR>—This ends the table row.</TABLE>—This ends the whole deal.
Although that table example is good enough, we at Goodies, Inc., go further and show you a couple of other methods. Here’s a bit of code that performs pretty much the exact same thing (it’s done with layers, so you have to be running Netscape 4.0 to see the effects):
<LAYER LEFT=250 TOP=500>
<IMG SRC=newjoe02.gif>
</LAYER>
<LAYER LEFT=250 TOP=500>
<IMG SRC=overtext.gif>
</LAYER>
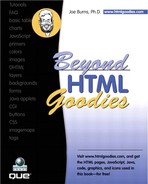
See the commands in action in Figure 3.2.
Pretty nifty! That’s my Paul McCartney, Sergeant Pepper pose—in case you didn’t know.
As you can see, the effect is the same, but the parts are a little different. Look at the code. I set up two layers, but this time I did it with two images. One is of the back of my head (newjoe02.jpg), and the other is an image of the same size with the text “That Is Not a Bald Spot” written on it. Both are set to start 250 pixels from the left and 100 pixels from the top of the browser’s window.
Remember that layers lay one over the top of the other in the order they are written. That’s why the text image is written second.
The trick is that I made the image with the text transparent, except for the text itself. That way, the other image shows through and you get the effect.
It’s a bit of work. But, if you are chopping up your pages using layers and DIV sections, this is the way to go about setting up the effect.
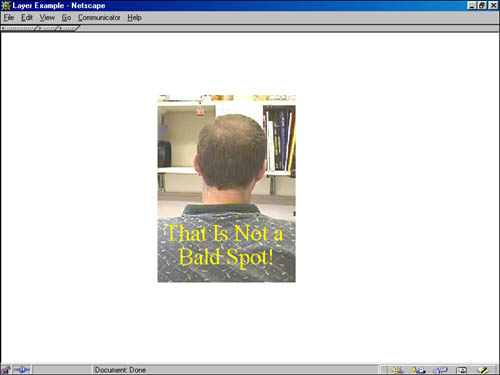
Positioning the text is a capital idea. We’re going to use the positioning commands available to Internet Explorer browsers to position the text and image so that one lays over the top of the other.
The idea is basically the same as with layers, except that you don’t have to create the text image like you did previously. Figure 3.3 shows the effect.
Here’s the code:
<IMG SRC="newjoe03.jpg">
<DIV STYLE="position:absolute; top:250px; left:20px; width:200px; height:25px">
<CENTER><FONT SIZE="+2" COLOR="00ff00">Looking Into The Future</FONT></CENTER>
</DIV>
That DIV section should really be all on one line.
I’m looking in to my computer screen actually. It’s a bad shot. It looks like I should have a county jail number card underneath my face.
The image is just sitting where it would normally sit. The text, formatted to +2 font size and a green color, has been placed in a division. Style Sheet commands then place it 250 pixels from the top of the browser window and 20 pixels from the left side. The height and width command set the height and width of the division the text will sit inside. You shouldn’t set that any wider than the image. That way, you’ll lessen your chance of rolling the text over the sides.
Most of you will probably end up using the TABLE background method up top, but maybe not. So now you can set your images with as many words of wisdom as you can muster. I haven’t any at the moment.
First Things First: This is a DHTML event; thus you must be running MSIE4.0+ to see the effect. However, browsers that do not understand DHTML will happily ignore the commands without throwing errors, so feel free to use them at will.
Note
You can find this tutorial, and all of its examples, online at http://www.htmlgoodies.com/beyond/revealTransFilter.html.
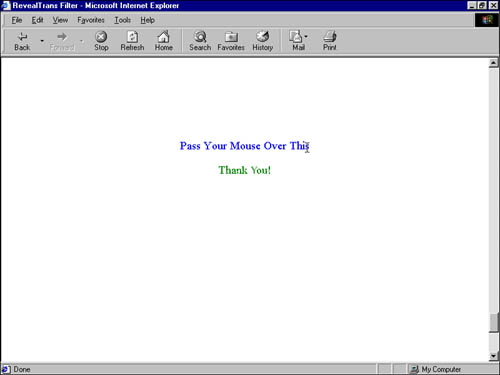
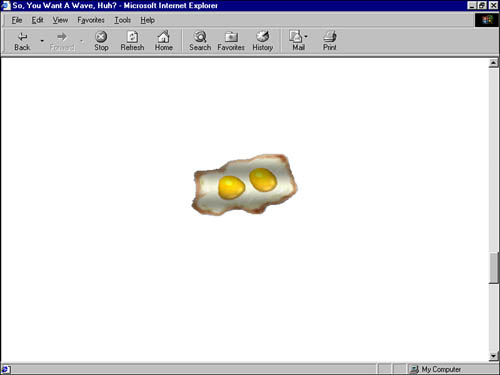
Do you want a cool effect? Dig this! Figure 3.4 shows what this tutorial teaches you. Notice that the button says to click it for the image to go away. I clicked it and then captured the image as the image was disappearing. Inside of two seconds, it was gone. Really!

Better yet, you can also set it so that the image comes back.
What you’re seeing there is the revealTrans() filter at work. Two separate JavaScripts are using the filter to make a SPAN disappear and then reappear. I’ll show you the first one and then explain the second one, but only quickly. (It’s just like the first one only backward.)
As I said previously, the image, "eggs.gi", itself doesn’t disappear. The SPAN surrounding the image disappears. The image just goes with it. So, let’s start with the SPAN and its image. The code looks like this:
<INPUT TYPE="button" VALUE="Go Away!" onClick="go();">
<SPAN ID=Egg1 Style="Visibility:visible;
Filter:revealTrans(duration=2);width:179;height:110">
<IMG SRC="eggs.gif">
</SPAN>
The first line is a form button with the text "Go Away!" The button is there to act as a trigger for the function "go()". When clicked, the function fires.
The code is a basic SPAN surrounding the image flag displaying the eggs.gif. A NAME, Egg1, is given to the SPAN. That links it to the next JavaScript covered in the next paragraph. Also, inside the SPAN are some Style Sheet commands and the filter. Note that the visibility of the SPAN is set to "visible". That changes in the next script. Then comes the Filter:revealTrans(duration=2). You can probably guess that the 2 means two seconds for the effect. Then the height and width of the image are given so that the SPAN fits it perfectly.
Okay. Got the SPAN? Good. Now here is the script that does the dirty work:
<SCRIPT LANGUAGE="javascript">
function go() {
Egg1.filters[0].Apply();
if (Egg1.style.visibility == "visible")
{
Egg1.style.visibility = "hidden";
Egg1.filters.revealTrans.transition=12;
}
else
{
Egg1.style.visibility = "visible";
Egg1.filters[0].transition=12;
}
Egg1.filters[0].Play();
}
</SCRIPT>
The script is pretty straightforward. When the function go() is triggered, the filter in Egg1 is applied. Remember that Egg1 is the SPAN. We gave it that name in the first script.
Then, if Egg1 is visible, set its value to "hidden" using transition number 12. Otherwise, make the SPAN Egg1 visible by using transition number 12.
Then play the transition! There’s nothing to it!
There are 22 different transitions to choose from. There is also transition 23, which chooses a number at random. I just happen to like 12.
And no, you do not need both transitions set to 12. It can be two different numbers. Table 3.1 describes the magic 23 numbers.
Table 3.1. Transition Effects
What Happens | |
|---|---|
1 | Reveals from inside out |
2 | Scrolls in from outer parts |
3 | Scrolls out from the center |
4 | Scrolls up from the button |
5 | Scrolls down from the top |
6 | Scrolls left to the right |
7 | Scrolls right to the left |
8 | Displays vertical blinds left to right |
9 | Displays horizontal blinds top to bottom |
10 | Displays a combination of 8 and 9 |
11 | Looks a lot like 8 |
12 | Comes in, in pixels |
13 | Scrolls in from outer parts |
14 | Scrolls out from the center |
15 | Closes from both the top and bottom |
16 | Opens from center to top and bottom |
17 | Displays a diagonal roll from right to left |
18 | Displays a different angle diagonal roll right to left |
19 | Displays number 17 the other way |
20 | Displays number 18 the other way |
21 | Displays random horizontal lines |
22 | Displays random vertical lines |
23 | Displays completely random |
After Transition 23, the cycle of effects appears to start over. Any one will work just fine. Some are just more interesting than others.
There are really two things to discuss when it comes to reversing the effect: simply setting the current script to go the opposite way and putting a second revealTrans() on a page.
If all you want to do is make the script and SPAN previously noted to go from invisible to visible, it’s simple. Everywhere you see the word "visible", you change it to "hidden"; and everywhere you see the word "hidden", you change it to "visible". Don’t forget to change the instance in the SPAN as well.
But what if you want to put a second revealTrans() on the same page? You can, but you need to do two things.
First, you need to set a new function name in the script. I chose goAway() for my second function name. Then you need to update that name in the Form Button onClick Event Handler.
Then there’s the NAME= in the SPAN. Remember how we named the SPAN in the original script Egg1? Well, that NAME connected the SPAN and the JavaScript. This means that if you put another revealTrans() on a page, the first name is dead and cannot be used by anything else. Thus, you have to change the name of the SPAN and each time that name appears in the script.
Here’s a hint to do it quickly: Copy the script and previous SPAN on to a separate text editor, like WordPad or SimpleText. Then, choose Replace from the Edit menu. Type in the current name of the SPAN and then what you would like the new name to be and choose to Replace All. Bingo! It’s done.
Now you can copy the new script and SPAN and paste it wherever you want it. No sweat! That’s what I had to do here. I went with the name Egg2. Clever, huh?
The following code is the second script and SPAN from before. It has a new function name, a new NAME for the SPAN—which has also been changed throughout the script—and is set to go in the opposite direction of the first revealTrans(). The transitions are still set to 12, though. I really do like that number:
<SCRIPT LANGUAGE="javascript">
function goAgain()
{
Egg2.filters[0].Apply();
if (Egg2.style.visibility == "hidden")
{
Egg2.style.visibility = "visible";
Egg2.filters.revealTrans.transition=12;
}
else {
Egg2.style.visibility = "hidden";
Egg2.filters[0].transition=12;
}
Egg2.filters[0].Play();
}
</SCRIPT>
<INPUT TYPE=button VALUE="Lemme See It" onClick="goAgain();">
<SPAN ID=Egg2 Style="Visibility:hidden;
Filter:revealTrans(duration=2);width:179;height:110"> <IMG SRC="eggs.gif">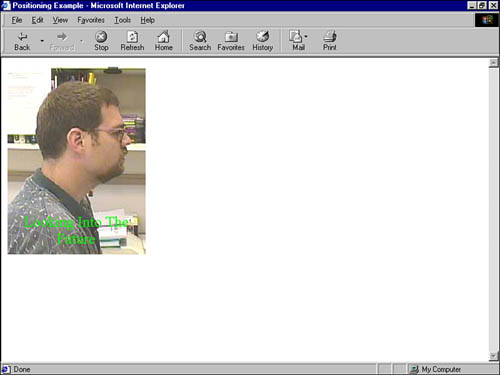
</SPAN>As you can probably tell, using a button to start the effect is not very useful. Just remember that as long as the effect can be surrounded by a SPAN and an Event Handler is used to trigger the function, this can be triggered any number of ways. An onLoad Event Handler can trigger the effect when the page loads. You could also set the effect to trigger using an onMouseOver as illustrated in Figure 3.5.
By the way, I got the effect to occur in less than a second by setting the duration to .25. Faster than that seemed to kill the effect.
First Things First: The material covered in this tutorial is only compatible with MSIE browsers versions 4.0 and above. Feel free to use them, though; browsers that do not comprehend the commands will happily ignore them.
Note
You can find this tutorial, and all of its examples, online at http://www.htmlgoodies.com/beyond/textfilter.html.
I often get questions from people asking how someone got a great font or neat text layout. I usually found that the text was an image. Well, now you have some limited ability to play around with text layout and appearance through Microsoft filters. They work like Style Sheet commands and give some great effects.
You can use filters just like Style Sheet commands. You can affect just one element in this format:
<SPAN STYLE="width:200;height:30;filter:fliph()">Affected Text</SPAN>
This format also works to affect images:
<DIV STYLE="width:200;height:30;filter:fliph()">
<IMG SRC="eggs.gif">
</DIV>
Please Note: Parentheses follow the filter name. In those parentheses, you’ll be able to manipulate the filter’s strength, color, and direction.
Please also note this. See the “width” and “height” settings? You need to denote at least the width so that this filter has something to act on. If you do not supply that parameter, the filter will not run. That includes both text and images.
I would assume that you’d use these commands mainly in the preceding format because a height or width must be set each time. However, you can also use the filters by assigning them to one type of text, say a hypertext link, or all images, through a Style block like so:
<STYLE TYPE="text/css">
 A {width:200;height:50;filter:blur(Direction=90)}
 IMG {width:200;height:50;filter:shadow(color=red)}
</STYLE>
Now, every link carries the blur filter coming straight in from the right, and every image carries a red shadow. That makes for an ugly page, huh?
The quickest way of showing you these filters is to just run them down. You’ll see the effect on both text and an image. They both normally look like Figure 3.6.
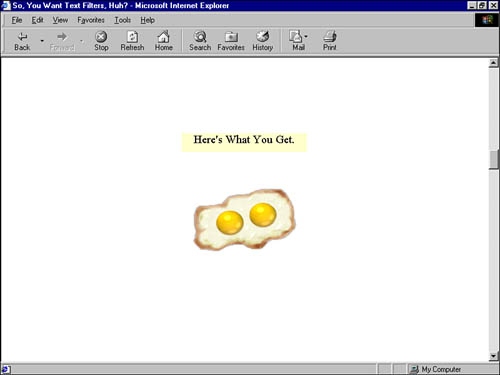
Here’s the code that rendered Figure 3.6:
<DIV STYLE="background:#ffffcc;width:200;height:30">
<FONT SIZE=+1>Here's What You Get.</FONT>
</DIV>
I made the text a little bigger and gave the background some color to show height and width. Remember that the filter is stuck in at the end of the run of Style Sheet commands just like I showed previously. Here we go. Enjoy.
Filter Name | Code | Image |
|---|---|---|
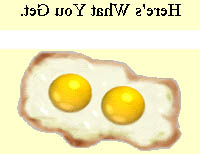
Horizontal Flip |
| |
Vertical Flip |
| |
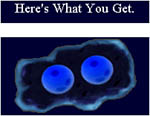
Invert |
| |
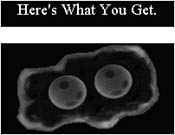
Gray Scale |
| |
X-Ray |
| |
Mask |
| |
Blur |
| |
Shadow |
| |
Drop Shadow |
| |
Glow |
|


Set the Strength number higher for more blur. The direction can be set to come from any one of the following. (If you do not set a direction, the blur will come from 270 by default.)
0—Top
45—Top right
90—Bottom
135—Bottom right
180—Bottom
225—Bottom left
270—Left
315—Top left
Set the color to a word color code. If you use a hex code, make sure that you use a leading pound sign (#). The direction of the shadow can be set to come from any one of the following. (If you do not set a direction, the shadow will come from 270 by default.)
0—Top
45—Top right
90—Bottom
135—Bottom right
180—Bottom
225—Bottom left
270—Left
315—Top left
The property is read/write with a default value of 270.
Set the color to a word color code. If you use a hex code, make sure that you use a leading pound sign (#). Set the Strength number higher for more glow, smaller for less.
The Wave Filter is a great effect that will wave either text or an image, as long as that text or image sits inside of a division or SPAN.
Note
You can find this tutorial, and all of its examples, online at http://www.htmlgoodies.com/beyond/wavefilter.html.
The Wave Filter acts a lot like a Style Sheet command, as do the other static text filters. I just broke this one out from the other text filters because there are so many more settings to play with.
Let me give you an example of what this filter can do. Take this code... please:
<DIV STYLE="width:350;height:70;filter:wave(strength=4, freq=2,
lightstrength=40, add=0, phase=20)">
<FONT SIZE=+3>Here's What You Get.</FONT>
</DIV>
It gives you the effect shown in Figure 3.17.

Now, let’s apply the same parameters to an image. The code looks like this:
<DIV STYLE="width:350;height:70;filter:wave(strength=4, freq=2,
lightstrength=40, add=0, phase=120)">
<IMG SRC="/images/eggs.gif">
</DIV>
...and it gives you Figure 3.18.
Make a point of keeping all the Style Sheet and parameter codes in the <DIV> on the same line. If you don’t, you might not get the effect.
The real fun of this filter is setting the parameters to differing levels of intensity. Go nuts! Here’s what each one means and how you can set it—just follow the format in the previous code examples:
add. Do you want the original image added to the mix? Use 0 for no and 1 for yes.enabled. Is the effect turned on or not? Use 0 for no and 1 for yes.freq. How many waves do you want?lightStrength. How much light intensity do you want?phase. At what phase do you want the waving to begin? If you try different numbers, you’ll set the difference.strength. How strong do you want the filter? Again, higher numbers are stronger.
Keep in mind that this effect only works on IE browsers 4.0 or better, but feel free to use the commands regardless. Browsers that do not understand the commands will happily ignore them.
First Things First: This is a tutorial dealing with DHTML. You need to be running an Internet Explorer browser, 4.0 level or better, to see the effect.
Note
You can find this tutorial, and all of its examples, online at http://www.htmlgoodies.com/beyond/toggle.html.
This tutorial is basically a DHTML session. What I’m going to show you here is how to make a division appear and disappear in MSIE. I also have a sister tutorial to this one that teaches you how to make a layer appear and disappear in Netscape Navigator. It’s covered in the next section, “Toggling Netscape’s Layers.” The effect is the same, but all the commands that do the trick are different, so multiple companies have a hand in the process. Basically, this means that I’m about to get a bunch of letters that tell me that this effect is actually called “visibility”, “layering,” or “Steve.”
The truth is because the MSIE and Navigator browsers are moving in such different directions, it’s hard to create one definitive statement that covers the effect. In one of my computer books, the author refers to making a layer appear and disappear as “toggling.” I thought was as good a term as any.
But no matter what you name it—the effect will still be as sweet (to paraphrase Bill Shakespeare—I’m a cultured man you know).
In Microsoft Internet Explorer, you get the effect through DHTML commands. Now remember that these commands are only supported in IE 4.0 and above and are not supported in Navigator (as of 10/20/01). So when you set up this effect, make sure that the users are running IE 4 or better. You can do that through setting up a browser detect script. If you don’t, errors fly all over the place. This is a good one to make sure that your people are prepared for.
Look carefully at Figures 3.19–3.21. The effects are demonstrated here.

It’s not that difficult of an effect either. Basically what’s happening is that I have positioned a division on the page. In that division, I put a table cell with the words “How About This?” inside, but just about anything can be put in the division.
Here’s the entire script (I break it apart just after the listing):
<script language="JavaScript">
function ShowIt()
{
document.body.insertAdjacentHTML('BeforeEnd', '<DIV STYLE="position:absolute; TOP:35px; LEFT:410px" ID="TheTip"><TABLE BORDER="1" CELLPADDING="3"> <TD BGCOLOR="ff00ff">How About This?</TD></TABLE></DIV>'),
}
function LoseIt()
{
TheTip.innerHTML = " ";
TheTip.outerHTML = " ";
}
</script>
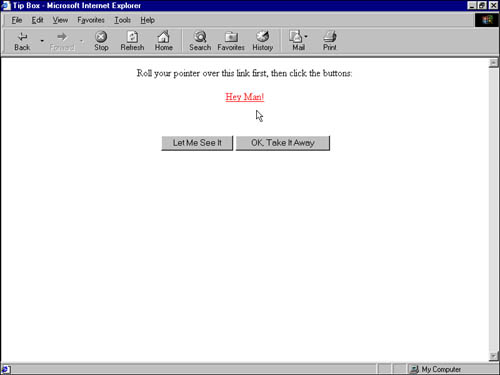
<center><a href="http://www.htmlgoodies.com" onMouseOver="ShowIt()" onMouseOut="LoseIt()">Hey Man!</A>
</center>
<P> <P>
<FORM>
<INPUT TYPE="button" Value="let me See It" onClick="ShowIt()">
<INPUT TYPE="button" Value="OK, Take It Away" onClick="LoseIt()">
</FORM>After the division was created, I encased it in a JavaScript function so that I could call on it whenever it is clicked or moused over.
Next, I set up another JavaScript function so that when the mouse moved off the link, the division disappeared again.
After I have a function set up that makes the division appear and disappear, the process is simple. Call the correct function, and the effect comes to life. Well, it’s relatively simple anyway.
The harder of the two functions is the one that makes the division appear, so we’ll start with that one. It goes up in between the <HEAD> flags and it looks like this:
<SCRIPT LANGUAGE="javascript">
function ShowIt()
{
document.body.insertAdjacentHTML('BeforeEnd', '<DIV STYLE="position:absolute; TOP:35px; LEFT:410px" ID="TheTip"> <TABLE BORDER="1" CELLPADDING="3"> <TD BGCOLOR="ff00ff">How About This?</TD></TABLE></DIV>'),
}
</SCRIPT>
That one line is pretty long, huh? Yeah. It can be broken down, if you really want, into multiple document.write statements, but why? It’s just more typing for the same effect.
So, what does it do? Nothing. It won’t do anything until it’s called on by its function name later in the page. Let’s tear it apart even more.
This is a JavaScript, so we have to start with the familiar "SCRIPT LANGUAGE=" flag.
The function is named ShowIt(). Note that fancy brackets always surround the JavaScript commands making up the event that the function performs.
Now here’s the magic—we begin with a hierarchy statement that uses commands which are proprietary to MSIE. That’s a nice way of saying that only Explorer understands them. It’s DHTML.
document.body.insertAdjacentHTML represents to the IE browser that whatever follows is to go on the document, in the body, and what follows in parentheses is to be inserted as HTML.
In case you’re wondering, and I know you are, there’s also the command, insertAdjacentText. It works the same way except that it handles what appears in the following parentheses as text alone and does not compile it into HTML.
Inside the parentheses, the first command deals with where this little division should display in terms of the command that is calling for it. It doesn’t come into play much in this scenario because we are calling on this division from a function and not from inside of an HTML command. But you still need to put something in there to denote where the inserted HTML will appear, or the format throws an error.
'BeforeEnd' means that the division should appear at the end of the element before the end tag. There are actually three others you can play with if you take this format and embed it in to an HTML flag:
BeforeBegin—The item is inserted in front of the flag.AfterBegin—The item is inserted after the flag, but before the text.AfterEnd—The items is inserted after the end tag.
Now we get to the element that will be inserted. It’s a division that has been positioned and given the NAME "TheTip" so that we can call on it later. It looks like this:
<DIV STYLE="position:absolute; TOP:35px; LEFT:410px" ID="TheTip">
In terms of the effect, the positioning is very important. If you decide to have multiple divisions popping up over a series of links, you need to have each one positioned so that they pop up at the right place.
Or, as I’ve seen it done, have them all appear in the exact same place, which is a great effect. One just lays right over the other. It’s like a little billboard popping up.
You know what I’ve found with positioning? It’s best to be most concerned with the pixels from the top and go real easy on the pixels from the left. Also, go easy on the concept of absolute positioning. There are too many screen resolutions and sizes out there to be overly concerned. Use the command positioning:absolute, but keep in mind that you’re only going to get “pretty close” positioning. It’ll keep your blood pressure down.
What follows in the division is a basic one-celled table with a purple background. It might look a little strange because it is all on one line, but that’s all it is.
The </DIV> flag kills the line of text.
The second curly bracket and the </SCRIPT> wrap up the entire format.
Now take that function, stick it in between <SCRIPT LANGUAGE="javascript"> and </SCRIPT> commands, and put that between the <HEAD> flags. So now, you understand and posses a function that will make the division appear. But can you make it disappear again? Read on to find out how.
What we need to do is set up another function.
function LoseIt()
{
TheTip.innerHTML = " ";
TheTip.outerHTML = " ";
}
This one’s pretty easy to figure out even if DHTML is brand new to you. The function, named LoseIt(), simply sets two sections of the division to represent nothing. In other words, it disappears.
Remember, the name of the division is "TheTip". Go ahead and look at the “appear” function again if you missed that point. It’s important. In this function, we set two parameters, innerHTML and outerHTML, to nothing. Note that the quote marks contain only an empty space. The end. There’s no more visible division. That’s very clever.
Now, take that code, stick it between <SCRIPT LANGUAGE="javascript"> and </SCRIPT> commands, and put that in between the <HEAD> flags.
OK, now we’re set. We can call for the division in the first function any darn time we feel like it.
Now that we have the two functions just waiting to be used, we can call for them as we would any other function. In the two examples shown in this tutorial, I set up a rollover on a hypertext link and also made the division appear through the use of a form button. Here’s the code for each.
The Hypertext Link:
<A HREF="http://www.htmlgoodies.com"
onMouseOver="ShowIt()" onMouseOut="LoseIt()">Hey Man!</A>
<FORM>
<INPUT TYPE="button" Value="let me see it" onClick="ShowIt()">
<INPUT TYPE="button" Value="OK, Take it Away" onClick="LoseIt()">
</FORM>
There’s no real science to it. I’ve called for the functions through basic onMouseOver, onMouseOut, and onClick Event Handlers depending on how the user would get the effect.
This is a great effect if you have a series of links down one side of the page. The effect of multiple divisions appearing one after the other looks high-tech and appears interactive.
The only downfall, if you want to call it that, is that each of these divisions is an element in its own right. They each have a NAME attribute assigned. Thus, you need to create a totally new function to make the division appear and disappear.
For example, let’s say that you already have the division described in this tutorial installed on a page. You want a second one. Here’s what you need to do:
Create a whole new function that makes the division appear. The easiest method would be to copy and paste the current “appear” function and change its name. The current appear function is named ShowIt(). You could simply change the name to ShowIt2().
You need to go in to the division itself and change out:
The
TOPandLEFTpositioning pixelsThe
NAMEof the divisionWhat is contained in the division
Finally, copy and paste the function that makes the first one disappear. Again, you need to make a few changes:
You need to change the name of the function. The current function is named
LoseIt(). You could simply change the new function name toLoseIt2().You need to change the
NAMEelement of theinnerHTMLandouterHTMLstatements. Remember that they are currently attached to the first division named"TheTip".You need to change
"TheTip"to whatever you named this new division.
Now you’re good to go with a second division. Yes, it’s a little work, but the results are great.
While working on this tutorial, I played with multiple and single divisions. I can honestly say that what makes these things really shine is the positioning element. Where they pop up is really the point of all this, more so than the fact that they pop up at all. I found that you couldn’t be overly precise. Get close. I loved the look of an element on the left side of the page popping a window on the right.
Got it? Great! Now learn how to toggle with Netscape’s Layers.
First Things First: This is a tutorial dealing with Netscape Layers. You need to be running a Navigator browser, 4.0 level or better, to see the effect.
Note
You can find this tutorial, and all of its examples, online at http://www.htmlgoodies.com/beyond/toggle2.html.
This tutorial is one of a pair that offers the same effect, but uses totally different methods to get the job done. If you haven’t already, you should take the time to read over this tutorial’s twin, “Toggling with MSIE.” The toggling effect, an item being made able to appear and disappear, is done in MSIE by using a division. In this Netscape-based tutorial, we’ll get the same effect by getting a layer to toggle.
If you have read the other tutorial, I think you’ll find that this one is a whole lot easier to understand.
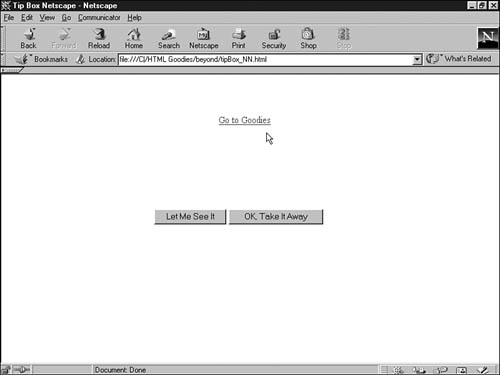
Figures 3.22–3.24 illustrate the effect. You’ll recognize it from the tutorial just before this one. Remember to pay close attention to the differences in the figures to really understand what’s happening.
Here is the full code—I’ll break it down as the tutorial goes on:
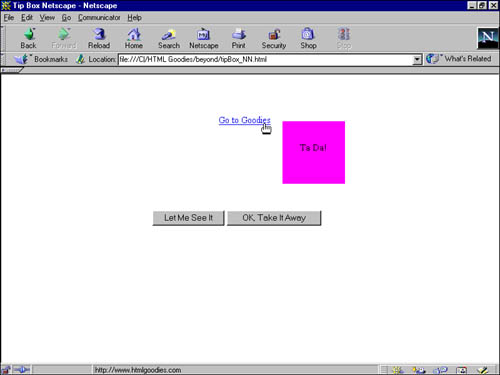
<LAYER NAME="layer1" visibility=hide bgcolor="ff00ff" WIDTH="100" HEIGHT="100" TOP="75" LEFT="450"> <center><br><br>Ta Da!</center></LAYER>
<A HREF="www.htmlgoodies.com" onMouseOver="document.layer1.visibility='show'" onMouseOut="document.layer1.visibility='hide'">Go to Goodies</A>
<FORM>
<INPUT TYPE="button" VALUE="Let Me See It" onClick="document.layer1.visibility='show'">
<INPUT TYPE="button" VALUE="Take It Away" onClick="document.layer1.visibility='hide'">
</FORM>


The layer itself carries with it all the stuff needed to place it and make it disappear. It’s a one trick pony, but it turns that trick so well as emphasized here:
<LAYER NAME="layer1" VISIBILITY="hide" BGCOLOR="ff00ff"
WIDTH="100" HEIGHT="100" TOP="105" LEFT="450">Ta Da!
</LAYER>
If you haven’t noticed already, dig that VISIBILITY="hide". That’s what makes the layer invisible. VISIBILITY="hide" hides the layer.
All I’ve got in the layer is a background set to purple and the words Ta Da!. I’m a clever fellow.
The other parts I’m interested in pointing out to you are the TOP and LEFT settings. It’s my opinion that this effect literally hinges on the correct positioning of the layer. I’ve seen the effect so that each layer comes up near the element it is supposed to work with, and I’ve seen the effect in which the layer comes up somewhere far away from the element that caused it to appear. I also like the look of multiple layers popping up and disappearing due to multiple mouse rollovers. However, each layer popped up in the exact same place. It was like a billboard. It looked great. So when you set this up for yourself, remember that positioning is king.
I also wanted to make sure that you saw that the layer was given a name. In this case, it’s layer1. I again made the name up all by myself.
You’ll also note that there’s an end layer flag. You need that.
Actually now that I’ve looked over the text, heck, I’ve pointed out just about everything. Eh, it’ll help you later.
The entire effect revolves around a JavaScript hierarchy statement meant to point an Event Handler right at the layer in question. Remember, the layer has a name, layer1. Later we’ll talk about getting multiple layer toggles. Then the name of the layer becomes quite important.
Here’s the code that made up the first hypertext link in the example:
<A HREF="www.htmlgoodies.com"
onMouseOver="document.layer1.visibility='show'"
onMouseOut="document.layer1.visibility='hide'">Go to Goodies</A>
This is the JavaScript hierarchy statement that makes the magic:
document.layer1.visibility='show'
And here’s its counterpart:
document.layer1.visibility='hide'
The first makes the layer visible. The second makes the layer disappear. Notice that the code is very similar to the code used in an image flip. An onMouseOver and onMouseOut Event Handler is used to enact the hierarchy statement. When the mouse passes over, the layer appears. When the mouse moves off, the layer is hidden. It’s just like magic except without the seven beautiful assistants and the disappearing tiger.
As you probably noticed, there are also two form buttons that get the effect. They work the same way incorporating the hierarchy statements, except the buttons use an onClick handler to get the job done. Here’s the basic code:
<FORM>
<INPUT TYPE="button" VALUE="Let Me See It" onClick="document.layer1.visibility='show'">
<INPUT TYPE="button" VALUE="Take It Away" onClick="document.layer1.visibility='hide'">
</FORM>
As promised, let’s talk about toggling multiple layers. Imagine a long line of links down the left side of a page. It would look great if you could get a new layer to show up every time the mouse passed over the next link. It would look like a glorified series of image flips.
The effect is not hard, but it does require some attention. You’ll obviously have to create a new layer code for each layer you want to pop up. I would assume that they’re all probably going to say different things.
You’ll need to set new TOP and LEFT positions unless you want all the layers to appear in the same location (which isn’t a bad look actually).
But most of all, you will have to assign each layer a different name. They cannot all have the same name. Think up new names for each layer! (Did that drive the point home?)
Now, after you have new names for each layer, you can create a JavaScript hierarchy for each individual layer. If you have a layer named bob, you would use the hierarchy statements:
document.bob.visibility='show'
and
document.bob.visibility='hide'
to affect that bob layer.
Now imagine that you create a second layer named george. The hierarchy statement you created for bob will not work for george. You need to use new george-ready hierarchy statements. They’ll look like this:
document.george.visibility='show'
and
document.george.visibility='hide'
Every time you create a new layer, you need to create new hierarchy statements. Then you can set links and buttons to toggle just the right layer.
And how much fun will that be?