It isn’t just important that your forms look good; they also need to provide a service and be helpful for the viewer. This chapter provides the following tips and tricks to enhance your forms to make the user feel better about him or herself:
Submit When Finished
Passing Variables with Forms and JavaScript
Limiting Check Box Choices
Select Boxes: If This...Then This
Copy to Clipboard
Select Box Links Menu
Hidden Password Protection
Array Password Protection
Okay, form fans, this is one that you’ve been requesting for a long time now. It’s not that I’ve been ignoring your requests, it’s just that...well...okay, I’ve been ignoring your requests. Sorry! I’m on it now.
Here’s the concept: You have a form. You ask your user to fill it in and then submit it. Many of you want the form to submit all by itself when the user presses Enter. I never saw any great benefit to this as part of a guest book form. There are too many items to fill in, and what if the user fills in the last item out of order? Then you’d get a half-finished form submitted. That’s not good.
Note
You can find this tutorial, and all of its examples, online at http://www.htmlgoodies.com/beyond/submitwhendone.html.
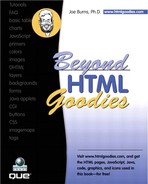
I’m presenting this tutorial as a single form element submit, like a database search or a simple email or name submit. You can see those all over the place now because everyone wants to put out a newsletter, including me. The single form element is there to capture the user’s email to add it to the list of those getting the newsletter.
Figure 6.1 shows an example of what I’m talking about.
The code is a short form coupled with an even shorter JavaScript. It looks like this:
<SCRIPT LANGUAGE="javascript">
function send()
{document.theform.submit()}
</SCRIPT>
<FORM NAME="theform" METHOD="post"
ACTION="mailto:[email protected]" ENCTYPE="text/plain">
<b>Submit your Name:</b>
<INPUT TYPE="text" name="mardi" size="30"
MAXLENGTH="30" onUnfocus="send()">
</FORM>We’ll start with the form code.
The form code is no different than any other form you’ve created before. The form tag offers a NAME, a METHOD, and then the ACTION. I have this one set to work as a simple mailto: form, but it can just as easily work by attaching the output to a CGI. Just put the path to the CGI right there after the ACTION, like you normally would. The name of the form is "theform". How’s that for originality, huh?
The INPUT TYPE is a text box. Its NAME is "mardi". It’s set to a size of 30 and a maxlength of 30.
The next snippet of text is the clincher. See that onUnfocus="send()"? That’s what triggers the JavaScript to run and send the form.
The form, of course, wraps up with the required </FORM> tag.
Here it is one more time:
<SCRIPT LANGUAGE="javascript">
function send()
{document.theform.submit()}
</SCRIPT>
The script is super simple. It’s a function triggered by the onUnfocus Event Handler in the form element. Remember that? The command onUnfocus works when focus is taken off an element. You probably could have guessed that. What is the movement that takes focus away from the form element? Why, it’s the user pressing Enter. See how it all works?
After focus has been put on and then taken off the text box, the line document.theform.submit() fires up. This is the hierarchy line that takes the content of something called “theform” and submits it as if you clicked a submit button.
That’s really all there is to it.
You can pretty much plop this on your page anywhere you want it, but I would suggest putting the function up in the head commands if you can.
This is a clever trick, but remember that you might run into trouble if you use it as part of a larger script. Stick with single elements like I showed previously, and you’ll do just fine.
One of the big questions people have is how they can carry information across pages. User A makes a choice on one page and then goes to another. How can I “remember” what her choice was? Well, the best way is to set a cookie. The cookie is placed right on the user’s computer and can be recalled again and again. I have a tutorial on doing just that right here.
The problem is that many people are scared of cookies. They don’t like them and feel they’re an invasion of their privacy. Okay, that’s fine. So now how do I get information across pages? Well, you could do it through one page spawning another, and then another, and then another. That would allow JavaScript variables to be transferred, but that opens a lot of windows.
To attempt to solve this little dilemma, I offer this down-and-dirty JavaScript method.
Note
You can find this tutorial, and all of its examples, online at http://www.htmlgoodies.com/beyond/jspass.html.
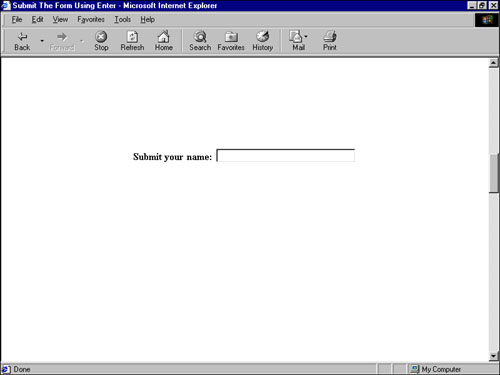
I’ll need two screen captures to show this effect. Figure 6.2 shows the form. Notice that I have put in my first and last name.

Figure 6.3 shows the next page after clicking the button. The values in those two text boxes have been plucked out and used to create the text of the page.
Let me start by showing you the code that made the small form in Figure 6.2:
<FORM METHOD="LINK" ACTION="jspass2.html">
Type your first name: <INPUT TYPE="text" NAME="FirstName">
Type your last name: <INPUT TYPE="text" NAME="LastName">
<INPUT TYPE="submit" VALUE="Click and See">
</FORM>
Look first at the main FORM flag. The METHOD is set to LINK, and the ACTION simply points toward another page. Nowhere does it say to send the user information anywhere. When you set up the form in this manner, the user input is carried along in the URL. This format does not require that the form be given a name. We are not interested in the form as a whole. We want the text from the individual text boxes.
The information is separated from the actual address by a question mark, so it doesn’t harm the movement to another page. This little quirk of the browser allows us to go to a totally new page and carry the user’s input right along with us in the URL.
Pretty clever, yes? Now all we have to do is find a method of extracting that information from the URL.
Now might be a darn good time to discuss limitations to this process.
To begin with, the information is not saved after each surfing like it is with a cookie. In order for this to work, you must ensure that the user moves in a linear fashion. Returning and backing up can harm the information being carried.
Next, the way I have this set up, you can only transfer two variables from page to page. You’ll see why in a moment.
Also, the method I have written here isn’t very friendly to spaces. If the user puts a space in either of her two text boxes, that space will be replaced by a plus sign. If you’re going to accept spaces, you’ll either have to live with that or write some extra code to eliminate it.
In addition, this is done with JavaScript, so there are browsers that will not be able to play with it. I have written my code in JavaScript 1.0 so that most browsers can understand what is to happen. I saw a suggestion on doing this by setting the answers to an array. It’s clever coding, but it’s in JavaScript 1.2, which means bunches of browsers will throw errors. The array method allows for endless variables being passed but limited browsers. Mine allows for the most number of browsers to be able to play with the code but only two variables. You decide.
Okay, because you’ve obviously chosen my method (or else you probably wouldn’t be reading this far), let’s look at the code that grabs the first name. This code will be found on the page that the previous form IS GOING TO
<FORM NAME="joe">
<INPUT TYPE="hidden" NAME="burns">
</FORM>
<SCRIPT LANGUAGE="javascript">
var locate = window.location
document.joe.burns.value = locate
var text = document.joe.burns.value
function delineate(str)
{
theleft = str.indexOf("=") + 1;
theright = str.lastIndexOf("&");
return(str.substring(theleft, theright));
}
document.write("First Name is " +delineate(text));
</SCRIPT>
I’m going to tell you up front the hardest part of this process. It kept me at bay for a good hour. I knew that the easiest method for doing this was to use substring JavaScript commands and grab elements from the URL. I also knew that I could grab the URL of a page simply by using the command window.location. Here is the URL of the online page using the command: http://www.htmlgoodies.com/beyond/jspass.html.
It’s no sweat, right? There’s the text string. Just grab what you want. The problem is that display is not a text string. It’s a property, which means that it cannot be acted on like a text string. Oh, that drove me nuts. After I figured out how to get it from a property to a text string, I was fine. Let’s look at that part first.
Okay, JavaScript friends, I know that there are other ways of doing this; this is just how I like to do it. The code starts with this:
<FORM NAME="joe">
<INPUT TYPE="hidden" NAME="burns">
</FORM>
You might remember that little blip of code for any number of forms you put together. It’s basically a text box, but it’s hidden. See how the type is "hidden"? That’s a great little trick to give yourself a place to store a value where no one can see it.
I figured if I take the property of the page’s location and put it in a text box, the property then becomes the value of that text box. When you grab the value from a text box, it becomes...you guessed it...a text string. Let’s look at the script:
var locate = window.location
document.joe.burns.value = locate
var text = document.joe.burns.value
That’s the beginning blip of code that changes the location into a text string. The property window.location is given to a variable named locate. Then the value of locate is put into the text box represented by document.joe.burns.value. See that in the code snippet? The NAME of the form itself is joe, and the NAME or the hidden text box is burns. By adding value to the end of the hierarchy statement, I basically forced a value in to the box.
The next line grabs that value out of the hidden text box and assigns the variable name text to it. The location of the page is now a text string and ready to be broken into parts.
Let’s say that it looks like this:
http://www.server.com/jspass2.html?FirstName=Super&LastName=Man
In order to grab things out of this line of code, we need to look for key elements looking from left to right and later, right to left. In the preceding example, we want the text Super yanked out of this line of letters.
The keys would most likely be the equal sign (=); it’s the first one counting from the left. The ending key would be the ampersand (&). Again, it’s the first one looking from the left. That bookends the text, so let’s set up a JavaScript that knocks everything off including that equals sign and keeps the next letters until an ampersand shows up. It’s not too hard:
function delineate(str)
{
theleft = str.indexOf("=") + 1;
theright = str.lastIndexOf("&");
return(str.substring(theleft, theright));
}
document.write("First Name is " +delineate(text));
First a function, named delineate(), is set up that will look for certain things.
The variable theleft is given the value of the first instance of an equals sign reading from the left. That’s what indexOf()does. Notice that we add one because we don’t want the equals sign. Adding one skips it. Notice that each line is acting on something called str. At the moment, str has no value. We’ll pass it a value in the last line.
Next, the variable theright is given the value of looking for the first instance of & reading from the right. That’s what lastIndexOf() does.
So now we have our bookends set. Let’s grab the text. The next line returns the substring of what appears between the equals sign (theleft) and the & (theright). See that?
Finally, the value is grabbed using a document.write command. Remember that at this point, nothing has actually been done. The document.write statement actually triggers the function to run. But look! When the function is triggered to run, now it is being passed a new variable, text. That’s the text string of the location to be acted on.
The return is the text Super.
Grabbing the last name is a whole lot easier. If you look at the text string again, you’ll see that we only need to set one point to look for. Nothing follows the last name, so if we read from the right and basically chop off everything including the second equal sign (from the right, it’s the first), we’ll be left with the last name. Here’s the code that did it:
var locate = window.location
document.joe.burns.value = locate
var text = document.joe.burns.value
function delineate2(str)
{
point = str.lastIndexOf("=");
return(str.substring(point+1,str.length));
}
document.write("Last Name is " +delineate2(text));
The code is very much the same in that it grabs the window.location and turns it into text. Where it differs is that the text string is only searching, from the right, for one item—the second equal sign.
The variable point is given the job of representing everything up to the second equal sign (first from the right—note I used lastIndexOf()).
The return is that point plus one, again to not include the equal sign, and then the length of the string—that’s everything that follows and that’s the last name.
A document.write statement again triggers the function and passes the variable text to it.
At this point in time, you can place the value anywhere you want by using the document.write wherever you want. I have some text thrown in, but that’s easily taken out. Remember to remove the plus sign if you take out the text. Getting the name into a text box is actually pretty easy. Here’s the code I used on the example page:
<FORM NAME="bull">
Last Name: <INPUT TYPE="text" NAME="bear">
</FORM>
<SCRIPT LANGUAGE="javascript">
var zork = delineate2(text)
document.bull.bear.value = zork
</SCRIPT>
You might notice a big chunk of it from the other scripts. I created a box first. The box has to be first, or the hierarchy statement won’t run, producing an error. The box is visible this time around. The value of the function is assigned to the variable zork, and then zork is put in to the text box. That’s pretty straightforward.
Just remember to change out the NAMEs of each element if you put more than one text box on a page. You also have to come up with a different variable name for the second text box. In other words, you can’t have two zorks on the same page.
And speaking of two zorks on the same page, remember the limitations of this. You can carry the same info across many pages, but they all must be in order. If you take these variables to yet a third page, all this coding must be redone on the new page. The variable does not carry across pages. The text in the URL carries. After it gets to the new page, it has to be assigned a new variable—each time.
Here’s a fantastic effect. As you know, multiple check boxes are often avoided in forms because users have a tendency to simply check all the boxes no matter what. Radio buttons have become the preferred element when a choice must be made. You mostly see check boxes used as single items. I see them mostly at the end of larger forms asking if I want to receive a newsletter or email updates about a product I’m downloading.
But what if you want a user to choose two out of, say, five elements?
Note
You can find this tutorial, and all of its examples, online at http://www.htmlgoodies.com/tutors/onlytwo.html.
Well, here’s a script you can attach to your forms that will allow you to limit the number of checks your users can make. You’ll fall in love with check boxes all over again. I got the original idea for this script from The Codeman. He has a similar script that only worked in Internet Explorer. I took the concept and rewrote it so that the script would work across browsers.
Here’s the effect shown in Figure 6.4. I know that it says to choose only two, but in order to see the effect, I picked a third. I say go ahead! Break the rules! Try to pick three!

You can even make different choices, unclick choices, and change things around. As long as you only have two, you’re good to go. Choose three, and you get the alert.
Did you see it? Not only did you get that nasty alert window, but you also had your third choice unclicked. Take that! Of course you can set the script to allow as many or as few clicks as you’d like, but in order to do that you need to understand how this puppy works. So let’s get into it.
I only have check boxes in the example, but you can surround them with any number of extra form elements. I just singled out the form check boxes for demonstration purposes. The code looks like this:
<FORM NAME="joe">
<b>Pick Only Two Please!</b>
<INPUT TYPE="checkbox" NAME="dog"
onClick="return KeepCount()"> Dog
<INPUT TYPE="checkbox" NAME="cat"
onClick="return KeepCount()"> Cat
<INPUT TYPE="checkbox" NAME="pig"
onClick="return KeepCount()"> Pig
<INPUT TYPE="checkbox" NAME="ferret"
onClick="return KeepCount()"> Ferret
<INPUT TYPE="checkbox" NAME="hamster"
onClick="return KeepCount()"> Hamster
</FORM>
These are basic check boxes. The form is named "joe". Each check box is then given a NAME. The NAME is equal to what the check box represents. That’s pretty basic form stuff.
The trick is the onClick() inside each of the check boxes. Notice the onClick() asks for a return from a function named KeepCount(). That return function will allow us to disallow the third box (or whichever you choose) to be checked.
Make a point of following that format or this JavaScript won’t give you the desired effect.
Got it? Super! Let’s move along...
It’s a fairly simple little script. It looks like this:
<SCRIPT LANGUAGE="javascript">
function KeepCount() {
var NewCount = 0
if (document.joe.dog.checked)
{NewCount = NewCount + 1}
if (document.joe.cat.checked)
{NewCount = NewCount + 1}
if (document.joe.pig.checked)
{NewCount = NewCount + 1}
if (document.joe.ferret.checked)
{NewCount = NewCount + 1}
if (document.joe.hamster.checked)
{NewCount = NewCount + 1}
if (NewCount == 3)
{
alert('Pick Just Two Please')
document.joe; return false;
}
}
</SCRIPT>
The script works because it’s set up to inspect every check box every time. That’s how you’re able to check, uncheck, and check again as long as only two are checked. The script counts the number of check marks every time you click.
We start with the function. I called it KeepCount() for fairly obvious reasons. You’ll remember that this function will trigger every time your user chooses a check box.
We need to give the JavaScript somewhere to keep a count, so I set it up as a variable named NewCount.
Now comes the magic. Notice that the script checks each check box right in a row, every time. Here’s just the first blip of code:
if (document.joe.dog.checked)
{NewCount = NewCount + 1}
If the first check box (dog) is checked, NewCount gets one added to it. If not, we move along to the next check box. Following the script down, if cat is checked, one is added. If not, we go to the next blip.
Each check box is tested in order. The script keeps count again and again each time the user clicks. But what happens if three are checked:
if (NewCount == 3)
{
alert('Pick Just Two Please')
document.joe; return false;
}
If NewCount is equal (==) to 3, up pops the alert box and then returns to the form; thus the third check box is false. It unclicks.
Cool, huh? The function bracket and the end-script flag round out the script.
The reason that the script is able to count the boxes again and again is way at the top of the function. Note that every time the function triggers, the NewCount value is set back to 0.
You can set this to as many check boxes as you’d like and as many choices from those boxes as you’d like. If you use the effect more than once on a page, please remember that you must change out the NAME of the check boxes, so you must also change out the names in the script.
You’ll need a blip of code for every check box you have in order for the check boxes to count each time. Just make sure that your script equals your check boxes both in number and in NAMEs. My suggestion is, if you’re going to use this more than one time on the page, paste an entirely new script with a new function name and new count name other than NewCount.
Just make sure to keep the return command in the check boxes themselves. That’s what makes the magic in this little script.
Okay, so I’m zipping around the Web looking for the answer to a coding question. I didn’t find the answer I was looking for there, but I did find a lot of other neat stuff.
Note
You can find this tutorial, and all of its examples, online at http://www.htmlgoodies.comtutors/ifthis.html.
The scripts I found on the sites I viewed were pretty good, so I took a couple of ideas in order to make an easy to incorporate script in to a Web page. Now, in order to see the effect, you have to be running Internet Explorer 5.0 or better or a later version of Netscape. Dig this.
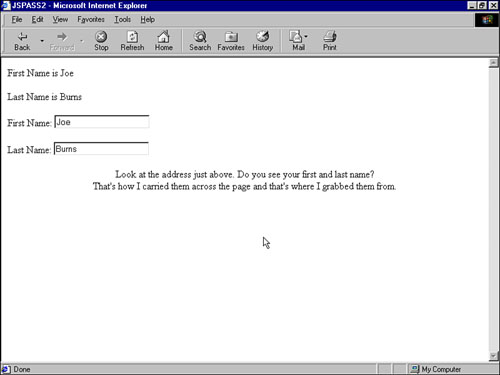
Figure 6.5 shows the form set before anything was done to it. No choices were made yet.
Figure 6.6 shows the same form after the Yes answer was chosen. Note that the choices in the select box have changed.
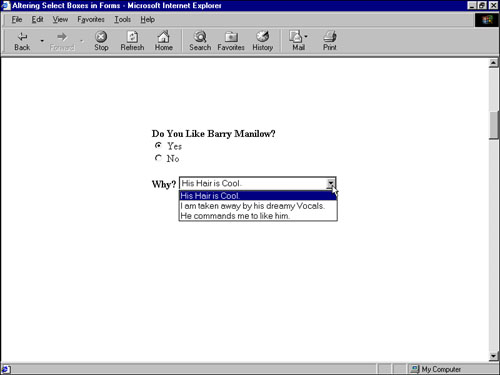
Figure 6.7 shows how choosing No just pushes the user along. But then, who doesn’t like Barry? I do.
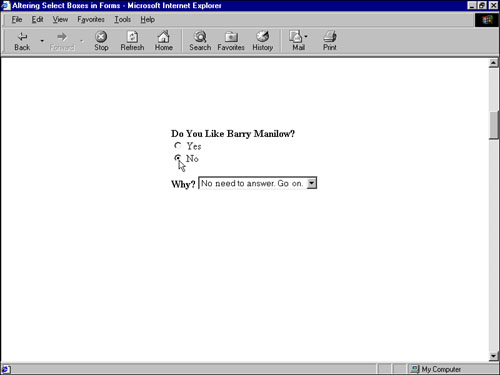
Cool, huh? I only have the effect running on one select box at the moment, but I think you can see the advantage of the effect. How many times have you run into a static form that asked questions that didn’t apply? Now you can create a form that will react to the user’s responses. Depending on what the user enters, you can grab more information or simply tell the user to move on to the next question.
<FORM NAME="joe">
<b>Do You Like Barry Manilow?</b>
<INPUT TYPE="radio" NAME="zork" VALUE="yes" onClick="YesAnswer()"> Yes
<INPUT TYPE="radio" NAME="zork" VALUE="no" onClick="NoAnswer()"> No
<b>Why? </b> <SELECT NAME="burns">
<OPTION SELECTED> Waiting for response from above
</SELECT>
</FORM>
The form is named "joe". The radio buttons are both named "zork" so that no matter which is chosen, the effect will trigger. The select box is named "burns". I often name form elements with my own name. It just helps me remember the element names without having to go back and look again and again. (That doesn’t explain the "zork" though, does it?)
The form is very basic except that the select box only has one element. The reason is that more would be silly. I’m going to change the content no matter which button the user chooses, so why go on and add multiple responses?
Notice that if the Yes radio button is clicked, YesAnswer() is triggered. If the No button is clicked, NoAnswer() is triggered. OK! We’re done here. We’re moving along...
The script code is a little lengthy, but stay with me here. You’ll note that it’s just the same thing again and again. Most scripts are like that.
<'SCRIPT LANGUAGE="JavaScript">

function YesAnswer()
{
var IntPath = document.joe.burns;
var TheOptions = IntPath.options.length;

document.joe.burns.options.length = 0;

IntPath.options[IntPath.options.length] =
new Option('His Hair is Cool','0'),
IntPath.options[IntPath.options.length] =
new Option('I am taken away by his dreamy Vocals','1'),
IntPath.options[IntPath.options.length] =
new Option('He commands me to like him','2'),
}

function NoAnswer()
{
var IntPath = document.joe.burns;
var TheOptions = IntPath.options.length;

document.joe.burns.options.length = 0;

IntPath.options[IntPath.options.length] = new Option ('No Need to Answer. Go On. ','0'),
}

</SCRIPT>
Place the script from the new window into your HTML document. In between the HEAD flags is best, but it’ll basically run from anywhere as long as it sits above the form in the document. That’s a Netscape thing.
Notice that the script is in two sections. The first is a function for YesAnswer(), and the second is a function for NoAnswer(). Can you see it all coming together now?
I’ve set two variables:
var IntPath = document.joe.burns;
var TheOptions = IntPath.options.length;
The first, IntPath represents the initial path to the select box. It follows the path document, and then the form name, and then the form element name.
The second variable, TheOptions uses the IntPath but also adds the additional directions options (the elements in the select box) and length (the number of options in the select box).
The next line reads
document.joe.burns.options.length = 0;
This line’s only purpose is to clear what is currently written in the select box so that new text can be written. If we didn’t have this, the new text would simply be written under the existing text. That would be rather confusing, don’t you think? Well, now that we’ve blanked the select box, we might as well write something in there:
IntPath.options[IntPath.options.length] = new Option('His Hair is Cool','0'),
IntPath.options[IntPath.options.length] = new Option('I am taken away by his dreamy Vocals','1'),
IntPath.options[IntPath.options.length] = new Option('He commands me to like him','2'),
If you simply keep in mind what IntPath represents (document.joe.burns), this reads pretty easily. In the select box’s options, write this new option. Then you receive the text for the new option and the option’s array number. Remember that JavaScript starts counting at zero, not one. That’s why the first new option’s number is 0. Numbers 1 and 2 follow right along.
If you click on the Yes radio button, the function YesAnswer() runs and the preceding script is enacted. If you click the No button, the NoAnswer()function triggers and the same process runs, yet only one option is entered in the box. That option’s sole purpose is to tell the user to go on to the next question, so only one option is needed.
Because most forms do not have a single drop-down box like this one, you’ll need to know how to alter this script if you have multiple form elements. My suggestion is to not get overly fancy with the coding. Create a new set of functions for each form/select box grouping you create.
That means a simple copy and paste, but be careful, you’ll need to change a few things. For one, the form elements will have new names, so you’ll have to change not only the name of the function, but also the name of the select box in the script.
So...
Change the name of the function in the form element itself so that each radio button grouping triggers a function built specifically for its purpose. That means you’ll have to change the name both in the script (when you paste in a new function) and in the form itself.
In the script, you’ll need to change the name of the select box element. That means everywhere you see burns (the name of the current select box), you’ll need to change the name to the new select box.
It’ll create a lot of text, that’s for sure, but you’ll be able to keep it all straight if you follow this format.
Using this script format can make a great form that will actually interact with the user rather than bothering the user by asking questions that shouldn’t be answered. I’m not a fan of surveys that read, “If yes, go here—If no, go here.” Using this script, you can alter the questions and answers as the user makes her choices.
I’ve seen this effect used in a couple of places. It’s a really neat look, so I thought a tutorial would be in order. I grabbed some blips of code and played with it to set it up so that it’s an easy grab from a tutorial. You can alter this and pretty it up to your heart’s content. All I’m passing along here is the basic code and how it all works. Figure 6.8 shows the foundation for this tutorial.

Note
You can find this tutorial, and all of its examples, online at http://www.htmlgoodies.com/beyond/clipboard.html.
Click the button below the shaded area and then paste it to a text editor. Ta da! That’s a cool effect. If I had been able to do this from the beginning, I could have set up every tutorial like this. Well, maybe I wouldn’t have. This effect requires the use of a command available only in IE 4.0 or better, execCommand().
It’s an Internet Explorer–only statement that allows the browser to execute a command, thus the name. In this case, we’re executing a copy. But you’ll see the code for that later. Let’s talk about what’s happening with the visible items first.
I’ve got a shaded block with text sitting inside. The shading is only there for presentation purposes. It’s to show that what is inside of the colored area is what will be copied to the clipboard.
You can’t see it yet, but there is also a Textarea box that’s hidden. When you click on the button, the program copies the text to the Textarea box and also to the clipboard. Let’s take a look at the code that puts these elements to the page.
Let’s start with the code that introduces what is to be copied. Follow this from the top. I have a SPAN surrounding text. That SPAN is given the ID "copytext". Whatever is within the SPAN commands is what will be copied. You’ll also note that I popped in an inline STYLE attribute in order to set the SPAN to a specific height, width, and background color. That’s not required. I just did it for looks:
<SPAN ID="copytext" STYLE="height:150;width:162;background-color:pink">
This text will be copied onto the clipboard
when you click the button below. Try it!
</SPAN>
<TEXTAREA ID="holdtext" STYLE="display:none;">
</TEXTAREA>
<BUTTON onClick="ClipBoard();">Copy to Clipboard</BUTTON>
Next is a Textarea box that’s been made invisible through an inline STYLE attribute. It has been given the ID "holdtext" because it is there simply to hold the text while copying.
In case you’re wondering, I tried the script by changing out NAME for ID, and the JavaScript wouldn’t recognize it. I also tried numerous other hidden elements including the traditional INPUT TYPE="hidden", but no dice. It really doesn’t matter though because this works well.
Finally, a basic button is in place simply to trigger the JavaScript that performs the copy. Yes, you can go with the traditional FORM button. That doesn’t matter. The button only triggers the function, ClipBoard().
The script uses a lot of commands proprietary to Internet Explorer 4.0 and above. You’ll want to be careful about changing any text you think might be a simple variable name. Except for the two names we assigned, holdtext and copytext, as well as Copied within the script itself, everything else carries with it actions past just a name. That’s why the script is so functional yet is so small. Let’s take it from the top...
<SCRIPT LANGUAGE="JavaScript">
function ClipBoard()
{
holdtext.innerText = copytext.innerText;
Copied = holdtext.createTextRange();
Copied.execCommand("Copy");
}
</SCRIPT>
The function is named ClipBoard(). It is triggered when the button is clicked. The text that appears within (innerText) the Textarea box (holdtext) is created by taking the text from within (innerText) the SPAN (copytext).
Parameters are set around that text (holdtext.createTextRange()), and the text is given a name (Copied).
Next, the text (Copied) is copied to the clipboard using the IE execCommand to copy.
That’s about it in a nutshell.
The script, as it is currently written, copies whatever text is within the SPAN flags. If there is code, like a <BR> command created to display using & commands, those will copy right along. If you have formatting in the text and you only want the user to copy the text, you need to add a command that will remove that formatting. Luckily, there’s an execCommand that will do that for you. It’s important that you place it in the script before the copy process.
The script will look like this:
<SCRIPT LANGUAGE="JavaScript">
function ClipBoard()
{
holdtext.innerText = copytext.innerText;
Copied = holdtext.createTextRange();
Copied.execCommand("RemoveFormat");
Copied.execCommand("Copy");
}
</SCRIPT>
I made the new line bold so it would stick out a little more. That line will remove any formatting associated with the copied code, so just the text will copy.
As with any time a JavaScript sits on a page, if you post multiples of that JavaScript, you need to make a point of changing the variables that attach the visible elements with the JavaScript. In this case, that includes the name of the function, the ID of the SPAN, the ID of the hidden Textarea box, and the variable name you give in the script itself to represent the text. I used “Copied”.
This is a great effect, and it will work with voluminous amounts of text or just a few words. This script goes to the concept of interacting with the user. Instead of asking the user to copy and paste, now you can help her along in the process by doing at least the copy for her.
This tutorial is a series of basic drop-down link menus. I remember very well when this form of creating links came out. Everyone wanted to know how to do it. Because of that, everyone tried at once, and many different methods of getting a FORM-based drop-down menu to act as links started floating around the Web. This is a very basic format. I think it’s a good one, but just keep in mind that this certainly isn’t the only way of getting the job done.
Note
You can find this tutorial, and all of its examples, online at http://www.htmlgoodies.com/stips/scripttip38.html.
As you’ll see, this link menu uses a button to trigger its effect. That can be eliminated, and after we understand how this format works, we’ll alter the script a bit so that the button isn’t required. It’ll just make the link when the user chooses from the menu.
This format works outside of frames. After the no-button version, we’ll alter it again so that it works within a frames format by loading its URLs into a separate frames window. Basically, we’re going to beat this drop-down menu to death.
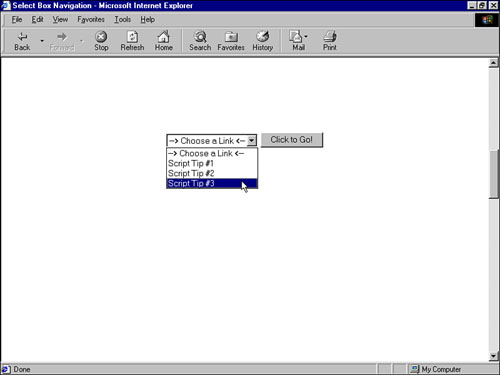
Figure 6.9 is a look at the first version of this navigation system.
<SCRIPT LANGUAGE="javascript">
function LinkUp()
{
var number = document.DropDown.DDlinks.selectedIndex;
location.href = document.DropDown.DDlinks.options [number].value;
}
</SCRIPT>
<FORM NAME="DropDown">
<SELECT NAME="DDlinks">
<OPTION SELECTED>--> Choose a Link <--
<OPTION VALUE="scripttip1.html"> Page One
<OPTION VALUE="scripttip2.html"> Page Two
<OPTION VALUE="scripttip3.html"> Page Three
</SELECT>
<INPUT TYPE="BUTTON" VALUE="Click to Go!" onClick="LinkUp()">
</FORM>
We’ll get underway by once again starting from the bottom up. Here’s the HTML that creates the drop-down box and the button:
<FORM NAME="DropDown">
<SELECT NAME="DDlinks">
<OPTION SELECTED>--> Choose a Link <--
<OPTION VALUE="scripttip1.html"> Page One
<OPTION VALUE="scripttip2.html"> Page Two
<OPTION VALUE="scripttip3.html"> Page Three
</SELECT>
<INPUT TYPE="BUTTON" VALUE="Click to Go!" onClick="LinkUp()">
</FORM>
You should be quite familiar with the drop-down link format by now. We start by setting a FORM and giving it a name. This form will be named DropDown. See that in the code?
Next, we’ll set up the select box and give it a name. We’ll call this one DDlinks. Are you still with me?
The first “option” is the one that will display, so we will not give that a VALUE. It will display the following text:
"--> Choose a link <--".
Next, we start listing the options that will be used to create links. Each is given a VALUE that represents the link it will point toward. Now, I only have that page name because the files I’m linking to are in the same directory. If you want to set this to links outside of your site, just put the entire URL in for the VALUE. For instance:
<OPTION VALUE="http://www.htmlgoodies.com/new.html">
I have three items to choose from. You can have 50 or more, if you want. I’m just keeping it small for the example.
The </SELECT> ends the drop-down box.
The button comes next:
<INPUT TYPE="BUTTON" VALUE="Click to Go!" onClick="LinkUp()">
Its job is to trigger the function that will grab the VALUE and turn it into a link. See the onClick="LinkUp()"? That’s what will do it.
Finally, </FORM> wraps up the FORM elements of this script’s HTML side. Now that we know the players, we can go after the function.
This is what we’re interested in:
function LinkUp()
{
var number = document.DropDown.DDlinks.selectedIndex;
location.href = document.DropDown.DDlinks.options [number].value;
}
See how the long lines of code should stay on one written line?
That’s the format. If you change it from that, you’ll get errors. The entire script, a little higher up on the page, truncates the second line. That’s bad. Keep it all on one line.
The function is named LinkUp() for no other reason than that’s what I’ve chosen. It’s a name I completely made up. Then comes the curly bracket that will surround the function commands. Then comes the first line of the function itself:
var number = document.DropDown.DDlinks.selectedIndex;
This first line assigns a variable name, number, to the value returned from the drop-down menu. Remember, the name of the form is DropDown, the name of the select box itself is DDlinks, and the value chosen by the user is represented in JavaScript by selectedIndex.
Now you have the number chosen by the user returned and assigned to the variable number. Just keep in mind that JavaScript counts everything, and it starts counting at zero. So the first choice, the zero choice, is no good. That’s the one that reads “Choose a Link.”
Now here’s the second line of the function:
location.href = document.DropDown.DDlinks.options [number].value;
You might remember “location.href” as the JavaScript that creates a hypertext link. If not, that’s what it does. The link then is created by gathering the VALUE from the choice the user has made.
Once again, a hierarchy statement is created using the name of the form, the name of the select box, and then option[number].
That [number] is the variable name we just created. It represents the hierarchy statement that will grab the number of the drop-down box the user chose. Thus when this script runs, the text “number” will actually be replaced with the number the user chose. Because this drop-down box only offers three choices (past the zero choice “Choose a Link”), that number will be 1, 2, or 3.
After the script replaces number with an actual number, it then asks for the VALUE. And what is the value for each OPTION? It’s a hypertext link!
The script grabs that hypertext link VALUE and the location.href creates the link. Ta da! That’s pretty clever. However, the link does not actually happen until the function is triggered to work. That happens through the button’s onClick="LinkUp()" Event Handler statement. See that in the preceding code?
But what if we could set it up so that the button wasn’t needed? The user simply made her choice, and the link went off immediately. Wouldn’t that be cool?
Figure 6.10 shows the effect we’re going for next. It’s the same navigation format, but this time around it just happens. No buttons are required.

This is a rather easy effect to generate. Notice that the button code has been taken out. The function remains the same, as does the code for the drop-down box itself. Here’s the new code that does the trick:
<SELECT NAME="DDlinks" onChange="LinkUp(this.form)">
An Event Handler, onChange, is used to fire the function, LinkUp(). onChange works just as you think it does. As soon as something changes, it’s triggered. When the page loads, the OPTION SELECTED is the item displayed. When someone changes that, the function is triggered.
This hasn’t come up a lot in the Script Tips, but do you see the text within the instance (the parentheses)? That text is known as a “parameter.” In this case, it is information that is going to be passed to the function.
The information passed to the function couldn’t be more clear, this.form. The output of the form, the index number of the user’s choice, is sent up to the function and used, along with the VALUE, to create the hypertext link just as it was when we had the button.
Here’s one more thing. Notice where I placed the onChange Event Handler? It is in the SELECT flag, not the first OPTION flag. That’s because the SELECT will change. The first OPTION will always stay the same and never trigger the function.
It sounds easy enough, but will it work across frames? Sure, it will!
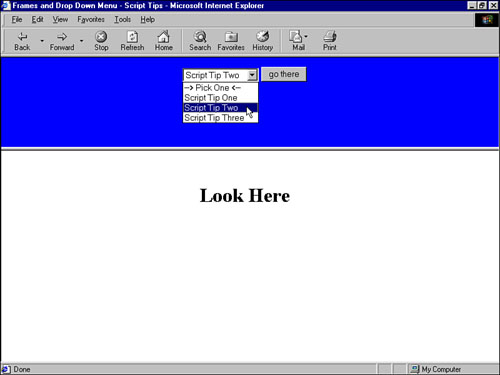
Ever since I announced we would be playing around with this drop-down menu, the mail has been coming in saying, “When are you going to get to the configuration that allows me to use this across frames?” Wait no longer. We’re there. Figures 6.11 and 6.12 show this script’s latest configuration.
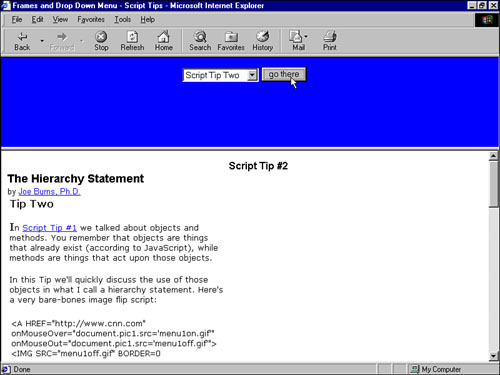
You sharp-eyed readers will notice that I brought the button back. If you want to be rid of it, reread the last tutorial and follow the same format. For this across-frames format, I want the button. Here we go:
<SCRIPT LANGUAGE="JavaScript">
function acrossFrames()
{
if (document.FrameForm.DDFrameForm.options[0].selected)
parent.frames[0].location='menuframes.html'
if (document.FrameForm.DDFrameForm.options[1].selected)
parent.frames[1].location='scripttip1.html'
if (document.FrameForm.DDFrameForm.options[2].selected)
parent.frames[1].location='scripttip2.html'
if (document.FrameForm.DDFrameForm.options[3].selected)
parent.frames[1].location='scripttip3.html'
}
</SCRIPT>
<FORM NAME="FrameForm">
<SELECT NAME="DDFrameForm">
<OPTION SELECTED> --> Pick One <--
<OPTION>Script Tip One
<OPTION>Script Tip Two
<OPTION>Script Tip Three
</SELECT>
<INPUT TYPE="button" VALUE="go there" onClick="acrossFrames()">
</FORM>
Let’s start at the bottom. It should look very familiar. The only reason I am showing it to you is that I have changed the name of the form and the drop-down box. It looks like this:
<FORM NAME="FrameForm">
<SELECT NAME="DDFrameForm">
<OPTION SELECTED> --> Pick One <--
<OPTION>Script Tip One
<OPTION>Script Tip Two
<OPTION>Script Tip Three
</SELECT>
<INPUT TYPE="button" VALUE="go there" onClick="acrossFrames()">
</FORM>
The FORM itself is called "FrameForm" and the SELECT box is named "DDFrameForm". The button is back and is set to trigger a function called acrossFrames(). Let’s see the function that passes info from frame window to frame window.
It looks like this:
function acrossFrames()
{
if (document.FrameForm.DDFrameForm.options[0].selected)
parent.frames[0].location='menuframes.html'
if (document.FrameForm.DDFrameForm.options[1].selected)
parent.frames[1].location='scripttip1.html'
if (document.FrameForm.DDFrameForm.options[2].selected)
parent.frames[1].location='scripttip2.html'
if (document.FrameForm.DDFrameForm.options[3].selected)
parent.frames[1].location='scripttip3.html'
}
Let me first point out a basic tenant of JavaScript. JavaScript counts everything, and it starts counting at 0. This means that the items in the SELECT box have already been assigned numbers. The first choice is 0, the next choice is 1, and then the choice is 2, and then the choice is 3.
In addition to that, the frames have also been given numbers starting at 0. The first frame listed in a page’s FRAMESET is frame window 0. The second is frame window 1. The third one listed would be frame window 2, and so on.
The frameset format for the example is a simple two-frame window, in rows, set to 30% and 70%:
<FRAMESET ROWS="30%,*">
<FRAME SRC="menuframes.html">
<FRAME SRC="lookhere.html">
</FRAMESET>
The first FRAME SRC listed will be known as frames[0]. The second one listed will be known as frames[1]. That’s the format of denoting a specific frame in JavaScript hierarchy statements.
Let’s look at the first two small blocks of code in the function:
if (document.FrameForm.DDFrameForm.options[0].selected)
parent.frames[0].location='menuframes.html'
if (document.FrameForm.DDFrameForm.options[1].selected)
parent.frames[1].location='scripttip1.html'
The first choice is the text “Pick One.” We do not want that to produce any linking, so I have set that link to reload the same page into the same frame window.
See that? If the item chosen by the user is option[0], the first choice, load menuframes.html in to frames[0], which is the one it is already in. Follow that? It just reloads the same page in the same frame window.
The next block of code is for the second choice. That is choice number 1 because JavaScript starts counting at 0. It reads that if someone chooses options[1], that page is to be loaded into frames[1], the lower frame window. Get it?
Follow along with the next two blocks of code. Each one says that if a specific option is chosen, load it in to frames[1], the lower frame.
But what if you have multiple frames? It’s no sweat. Just remember to count your frame windows from 0, top to bottom. If you have five frame windows, they would be numbered 0 through 4. You could set each choice in the drop-down menu to load into a different window simply by putting in the appropriate frame window number.
Each of the function blocks of code is an If statement. Usually, an If statement ends with an Else. This does not because I am sure one of the If statements will be true every time someone chooses one of the SELECT box items. The Else statement is not needed.
You now know more ways to play with a drop-down menu than you will probably ever need to know. So enjoy it. It’s a great script that can look very professional on your pages.
This is the first in a series of two scripts meant to discuss and describe the concept of creating password protection through JavaScript. Each uses a different method of password protection. You choose which one you think is best.
The two are
Password in script —hidden script
Password encrypted through arrays
Both are effective to a point. As with most password protection, the protection is only as good as the user’s ability to not blab the password. JavaScript has taken a bad rap in all this because many people say that the password is in the script and that it’s easy to look at the code, grab the password, and get in.
The second script simply does not include the password, so that’s out. The first does, but I’ll show you how to make it darn hard to grab it from the code—if you can get to the code at all.
Let’s get started with the first one.
In all honesty, it would do you good to go online and see this pup in action. It’s really clever the way the script hides its code.
I have a working copy linked directly to http://www.htmlgoodies.com/stips/scripttip73effect.html. Try to break in.
Here’s what you’re looking for. Figure 6.13 displays the prompt box that’s waiting for your password.
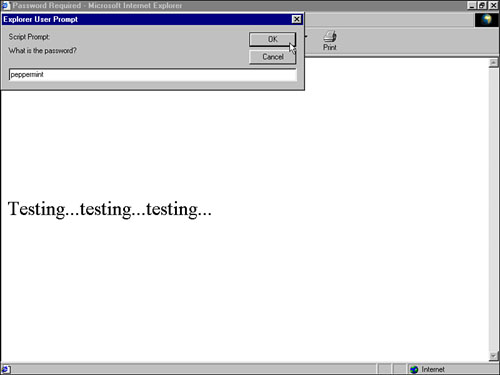
The password is “peppermint”—without the quotes. Before you do it correctly, put in incorrect passwords, leave spaces blank, press Cancel, and try to look at the pages code. You’ll see how I hid it.
Here’s code after you get back:
<SCRIPT LANGUAGE="javascript">
var getin = prompt("What is the password?","")
if (getin=="peppermint")
{
alert('You got it! In you go...')
location.href='scripttip73correct.html'
}
else
{
if (getin=="null")
{location.href='nope2.,html'}
else
if (getin!="peppermint")
{location.href='nope.html'}
}
</SCRIPT>
How do you like that? I wrote that code for a fellow professor who wanted a basic password system. The system works pretty well, but it is still crack-able if you know how. Did you try to get the password? Hard, wasn’t it?
It was difficult because of the way the script was put together. None of the password elements ran before prompt or alert elements. That way, it was impossible to get the page by itself without some type of JavaScript element taking the focus of the browser. The moment you’d click to lose one item, another would pop up.
Let’s look at the code:
var getin = prompt("What is the password?","")We begin with a prompt that runs first in the script. Every time this page loads, this prompt pops up first. You simply haven’t time to get to the view source menu item.
The variable getin is given the value of the text the user puts in to the prompt box.
There’s one more thing—notice that there’s no text set to go in to the text box part of the prompt. That way, I can set up an event to occur if the user simply clicks Cancel without putting in any text.
if (getin=="peppermint")
{
alert('You got it! In you go...')
location.href='scripttip73correct.html'
}
The first IF statement is set up to work if the password is correct. If getin is equal (==) to "peppermint" (the password), an alert box pops up. The box is again to keep focus away from the page itself. After you click to close the alert box, the location.href hierarchy statement is enacted and the browser changes the page.
But what if the user puts in the wrong password:
else
{
if (getin=="null")
{location.href='nope2.,html'}
else
if (getin!="peppermint")
{location.href='nope.html'}
}
The wrong password brings on the wrath of the Else statement. I have the Else statement set to itself to be another If statement. Basically if the user response does not match the original If statement, the user’s answer is checked again by a second If statement. The Else moves the user response from one to the other.
If the user just clicks Cancel, the variable getin will be null. This response is set to go to a page called nope2.html that tells the user to stop clicking Cancel. (NOTE: This doesn’t work on all browser versions—but all versions will get the next blip of code.)
If getin is not null, a value must be put in by the user. If it is anything but "peppermint" (!=), the page nope.html pops up instructing the user to try again.
That’s basically it. It’s not a hard script, and the password appears in the code, but it’s darn hard to get to. The script creates a vicious circle that can only be broken by putting in the correct password or closing the browser window.
Have you figured out how to get to the code yet? The easiest method is to close the browser and re-open it on the page that would send you to the password page. Then put your pointer on the link, right-click, and download the target page. Then you would have the code and the password.
Had you thought of that? If not, your user might very well not have either. Maybe this password script is the one for you. If what you have to protect isn’t of high-end importance, this could be the one.
This is the second in a string of JavaScript password scripts. In this script, we again use a format in which the password is the name of the page to be linked to—except in this one, the concept is further hidden because the user will not put in the name of the page. The user will put in a numeric password, which will be turned in to the name of the page by the script.
It’s done through an array. It’s, again, best if you see this one in action. I have a working version online at http://www.htmlgoodies.com/stips/scripttip75effect.html.
Use the password 145.
The password page looks like Figure 6.14.
This script creates a very difficult-to-crack password system:
<SCRIPT LANGUAGE="javascript">
function GoIn()
{
var Password = new Array("p","j","l","z","o","e","m","b","x","z")
function getNumbers()
{
return document.userInput.u1.value
return document.userInput.u2.value
return document.userInput.u3.value
}
var input1 = document.userInput.u1.value
var input2 = document.userInput.u2.value
var input3 = document.userInput.u3.value
var pw1 = Password[input1]
var pw2 = Password[input2]
var pw3 = Password[input3]
var pw = pw1 + pw2 + pw3
if (pw == pw1+pw2+pw3)
{location.href = pw+ ".html"}
}
</SCRIPT>
Put in Your Three-Number Password to Enter: <center>
<FORM NAME="userInput">
<INPUT TYPE="text" Name ="u1" SIZE="2">
<INPUT TYPE="text" Name ="u2" SIZE="2">
<INPUT TYPE="text" Name ="u3" SIZE="2">
<INPUT TYPE="button" VALUE="Enter" onClick="GoIn()">
</FORM>
</CENTER>
Of course, when we have form elements in a script, we start with them so that we can understand the hierarchy statements in the functions:
<FORM NAME="userInput">
<INPUT TYPE="text" Name ="u1" SIZE="2">
<INPUT TYPE="text" Name ="u2" SIZE="2">
<INPUT TYPE="text" Name ="u3" SIZE="2">
<INPUT TYPE="button" VALUE="Enter" onClick="GoIn()">
</FORM>
The form itself is given the name "userInput". Following the form flag are three input text boxes: Each set to accept only two characters.
The text boxes are named "u1", "u2", and "u3" down the line.
A final button triggers a function called GoIn(). Now we can put together hierarchy statement to grab whatever the user puts into the boxes. Now here’s the GoIn() function:
function GoIn()
{
var Password = new Array("p","j","l","z","o","e","m","b","x","z")
The function starts with an array. We’ve used the format before. The array is named “Password”. Each element in the array is a text string because it is contained within double quotes. A comma separates each item, with no spaces.
What isn’t shown here is what helps us to use the script as a password function. Any time you set up an array in JavaScript, the array list members are given numbers starting at zero and counting up until JavaScript runs out of things to count.
In this case, "p" is zero, "j" is one, "l" is two, and so forth. That will become important in a moment.
function getNumbers() {
return document.userInput.u1.value
return document.userInput.u2.value
return document.userInput.u3.value
}
Next, a second function, getNumbers(), is employed to simply return, to the script, the numbers the user put in to the text boxes. Note that the three hierarchy statements are each attached to one of the three text boxes:
var input1 = document.userInput.u1.value
var input2 = document.userInput.u2.value
var input3 = document.userInput.u3.value
Next, the three input items that are returned from the three text boxes are given the variable names input1, input2, and input3. Please remember that when grabbing values from form elements, the use of the command value is very important at the end of the hierarchy statement.
Here the array is called on three times. (Password is the name assigned to the array, remember?) The array items pulled out will be equal to the three numbers entered by the user. Notice that each time, the variable names assigned to the user’s choices are used within square brackets:
var pw1 = Password[input1]
var pw2 = Password[input2]
var pw3 = Password[input3]
This format works basically like a replacement. Whatever number the user put in will replace the variable name. So if the user put zero in the first box, input1 will be replaced by zero and the first letter of the array, p, will be returned. That happens three times, assigning the variables pw1, pw2, and pw3, for each of the text boxes:
var pw = pw1 + pw2 + pw3
if (pw == pw1+pw2+pw3)
{location.href = pw+ ".html"}
}
Last but not least, the variable pw is created and given the value of the three variables put together.
An If statement asks if pw is equal to pw1+pw2+pw3. Of course it is. We just set it to that. Because it is, the commands location.href trigger, taking the user to the page name created by the user’s three numbers plus .html.
Do that again...
The password for this script is 145. If you count in to the array to 1, you get j. Remember that the p is zero. Count to 4 and you get o. Count one more and you get e.
Put them all together, add .html, and you get the page name “joe.html”. If you retry the password, you note that joe.html is the page you were sent to.
Pick the one you like. Each has its own merits, and each can be defeated. I actually like the first one I showed. It’s simple, and it works.