PROJECTS

Colored ink is a truly universal medium and can be applied to so many genres. In this chapter, you’ll explore five art projects that will take your inking skills to the next level. You’ll make a cork bracelet and a sculpted horse, decorate a tote bag, produce a modern paper doll collection, and create an accordion book inspired by Alice’s Adventures in Wonderland. These pieces are fun and rewarding to create and make spectacular gifts. Unlock your imagination and see what you can create.

CORK BRACELET
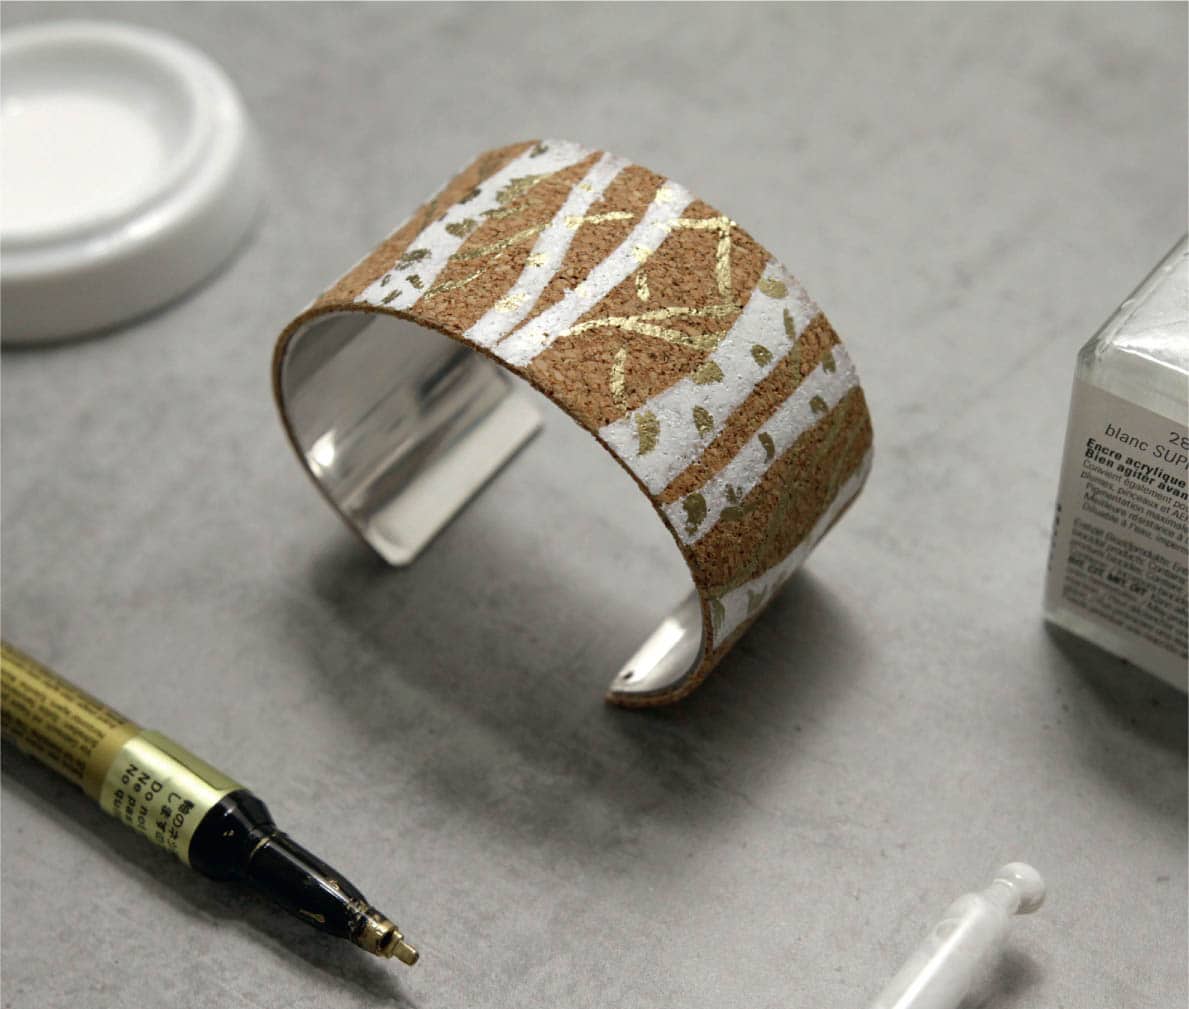
Cork is a natural material with unique properties. Most importantly, it’s fully biodegradable, renewable, and recyclable—no wonder it’s getting more popular among artists and crafters. In this project, you’ll create a modern bracelet decorated with a birch tree motif.
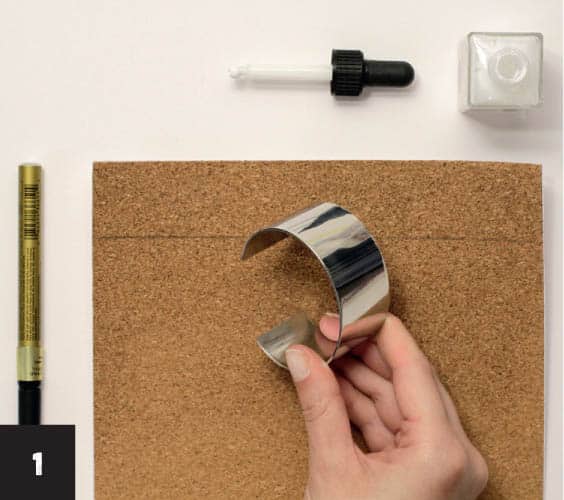
1 Mark the width and length of the bracelet on the cork sheet. Coat the cork with a primer such as matte medium or clear gesso and allow it to dry. This step isn’t necessary when working with acrylic inks, but it adds durability.
2 Paint the first birch tree silhouette with white acrylic ink, going from the top of the cork to the marked-off line. Paint a curved line about ¼" (6 mm) from the top of the cork strip to the bottom.

3 Create various birch tree trunks, slightly changing the shape and thickness of the trunks every time and making them curvy, almost as if they’re dancing. As you paint, consider not only the white shapes but also the negative space. By making negative spaces interesting and balanced, you can create an impactful image with minimal effort. Remember the power of a silhouette, and that beautiful designs can be achieved with minimal shapes.
If the first layer is not opaque enough, apply a second layer with undiluted white ink; this will increase the contrast with the cork. Allow this layer to dry for about 30 minutes.

4 Add texture to the trees with a metallic paint pen. Dab the marker (or a brush, if using acrylic paint) on the trees, making irregular, asymmetrical marks. This helps create the look of birch bark in a unique way. The marker’s chisel tip works well for making marks that add visual texture. Allow the paint to dry.

5 Add tiny branches to the trees with the paint pen, paying attention to the perspective of the branches. Allow the paint to dry.

6 Measure the exact width of the bracelet and mark the cork with a pencil. Place the cork on a cutting mat and cut it along the line, cutting against a metal ruler with a craft knife.

7 Remove the backing on the cork sheet. Before adhering it to the bracelet, make sure the bracelet is clean and oil-free. Decide how you want to position the cork on the bracelet and adhere it, going slowly and making sure there are no air bubbles. Trim any overhang with a craft knife or scissors.

DECORATED SCULPTURE
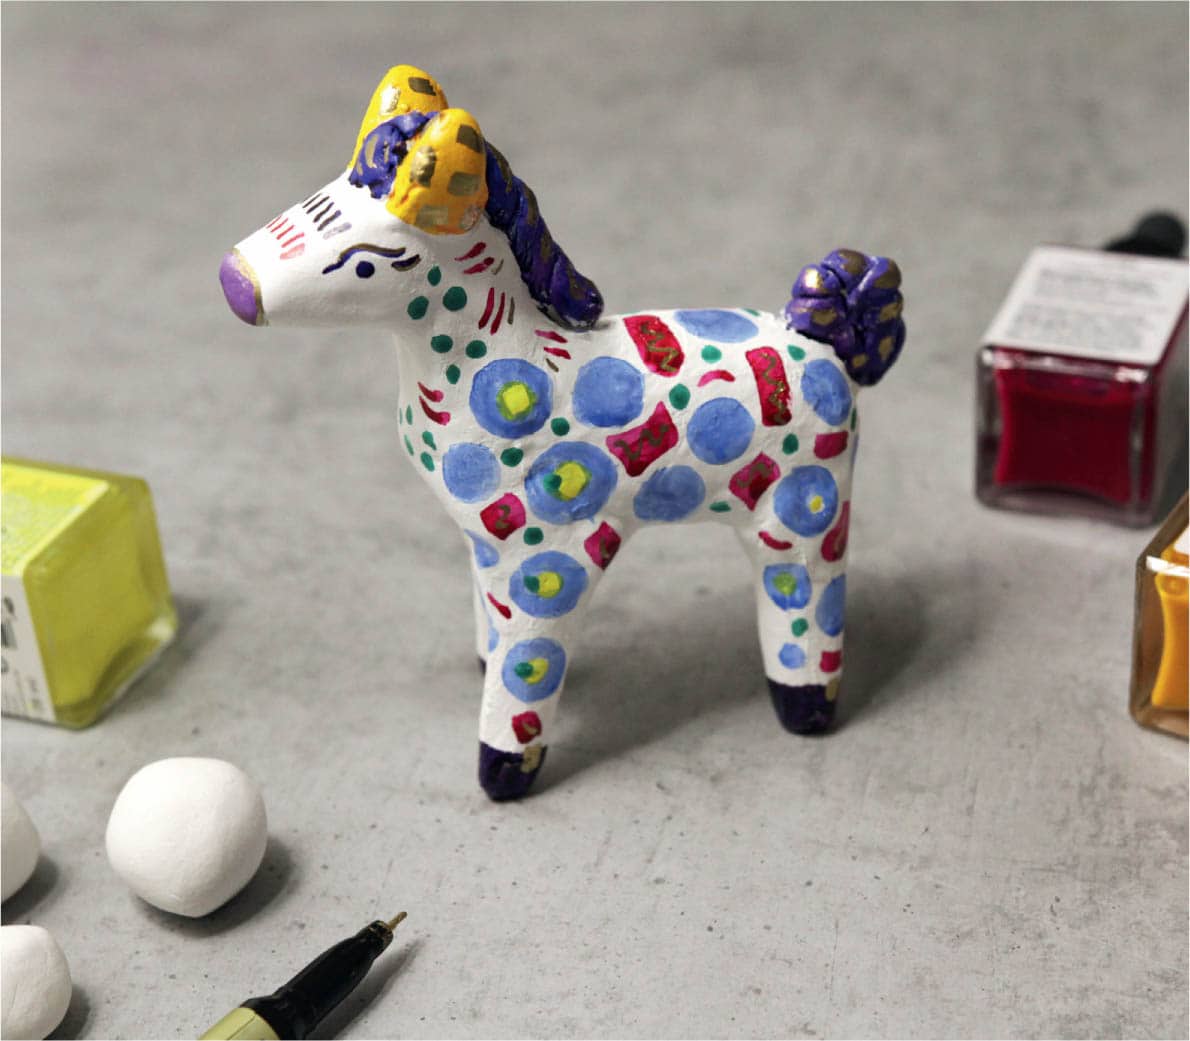
Add a new dimension to your inky projects and create a modern sculpture. You can make it from scratch, as I’ll show you in this project, or paint a ready-made clay or ceramic object. Note that alcohol inks work on any surface, and acrylic inks can be applied to almost any surface if it has been treated with an acrylic primer.
Air-dry clay is easy to use for sculpting and hardens when exposed to air, so no oven or kiln is needed. You’ll paint it with bright, cheerful abstract shapes, plus circles and dots in various colors.
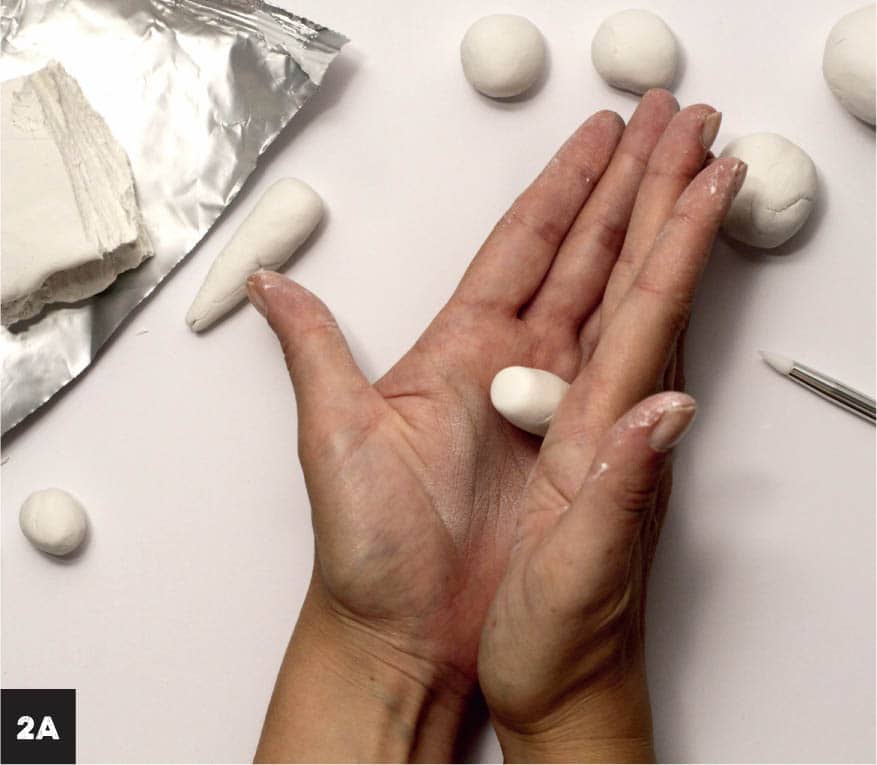
1 Pinch off several pieces of clay and form ten balls of various sizes in the proportion shown. These will become parts of the horse. Estimating the size of the pieces is easier when they’re in ball shapes, rather than randomly shaped chunks. I’ve made two large balls about 2" (5 cm) in diameter, four about 1" (2.5 cm) in diameter, and four smaller ones about ½" (1.3 cm) in diameter.

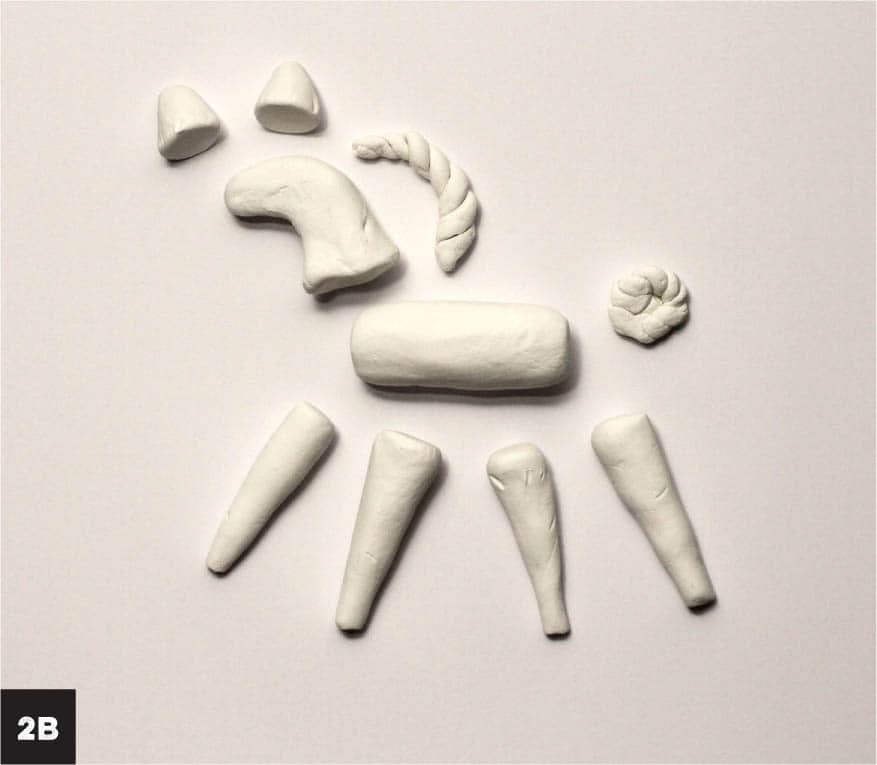
2 Sculpt the clay balls into the ten parts of the horse: the body, head, four legs, two ears, tail, and mane. Sculpt the legs by rolling the four 1" (2.5 cm) balls between your hands, molding them into carrot shapes (2A). Use the two largest balls to form the body of the horse and head by forming them into sausage shapes. Bend one sausage shape in an arc to create the head. Brush the shapes with slightly wet fingers to smooth the surface. Use the four smallest balls for the ears, mane, and tail. Create two small cone shapes for the ears. Roll out the remaining small pieces and twist them, creating the mane and the tail (2B).
Feel free to interpret the elements in your own unique way. Work intuitively, adding or removing clay to match the proportions you envision. If the clay becomes too stiff, add some water to your hands and work it into the clay.
3 Put the ten parts together, connecting and leveling the edges as you go. Add a bit of water to smooth the edges and help the clay adhere. Use your fingers or a clay molding tool on some areas to make stronger connections.
Add texture at this stage or use water to create a smooth, slick surface. Add texture by scratching designs or simple marks into the clay with a molding tool or a toothpick.
Allow the piece to dry completely; this may take 10 hours or more, depending on weather and temperature conditions. The clay is dry when it feels room temperature to the touch. If the clay feels cool, it’s still wet.
Note that as the piece dries, it will shrink slightly as the water evaporates.

4 Apply universal primer to the piece. I used an indoor/outdoor primer, which works on any surface. Alternatively, you can use gesso. Read the instructions on the primer or gesso to see how much you should use and how to apply it. Let it dry completely.

5 Prepare the inks by placing some of each color in the wells of a palette; this will give you an overview of the color scheme.

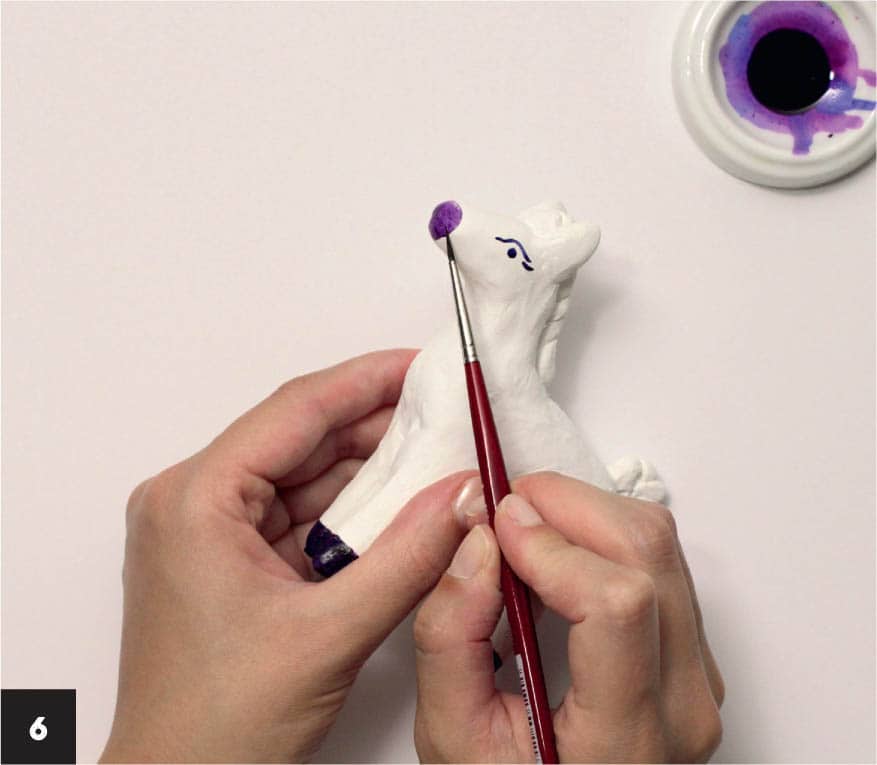
6 Load the brush with violet ink (or mix primary magenta and ultramarine) and carefully paint the eyes, nose, and hooves. When painting the eye, think of an ancient Egyptian symbol. Use minimal and playful strokes. Apply ink to the mane and tail carefully, painting every curl. Remove any excess ink if necessary.
7 Paint the ears Indian yellow; this makes a great contrast with the dark violet mane. Add decorative circles and shapes on the body with cobalt. To achieve a lighter, more pastel color, mix cobalt with white.
Fill the brush with primary magenta and ink geometric ornaments and lines on various parts of the horse. Add blue circles with a drop of yellow in the center. Paint intuitively to create an individual piece!
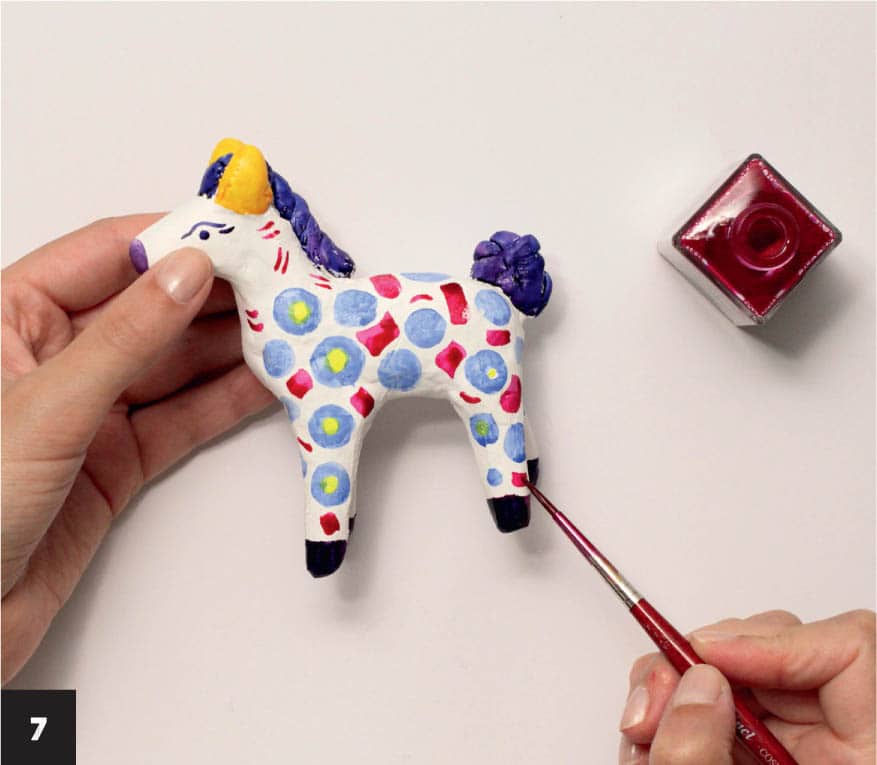
8 Add more decorative circles of various sizes to brighten the piece; I created small dots in mint (you can mix white ink with phthalo green). To intensify the contrast even more, add lemon yellow in the middle of the blue circles or near the violet elements. Add a few colorful lines on the forehead. Allow the ink to dry.

9 Add extra magic and sparkles. Add dots, curls, swirls, and marks of various sizes all over with a metallic gold marker. The cold gold pop on dark violet adds extra richness to the primary magenta. Allow the ink to dry.

ABSTRACT ALCOHOL INK TOTE

You’ve probably seen alcohol inks used in techniques such as pouring, liquid painting, or for coloring resin. This ink’s superpower is that it adheres to nonabsorbent surfaces such as glass and ceramics. You can also use it to color fabric. If you’ve ever tie-dyed fabric, you can imagine the possibilities of the medium.
In this project, you’ll apply alcohol inks to a canvas bag to create a unique piece. The technique is super easy and can be applied to any household items, such as glass vases, ceramic bowls, metal utensils, porcelain, and fabric.
1 Cut a piece of aluminum foil to fit inside the bag, then place it inside to prevent any ink from bleeding through. Place the jar lid inside the bag as well, on top of the foil. Alcohol ink is very thin and runny and can splash easily, so the lid collects any overflow ink under the fabric if you add too much while you’re experimenting.

2 Put on protective gloves if desired. Add a drop of lemon yellow to the bag. Immediately after, add a few drops of magenta around the yellow. Add a round of violet drops, forming an outer circle. The whole process should take just a few seconds. Don’t worry if the inks splash and spatter around—your design will look like a beautiful abstraction.

3 Drop or pour the blending solution directly onto the fabric in spots and see what happens. The changes will happen in an instant, diluting the pigment and creating a beautiful blurry effect.

4 Increase the dark values by adding a few more drops of violet and notice how it blends beautifully with the magenta. Add drops of violet around the yellow center to add interest and variety, making sure to avoid mixing the two colors. As an option you can also use alcohol ink markers to add accents or draw patterns.

5 Add a few drops of ink here and there to harmonize the gradients if you feel like it. Remove the foil and jar lid from the bag and enjoy the incredible results.
You can use a clear spray varnish to seal the bag, protect it from UV rays, and fix the alcohol ink. Make sure the varnish doesn’t contain alcohol, or it will react with the inks.
Note: Not all inks are washable. Check the manufacturer’s washing recommendations or test a scrap piece of fabric to see whether the colors bleed when wet.

ALICE’S ADVENTURES IN WONDERLAND ACCORDION BOOK

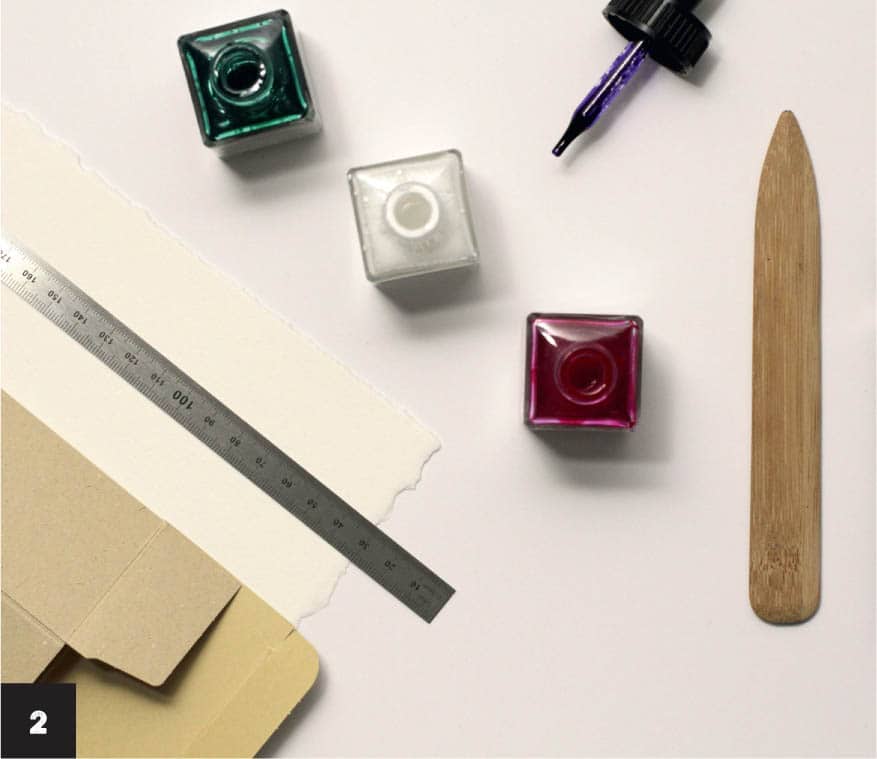
The book Alice’s Adventures in Wonderland has inspired endless interpretations around the globe. You can create your own interpretation of this adorable play on logic and imagination by making a whimsical accordion or zigzag book. Fill it with silhouettes of the main characters, applying some of the methods you learned earlier in the book. We’ll use only three colors and a minimalist approach. The techniques are easy, and you’ll be amazed by the results. Join me, and things will get curiouser and curiouser.
1 Decide which scenes or characters from the book you want to illustrate. I made a list of the six characters I find most memorable: the White Rabbit, Alice, Absalom the Caterpillar, the Cheshire Cat, the Hatter (more commonly known as the Mad Hatter), and the Queen of Hearts. The White Rabbit, known for holding his pocket watch, will work great as a cover.
2 On a cutting mat, using a craft knife and ruler, cut a long sheet of watercolor paper for the accordion book. You can make the book any size; I used an 18.8" × 6.5" (48 × 16.5 cm) piece of paper and folded it into six equal panels. Using a 2:1 ratio of height to width is helpful to determine the overall paper size. Fold the paper back and forth to create an accordion or zigzag and use the bone folder to firmly crease the paper.
If you don’t have a piece of paper long enough to create six panels, make shorter accordions and glue the first and last panels together to make one continuous piece.
Note: If you want to enclose the book in a gift box, measure the box and size the book accordingly. Make sure that the height and width of the folded book is slightly smaller than the box, so it will comfortably fit inside. Alternatively, search for box templates online and create one to suit your needs.
3 With an HB pencil, sketch the White Rabbit outline using the template or your own inspiration and surround it with a few decorative leaves and plants from the magic garden. Draw the image on one panel or spread the image out over several panels. Continue sketching the characters and/or scenes. I use a binder clip to hold the pages together while I’m working.

4 Ink the characters in violet, using a small brush. Create silhouettes, leaving some areas unpainted so you can add details and accents later (4A).
For example, you can emphasize the fact that Alice is looking at the key curiously by using another color. You’ll do that in a later step, but at this stage I’m thinking about which tiny objects or costume pieces can be inked to contrast with the first color to attract attention. The same technique works well for parts of the garments and the accessories of the other characters (4B). For example, the Queen’s dress will look more attractive if a pattern of tiny hearts pops, due to adding bright pink on deep violet. The Hatter’s scarf or coat can be decorated with little white dots by leaving the paper white or by inking them with an opaque white pen on top of the dried violet layer. A few pink ovals on a colossal mushroom will visually balance the position of the Caterpillar, with his pink smoke circles.


5 Mix primary magenta with white to create pastel pink, which contrasts with violet. Use it to paint the foliage surrounding the White Rabbit. This unusual color choice symbolizes the imaginative events that happen in the book.

6 Use the pastel pink to paint other elements, aiming to unify and harmonize the design. Alice’s dress, the smoke from the Caterpillar’s hookah, tiny dots on the mushroom—all of these tiny components add to the whole and create a world with its own rules. Allow the ink to dry.

7 Mix phthalo green with white to create a pastel mint color to match the pastel pink. Since this hue is the brightest one, it should be used as an accent only, as we learned earlier (see here). The unique Caterpillar, however, is an exception, so use it to color the shape.

8 Continue painting and adding elements to the other characters, using all three colors. The Queen of Hearts has a lot of details and is surrounded by a few falling cards. Paint her face in profile to show her traits and emotions.
The Cheshire Cat is more effective rendered straight on so we can see the direct look of his hypnotic eyes. Has his tail disappeared already?
The Hatter is drinking tea. Paint the cup and the hat in the air to show the lunacy of the tea party. Add interest by creating white dots on his coat by leaving small spots unpainted, or by adding dots later with a white pen.
Complete the illustrations and allow the ink to dry.

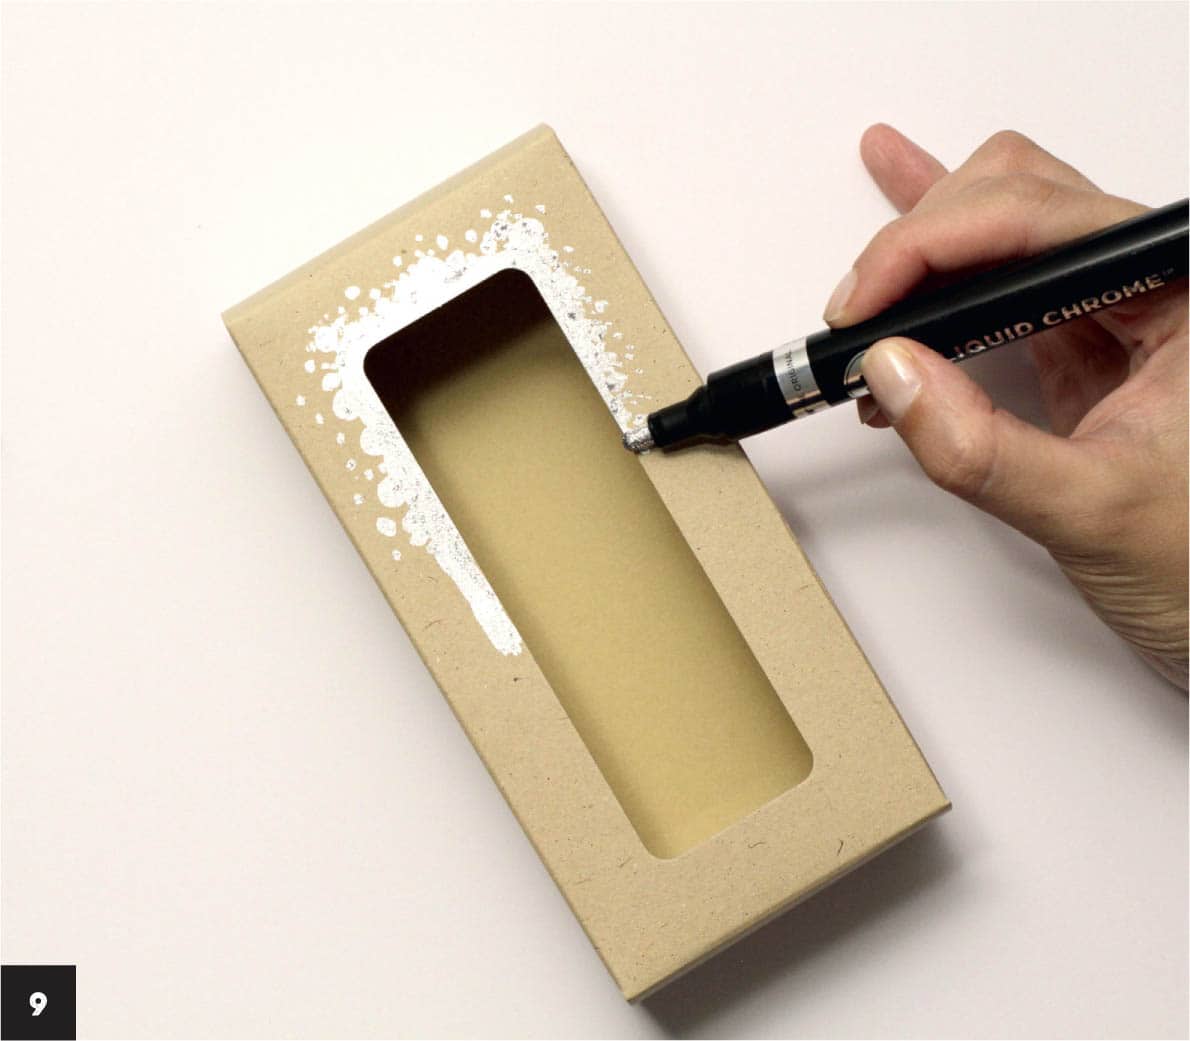
9 Cut out a window in the box lid, using a craft knife and cutting mat. You can also buy a gift box with a lid and window, as I did here. Consider the shape you want— you can create an ellipse, or even a keyhole. Decorate the lid around part of the window with a chrome or metallic marker, creating abstract elements.
10 Using the foliage illustrations as inspiration, add motifs around the rest of the window with pastel pink. These botanical elements will complement the ones surrounding the White Rabbit.

11 Place the book in the box and see how they look as a set. Add a few leaves here and there on the box to balance the overall design. Enjoy holding this treasure in your hands!
