Okay, now you've got your multicopter flying, and it's time to shoot some video. Usually, the whole point of using a multicopter is to use it as a camera platform. So, what good is it if you can't see what the camera sees? Any serious multicopter imager needs an FPV system to be effective. Let's take a look at how these systems work.
There are really only five main components of an FPV system:
- The camera
- OSD (onscreen display)
- Video transmitter (TX)
- Video receiver (RX)
- Monitor
Let's take a look at these one by one. The following image shows you the wiring diagram with an added FPV system so that you can see how it fits into the grand scheme of things (the bottom-left section of the figure):

There are so many cameras in the market that can suit your needs. Recommending a camera can be a whole book by itself. So rather than getting into specific models, let's take a look at a few specifications you should look at.
The whole reason HD cameras have gotten so small and power-efficient is the CMOS chip. Far more cameras use CMOS than CCD sensors to convert light to data. The main difference is that CMOS sensors scan from the bottom-up while CCD sensors capture an entire frame (image) at once. This scanning (by the CMOS chip) method can lead to what's known as shutter roll or jello. The following image is a screen capture from a YouTube video by Ramon Panzavolta (https://www.youtube.com/watch?v=DB740lEkEkg) that illustrates the difference when panning fast with CCD (left) and CMOS (right). I suggest that you watch this video.

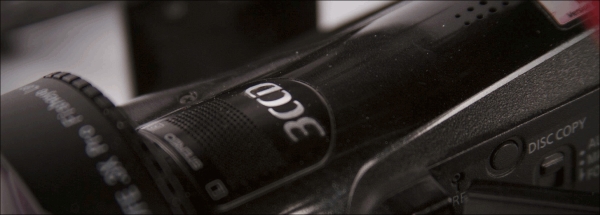
This can also create strange results with any vibration in the multicopter. Any vertical line on the image captured will begin to squiggle. For this reason, you'll either want a very fast CMOS sensor (which scans fast enough to minimize this effect), or an HD camera with three CCD sensors. 3CCD cameras use an individual CCD sensor for each color (RGB), giving you a very clear picture. The following image shows you the 3CCD logo that you should look for when deciding on a CCD-based camera:
The camera should also be lightweight, and the lens should be easy to clean (as you'll need to clean the lens for every flight).
Some pilots call this a heads-up display. Simply put, it overlays telemetry data from your guidance system to the video feed coming from the camera. At a glance, you can tell what your multicopter is doing—usually its position in relation to where it took off from—and information such as the current battery charge. It gets this telemetry data by hooking directly to the guidance system. The OSD does not affect the video/images recorded on the camera and only transmits that data via the FPV system. The following image shows you what an OSD can provide. I have used the DJI iOSD mini.

It's important to use a different frequency than your control's receiver to minimize risk of jamming the signal for control. As both Spektrum and Futaba use 2.4 GHz for their frequency, we'll use a 5.8 GHz video transmitter by Immersion RC. This transmitter is light, has 600 mW of transmission power (giving it a decent range), and is available at http://www.hobbyking.com/hobbyking/store/uh_viewitem.asp?idproduct=17507&aff=492101.
The receiver should be of the same brand as your transmitter (as they all use slightly different frequency variations) in order to make sure they're compatible. Also … check to make sure that the frequency (and strength) your transmitter uses is legal in your part of the world. You should not use goggles (such as Fat Shark) until you are very experienced at FPV flying. You don't get depth perception with goggles, and if something goes wrong, your eyes will be blinded by the difference in light when you take them off. So, a receiver that has a video output is crucial (rather than just a set of goggles with an antenna). The Immersion RC receiver is available at http://www.hobbyking.com/hobbyking/store/uh_viewitem.asp?idproduct=41147&aff=492101.
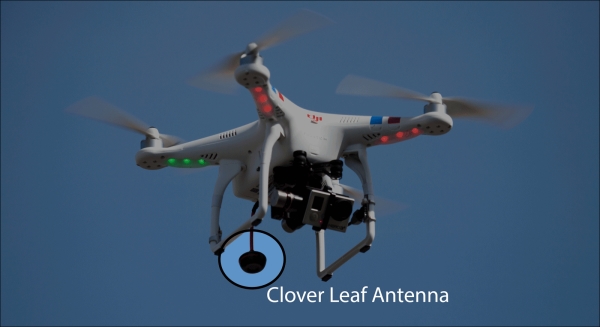
Finally, a regular stick-style antenna is not adequate for FPV. You want something that has the same sensitivity and power in any direction. Therefore, a cloverleaf antenna set for both the TX and RX is also crucial. The following image shows you a clover-leaf antenna mounted to the bottom of a DJI Phantom 2. The 5.8 GHz clover-leaf antenna I use is available at http://www.hobbyking.com/hobbyking/store/uh_viewitem.asp?idproduct=49827&aff=492101.
As most of the time you will be flying outdoors, it's important to choose a monitor that is bright and has a lot of contrast. It should also be capable of having power from a battery (DC) and be mountable to your remote (therefore, it should also be light). Finally, it should have a sunshade (cover to shade the screen from sun glare). The monitor I use is inexpensive and works very well. It is available at http://www.hobbyking.com/hobbyking/store/uh_viewitem.asp?idproduct=28907&aff=492101, and the mount for the remote is available at http://www.hobbyking.com/hobbyking/store/uh_viewitem.asp?idproduct=40608&aff=492101.