
8. Finishing Touches
You’ve turned Raiders into a functioning game. Players and enemies can be shot and destroyed in a burst of animated pixels, accompanied by a spot sound effect or two. But, at this point Raiders isn’t a finished game. Now, you’ll tweak and tidy your code, and by the end of the chapter, Raiders will be a complete, albeit very small, iOS game.
Building a Scoreboard
Scoring is an essential part of almost all games. The lure of achieving higher and higher points levels really gives a player “something to shoot for.” And nothing spurs that competitive spirit more effectively than a prominently placed scoreboard that tallies points as they are earned.
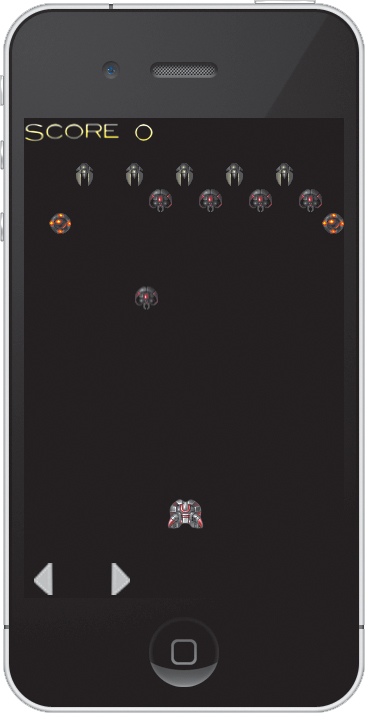
The Raiders scoreboard will be displayed along the top of the screen (Figure 8.1), which means that the enemy hoards must be lowered 20 pixels.
Figure 8.1 New Layout showing score
Rendering Fonts
The need to display text and numbers on your scoreboard raises an interesting issue. OpenGL ES has no built-in support for fonts or font rendering. It does have font rendering libraries that convert a True Type font to a raster image that can be drawn to the OpenGL context. However, these libraries are generally difficult to use and are written in C or C++, which puts them beyond the scope of this book.
An alternative approach to font rendering is to create a sprite sheet image from a font and extract the individual characters into a Font Class. This sounds more difficult than it is.
You first convert a font using one of several programs that can create the sprite sheet image. The program used in this book is Hiero and can be downloaded free from n4te at www.n4te.com/hiero/hiero.jnlp. Hiero is a Java app that should run on any platform (Figure 8.2).
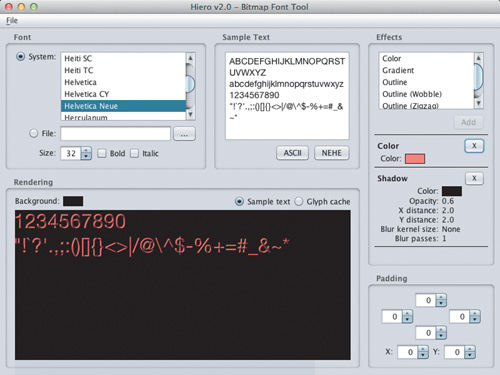
Hiero is easy to use. Just select a font; choose the font options, such as shadow, color, and gradient; and save the results. Two files are created: the sprite sheet of characters and an .fnt control file. The font used in Raiders is Blair Medium at 32 point size, although it is scaled in the actual game.
The control file is just a text file that identifies the location of each character in the sprite sheet. A section of the control file looks like this:
info face="BlairMdITCTT-Medium" size=32 bold=0 italic=0 charset="" unicode=0 stretchH=100 smooth=1 aa=1 padding=0,0,0,0 spacing=1,1
common lineHeight=39 base=31 scaleW=512 scaleH=256 pages=1 packed=0
page id=0 file="1.png"
charid=81 x=0 y=0 width=32 height=32 xoffset=3 yoffset=7 xadvance=35 page=0 chnl=0
charid=48 x=32 y=0 width=27 height=26 xoffset=3 yoffset=7 xadvance=30 page=0 chnl=0
A new class, BitmapFont, parses the control file, extracts the separate characters into a dictionary of sprites, and includes the code for rendering to text. Overall, the code is fairly straightforward, with the possible exception of:
getSubImageFromRect:fullImage:
- (UIImage *)getSubImageFromRect:(CGRect)rect fullImage:(UIImage *)fullImage {
UIGraphicsBeginImageContext(rect.size);
CGContextRef context = UIGraphicsGetCurrentContext();
CGRect drawRect = CGRectMake(-rect.origin.x, -rect.origin.y, fullImage.size.width, fullImage.size.height);
CGContextClipToRect(context, CGRectMake(0, 0, rect.size.width * 0.75, rect.size.height * 0.75));
CGContextScaleCTM(context, 0.75f, 0.75f);
[fullImage drawInRect:drawRect];
UIImage* subImage = UIGraphicsGetImageFromCurrentImageContext();
UIGraphicsEndImageContext();
return subImage;
}
This code creates a graphics context, clips the full font set image to the bounds of the particular character in use, draws the character on the context, scales it to 75 percent of its original size, and creates a UIImage. The scaled character image is then stored in an NSArray with the key being the ASCII-based value of the character.
Keeping Score
To keep track of the score, a new property of GameController, currentScore, is used. Scores increase for each enemy that is destroyed: 10 points for destroying a DumbSprite, 20 for a Diagonal Sprite, and 30 for a Kamikaze Sprite.
Every time a player missile hits an enemy, the currentScore in the game controller is updated. Because you have only one instance of GameController, it is the logical place to put the scores. When a collision is detected, the score is updated in Level1SceneController using this code:
- (void)updateScore:(int)amount {
GameController *controller = [GameController sharedGameController];
controller.currentScore += amount;
[self removeMessage:scoreCharacterArray];
scoreCharacterArray = [font drawTextAtPoint: [NSString stringWithFormat:@"%d", controller.currentScore] point:SCORE_POINT];
[self addMessage:scoreCharacterArray];
}
Player Lives
In Raiders, the player has the obligatory three lives. A property in GameController tracks these lives, using a process similar to tracking the score.
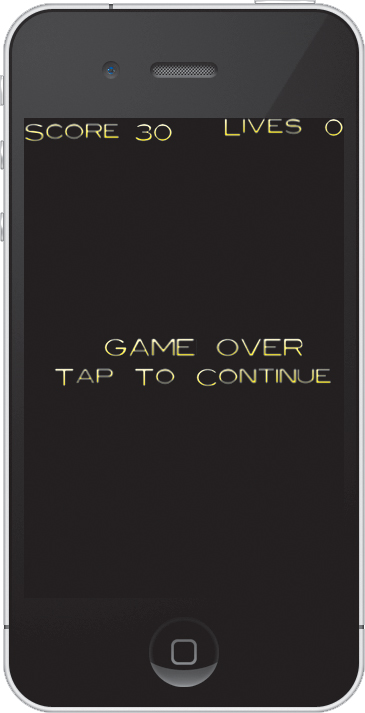
A few things happen when a player dies. First, the available lives are reduced by one. If lives are reduced to zero, then the “game over” message is displayed (Figure 8.3) and the game returns to the menu scene.
If the player has lives remaining, then the player sprite disappears briefly, and more importantly, the enemy sprite can’t fire missiles. This helps avoid player frustration. Nothing is worse than resuming with a new life, only to have the enemy shoot down the player straight away.
To track this, the player sprite uses the property hasBeenShot. If hasBeenShot is true, the player sprite isn’t drawn for 240 updates, using the following code:
ticks++;
if (ticks > 240) {
ticks = 0;
playerSprite.hasBeenShot = NO;
}
In that time, a new property, canFireMissiles, ensures that enemies can’t fire missiles. When the hasBeenShot is YES, canFireMissiles is set to NO.
If the player has lost all her lives, a property called isGameOver is set to YES, the list of sprites is no longer updated, and a game over message is displayed. The only input the game can accept is a single tap to return the game to the MenuScene.
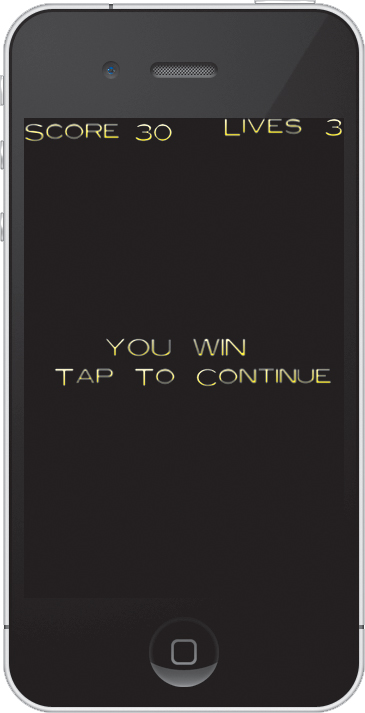
Winning the Level
You win the level by shooting each of the enemy sprites without losing all your lives. Fairly simple. Keeping track of the number of enemies is just as easy. A private variable called activeEnemies starts at NUM_ITEMS, and reduces by one after every enemy hit. When activeEnemies is 0 and isGameOver is set to YES, the player sprite isn’t drawn, the controls are locked, and a “you win” message appears on the screen (Figure 8.4).
Starting Over
Because of the mechanics of the game, scenes are stored in memory. Until now, the main initialization routine happened in the init of each scene. The init method is called only when the class is instantiated, so you need another way to initialize the game each time it is run.
You do so using a new method called initScene. In AbstractSceneController, this method clears all the sprite arrays.
- (void)initScene {
messageList = nil;
explosionList = nil;
spriteList = nil;
}
In each of the individual scene classes, the code that was in the init is now in the initScene method. In the Level1SceneController, currentLives and currentScore must be reset in the GameController, isGameOver is reset to NO, and the code that was in the init method is now in initScene.
Are We There Yet?
As a game, Raiders is functionally complete. Creating more levels is a trivial exercise of inserting new scenes and increasing the difficulty by creating slightly better AI, adding more attacking sprites, or allowing more than one strafing run at a time.
To create a multi-level game, you need only repeat the same programming techniques you’ve already learned while spinning a few variations on the gameplay and enemy logic. So here’s the chance for you to exercise your skills by programming more levels for your version of Raiders!
Wrapping Up
Raiders is now a feature-complete game. The player can win or lose, and a score is kept. You’ve implemented fonts in the game, and tracked scores and lives. However, you can still add value by bringing a social component to the game, which you will do in Chapter 9.